
How to Enable Passwordless RDP with FIDO2 Security Keys in Microsoft Intune
 Keytos Team |
Remote Desktop Protocol (RDP) is a popular protocol that allows you to remotely access and manage Windows computers. Enter in your machine’s name or IP address, provide your username and password, and you can access your desktop from anywhere. However, RDP opens up a potential attack vector for cybercriminals, especially if you are using weak or reused passwords. To enhance the security of your RDP sessions, you can enable passwordless authentication using FIDO2 security keys in Microsoft Intune. This guide will walk you through the steps to set up passwordless RDP with FIDO2 security keys in Microsoft Intune.
What are FIDO2 Passkeys and How Are They Stronger than Passwords?
FIDO2 passkeys are a modern authentication method where instead of a username and password, you use a hardware security key (like a YubiKey) or a built-in biometric authentication method (like Windows Hello) to authenticate. Instead of memorizing a password (what you know), you authenticate with a physical device (what you have) or a biometric factor (what you are). This makes FIDO2 passkeys much stronger than traditional passwords, as they are resistant to phishing attacks, credential stuffing, and other common password-based attacks. Plus, when paired with a PIN or biometric check, they provide multi-factor authentication without the need for a password. In fact, at Keytos Security we only use passwordless authentication methods, and our engineers don’t even have passwords for their accounts.
Interested in moving to passwordless and unphishable FIDO2 passkeys? Our blog post walks you through how to onboard users to FIDO2 security keys in Entra ID, which is a prerequisite for using them for passwordless RDP.
Learn How to Onboard YubiKeys for Azure CBA and FIDO2 in Entra IDHow to Configure Microsoft Intune to Push Out Passwordless RDP with FIDO2 Security Keys
It’s easy to configure passwordless RDP using Microsoft Intune. There are two main Configuration profiles you’ll be creating in Intune:
- A Device Configuration profile to enable RDP and FIDO2 authentication on the target machines.
- An Endpoint Security Firewall profile to open port 3389 for RDP traffic.
Prerequisites for Enabling Passwordless RDP
- You need to enable FIDO2 security keys as an authentication method and have users register their security keys in Entra ID. Learn how to do that here.
- You need to have Microsoft Intune set up with devices enrolled.
How to Enable RDP and FIDO2 Authentication in Microsoft Intune
The first step to moving to passwordless RDP is to enable RDP on the target machines. You can do this using Intune by creating a device configuration profile with the required settings.
-
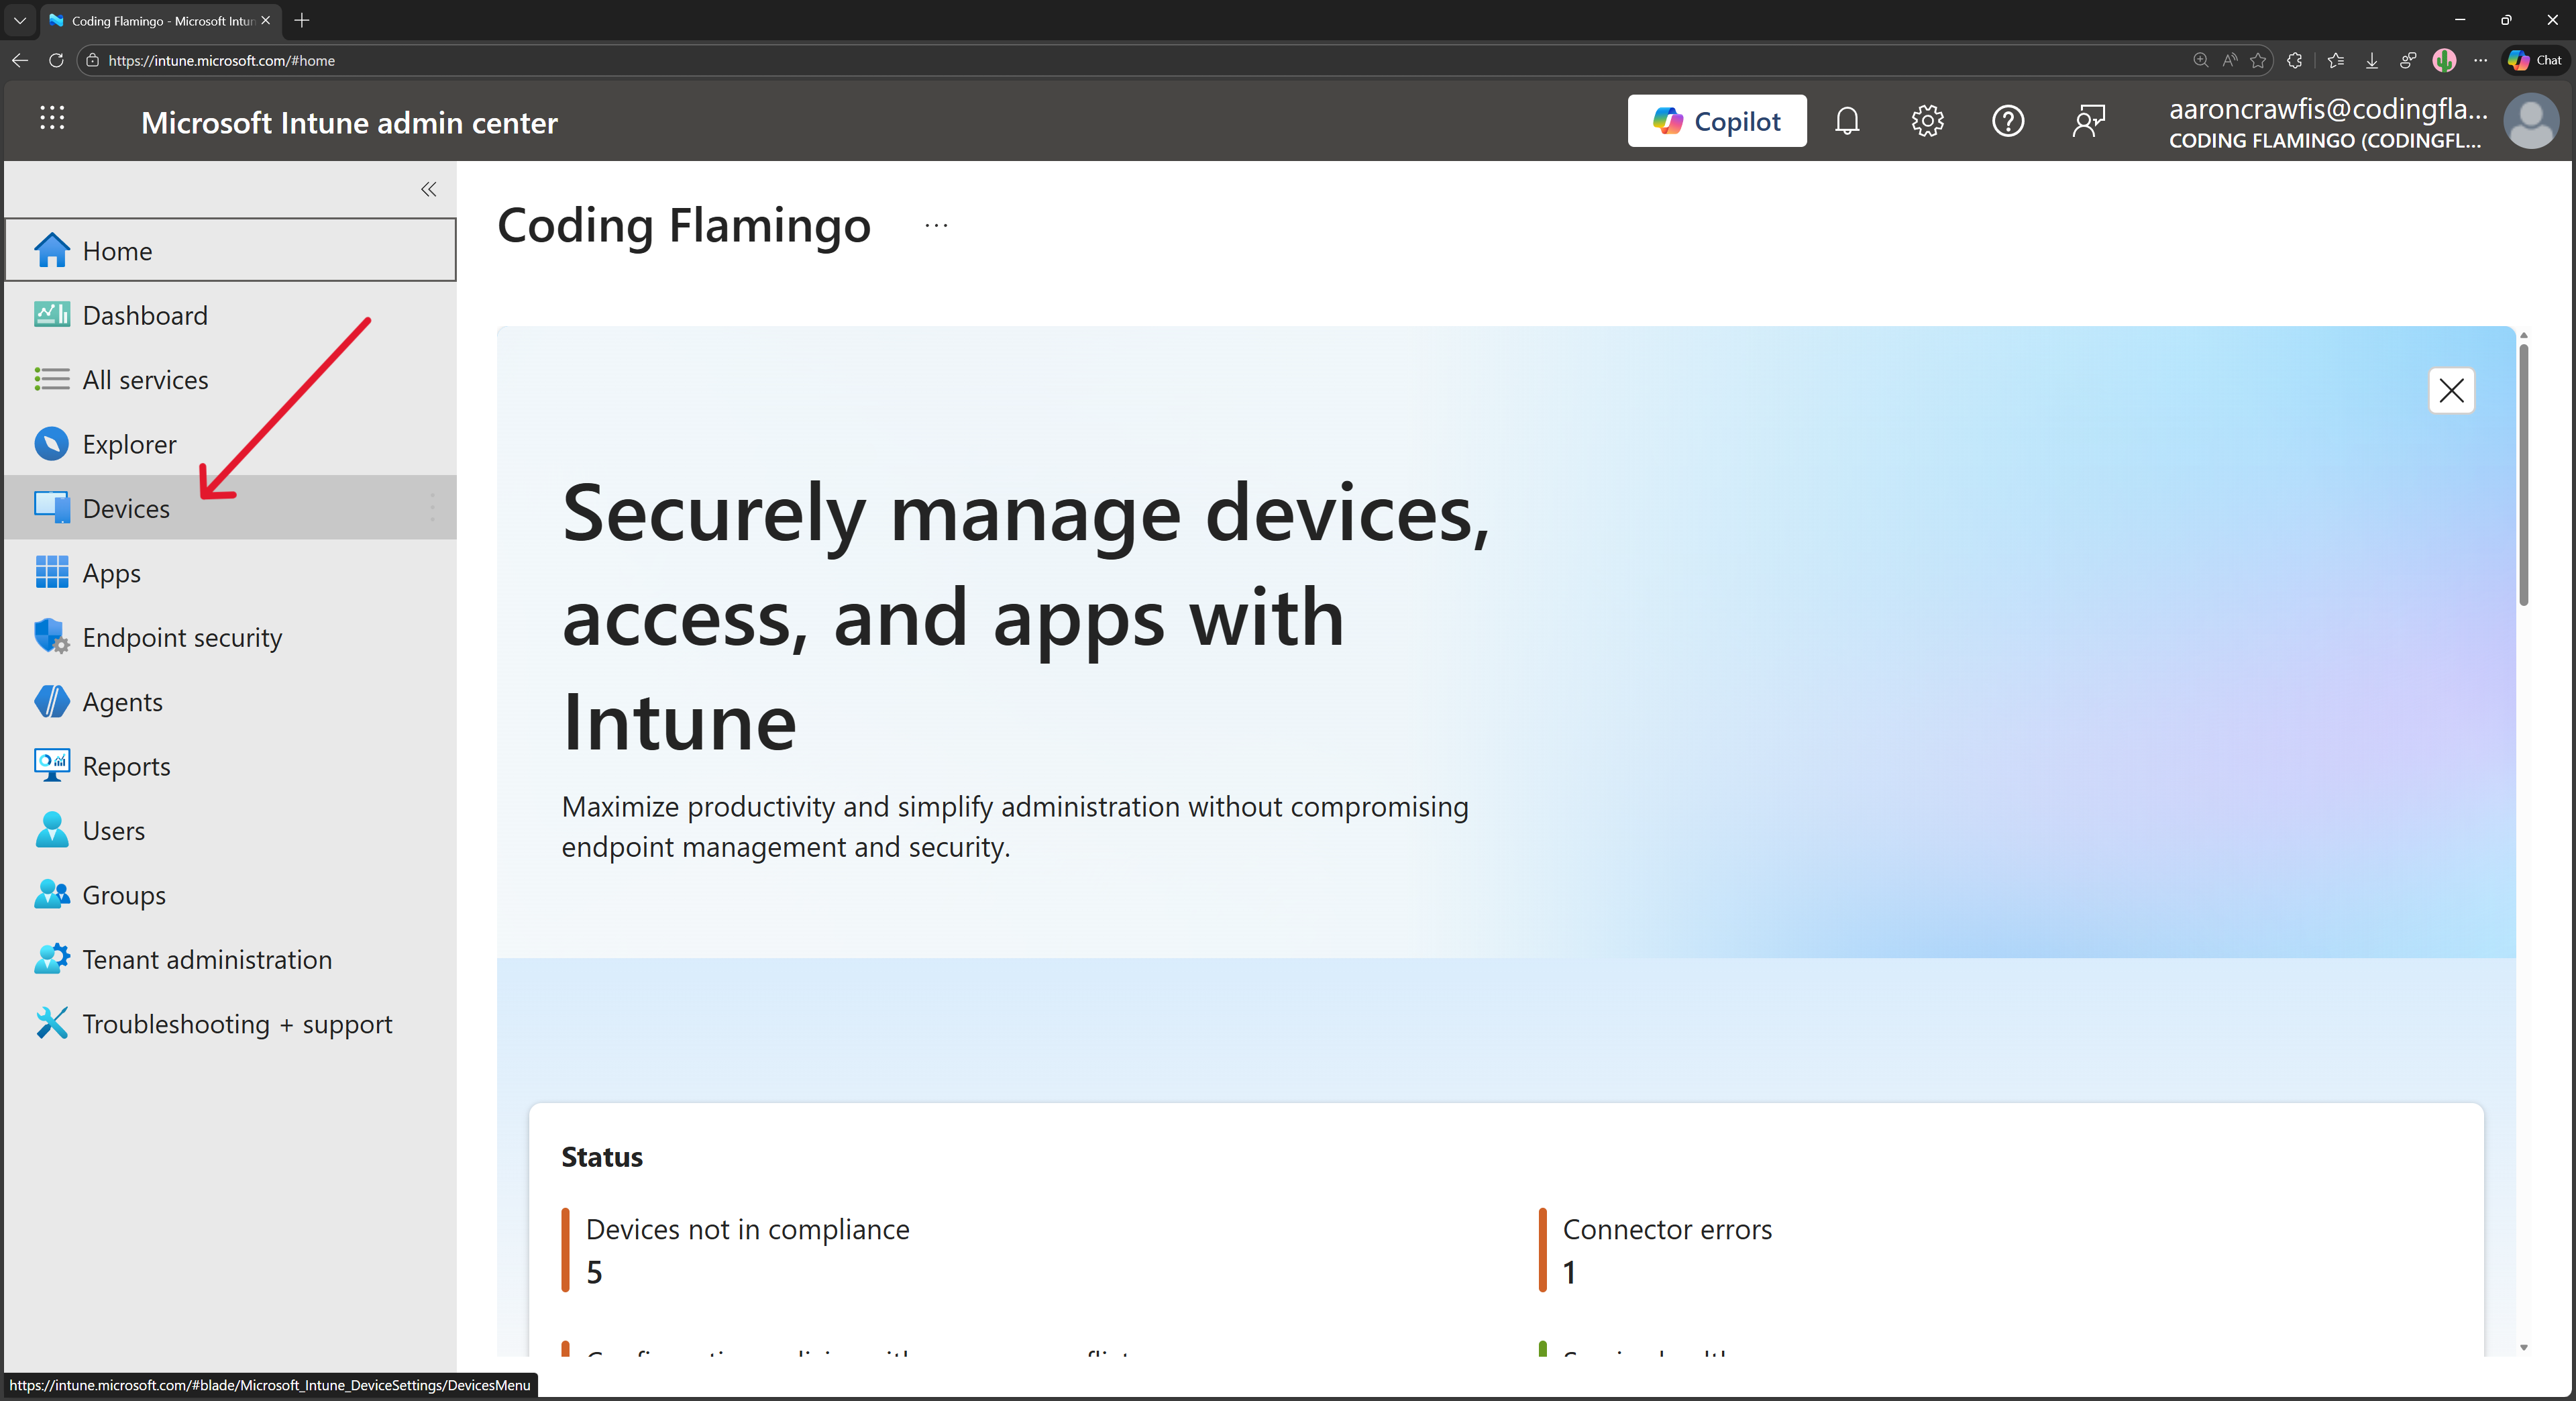
Navigate to the Intune portal.
-
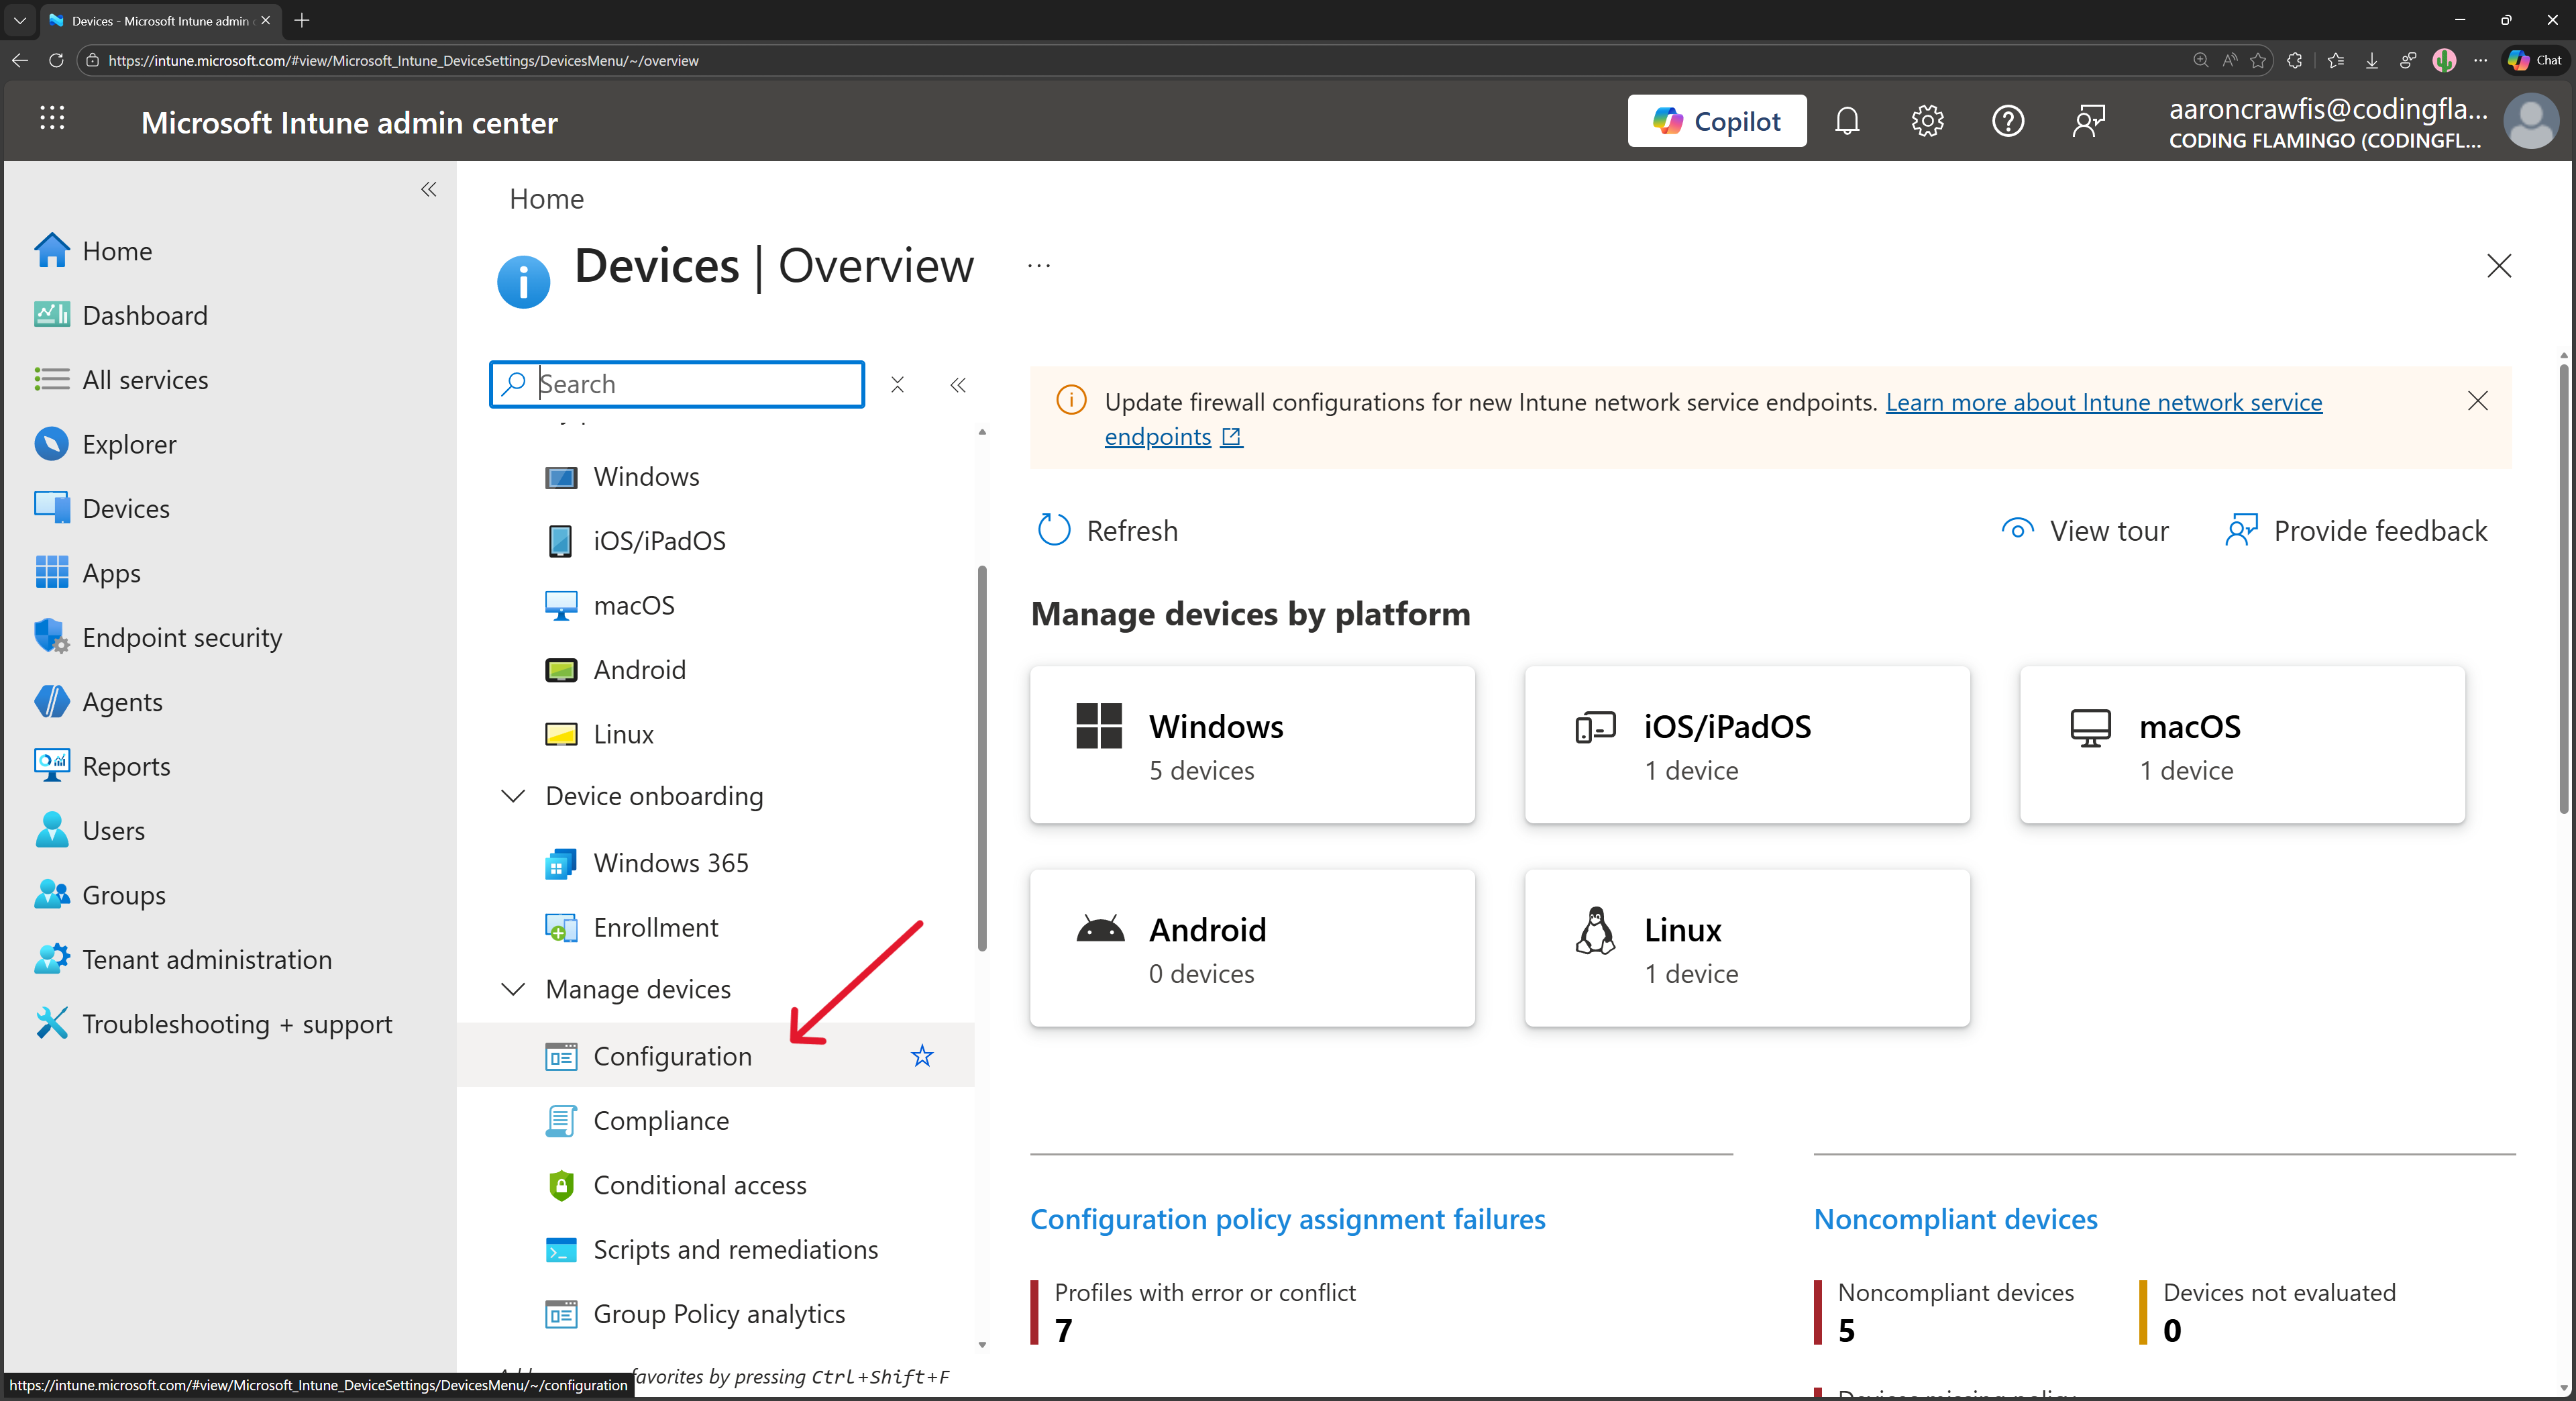
From the left-hand menu, select Devices.
-
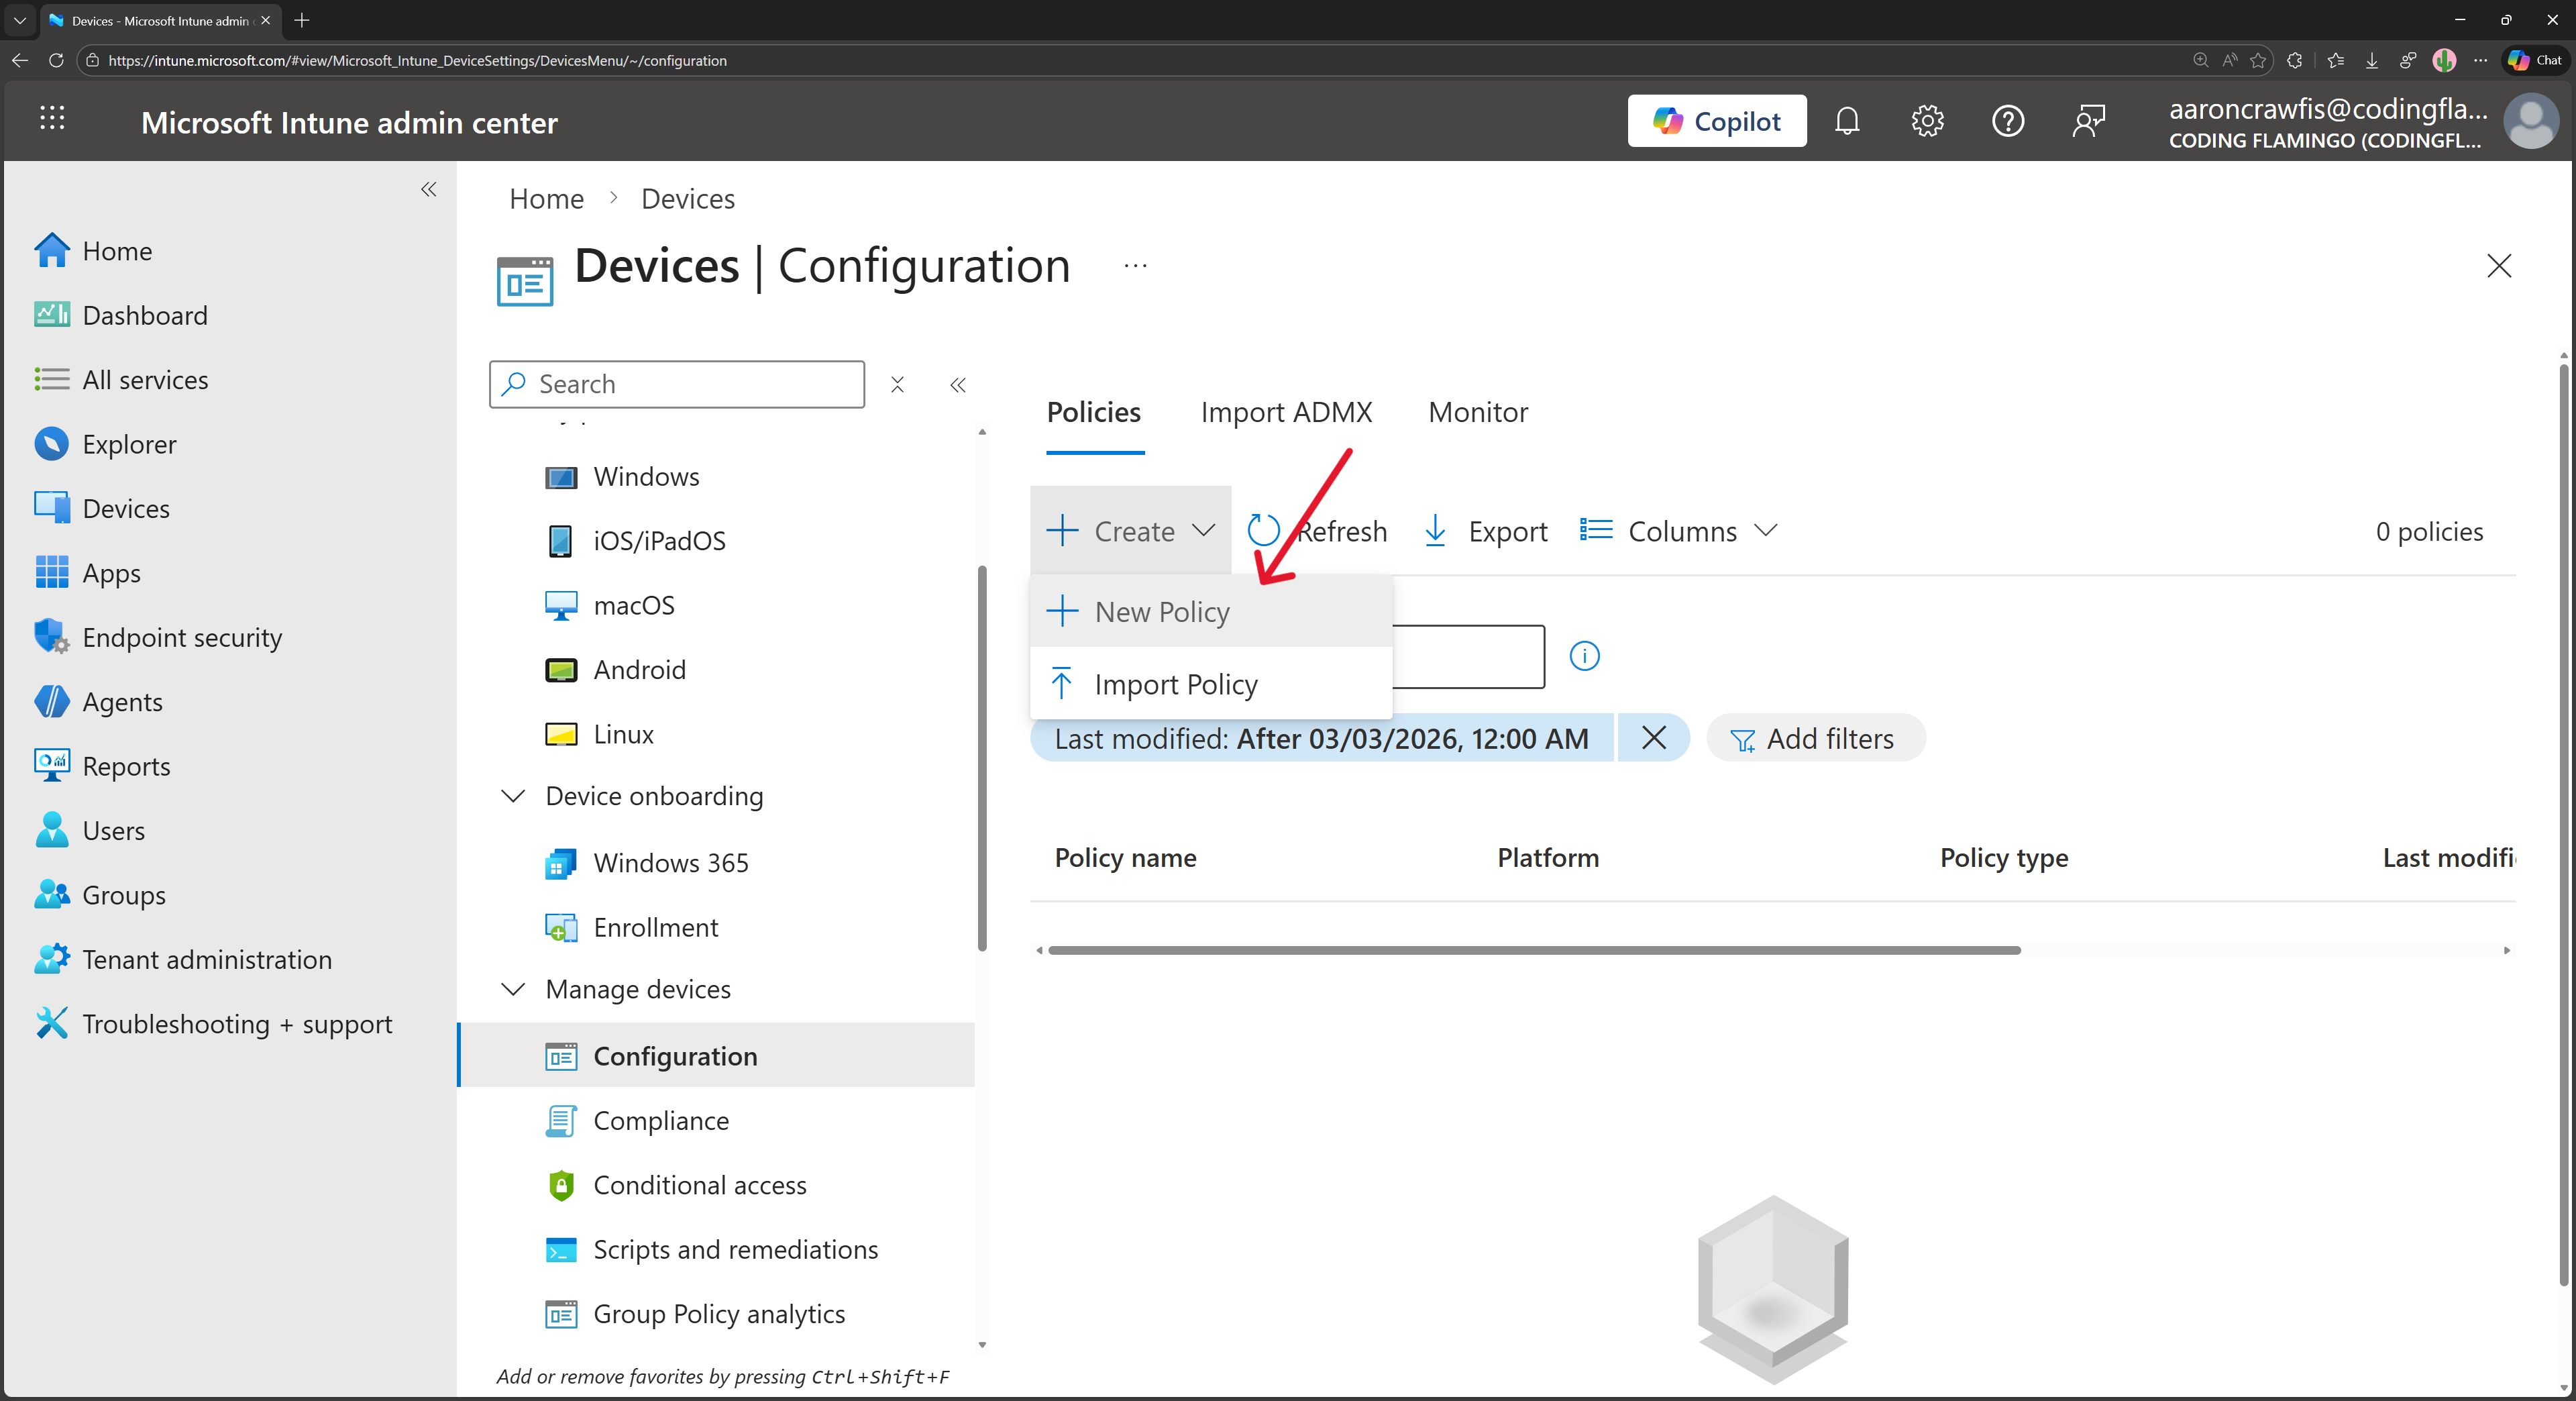
Under Manage devices, select Configuration.
-
Click on + Create → + New Policy.
-
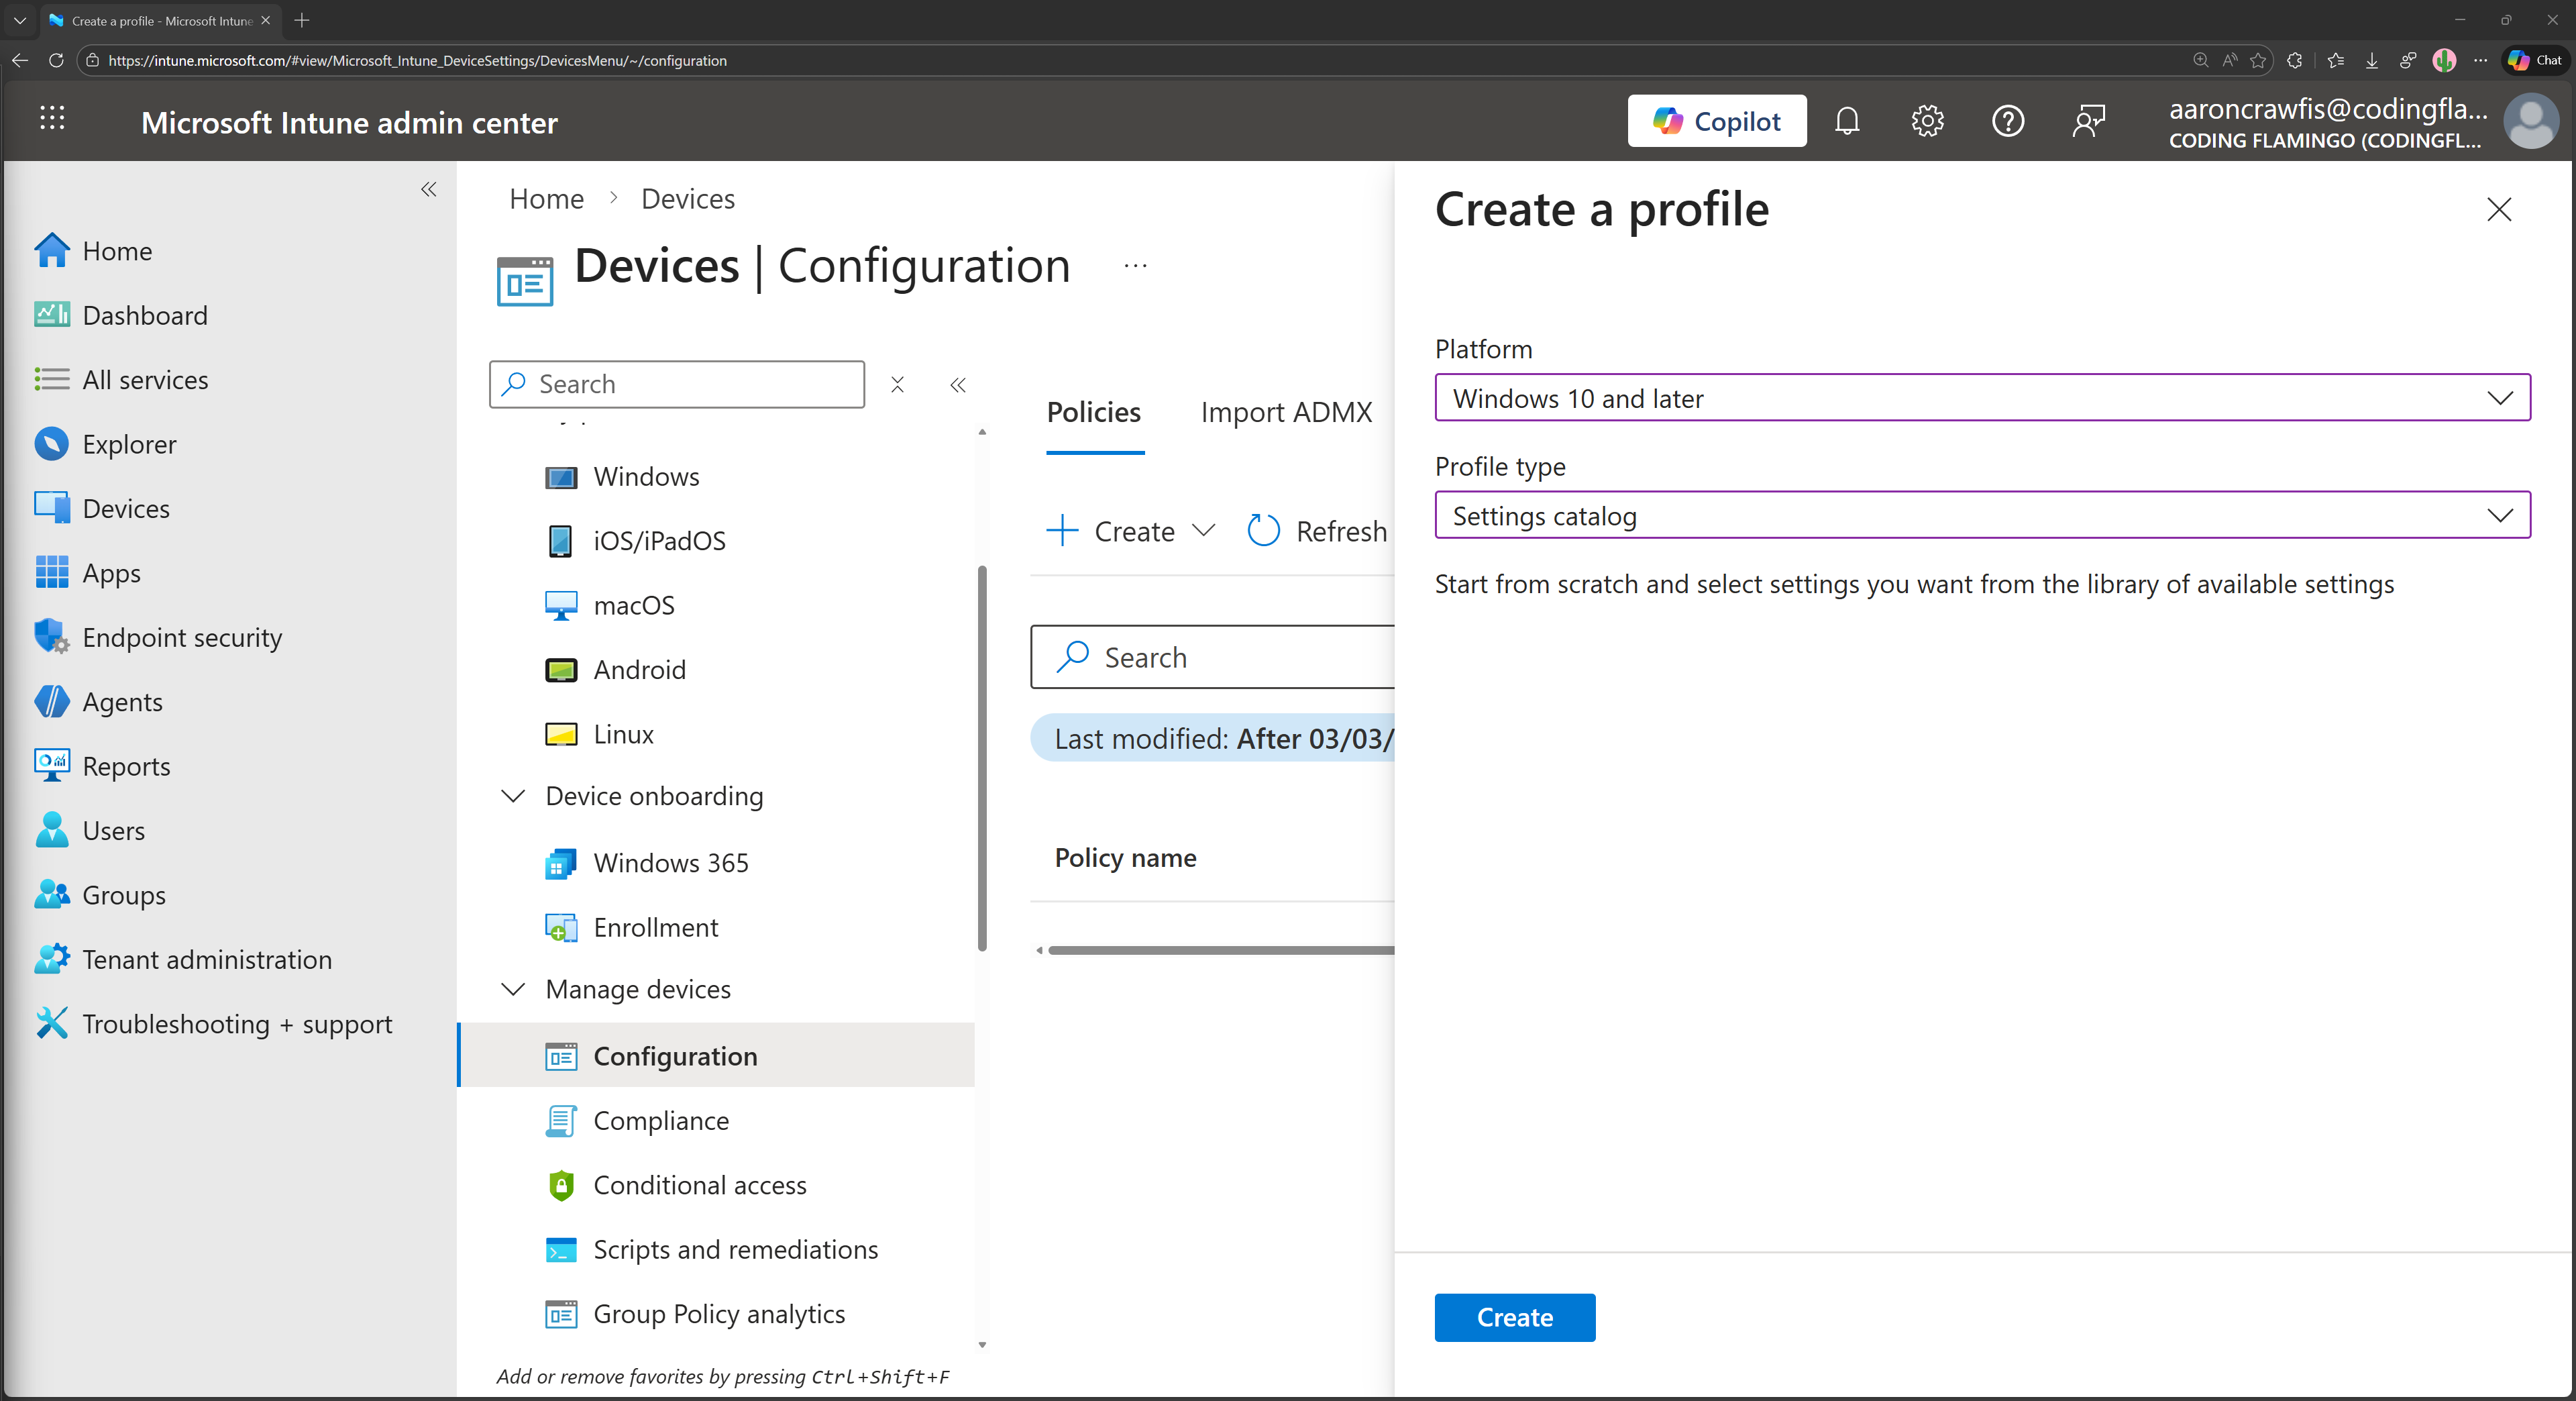
Select Windows 10 and later as the platform and Settings catalog as the profile type, then click Create.
-
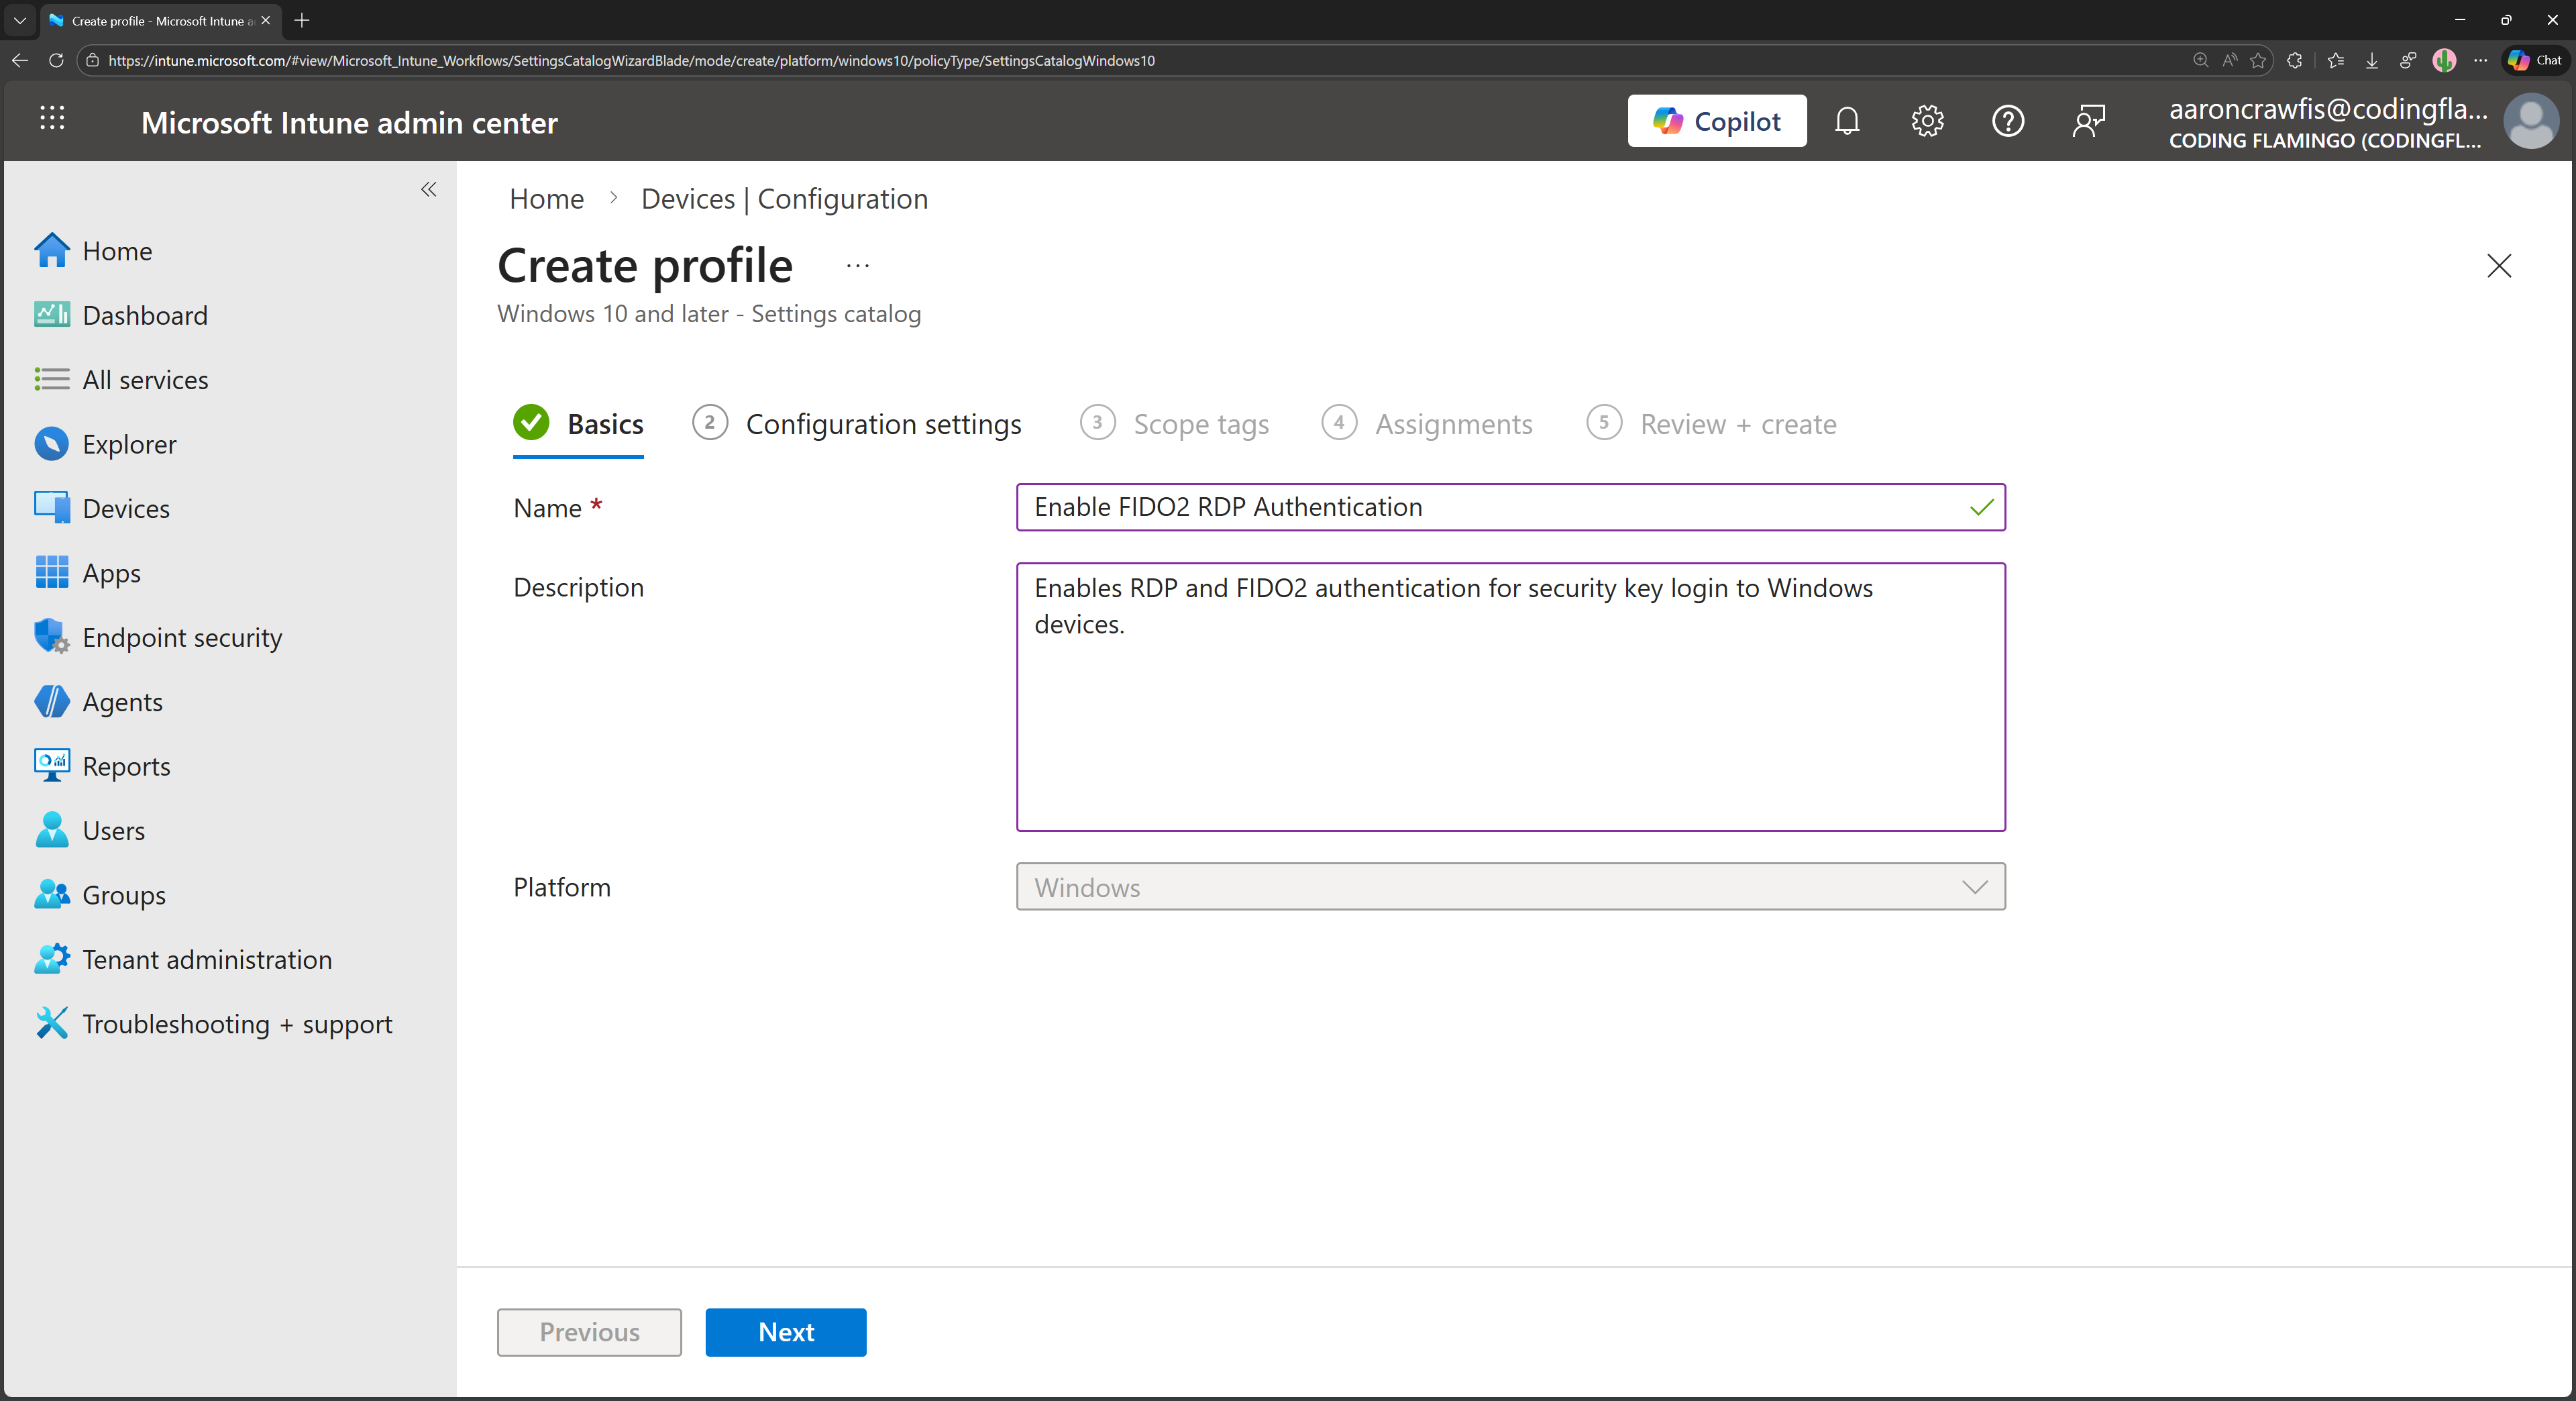
Give your new policy a name and a description, then click Next.
-
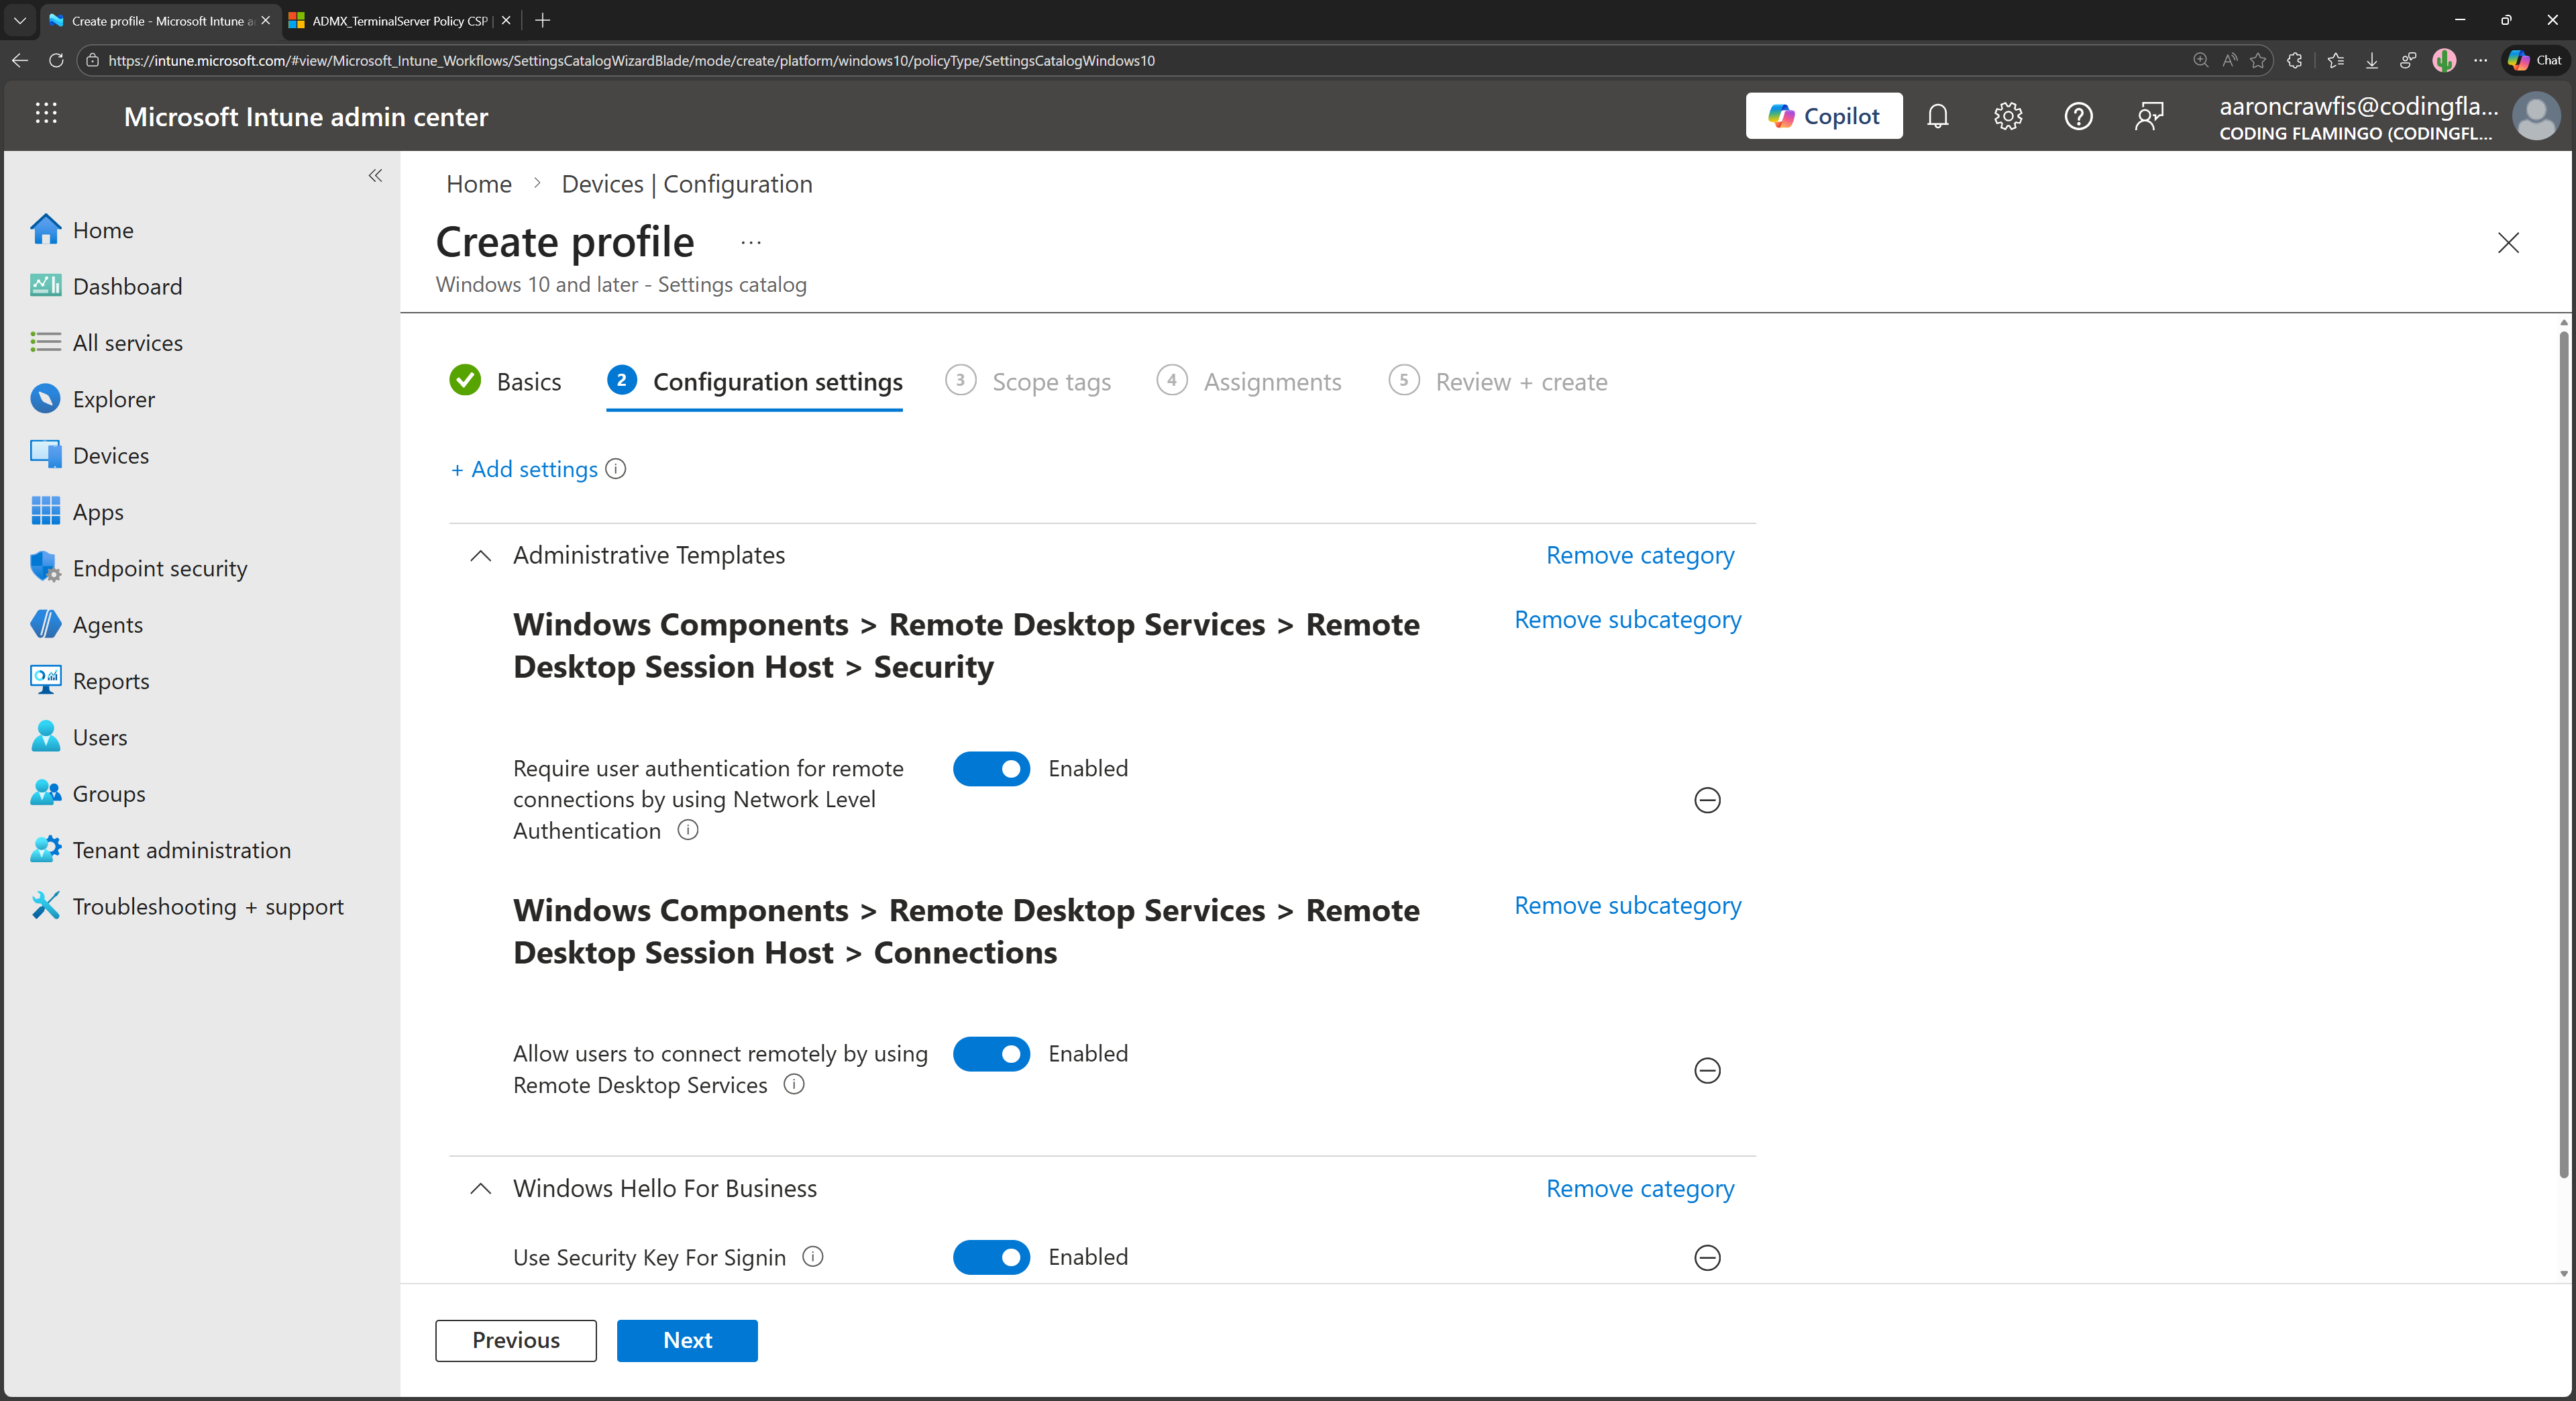
Click + Add settings and add the following settings:
- Allow users to connect remotely using Remote Desktop Services: Enabled
- Require user authentication for remote connections by using Network Level Authentication: Enabled
- Use Security Key for Signin: Enabled
-
Set any Scope tags if needed, then click Next.
-
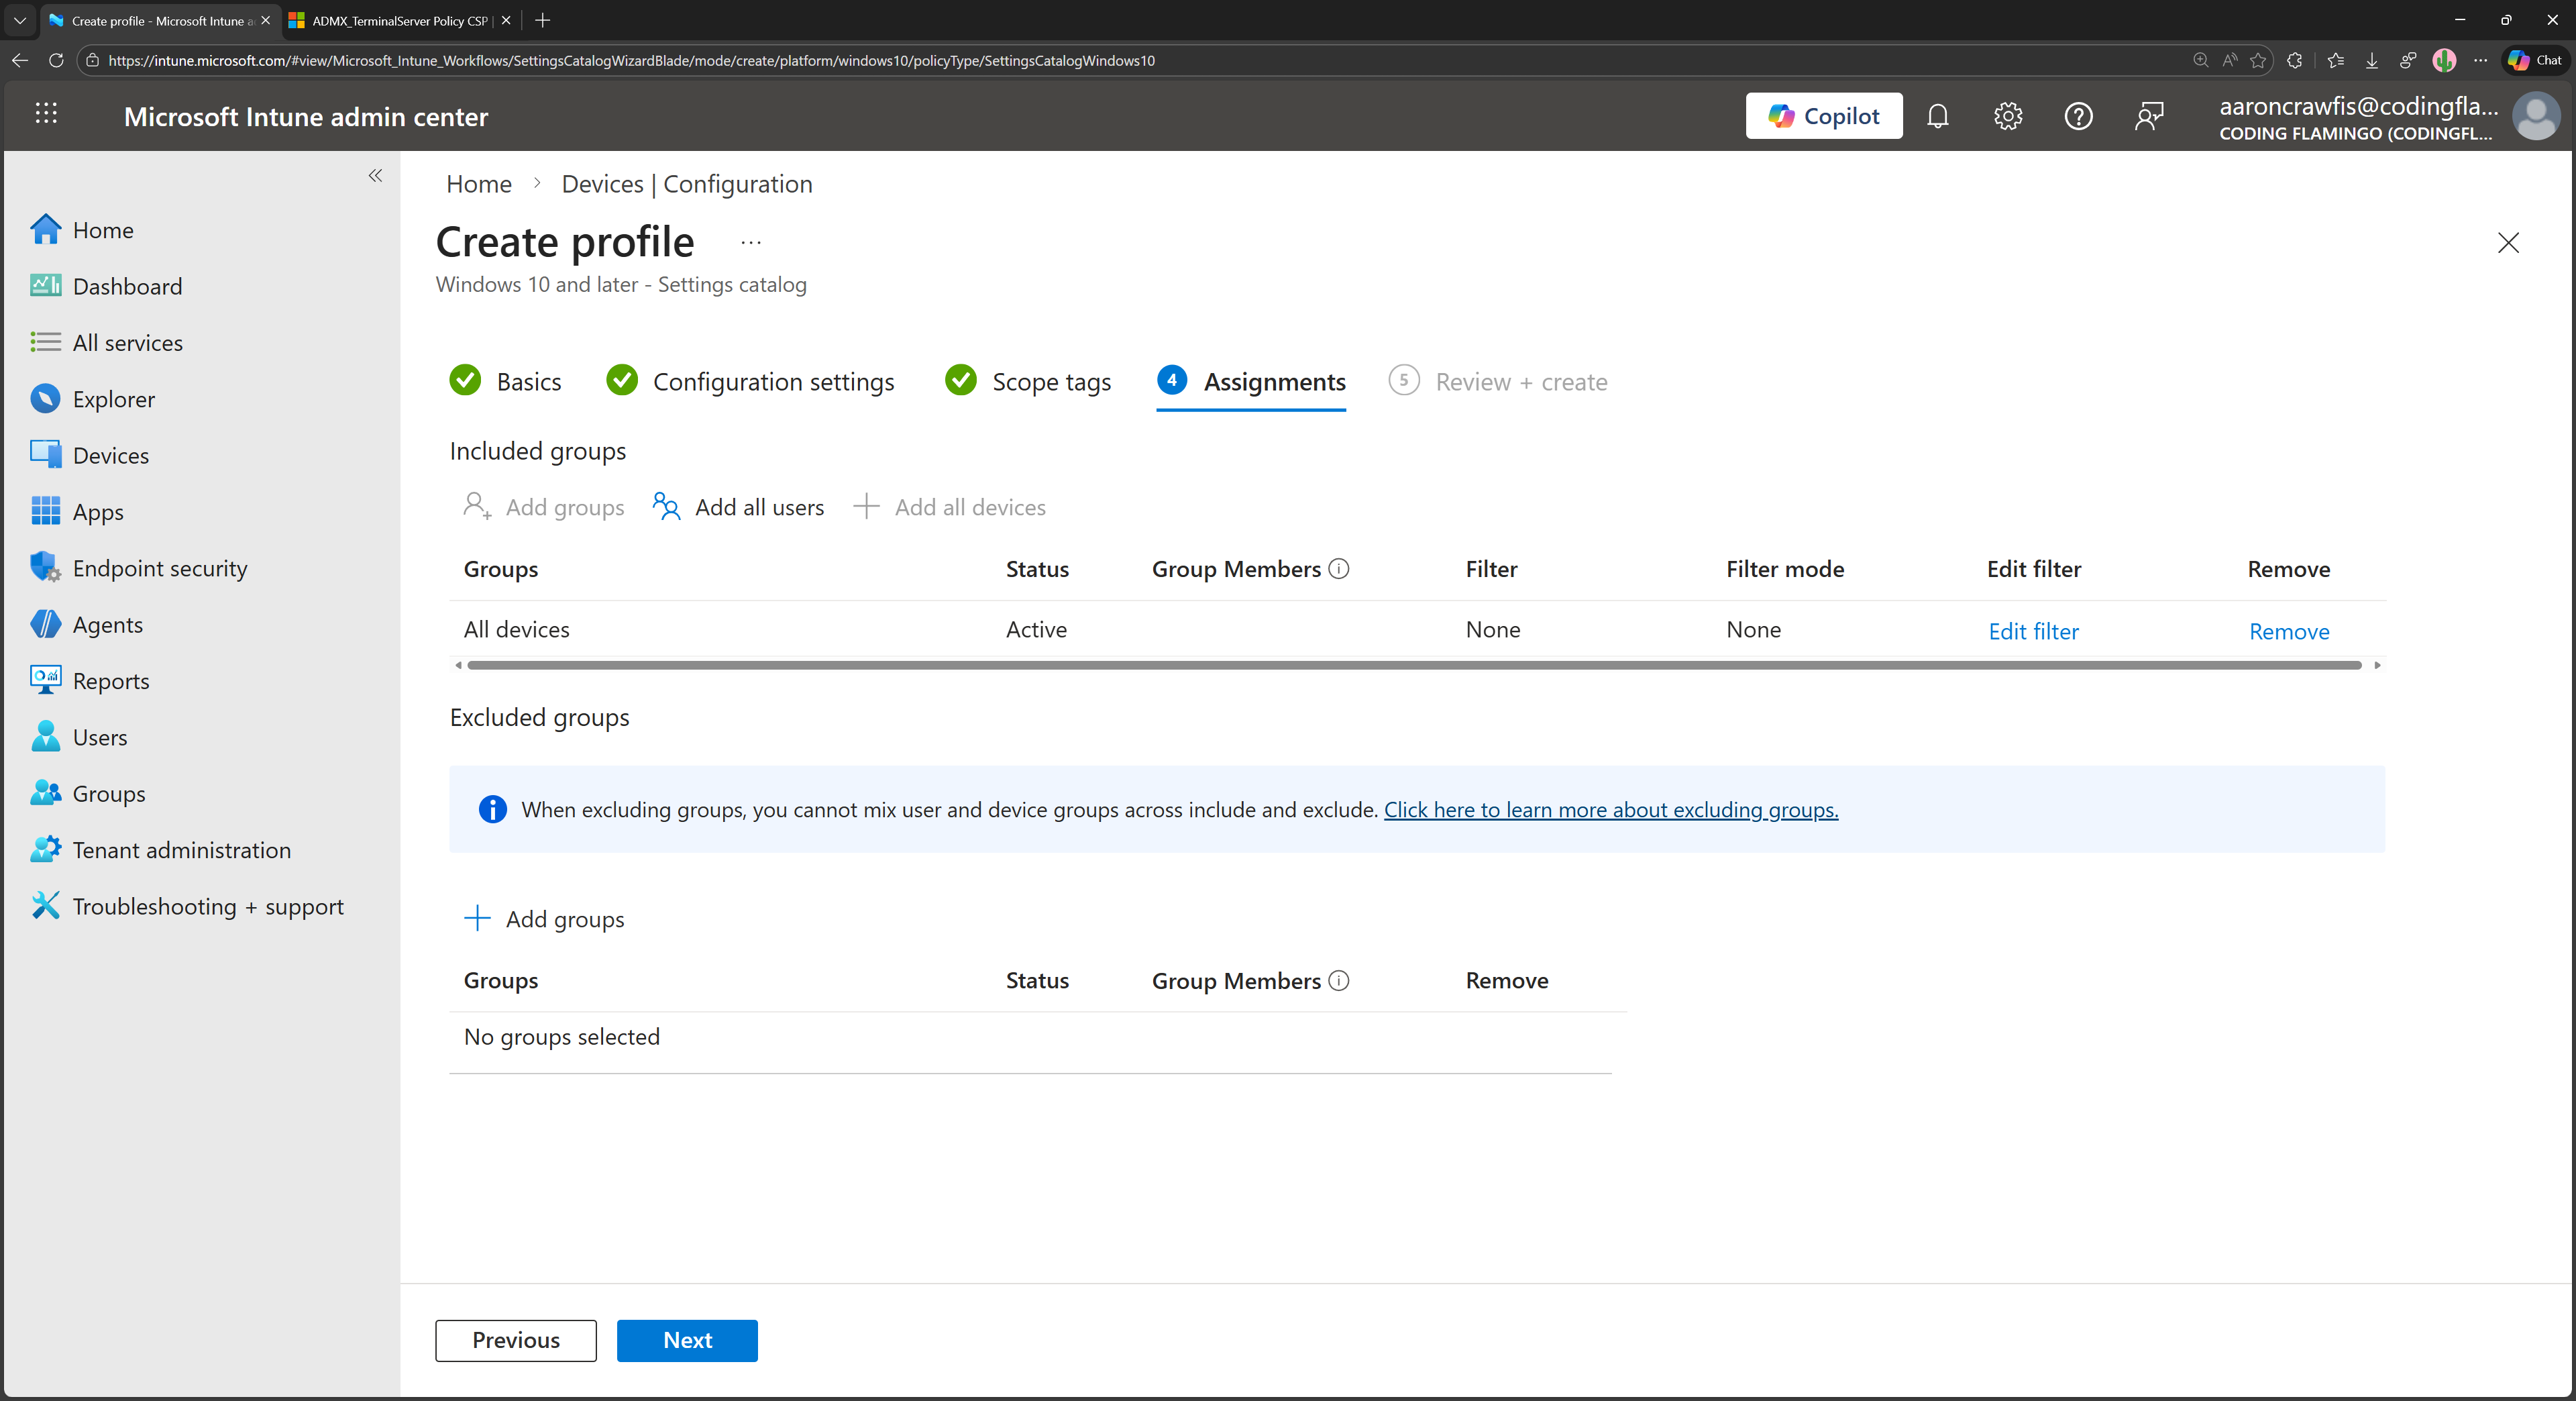
Under Assignments, select the groups of devices you want to apply this policy to, then click Next.
-
Review your settings, then click Create to create the policy.
The next time your managed devices sync with Intune, they will receive the new configuration profile, and RDP will be enabled along with FIDO2 authentication. However, you won’t be able to use your FIDO2 security keys just yet, as you still need to configure a firewall rule.
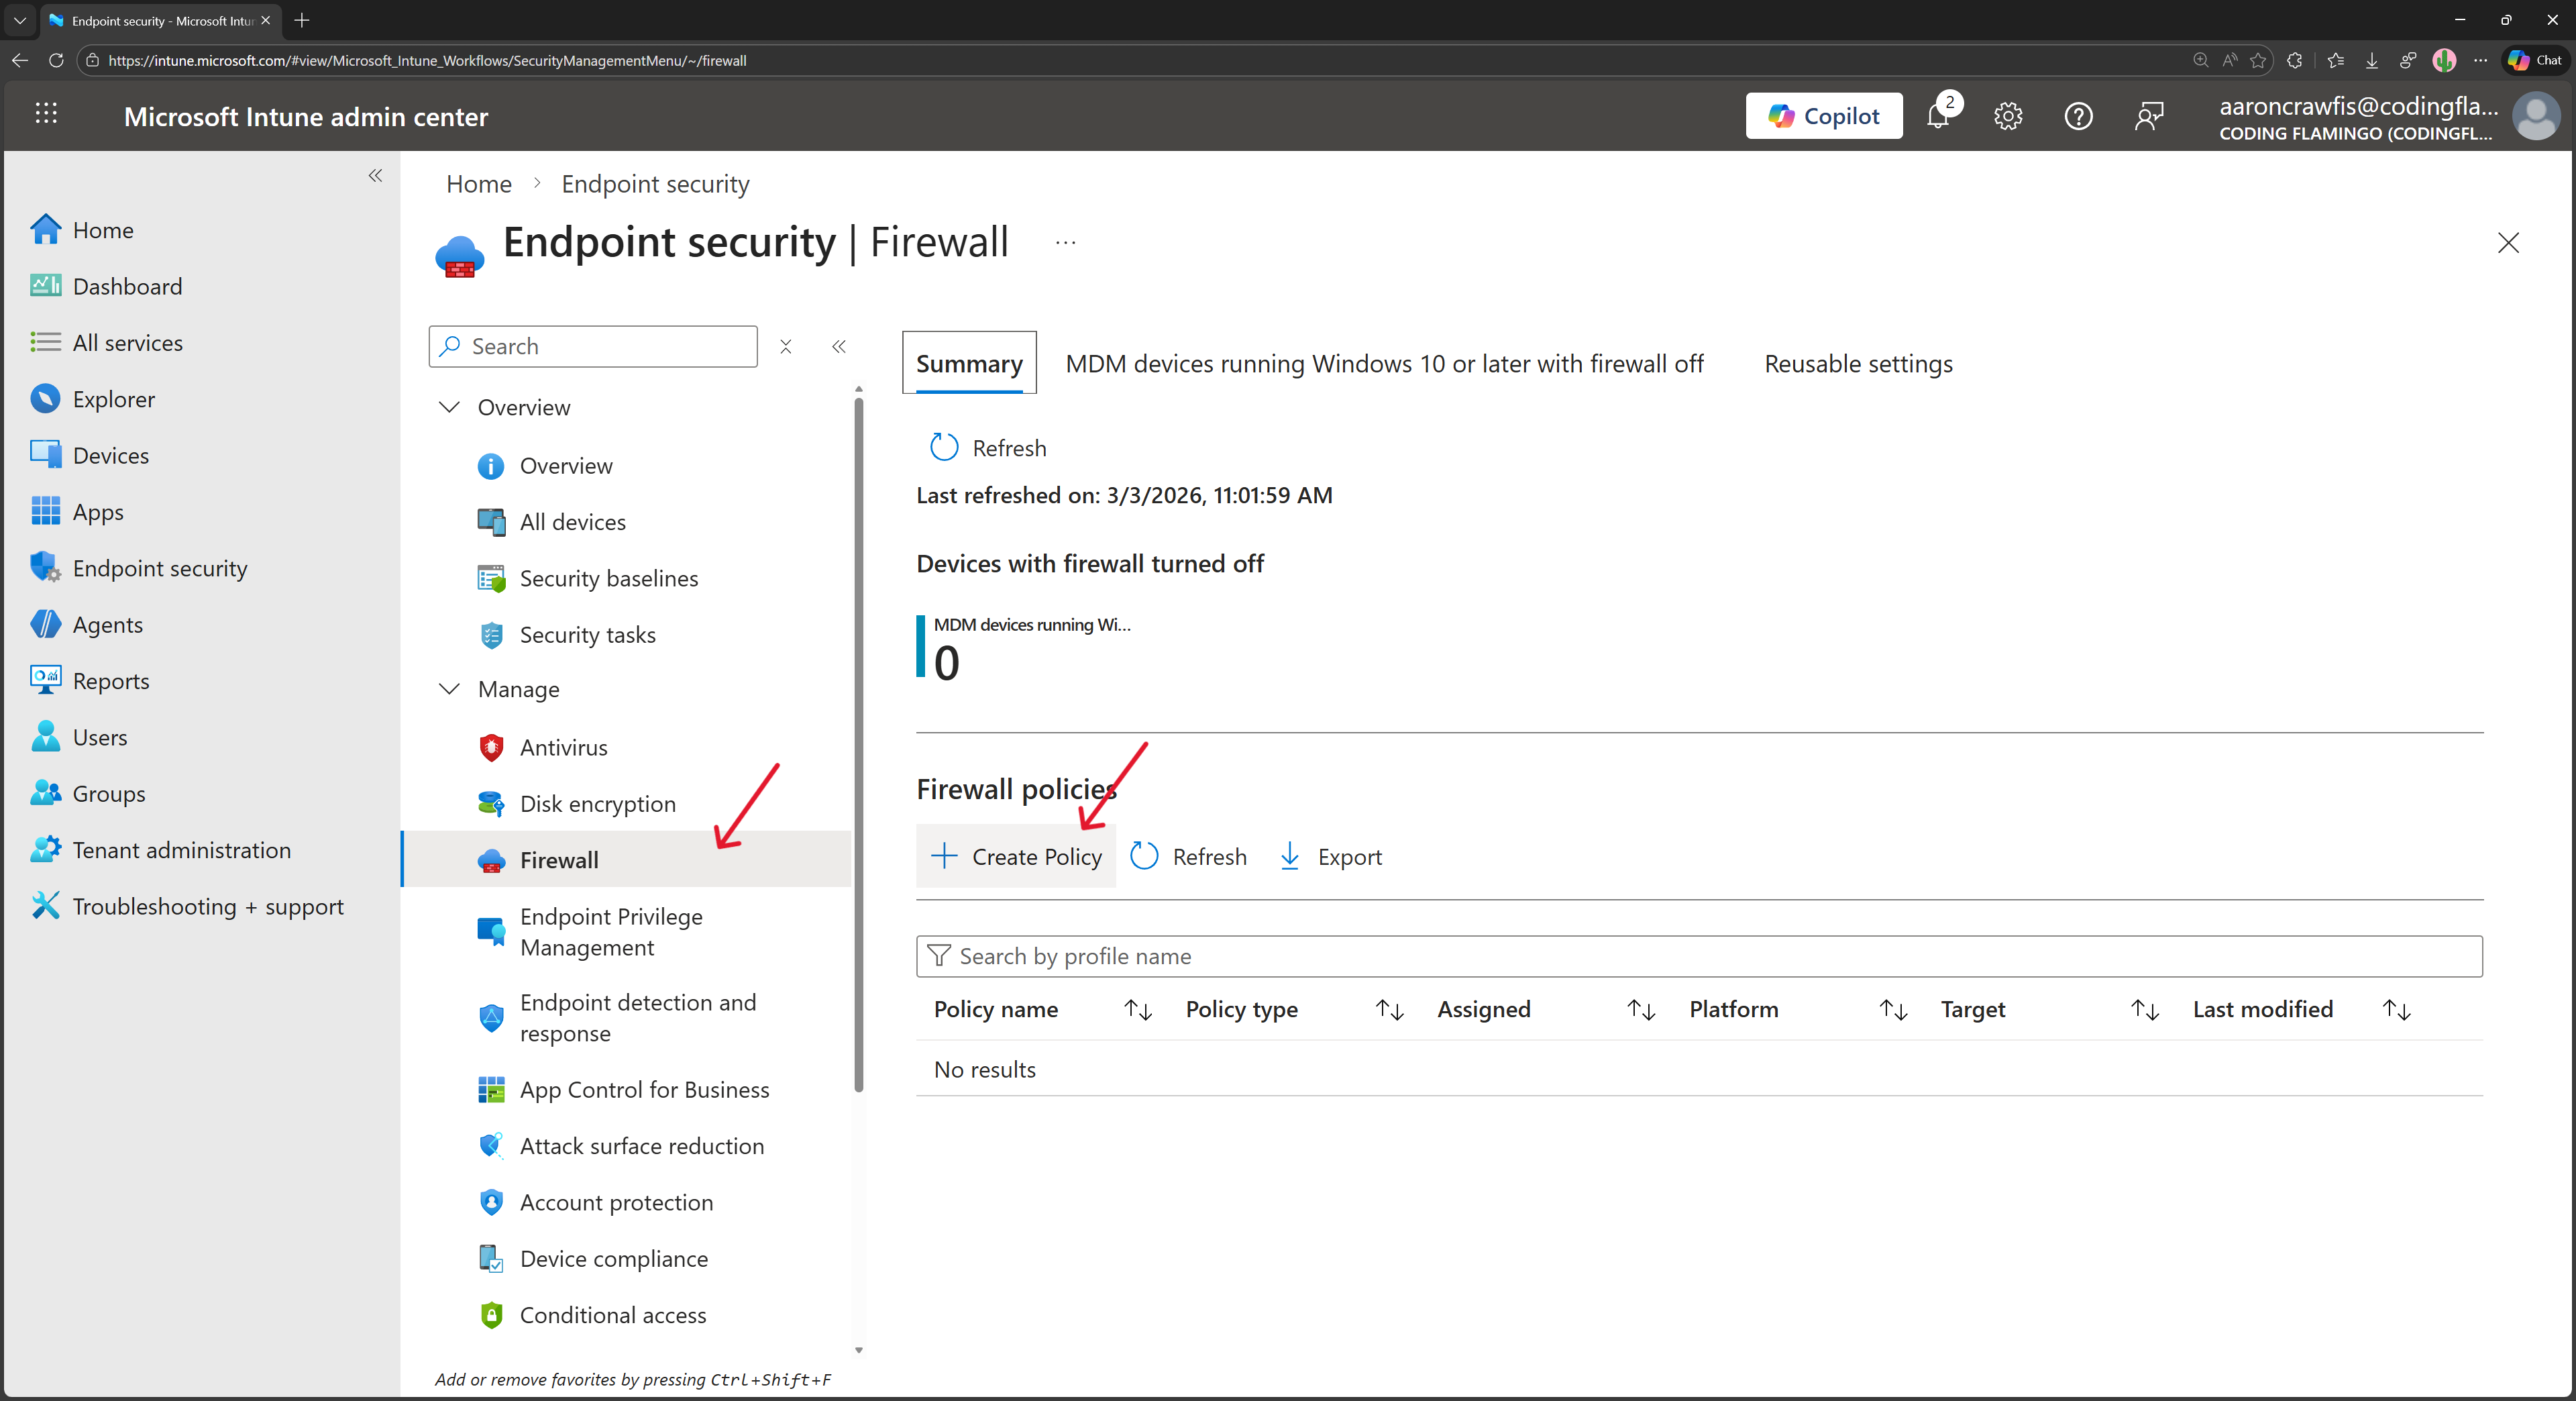
How to Open RDP Port 3389 in Microsoft Intune Firewall Settings
While enabling RDP directly in Windows Settings also enables the required firewall rules, the same is not true when enabling RDP through Intune. You need to create a new firewall rule in Intune to allow RDP traffic on port 3389.
-
In the Intune portal, navigate to Endpoint Security
-
Under Manage, select Firewall and click on + Create Policy.
-
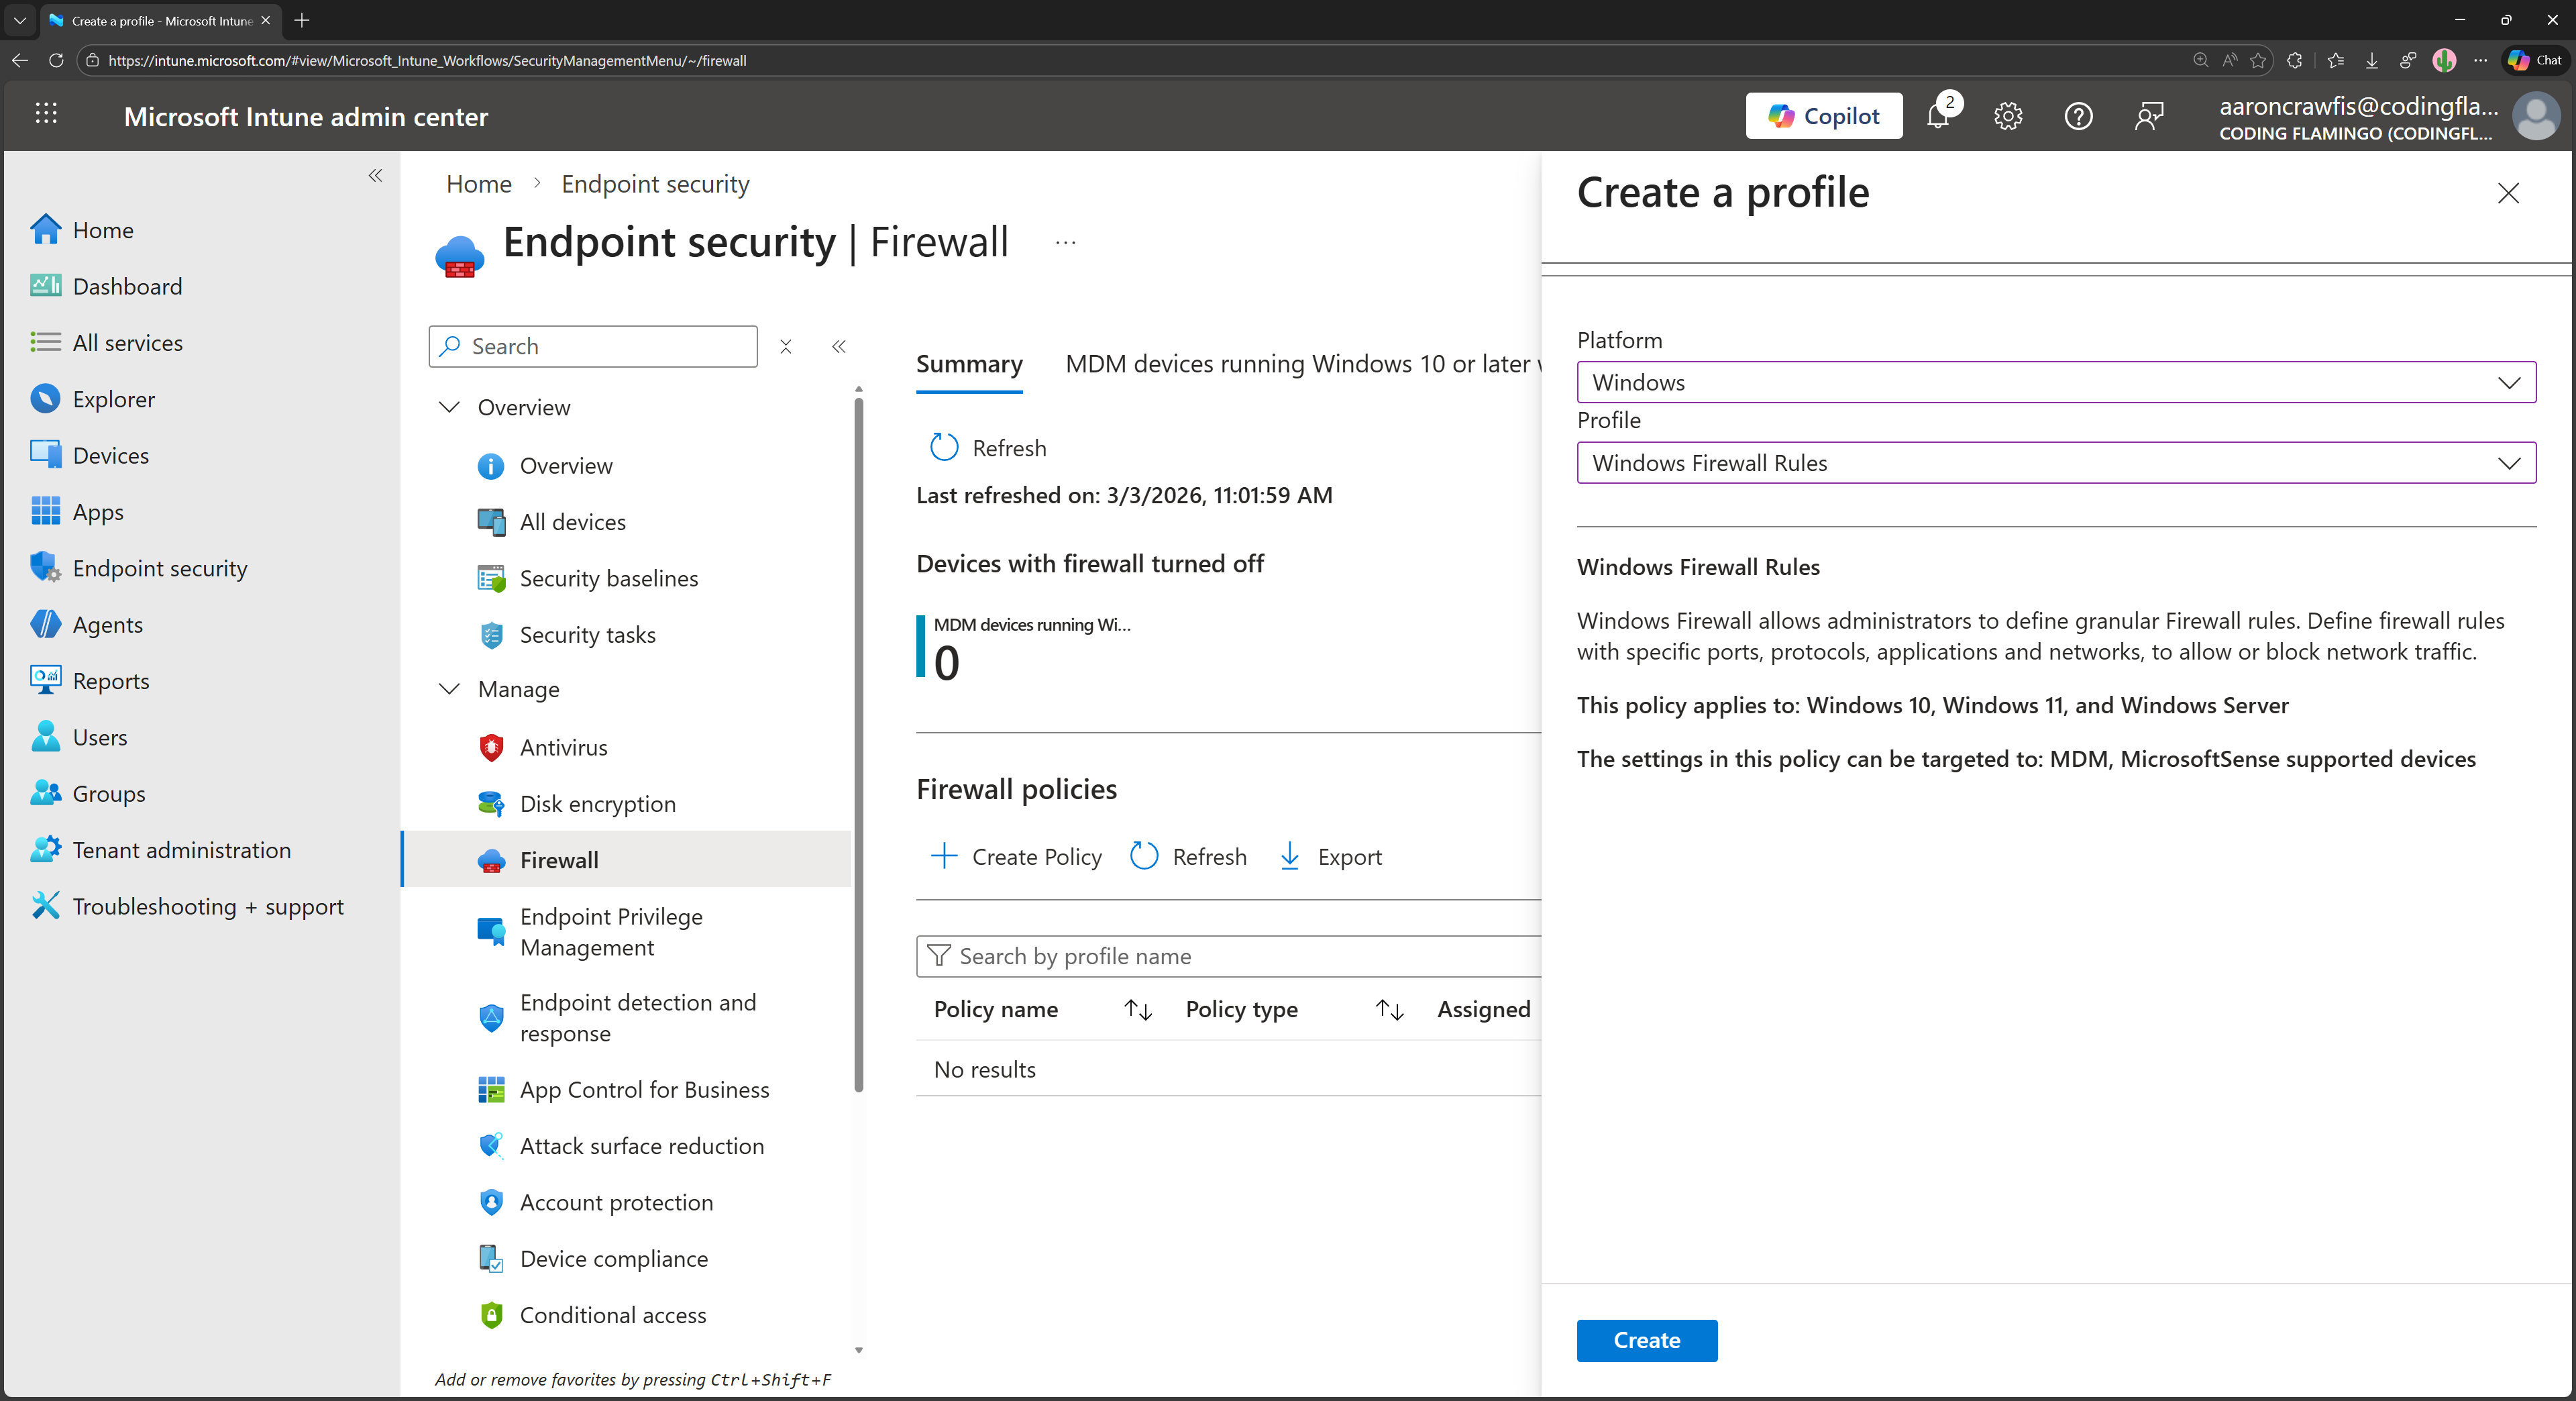
Select Windows as the Platform and Windows Firewall Rules as the Profile, then click Create.
-
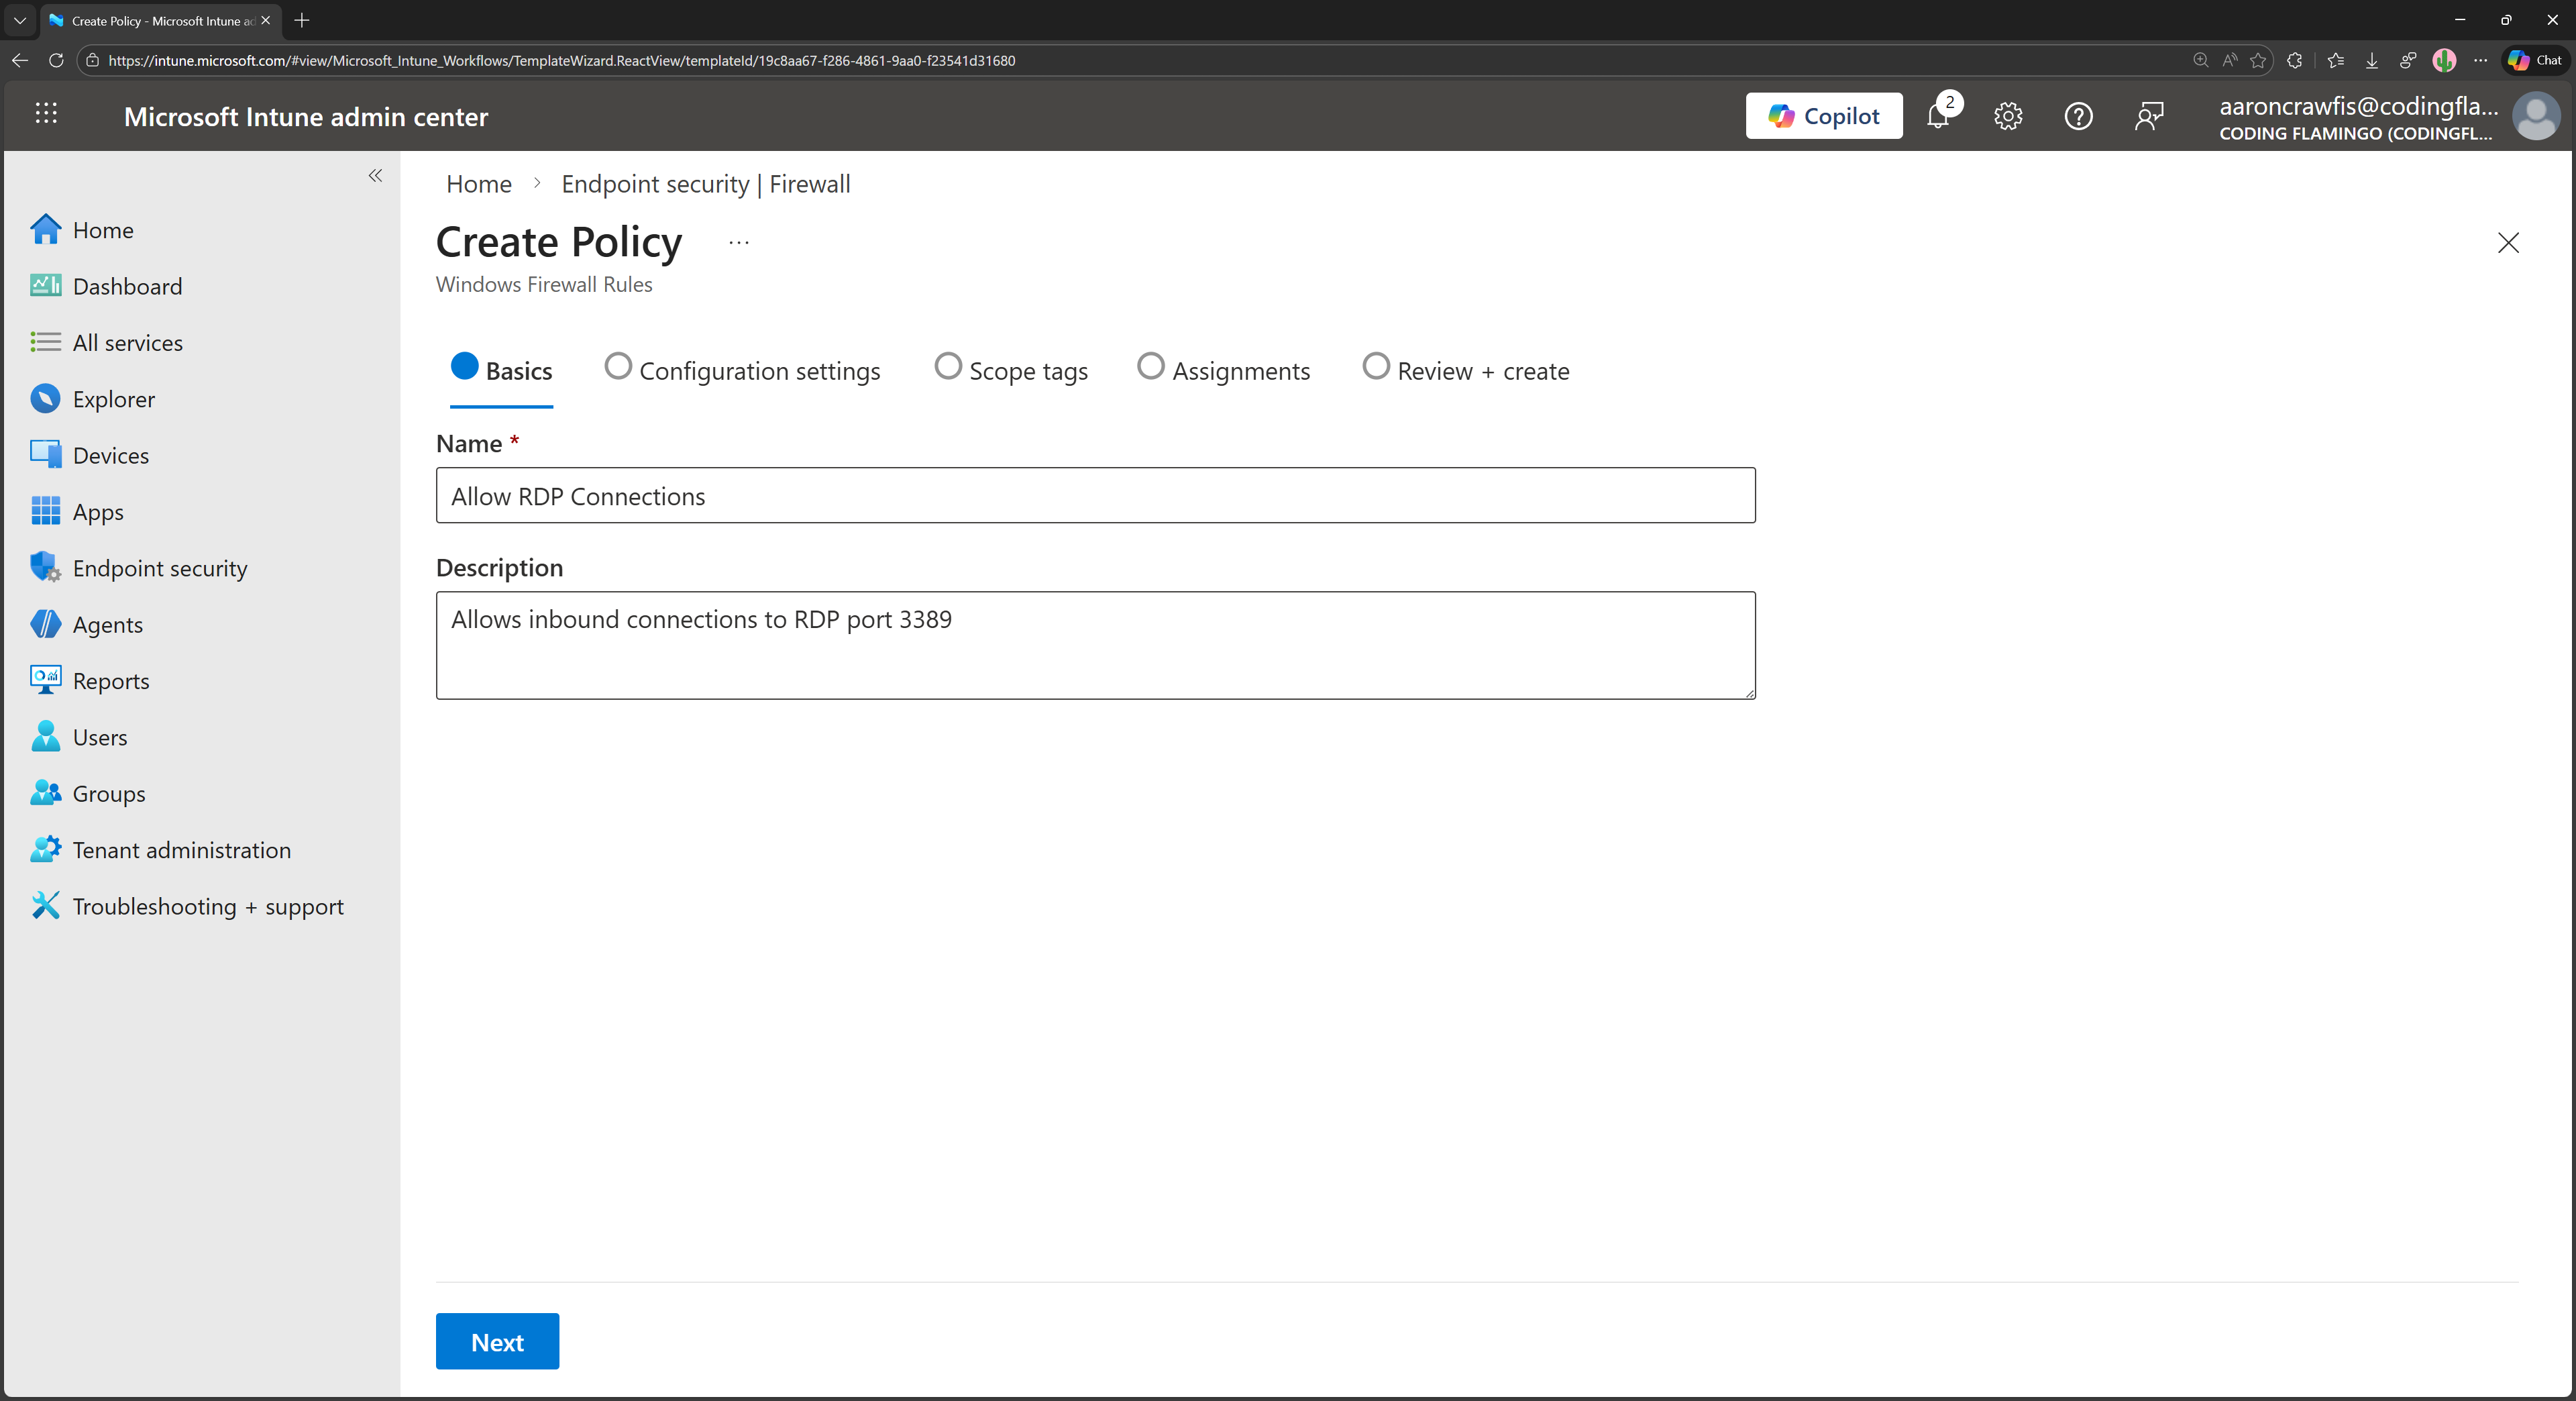
Under Basics, give your new firewall policy a name and a description, then click Next.
-
Under Configuration settings, click on + Add.
-
Enter a friendly name for the rule, select Allow as the Action, and click Edit instance.
-
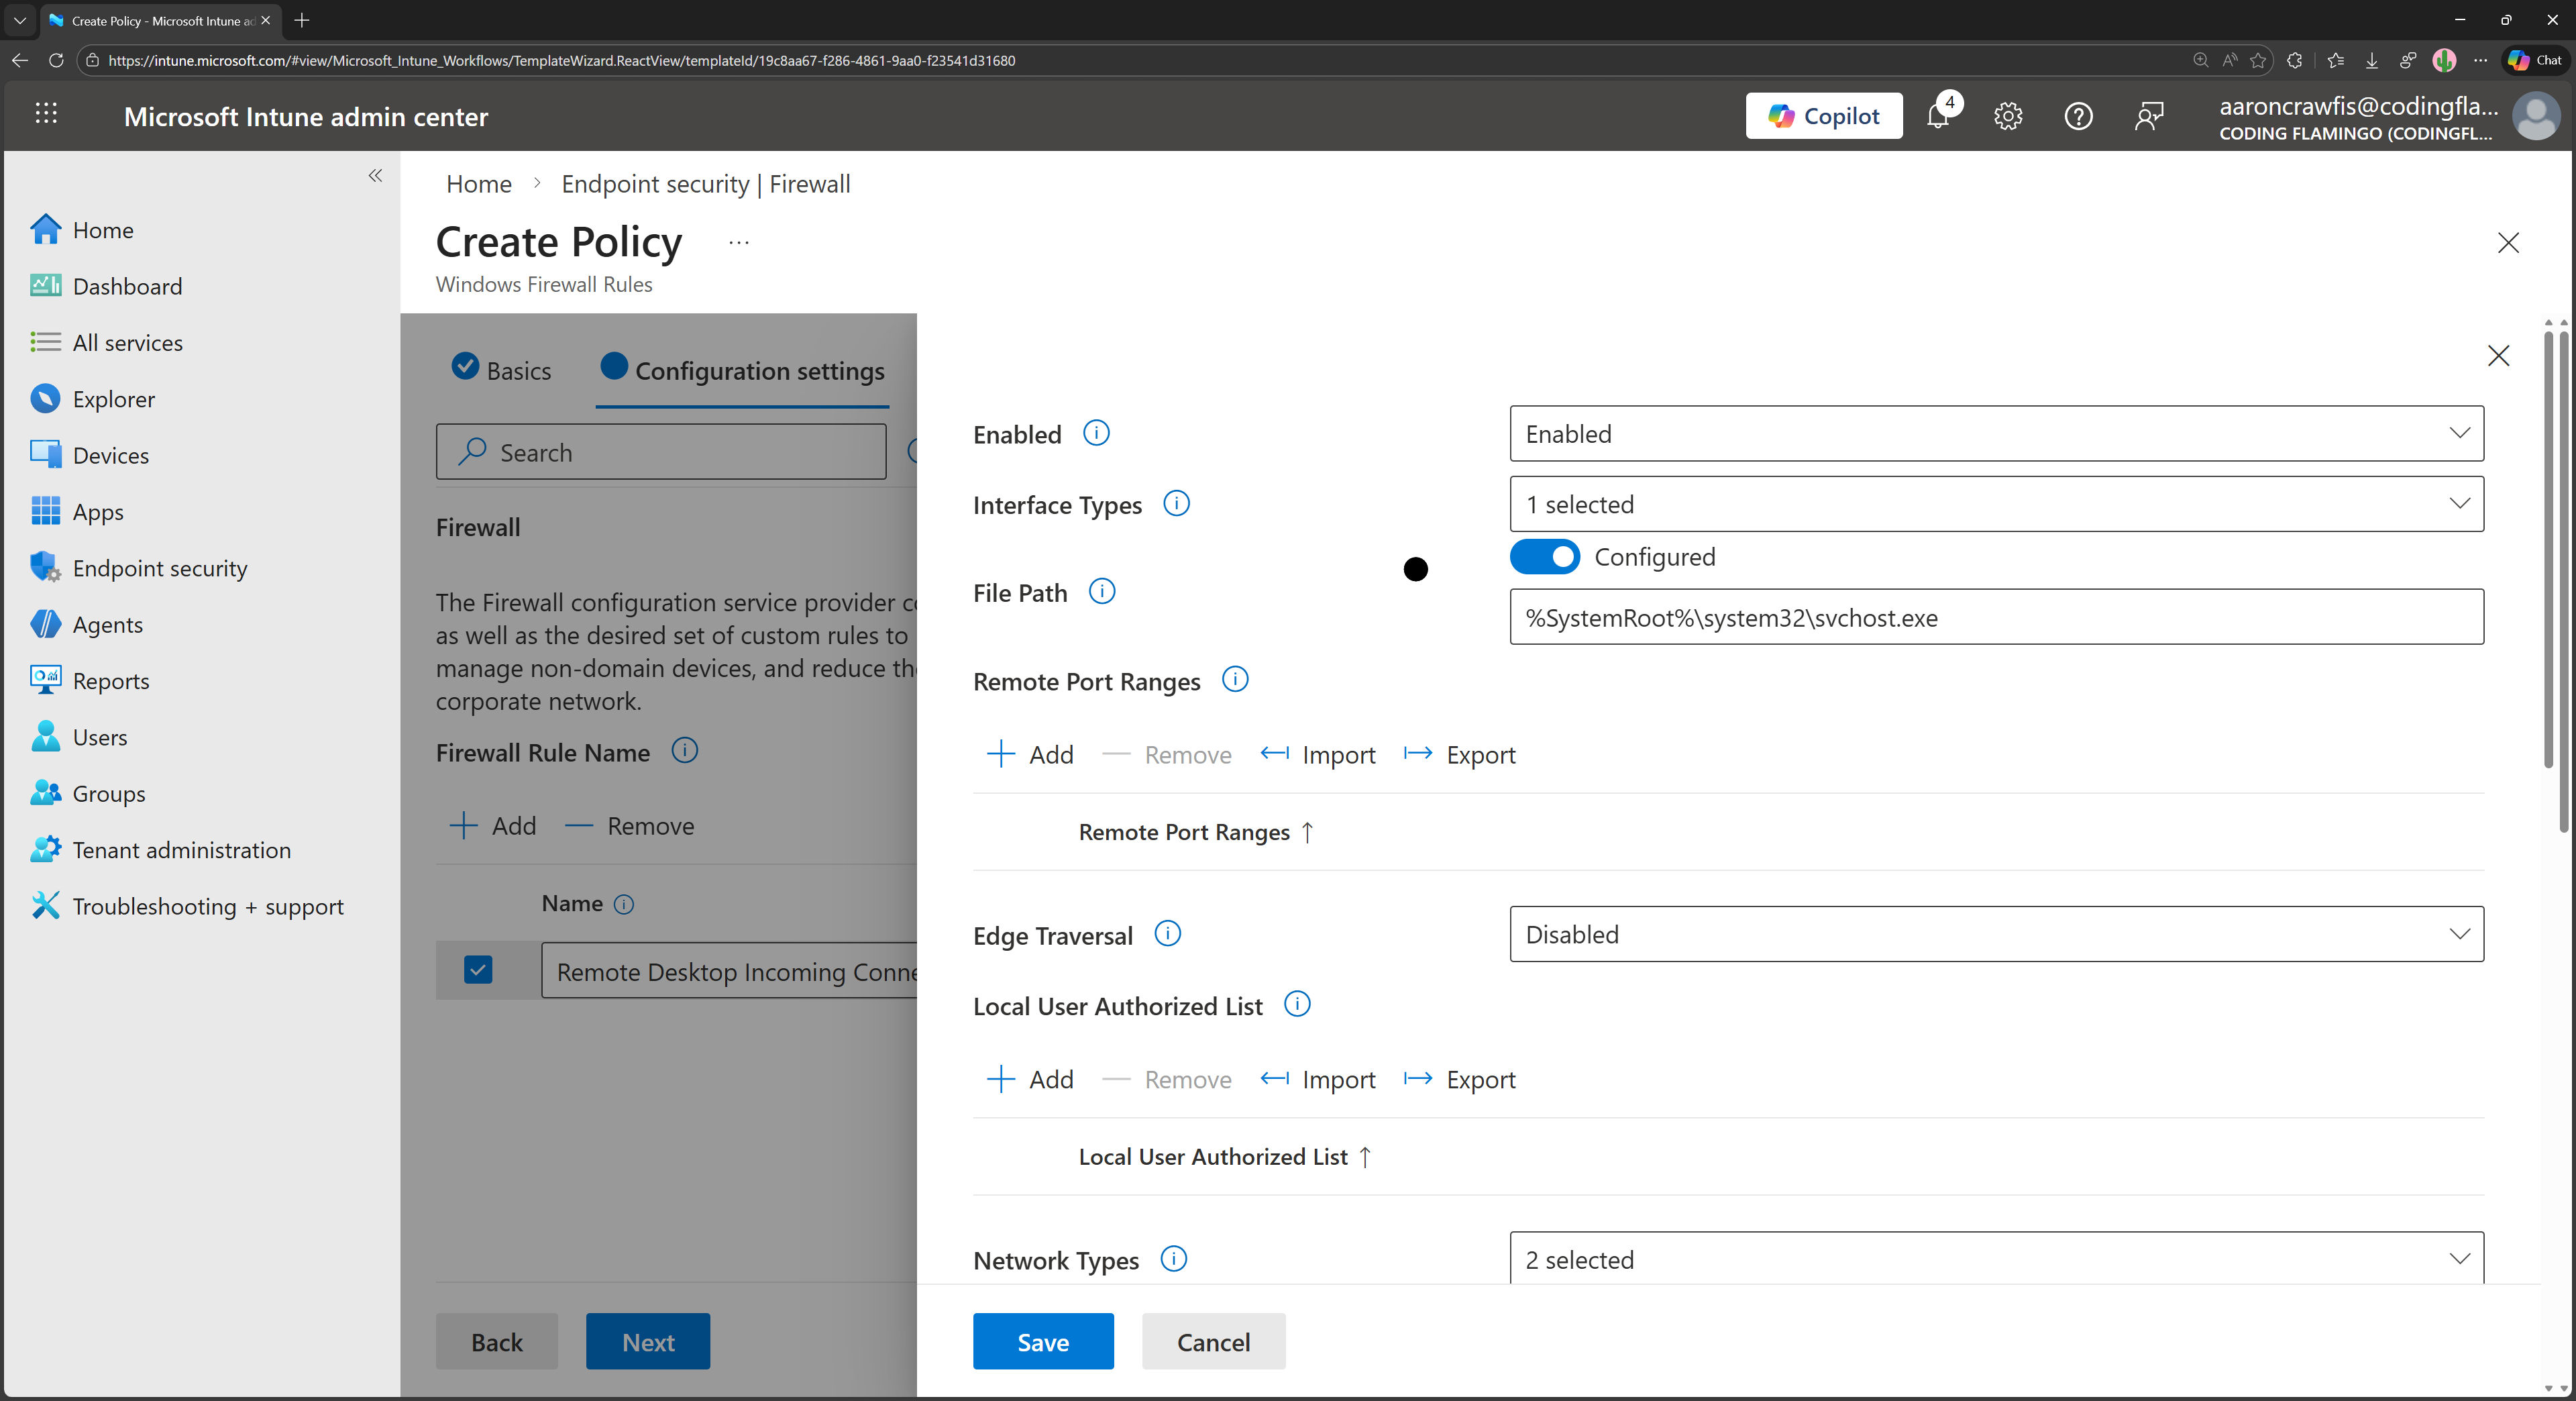
Enter the following settings for the firewall rule:
- Enabled: Enabled
- Interface Types: Set as needed (e.g. Lan, Wireless, etc.). Choose only the interfaces you want to allow RDP traffic on and where you expect to use RDP from.
- File Path: Set to Configured with value
%SystemRoot%\System32\svchost.exe. - Edge Traversal: Disabled
- Network Types: Recommended to restrict to
FW_PROFILE_TYPE_DOMAINandFW_PROFILE_TYPE_PRIVATEto avoid allowing RDP traffic on public networks, but set as needed. - Local Port Ranges: Click + Add and add
3389to allow RDP traffic. - Protocol: Select Configured and choose 6 (TCP).
- Direction: Inbound
-
Review your settings and click Save.
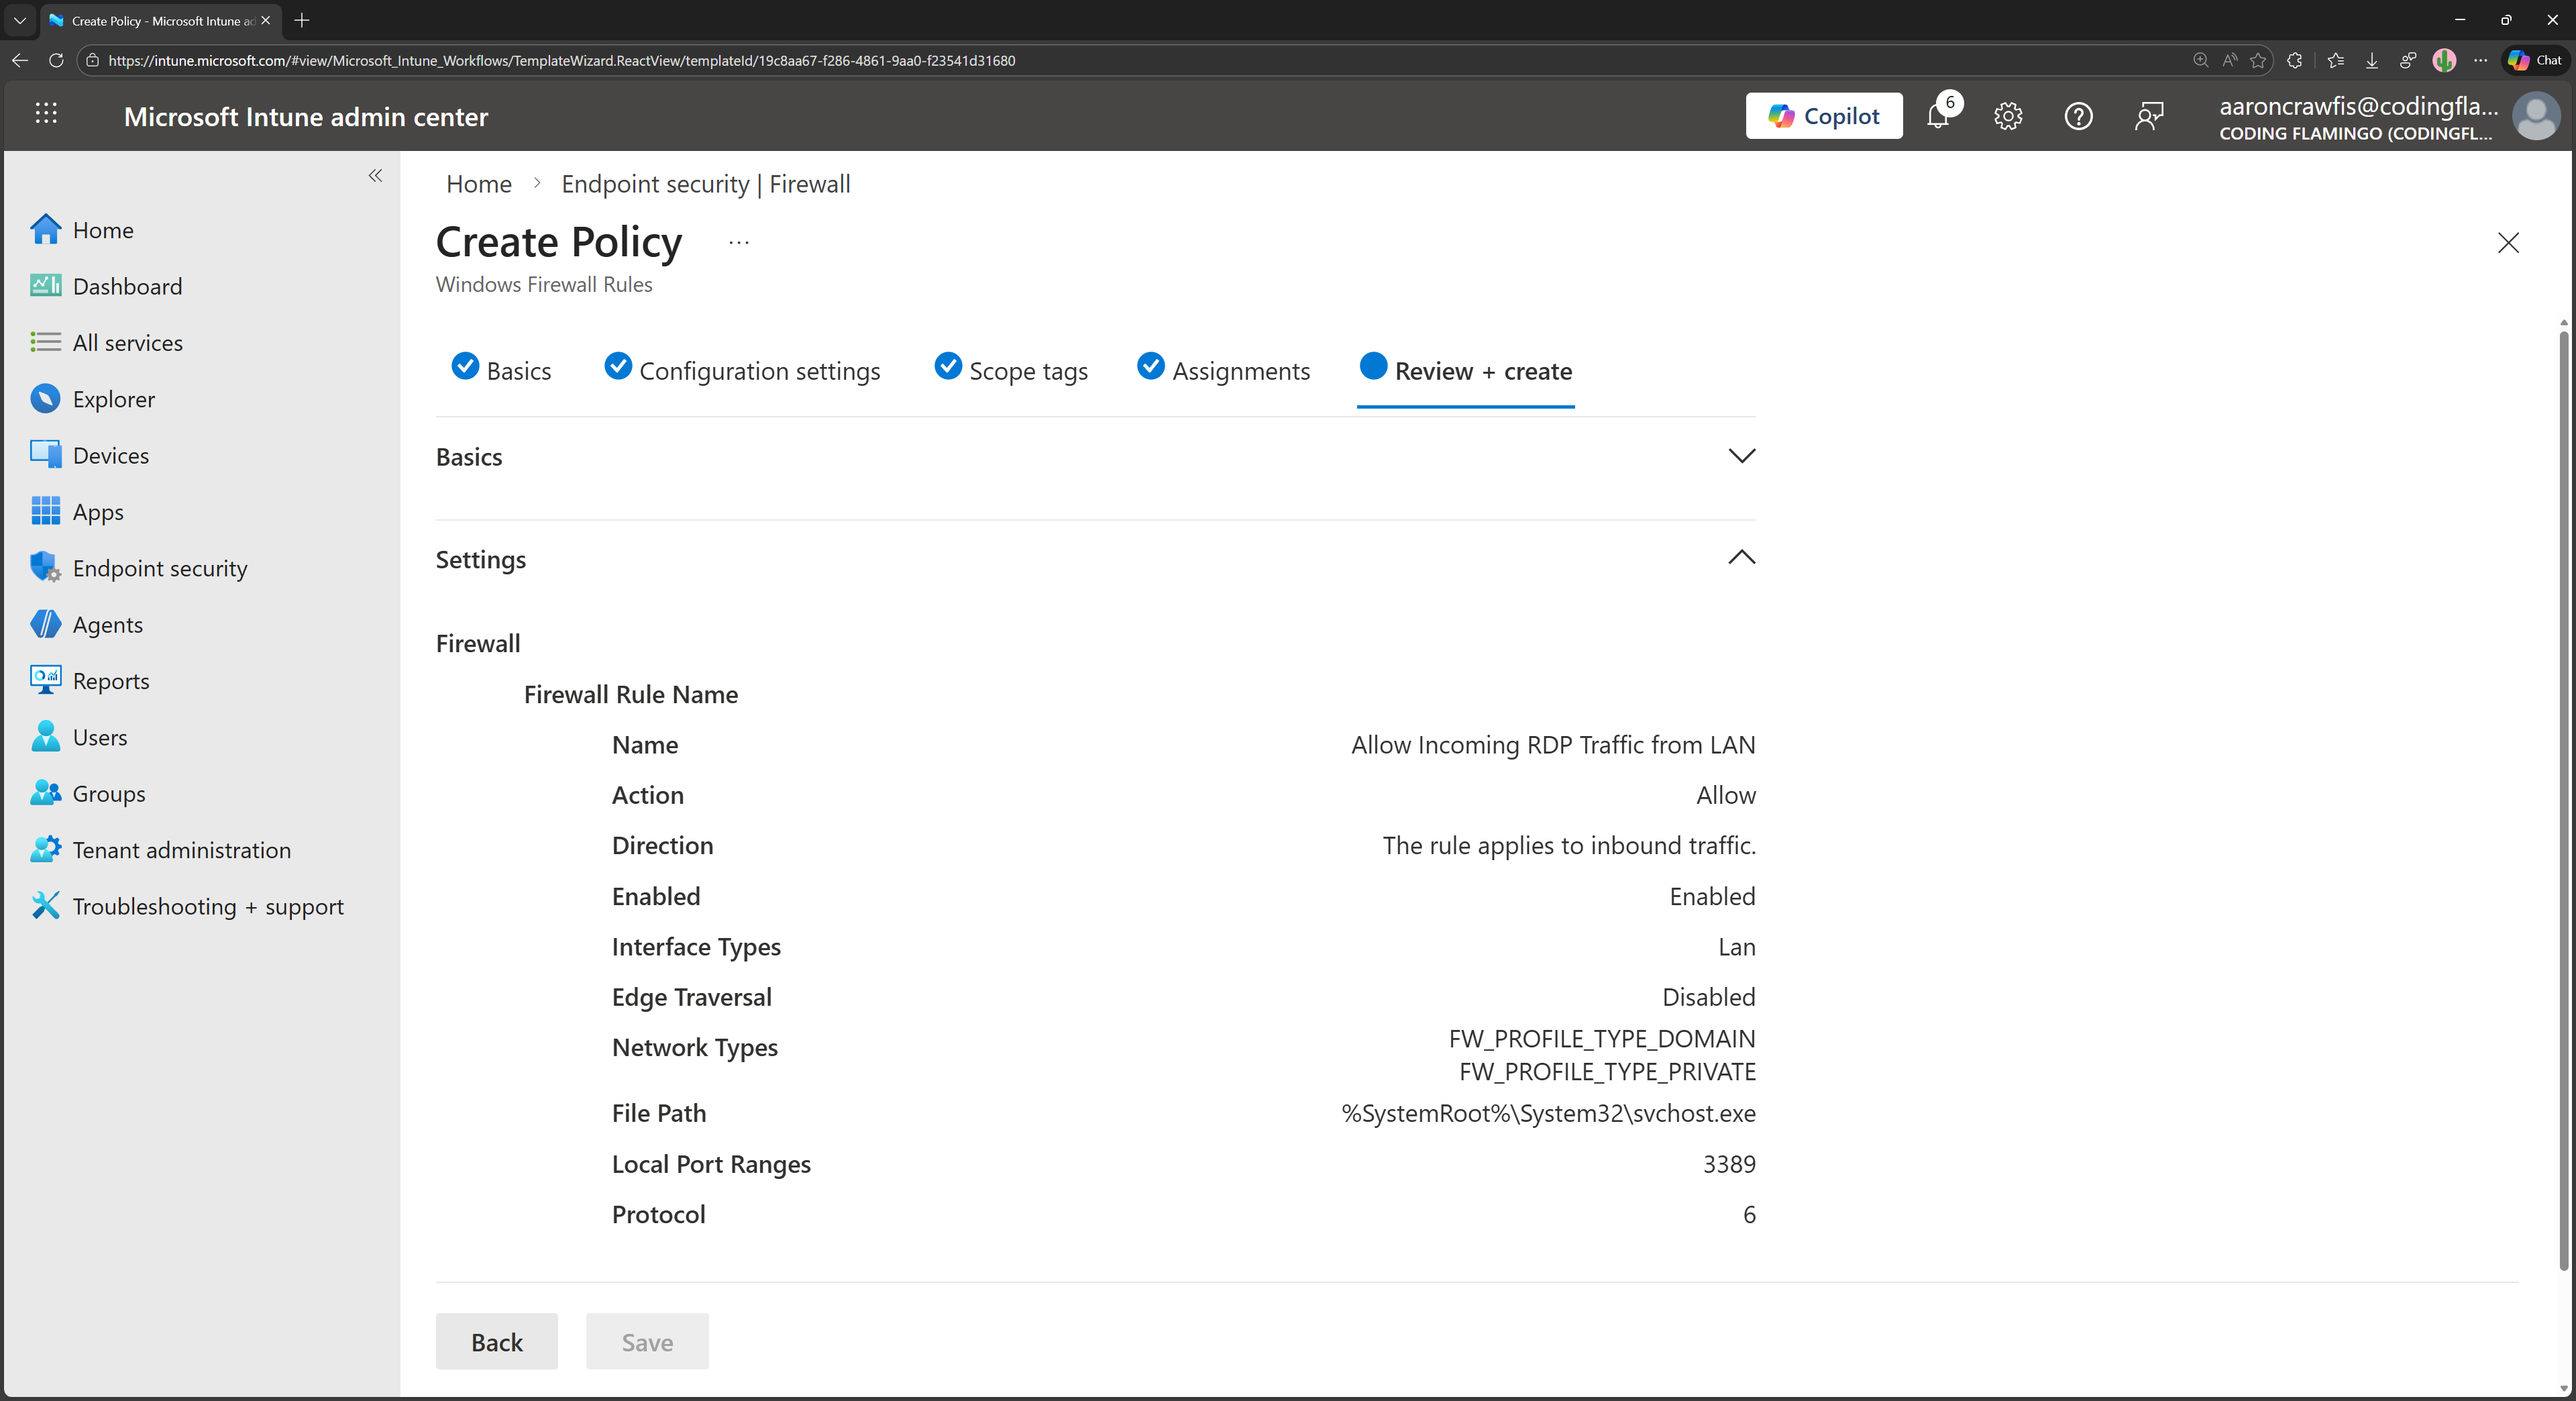
The next time your managed devices sync with Intune, they will receive the new firewall policy, and RDP traffic on port 3389 will be allowed. You can now use your FIDO2 security keys to authenticate when connecting to your remote desktop via RDP.
How to RDP Into a Remote Machine Using FIDO2 Security Keys
Now that you have your remote machine configured for passwordless RDP with FIDO2 security keys, you can connect to it using the Remote Desktop client on Windows.
-
Open Remote Desktop Connection on your Windows machine.
-
In the Computer field, enter the name or IP address of the remote machine you want to connect to.
-
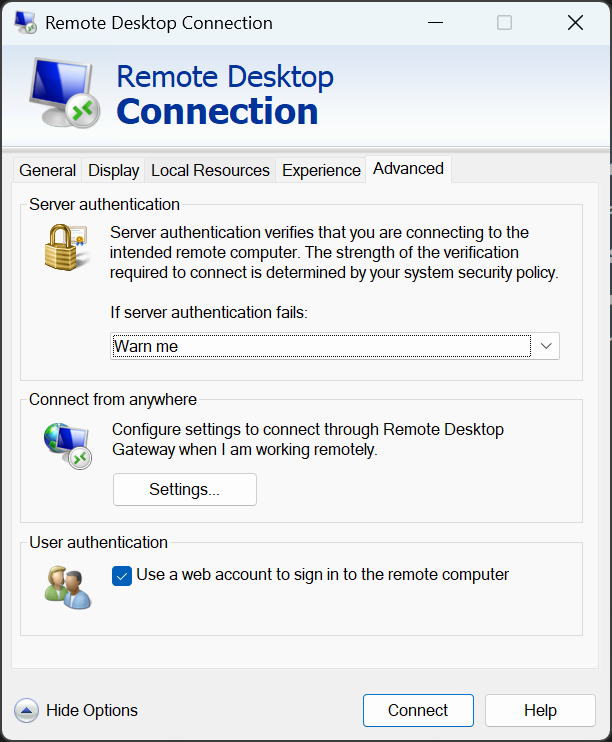
Click on Show Options to expand the options, then navigate to the Advanced tab.
-
Under User authentication, check the box for Use a web account to sign in to the remote computer.
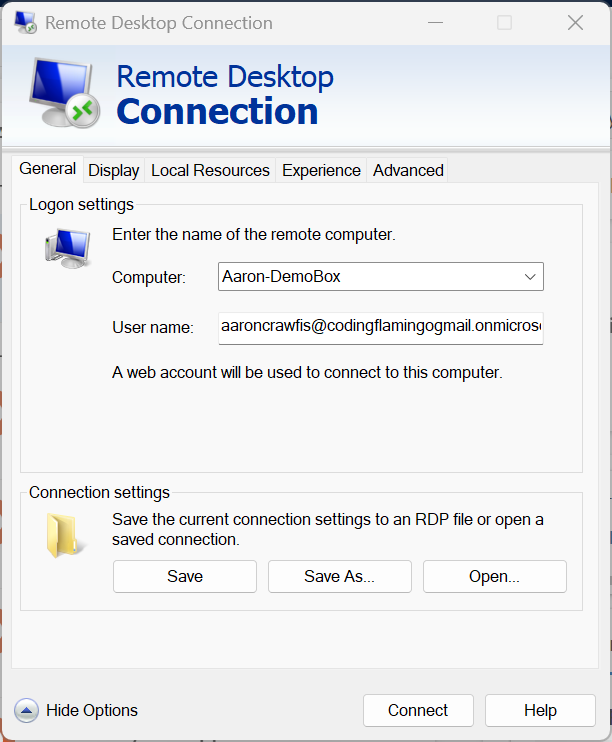
-
Back in the General tab, enter your Entra ID email address in the User name field. Click Connect to initiate the connection.
-
A pop-up window will appear asking you to sign-in with your web account. Follow the prompts to authenticate using your FIDO2 security key (e.g. insert your YubiKey and enter your PIN or use Windows Hello biometric authentication).
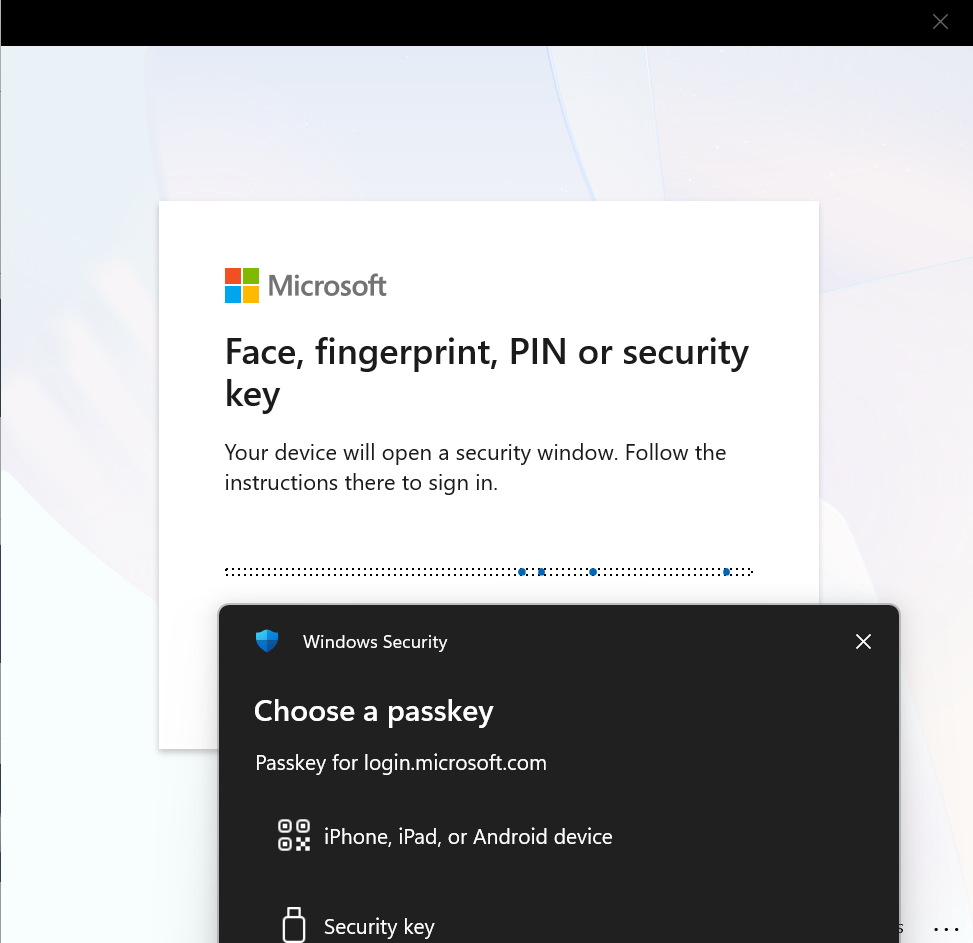
-
Once authenticated, you will be connected to your remote desktop without ever having to enter a password!
Check out our video walkthrough of these steps, along with some troubleshooting tips:
Further Reading - How to RDP into Hybrid Joined Devices and From Other Users
While the above steps are great for enabling passwordless RDP to Entra ID joined devices using FIDO2 security keys, you may have other scenarios where you want to use passwordless RDP that require additional configuration. For example, if you want to RDP into a hybrid Azure AD joined device, you will need some additional configuration to allow the device to use FIDO2 authentication for RDP. Additionally, if you want to RDP from a different user than the one which owns the machine, you will also need to configure group access. Learn more about these advanced settings in this Microsoft blog post.
Learn How to Configure Advanced Settings for Passwordless RDP with FIDO2 Security KeysConclusion - Going Passwordless Doesn’t Have to Limit You
A big concern we often hear from organizations when they are considering going passwordless is that it will limit their users’ experience or prevent them from using certain applications or services. Thankfully, most applications and services out there today fully support passwordless authentication methods like FIDO2 security keys, and RDP is no exception. Entra ID takes care of the authentication process and FIDO2 passkey auth flows, allowing you and your apps to seamlessly use passwordless credentials.
Looking to start your passwordless journey? Set up a free assessment with an identity expert today to learn how EZCMS can help you easily onboard users to FIDO2 security keys and other passwordless authentication methods, and provide a seamless and secure remote onboarding experience for your users.
Learn How EZCMS Can Help You Go Passwordless