

How to Use Entra CBA (Certificate-Based Authentication)
 Keytos Team |
How to Implement Entra CBA
Entra CBA (Certificate-Based Authentication) is by far the best way to secure your organization via Entra MFA. Did you know that aside from improving your security posture, Entra CBA improves your user experience and productivity? That’s right – studies show that with Entra CBA, there is a 4x improvement in authentication speed and a 20-50% reduction in the number of support tickets! In this article, we will show you how to set up Entra CBA passwordless authentication in 9 easy steps (that’s less than an hour’s worth of steps!).
What You Need to Set Up Entra CBA
Entra CBA utilizes X.509 certificates to verify users. These certificates must be provided by a Certificate Authority (CA) recognized by Entra ID. Unfortunately, Entra does not offer an in-built CA to produce these certificates for users, and they have stated that the issuance and distribution of certificates fall outside the purview of Entra CBA. For certificate enrollment, there are two main avenues:
-
Use Intune SCEP. Sadly, since Intune certificates lack PIN protection, they’re deemed as a single factor (more details can be found in the Azure CBA section below regarding setting up Azure CBA for Intune as a single factor).
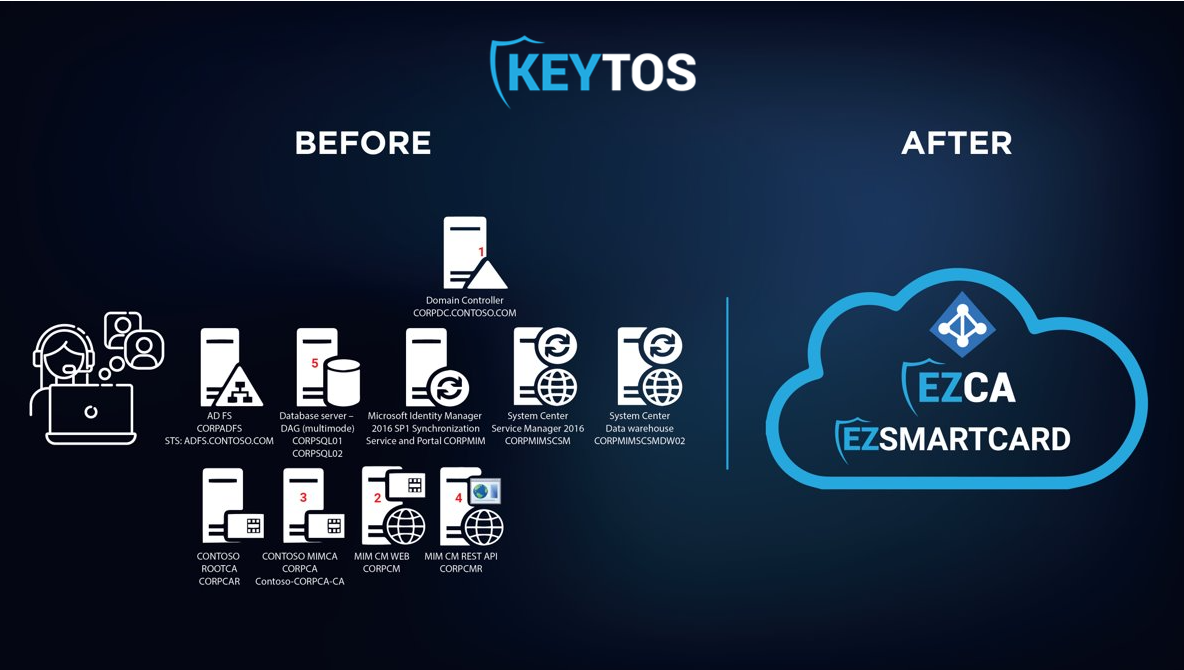
In this article, we will guide you on configuring Azure CBA using smart cards and YubiKeys. To facilitate the self-enrollment of smartcard certificates, we’ll employ EZCMS, our smartcard management tool. This allows for effective management of your smart card inventory and empowers users with a self-service smart card registration process. The good news is that Entra CBA, EZCA, and EZCMS are all cloud-based solutions hosted on Azure, ensuring that your team need not be concerned with maintaining any underlying infrastructure.
1) Choose Your Smartcard Provider
Your choice of smartcard provider is vital in setting up Entra CBA. Whichever provider you choose will impact the cost, security and UX of your Entra CBA deployment. There are tons of smartcard providers out there, but we highly recommend YubiKeys due to their FIDO2 support and enhanced security protocols developed in collaboration between Yubico and Keytos. This ensures optimal security during the onboarding process. Nevertheless, we recognize that YubiKeys might not suit everyone; as such, we’ve also incorporated support for PIVKey smartcards. This offers a more budget-friendly alternative for your Entra CBA deployment and can simultaneously serve as an employee ID! We even assist in the printing and shipping of the smartcards.
Once you’ve chosen your smartcard vendor and placed a sample order, we can assist in configuring the remaining infrastructure.
2) Create an EZCMS Instance
To set up EZCMS, you first must register the EZCMS application in your tenant. By doing so, you enable EZCMS to authenticate your users! Once you register the EZCMS application, you can go to the Azure portal and create your EZCMS instance; once this is done and your settings are confirmed, we can create the CA that will issue the smartcard certificates.
3) Set Up Your Entra CBA CA
If you’ve previously established a Windows ADCS Certificate Authority for smart card certificate issuance, you can integrate EZCMS with ADCS and begin distributing certificates from your ADCS CA. On the other hand, if you don’t have an existing CA or wish to transition your system to the cloud, we suggest EZCA, our cloud-based certificate authority. EZCA facilitates the generation of secure, compliant, HSM-supported Certificate Authorities in Azure. It’s worth noting that the EZCA Smartcard CA must be chained to a Root CA. You have the option to create one within EZCA or chain it to an already existing root CA. After setting up your CAs, the next step is to upload these certificates to Azure.
4) Upload the CA Certificates to Entra
Once you’ve created your CAs, you need to upload the CA certificates to Azure as trusted CAs by doing the following:
-
Enter the Azure portal as a Global Administrator.
-
Choose Azure Active Directory and click Security in the left-hand panel.
-
Choose Certificate Authorities.
-
Upload the certificate for every root and issuing CA in your infrastructure. Be sure that you add a publicly-accessible CRL URL for Azure to be able to verify that the certificates have not been revoked.
5) Configure Entra CBA
Upon creating the CAs that Azure needs to trust for user authentication, you must allow Azure to accept CBA as the authentication method by doing the following:
-
Go to Authentication Methods (within the Security section).
-
Choose Policies in the left-hand panel.
-
Choose Certificate-Based Authentication.
-
Choose the Configure tab.
-
Choose your preferred protection level (Azure defaults to Single Factor, so if you’re using smartcards be sure to change it to Multi-Factor).
-
Go to the Rules section and change the setting so that CAs can issue user certificates.
-
Set the username binding order (how the username is written in the certificate).
-
Click Save.
6) Register the Tenant in EZCMS
EZCMS was designed to onboard users from multiple different tenants. Check out either our EZCMS documentation or the below video to learn how to register your tenant (NOTE: EZCMS used to be called EZSmartCard).
7) Establish a Test User in EZCMS
The final step before you can issue your first smartcard is adding a test user to EZCMS and assigning a smartcard to that user. Once that is done, you can finally issue your very first smartcard!
8) Test the Authentication Flow
Once you have set up EZCMS and established your test smartcard, you can test the authentication flow if you so choose! Just follow these steps:
-
Use an incognito tab to go to the Azure portal.
-
Input your username.
-
Choose Use a Certificate or Smartcard.
-
Choose your smartcard certificate.
-
Input your PIN.
-
If you are using a YubiKey, touch it in order to complete the authentication process.
9) Begin Rollout of Entra CBA
Congratulations, you’ve now successfully set up smartcard authentication with Entra CBA! Now you can finally begin rolling it out to all of your users.
See? We told you it was easy to set up Entra CBA! If you have any outstanding questions, comments or concerns, schedule a FREE identity assessment with one of our identity experts today!