How-To: Manage Users in EZCMS
Introduction
EZCMS manages the status of the users in your organizations based on our “HR Database” this is integrated into EZCMS and can be managed by your HR department or by your IT department. Below you can see the three options for managing users in EZCMS: manually adding and removing users, using the Keytos automatic user lifecycle, or using the EZCMS API.
Verifying HR Administrator Access
To be able to see or manage the HR database you must be an HR Administrator. To verify this follow the steps below:
If you are not using the Keytos automatic user lifecycle, the accounts that will manage the users must be set as HR Administrators. We recommend creating an AAD group with the HR administrators and adding that group to the HR Administrators section.
- Navigate to your EZCMS instance and select “Settings”
You must be an administrator for this option to appear.
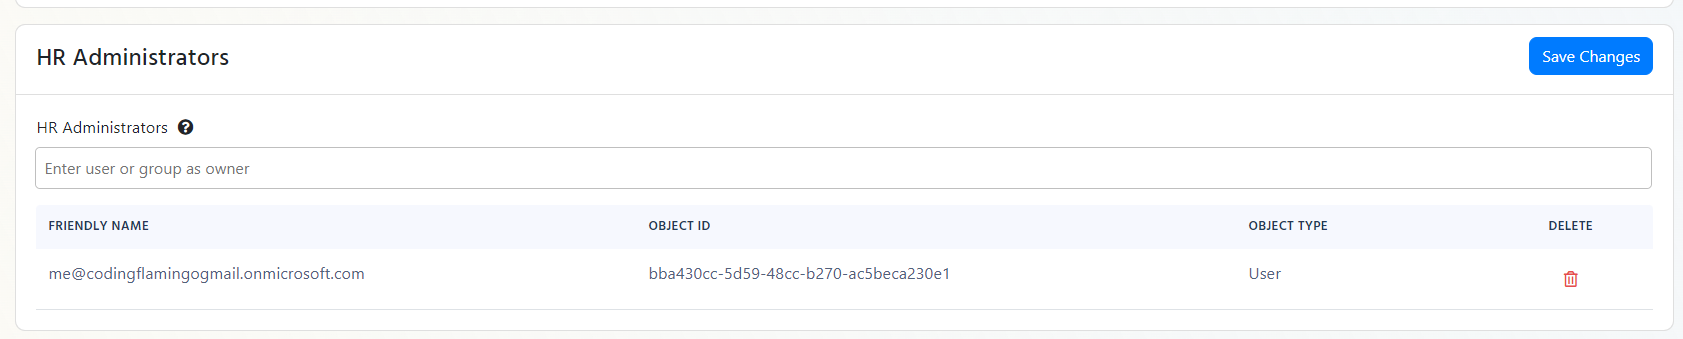
- Scroll down to “HR Administrators” ensure your account is listed.
Adding a User In The Portal
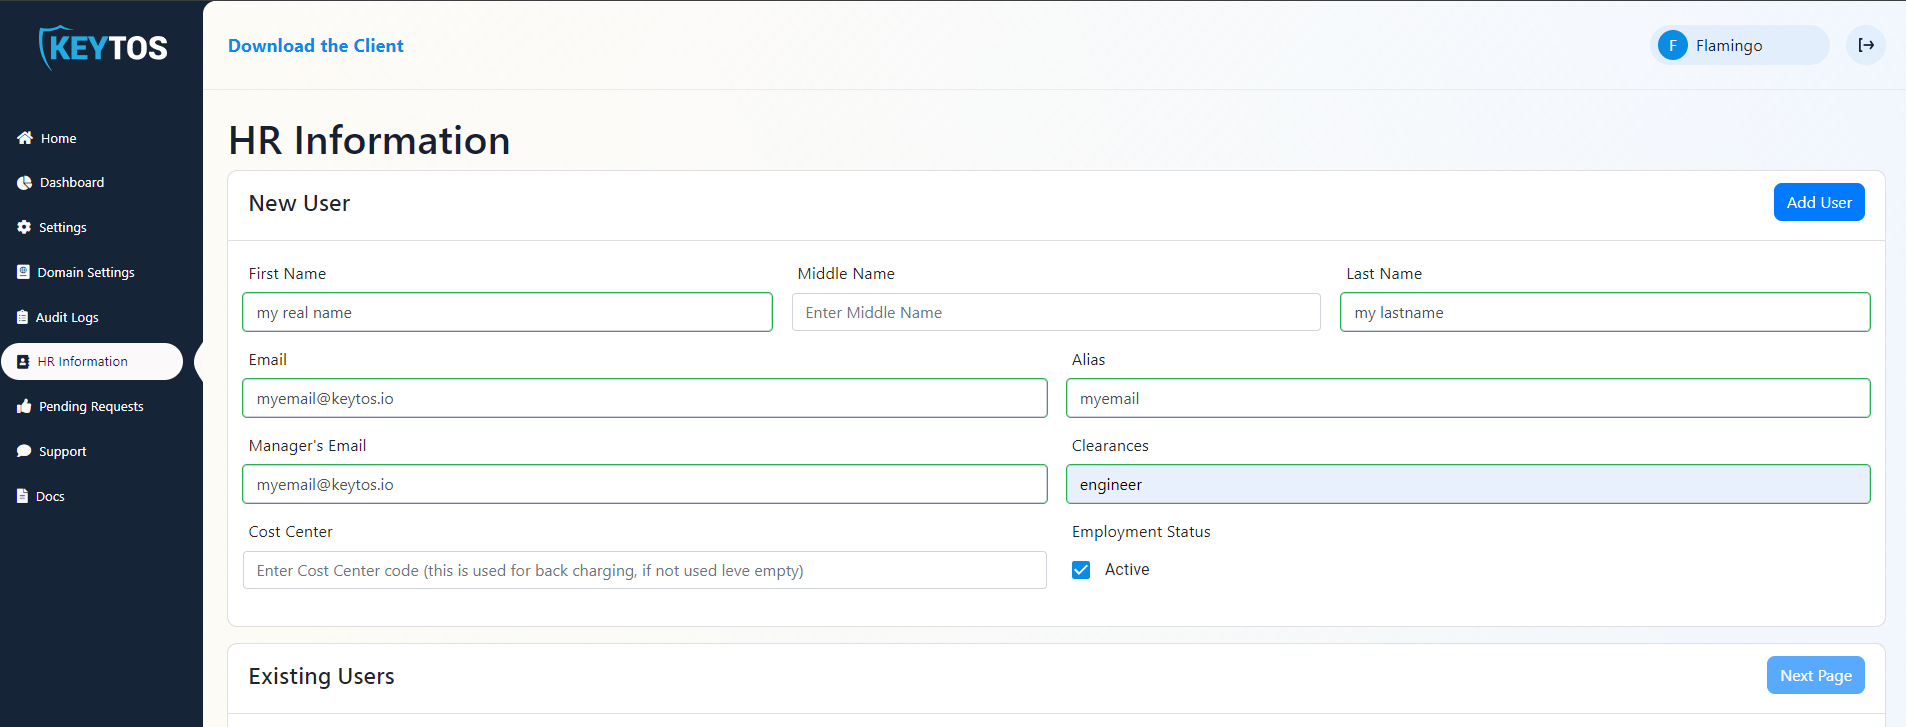
- Navigate to your EZCMS instance and select “HR Information”
- Enter the the information of the user. If you are testing for yourself set the manager email to your own account since the manage must approve any hardware requests.
- Enter the clearances for the user (This is used for multiple domains, in the government use case this is used for the security clearance of the user, however, different organizations might have different user classifications such as “Engineer” or “Sales” that gives them different access or permissions.)
- Enter the cost center, this is used for internal billing purposes for organizations that charge the hardware tokens back to departments.
- Select the Active Checkbox to enable the user.
Automatic User Lifecycle
EZCMS allows you to automate the user lifecycle using your home AAD tenant. This allows you to automatically onboard and offload users based on either your full AAD tenant or an AAD group you have selected. To enable this follow the steps below:
-
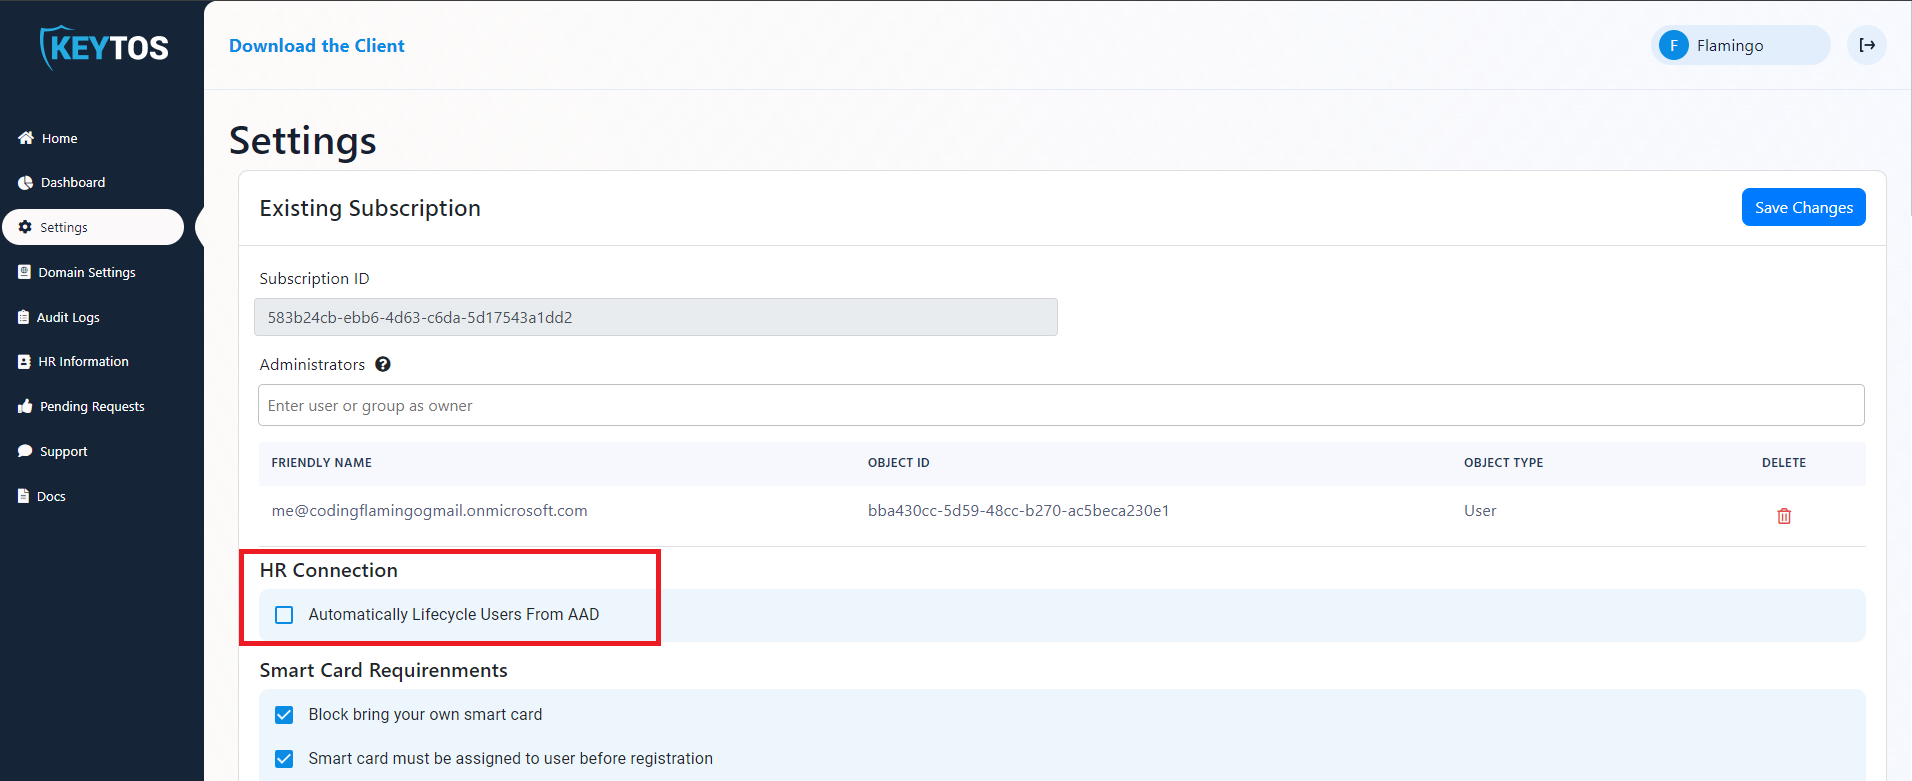
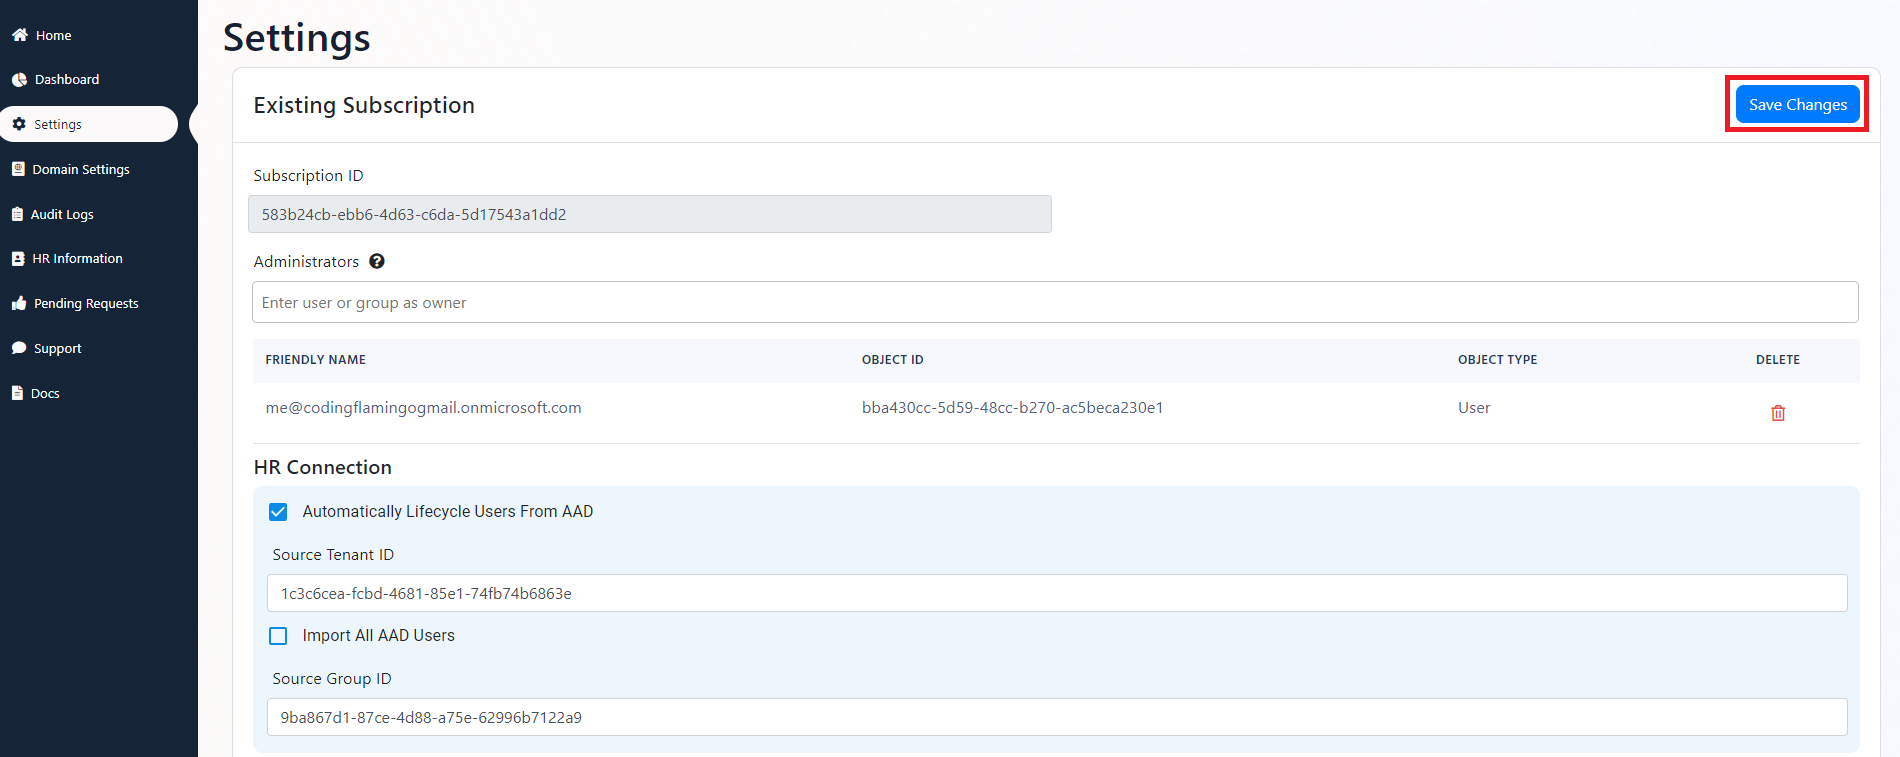
Navigate to your EZCMS instance and select “Settings”
-
Under HR Connection enable the “Automatically Lifecycle Users From AAD” checkbox.
-
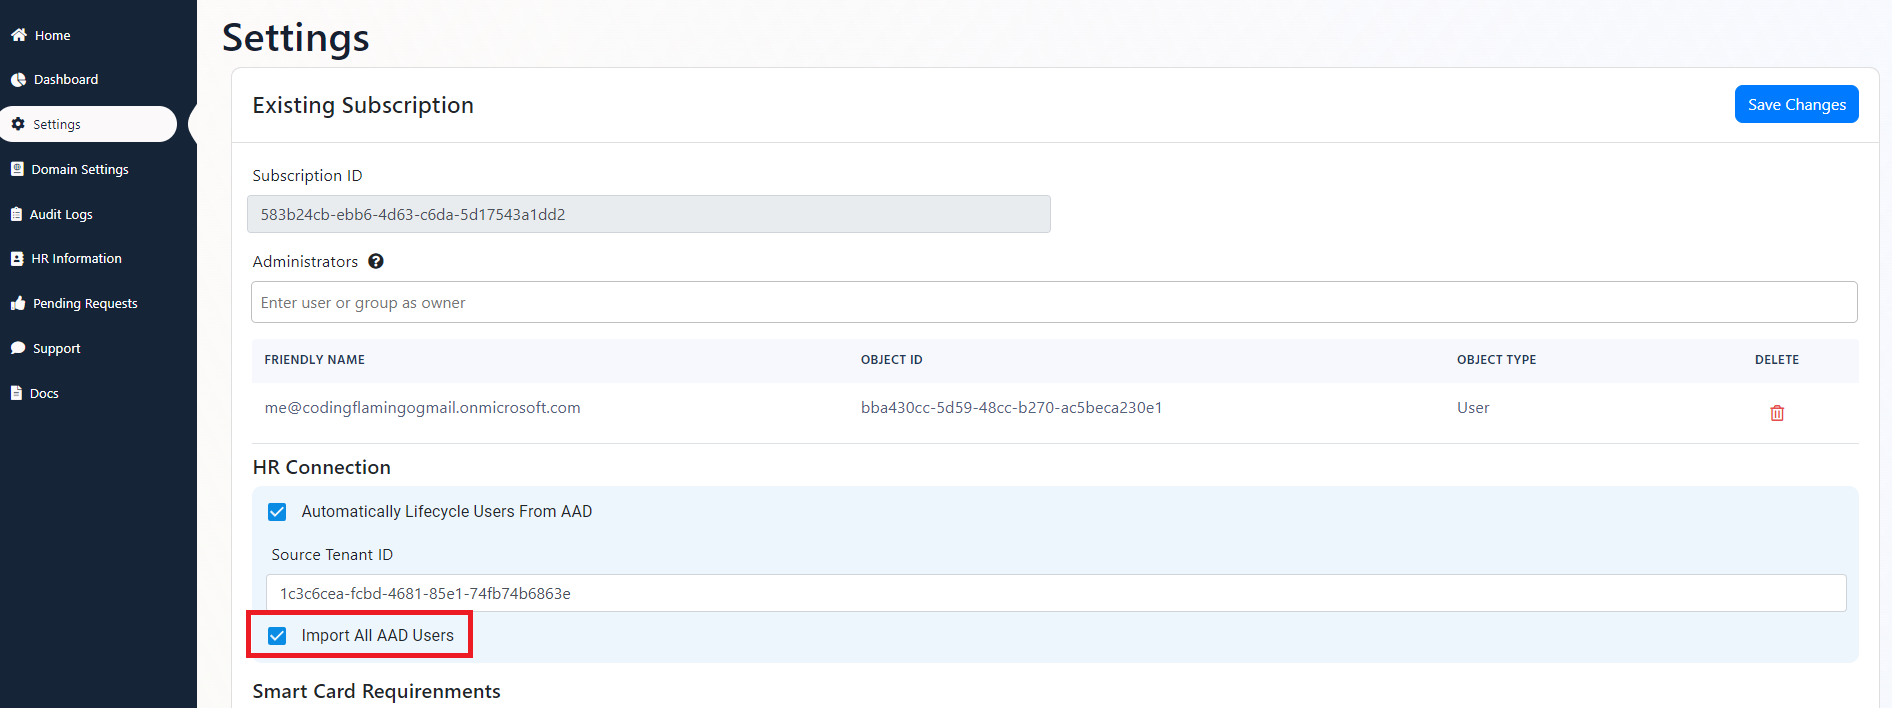
Enter your Source tenant ID (This is the tenant ID that you want to based your user lifecycle from, we recommend using your corporate tenant for this)
-
If you want to add all your tenant users to EZCMS select the “Import All AAD Users” checkbox.
-
If you want to only add users from a specific group uncheck the “Import All AAD Users” checkbox and enter the group ID.
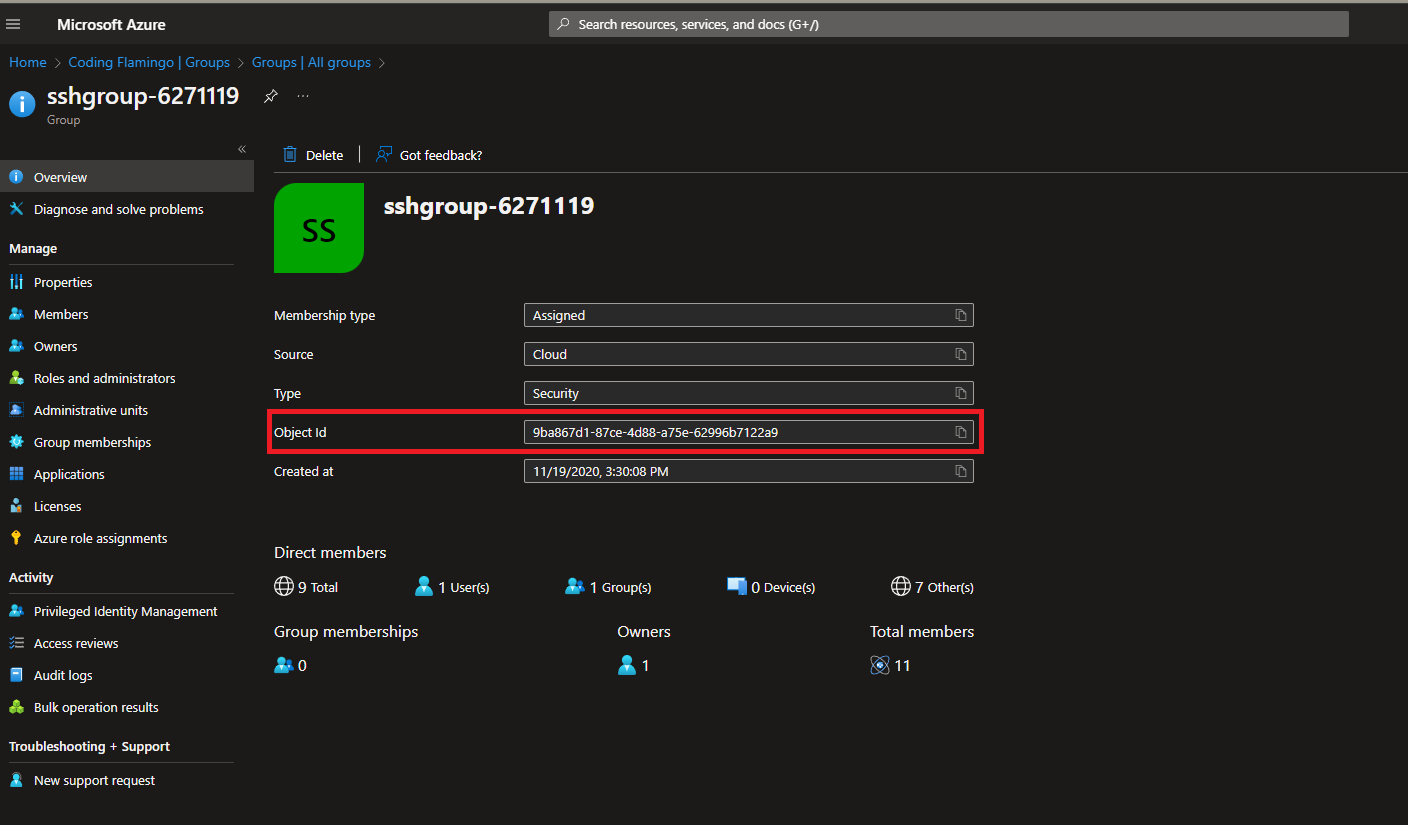
TipYou can find your group’s ID by going into https://portal.azure.com selecting Azure Active Directory, selecting Groups, and selecting the group you want to use.

-
After you have selected your Lifecycle method click “save changes” at the top of the page.
Adding a User Using the API
Since each organization has different onboarding processes, we have made it easy to integrate EZCMS to your existing automation. You can use our NuGet package to quickly create your own lifecycle management. To help you get started, we have created a sample console application that can read user information from Azure AD and add it to the EZCMS HR system.