
How to Setup YubiKey in Entra ID: A Simple Guide
 Keytos Team |
Entra ID MFA with Yubico YubiKey
With the rising importance of securing Entra ID (fka Azure AD), it’s essential to explore enhanced security measures. One of the most effective methods is, without question, the use of hardware keys such as a YubiKey. This post will guide you through setting up a YubiKey, registering, and enrolling it with Entra ID.
Why is YubiKey Secure?
You have probably heard online or at conferences that a YubiKey can stop many attacks. However, not all YubiKey authentication methods are the same. The YubiKey 5 series has multiple authentication protocols including FIDO2/WebAuthn (hardware bound passkey), FIDO U2F, Yubico OTP, OATH-TOTP, OATH-HOTP, and Smart card (PIV). Out of these protocols we will focus on FIDO2 and SmartCard PIV since they are considered unphishable MFA credentials meaning that the key never leaves the YubiKey, making it almost impossible for an attacker to phish the credentials (as an added bonus, you don’t need a password, meaning you can go fully passwordless). And don’t worry if you lose your YubiKey your account is still protected
“Should I Use FIDO2 or Smartcard (PIV)?”
In the previous section I mentioned that we were going to focus on both FIDO2 and Smartcards, the reason for this is that while FIDO2 is the more modern version of phishing resistant MFA, it is still not supported everywhere. For example, if you are using iOS devices, you cannot use FIDO2 in native apps forcing you to also need Smartcard authentication. Luckly, the certificate for the smartcard authentication can also be stored in the YubiKey. And if you use something like EZCMS both the FIDO2 credentials and smartcard certificate will be added when the user self-onboards. You can learn more about the challenges you might face while going passwordless and how to solve them in the video below:
How to Setup FIDO2 Authentication in Entra ID
As FIDO2 promises, setting up FIDO2 Authentication for Entra ID is very straightforward:
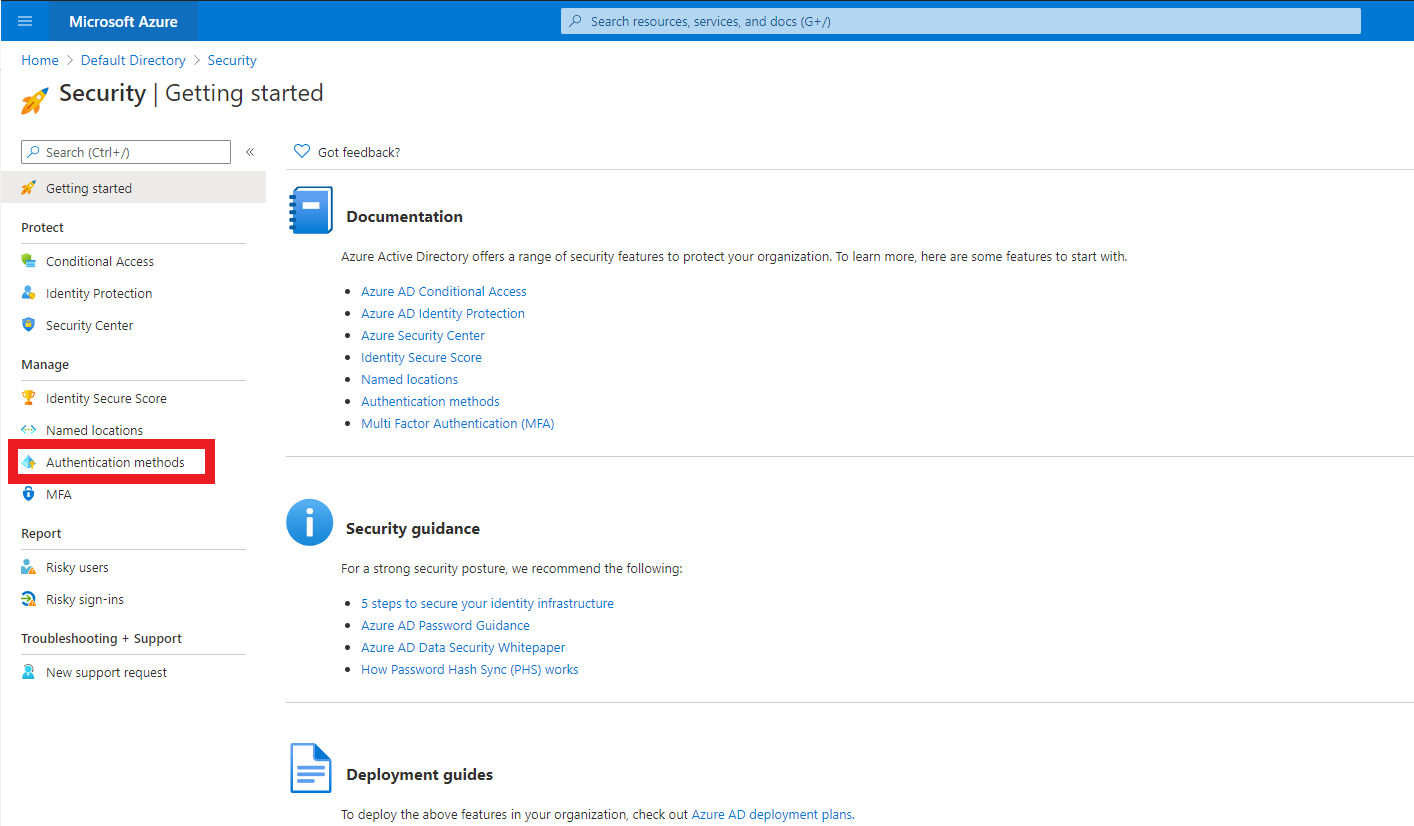
- Login to the Azure portal as a global administrator and go to Entra ID -> Security -> authentication methods.
- Click on FIDO2. This will bring up the FIDO2 tab. Click on Enable, select your target users, and click on Save.
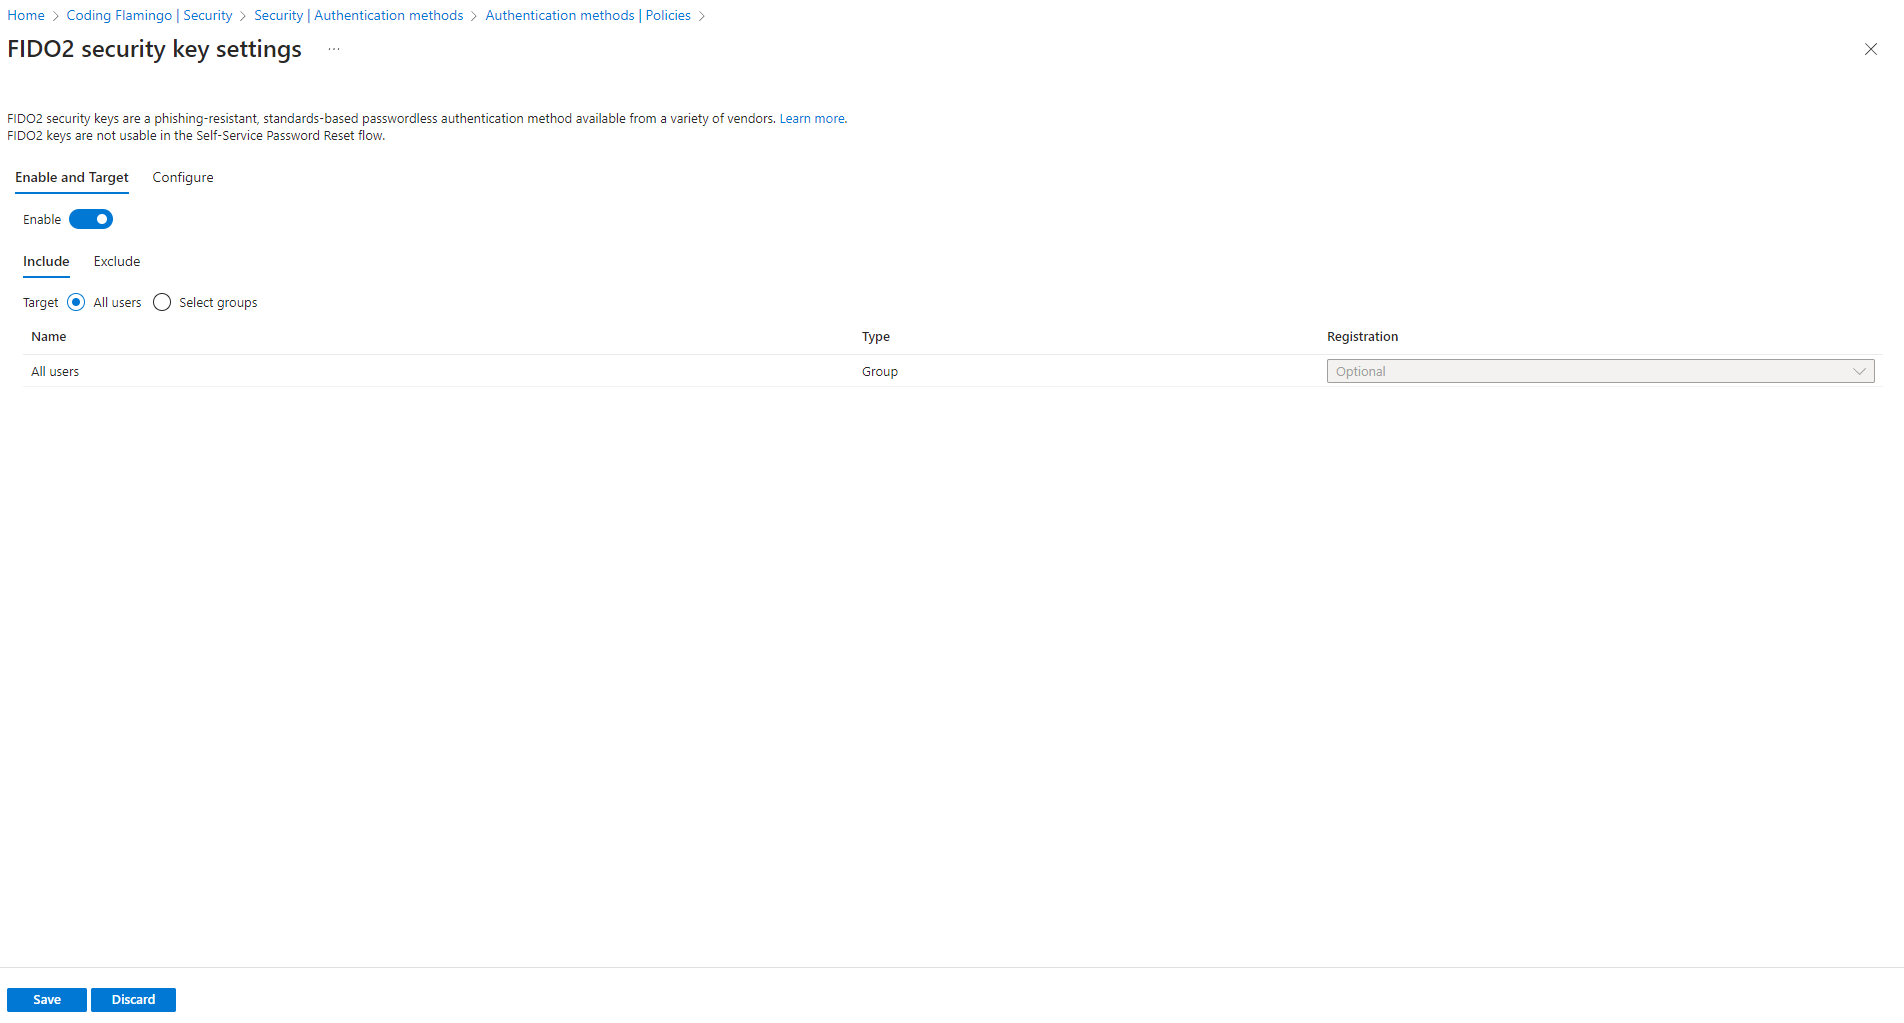
- In the configuration, allow for self-service setup, and you can restrict to specific keys (this forces your users to only utilize the key SKUs you purchase; however, it doesn’t limit it to corporate bought keys or assigned keys only. This can be done with the EZCMS and Yubico Integration). If you opt to restrict the keys to specific GUIDs, you can get them from the Yubico page.
FIDO2 Self-Enrollment in Microsoft
Now that you have setup FIDO2 in the Microsoft portal, your users can self-service enroll (assuming they already have a multi-factor credential or a TAP (Temporary Access Pass)) by going to https://myprofile.microsoft.com/ and click on Security Info.
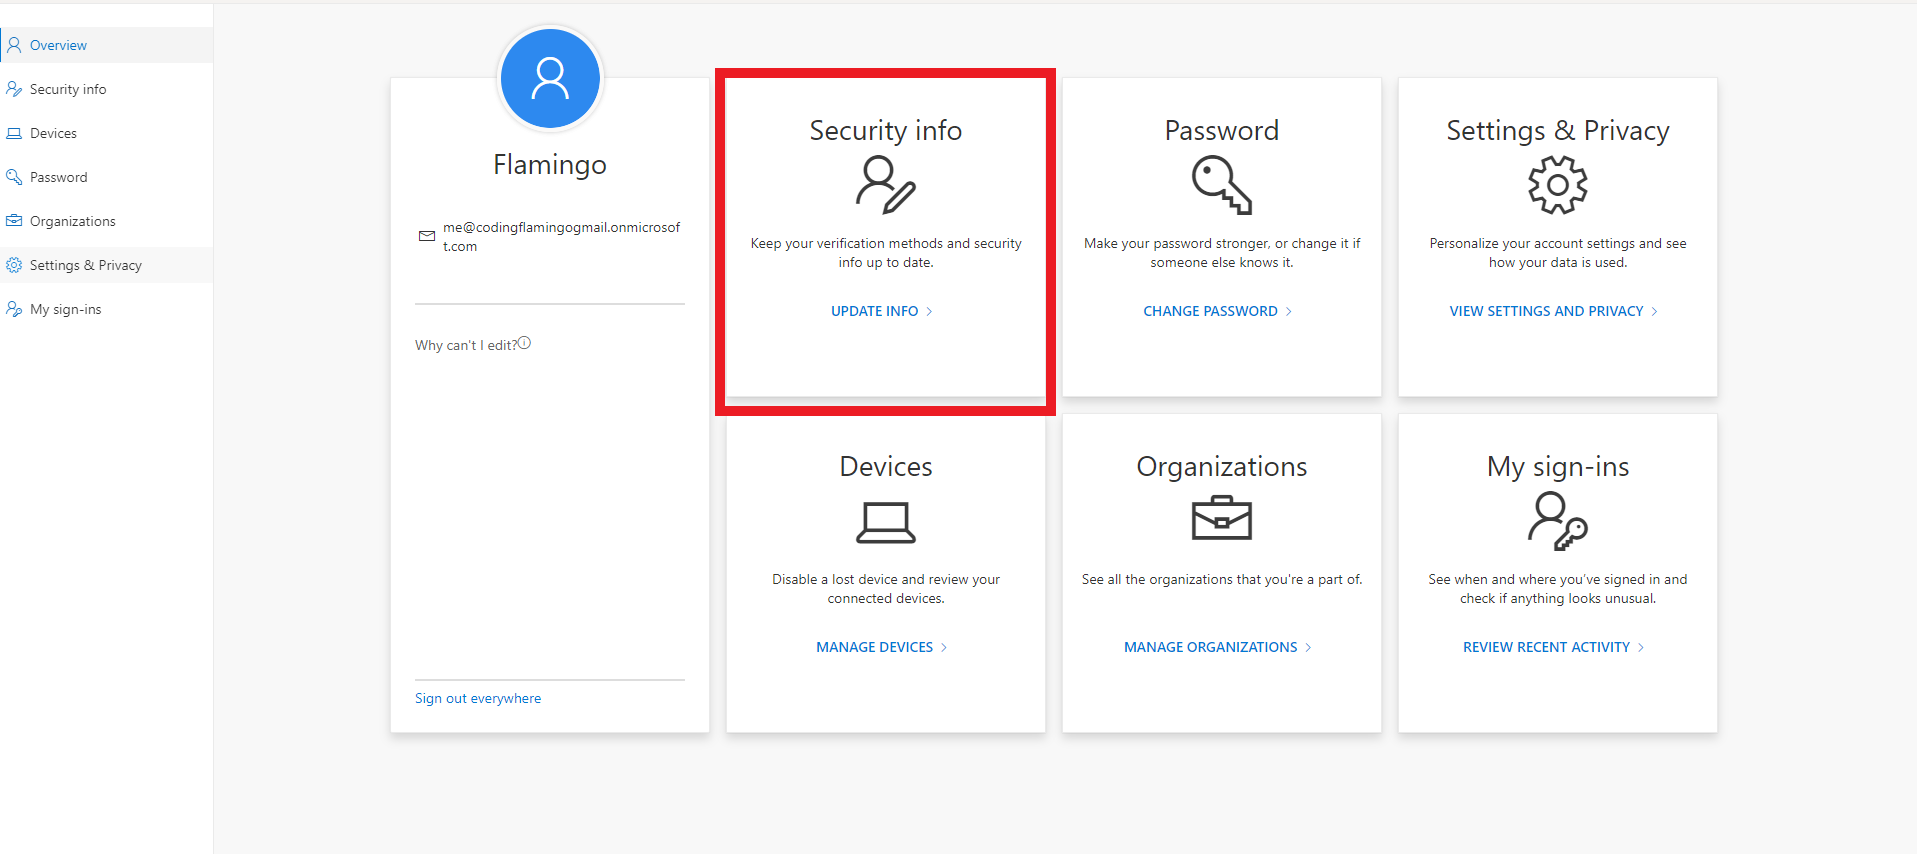
In the security information page, they can click “Add Sign-In Method” select FIDO2, then they will have to authenticate with a multifactor credential, and they will be able to set up the pin for their YubiKey and start using the YubiKey.
Microsoft FIDO2 Self Service Limitations
As you saw, setting up FIDO2 in Entra ID and issuing your first YubiKey FIDO2 credential is very easy and straightforward; however, there are a few things that, in my opinion, Microsoft missed in this process:
-
You cannot enforce PIN complexity. As you saw while creating your key, you could enter any PIN for your YubiKey; while YubiKeys lock after a few failed attempts, if your user selects 0000 as their PIN, there is a big chance an attacker will be able to guess it.
-
You require an existing Multifactor credential to create the FIDO2 key. This experience is aimed at existing users, meaning that if you get a new user in your organization, you cannot just give them a FIDO2 key without giving them another authentication method before.
-
So far we have only talked about FIDO2, but as I mentioned in the introduction, FIDO2 might not cover all your scenarios, another scenario I forgot to mention is FIDO2 on on-premises infrastructure, so if you use this onboarding method, you will have to use another tool to onboard into Entra CBA, since Microsoft says creating certificates it out of scope for Entra CBA.
Don’t worry, there are tools created by Microsoft partners that close the gap! As mentioned earlier in this post, EZCMS, takes care of this for you! Take a look at how the user experience (even if they don’t have an existing credential):
How to Setup Entra CBA with a YubiKey
For creating Entra CBA, you will need:
-
A Certificate Authority (CA).
-
To add the Certificate Authority to Entra ID.
-
A way to distribute your certificates.
This can be done in many ways. One of them is using a Microsoft CA on premises and enabling onboarding through AD; however, last time I did a lab for that it took me almost a week to get it all correctly and I didn’t even use HSMs (Hardware Security Modules) for my CAs. So instead, we are going to follow the guide on how to set up Azure CBA with EZCA and EZCMS – this allows us to keep all the infrastructure as a PaaS in the cloud, removing the responsibility for patching or uptime of our systems.
I am more of a visual learner, so here is a video that will walk you through the whole setup (yes it can all be done in less than an hour). Or if you prefer, keep reading for the text version.
Create an EZCMS Instance
EZCMS will help us manage the YubiKeys and enable self-service for the users (It even offers world-wide shipping logistics if you don’t want to deal with shipping the YubiKeys to your remote workers). To set up EZCMS, you first must register the EZCMS application in your tenant. By doing so, you enable EZCMS to authenticate your users! Once you register the EZCMS application, you can go to the Azure portal and create your EZCMS instance; once this is done and your settings are confirmed, we can create the CA that will issue the smartcard certificates.
How to Create a Certificate Authority for Entra CBA
Next, we must create the certificate authority for Entra CBA, for this we are going to use EZCA. Once you have created your EZCA instance in Azure, you can create your EZCA Smartcard CA for Entra CBA. Once the CA is created, you have to upload the certificate to Entra ID.
-
Enter the Azure portal as a Global Administrator.
-
Choose Entra ID and click Security in the left-hand panel.
-
Choose Certificate Authorities.
-
Upload the Certificate for the root and issuing CAs you created. Be sure that you add a publicly-accessible CRL (Certificate Revocation List) URL for Azure to be able to verify that the certificates have not been revoked.
-
Now go back to the Security tab and select Authentication methods.
-
Choose Policies in the left-hand panel.
-
Choose Certificate-Based Authentication.
-
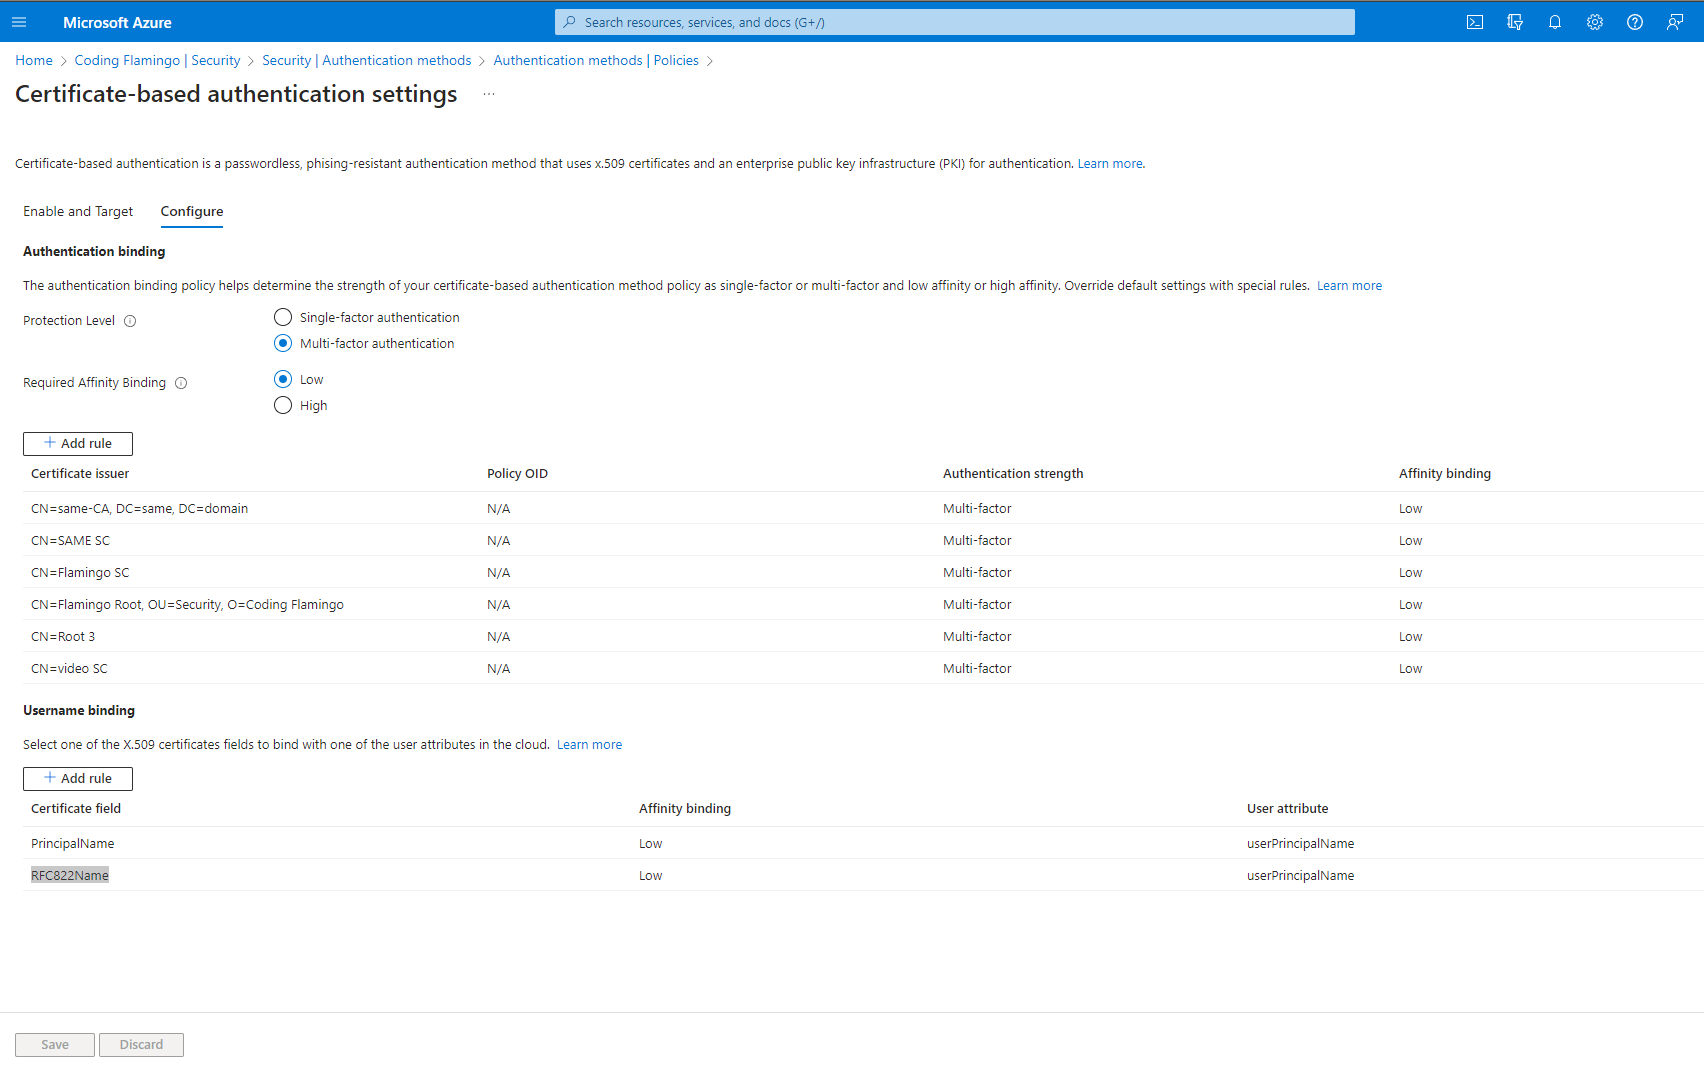
Choose the Configure tab.
-
Choose your preferred protection level (Azure defaults to Single Factor, since many people use the certificate stored in their device instead of in a second factor such as the YubiKey). Since we are using the YubiKey, we are setting this to Multi-Factor.
-
Go to the Rules section and add each of the CAs we added in to Entra ID, set them as Multifactor.
-
Set the username binding order (how the username is written in the certificate). For EZCA certificates, you should set the first field as PrincipalName with the user attribute of userPrincipalName, you can also add a second field with RFC822Name with the user attribute of userPrincipalName. Now Entra CBA will check that the certificate was issued by a trusted CA and that it has the username in one of those fields. (Don’t worry if a user leaves the organization, EZCMS will revoke the certificate and it will no longer be usable).
-
Click Save. This is how it should look (Note: I have more CAs than what you should have).
Register Your Entra ID Tenant in EZCMS
EZCMS was designed to onboard users from multiple different tenants; therefore, you have to register each tenant you want to issue certificates for and set specific security settings for each tenant. Check out either our EZCMS documentation or the below video to learn how to register your tenant (NOTE: EZCMS used to be called EZSmartCard).
Create a Test User in EZCMS
The final step before you can issue your first smartcard is adding a test user to EZCMS and assigning a smartcard to that user (Don’t worry, after the test, you can have EZCMS automatically add your Entra ID users as eligible YubiKey users). Once that is done, you can issue your very first smartcard! Congratulations!