



How To Move Network Policy Server (NPS) to the Cloud with Entra ID
 Igal Flegmann |
Background - Why Move NPS to the Cloud with Entra ID?
As you start moving your organization to use the modern cloud-based identity solutions provided by Microsoft, such as Entra ID (formerly Azure AD), you may quickly start to hit some common challenges related to integrating your existing on-premises infrastructure with the cloud. One of the biggest challenges is that NPS does not natively support cloud identities. It also requires costly on-premises infrastructure or VMs that need to be constantly maintained and updated. For something seemingly as simple as network authentication, you end up paying a significant amount of time and money to maintain the necessary infrastructure. This guide will walk you through how to migrate your costly NPS servers to the cloud, providing a seamless connection to Entra ID and offering a substantial savings on your cloud RADIUS bill.
How to Move NPS to the Cloud with Entra ID
Step 1: How to Assess Your Current NPS Setup
Before you begin the migration process, it’s important to know your current NPS setup. Here are the main things to consider:
- Current Authentication Methods: Identify the authentication methods currently in use (username and password vs certificate-based authentication).
- Existing PKI: If you currently have an existing PKI, with on-premises certificate authorities, you will need to assess whether you can leverage this PKI in the cloud or if you need to set up a new one.
- End Goal: Last question I ask people when they are moving to the cloud is: “How do you want to authenticate your network?” Do you have any restrictions on only managed devices to be in the network? Do you want to allow BYOD (Bring Your Own Device)? These are all important questions that will help you determine the best approach for your NPS migration.
Step 2: How to Choose Your Cloud Authentication Method
With current cloud RADIUS authentication, I always recommend using certificate-based authentication (EAP-TLS). This is because over the last few years, cloud PKI services have made it that you can have a secure and reliable PKI in a few minutes without having to manage your own Certificate Authority (CA) infrastructure. If you are using username and password authentication, you will need to consider the security implications of this method and whether it aligns with your organization’s security policies and keep in mind that there is no good way to have Multi Factor Authentication (MFA) with username and password authentication (there is a way to do it with Keytos Connect but we will cover that later in the post).
Step 3: How to Select the PKI You Will Use to Issue Certificates For Your NPS Migrations
The next step is to select the PKI you will use to issue certificates for your NPS migrations. You have a few options here:
Option 1: Use an Existing On-Premises PKI
If you have an existing on-premises PKI, such as Active Directory Certificate Services (AD CS), you can use it to issue certificates for your NPS migration. This is a good option if you already have a well-established PKI and want to leverage it for your cloud migration.
Option 2: Use Microsoft Cloud PKI in Intune
If you don’t have an existing on-premises PKI or want to avoid managing one, you can use a cloud-based PKI service. Microsoft has Microsoft Cloud PKI which is a good option if you are only using Microsoft Intune and you have an E5 License (if you don’t have an E5 license, using Keytos Shield gives you more features than Intune Cloud PKI and it is cheaper than Microsoft Intune Cloud PKI). The only thing to keep in mind is that Microsoft Cloud PKI cannot issue certificates for devices that are not managed by Intune, this includes BYOD devices, but more important during your migration, it cannot issue certificates for your on-premise servers including domain controllers (used for LDAPS and Kerberos authentication). This means that if you are using Microsoft Intune Cloud PKI, you will need to keep your on-premises PKI until you fully decommission your full on-premise infrastructure. If you are using Keytos Shield, you can issue certificates for your on-premises servers and devices that are not managed by Intune, which makes it a better option for organizations that want to fully move to the cloud.
Option 3: Use a Third-Party Cloud-Based PKI
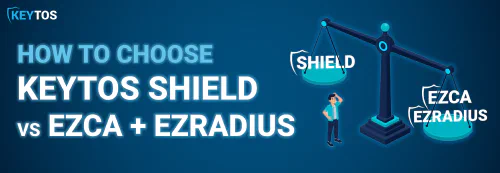
If Microsoft Intune Cloud PKI does not meet your needs, either because you have to issue on-premises certificates or because you have other MDMs or BYOD devices that you want to issue certificates for, you can use a third-party cloud-based PKI service. There are many options available, in this article we already mentioned Keytos Shield that is charged per user and it also includes the cloud RADIUS that you will need to use to transition your NPS to the cloud. Another option is EZCA which is a cloud-based PKI service that is built by ex-Microsoft PKI experts to fully address the needs of the organizations that are moving to the cloud. EZCA is charged per certificate authority meaning that for $200 USD per month you can have a fully managed cloud PKI that can issue as many certificates as your organization needs.
Step 4: How to Set Up Your Cloud RADIUS Server that Will Replace Your NPS
Once you have selected your PKI, the next step is to set-up your cloud RADIUS server that will replace your NPS. Since Microsoft does not have a cloud based RADIUS server, you will have to use a third-party cloud RADIUS server. There are many options available, in this article we already mentioned Keytos Shield that is charged per user and it includes both PKI and RADIUS, but if you are looking for a RADIUS only service, this is where you can use EZRADIUS a cloud RADIUS service that is fully managed with geo-redundancy and high availability. EZRADIUS has a pay-what-you-use model, that only charges you for the number of identities that authenticated that month and it starts at $1 USD per identity per month with no minimums which makes it a good option for both small and large organizations.
Step 5: How to Configure Your Cloud RADIUS Server to Use Your PKI
Now that we have selected both the RADIUS and PKI providers, we have to set up the certificate distribution and configure the RADIUS server to use the PKI. You have to first deploy the Root CA to all devices, then you have to push the certificate that the devices will use to authenticate to the RADIUS server, here is how to do it in Intune and here is a comprehensive list of certificate distribution in other MDMs. Once the devices have the certificate, you will need to configure the RADIUS server to use the PKI for authentication. Below is a video that shows how to configure the Cloud RADIUS server to use the PKI for authentication.
For testing the new RADIUS server, we recommend creating a new SSID that is connected to the new RADIUS and as you expand the users using it, you just keep moving them to the new SSID. This way you can test the new RADIUS server without affecting your current users.
Now that we have set up the client certificates, the RADIUS server, and the new SSID, we can now test it. To test it, we have to create a Wi-Fi profile that is connected to the new SSID and then connect a device to it.
For Keytos Shield, we have compressed this process into a few clicks, here are the 5 steps you need to do to create everything in Keytos Shield.
Step 6: How to Update your On-Premises Servers to Use your New PKI
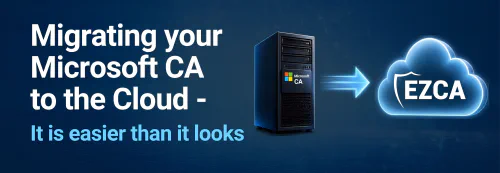
Now that we have the new RADIUS and SSID working, comes the next step, which is fully migrating from your on-premises CA to the cloud.
Conclusion - Moving NPS to the Cloud and Entra ID Sounds Daunting but with the Right Tools and Guidance, It Can Be Done Smoothly
As you can see, moving your network authentication to the cloud and decommissioning your on-premises NPS can be intimidating, however, with the right tools and guidance, it is very doable and in the long term it will save you time and money. By following the steps outlined in this guide, you can successfully move your NPS to the cloud and integrate it with Entra ID, providing a more modern and secure identity solution for your organization. If you still have questions or need assistance, you can schedule a free call with one of our engineers and we are happy to talk about your specific situation and help you find the best solution for your organization.