Adding EZSSH Access to Endpoints With Pulumi
Prerequisites
- Have at least one policy with endpoints
- Install Pulumi for C# Runtime
- Clone or Download EZSSH Pulumi Sample
Overview
EZSSH uses SSH Certificates to authenticate to endpoints. Since this is a OpenSSH supported protocol, no custom code has to run on your endpoints for authentication to work. By adding your EZSSH Certificate to your TrustedUserCAKeys your endpoint will start working with EZSSH.
In this page we will go through how to do this by deploying to Azure using Pulumi. You might also be interested in:
Getting the Cloud Init
- go to https://portal.ezssh.io/
- Select the policy type you want to access (Azure Policy or Hybrid Policy)
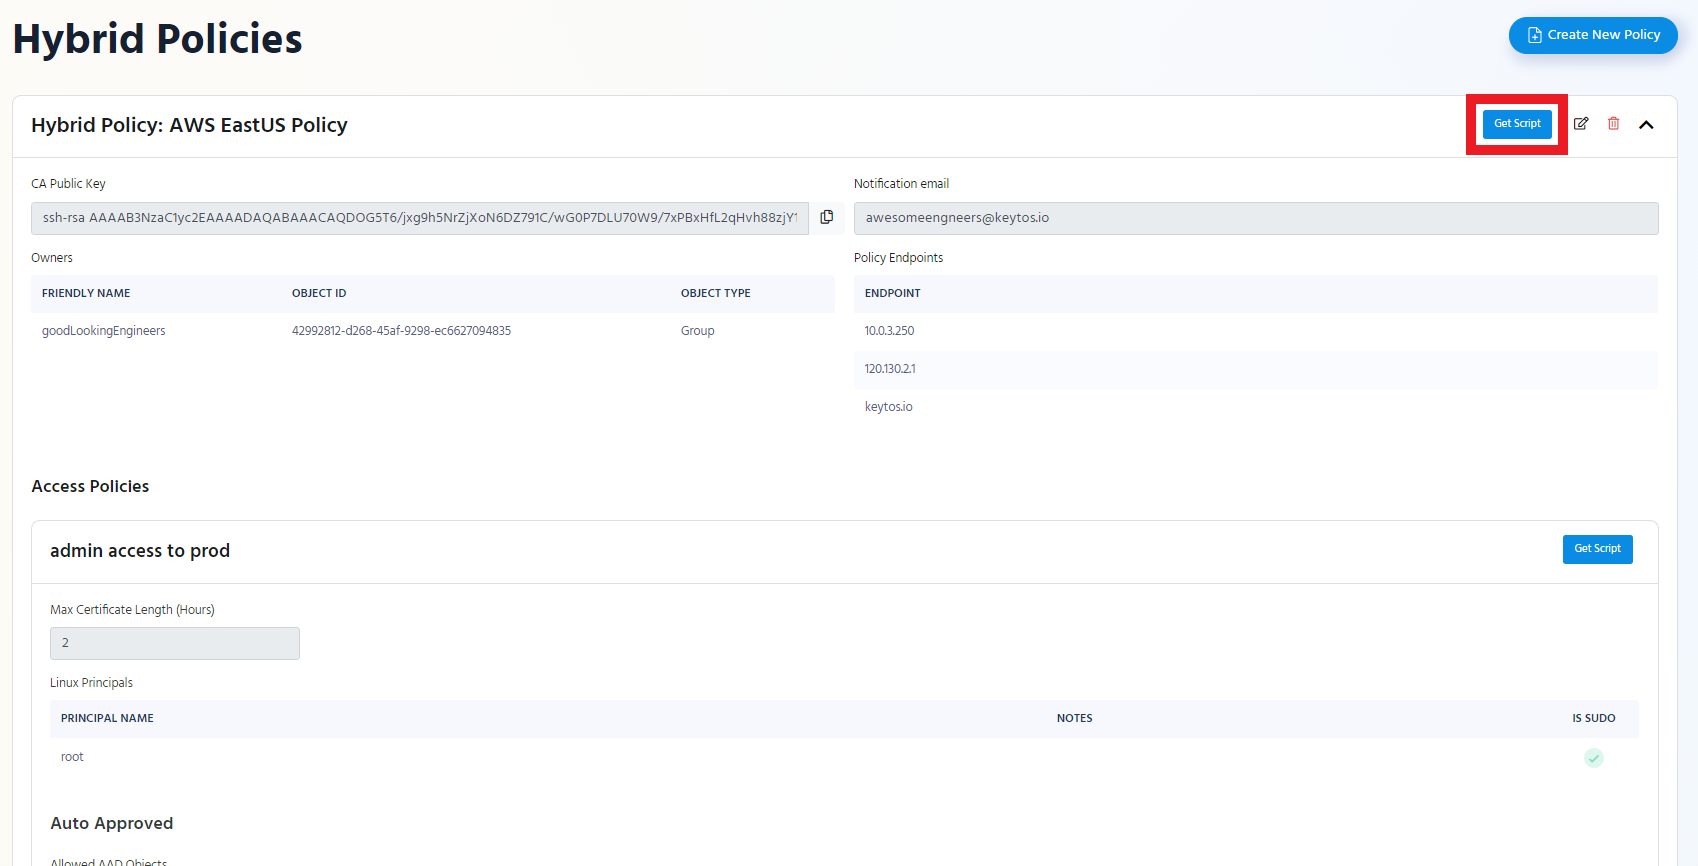
- Once you are in the policy type page, expand the policy you want to set up. In this example we will expand “AWS EastUS Policy”

- Click the “Get Script” button at the top of the policy.
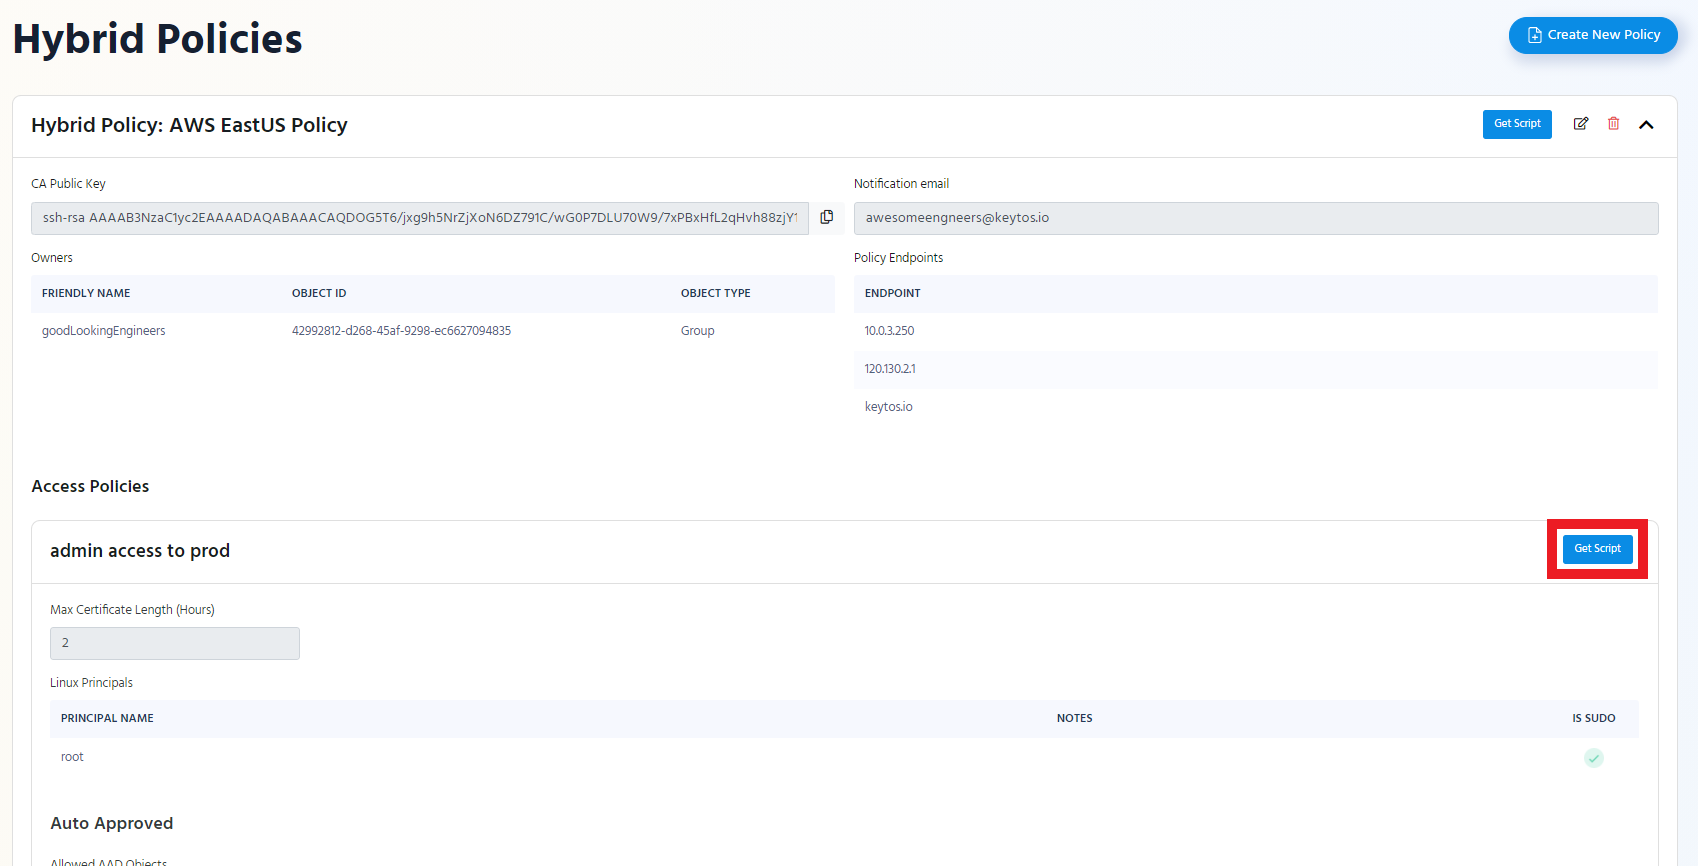
If you want to only set up the Linux principals of an access policy click the “Get Script” button of that access policy.
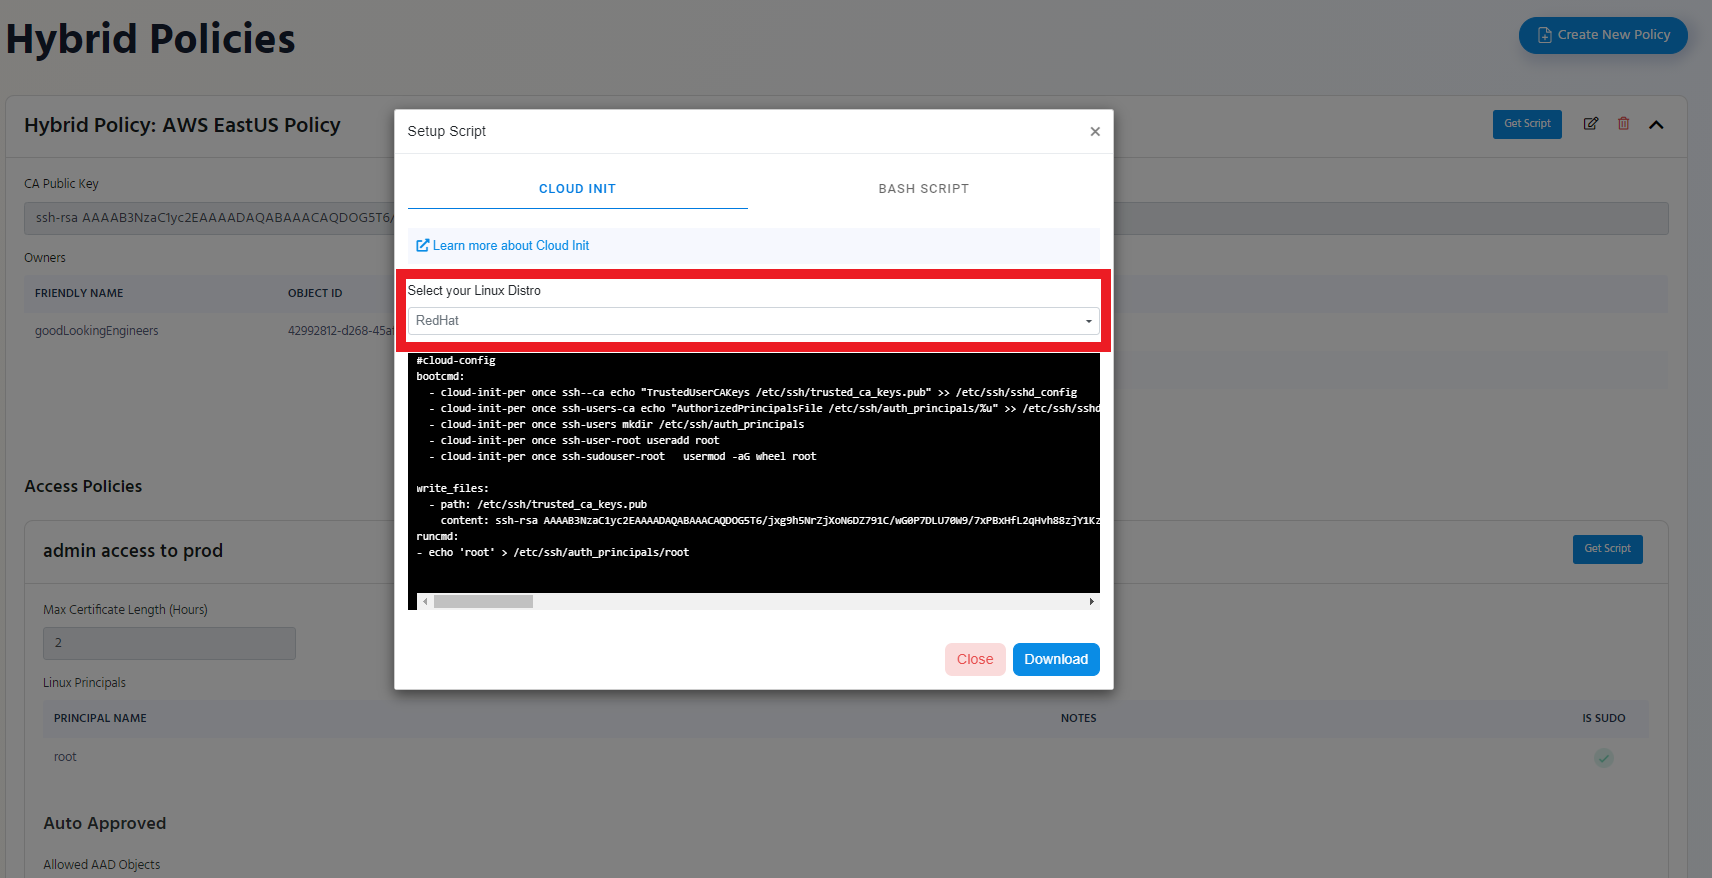
- Select the Distro you will use this Cloud Init for.
- Click the “Download” Button
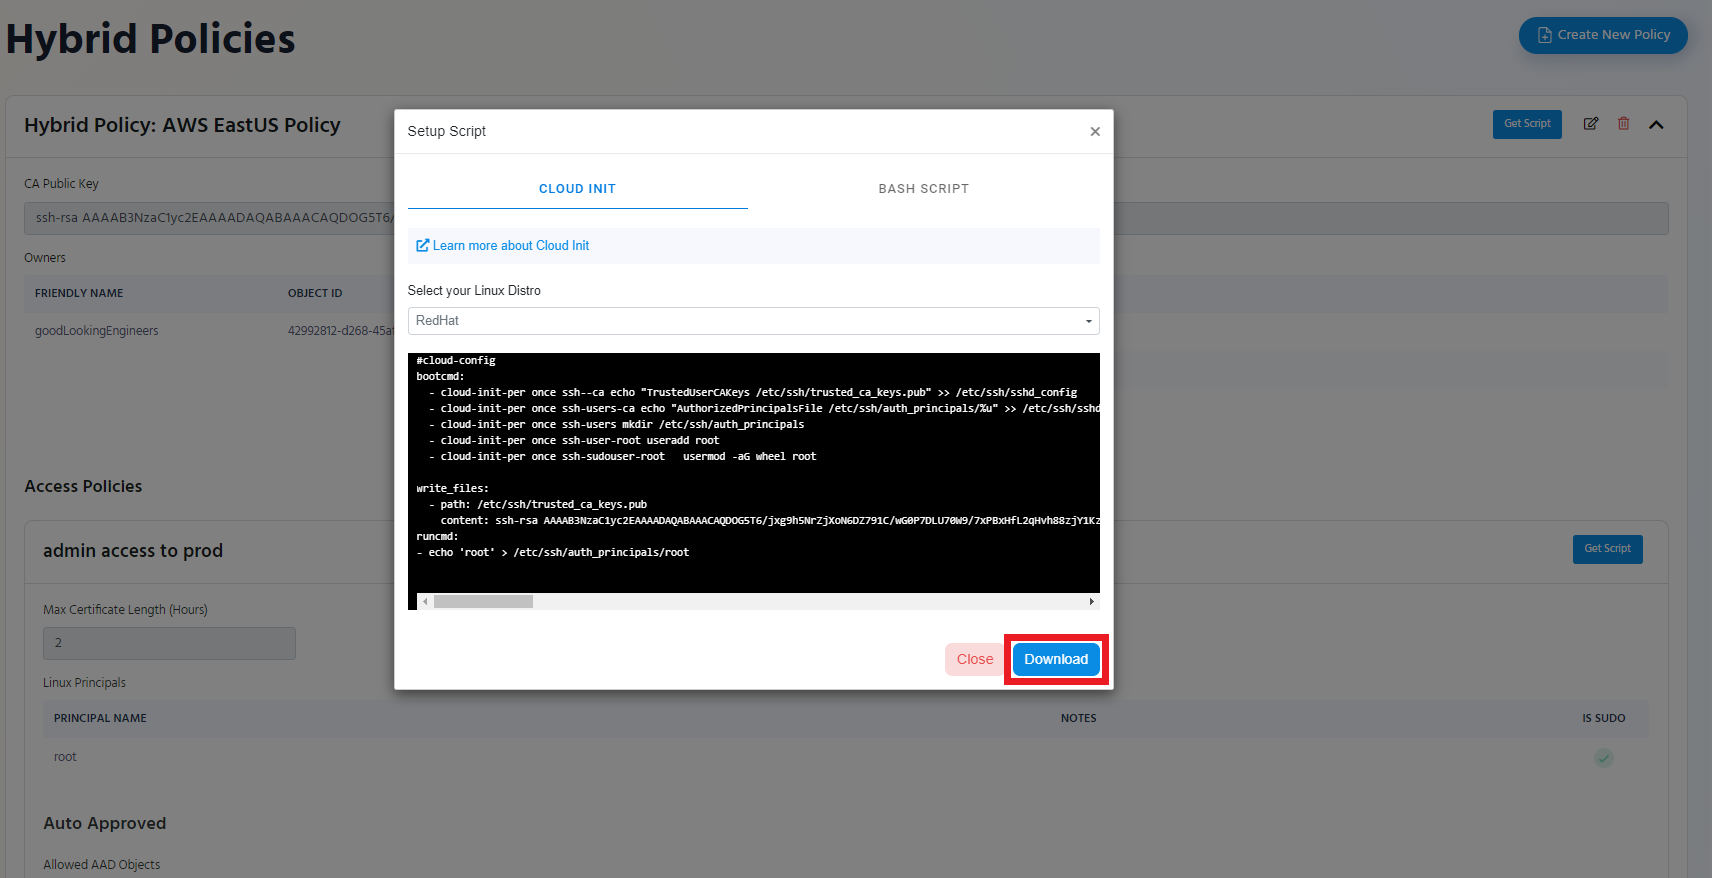
- The Script will be downloaded to your Downloads Folder.
Getting Started
-
After you have cloned the EZSSH Pulumi Azure Sample, open the folder in VSCode:
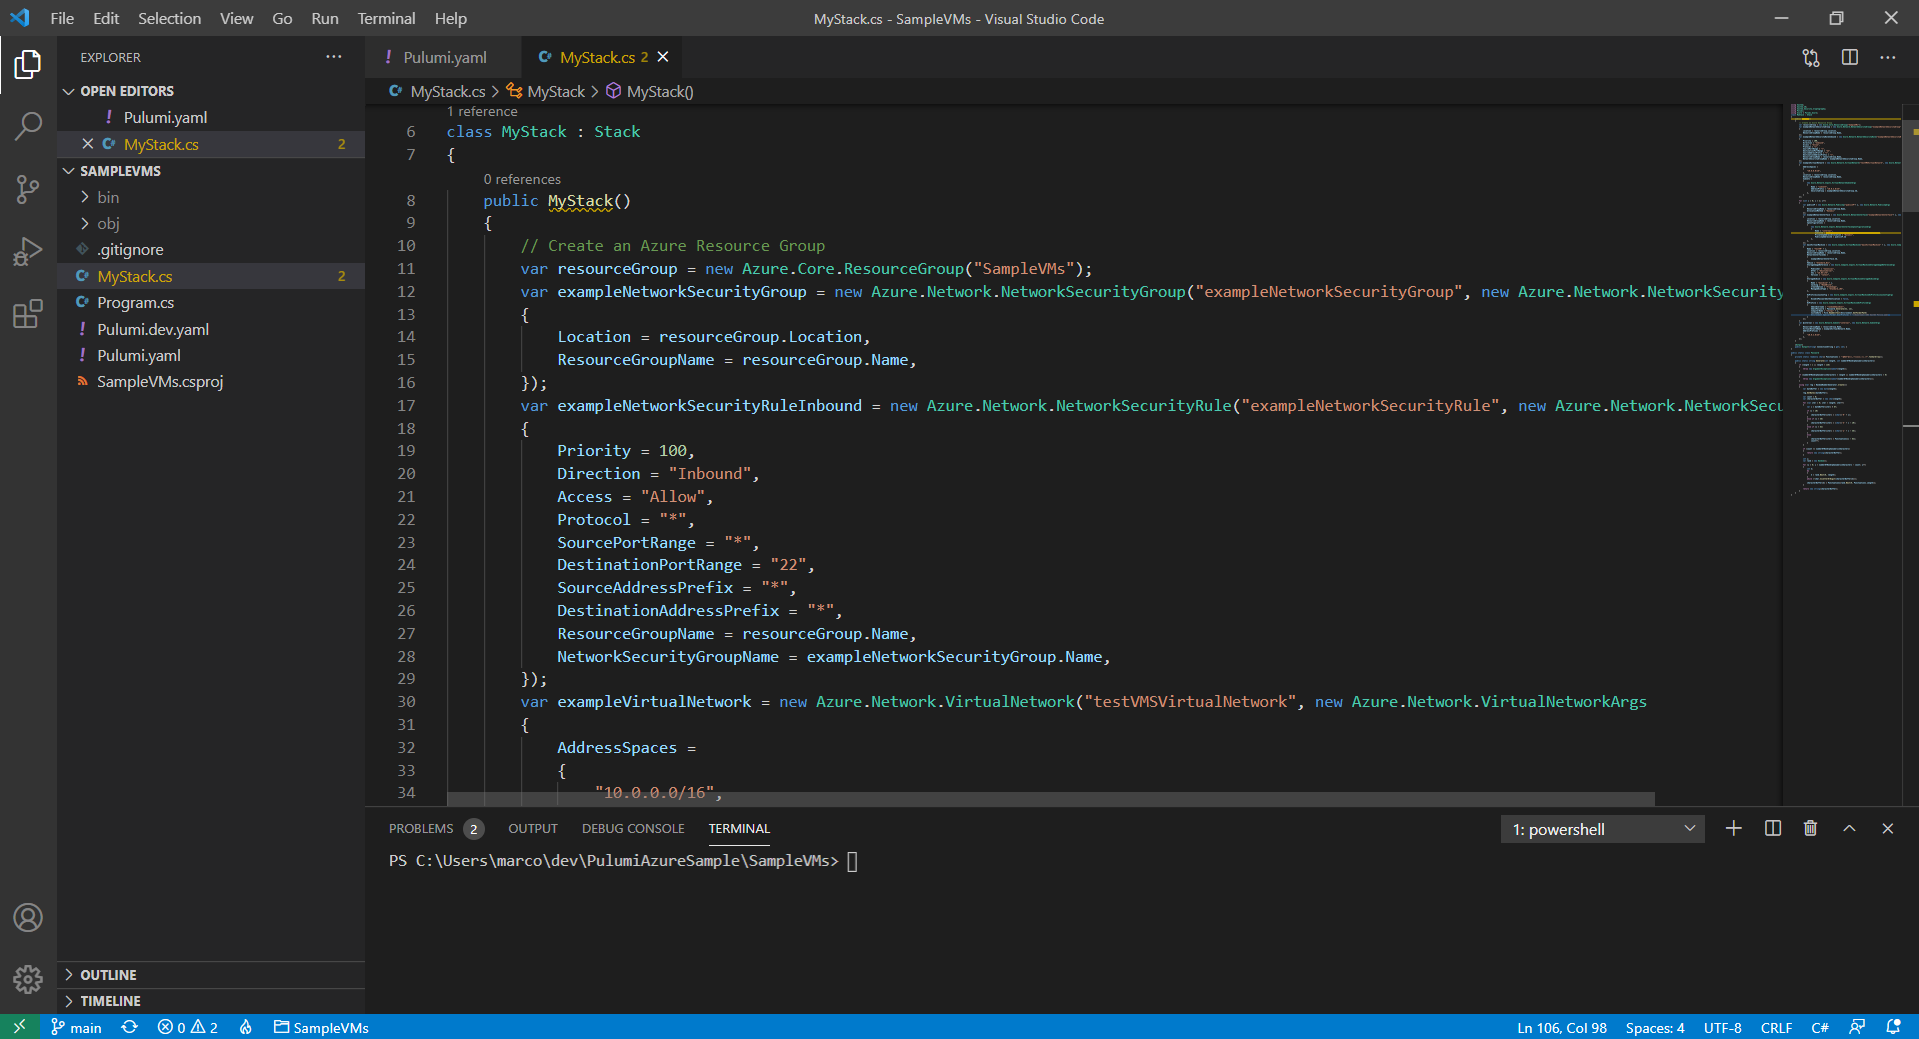
-
Modify the
Pulumi.dev.yamlfile to select the location where you want to deploy your VMs to. -
Open
MyStack.csfile. This is the file that has all your infrastructure as code. -
Modify the For loop in line 49 to specify the number of VMs you want to create.
-
Modify line 106 to match the path and name of the cloud init you previously downloaded.

-
Open Terminal inside the folder and run
pulumi up -
The First time it will ask you to login to your Pulumi instance, Login to your Pulumi instance. If you do not have an account you can create one for free here
-
Then it will ask you to create a stack create one called “dev”
-
Once it builds, it will show you the changes it will make to your subscription:
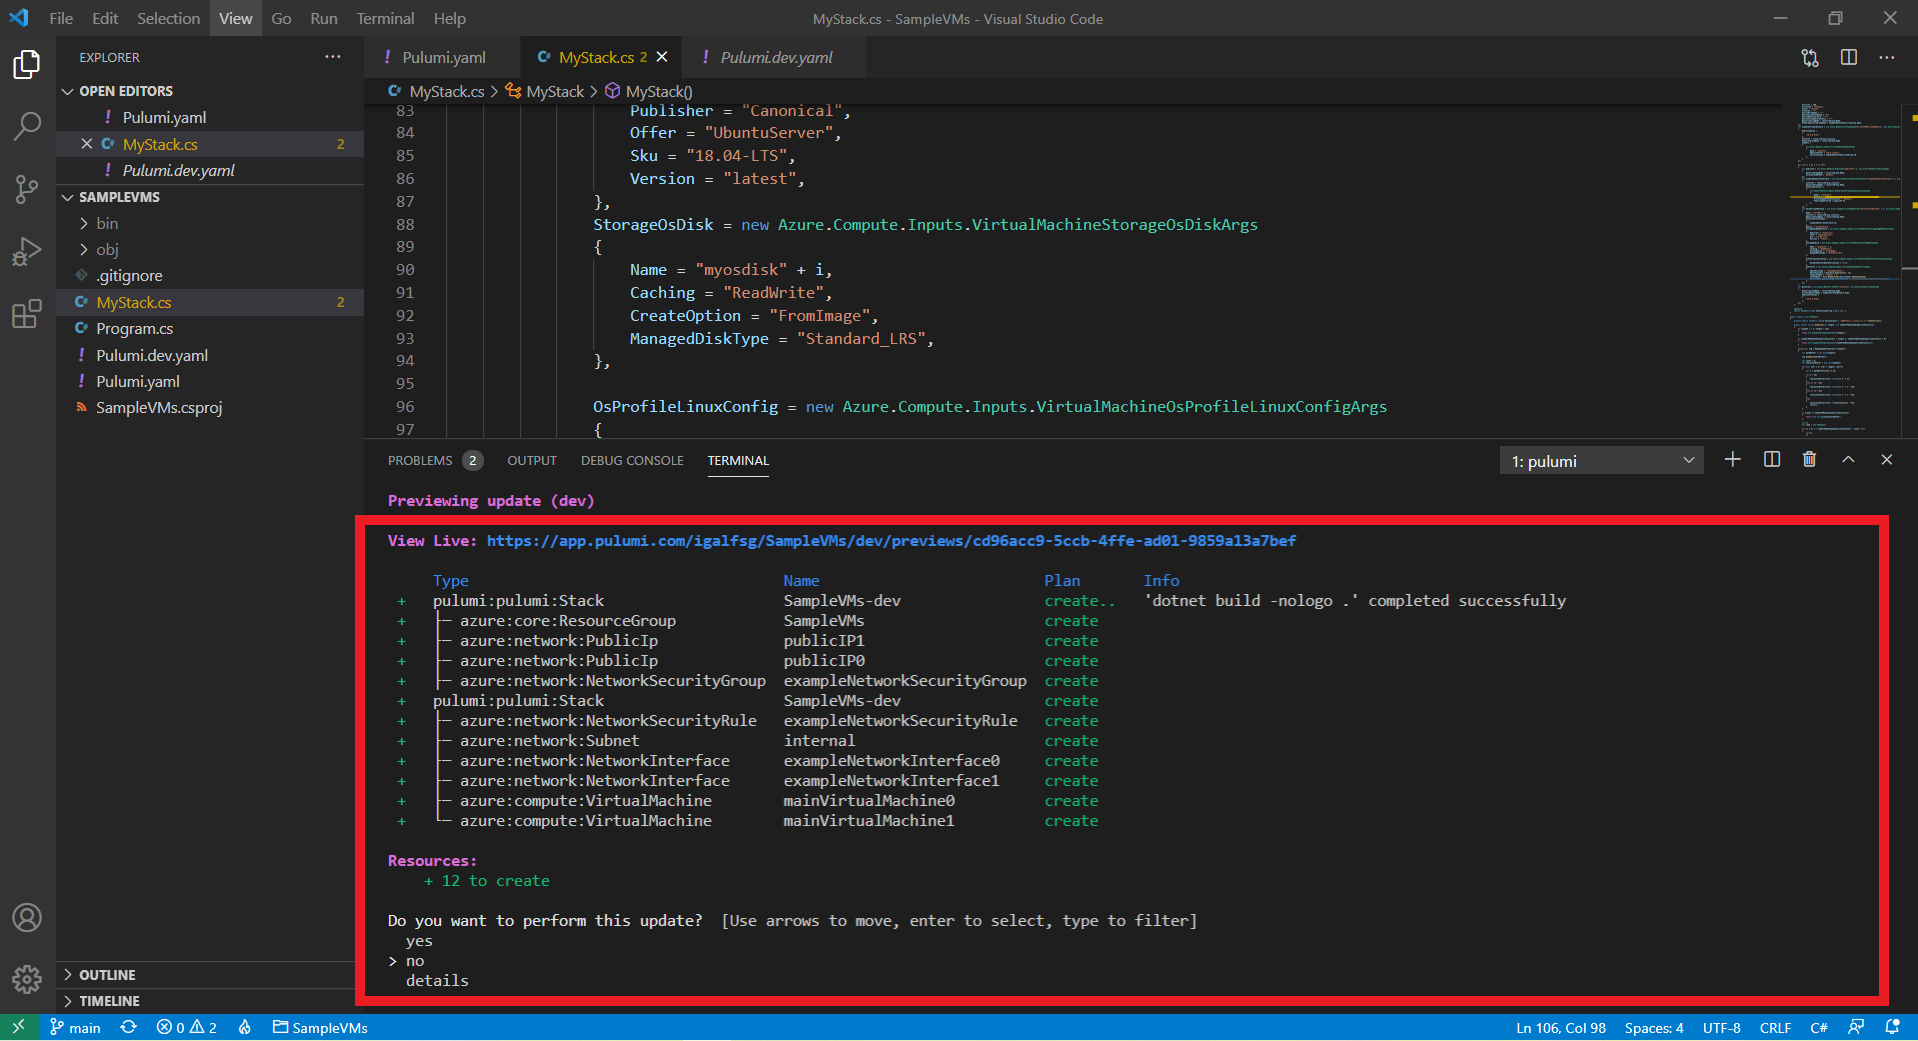
-
Verify the changes, and move the arrow to select yes.
-
Pulumi will deploy the resources to Azure.
Updating Azure Policy
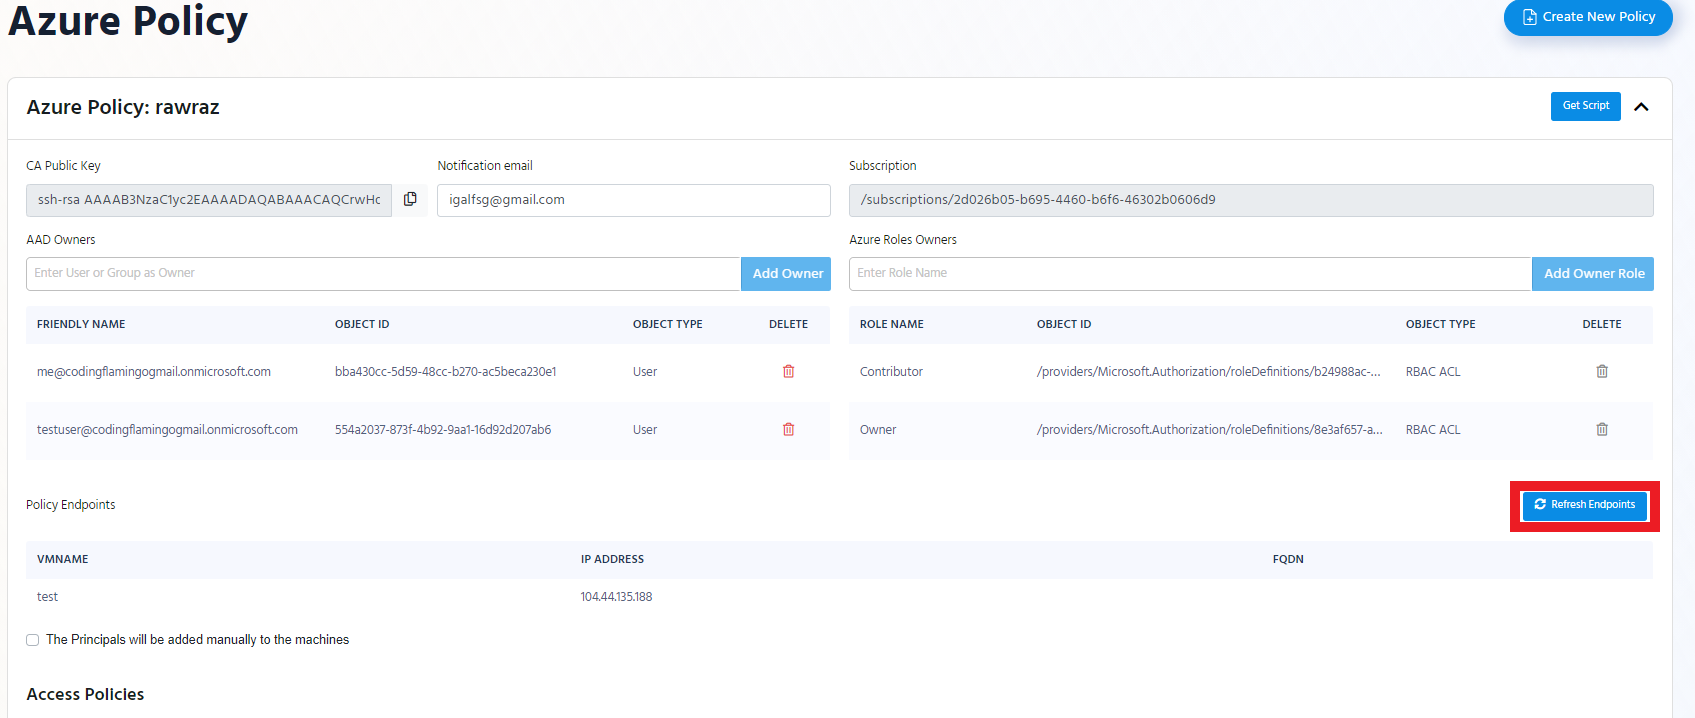
If you are using an Azure EZSSH Policy, refresh the endpoints, to get the new endpoints added to the policy.
-
In the EZSSH Portal go to your Azure policy and click edit.
-
Click the “Refresh Endpoints” Button
-
Your new VMs are ready to be used with EZSSH!
Updating Hybrid Policy
If you are using a Hybrid EZSSH Policy, you will have to Manually add the endpoints.
- In the EZSSH Portal go to your hybrid policy and click edit.
- Add the new endpoints to your policy endpoints.
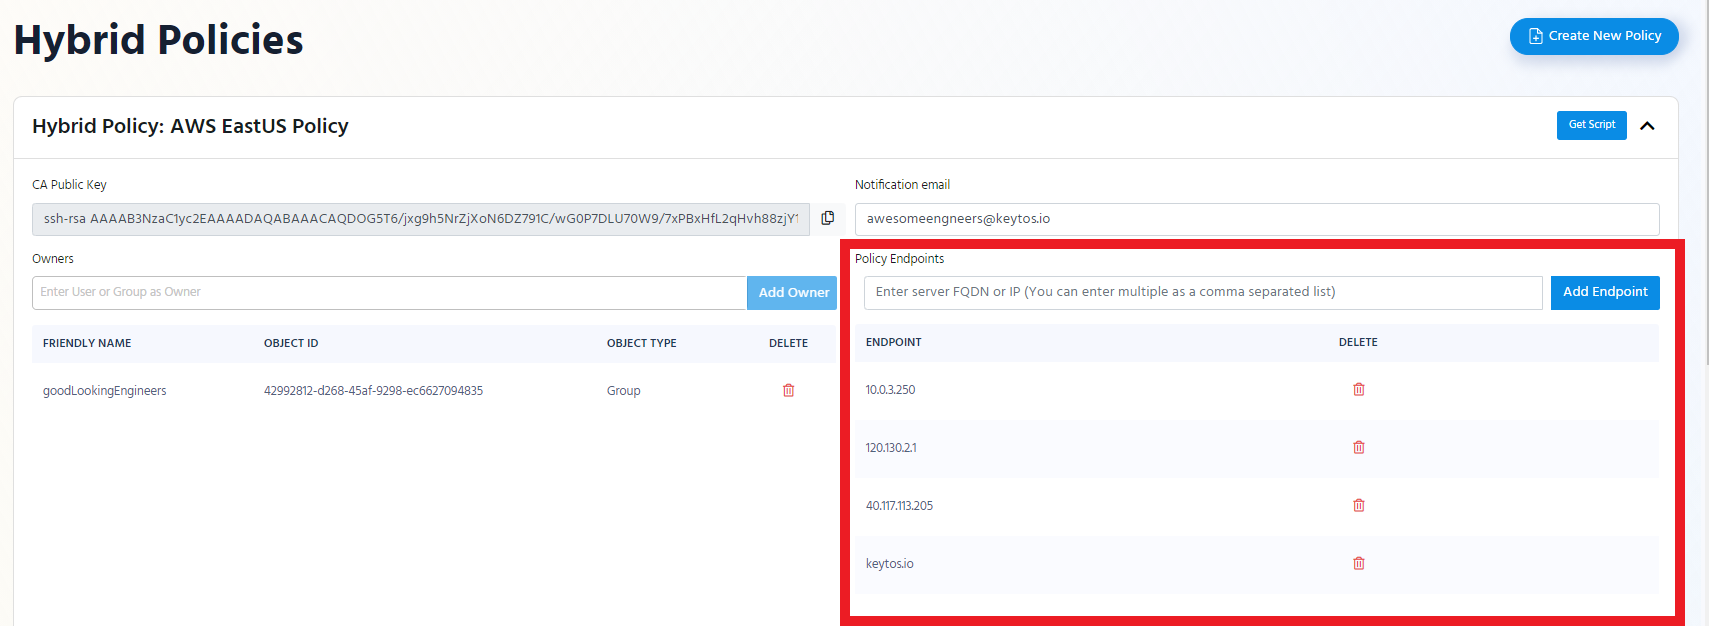
- Save the policy changes.

- Your new VMs are ready to be used with EZSSH!
Understanding The Pulumi Deployment
In this section we will go through the Pulumi deployment to help you create your own. First we create a resource group named “SampleVMs”
Pulumi will add some random characters at the end to make it unique.
var resourceGroup = new Azure.Core.ResourceGroup("SampleVMs");
Then we create a network security group named “exampleNetworkSecurityGroup” and set it in the just created resource group and in the same location.
var exampleNetworkSecurityGroup = new Azure.Network.NetworkSecurityGroup("exampleNetworkSecurityGroup", new Azure.Network.NetworkSecurityGroupArgs
{
    Location = resourceGroup.Location,
    ResourceGroupName = resourceGroup.Name,
});
Then we create an inbound rule that will accept any connection to port 22
This is a very open inbound rule, you should only allow a select number of IP addresses into your admin ports.
var exampleNetworkSecurityRuleInbound = new Azure.Network.NetworkSecurityRule("exampleNetworkSecurityRule", new Azure.Network.NetworkSecurityRuleArgs
{
    Priority = 100,
    Direction = "Inbound",
    Access = "Allow",
    Protocol = "*",
    SourcePortRange = "*",
    DestinationPortRange = "22",
    SourceAddressPrefix = "*",
    DestinationAddressPrefix = "*",
    ResourceGroupName = resourceGroup.Name,
    NetworkSecurityGroupName = exampleNetworkSecurityGroup.Name,
});
Then we create a virtual network for our VMs.
var exampleVirtualNetwork = new Azure.Network.VirtualNetwork("testVMSVirtualNetwork", new Azure.Network.VirtualNetworkArgs
{
    AddressSpaces =
    {
        "10.0.0.0/16",
    },
    Location = resourceGroup.Location,
    ResourceGroupName = resourceGroup.Name,
    Subnets =
    {
        new Azure.Network.Inputs.VirtualNetworkSubnetArgs
        {
            Name = "subnet3",
            AddressPrefix = "10.0.3.0/24",
            SecurityGroup = exampleNetworkSecurityGroup.Id,
        },
    }
});
Then we have a for loop that creates vms. (This was created to create multiple vms at once). The rest of the code is inside this for loop and will create one of each of the resources for each vm in the for loop.
Inside the For Loop
First we create a public IP address for the VM.
In this sample the IP address is dynamic, it will change each time the vm is allocated.
var publicIP = new Azure.Network.PublicIp("publicIP-"+ i, new Azure.Network.PublicIpArgs
{
    ResourceGroupName = resourceGroup.Name,
    AllocationMethod = "Dynamic"
});
Then we create a network interface and attach the public IP to the VM.
var exampleNetworkInterface = new Azure.Network.NetworkInterface("exampleNetworkInterface"+ i, new Azure.Network.NetworkInterfaceArgs
{
    Location = resourceGroup.Location,
    ResourceGroupName = resourceGroup.Name,
    IpConfigurations =
    {
        new Azure.Network.Inputs.NetworkInterfaceIpConfigurationArgs
        {
            Name = "internal",
            SubnetId = exampleVirtualNetwork.Subnets.First().Apply(x => x.Id),
            PrivateIpAddressAllocation = "Dynamic",
            PublicIpAddressId = publicIP.Id
        },
    },
});
Then we create the VM with the following properties:
- Name TestVM + the number of vm it is in the for loop.
- In the same location as the resource group.
- Using the Network Interface we just created.
- VM Size “Standard_B1s” (the cheapest)
- Using Ubuntu Server 18.04 LTS
- With a new disk for the OS
- Azure Requires an admin user so we set up a random admin user, with a randomly generated password that we do not keep.
- Lastly we have
CustomData = File.ReadAllText(Environment.GetFolderPath( Environment.SpecialFolder.UserProfile) + "\\Downloads\\AWS EastUS Policy.yaml")This is the line where we add the cloud init we downloaded previously and will grant access to the EZSSH Policy.
var mainVirtualMachine = new Azure.Compute.VirtualMachine("mainVirtualMachine" + i, new Azure.Compute.VirtualMachineArgs
{
    Name = "TestVM" + i,
    Location = resourceGroup.Location,
    ResourceGroupName = resourceGroup.Name,
    NetworkInterfaceIds =
    {
        exampleNetworkInterface.Id,
    },
    VmSize = "Standard_B1s",
    StorageImageReference = new Azure.Compute.Inputs.VirtualMachineStorageImageReferenceArgs
    {
        Publisher = "Canonical",
        Offer = "UbuntuServer",
        Sku = "18.04-LTS",
        Version = "latest",
    },
    StorageOsDisk = new Azure.Compute.Inputs.VirtualMachineStorageOsDiskArgs
    {
        Name = "myosdisk" + i,
        Caching = "ReadWrite",
        CreateOption = "FromImage",
        ManagedDiskType = "Standard_LRS",
    },

    OsProfileLinuxConfig = new Azure.Compute.Inputs.VirtualMachineOsProfileLinuxConfigArgs
    {
        DisablePasswordAuthentication = false,
    },
    OsProfile = new Azure.Compute.Inputs.VirtualMachineOsProfileArgs
    {
        AdminUsername = "randomAdminUser",
        AdminPassword = Password.Generate(32, 12),
        ComputerName = "testpc" + i,
        CustomData = File.ReadAllText(Environment.GetFolderPath(
        Environment.SpecialFolder.UserProfile) + "\\Downloads\\AWS EastUS Policy.yaml")
    }
});
