How To Enable Self Service User Certificates
How to enable self service user certificates
If you are using X509 Certificates for user authentication either for wifi or VPN, you might have setup a SCEP CA that connects to your MDM and enables your to automatically create certificates for your users. However, some users that require certificates for your organization might not have a device managed by your MDM. In this case you can enable self service user certificates for your users. This will enable your users to create their own certificates for authentication and encryption with a single in our portal; removing the need of an MDM.
Prerequisites
How to enable self service user certificates in your SCEP CA
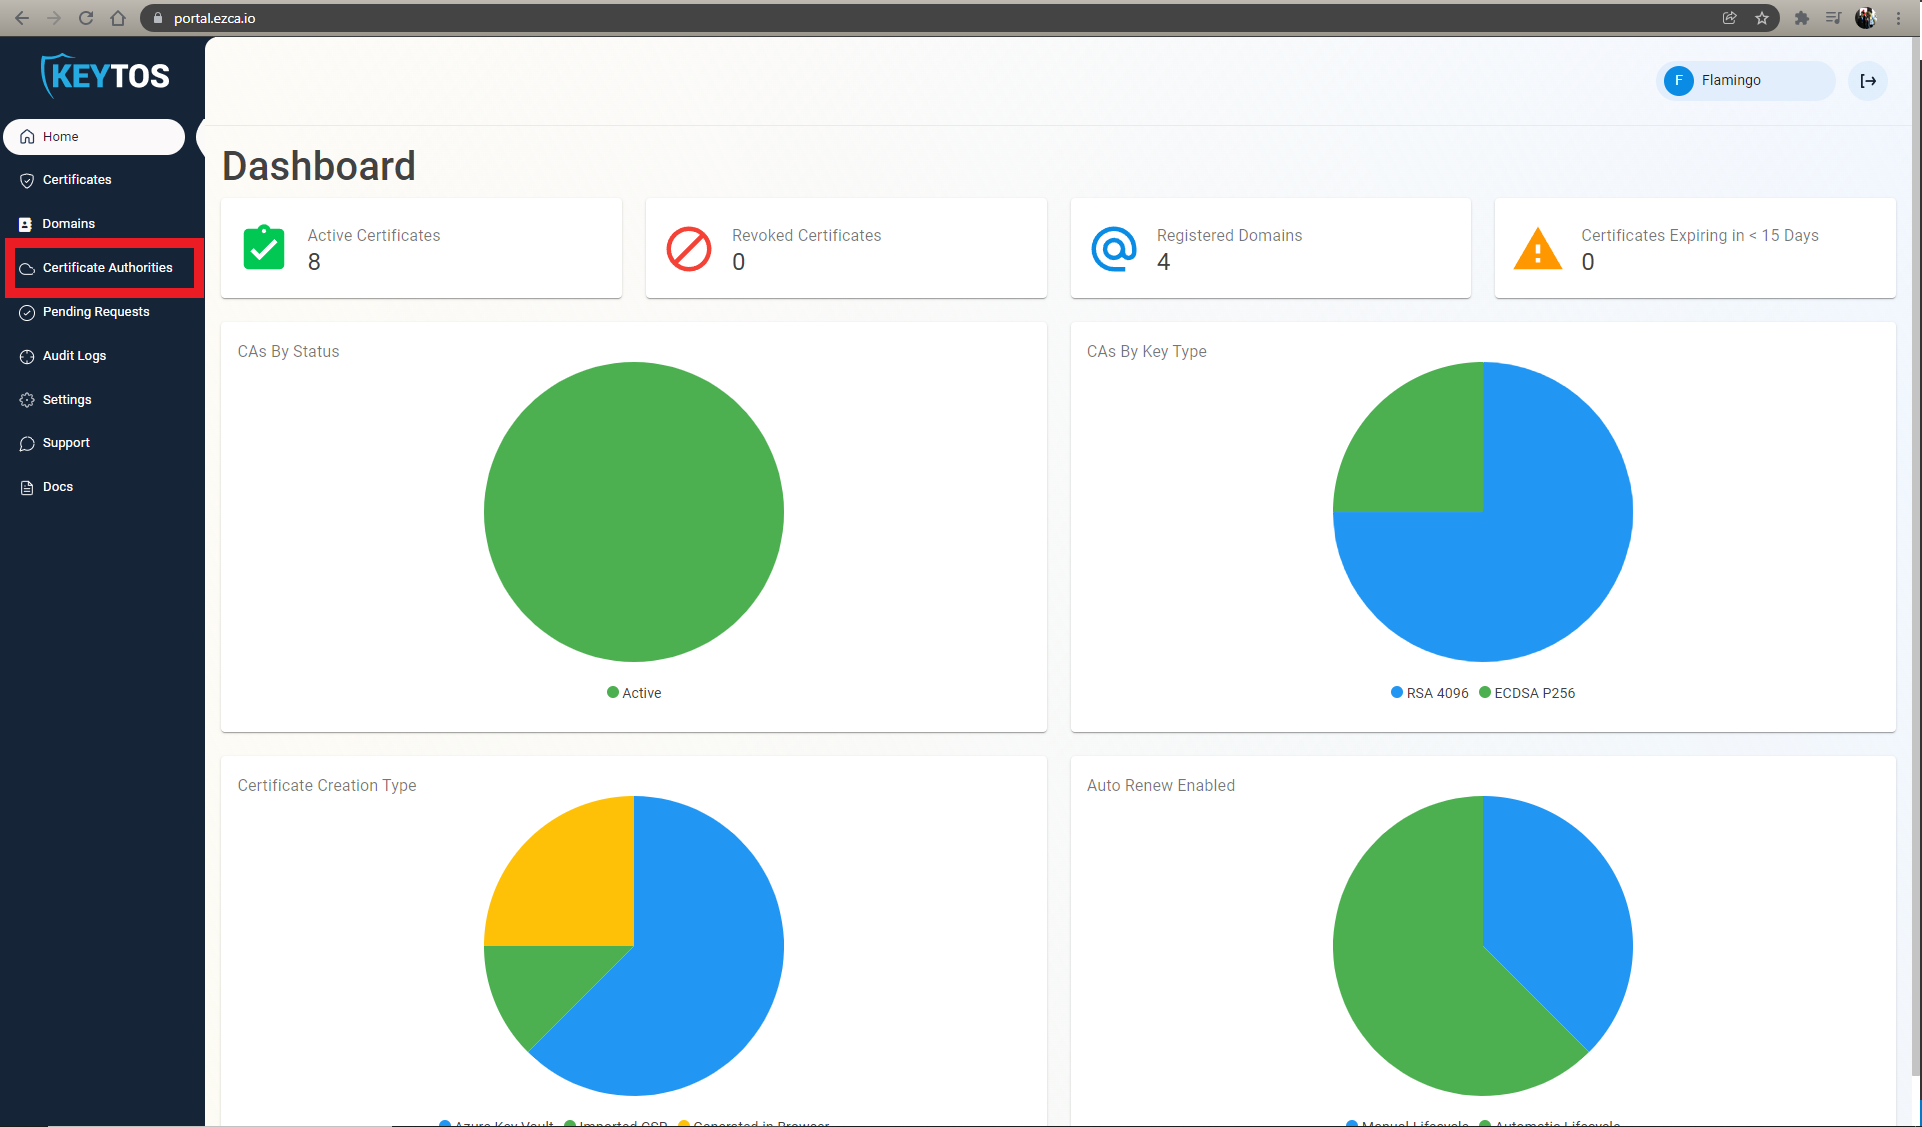
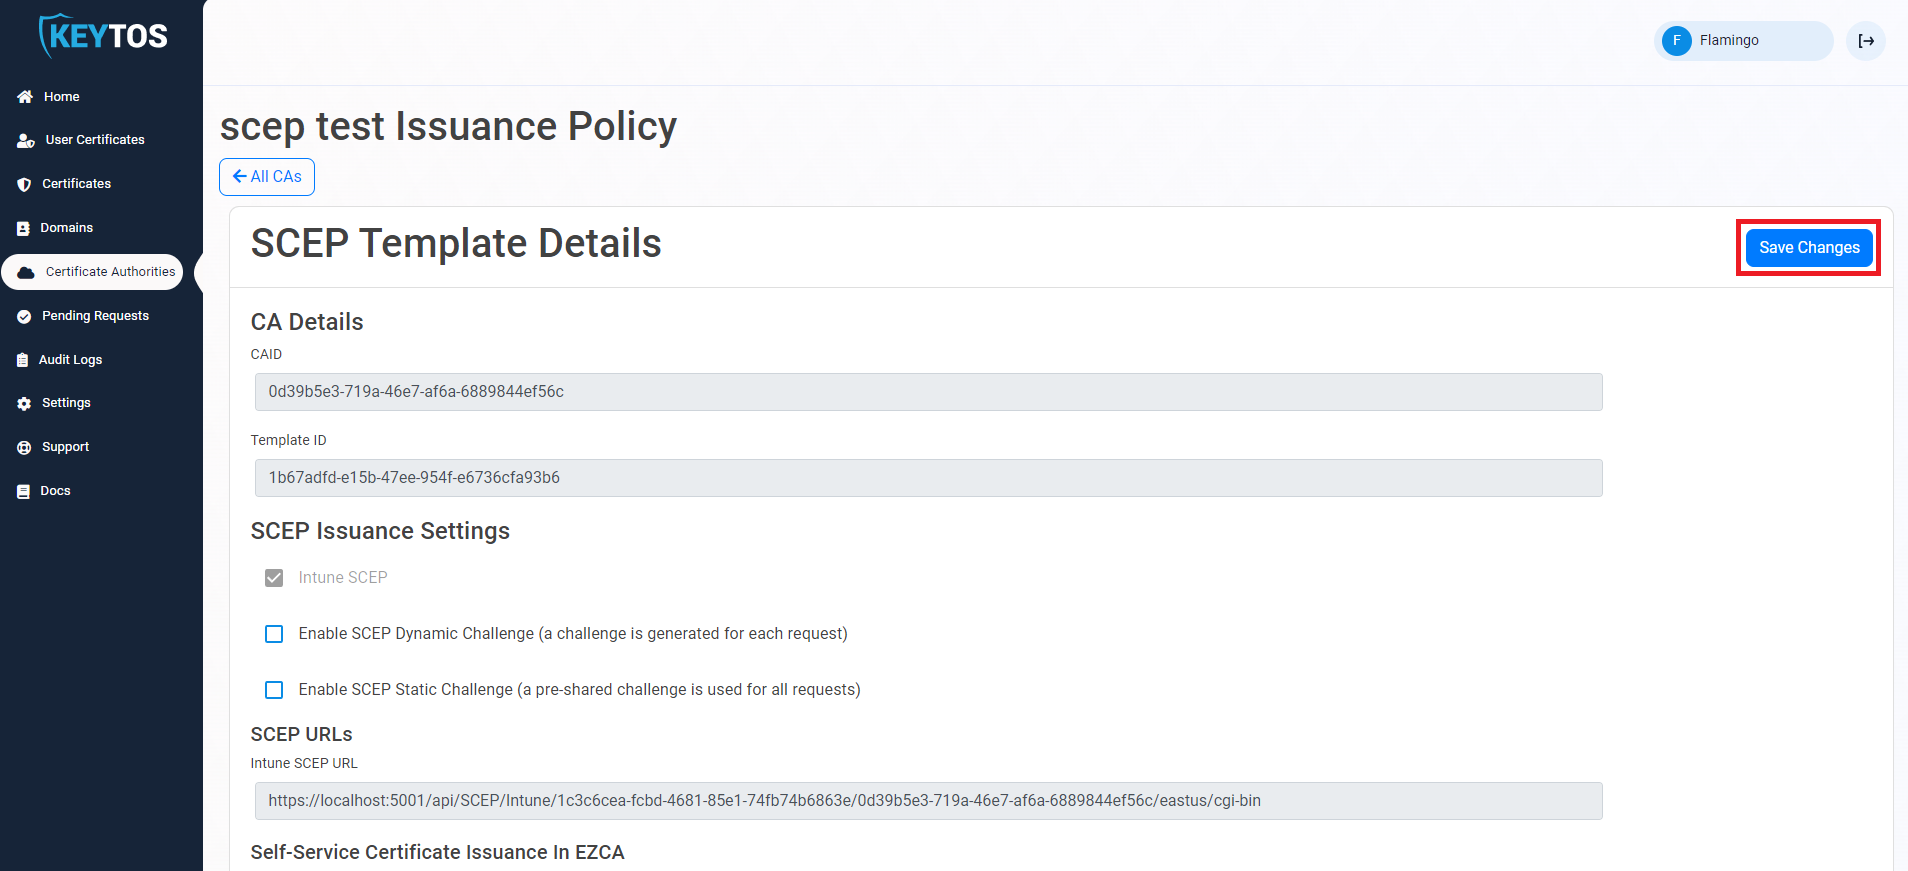
- Go to the EZCA portal (If you have your private instance go to that specific portal) and login with your credentials.
- Click on the “Certificate Authorities” button.
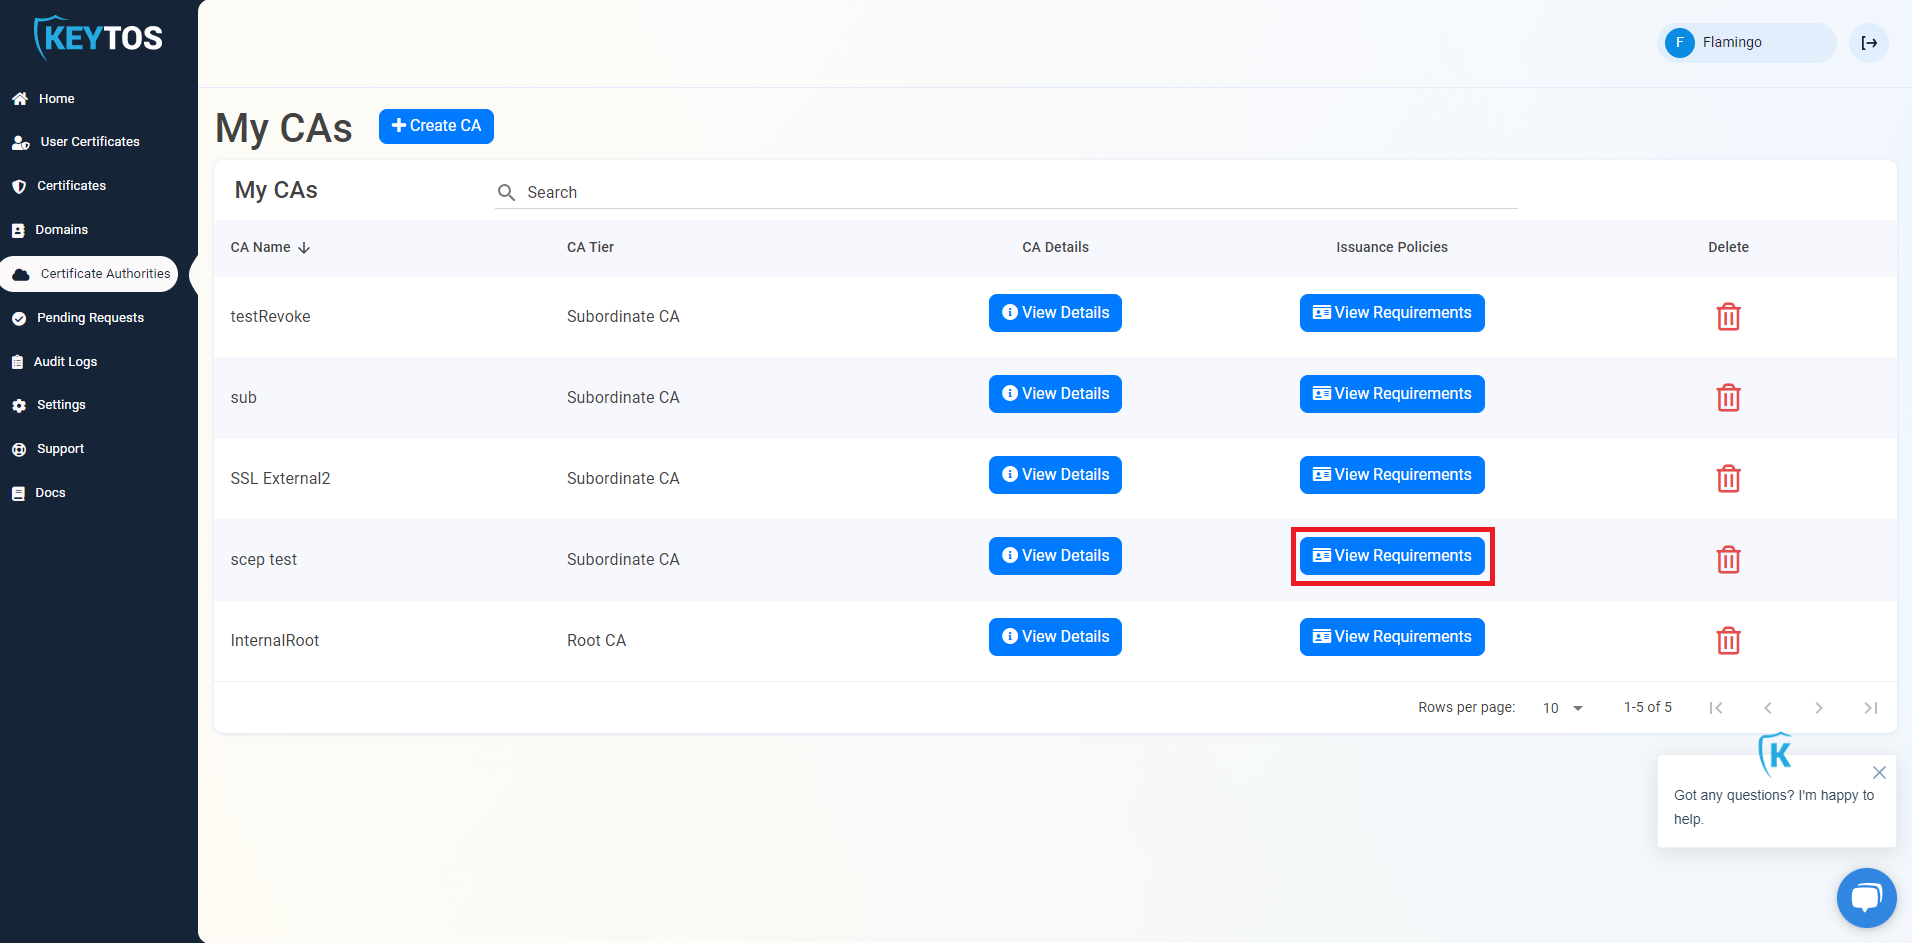
- Click on the “View Requirements” button of the SCEP CA you want to enable self service user certificates.
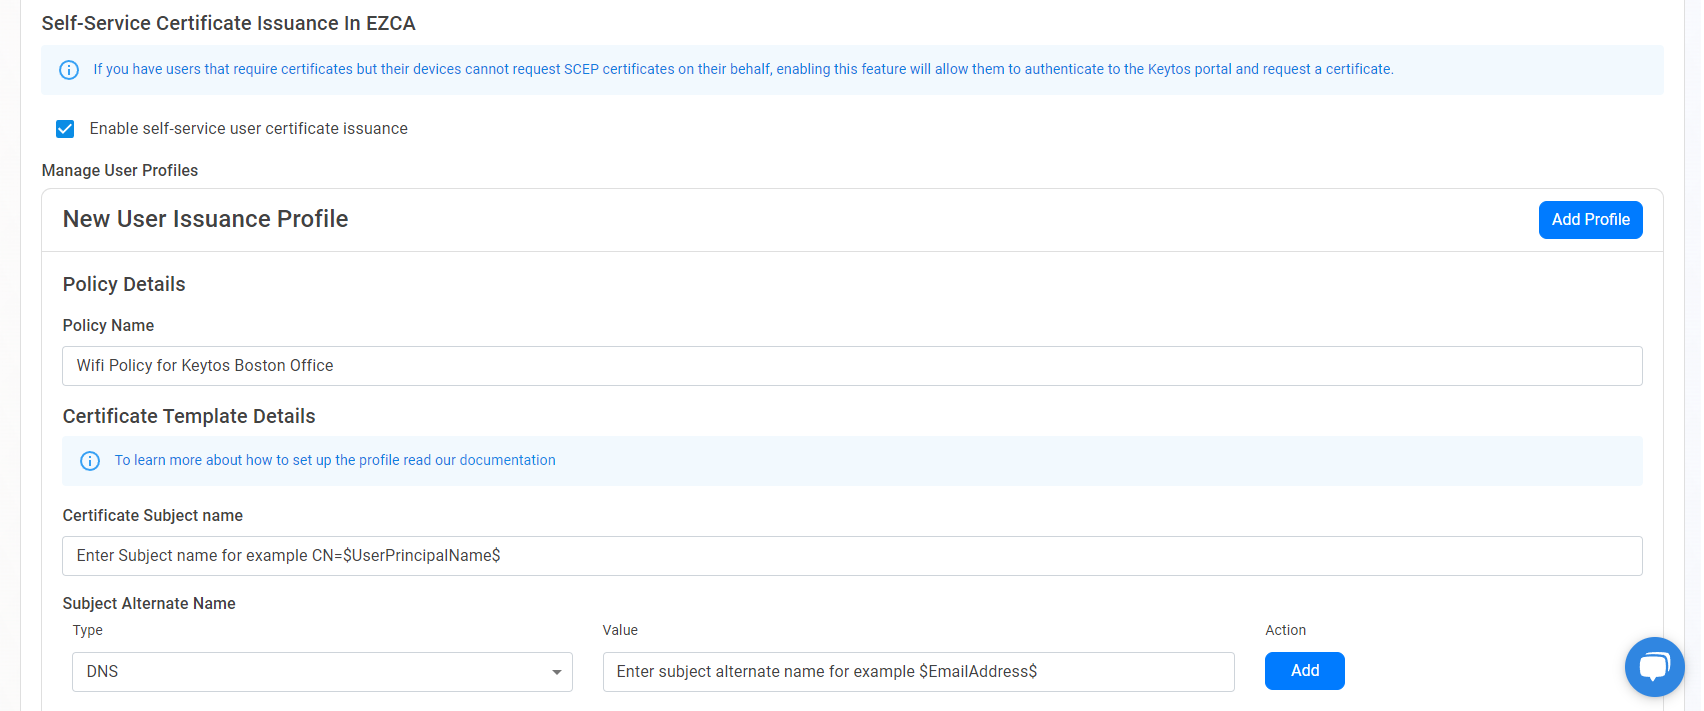
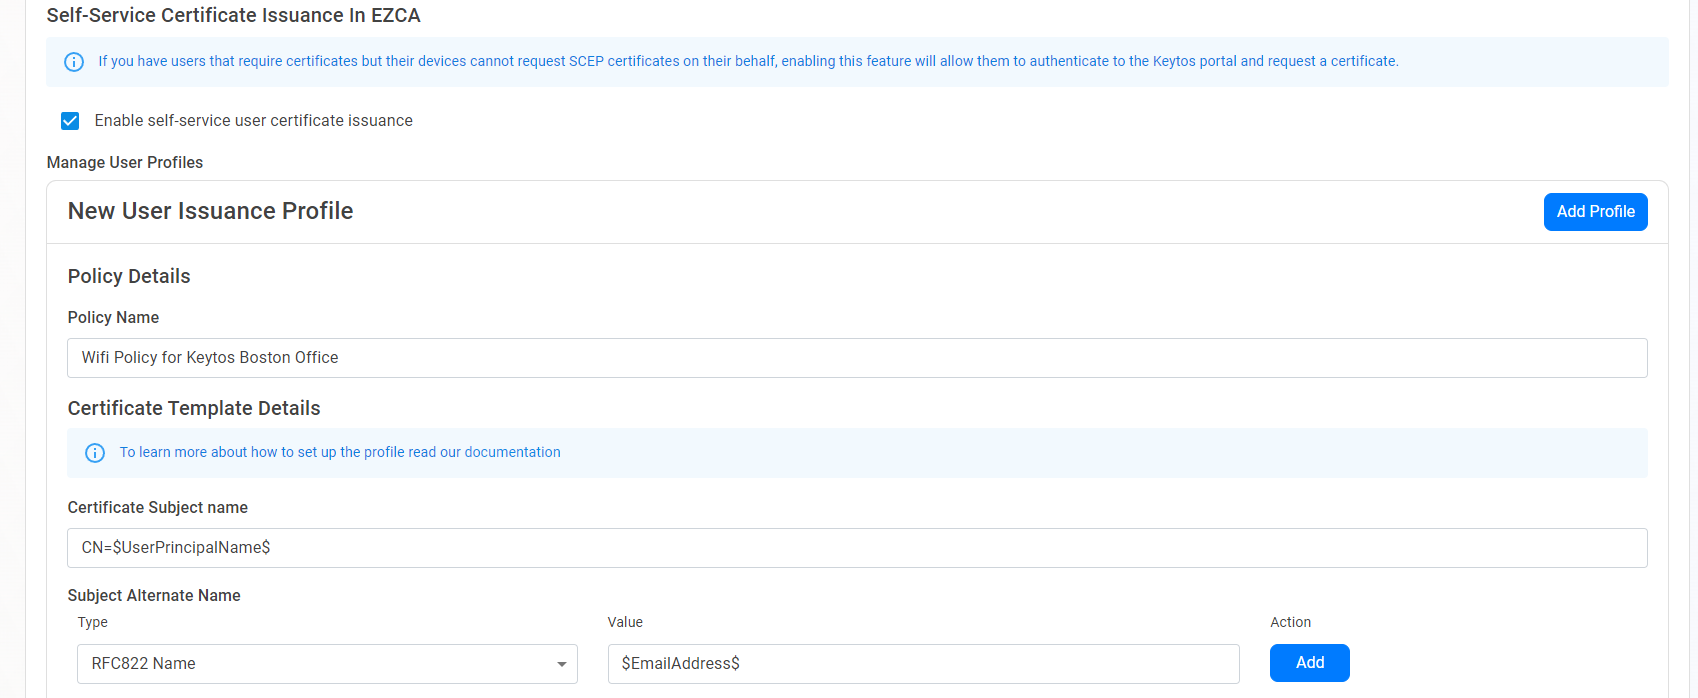
- Scroll down to the “Self-Service Certificate Issuance In EZCA” and click on the “Enable self-service user certificate issuance” checkbox.
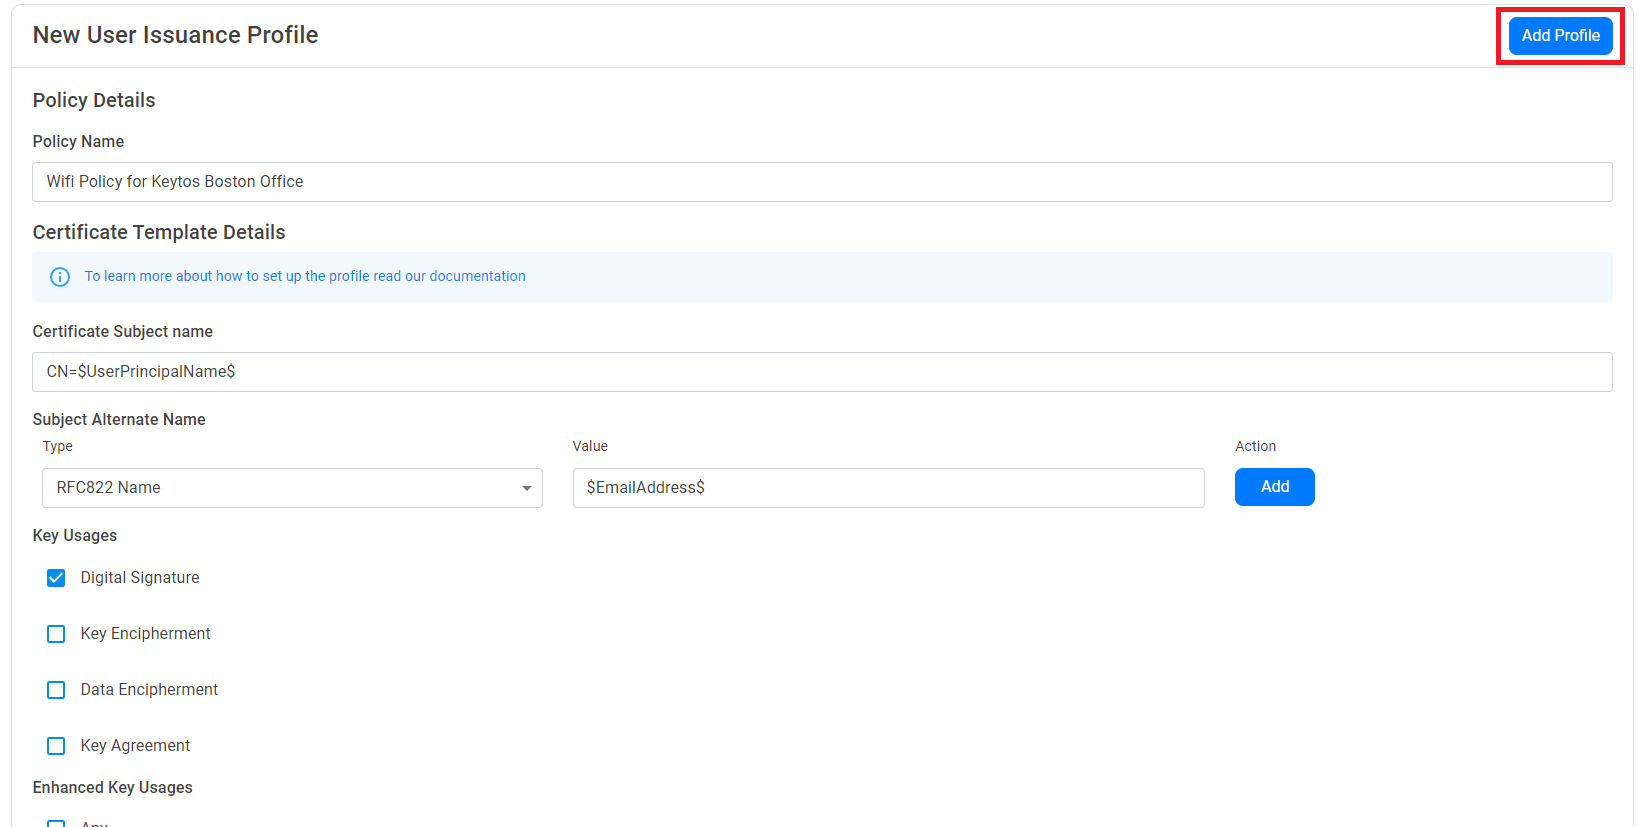
- This will show a New User Issuance Policy section. First, we will enter the policy name. This is just for your reference (and if you offer multiple policies to your users, this will be the name the users see when creating their certificate).
- Next, we will enter the certificate information, this is the information that will be used to create the certificate. You can use the following variables to create your certificate:
- $UserName$: The user name of the user, such as Peter Pan.
- $UserPrincipalName$: The user principal name (UPN) of the user, such as jared@pidepiper.com
- $Alias$: The alias of the user (the username of the UPN for example if the UPN is jared1@pidepiper.com, this value will be jared1).
- $EmailAddress$: The email address of the user, (this is the mail attribute in Azure AD), if this is empty, the UPN will be used.
- Enter the Subject Name of the certificate. This is the name that will appear in the certificate’s subject name, consult with your identity provider to see if they have any requirements for the content and format of your certificate subject name. You can use the variables above to create the subject name. For example, if you want the subject name to be the user’s email address, you can enter CN=$EmailAddress$.
The must start with CN=
- Enter the Subject Alternative Names of the certificate. This is the name that will appear in the certificate’s subject alternative names, consult with your identity provider to see if they have any requirements for the content and format of your certificate subject alternative name. You can set they subject name type on the left and use the variables above to create the subject alternative name. For example, if you want the subject alternative name to be the user’s email address, you can enter $EmailAddress$.
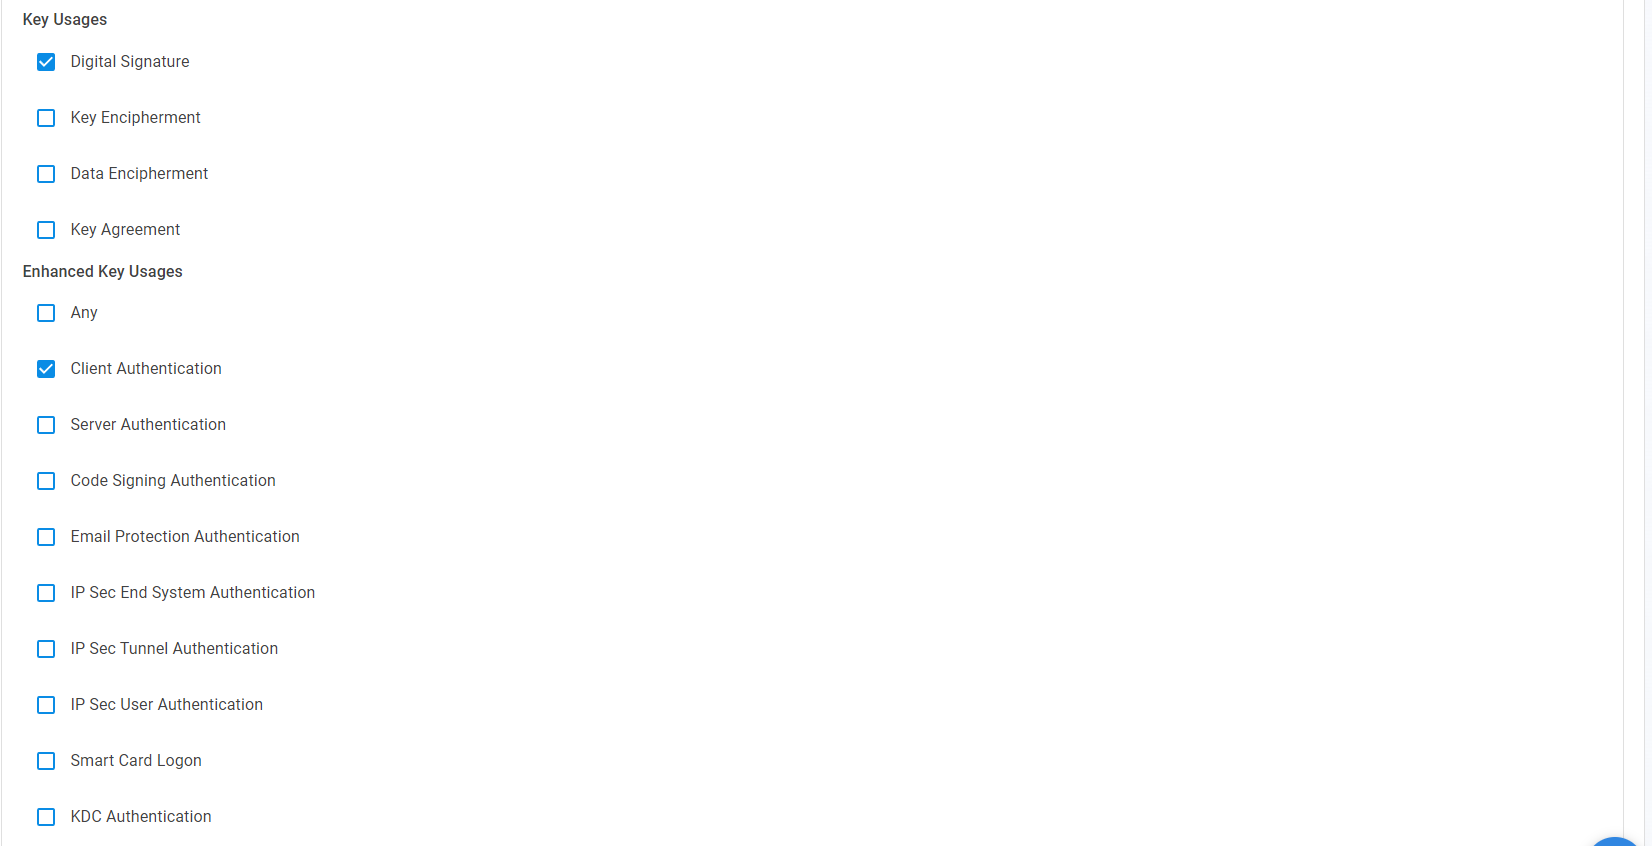
- Enter the Key Usage of the certificate. This is the key usage that will appear in the certificate’s key usage, consult with your identity provider to see if they have any requirements for the content and format of your certificate key usage. By default it will have digital signature enabled.
- Enter the Extended Key Usage of the certificate. This is the extended key usage that will appear in the certificate’s extended key usage, consult with your identity provider to see if they have any requirements for the content and format of your certificate extended key usage. By default it will have client authentication enabled.
How to Enable Key Management for Self Service User Certificates
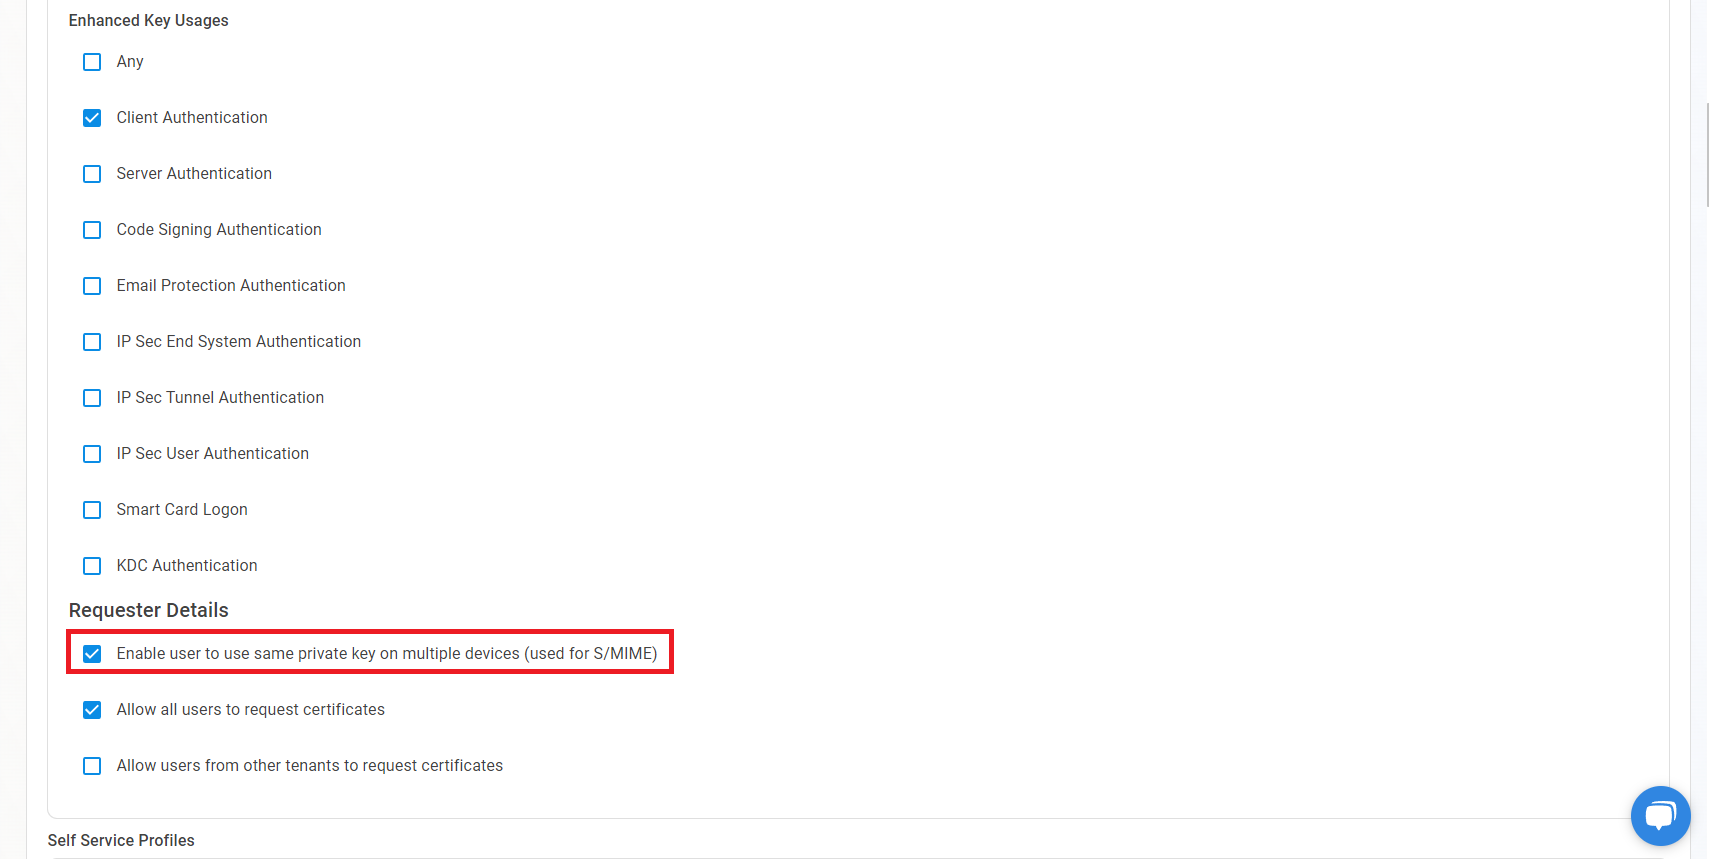
Do to compliance requirements, or security requirements, you might want to enable key management for your self service user certificates. This will enable you to have a copy of the private key of the certificate in EZCA. This is useful for S/MIME certificates where you want to have a backup of the private key in case the user loses access to their certificate. To enable key management for your self service user certificates, Check the “Enable user to use same private key on multiple devices (used for S/MIME)” checkbox. This will enable you to have a copy of the private key of the certificate in EZCA (Encrypted by your CA’s HSM).
How to Limit Who Can Create Certificates Using This Policy
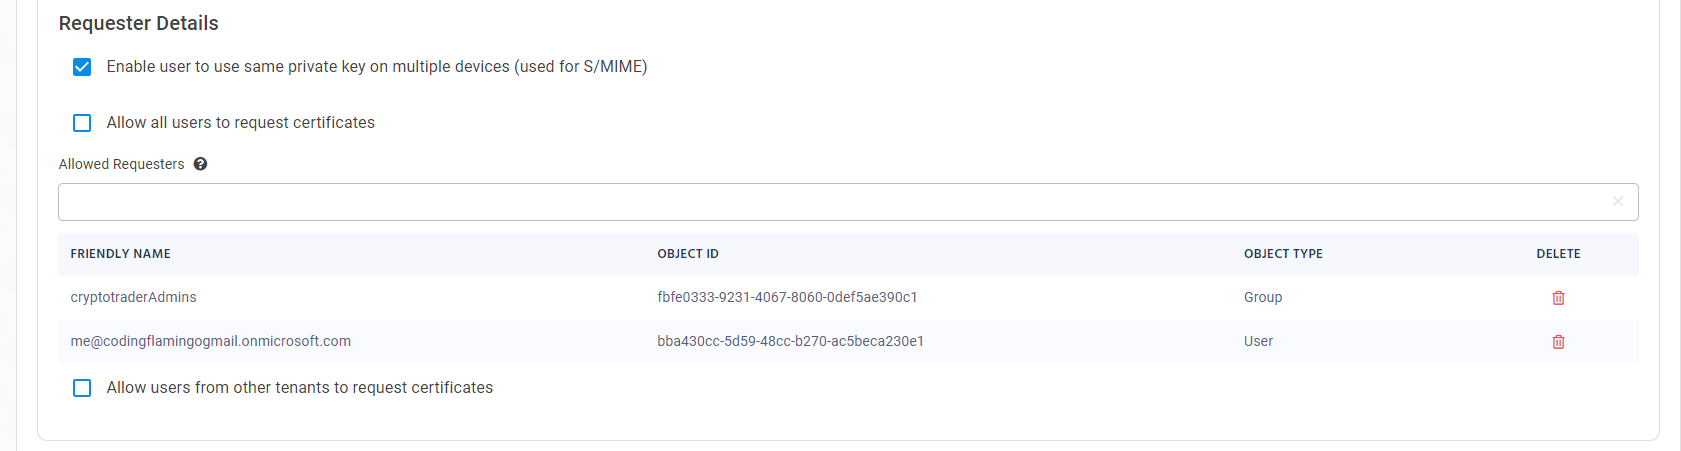
- By default all users in your organization will be able to create certificates using this policy. If you want to limit who can create certificates using this policy, you can enter uncheck the “Allow all users to request certificates” checkbox and enter the groups and users that are allowed to issue certificates for this policy.
Enabling Certificate Issuance for External Users
- As your organization grows, and uses user certificates for more scenarios you might want to enable certificate issuance for external users. To enable certificate issuance for external users, check the “Allow users from other tenants to request certificates” checkbox. This will open a New Guest Tenant Card, we must fill in the information and add it to the policy.
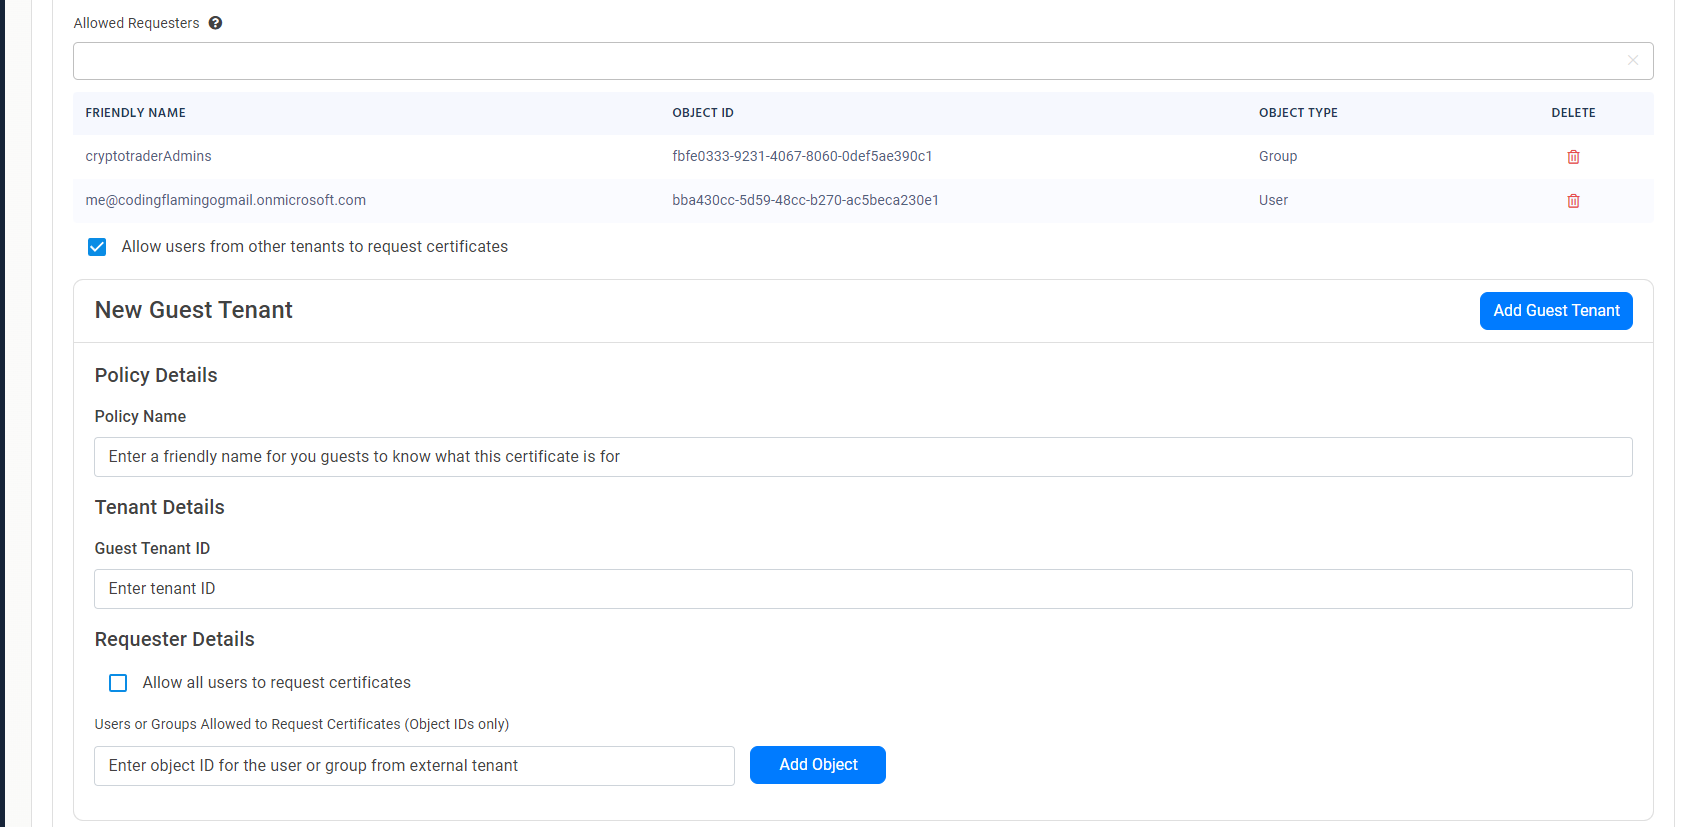
- First, we will enter the policy name, this is the name that your guests will see when they log in to the portal to create their certificate.
- Then enter the tenant ID of the tenant you want to enable certificate issuance for. You can find the tenant ID in the Azure portal, under Azure Active Directory -> Properties -> Directory ID. (Note: The administrator of the tenant must have registered the EZCA application to allow EZCA to Authenticate the users in their tenant).
- Next you can either enter the groups and users that are allowed to issue certificates for this policy, or you can allow all users in the tenant to issue certificates.
- If you are limiting the users that can issue certificates, you must enter the group ID of the group in their tenant. You can find the group ID in the Azure portal, under Azure Active Directory -> Groups -> Select the group -> Properties -> Object ID.
- Once you have entered the group ID, click on the “Add Object” button to add the group to the policy.
- Once you have added all the groups and users you want to allow to issue certificates, click on the “Add Guest Tenant” button to add the tenant to the policy.
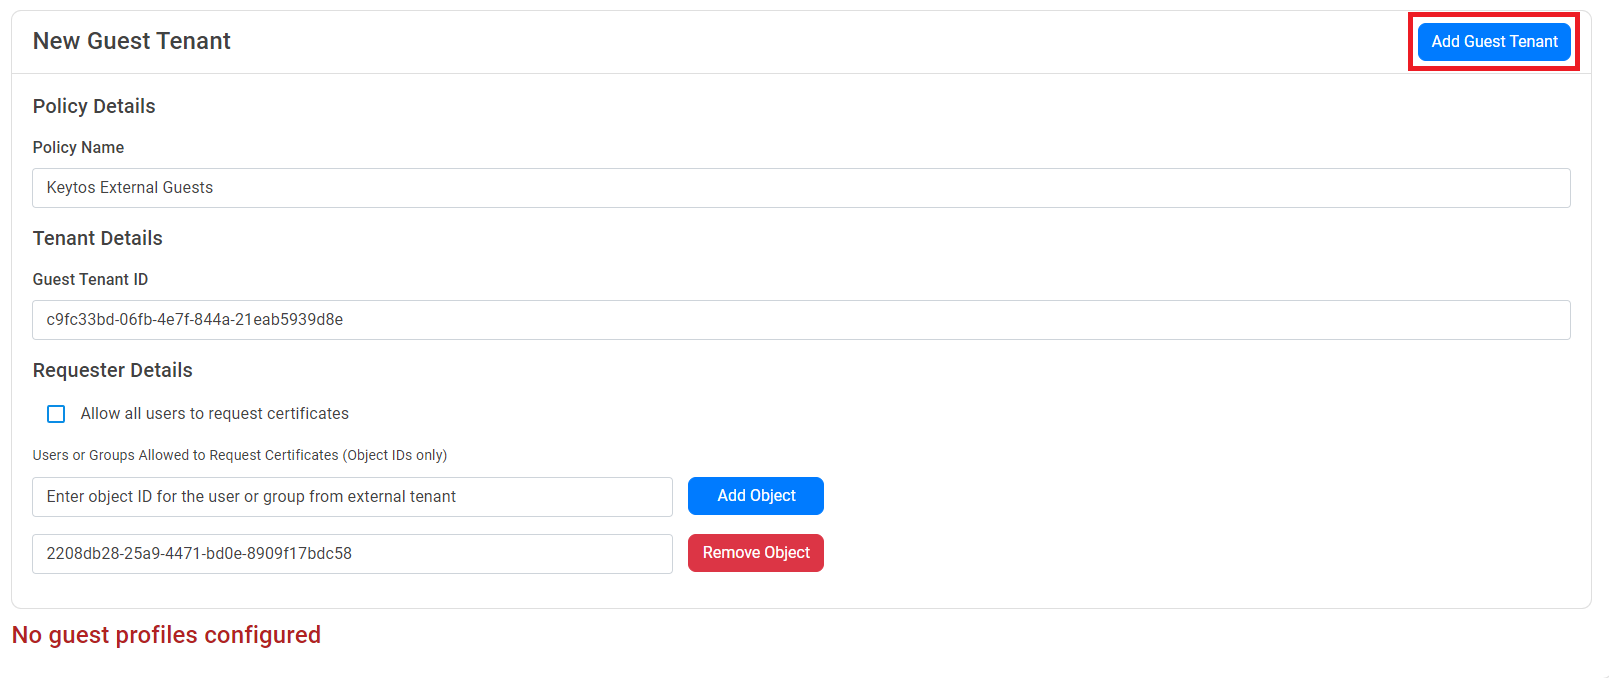
- Repeat the steps above to add more tenants to the policy.
How to Save the Self Service User Certificate Policy
- Once you have entered all the information for the policy, Click the “Add Profile” Button at the top of the policy.
- Repeat the steps above to add more policies.
- Once you have added all the policies you want to enable, click on the “Save Changes” button at the top of the page.
- Once you have saved the changes, your users will be able to create their own certificates in the portal.