

















How-To: Issue SCEP Certificates to macOS Devices with Intune
Introduction - How to Issue SCEP Certificates to macOS Devices with Intune
This guide shows how to issue X509 certificates to macOS devices with Microsoft Intune and SCEP. You will create:
- A Trusted Certificate profile to establish trust with your CA chain.
- A SCEP Certificate profile to request and install certificates for users or devices.
By the end, your macOS devices will be able to enroll and receive certificates from your EZCA SCEP CA.
Prerequisites for Issuing SCEP Certificates to macOS Devices with Intune
Before you begin, confirm the following prerequisites:
- You have created an Intune SCEP CA.
- You have registered the Keytos Intune application in your Entra ID tenant.
- You are an Intune administrator with permissions to create configuration profiles in Intune.
How to Issue SCEP Certificates to macOS Devices with Intune - Step by Step Guide
In this section, you will first create a Trusted Certificate profile to deploy CA certificates, then create a SCEP Certificate profile for certificate enrollment.
How to Download Your CA Certificates from EZCA
To issue certificates to your macOS devices using Intune, you first need to download the CA certificate from your EZCA portal and upload it to Intune as a trusted certificate. Follow these steps to download your CA certificate from EZCA:
- Navigate to your EZCA portal instance, such as portal.ezca.io.
- From the left-hand menu, select Certificate Authorities.
- Find the CA you created for Intune and click on the View Details button.
- For your CA’s region(s), click on the Download Certificate button to download the CA certificate.
- Repeat the previous step for each CA in your PKI chain. If you have a Root CA and an Intermediate CA, make sure to download both certificates.
How to Create an Intune Trusted Certificate Profile for macOS Devices
Before issuing certificates, devices must trust your issuing chain.
Follow these steps for macOS devices:
-
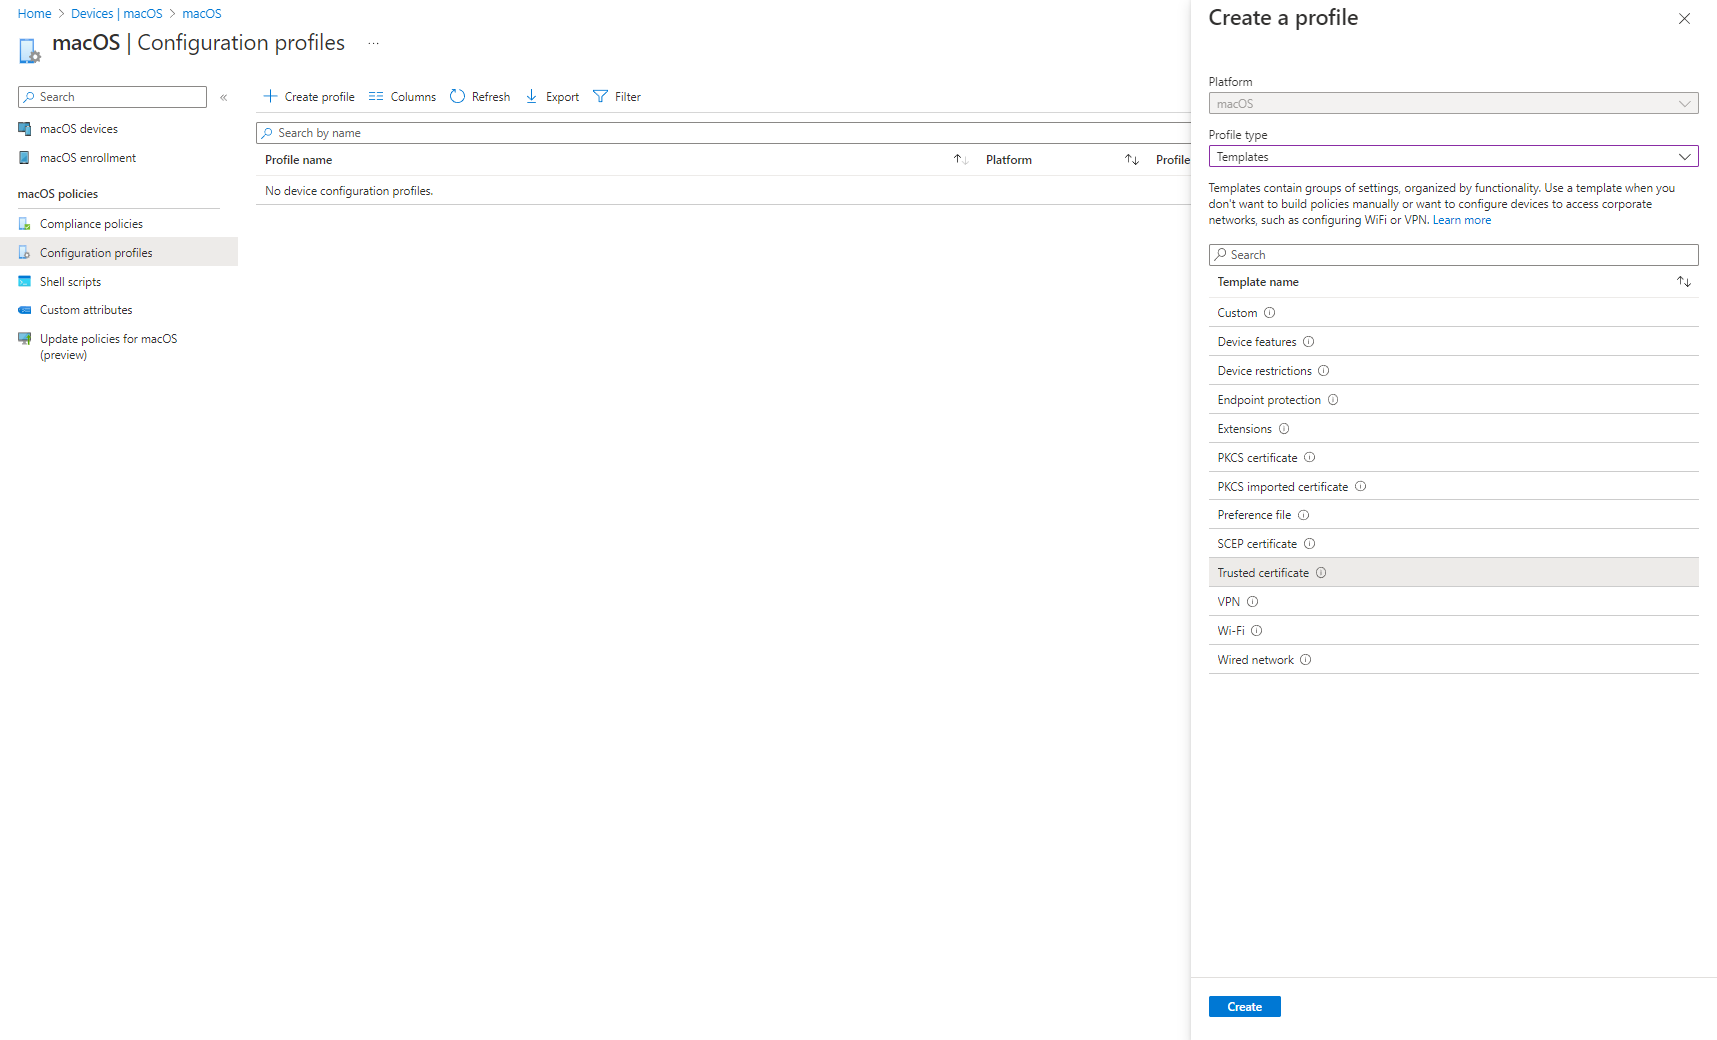
Select: Devices > macOS > Configuration profiles.
-
Click Create profile.
-
Select Templates as the profile type.
-
Select the Trusted Certificate template.
-
Click Create.
-
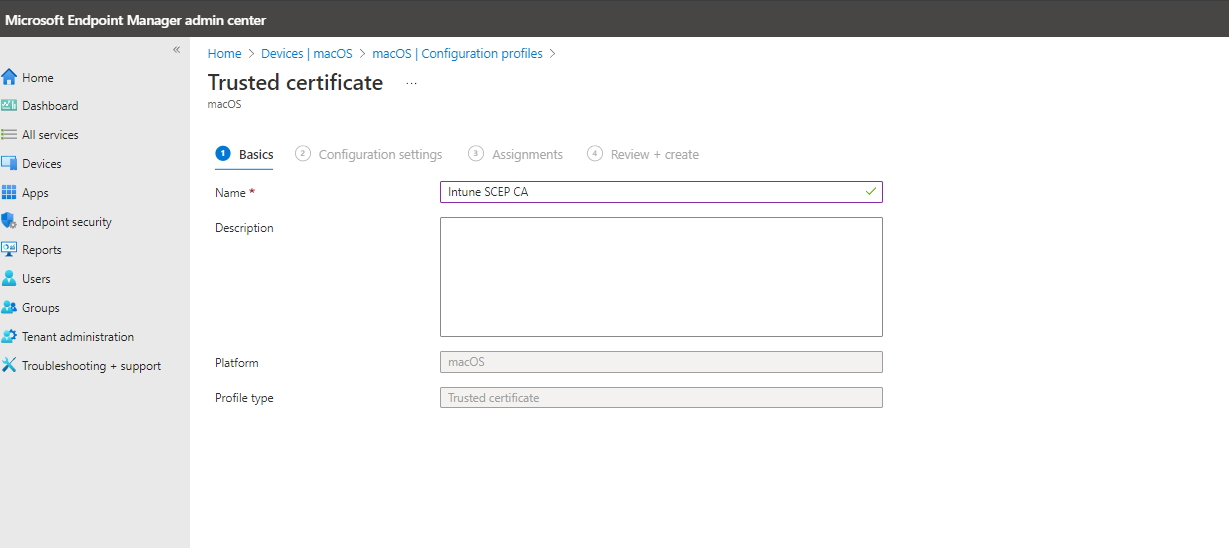
Enter the Name and Description for this Intune certificate profile.
-
Upload the CA certificate you downloaded from EZCA.
-
Select your Assignments and complete the profile creation.
-
Repeat these steps for each CA certificate in your chain (Root CA and Issuing CA as applicable).
-
Done! Your managed macOS devices will now trust certificates issued by your EZCA CA chain.
How to Create an Intune SCEP Profile for macOS Certificates
You can issue either device certificates or user certificates, depending on your scenario:
- Use device certificates for machine identity and device-based authentication.
- Use user certificates for user identity use cases.
- If needed, deploy both profile types.
Use the tabs below for the profile type you want to configure.
How to Create an Intune SCEP Profile For Device Certificates
The following steps will guide you on how to create an Intune SCEP profile to issue device certificates to your macOS devices.
-
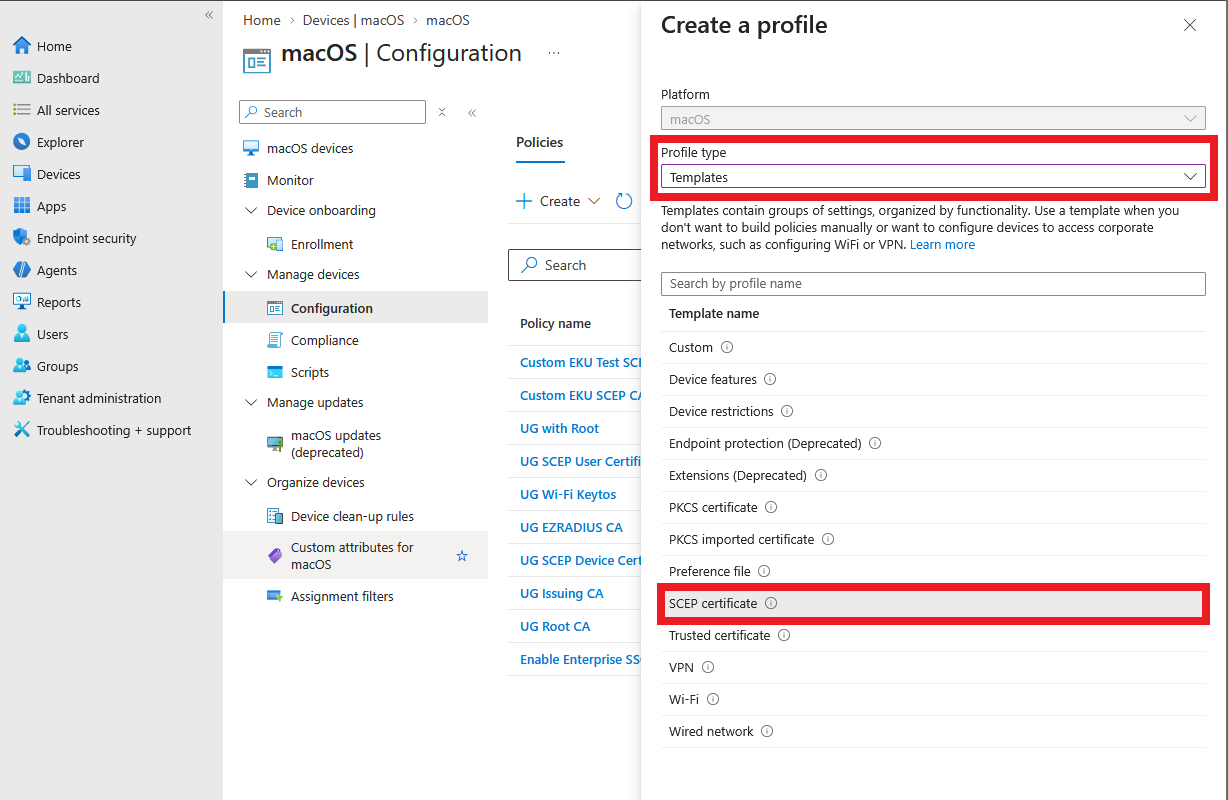
In the Intune Portal, click on + Create profile again to start creating a new configuration profile. Enter the following fields:
-
Profile type: select Templates.
-
Template name: select SCEP Certificate.
-
-
Click Create.
-
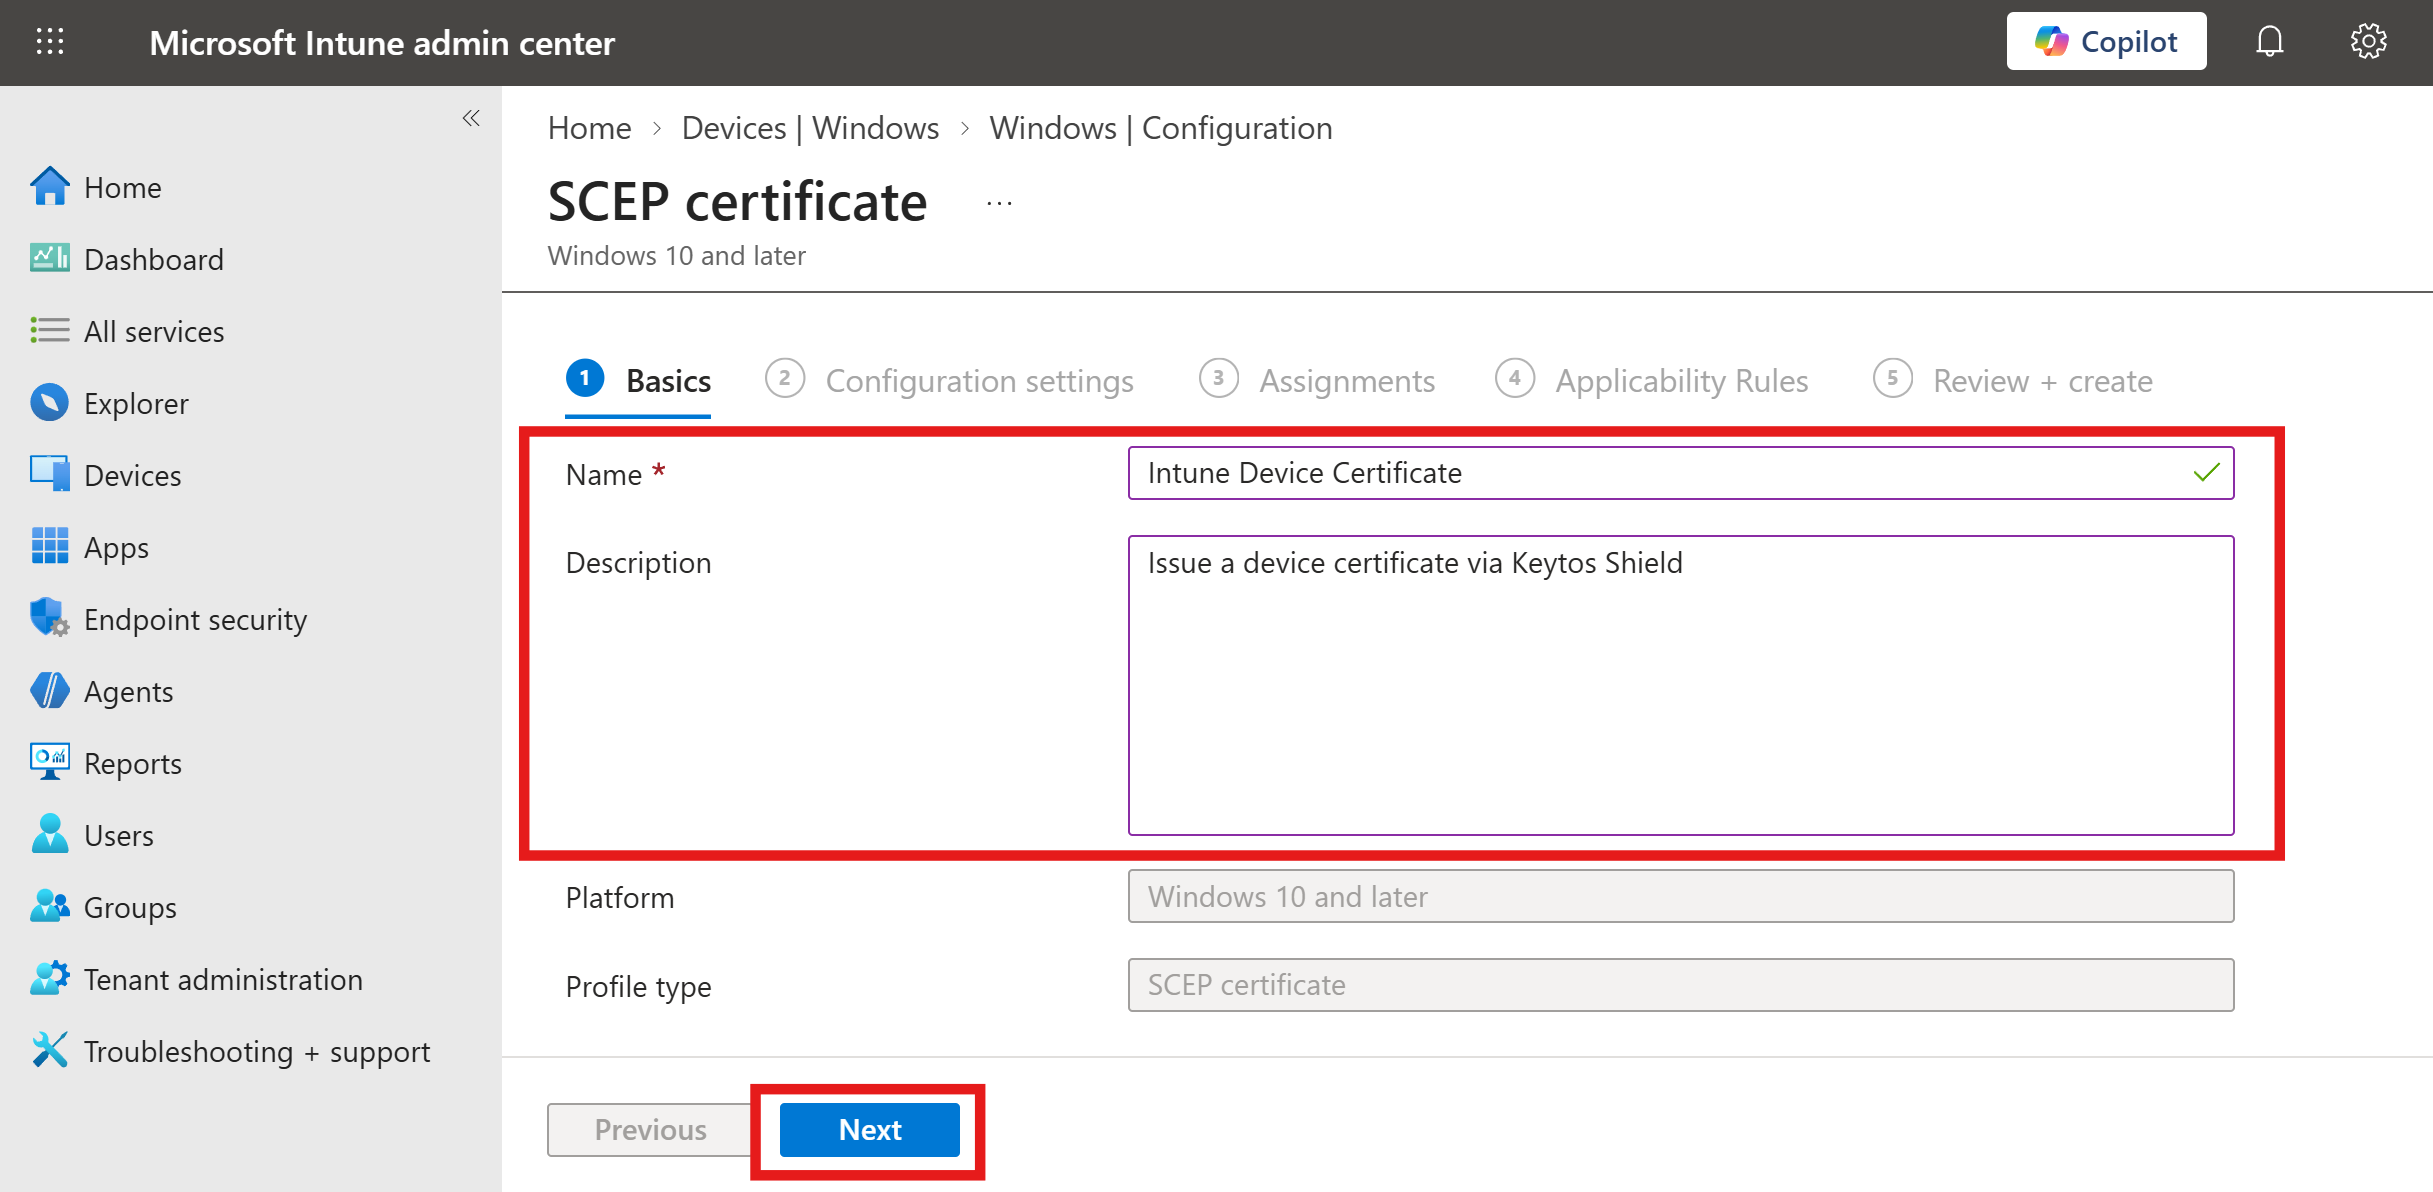
Under the Basics tab, enter the Name and Description for this Intune SCEP profile and click Next to proceed.
-
Under the Configuration settings tab, configure your basic certificate settings:
-
Deployment Channel: select Device Channel.
-
Certificate type: select Device.
-
Subject name format: Leave this as the default of
CN={{AAD_Device_ID}}. -
Subject alternative name > Attribute: select DNS.
-
Subject alternative name > Value: enter
{{DeviceId}}.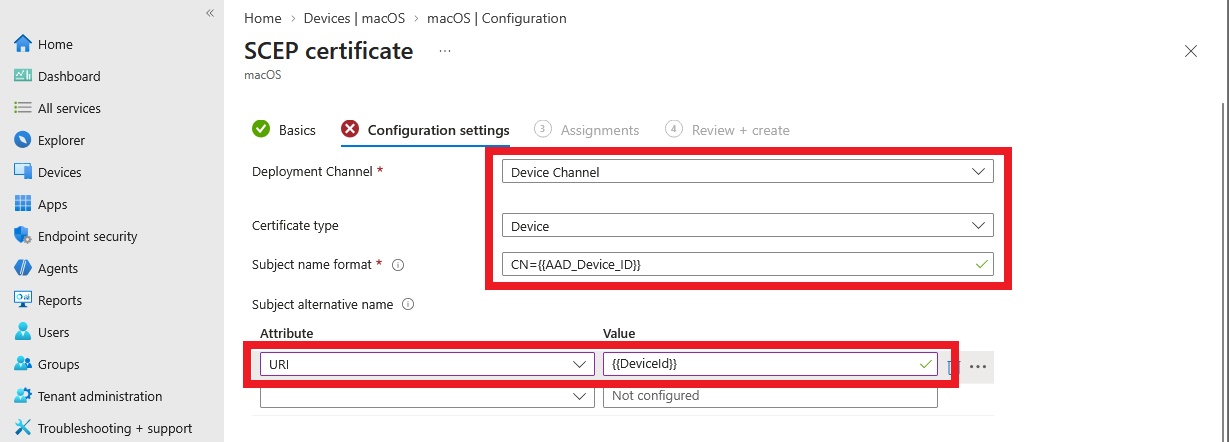
Changing Subject Alternative Name ValuesThe values you set here must match the values set in your KEYTOS-RADIUS network profile access policy. If you want to change your SAN values, make sure to update the corresponding settings in your network profile as well.
-
-
If you have Microsoft Entra hybrid-joined devices and plan to use your SCEP certificates for Key Distribution Center (KDC) authentication, add another Subject alternative name URI attribute with the value
{{OnpremisesSecurityIdentifier}}. This fulfills the strong mapping requirements for KB5014754.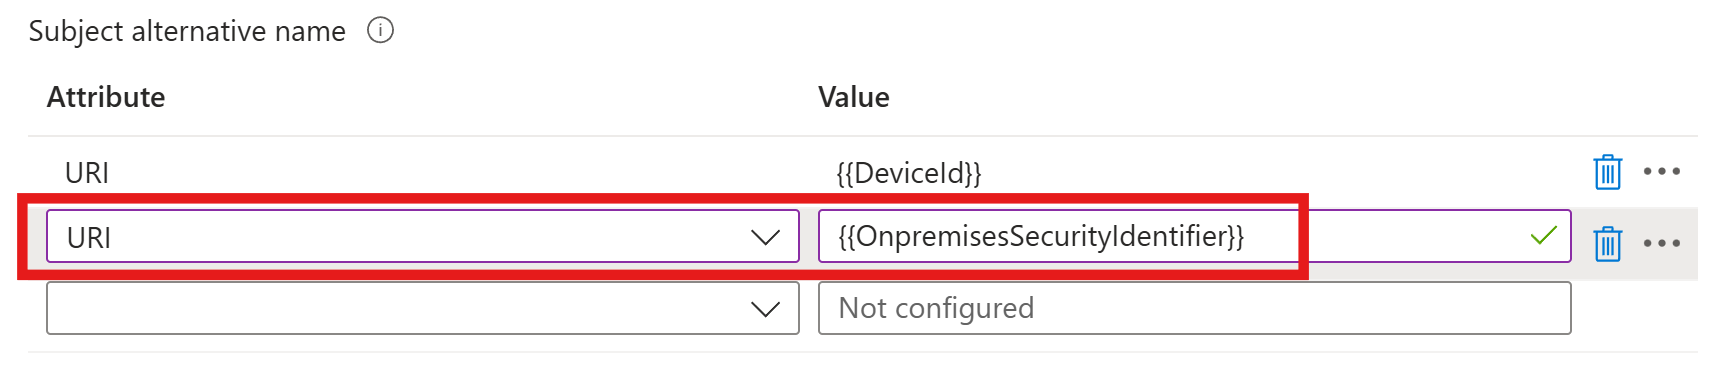
-
For Certificate Validity Period, keep the default value of 1 year.
Custom Validity PeriodsKEYTOS-PKI will always issue certificates for the default 1-year validity period. If you set a different value in Intune it will be ignored due to this value not being supported in Apple devices.
As a workaround, if you want to change the validity period for a specific Intune profile, you can add an additional DNS Subject Alternative Name with the value
keytosEZCAValidity=90where the number is the number of days for that specific certificate, up to 365 days.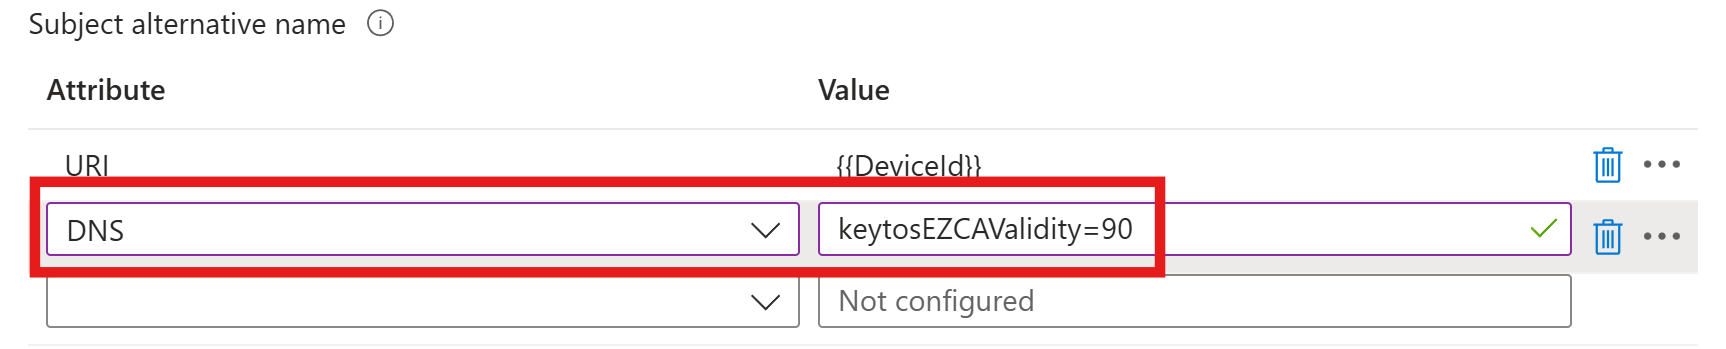
-
For Key Usage, select both Digital Signature and Key Encipherment.

-
For Key Size, select 2048.

-
For Hash Algorithm, select SHA-2.

-
In the Root Certificate field, click + Root Certificate and select the issuing CA you created in the Create Trusted Certificate Profile section.
 Make sure to select your Issuing CA
While it says Root Certificate, if you created a Subordinate/Issuing CA as part of a multi-tier CA hierarchy, you must select the Issuing CA profile not the Root CA.
-
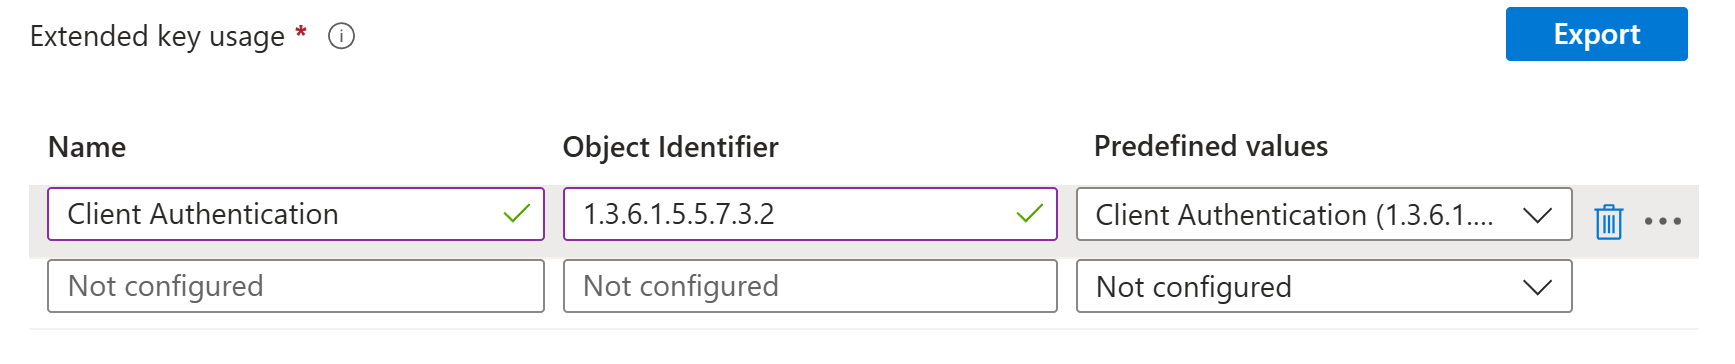
For Extended Key Usage select Client Authentication (1.3.6.1.5.5.7.3.2).
-
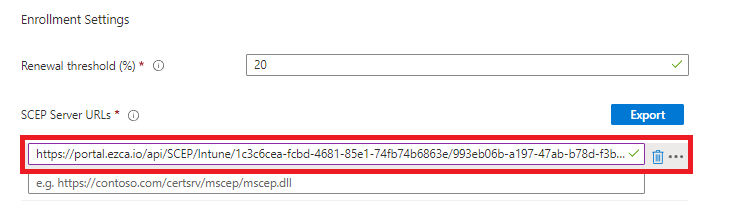
Leave Renewal threshold at the default value of 20% so your certificates automatically renew when they reach 20% of their validity period remaining.

-
Paste your Intune SCEP Server URL that you copied from the KEYTOS-PKI portal into the SCEP Server URLs field.
-
Click Next.
-
Under the Assignments and Applicability Rules sections, configure the target devices or users for this profile and click Next.
-
Review your profile settings and click Create.
How to Create an Intune SCEP Profile For User Certificates
The following steps will guide you on how to create an Intune SCEP profile to issue user certificates to your macOS devices.
-
In the Intune Portal, click on + Create profile again to start creating a new configuration profile. Enter the following fields:
-
Profile type: select Templates.
-
Template name: select SCEP Certificate.
-
-
Click Create.
-
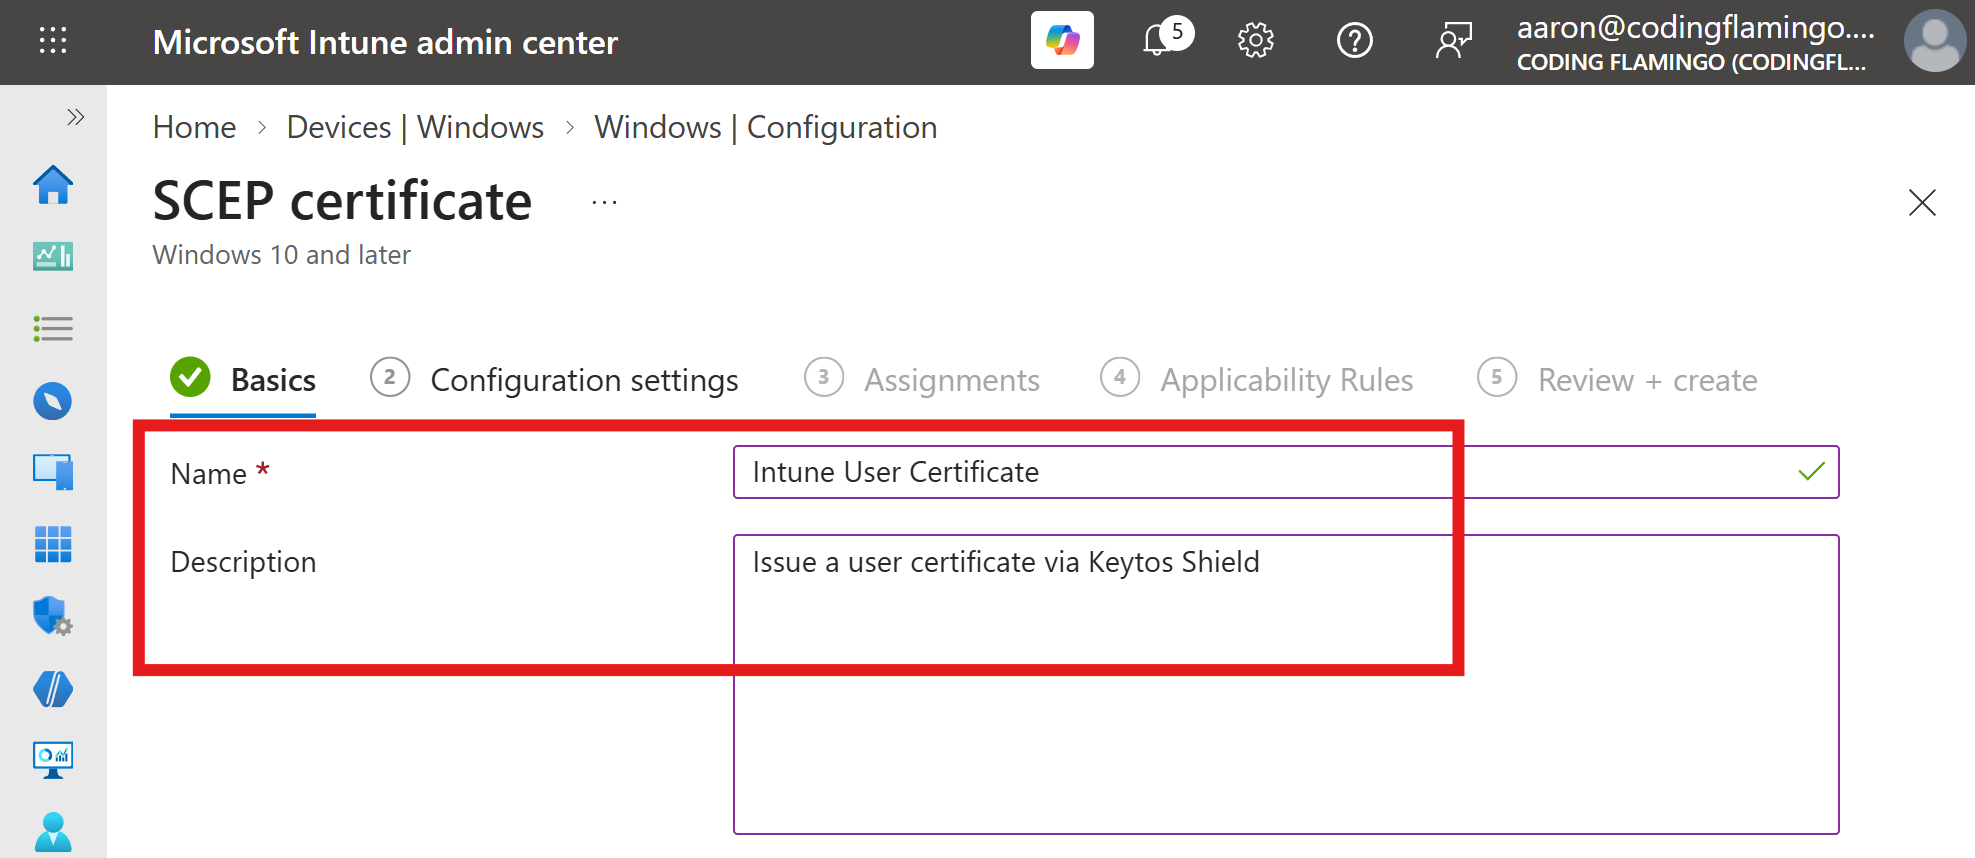
Under the Basics tab, enter the Name and Description for this Intune SCEP profile and click Next to proceed.
-
Under the Configuration settings tab, configure your basic certificate settings:
-
Certificate type: select User.
-
Subject name format: Leave this as the default of
CN={{UserName}},E={{EmailAddress}}. -
Subject alternative name > Attribute: select UPN.
-
Subject alternative name > Value: enter
{{UserPrincipalName}}.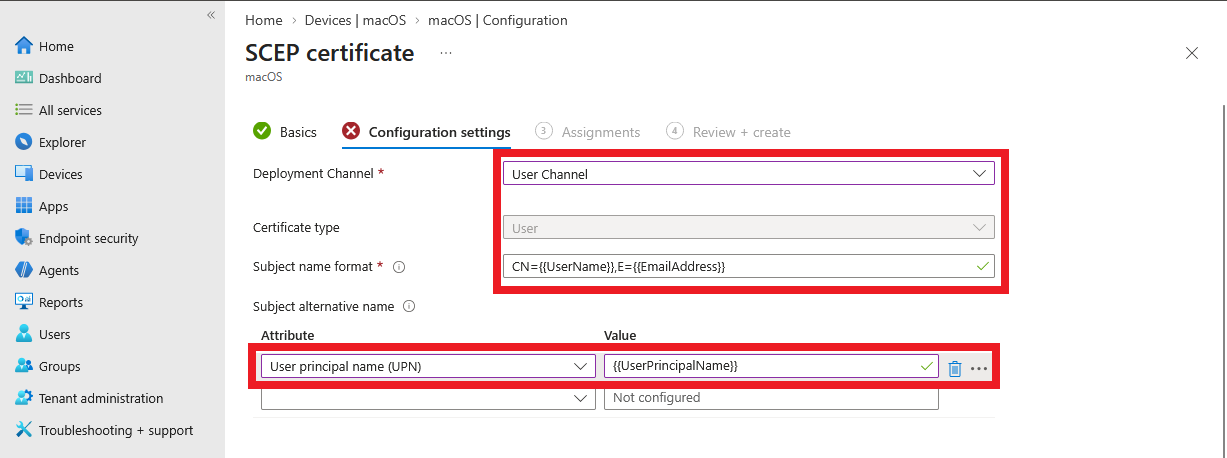
Changing Subject Alternative Name ValuesThe values you set here must match the values set in your KEYTOS-RADIUS network profile access policy. If you want to change your SAN values, make sure to update the corresponding settings in your network profile as well.
-
-
If you have Microsoft Entra hybrid-joined devices and plan to use your SCEP certificates for Key Distribution Center (KDC) authentication, add another Subject alternative name URI attribute with the value
{{OnpremisesSecurityIdentifier}}. This fulfills the strong mapping requirements for KB5014754.
-
For Certificate Validity Period, keep the default value of 1 year.
Custom Validity PeriodsKEYTOS-PKI will always issue certificates for the default 1-year validity period. If you set a different value in Intune it will be ignored due to this value not being supported in Apple devices.
As a workaround, if you want to change the validity period for a specific Intune profile, you can add an additional DNS Subject Alternative Name with the value
keytosEZCAValidity=90where the number is the number of days for that specific certificate, up to 365 days.
-
For Key Storage Provider (KSP), set this to Enroll to Trusted Platform Module (TPM) KSP, otherwise fail to ensure your private keys are securely stored in the TPM. If you need to support PCs without a TPM and are ok with the risk of software based keys, you can select another option, such as fallback to software KSP.

-
For Key Usage, select both Digital Signature and Key Encipherment.
-
For Key Size, select 2048.
-
For Hash Algorithm, select SHA-2.
-
In the Root Certificate field, click + Root Certificate and select the issuing CA you created in the Create Trusted Certificate Profile section.
Make sure to select your Issuing CAWhile it says Root Certificate, if you created a Subordinate/Issuing CA as part of a multi-tier CA hierarchy, you must select the Issuing CA profile not the Root CA.
-
For Extended Key Usage select Client Authentication (1.3.6.1.5.5.7.3.2).
-
Leave Renewal threshold at the default value of 20% so your certificates automatically renew when they reach 20% of their validity period remaining.
-
Paste your Intune SCEP Server URL that you copied from the KEYTOS-PKI portal into the SCEP Server URLs field.
-
Click Next.
-
Under the Assignments and Applicability Rules sections, configure the target devices or users for this profile and click Next.
-
Review your profile settings and click Create.