How-To: Use EZSSH Interactive Mode
Prerequisites
Tenant Prerequisites
The following prerequisites have to be done only once per tenant.
Starting Interactive Mode
The easiest way to explore your resources and connect to them is using EZSSH Interactive mode.
- First run the following command in your favorite terminal:
ezssh i
- This command will start ezssh in interactive mode.
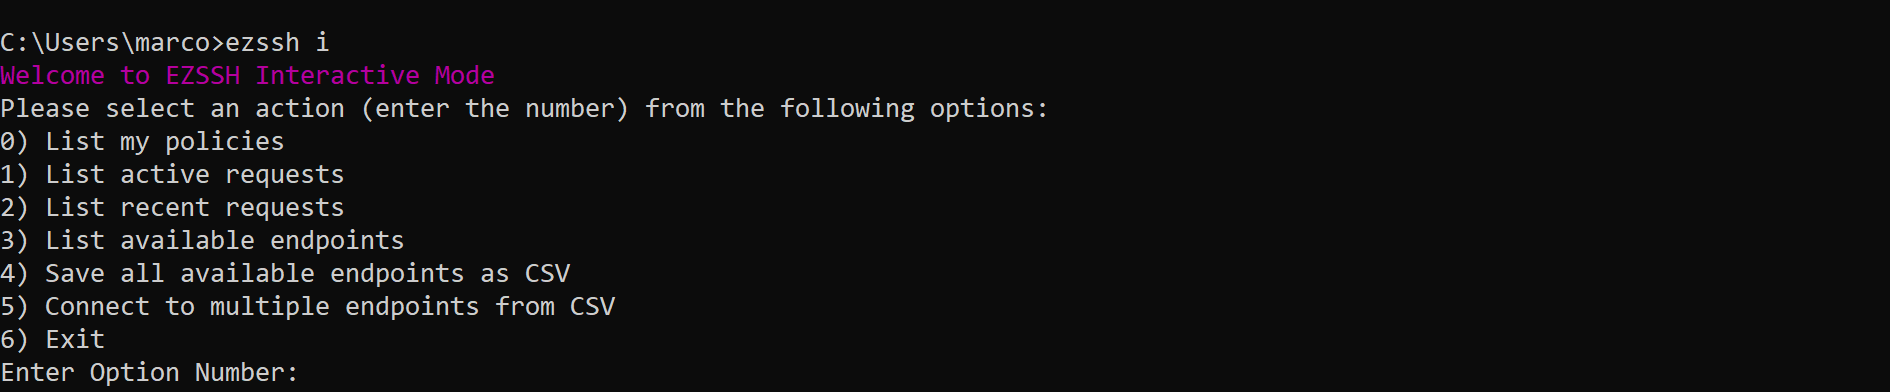
- This will show you 5 different options, let’s explore each one.
List My Policies
- Press 0 to List the policies you own or have access to.
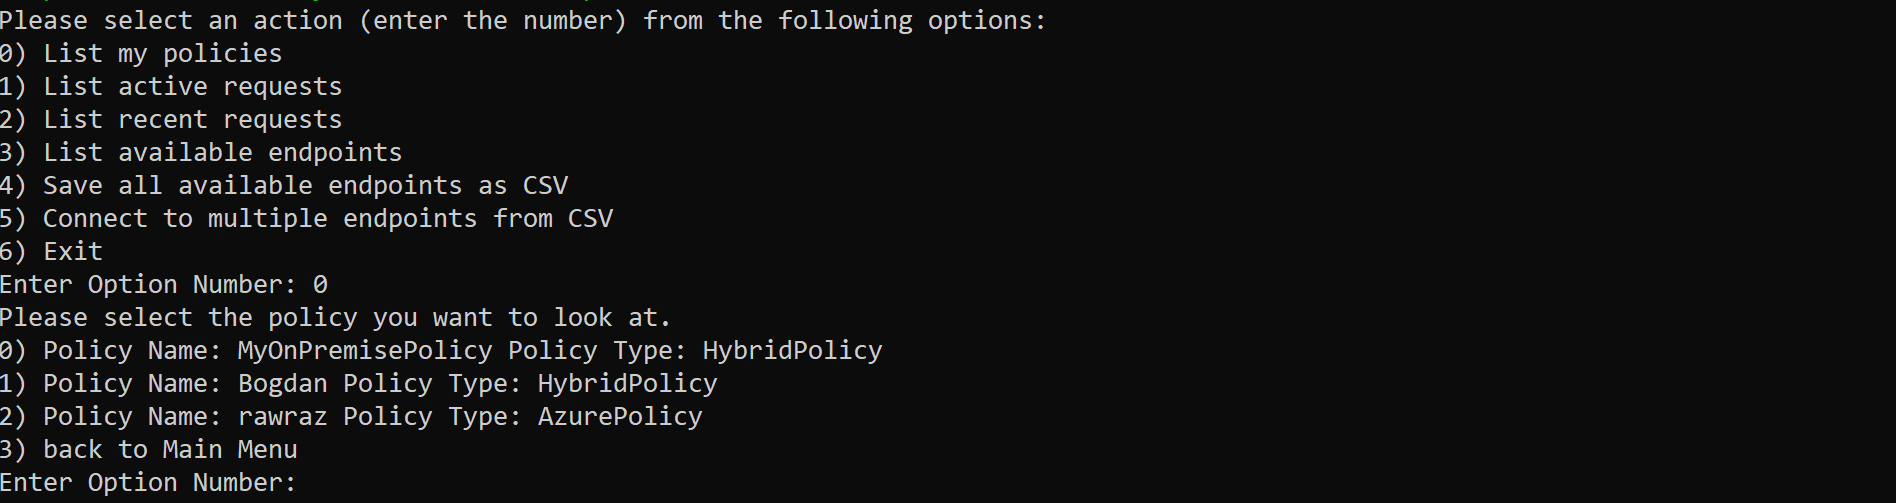
- This will list the policy name, and whether it is a Hybrid or Azure Policy. You can learn the difference between the two
- Select the policy you want to explore
- This will give you two options List policy’s endpoints and Download policy’s endpoints to csv (for batchssh)
List Endpoints
- List endpoints will give you a list of all the endpoints available in that policy (One endpoint might have multiple rows if it has different Linux user principals in the policy)
- Enter the number of the endpoint you want to connect or the number for going back to the policy menu.
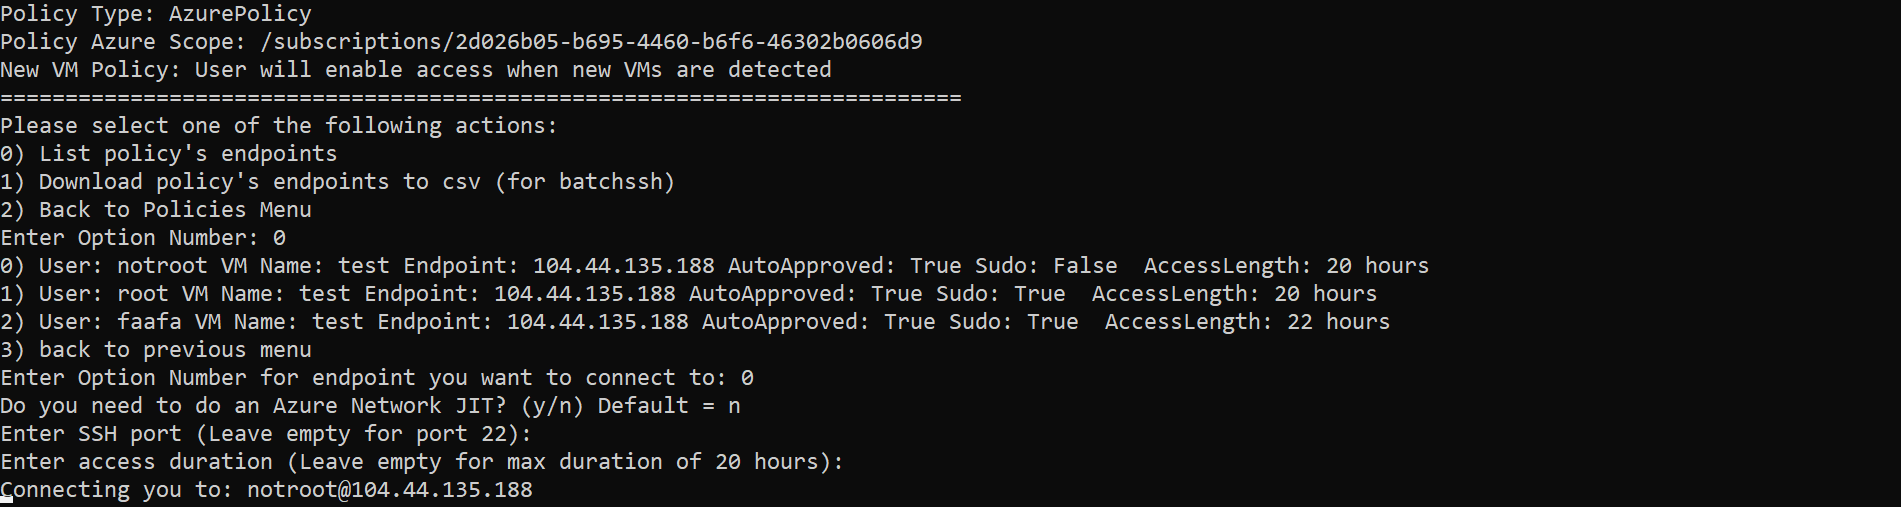
- If you use Azure Networking JIT EZSSH can make the request to open it for you. Enter y for opening a JIT request. Press enter to skip.
- EZSSH defaults to try to connect to port 22, if your endpoint uses another port, enter the port number. Press enter to skip.
- EZSSH works on the Just In Time methodology of just giving users access for the time they need, enter the number of hours you need access to the machine. It defaults to the maximum allowed time for that machine. Press enter for the default value.
- SSH session will start in another window.
Download policy’s endpoints to csv (for batchssh)
Download policy endpoints gives you the option of saving the policy endpoints into a CSV that can then be used to connect to multiple endpoints at once
- Select the “Download policy endpoints”

- After downloading the CSV follow the batchssh instructions to connect to multiple endpoints at once.
List Active Requests
List Active Request is the easiest way to connect to endpoints you have already requested access to.
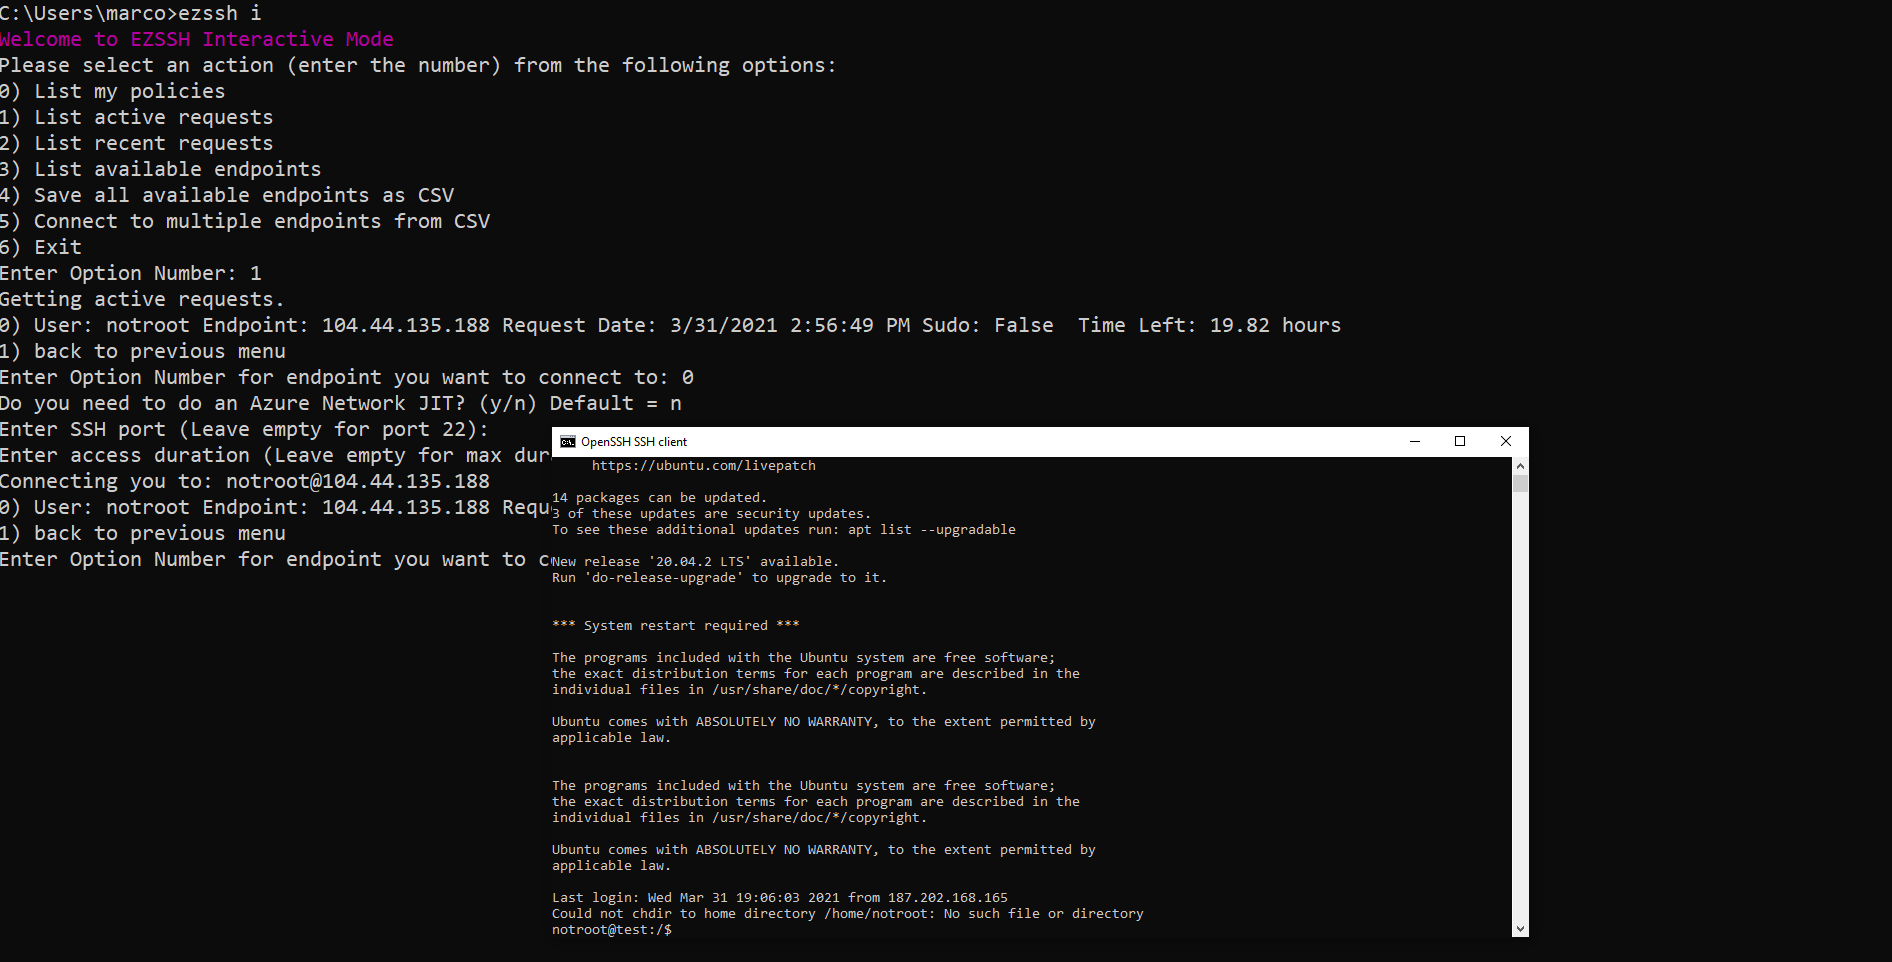
- List Active requests will list any endpoint you currently have access to.

- Select any of the active requests to connect to that endpoint.
- If you use Azure Networking JIT EZSSH can make the request to open it for you. Enter y for opening a JIT request. Press enter to skip.
- EZSSH defaults to try to connect to port 22, if your endpoint uses another port, enter the port number. Press enter to skip.
- EZSSH works on the Just In Time methodology of just giving users access for the time they need, enter the number of hours you need access to the machine. It defaults to the maximum allowed time for that machine. Press enter for the default value.
- SSH session will start in another window.
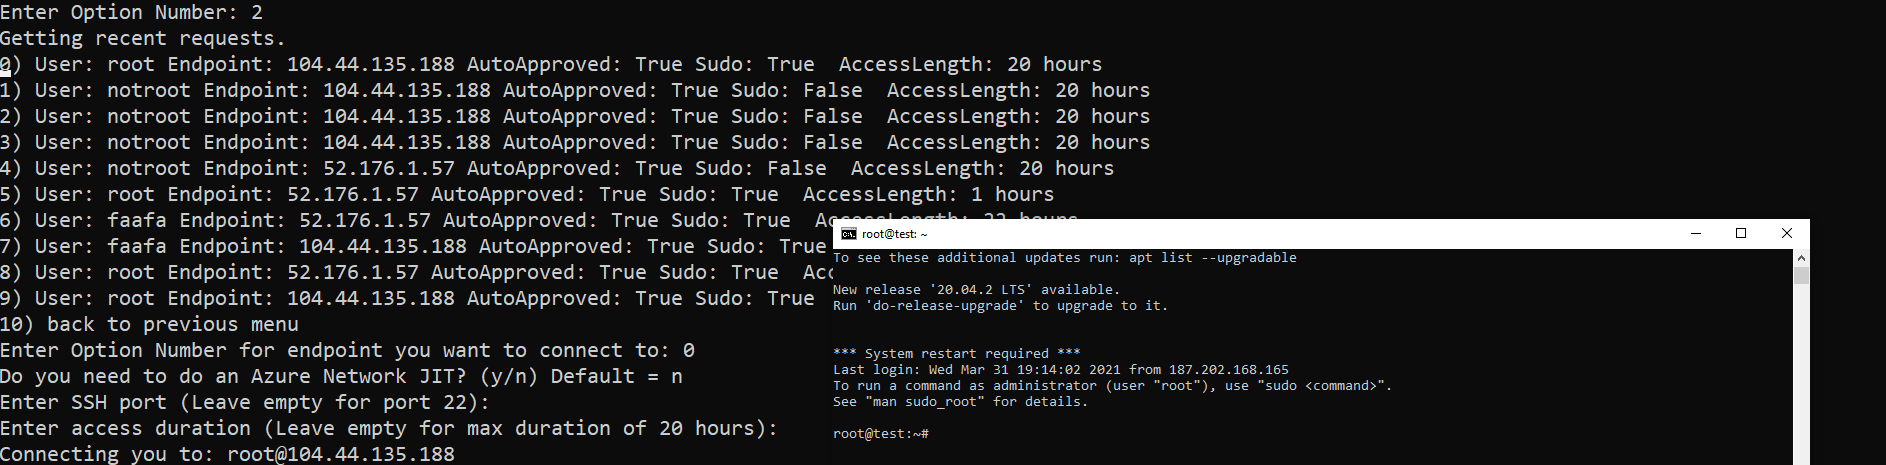
List Recent Requests
In Keytos we understand that most users always connect to the same endpoints. List Recent Requests, will list the 10 most recent requested endpoints.
- Select the endpoint you want to connect to.
- If you use Azure Networking JIT EZSSH can make the request to open it for you. Enter y for opening a JIT request. Press enter to skip.
- EZSSH defaults to try to connect to port 22, if your endpoint uses another port, enter the port number. Press enter to skip.
- EZSSH works on the Just In Time methodology of just giving users access for the time they need, enter the number of hours you need access to the machine. It defaults to the maximum allowed time for that machine. Press enter for the default value.
- SSH session will start in another window.
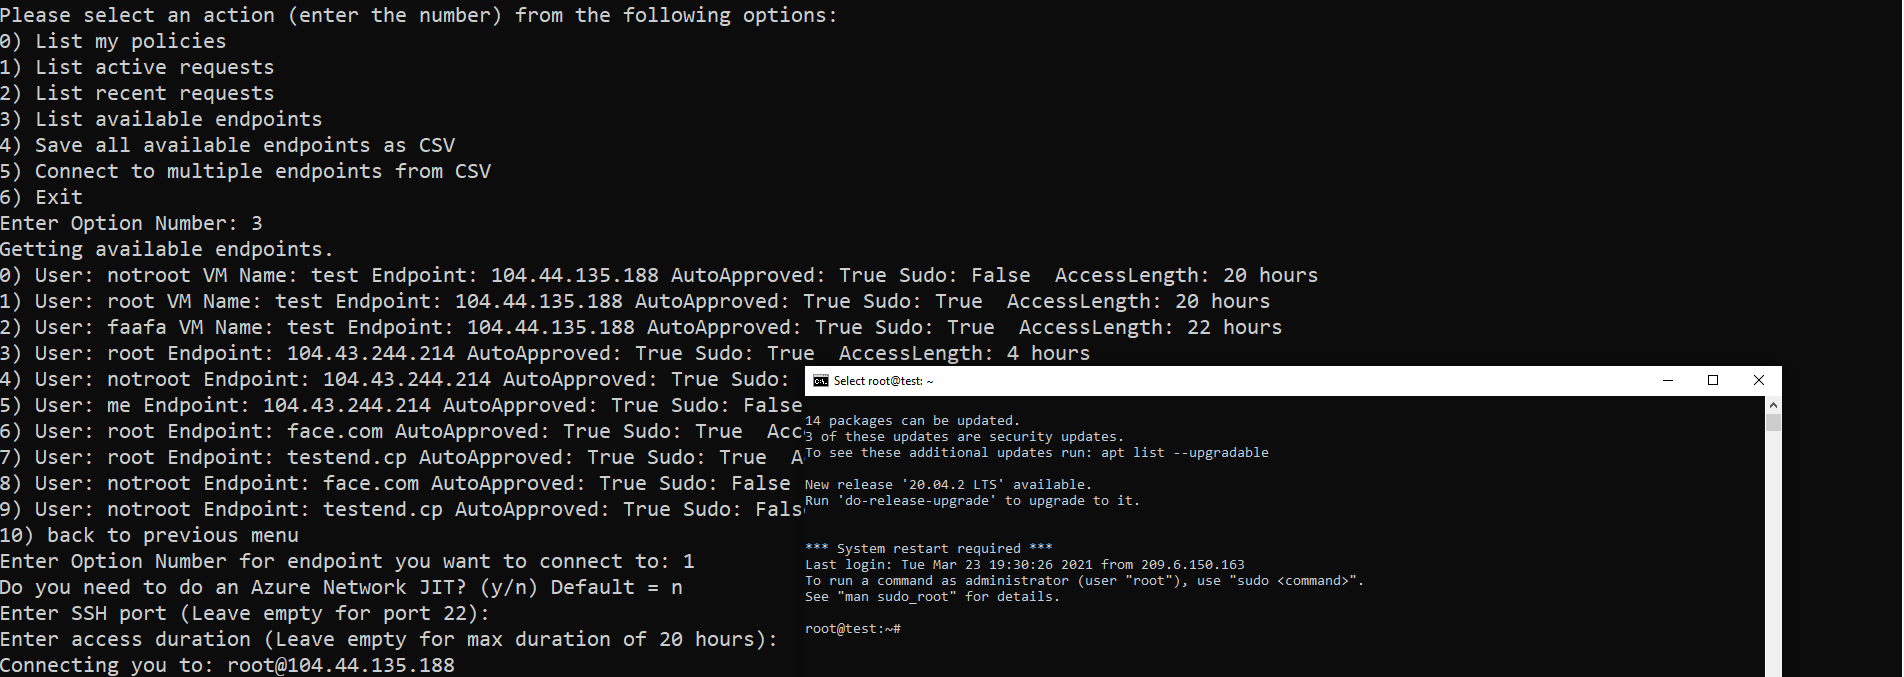
List Available Endpoints
List Available endpoints will list all the endpoints that you have access to and allow you to connect to them.
- Select the endpoint you want to connect to.
- If you use Azure Networking JIT EZSSH can make the request to open it for you. Enter y for opening a JIT request. Press enter to skip.
- EZSSH defaults to try to connect to port 22, if your endpoint uses another port, enter the port number. Press enter to skip.
- EZSSH works on the Just In Time methodology of just giving users access for the time they need, enter the number of hours you need access to the machine. It defaults to the maximum allowed time for that machine. Press enter for the default value.
- SSH session will start in another window.
Save all Available Endpoints as CSV
Save all Available Endpoints as CSV gives you the option of saving all your available endpoints into a CSV that can then be used to connect to multiple endpoints at once
- To Save all your endpoint to a CSV select option 4
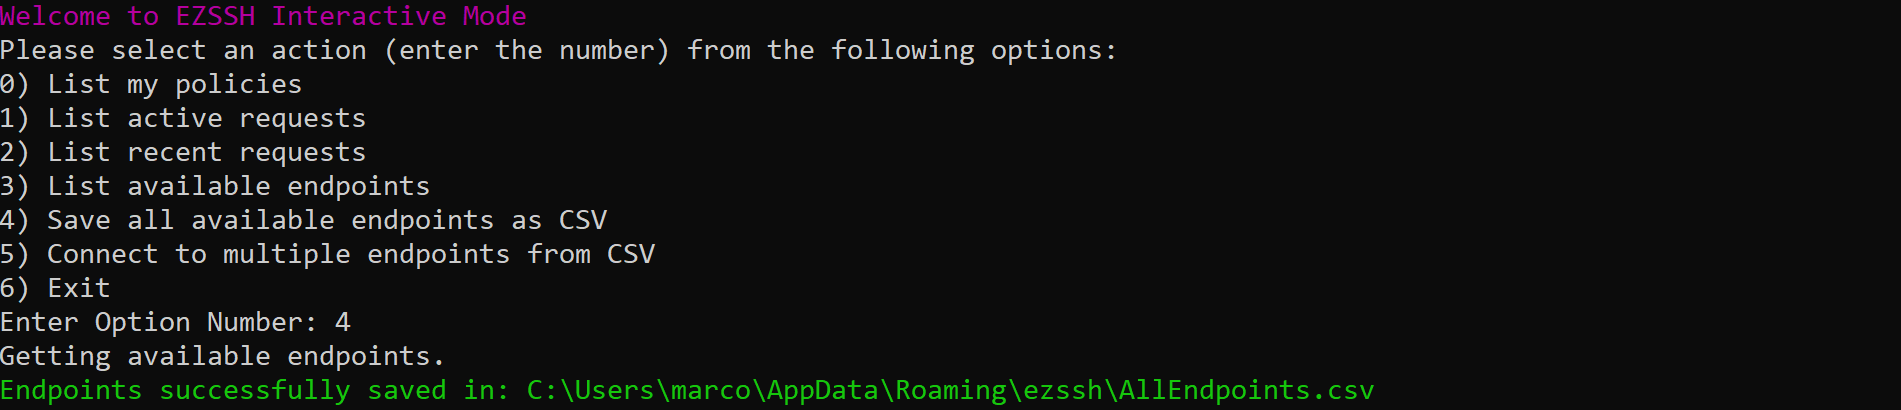
- After downloading the CSV follow the batchssh instructions to connect to multiple endpoints at once or use the Connect to Multiple Endpoints from CSV option from the interactive menu.
Connect to Multiple Endpoints from CSV
If you Downloaded your policy’s endpoints as CSV or saved all your available endpoints as CSV you can use the batchssh command to connect to multiple endpoints or press option 5 in interactive mode.
- Once you selected the “Connect to multiple endpoints from CSV” option, enter the file path of where the file is saved.
- EZSSH will start a session to each of the endpoints in the CSV in another window.
