How to Create a Subordinate ADCS CA in EZCA
Prerequisites
Overview - How To Create an External Issuing/Subordinate CA
As you start to modernize your PKI, you might want to move your Root CA to EZCA. However, your migration plan might still have some on-premises CAs for certain workloads. In this page we will go through how you can sign your external CA (for example ADCS (Active Directory Certificate Services) CA) with your EZCA Root.
Getting Started on Creating Your Microsoft CA
This Guide will guide you on how to create an ADCS CA in a lab environment and will be skipping many security steps. For production settings we recommend following PKI best practices and protecting your CA keys with an hsm and setup a CRL Server. Since setting up a Windows CA can cause major security misconfigurations, we recommend sticking with EZCA CAs, or taking a course such as the PKI Solutions courses to ensure a secure setup.
- In your Windows Server (Usually it is recommended Certificate Authorities run on isolated Windows server) open the Server Manager and click on Add Roles and Features.
- Click Next on the Before You Begin Page.
- Select Role-based or feature-based installation and click Next.
- Select the server you want to install the CA on and click Next.
- Select Active Directory Certificate Services and click Next.
- Click Next on the Add Roles and Features Wizard.
- Click Next on the Features page.
- Click Next on the AD CS page.
- Click Next on the Role Services page.
- Click Install on the Confirmation page.
- Click Close on the Results page.
- Open the Server Manager and click on the yellow triangle on the top right corner.
- Click on Configure Active Directory Certificate Services on the destination server.
- Click Next on the Credentials page.
- Select Certification Authority and click Next.
- Select Enterprise CA if you are using a domain joined server, or Standalone CA if you are using a workgroup server.
- Select Subordinate CA and click Next.
- Select Create a new private key and click Next.
- Select RSA#Microsoft Software Key Storage Provider (in this step we would prefer for an HSM provider but for this example we are using software keys).
- Select 4096 for the Key Character Length.
- Select SHA256 for the Hash Algorithm.
- Click Next.
- Enter a Common Name for your CA. This is the name that will appear in the certificate. For example “My On Premises Issuing CA”.
- Click Next.
- Select where you want to save the certificate request (this file will be used to sign the certificate in EZCA).
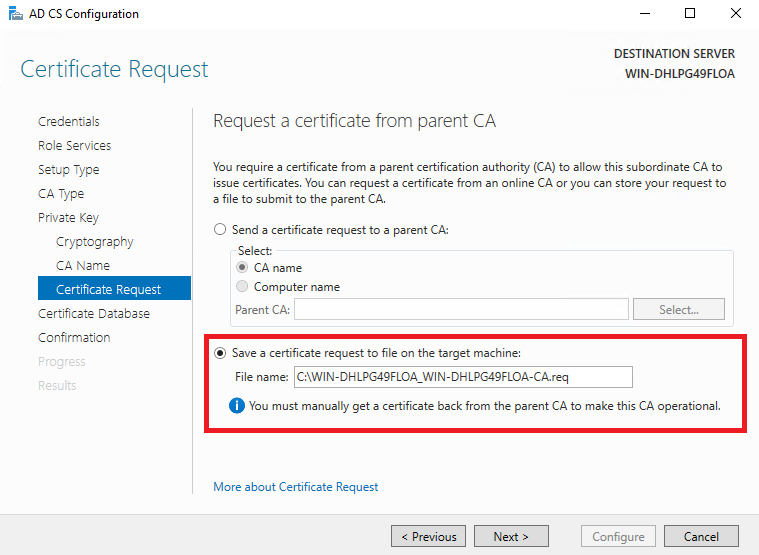
- Click Next.
- Select where you want to save the certificate database and the certificate database log.
- Click Next.
- Click Configure.
- It should finish with a warning saying that it is missing the certificate
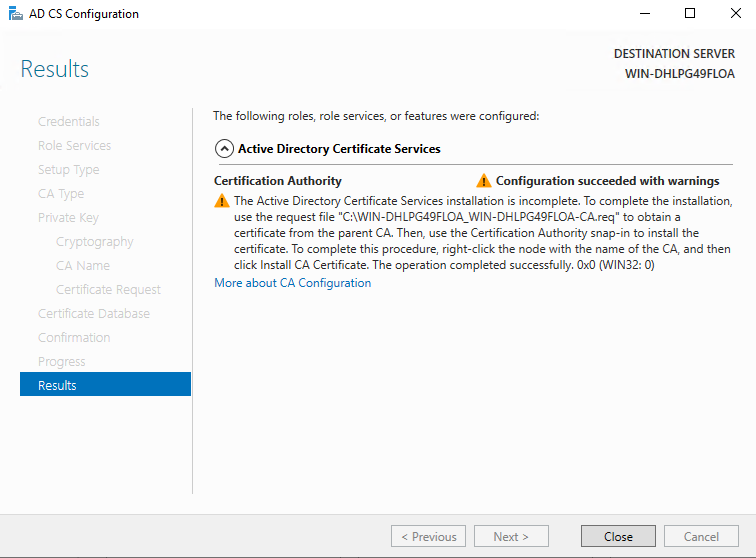
- Click Close.
- Open the File where you saved your certificate request and copy the contents of the file.
How to Sign the ADCS Certificate Request in EZCA
- Go to https://portal.ezca.io/ (or your EZCA instance)
- Login with an account that is registered as a PKI Admin in EZCA.
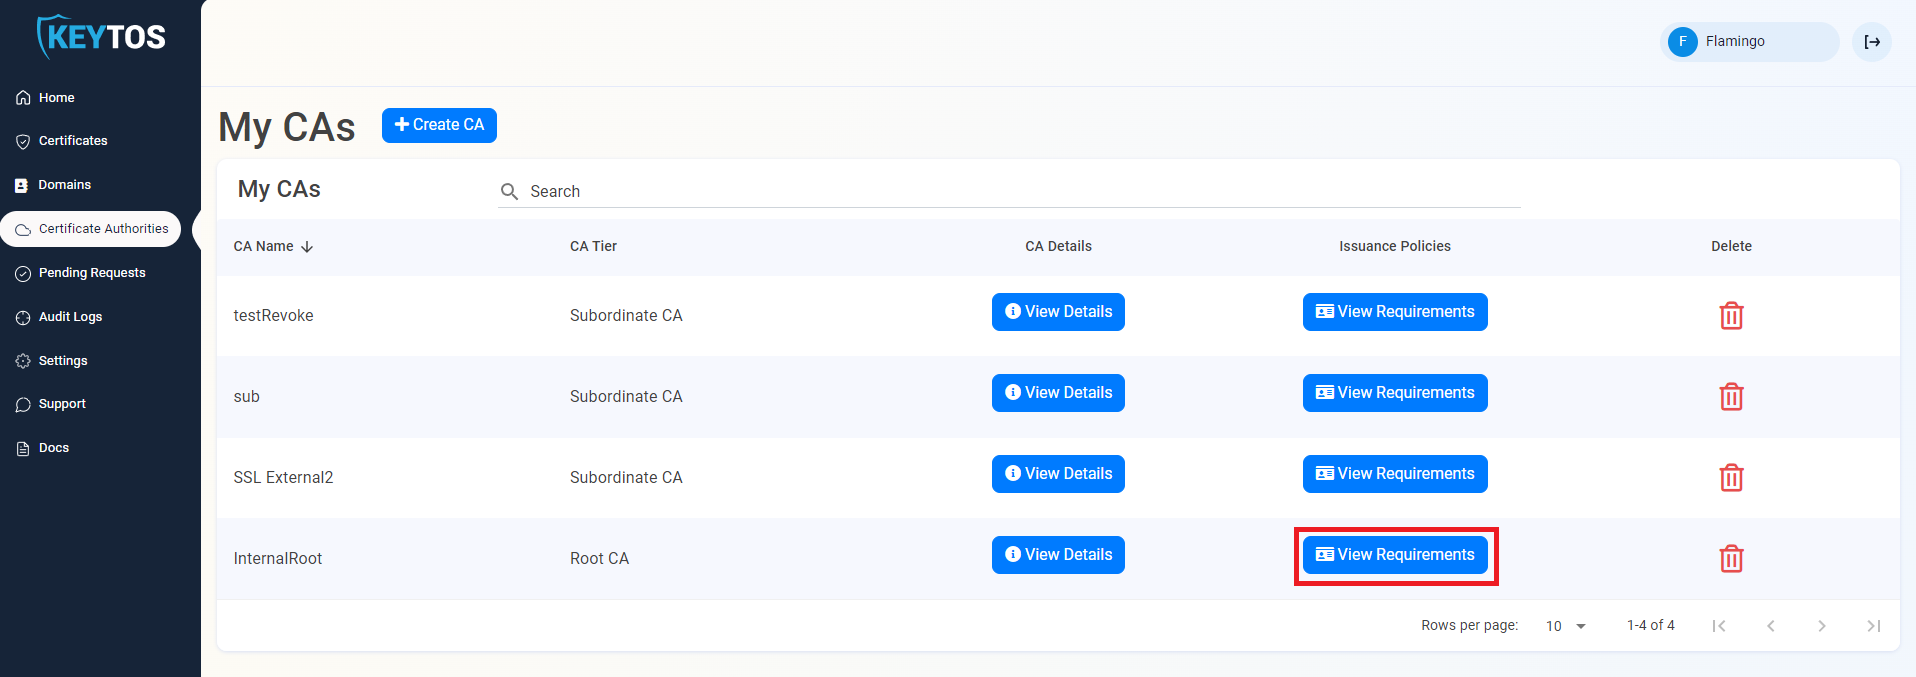
- Navigate to Certificate Authorities.
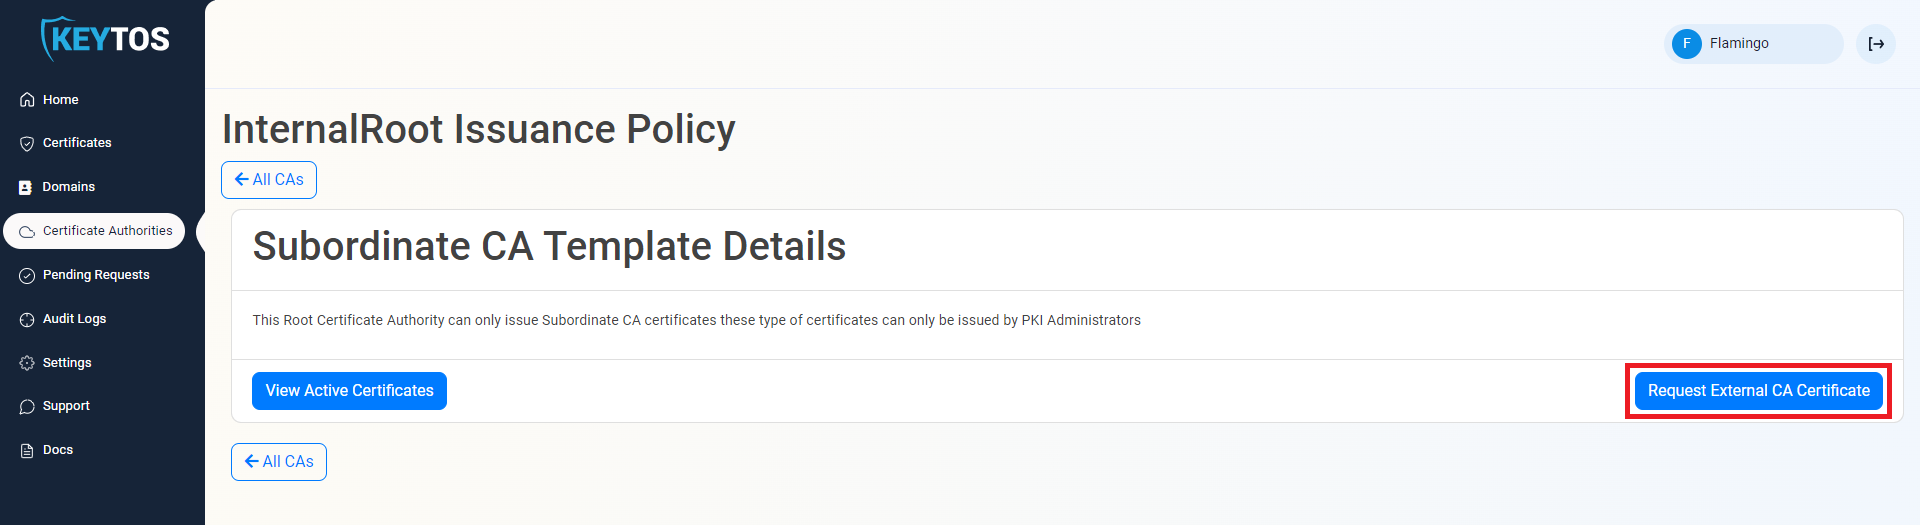
- Select the Root CA you want to sign the ADCS CA and click “Issuance Requirements”.
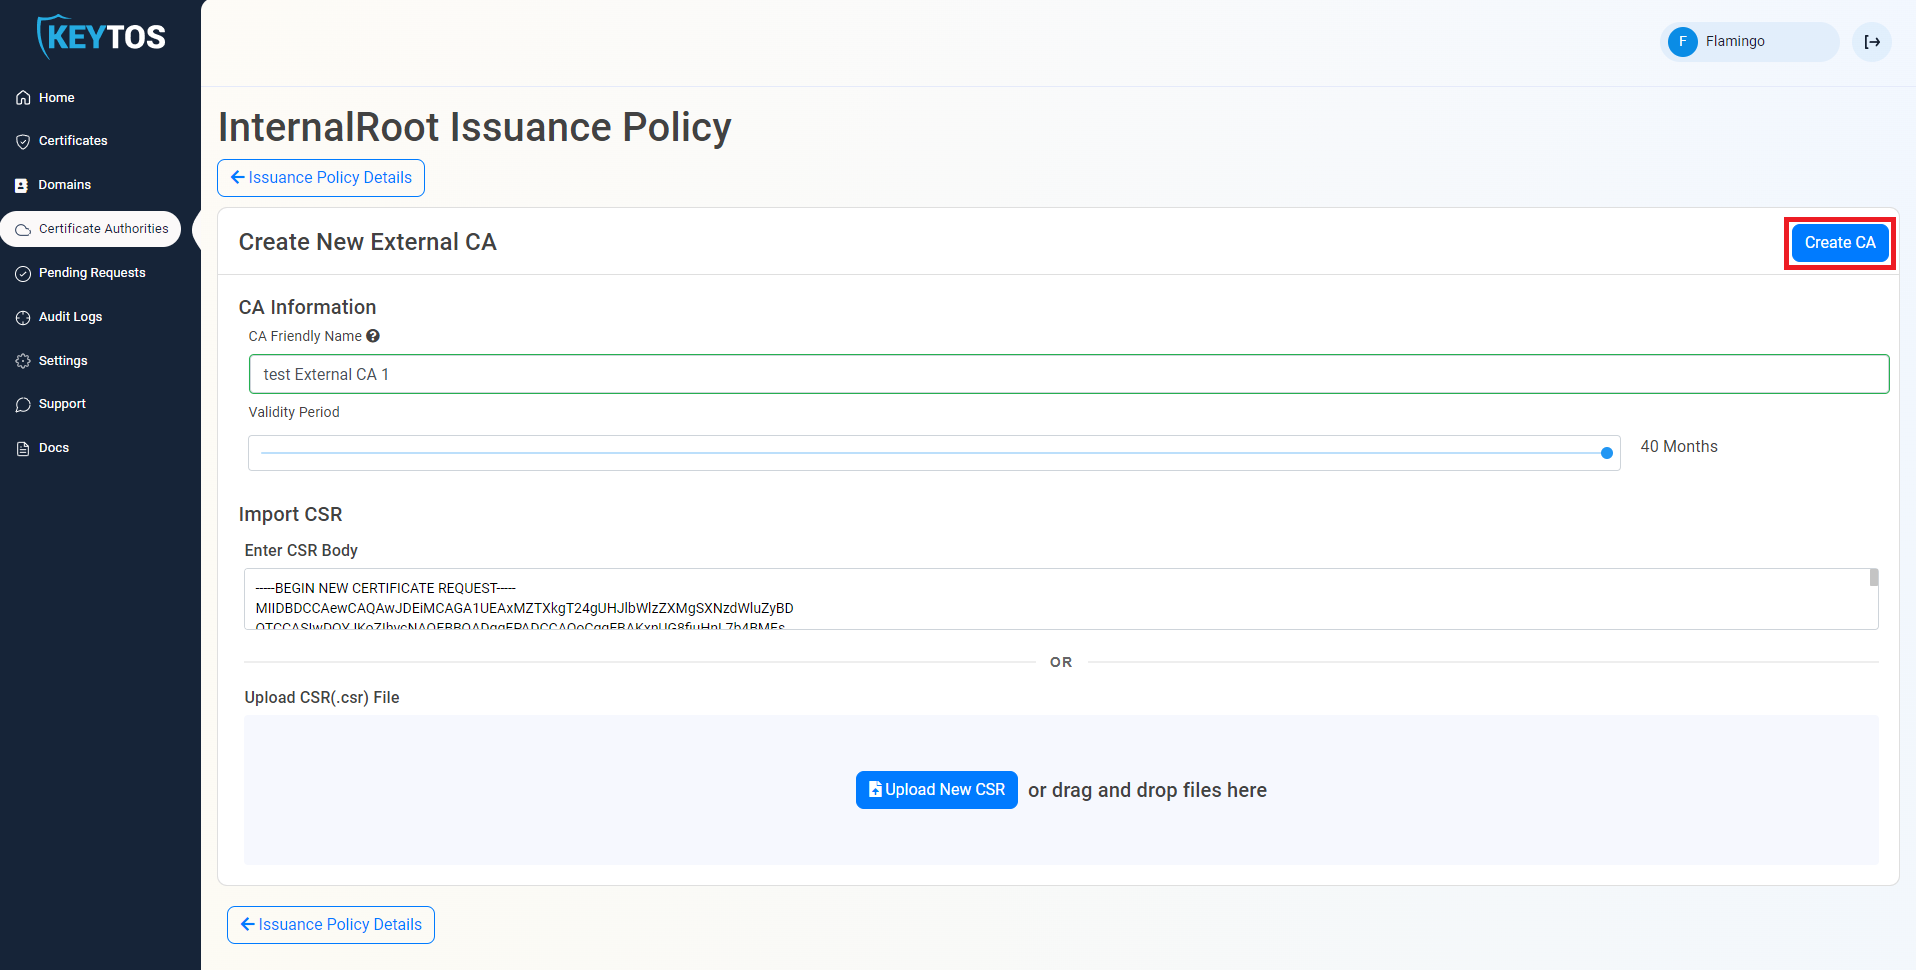
- On the bottom right, click the “Request External CA Certificate” button.
- Enter a friendly name to this CA so you can recognize it in EZCA.
- Set the validity period for this CA.
- Paste the contents of the certificate request you copied from the ADCS CA.
- On the top right, press the “Create CA” button
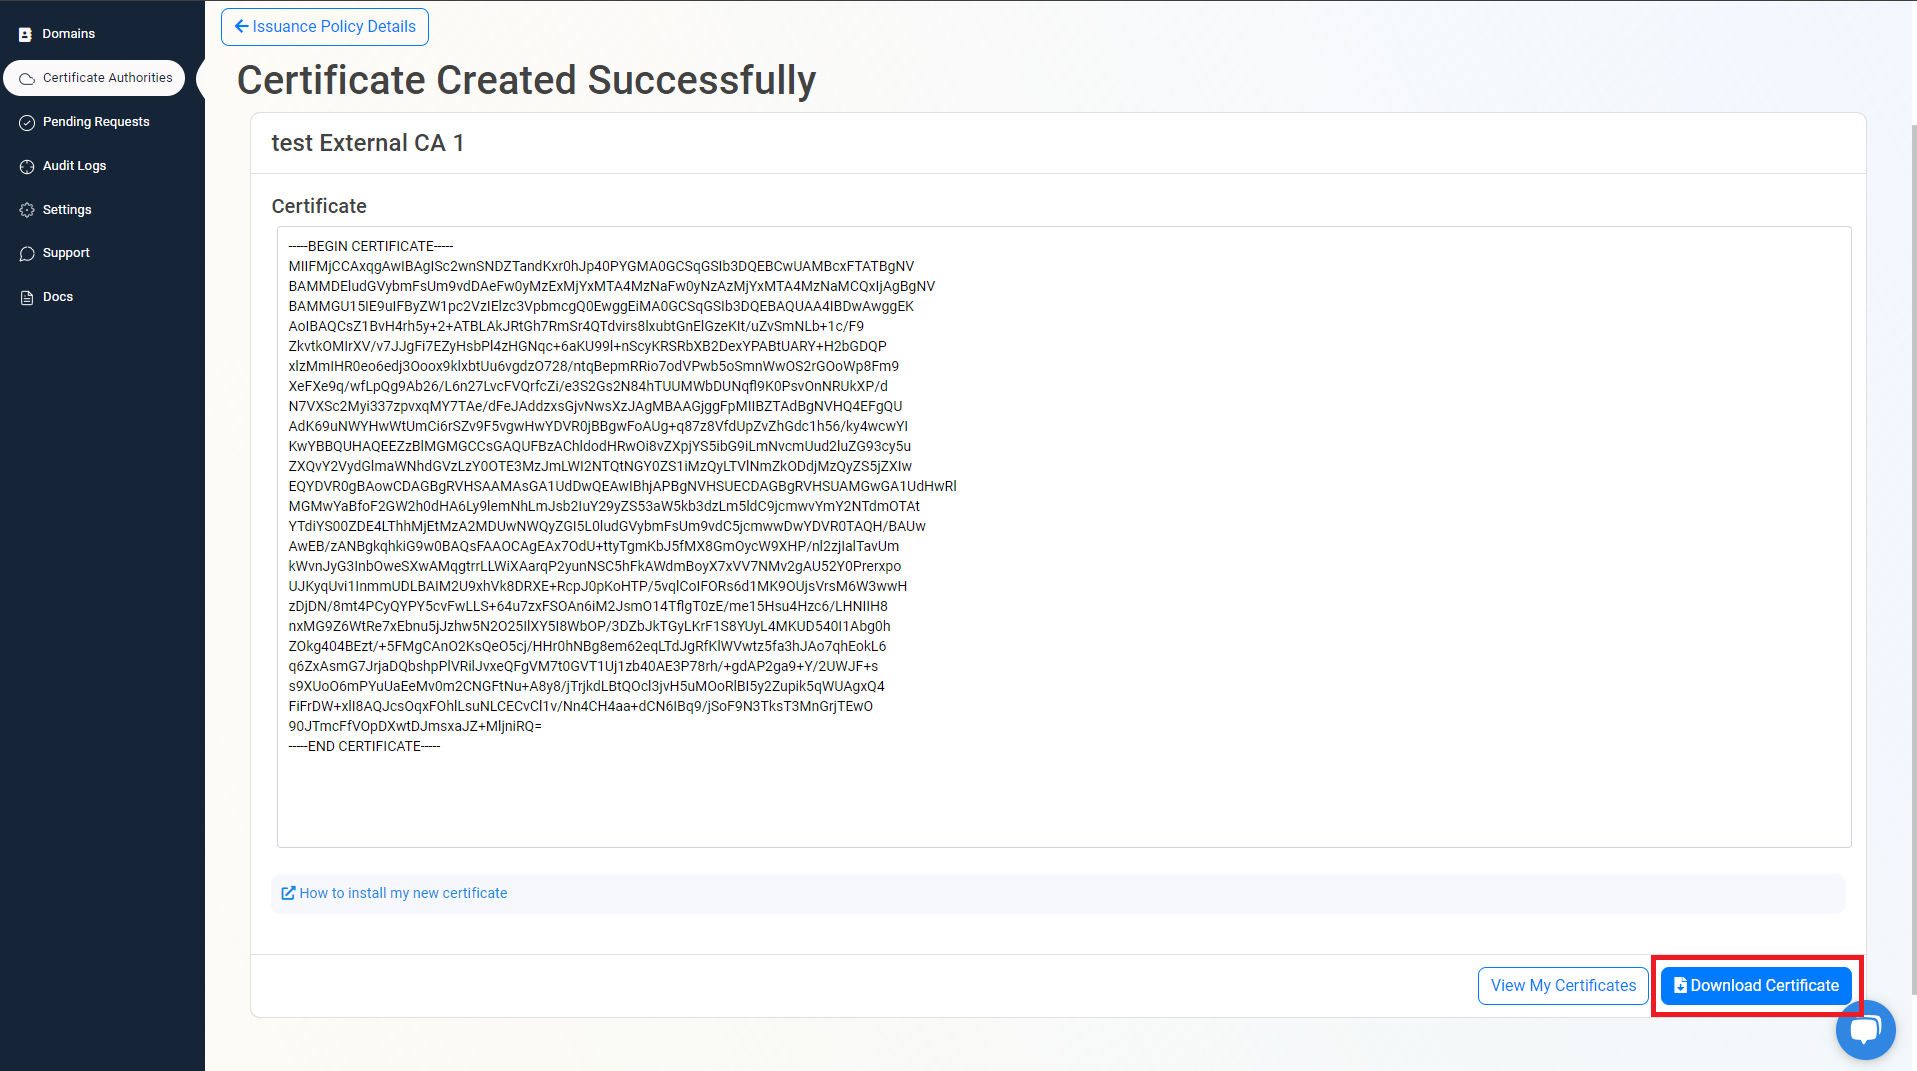
- Now you have created your CA certificate, click on the “Download Certificate” button located on the bottom right of the screen to download the certificate.
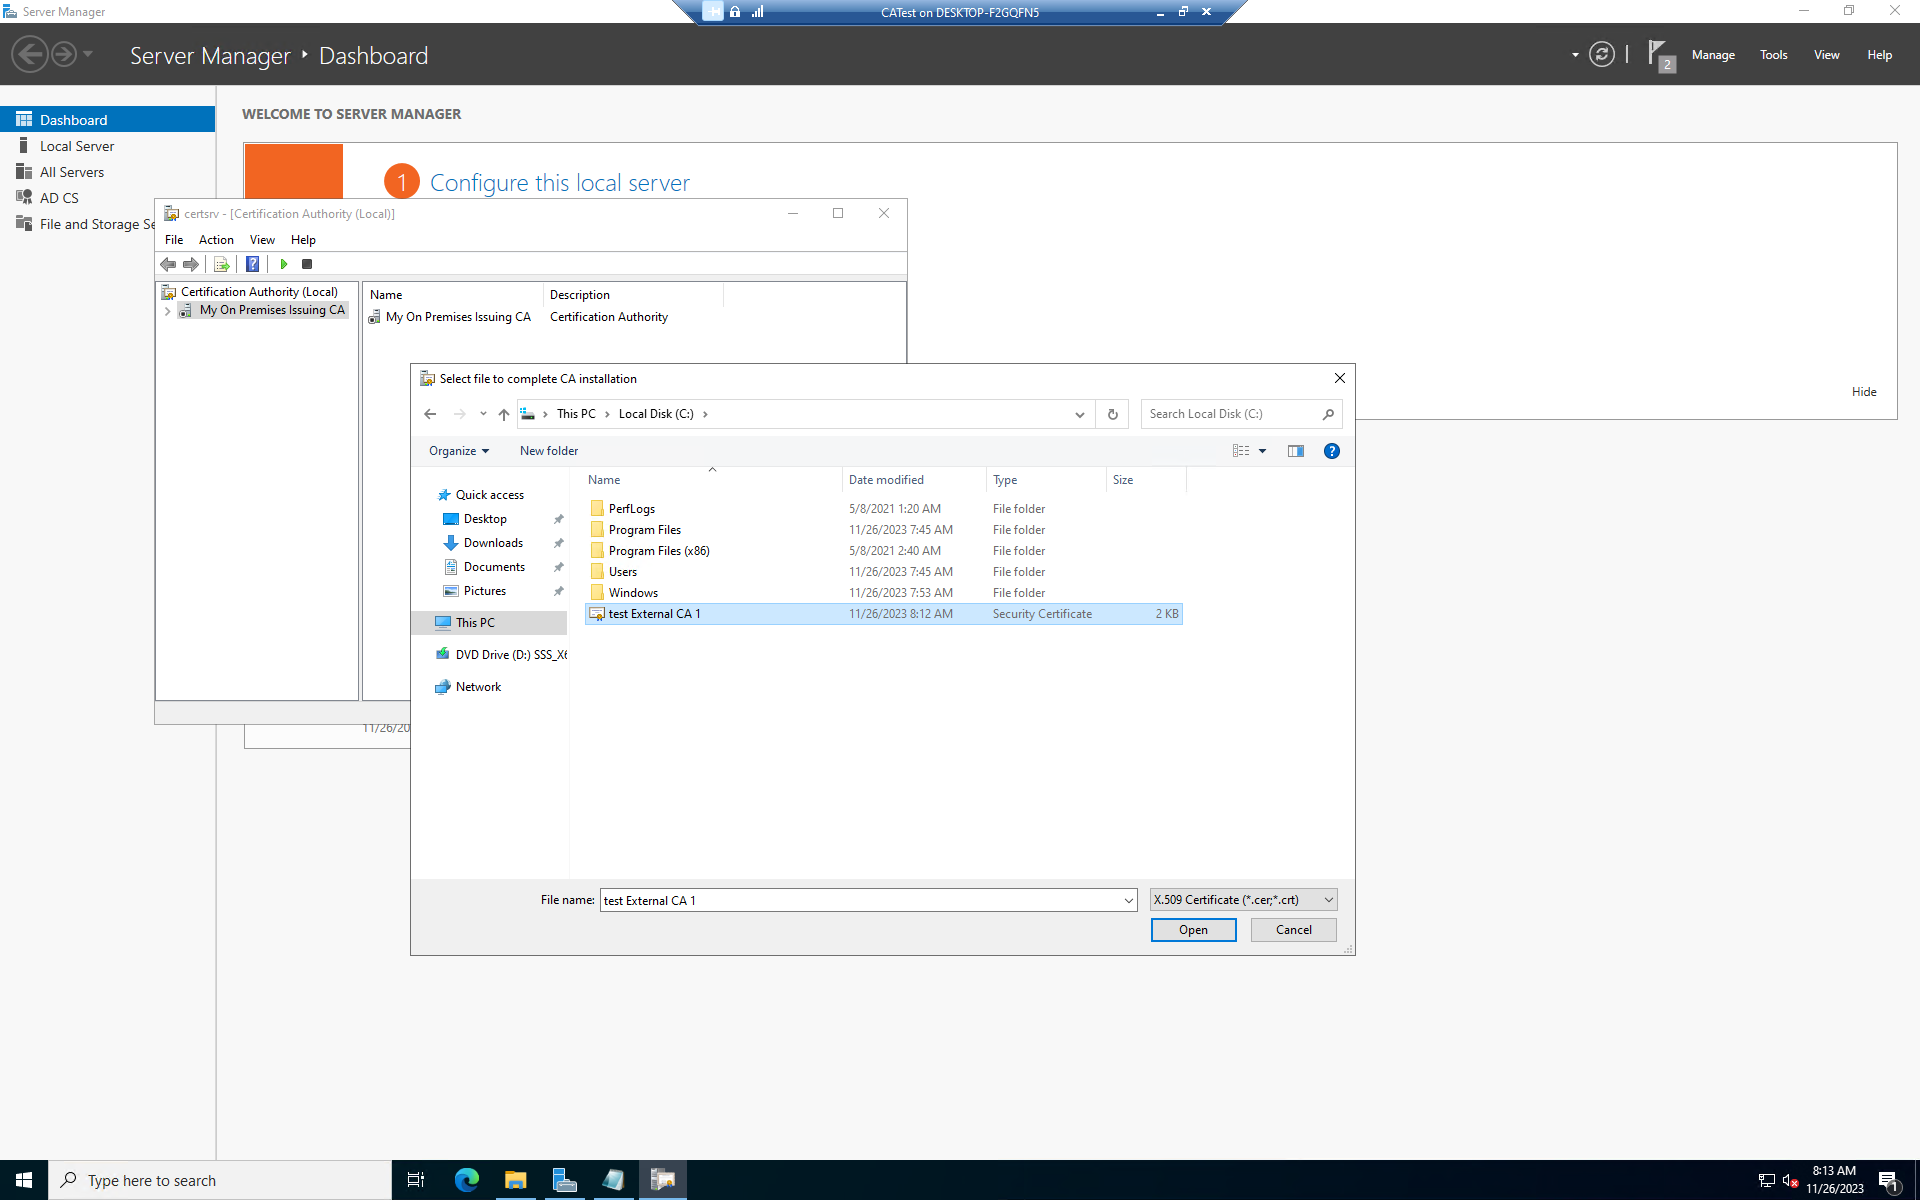
- Go back to your ADCS CA and copy the certificate you downloaded from EZCA into that server.
- Search on the start menu for “certification authority” and open the Certificate Authority.
- Right click on the name of your CA and select “All Tasks” -> “Install CA Certificate”.
- Select the CA Certificate file we just copied. (It might default to PKCS7, file type, ensure .cer is selected).
- Press the play button on the top right to start the CA.
- Your CA certificate has now been installed, you can now enable your templates and start issuing certificates from your new ADCS CA.