How-To: Create Your First Hybrid Policy
Prerequisites
Overview
EZSSH Hybrid policies are the best option to manage access to your cross-cloud and on-premise Linux endpoints. This policy allows you to manage access to your resources without the need of a highly privilege agent.
Video Version
Getting Started
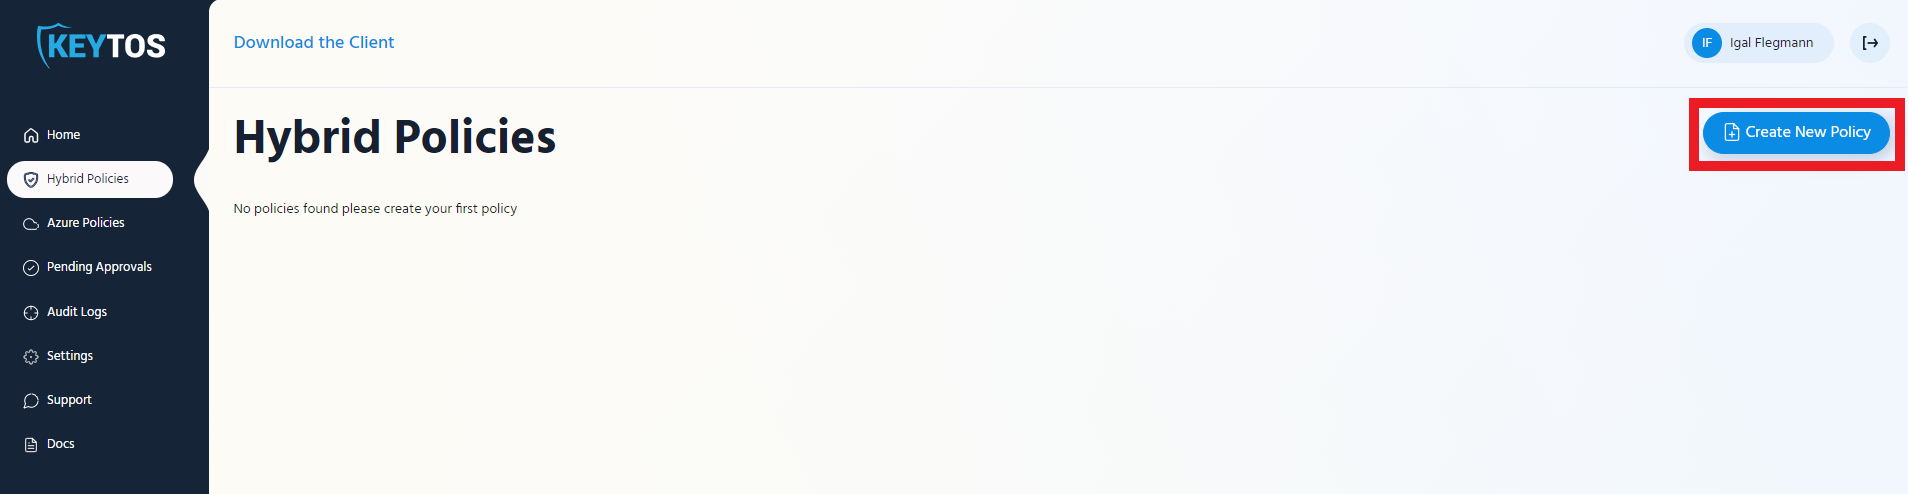
- Go to https://portal.ezssh.io/
- Navigate to Hybrid Policies
- Click on the “Create New Policy”
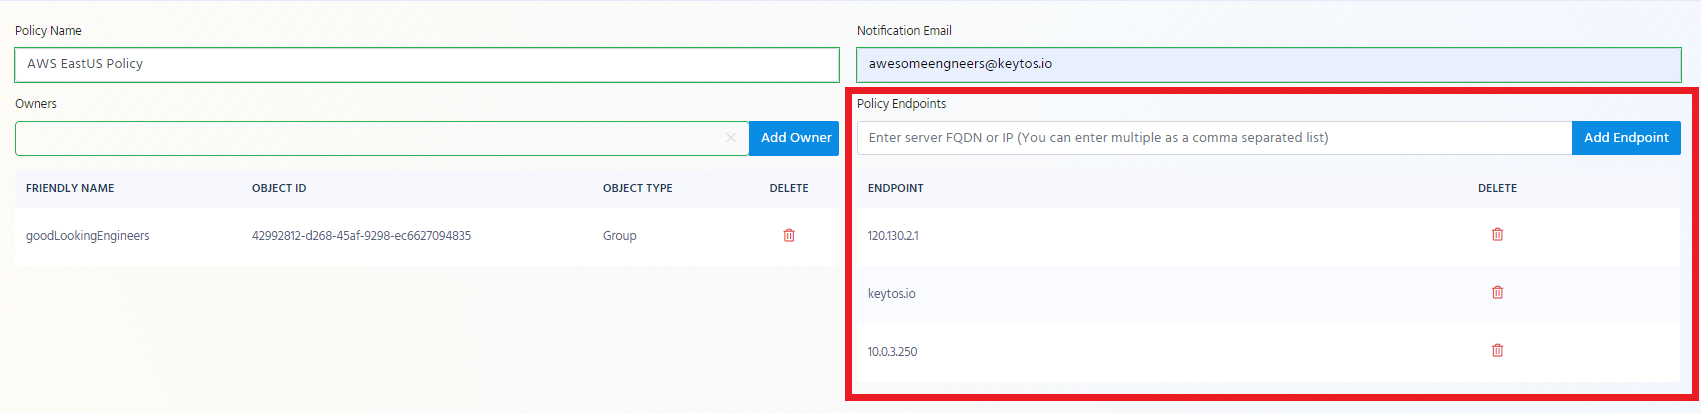
- Enter Policy Name: This name is just to make it easier for users to know what this policy gives them access to.
- Enter Notification Email: Usually a team DL that would get notifications for changes to the policy.

Adding Policy Owners
Overview
Policy owners are the people that can make changes to EZSSH policies.
Adding Owners
In the Owner section enter the UPN or group name of the owner you want to add to the policy. and click “Add Owner”

Adding Endpoints
Now we have to add the endpoints to the policy, you can add you endpoints as IP addresses or by its FQDN.
Creating Access Policies
Overview
Up until now we have set up: who can manage the Hybrid Policy, who will get notifications, and which endpoints will be covered by this policy. Now we have to create who will have access, for how long and with which Linux user. For this we have the access policies. One hybrid policy can have multiple access policies.
Basic Details
Access Policy Name
Enter a name to help you identify the access policy for example “admin access to prod”
Max Certificate Length
This is the Maximum amount of time that users can request their certificate for (how long the user will have access after the request is approved). The accepted values are between 1 hour and 168 hours (one week).

Linux Principals
This are the usernames that you will be able to login to Linux with enter all the ones your team uses and you want this policy to have.
Reminder: you can have multiple access policies to the same endpoints so if you want to break it up that only some people have access to some and others have access to others, create multiple access policies.
Enter the principal name, enter a note (for your team to know what that gives them access to), and check whether it has sudo permissions. Once you have entered all the information click the “Add Principal” button.
 Repeat this step for all the Linux principals you want in this access policy.
Auto Approved
Auto approved principals are principals that will be able to request access to the endpoint without needing the approval of someone else in the team. This is ideal for automation accounts, and On-Call engineers.
Adding Auto Approved Requesters
To add an AAD Object as an auto approved requester, start typing the object’s name under the “Allowed AAD Objects” in the auto approved section.
 Once the object appears in the drop down, click on it and click the “Add Requester” button.
 Repeat these steps to add all the desired Auto Approved AAD Objects.
Manually Approved
Manually approved principals are principals that will be able to access endpoints only after they have been approved by a member of the approvers group. If any manually approved requesters are added, at least one approver is required.
Adding AAD Objects as Approvers
To add an AAD Object as an approver, start typing the object’s name under the “AAD Approvers” in the the manually approved section.
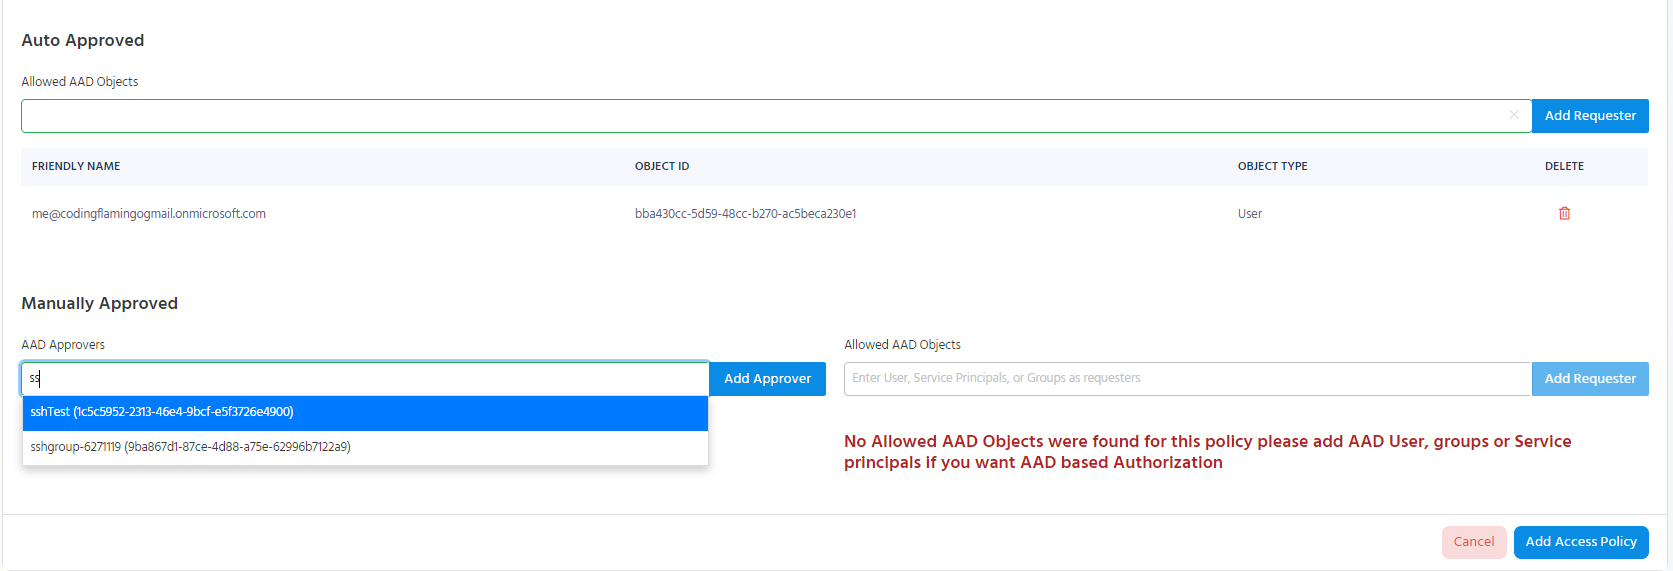 Once the object appears in the drop down, click on it and click the “Add Approver” button.
 Repeat these steps to add all the desired approver AAD Objects.
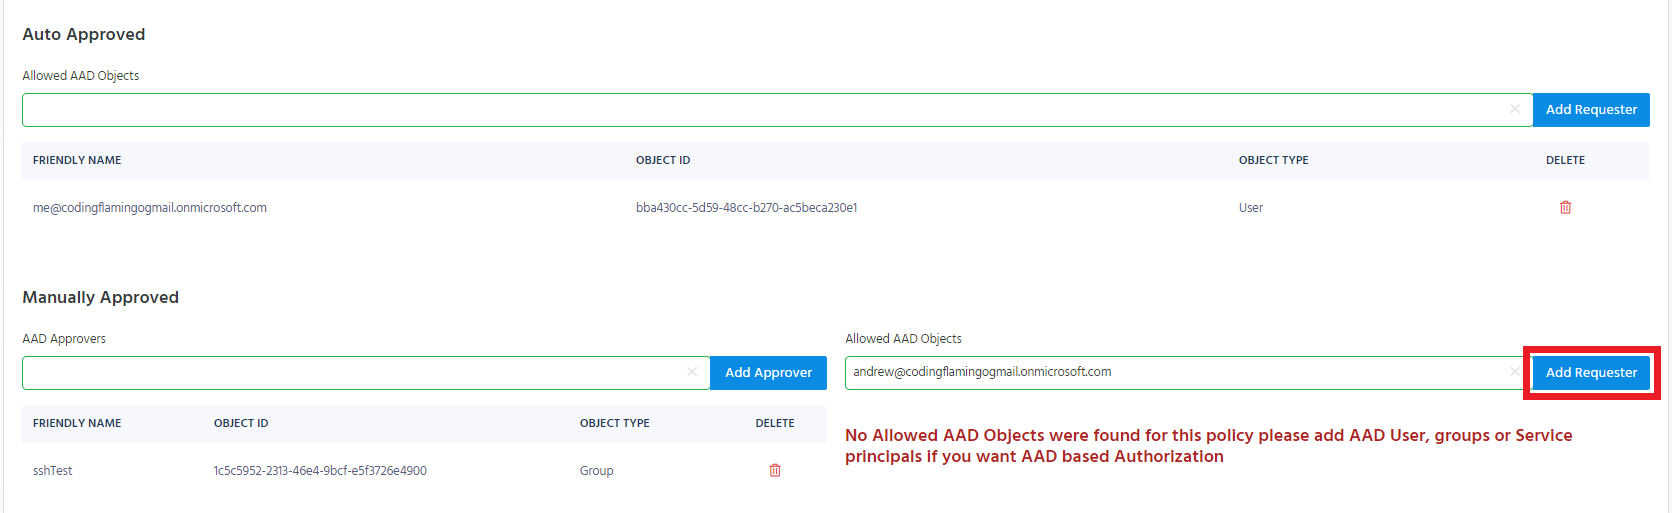
Adding AAD Objects as Manually Approved Requesters
To add an AAD Object as a manually approved requester, start typing the object’s name under the “Allowed AAD Objects” in the manually approved section.
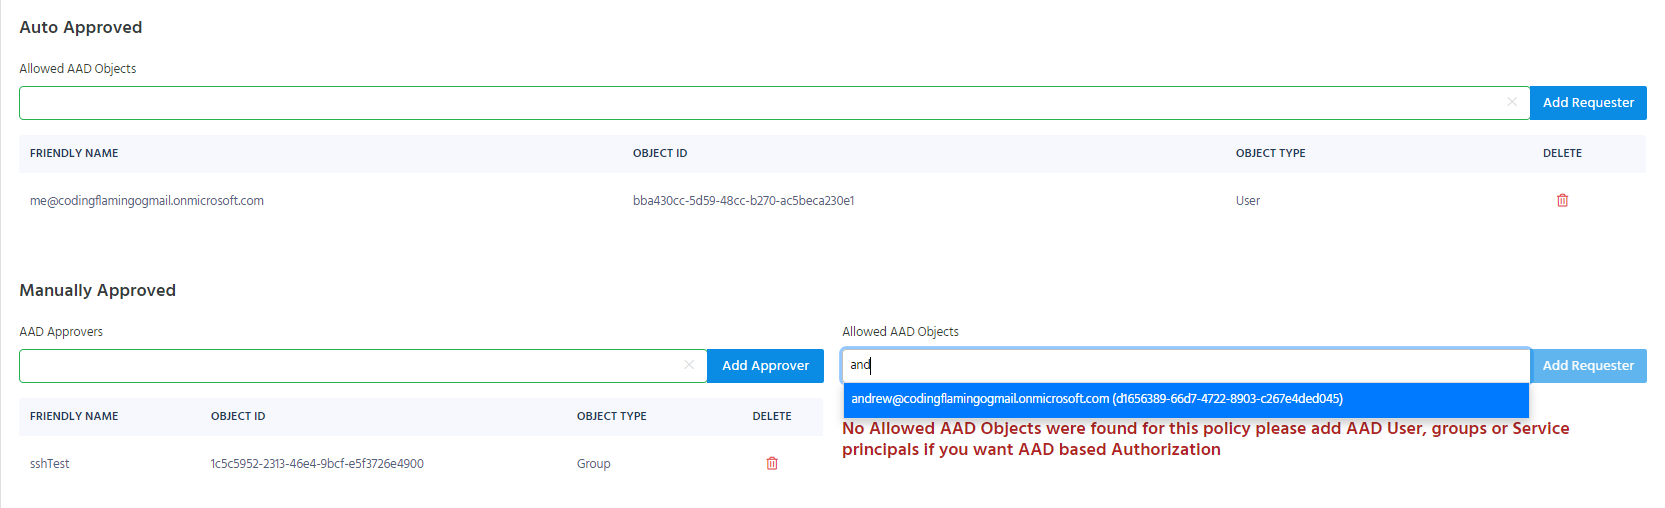 Once the object appears in the drop down, click on it and click the “Add Requester” button.
 Repeat these steps to add all the desired Manually Approved AAD Objects.
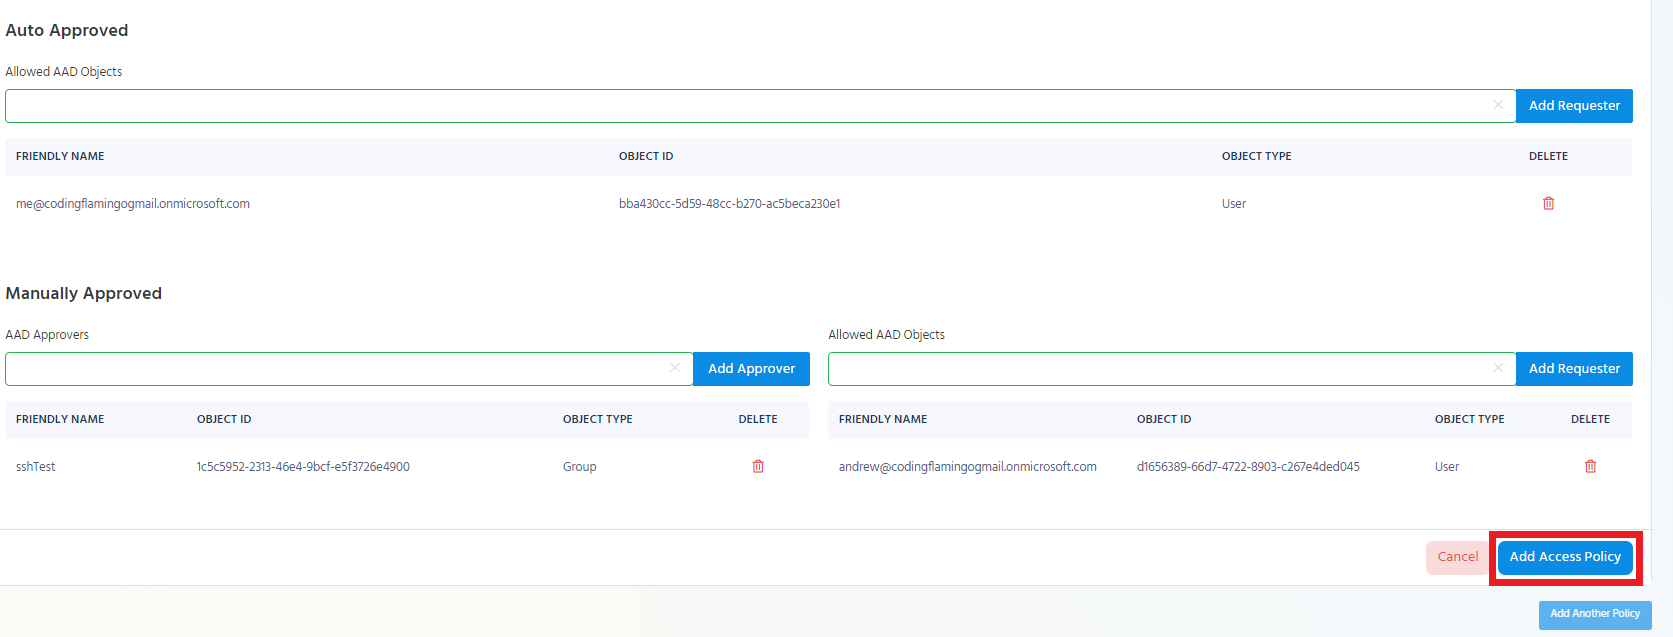
Adding the Access Policy to the Hybrid Policy
Once the access policy is complete, the “Add Access Policy” button will be enabled. Click the Button to add the access policy to the Hybrid policy.
Adding an Additional Access Policy to the Hybrid Policy
If you want to add additional access policies to the Hybrid policy click the “Add Another Policy” button.
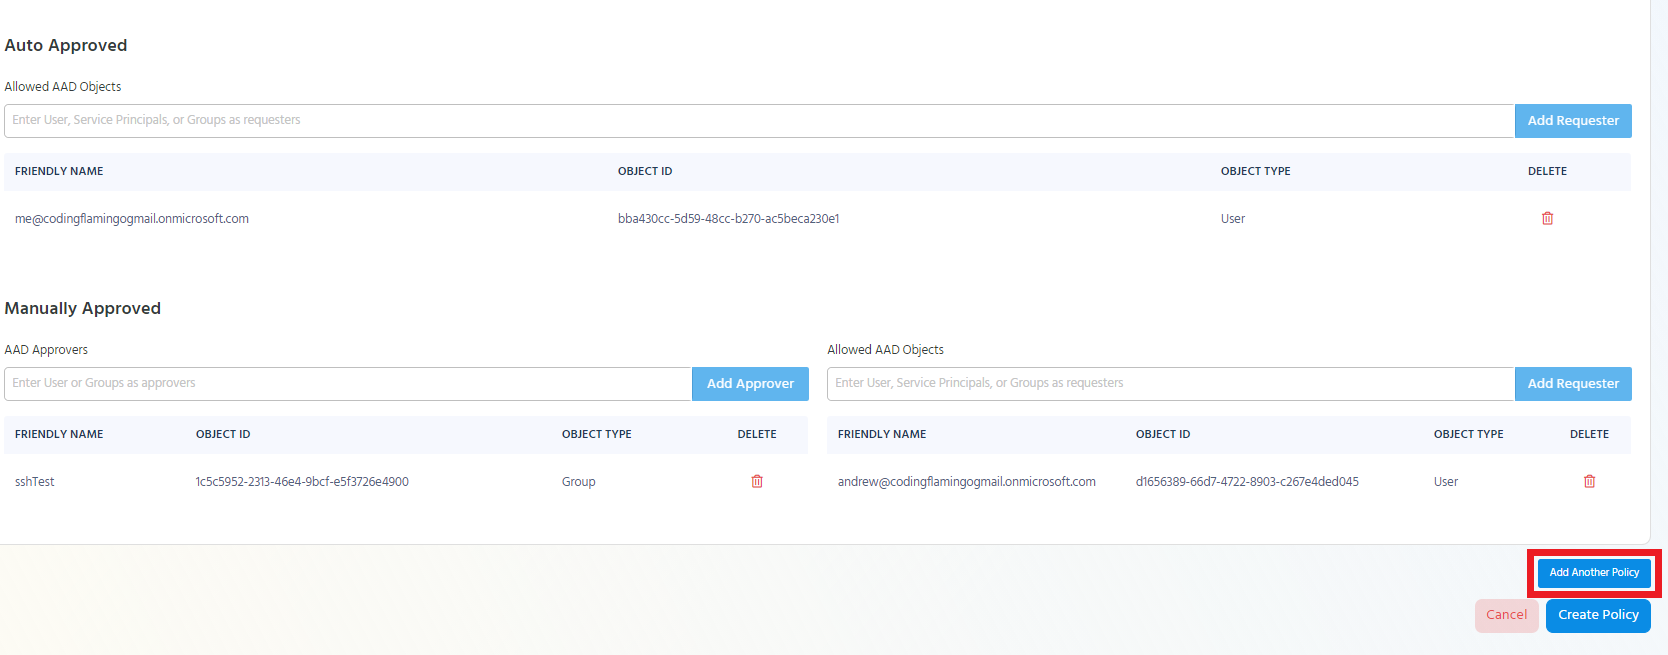
Add all the needed information for that access policy and add it to the Hybrid policy.
Repeat these steps until you have added all the needed access policies.
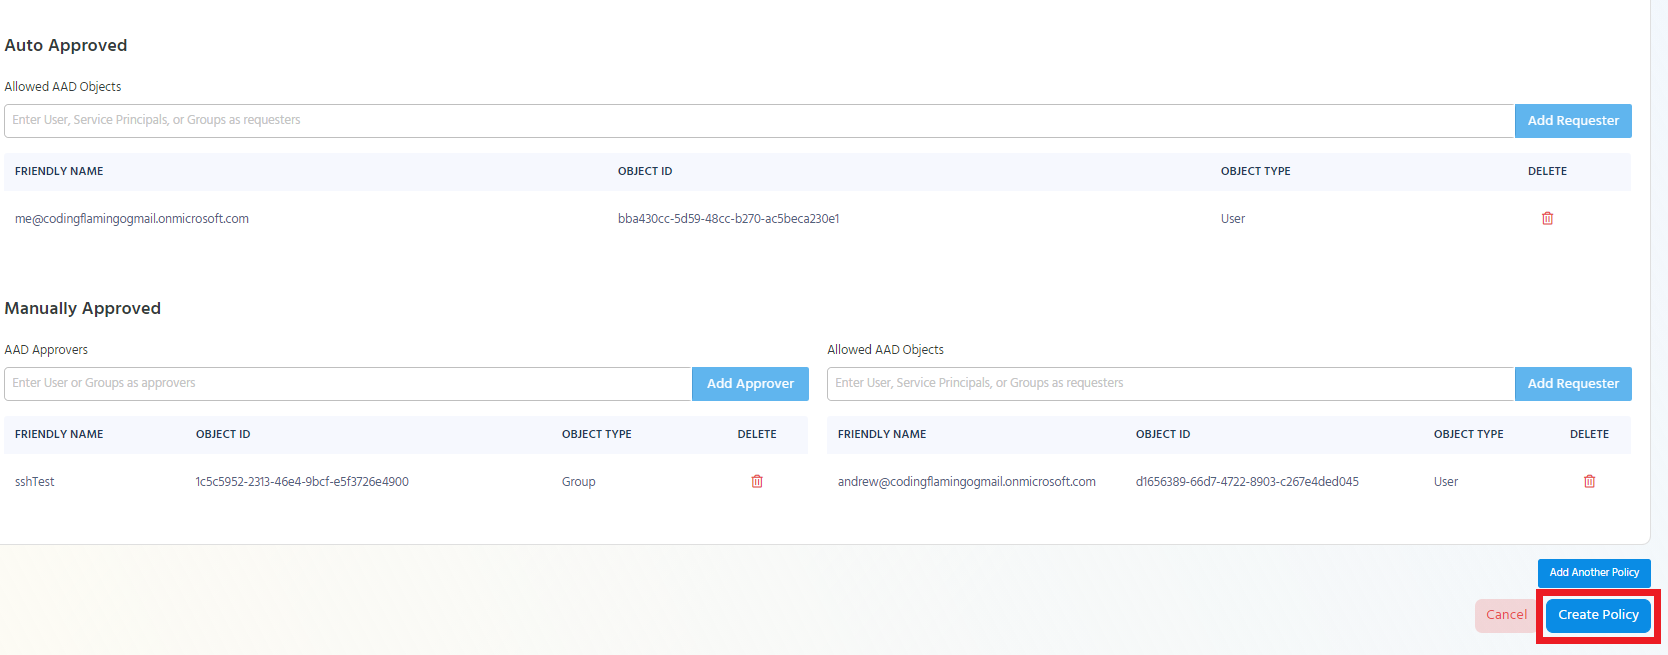
Saving the Hybrid Policy
Once you have entered all the information needed for the Hybrid policy, click the “Create Policy” button.
Adding EZSSH Certificate Authority Access to Endpoint
To manually add the EZSSH Certificate Authority to your endpoints, follow this guide.
For future endpoints, read Adding EZSSH Using Cloud Init and our example using Pulumi