How-To: Connect SCEP CA To ManageEngine MDM Plus
EZCA Allows you to create and manage your own PKI in Azure. In this page we will go over how to connect your CA to Manage Engine MDM (Mobile Device Manager) Plus.
EZCA, the first Azure based PKI, enables you to create a secure and compliant certificate authority in Azure in minutes one of the MDMs we are happy to integrate with is ManageEngine Mobile Device Manager Plus. In this page we will guide you on how to connect your CA to ManageEngine MDM Plus.
Prerequisites - Create your Cloud Certificate Authority
- This page assumes that you have already created your SCEP CA.
How to Issue SSL Certificates in ManageEngine Mobile Device Manager Plus - Video Version
How To Connect Your CA to ManageEngine MDM Plus For SCEP Certificate Issuance
- The first step, is to download your CA certificate. To do this, navigate to the EZCA portal (If you have your private instance go to that specific portal)
- Login with an account that is registered as a PKI Admin in EZCA.
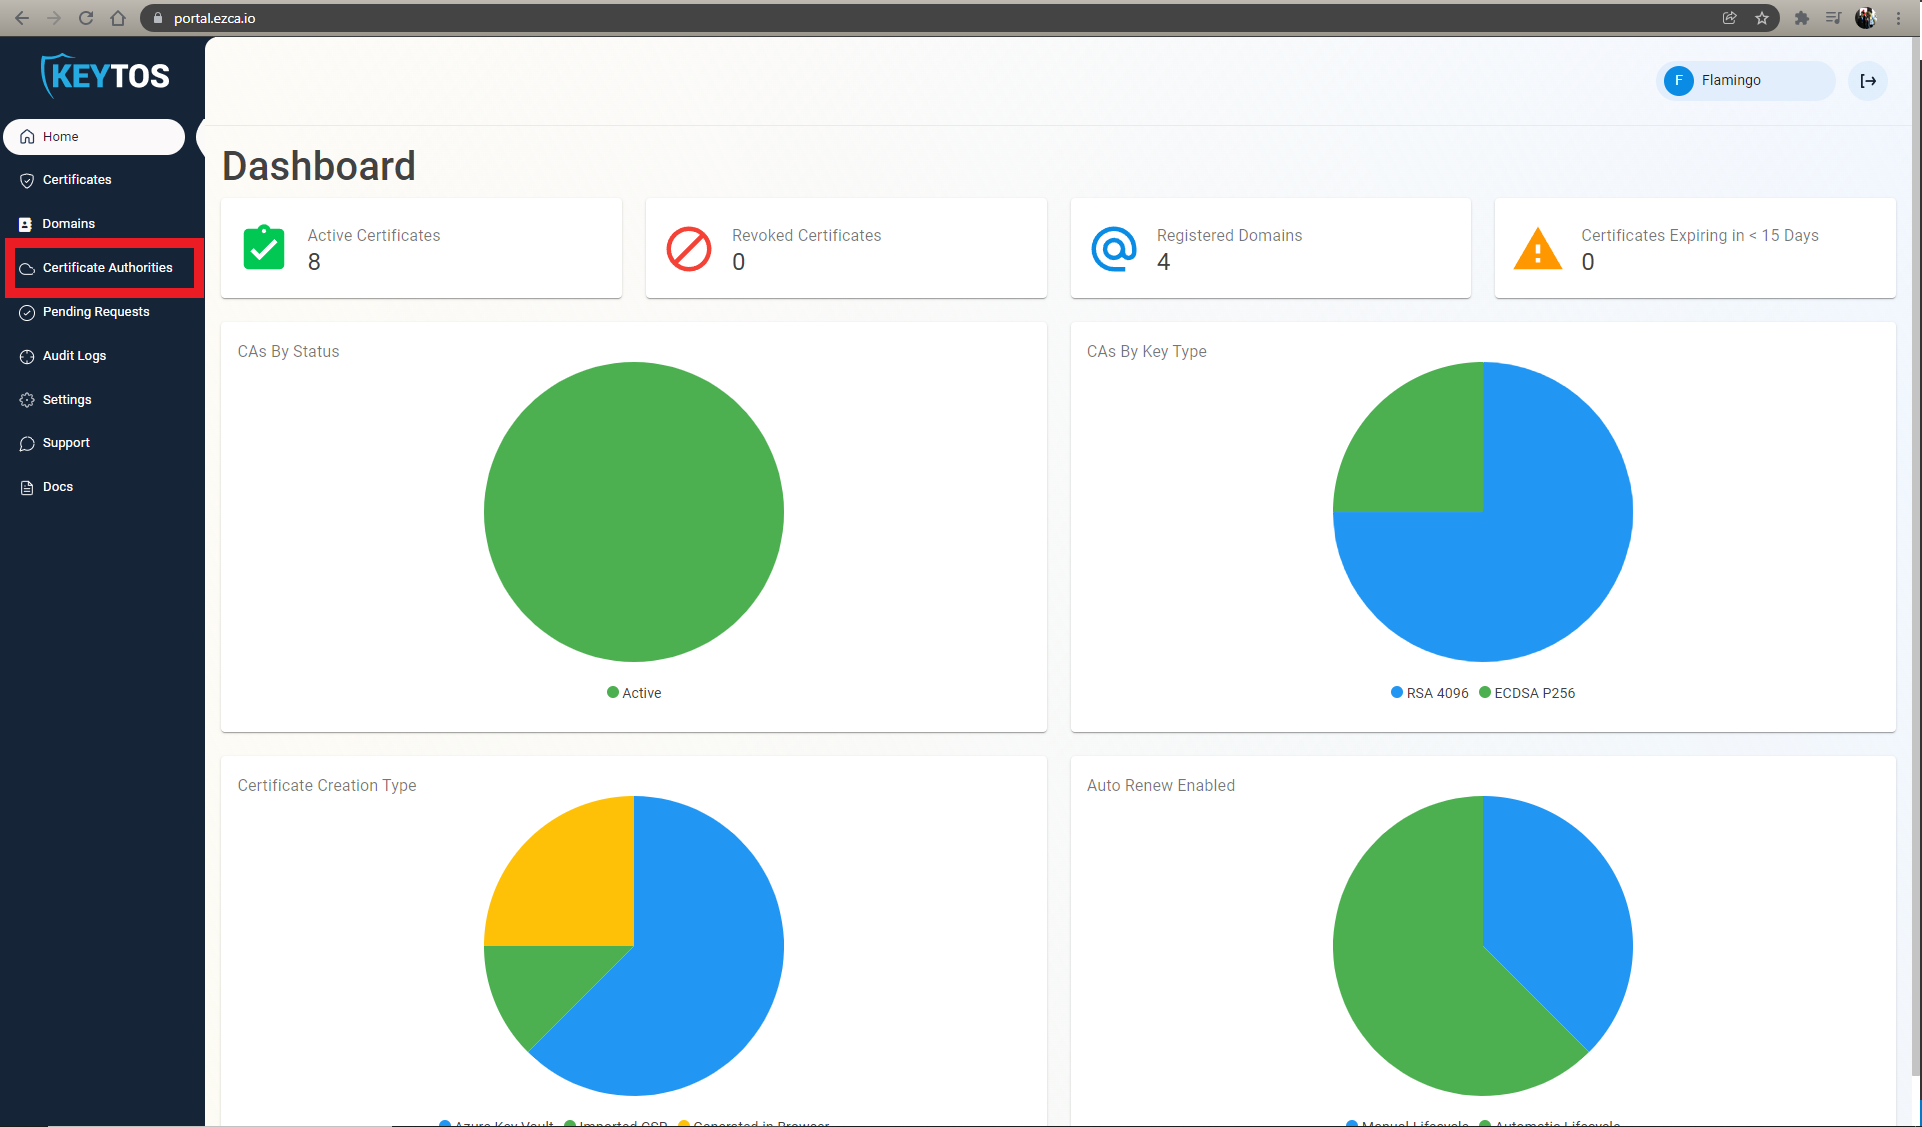
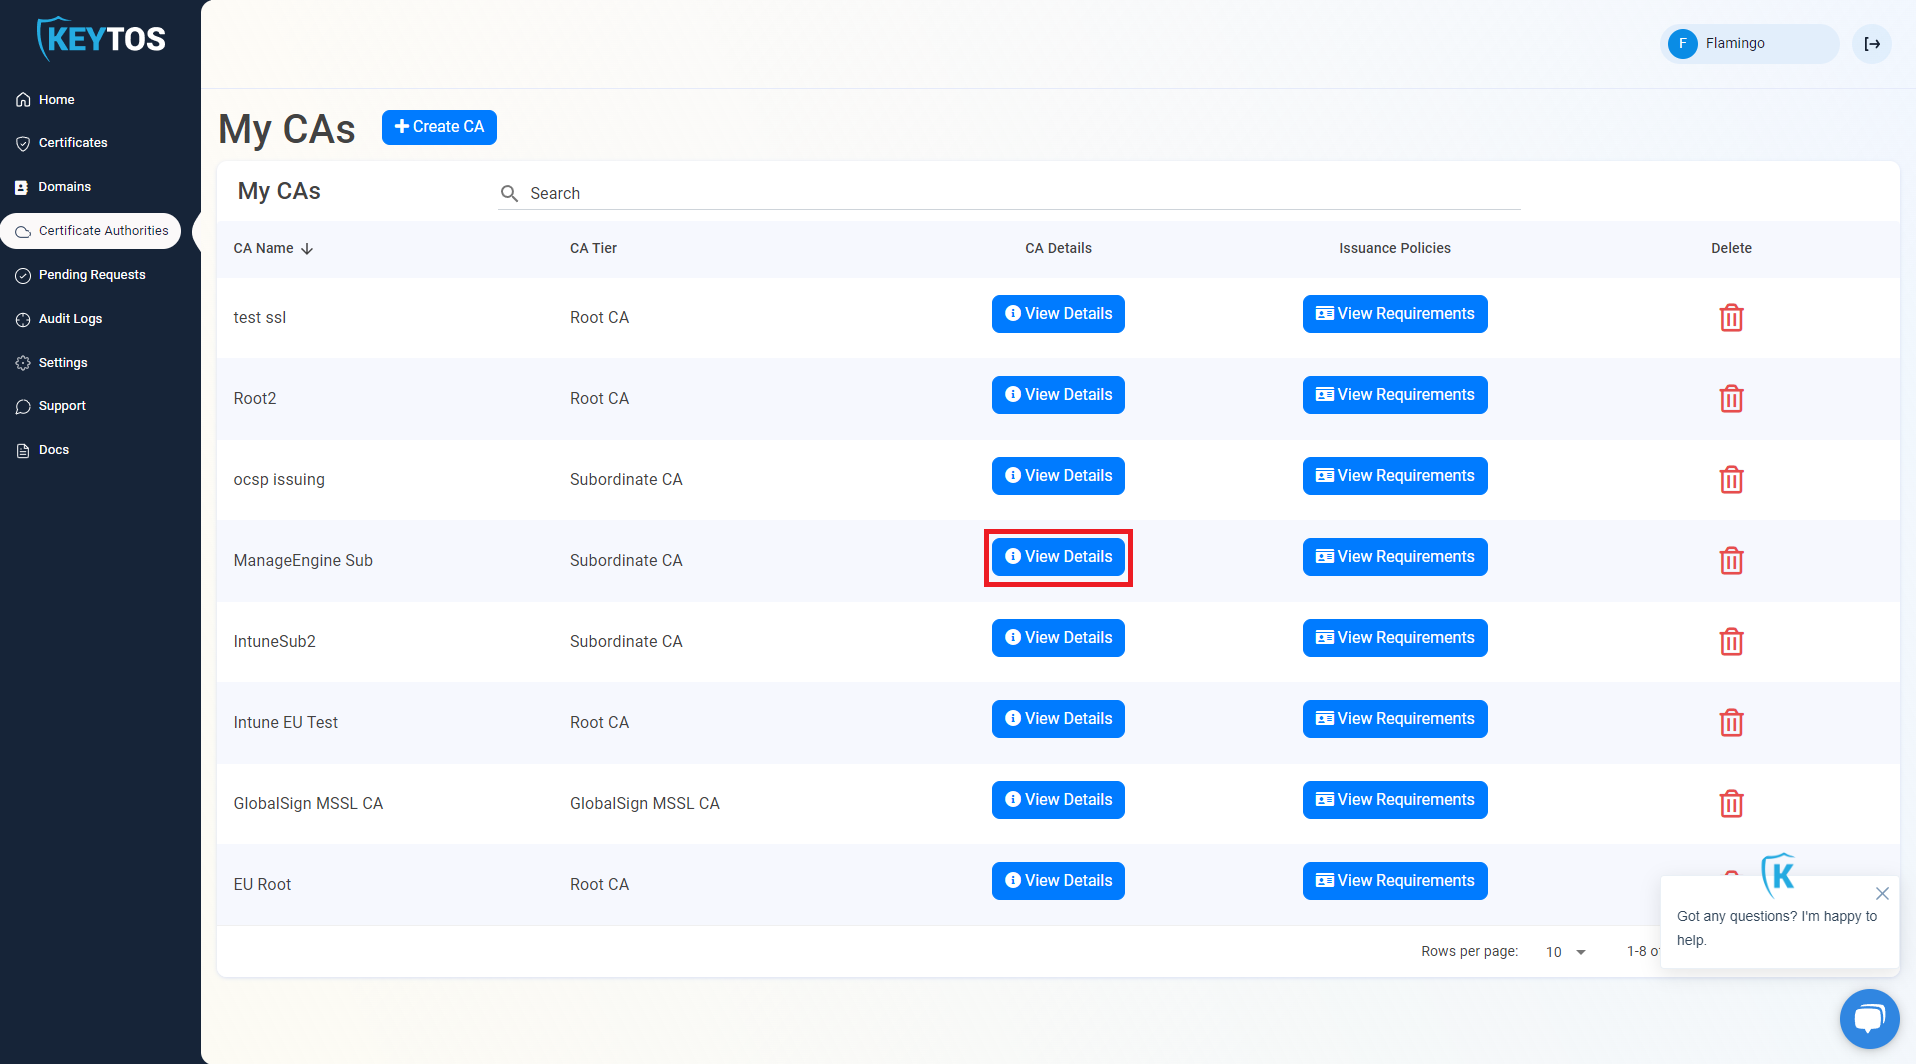
- Navigate to Certificate Authorities.
- Click on the “View Details” CA you want to connect to ManageEngine MDM Plus.
- Click on the “Download CA Certificate” button.
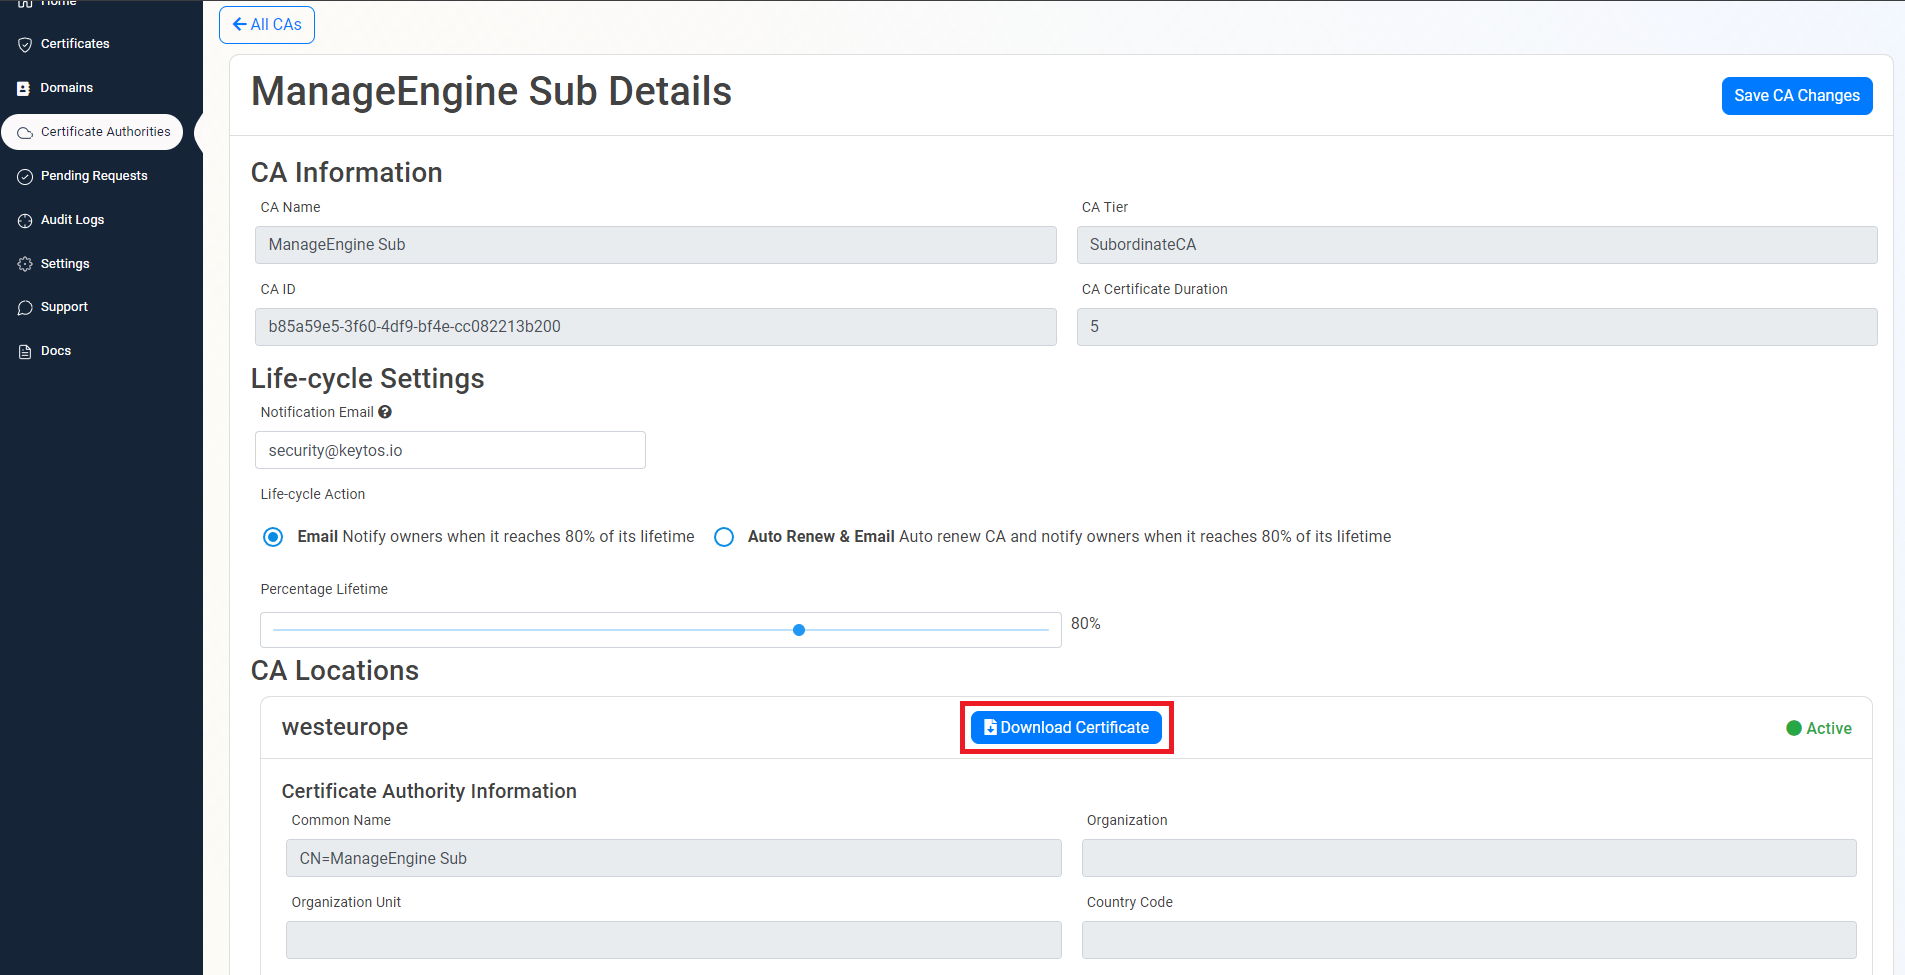
- Repeat this step for all locations of the CA.
- If you also have a Root CA, download the Root CA certificate as well.
- In another Tab, navigate to your ManageEngine MDM Plus portal.
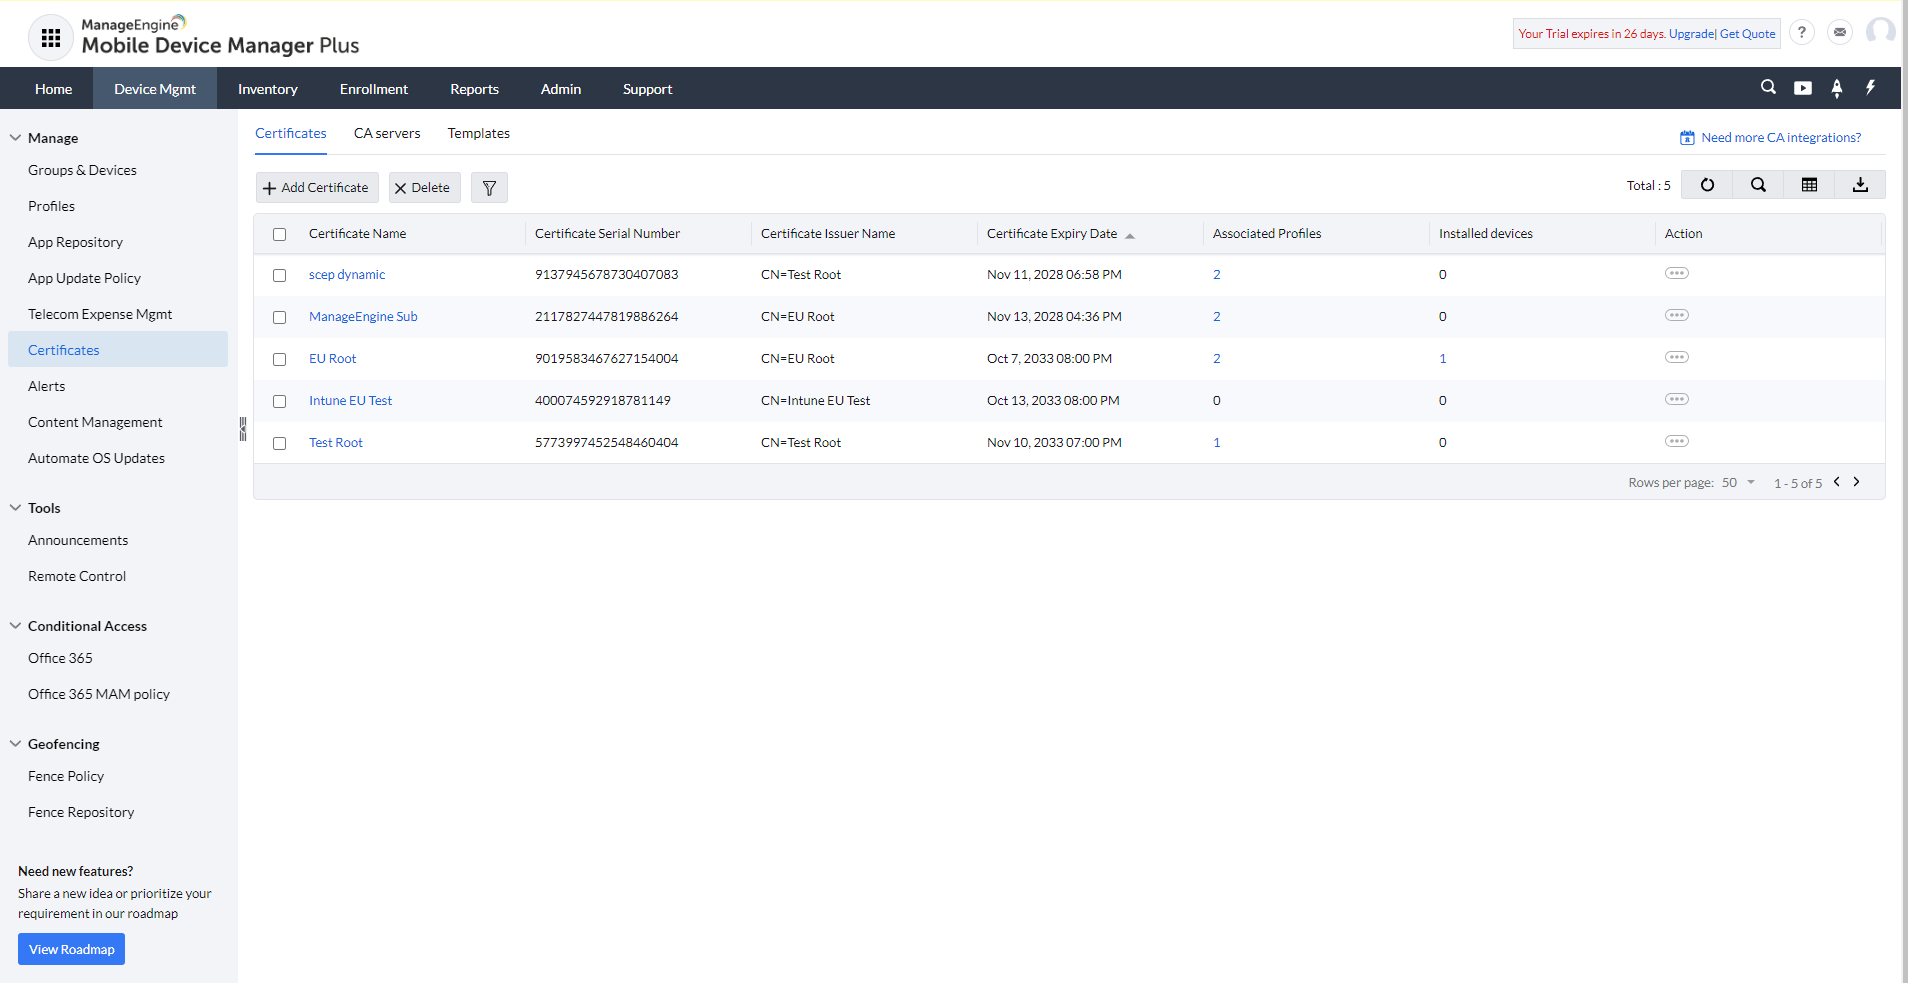
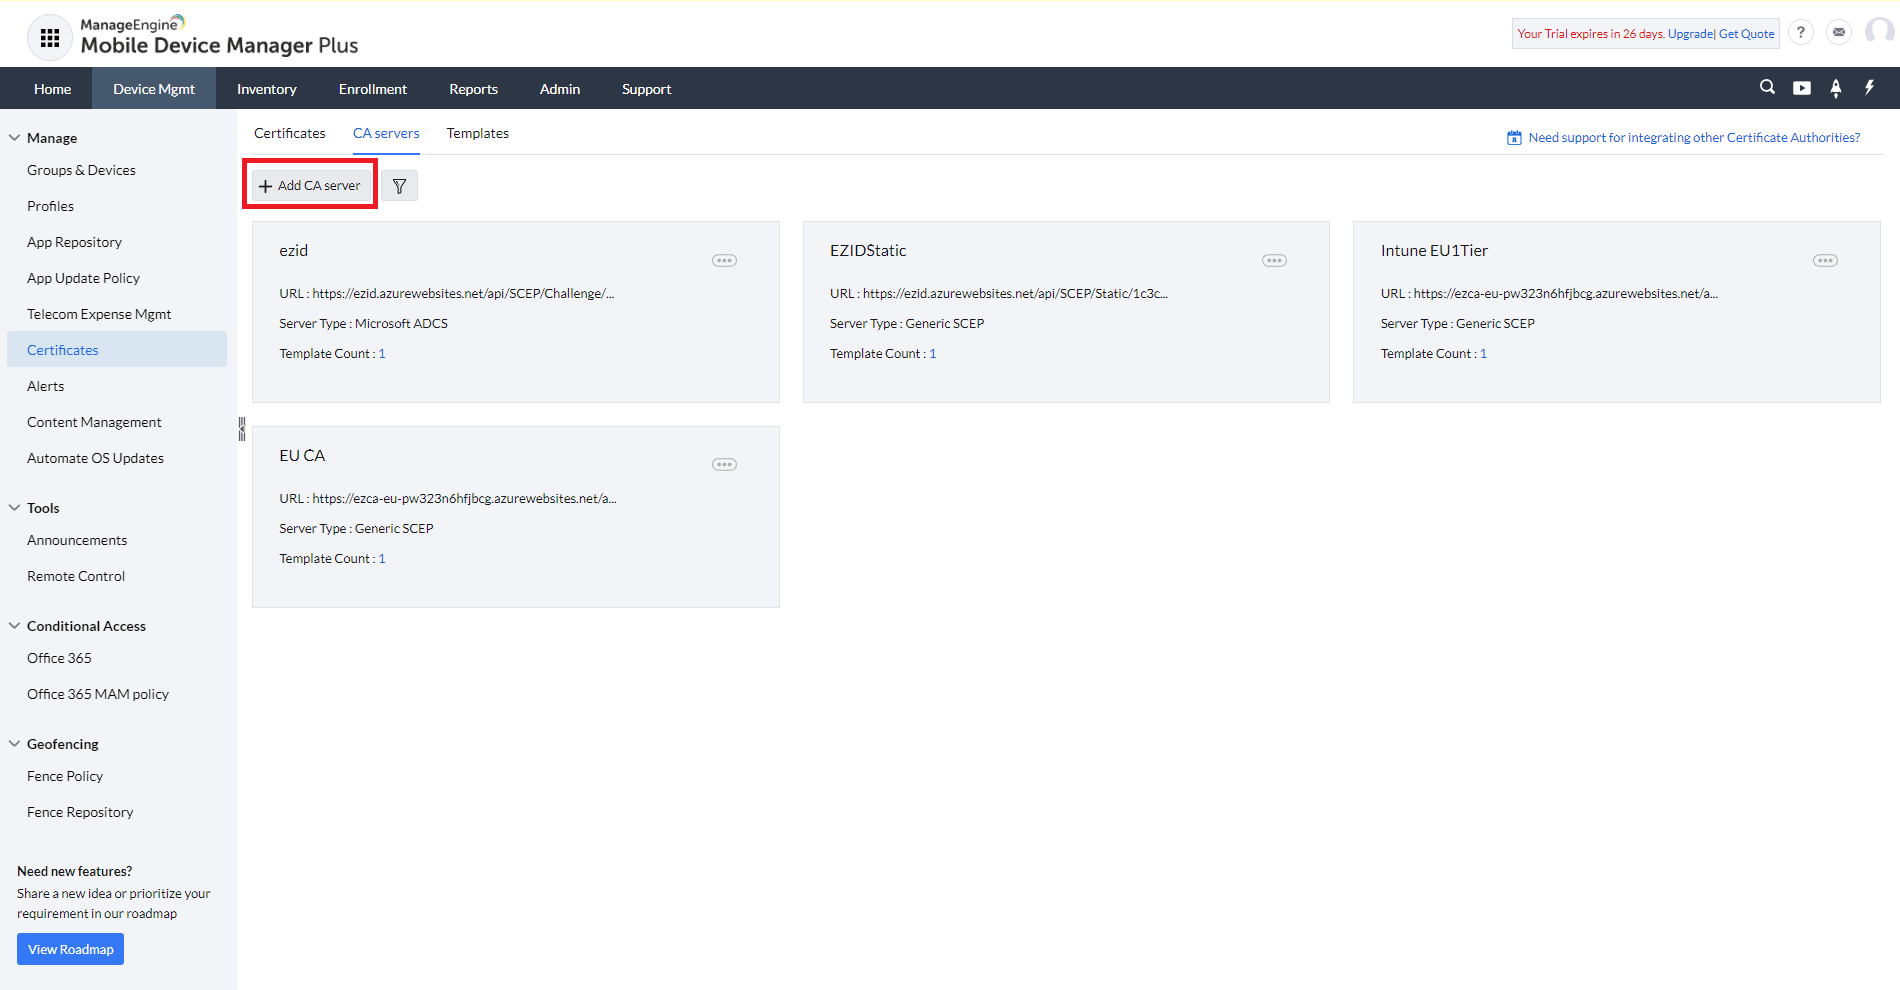
- Click on the device Mgmt tab and Select Certificates in the left menu.
- Click on the “CA Severs” tab at the top.
- Click on the “Add CA Server” button.
- Select the “Generic SCEP” option.
- Enter a CA Name (this is just so you identify it under ManageEngine MDM Plus).
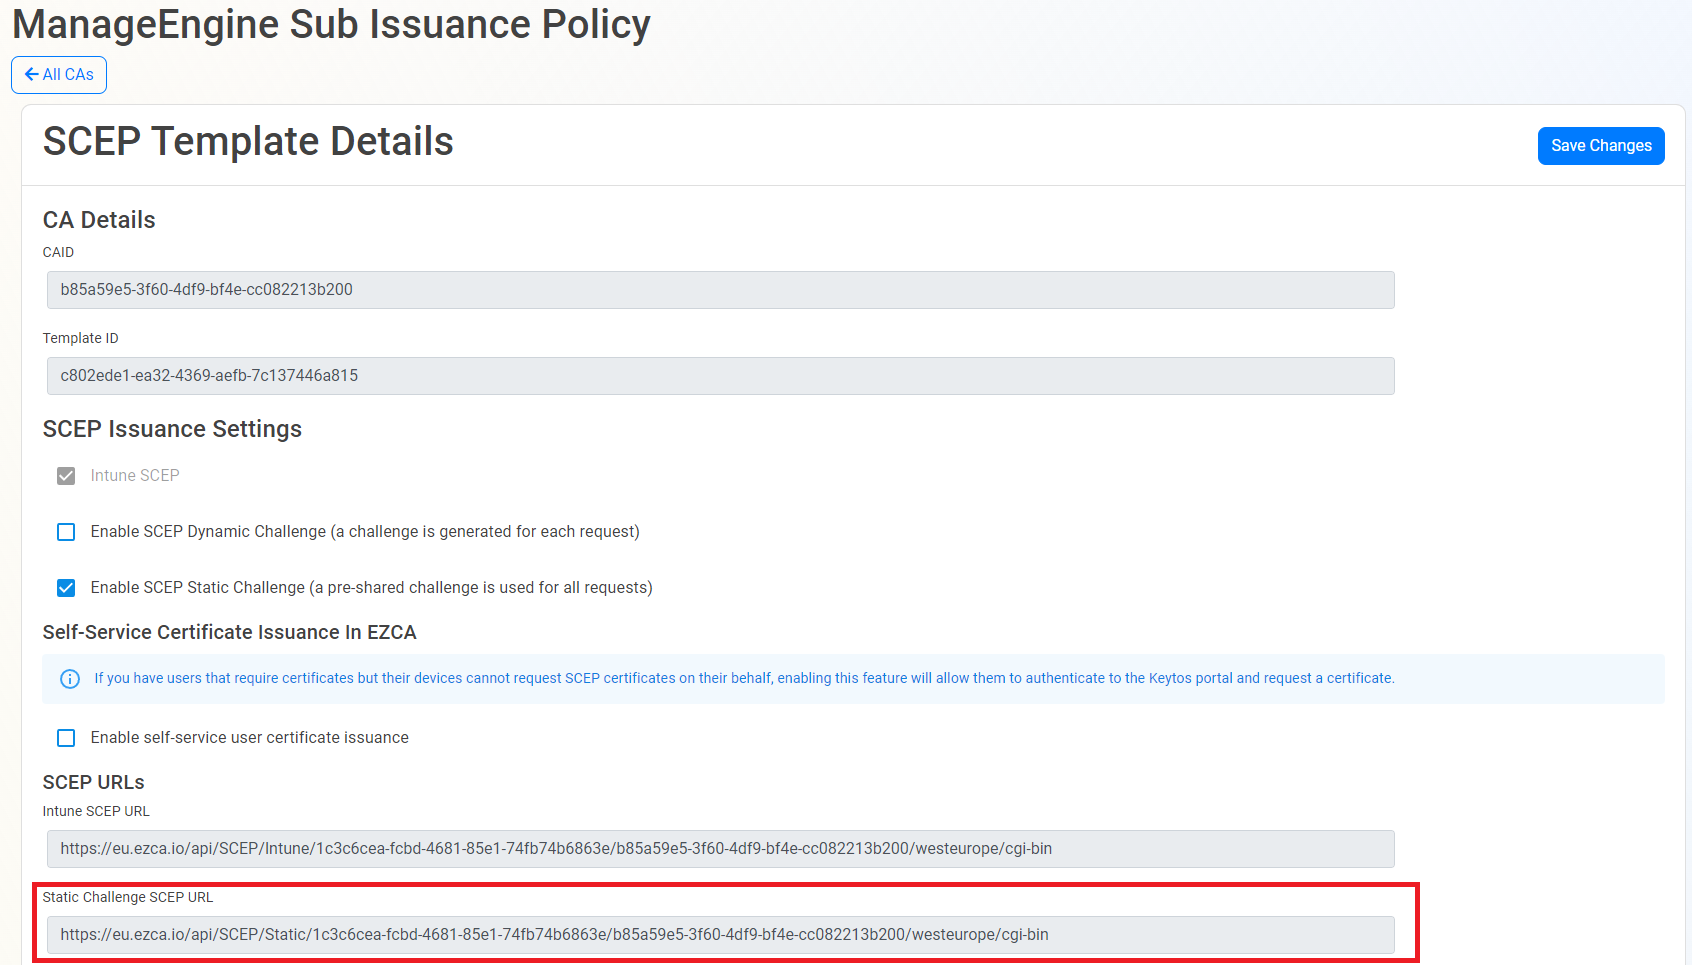
- Go Back to your EZCA tab, in the CAs list, and click “View Requirements” for the CA you want to connect to ManageEngine MDM Plus.
- Ensure “Enable SCEP Static Challenge” is checked. If not, Check the option and click “Save Changes” on the top right.
- Now you will copy the Static Challenge SCEP URL
- Go back to your ManageEngine MDM Plus tab, and paste the URL in the “SCEP Server URL” field.
- Click the “Add Certificate Link”
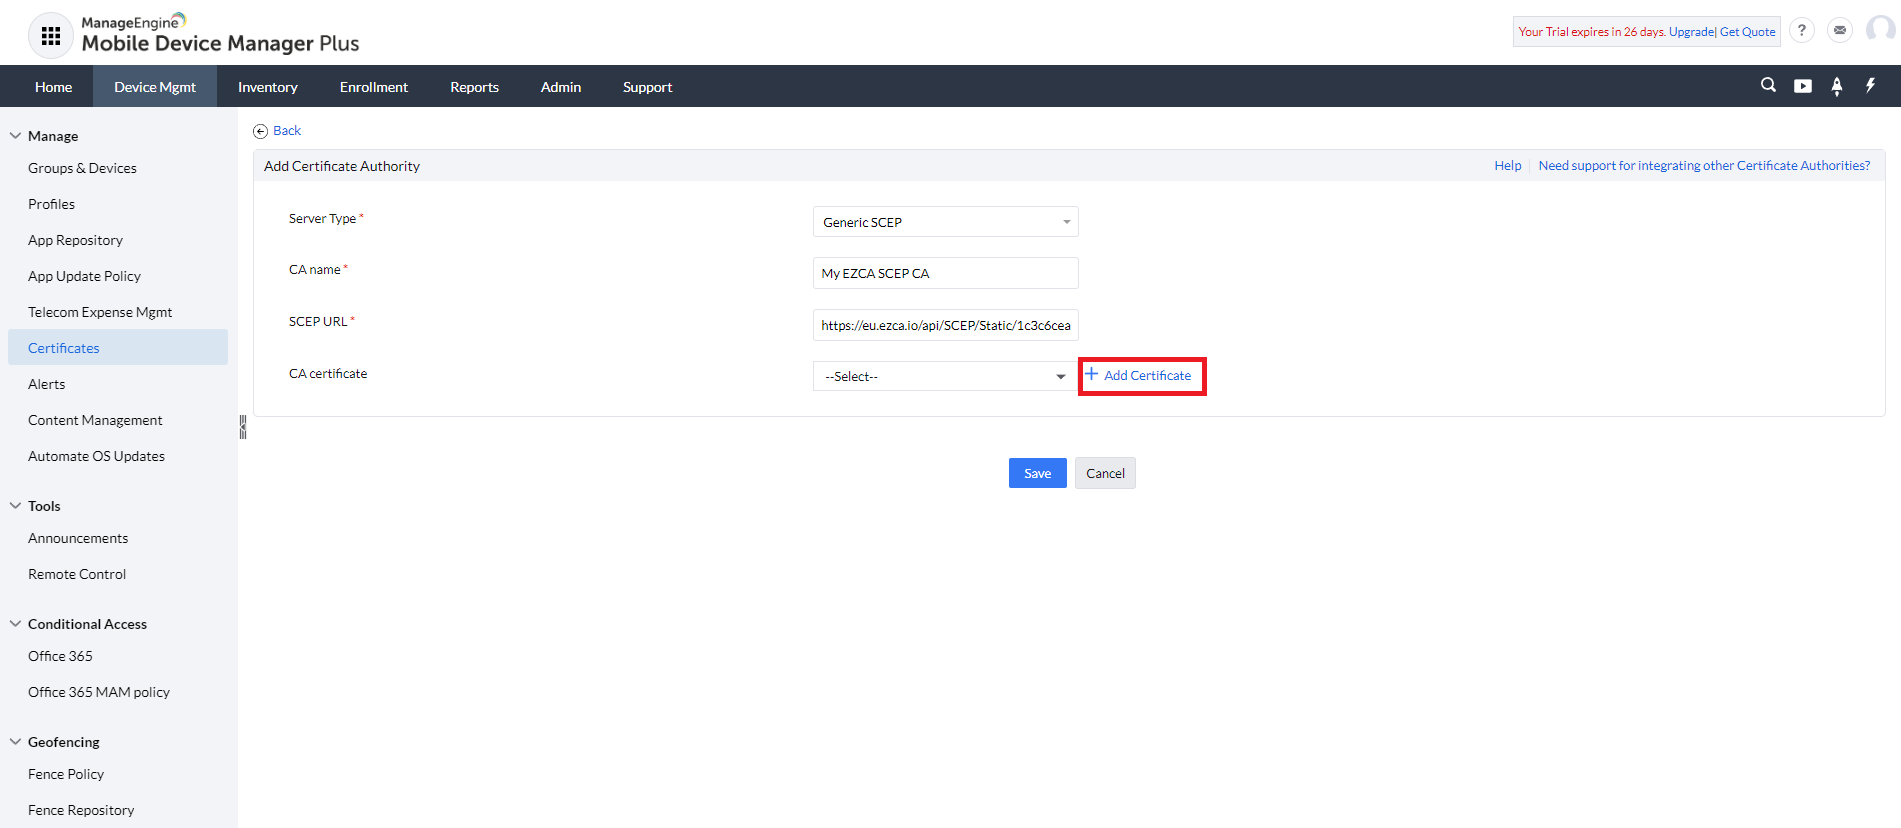
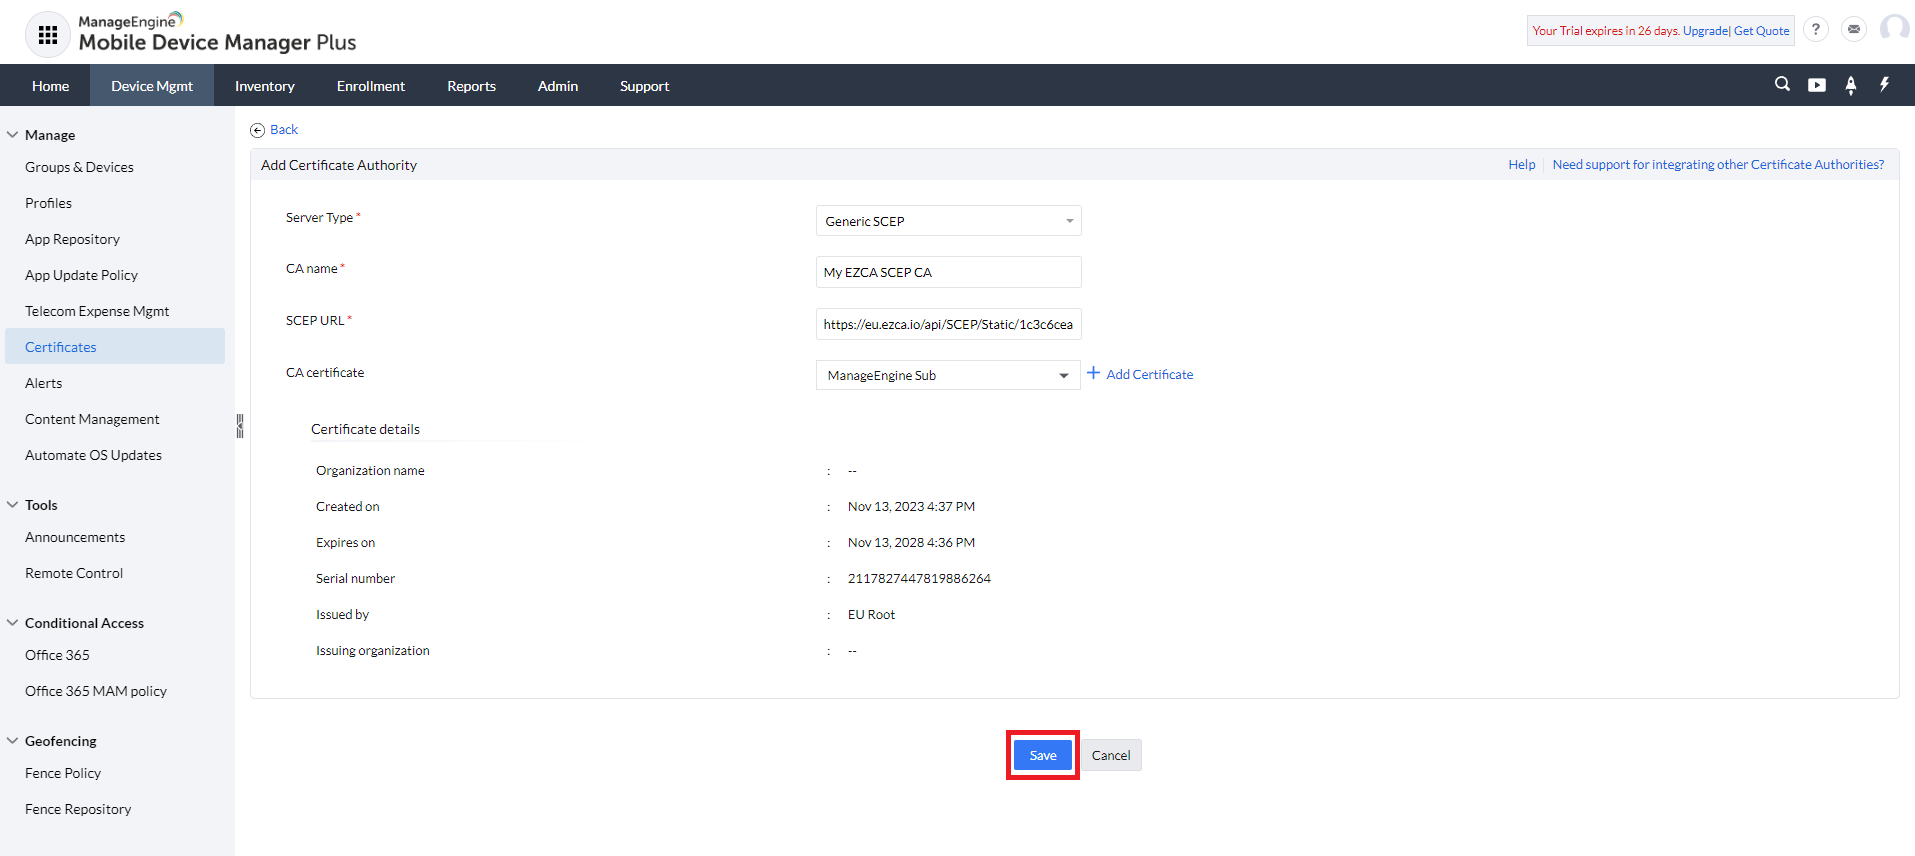
- Select your SCEP CA certificate from your computer.
- Click the “Add Certificate Button”
- Click the “Save” button.
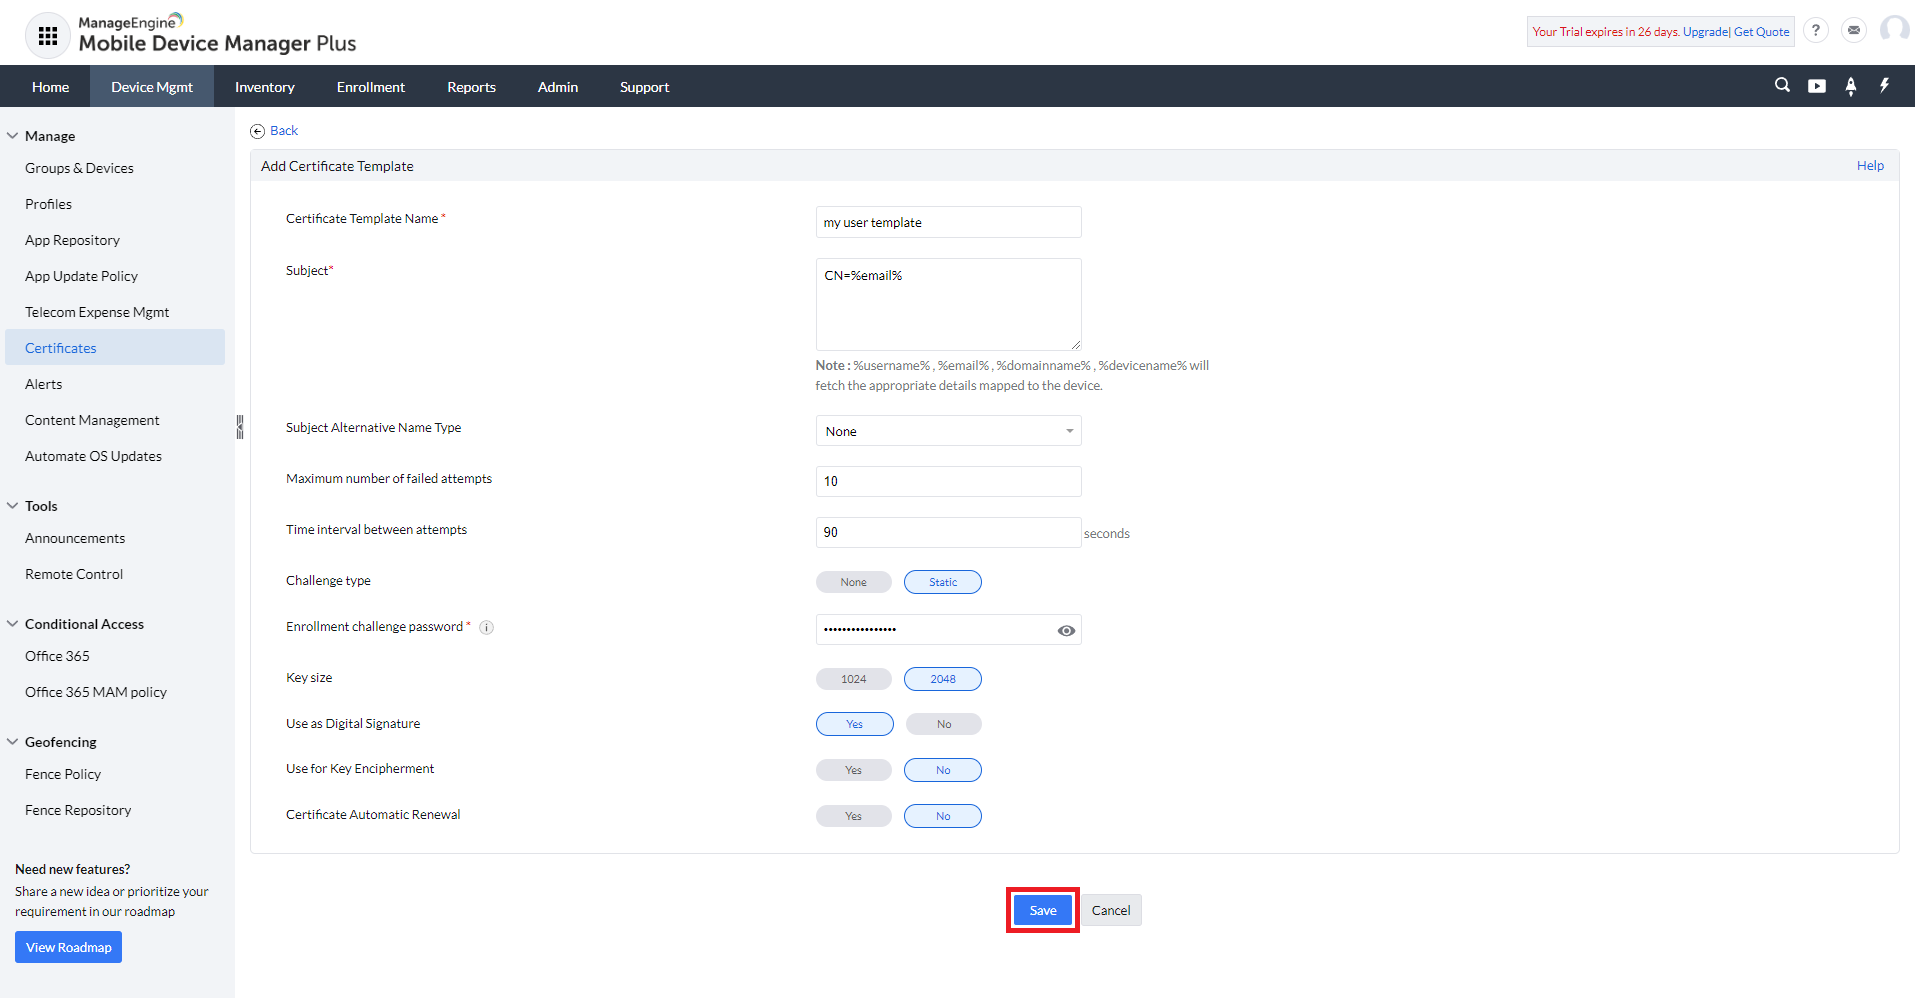
- Enter a Certificate Template Name (this is for reference in the ManageEngine MDM Plus portal).
- Enter the Subject Name (this is the name of the certificate that will be issued to the device). You can do dynamic names based on the user requesting them with their keywords for example
CN=%USERNAME%will issue the certificate with the username of the user requesting the certificate. - If your infrastructure requires, add the settings for Subject Alternative Name (SAN) of the certificate, this field is also commonly used for certificate authentication.
- Enter the maximum number of attempts for a failed request and how long to wait between failed attempts.
- In Challenge Type, select “Static”.
- Go Back to the EZCA Tab, and copy the “SCEP Challenge”.
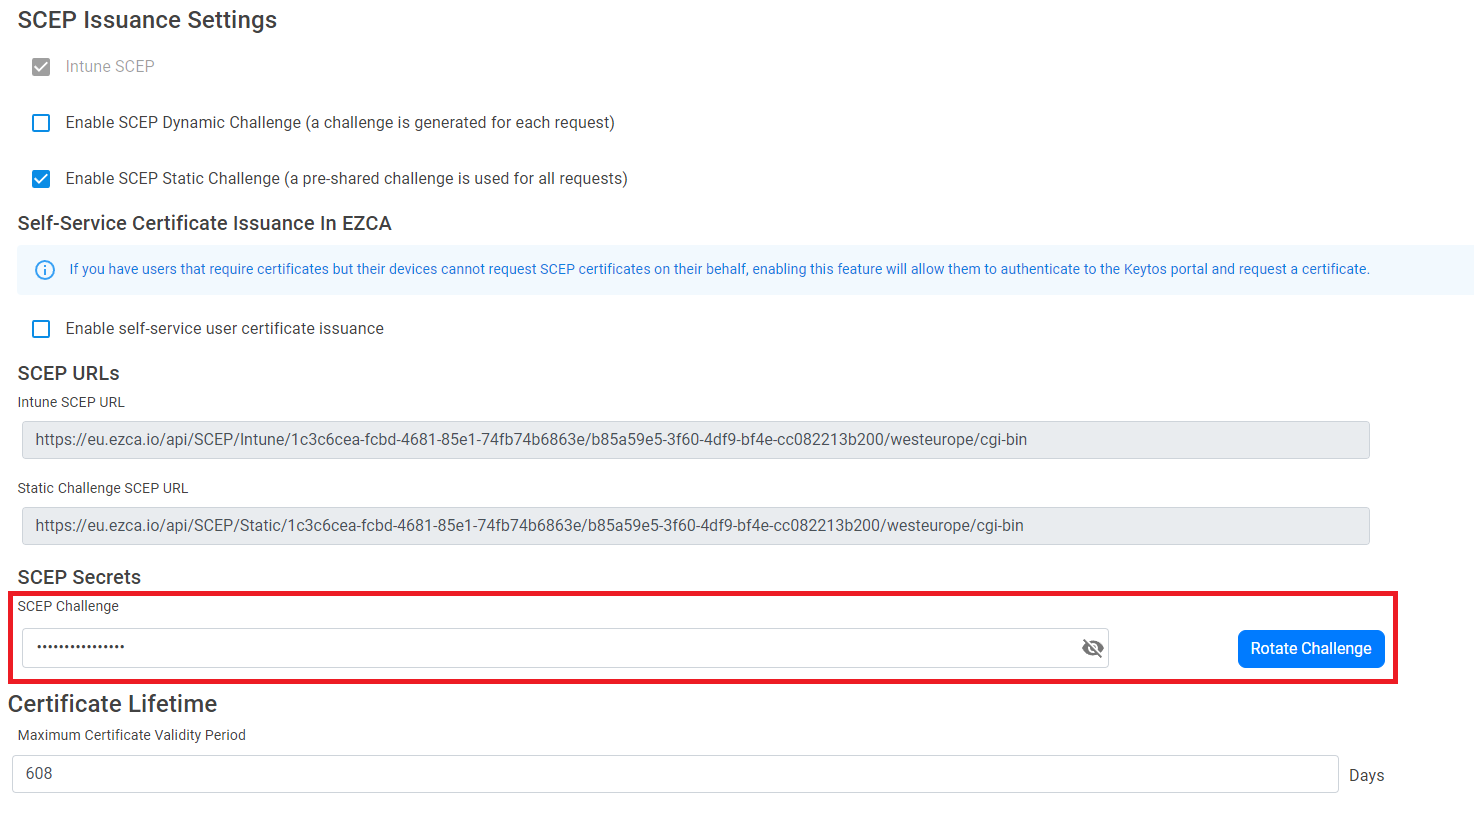
- Paste the SCEP Challenge in the “SCEP Challenge” field in ManageEngine MDM Plus.
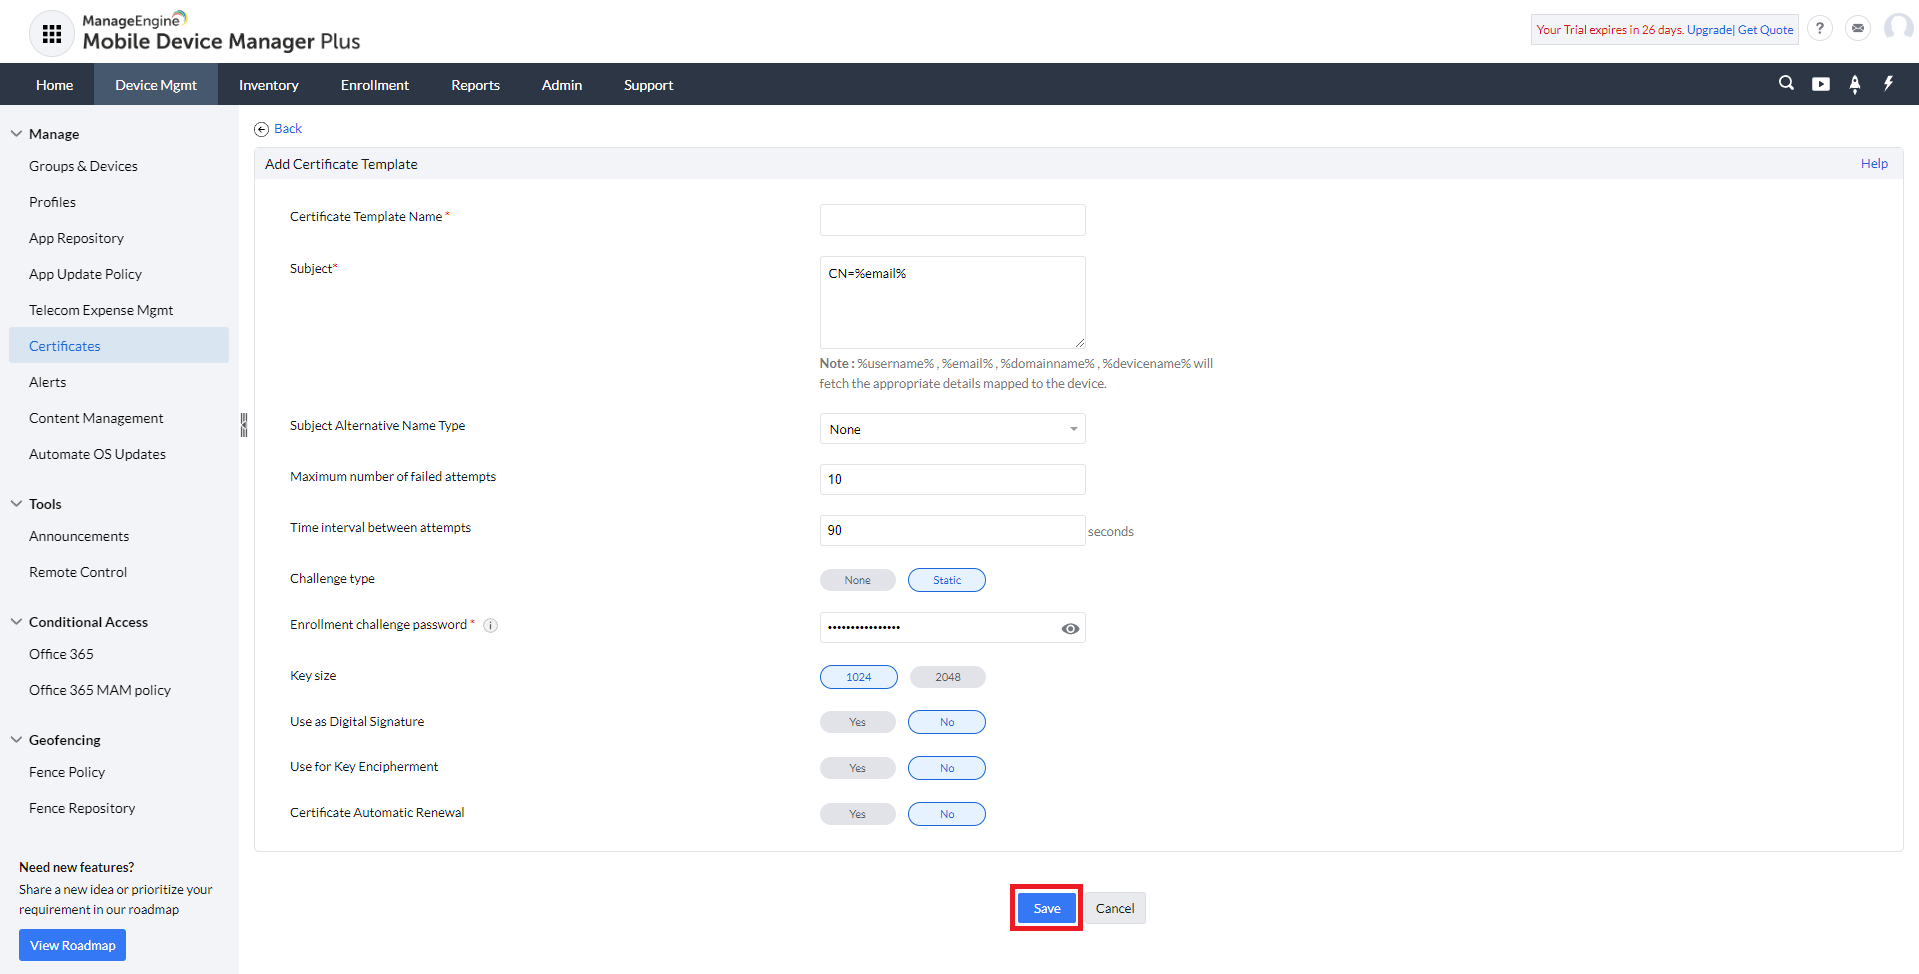
- Set the Key Size to 2048.
- Select what you want your users to use the Key for (Digital Signature and/or Key Encipherment).
- Set the Certificates to Automatically Renew.
- Click the “Save” button.
- If you also have a root certificate, Go to the Certificates Tab and Also add that certificate.
How To Create Your Manage Engine MDM Plus Profile
- In the ManageEngine MDM Plus portal, click on the “Profiles” menu on the left.
- Click “Create Profile” and select your desired platform.
- Enter a name for the profile.
- Click Continue.
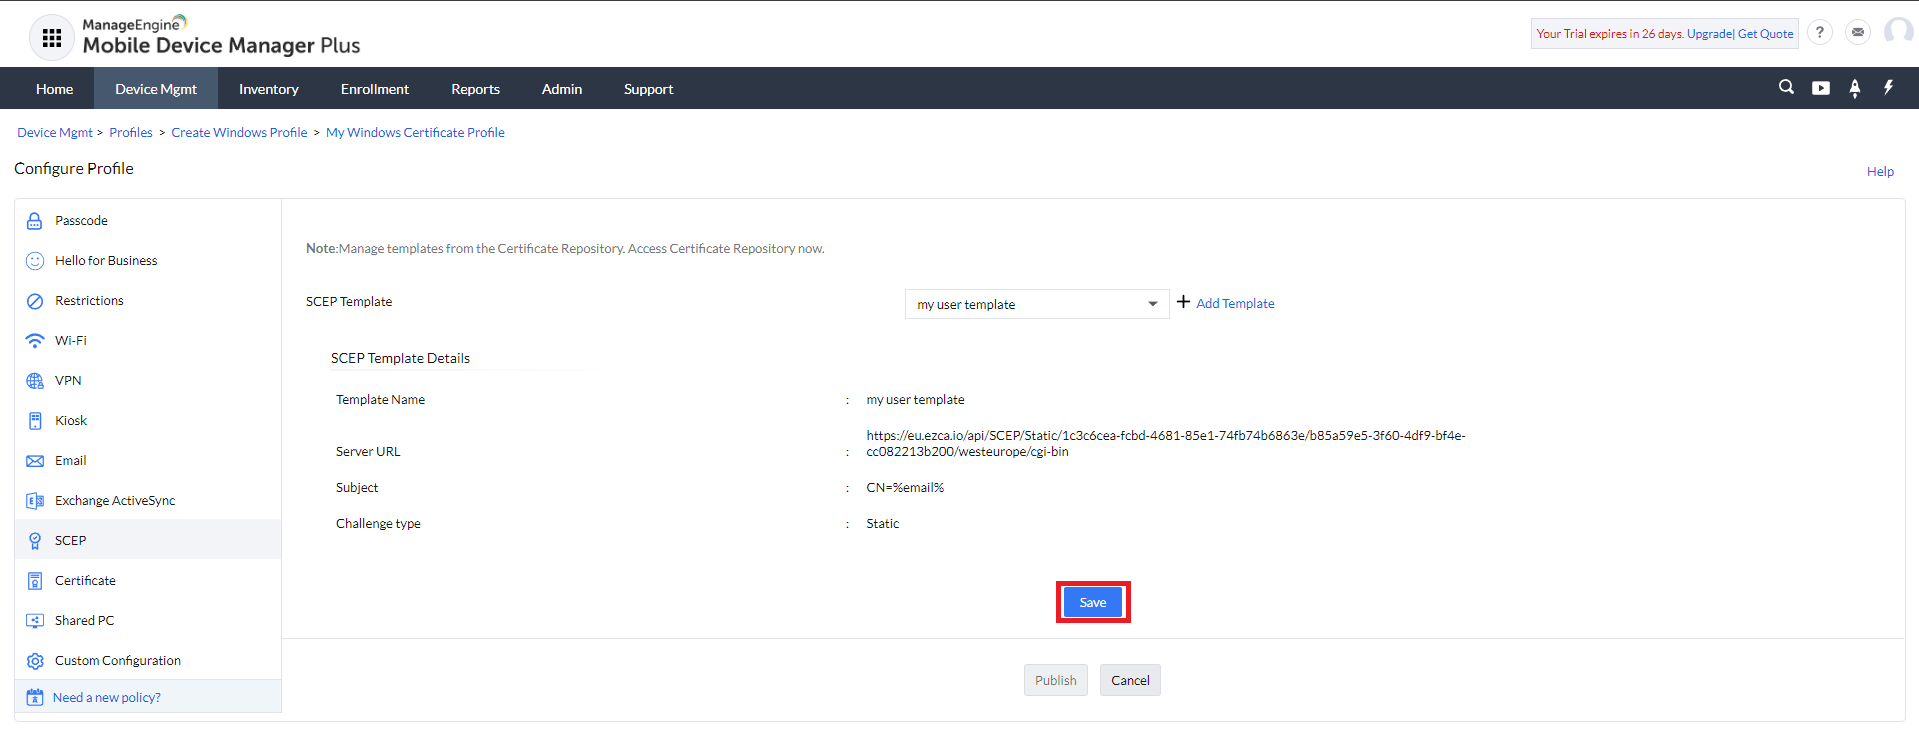
- On the Left Menu, click on “SCEP”.
- Select your SCEP template we created above.
- Click “Save”.
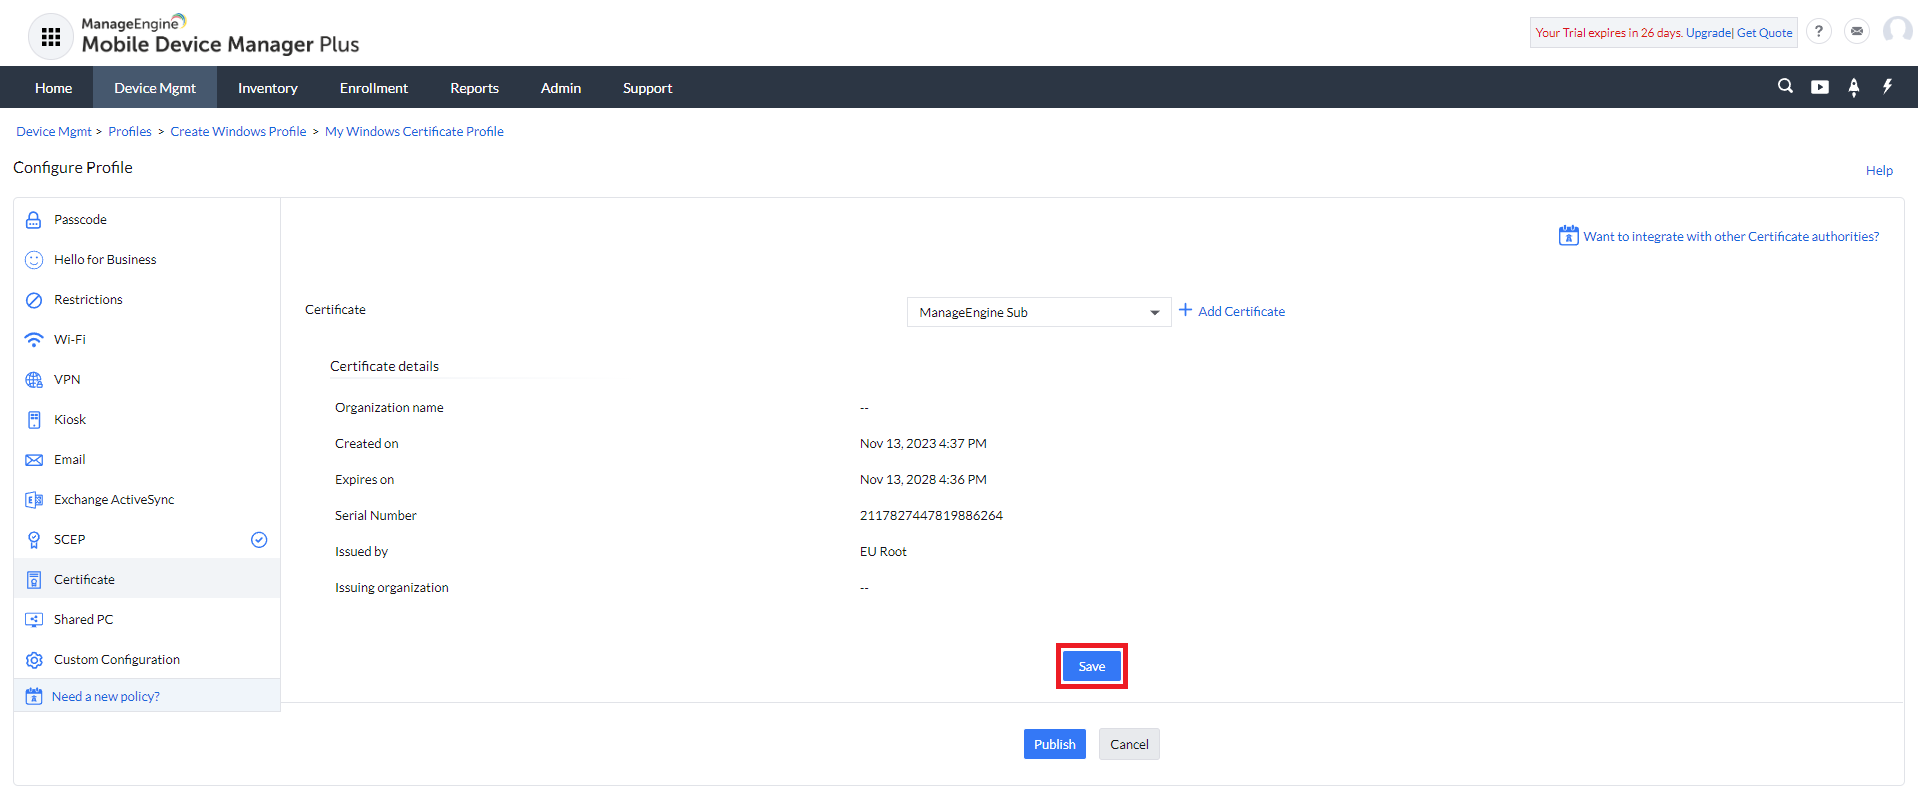
- On the left menu, click on “Certificate”.
- Select the SCEP certificate we created above.
- Click “Save”.
- Add any other settings you might want to add to this profile, and then click publish.
- If you also have a Root CA, create another profile to push that certificate to the certificate root store of your computer.
- Now you can assign this profile to your devices.
- Assign it to your first device and verify that your certificate was issued.
Enjoying EZCA? Leave Us a Review!
We hope you’re enjoying using EZCA to issue your SCEP certificates! If you have a moment, we would greatly appreciate it if you could leave us a review on G2. Your feedback helps other IT professionals discover EZCA and helps us continue to improve our service. Thank you for your support!