How-To: Select an EZMonitor Plan in the Azure Portal
Learn how to activate your EZMonitor subscription in Azure and start monitoring your SSL certificates in minutes and get visibility into all your private and public X509 Certificates.
Prerequisites
Creating the Azure Resource
- Go to https://portal.azure.com/
- Click on “Create a resource”.
- Type “EZMonitor” in the search bar.
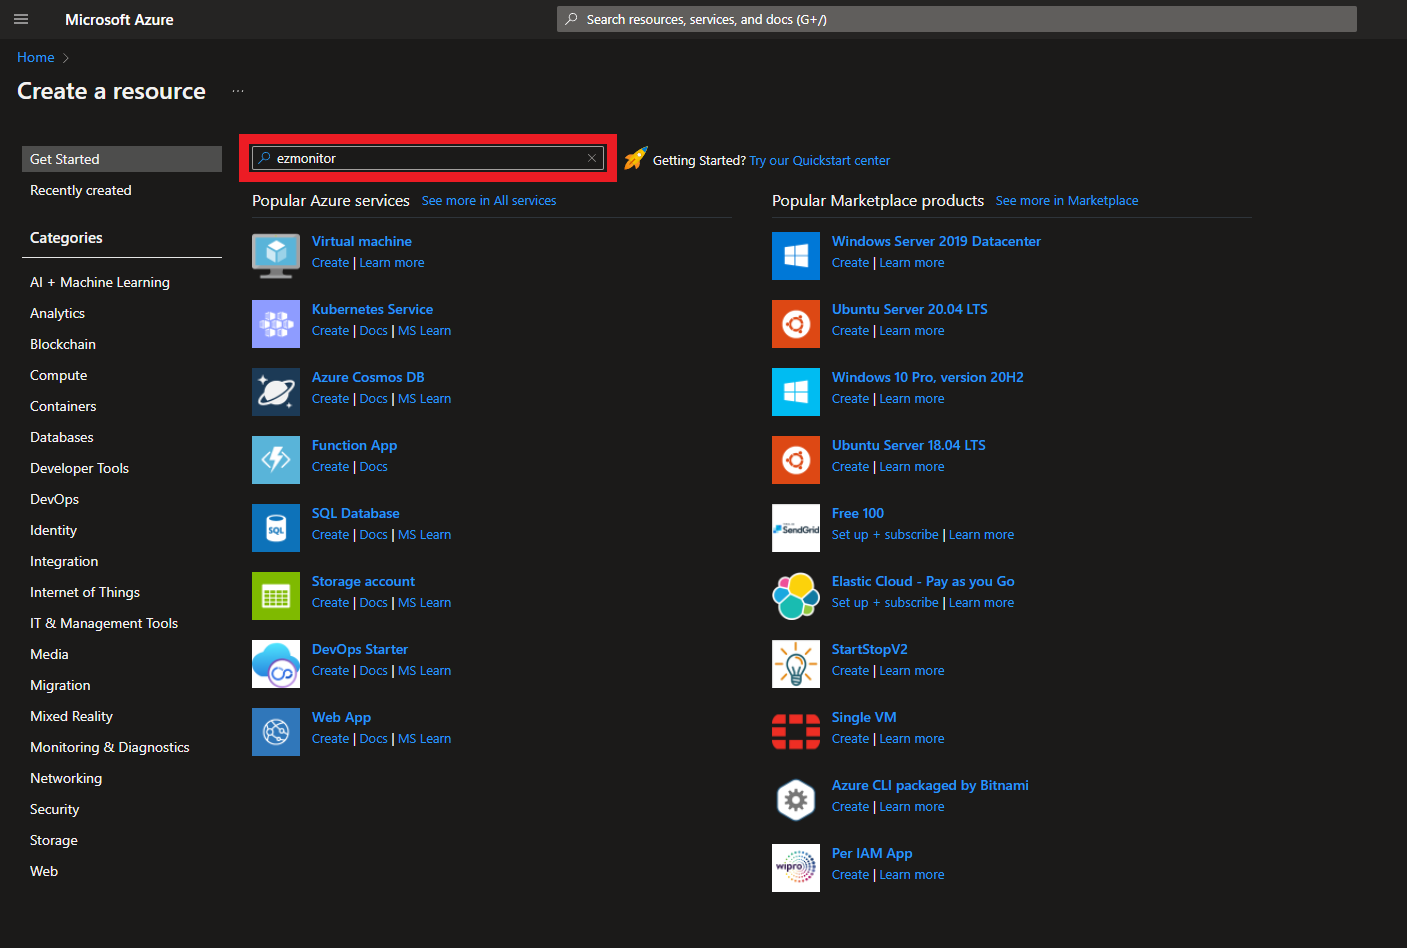
- Press enter.
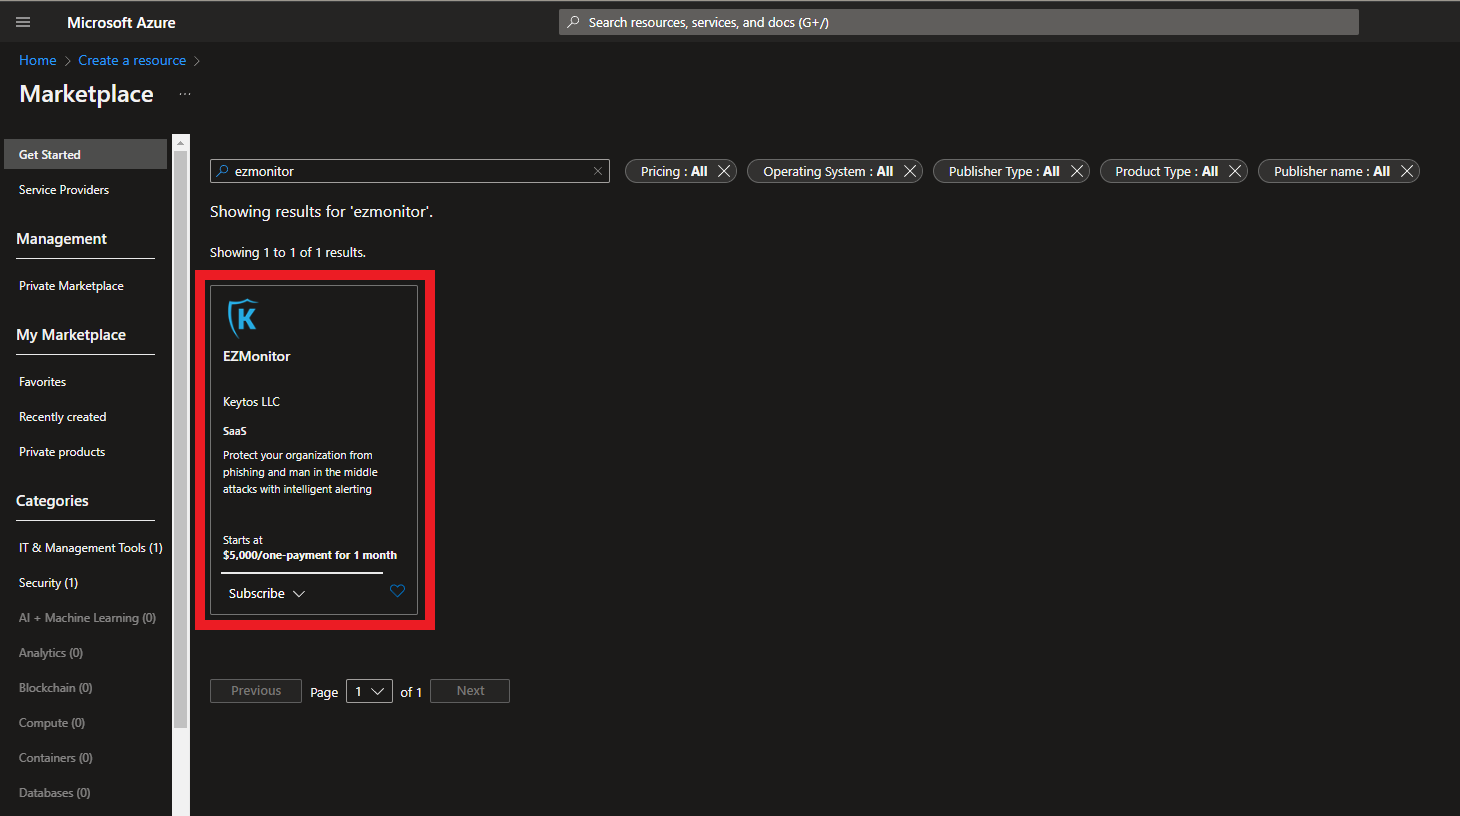
- Select the EZMonitor offering
- Select the plan.
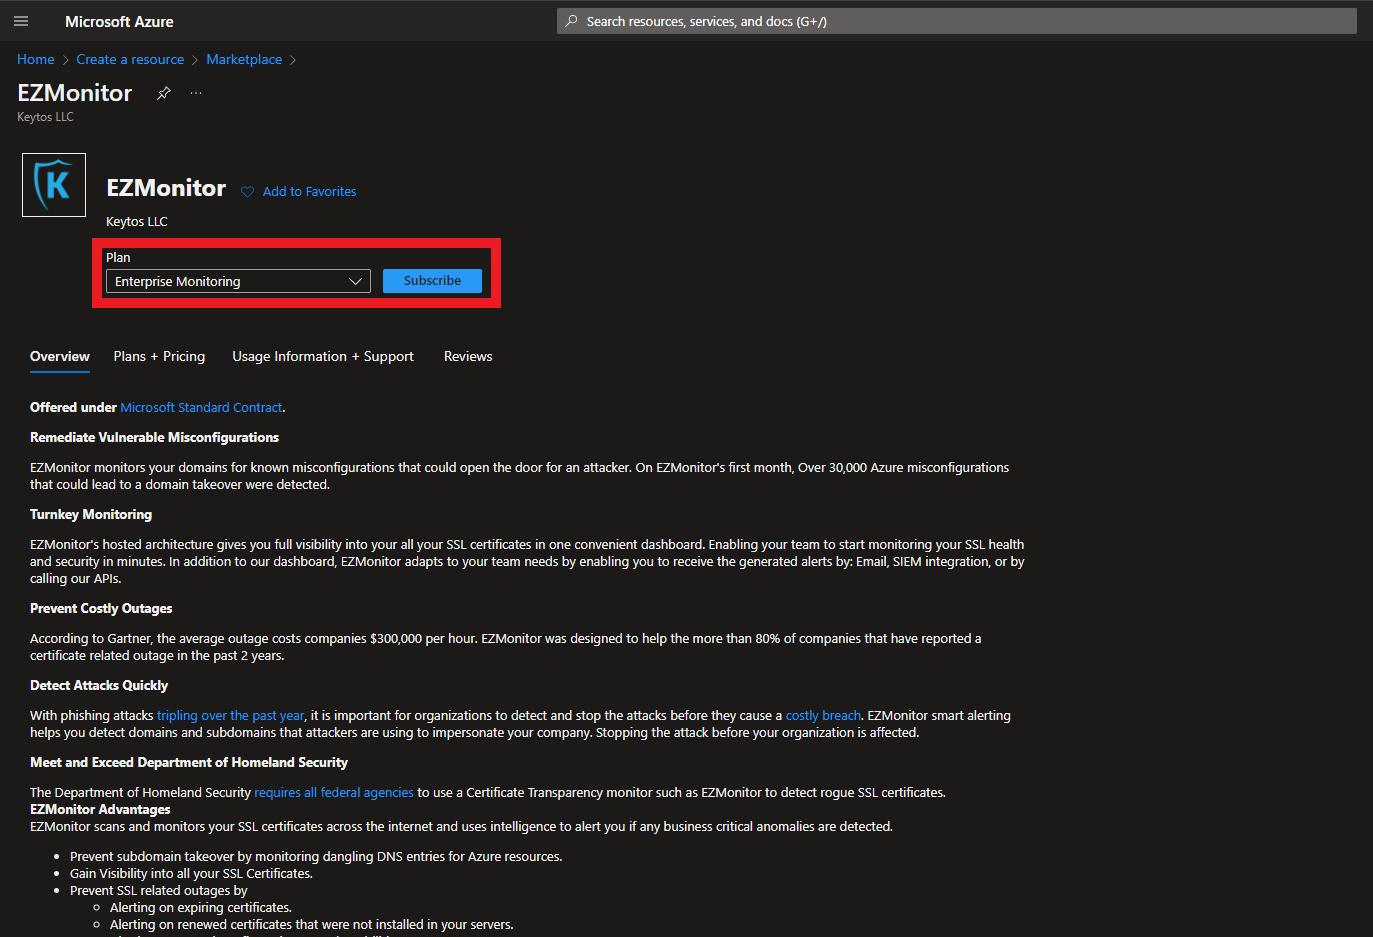
- Click the “Subscribe” button
- Enter your subscription and resource group information.
- Click the “Review + Subscribe” button
- Click the “Subscribe” button
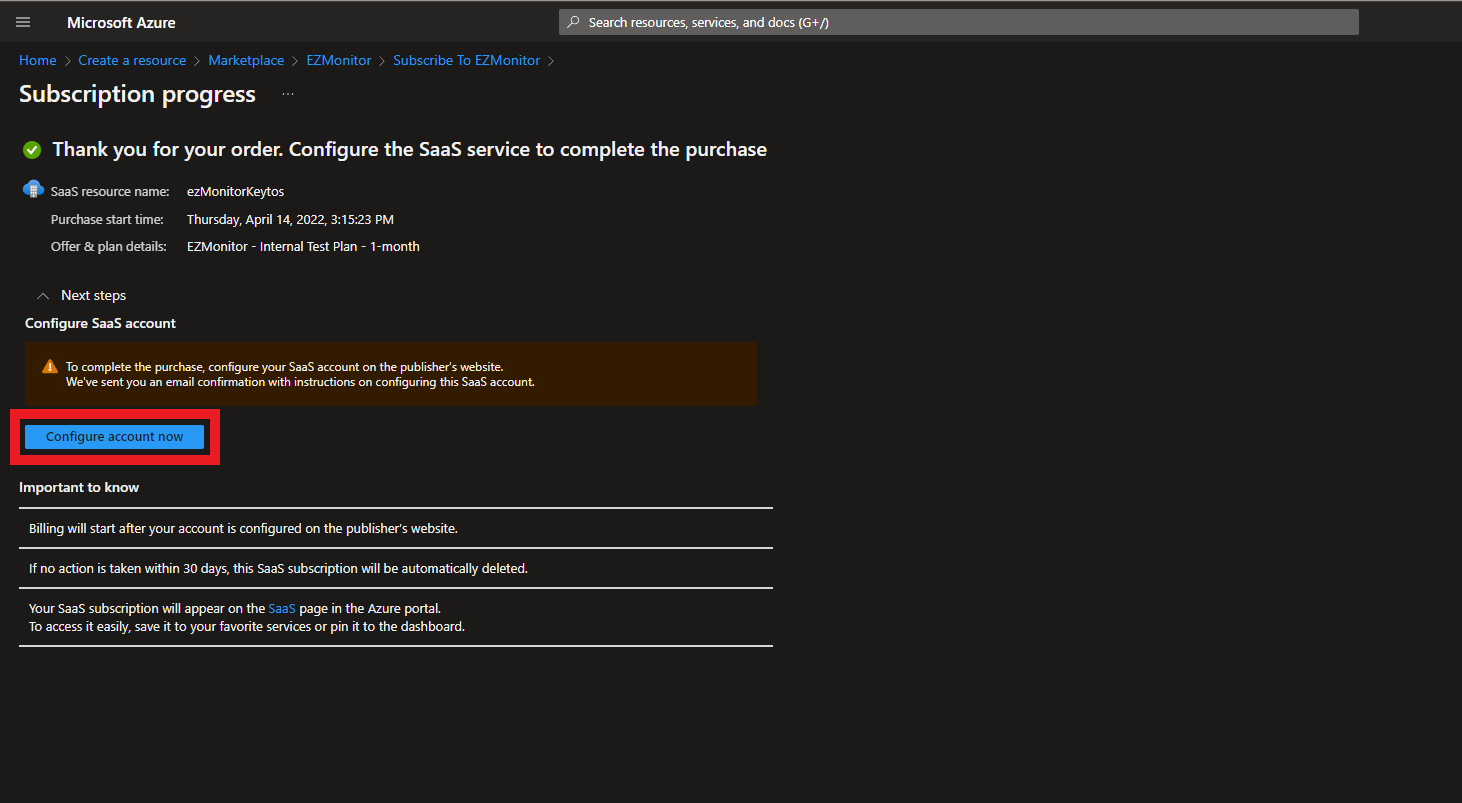
- Once the subscription is complete, click the “Configure account now” button.
- This will redirect you to our portal (https://portal.ezmonitor.io/). Sign in with your same Microsoft account.
- Enter the AAD Users or Groups that represent your subscription administrators
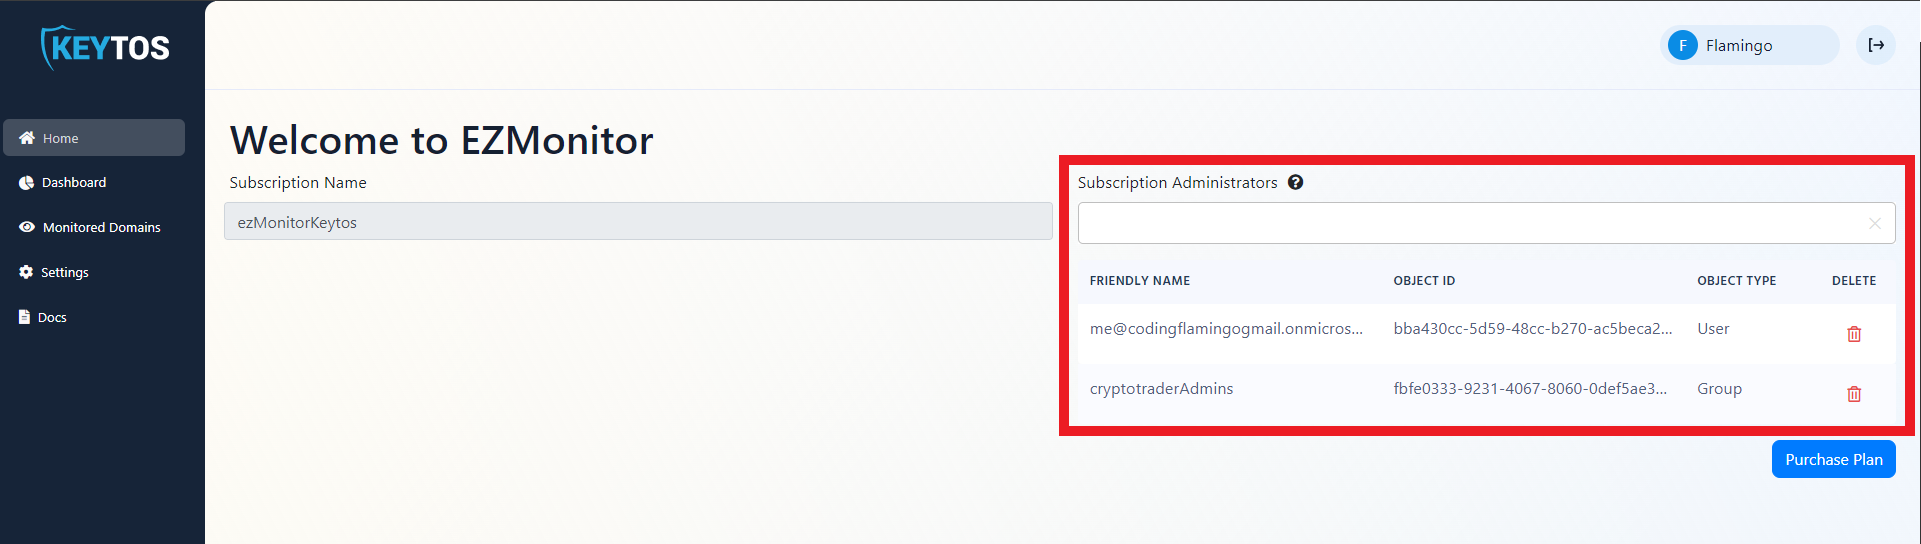
- Once you have added the subscription administrators, click the “Purchase Plan” button.

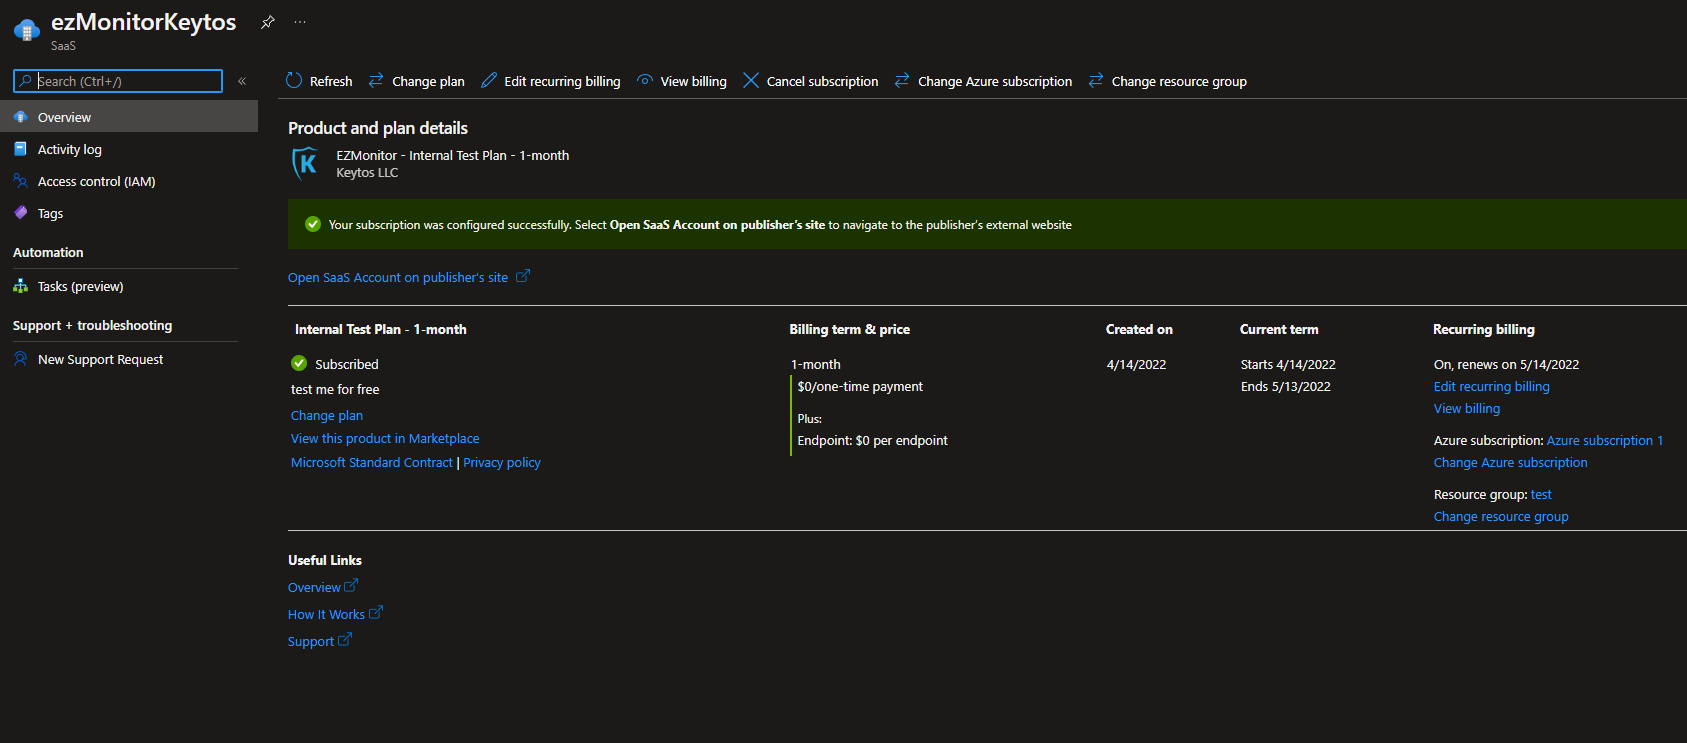
- Once you have registered in EZMonitor, the status in your Azure resource will change to subscribed.
- Now you are ready to monitor your domains.