How To Setup EAP-TTLS/PAP RADIUS Authentication For Entra ID Wifi Authentication in Device
Prerequisites
- Registering the application in your tenant
- Creating Cloud Radius Instance
- Being a Subscription Owner or Network Administrator
- Being an MDM Administrator.
Introduction - How to Setup RADIUS Authentication in Device
When you are authenticating your devices to your network, it is usually seamless to the user. The user connects to the network and the device prompts the user for the appropriate credentials (Either username and password, or to choose the certificate). This is the most secure way to authenticate your devices to your network. However, there are some scenarios (such as using Entra ID passwords) where more configuration is needed in the device (We recommend doing this manually only for testing in the device and then using an MDM to deploy the settings to the devices).
How to Configure EAP-TTLS/PAP on Windows for WiFi RADIUS Authentication
As mentioned in the introductions, if you are using Entra ID passwords, you will need to configure the device to use EAP-TTLS/PAP (This is due to Entra ID not supporting MS-CHAPV2 Identity delegation). To configure EAP-TTLS/PAP on Windows, follow these steps:
- Go to Settings -> Network & Internet -> Wi-Fi.
- Click on Manage known networks.
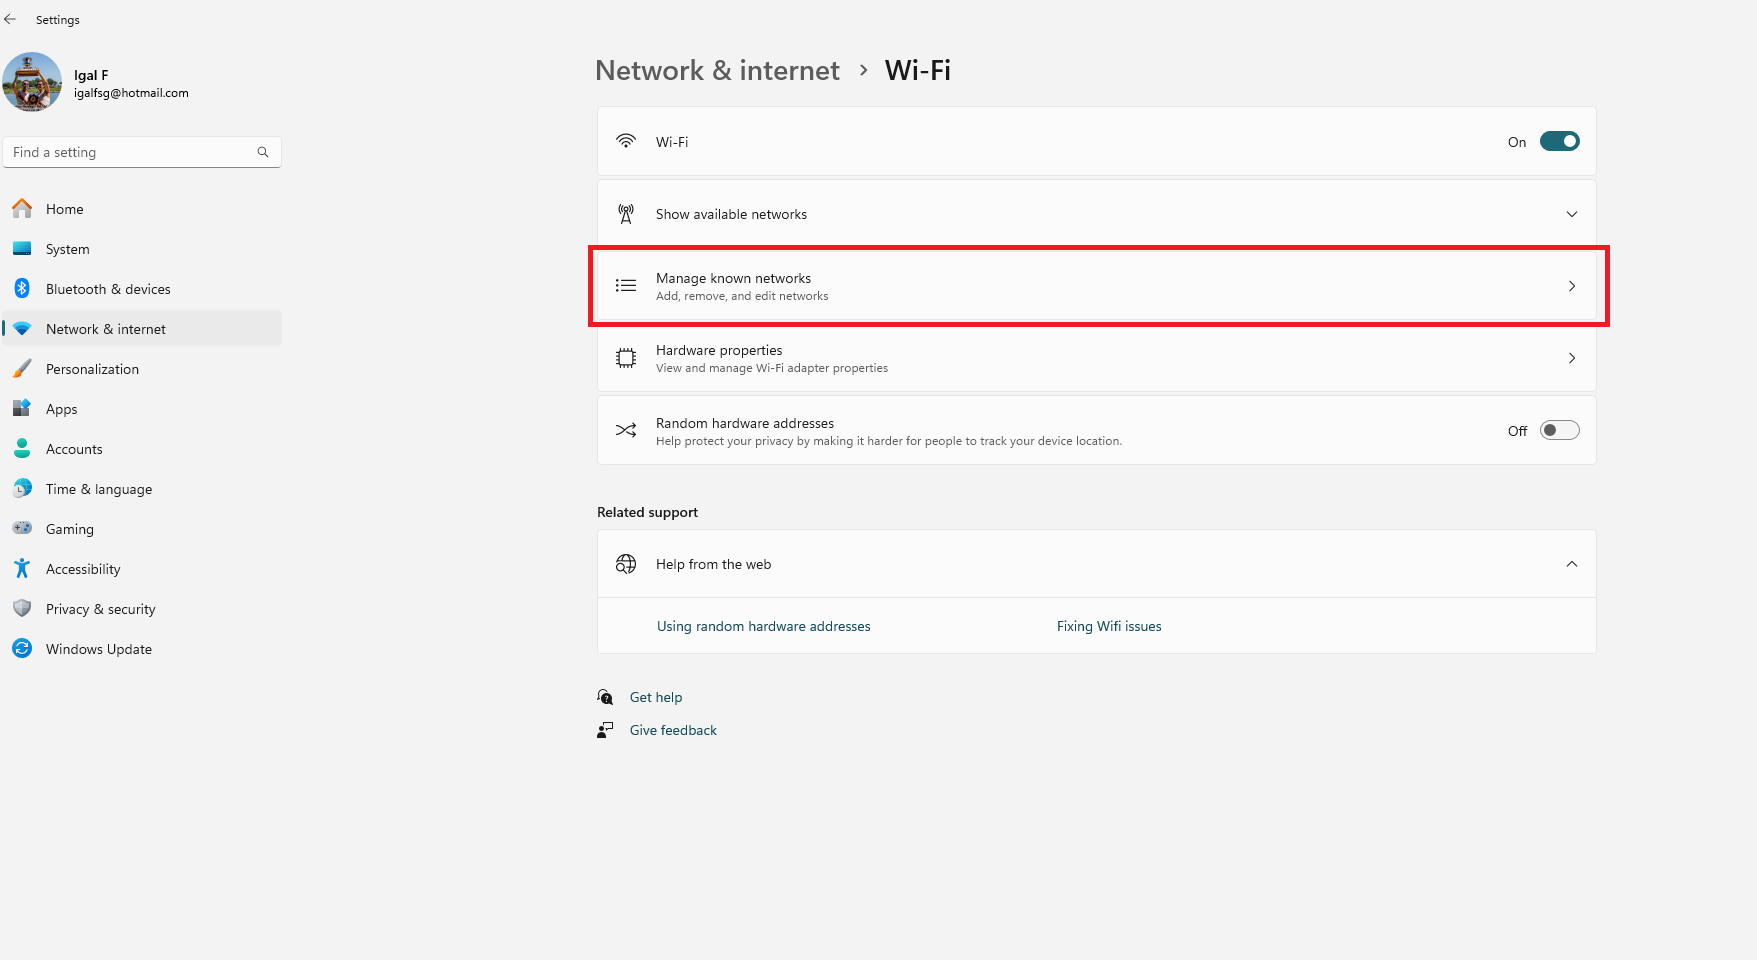
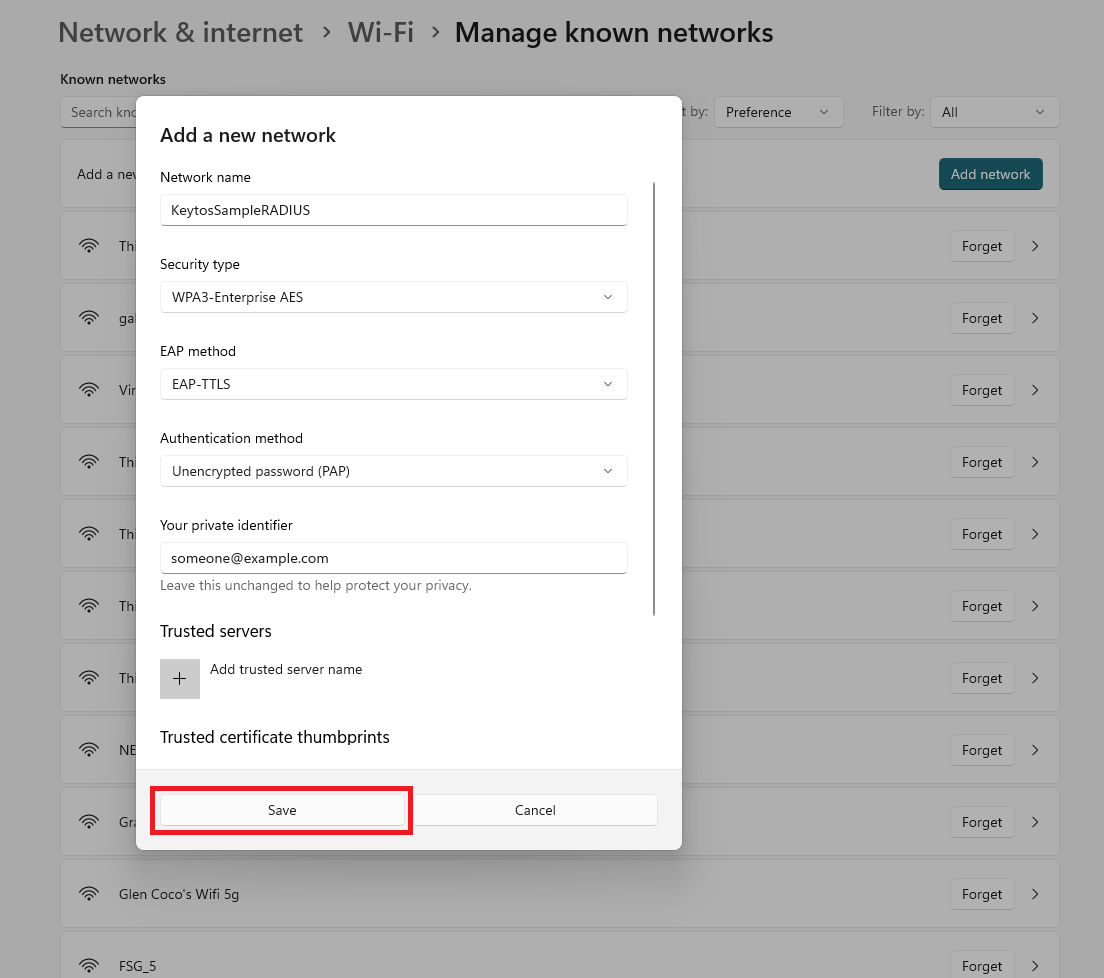
- Click on “Add Network” on the top right.
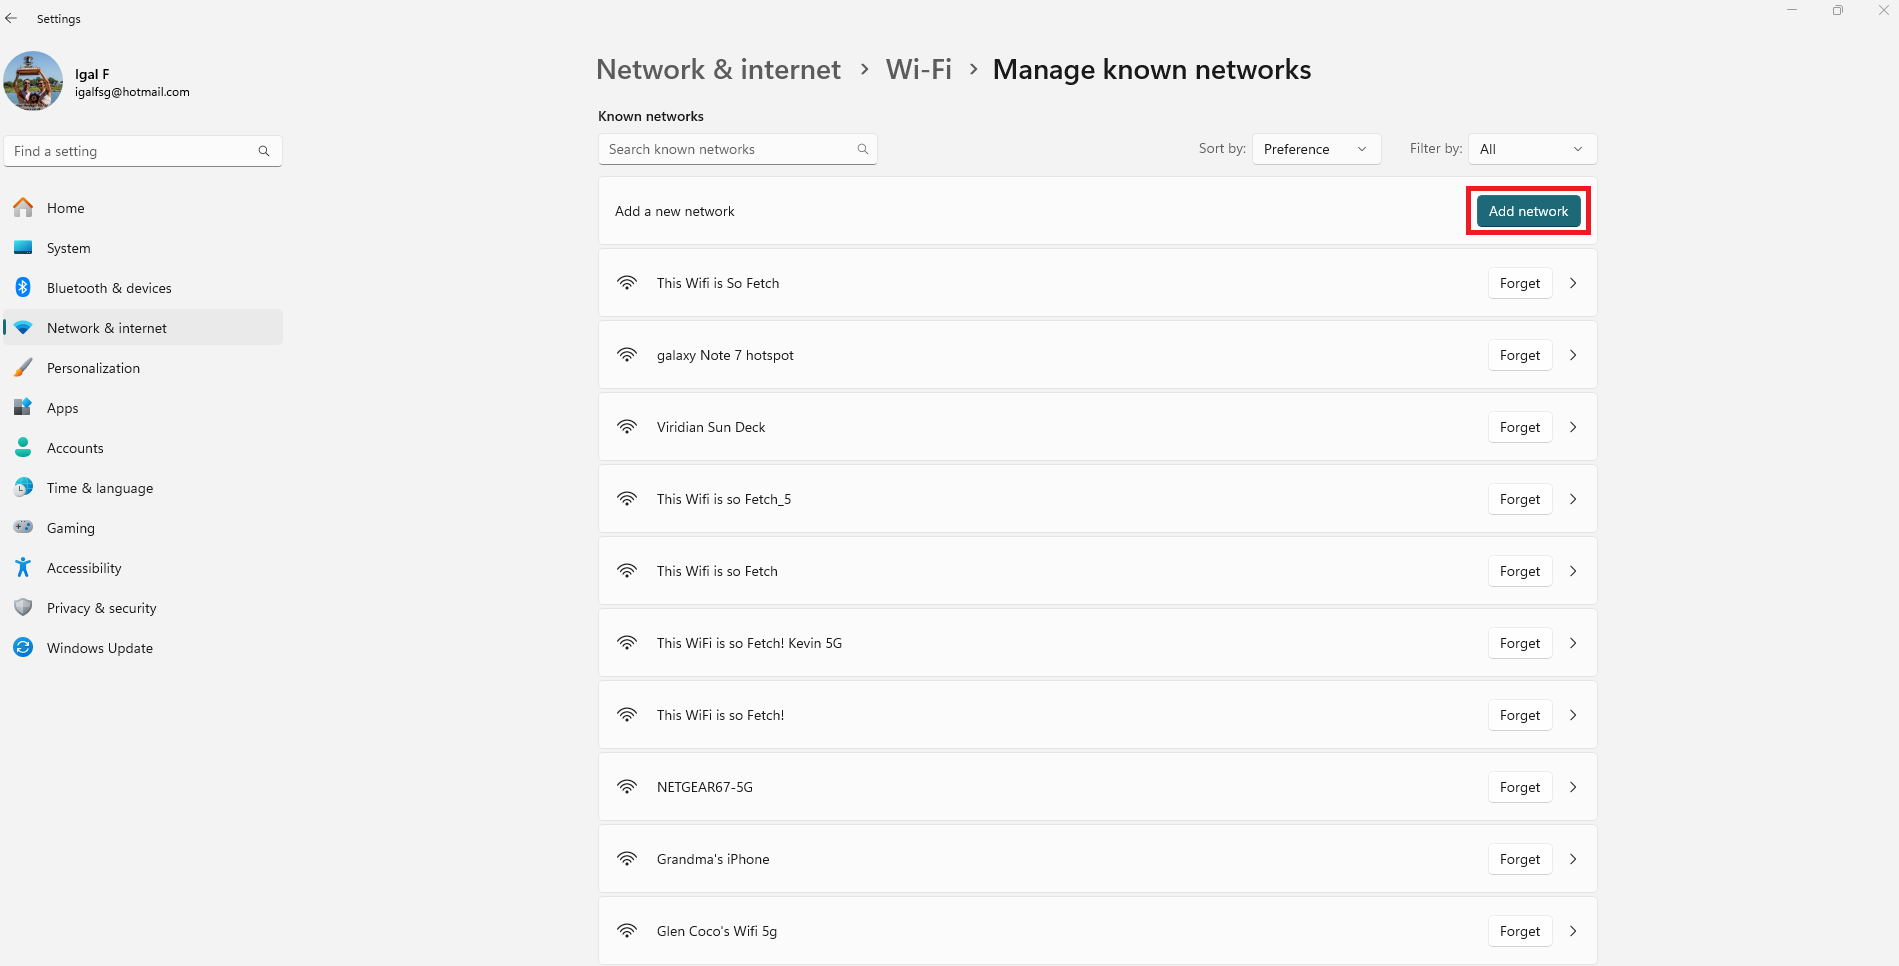
- Enter the SSID of your network (Case Sensitive).
- Select the Security type as either WPA2-Enterprise or WPA3-Enterprise (Depending on your network settings).
- As the EAP Method, select “EAP-TTLS”.
- For the Authentication Method, select “Unencrypted password (PAP)” (Don’t worry the password is encrypted by EAP-TTLS using the server certificate).
- Click Save.
- Now when you connect to the network you will be prompted for your Entra ID username and password.
How to Configure EAP-TTLS/PAP on Windows for Wired Ethernet RADIUS Authentication
In certain network configurations, you would need to configure EAP-TTLS/PAP for wired networks instead of WiFi. To configure EAP-TTLS/PAP on Windows for a wired ethernet network follow these steps:
- Go to Settings -> Network & Internet -> Ethernet.
- Open the network details and for Authentication settings click on “Edit”
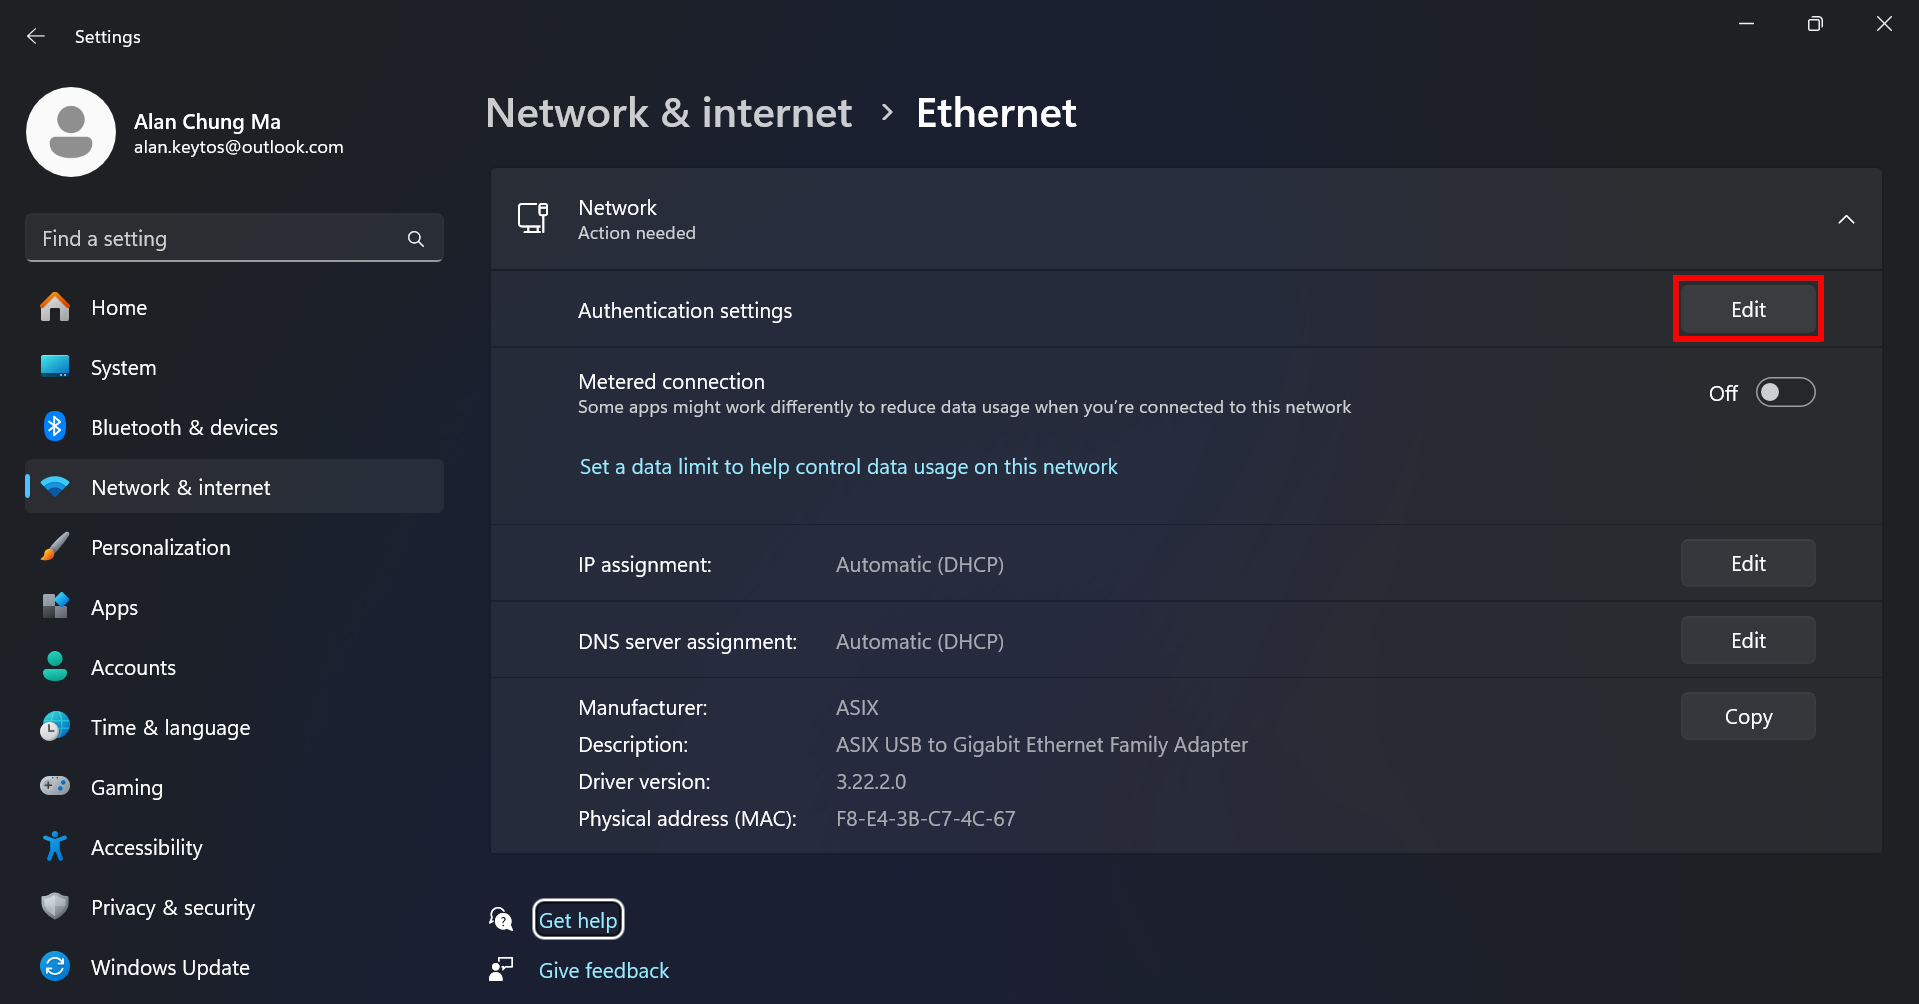
- Enable “IEEE 802.1X authentication”
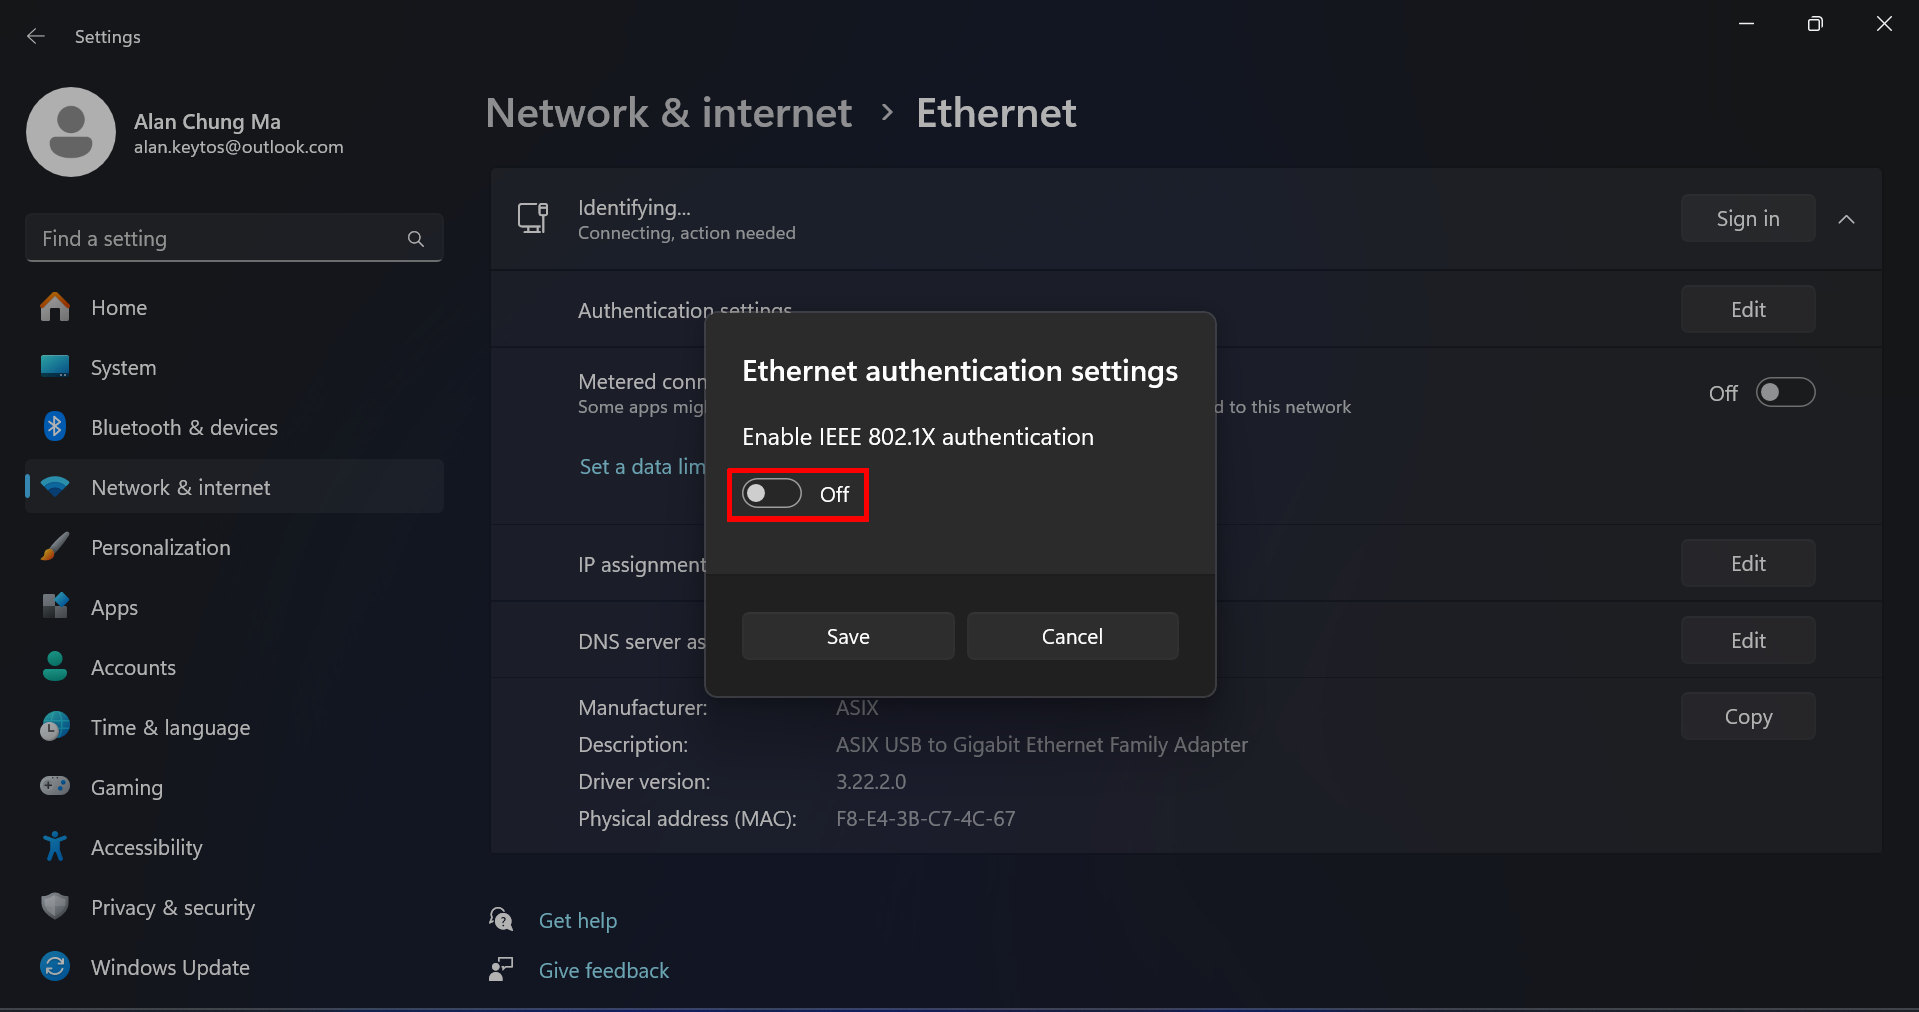
- Click on “Edit configuration”
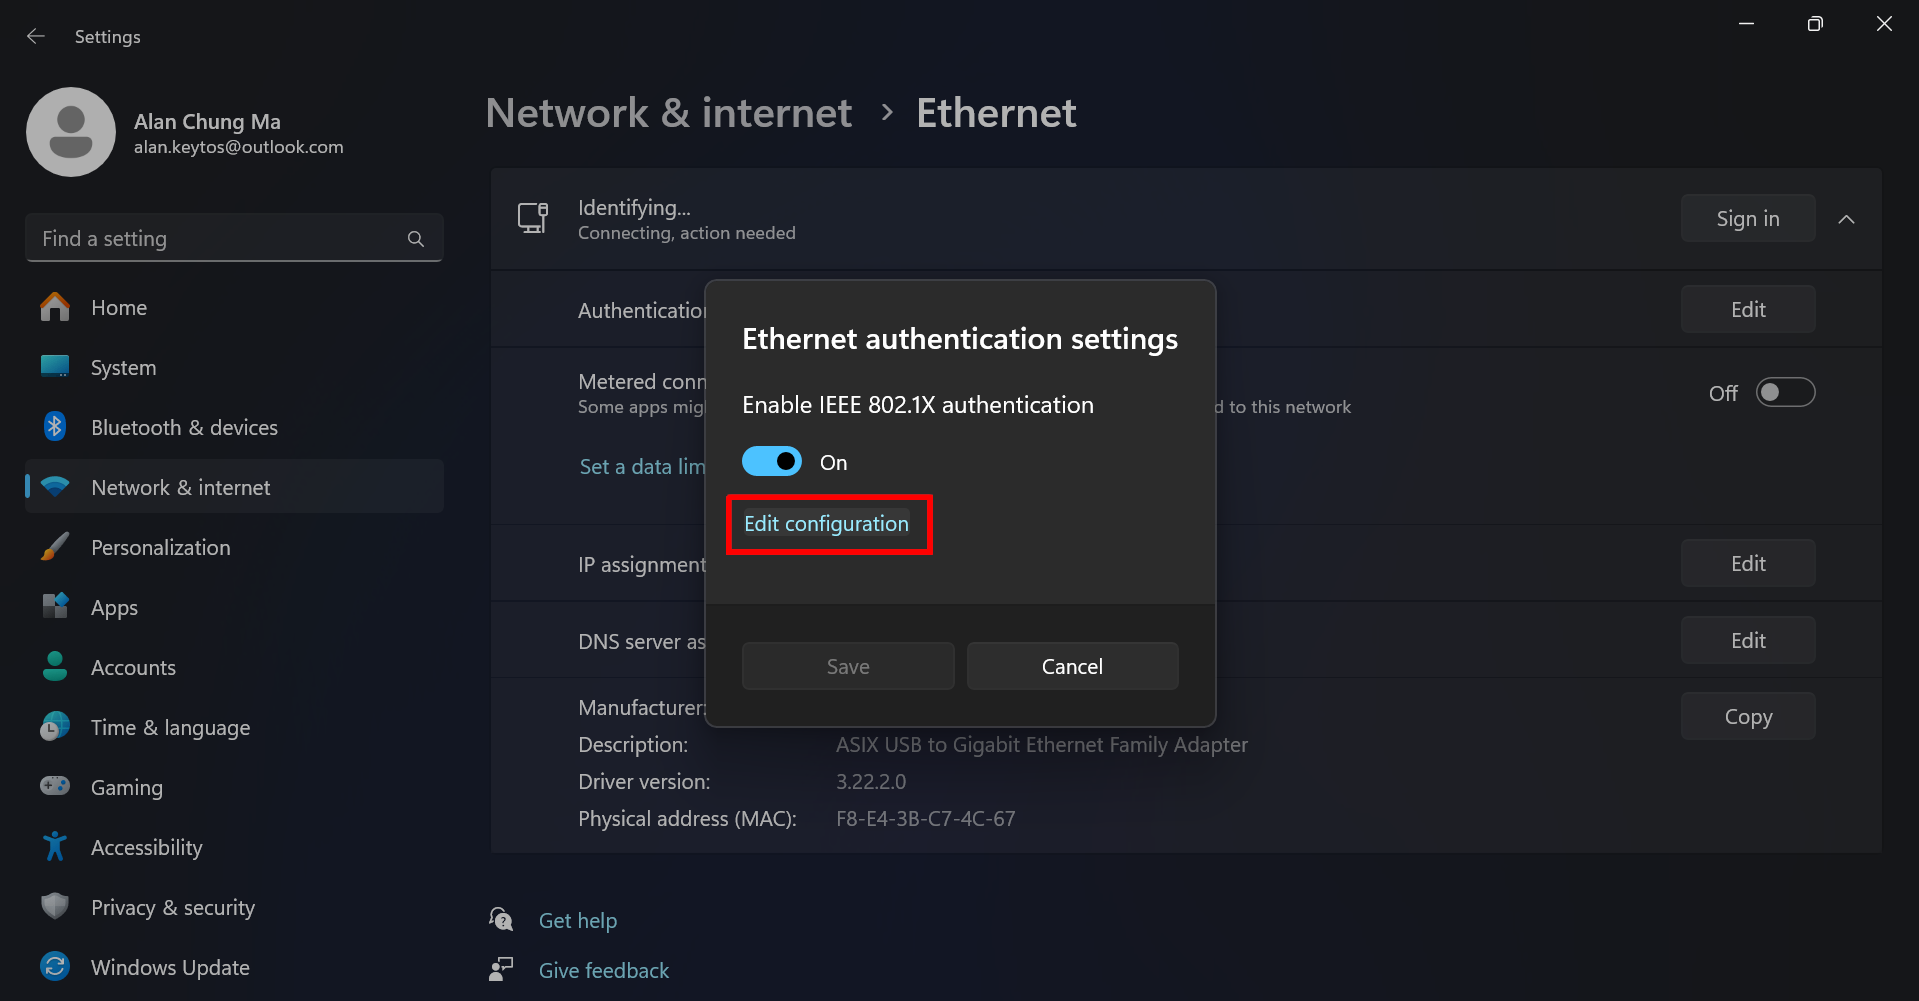
- Set the EAP method to “EAP-TTLS” and the Authentication method to “Unencrypted password (PAP)” and click on “Save”
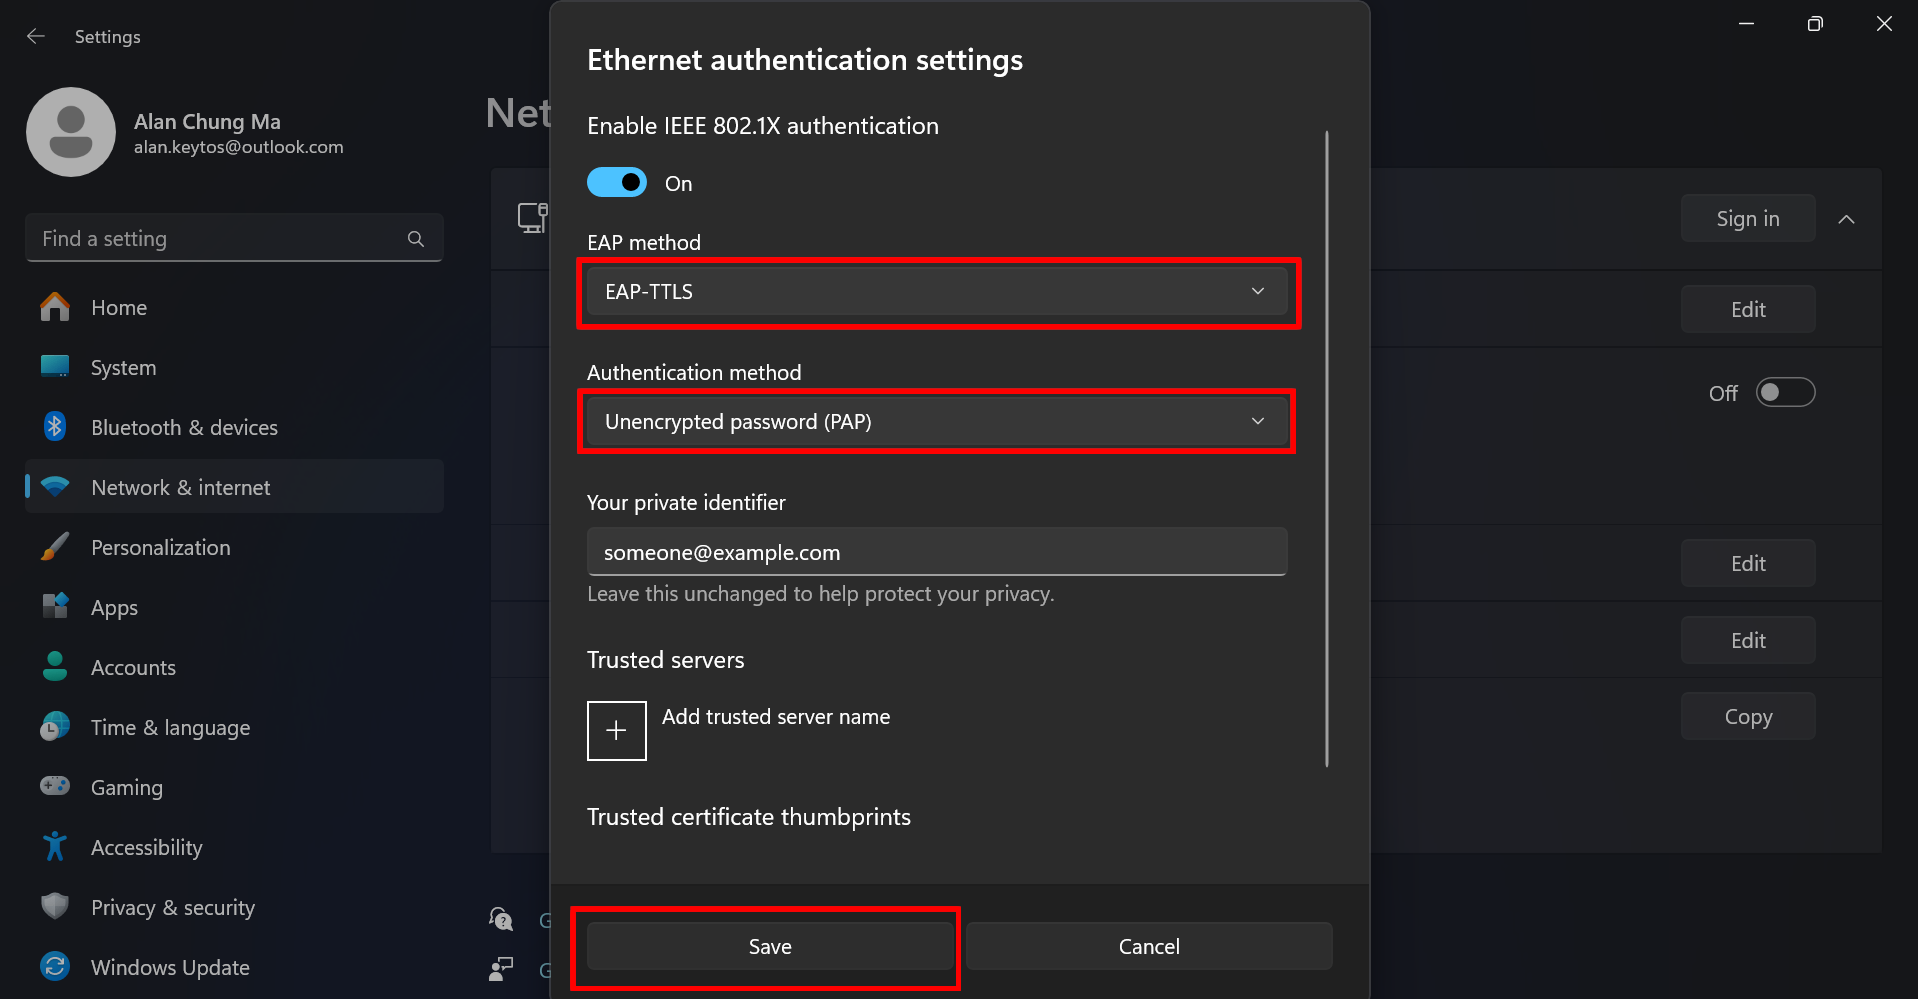
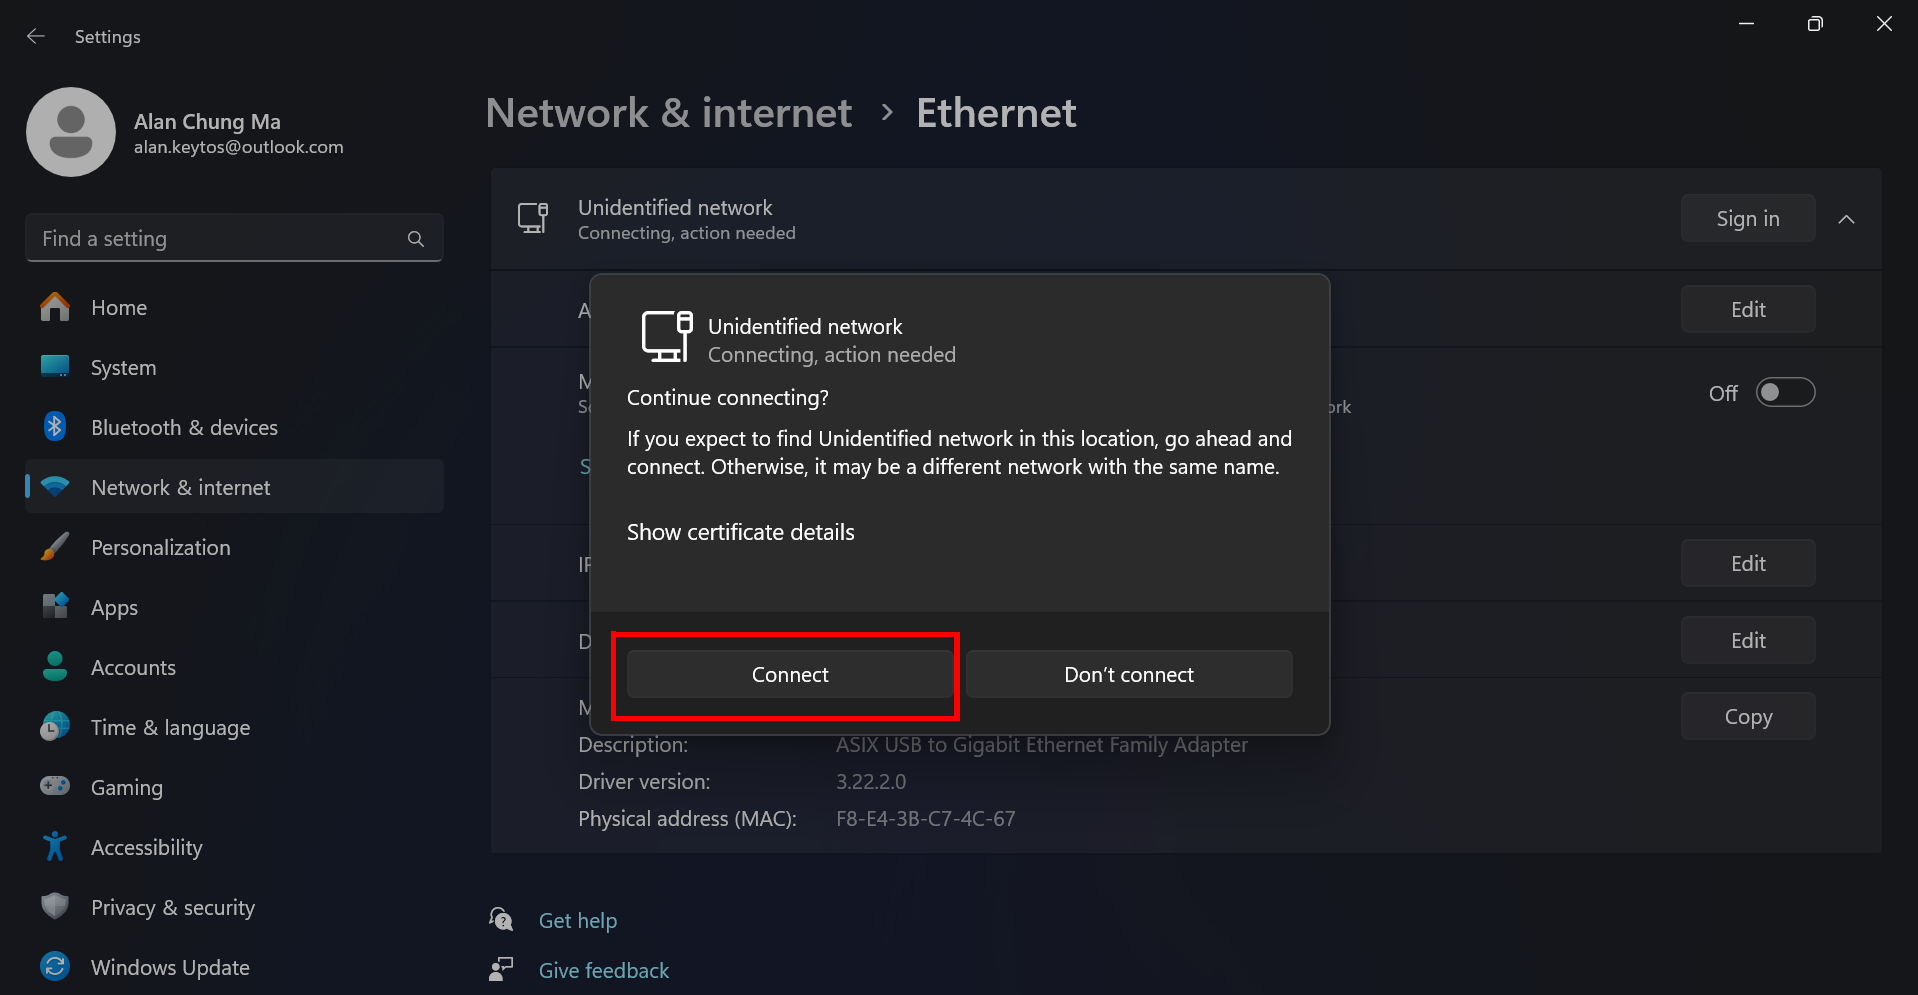
- Click on “Sign in” for the wired network and make sure to connect
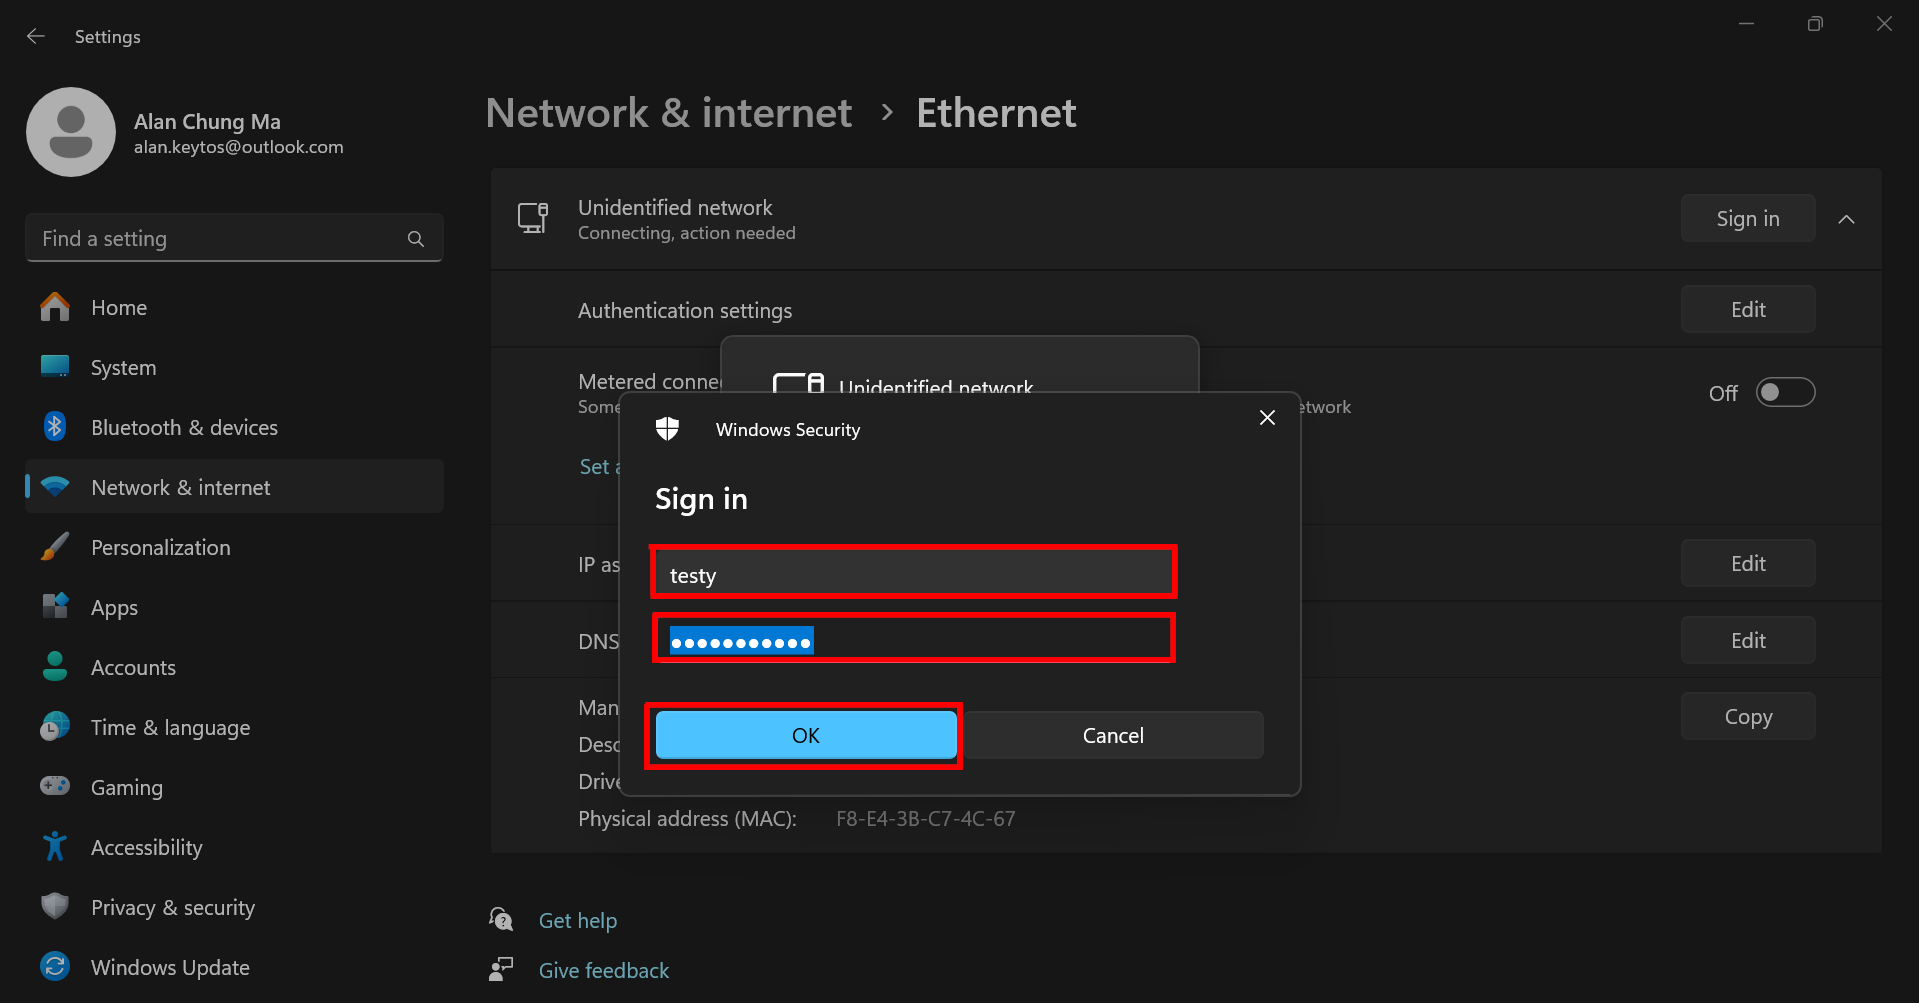
- Enter your Entra ID credentials and click “OK”
How to Configure EAP-TTLS/PAP on MacOS for RADIUS Authentication with Entra ID Passwords
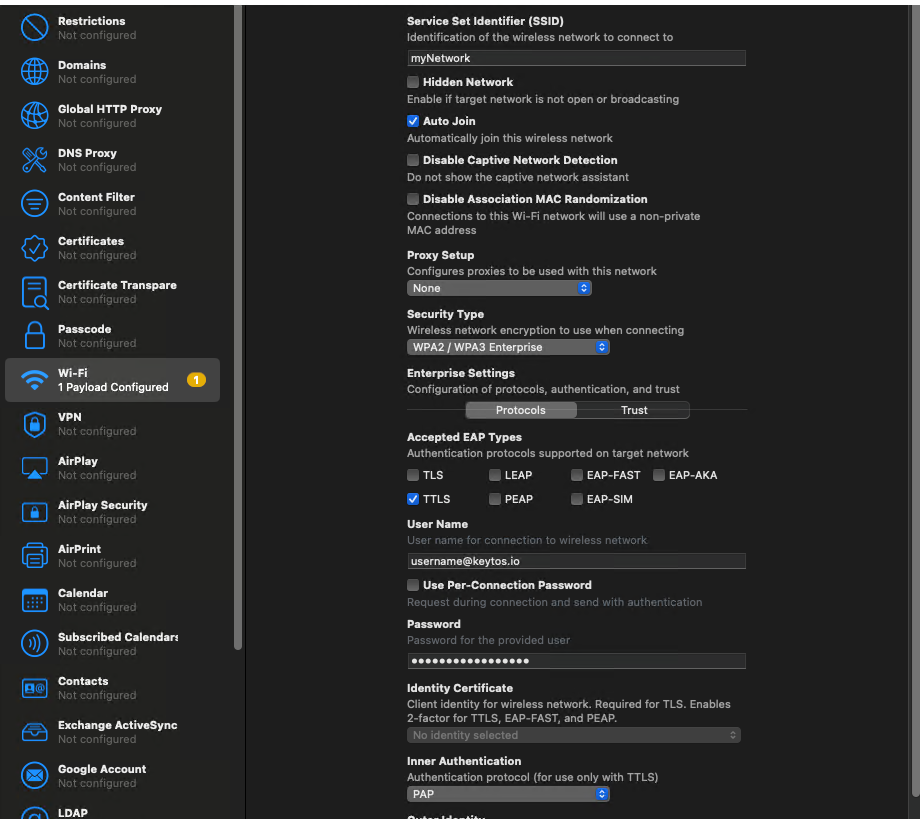
As mentioned in the introductions, if you are using Entra ID passwords, you will need to configure the device to use EAP-TTLS/PAP (This is due to Entra ID not supporting MS-CHAPV2 Identity delegation). To configure EAP-TTLS/PAP on MacOS, follow these steps:
- Download “Apple Configurator” from the App Store.
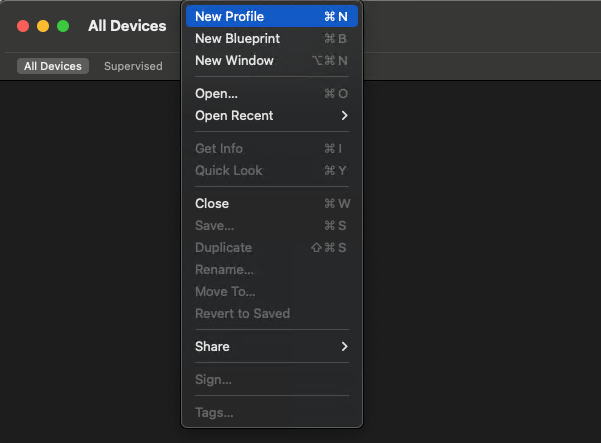
- In Apple Configurator, click on “File” -> “New Profile”.
- In the General settings, enter the name of the profile.
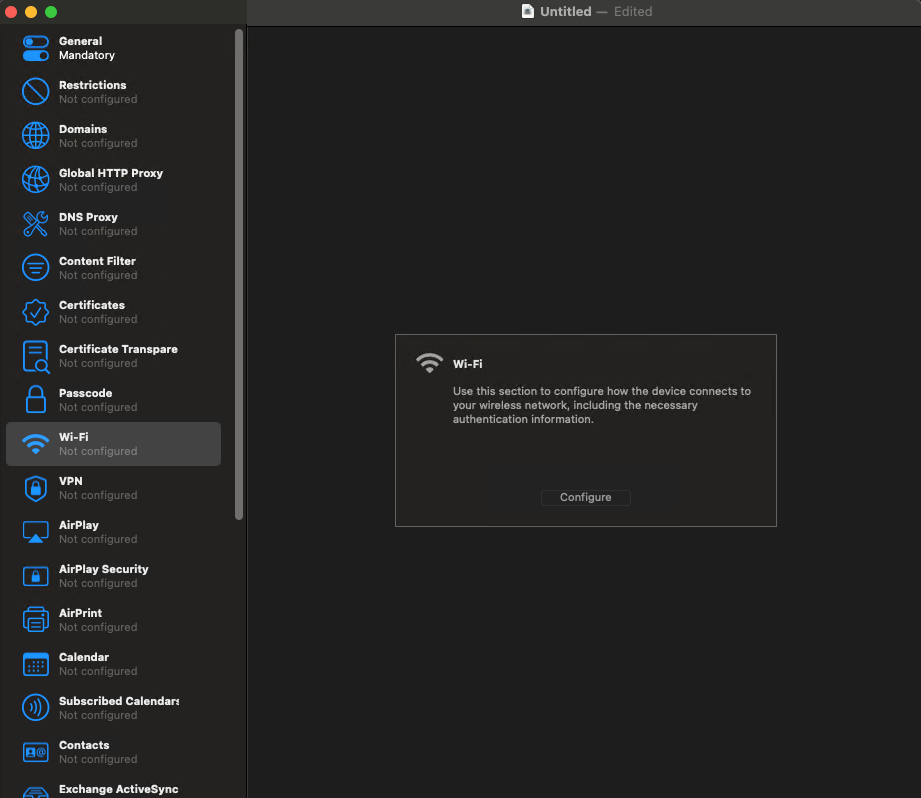
- Click on “Wi-Fi” on the left.
- Click on “Configure”.
- Enter the SSID of your network (Case Sensitive).
- Select the Security type as either WPA2-Enterprise/WPA3-Enterprise.
- Select the EAP Method as “TTLS”.
- Enter your Entra ID username in the Identity field.
- Enter your Entra ID password in the Password field.
- Select “PAP” as the Inner Authentication.
- Click Save.
How to Configure EAP-TTLS/PAP on Android for RADIUS Authentication with Entra ID Passwords
As mentioned in the introductions, if you are using Entra ID passwords, you will need to configure the device to use EAP-TTLS/PAP (This is due to Entra ID not supporting MS-CHAPV2 Identity delegation). To configure EAP-TTLS/PAP on Android, follow these steps:
- Go to Settings -> Network & Internet -> Wi-Fi.
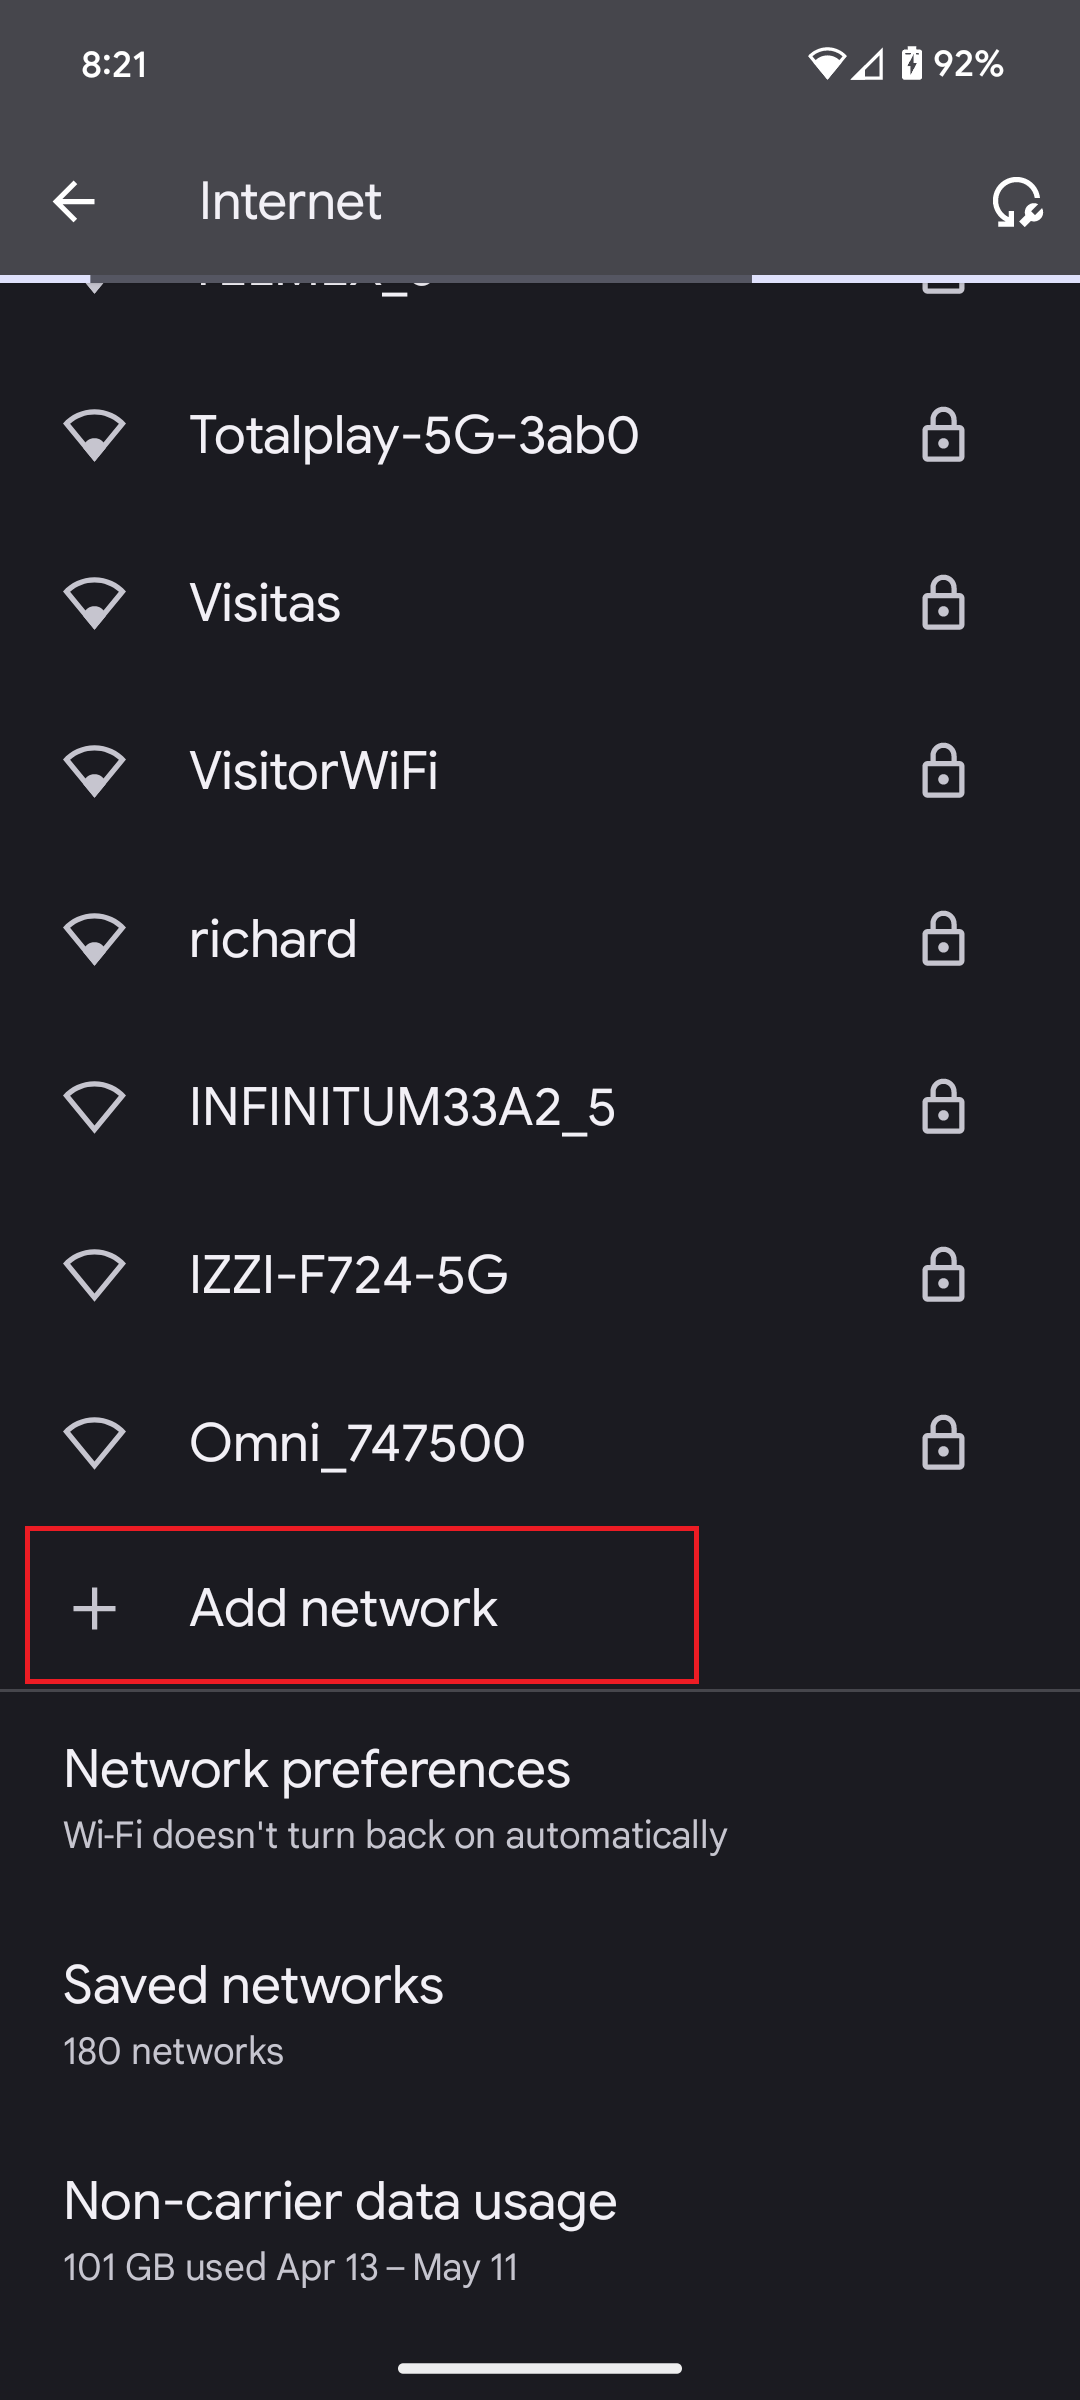
- Scroll down to the bottom and click on “Add Network”.
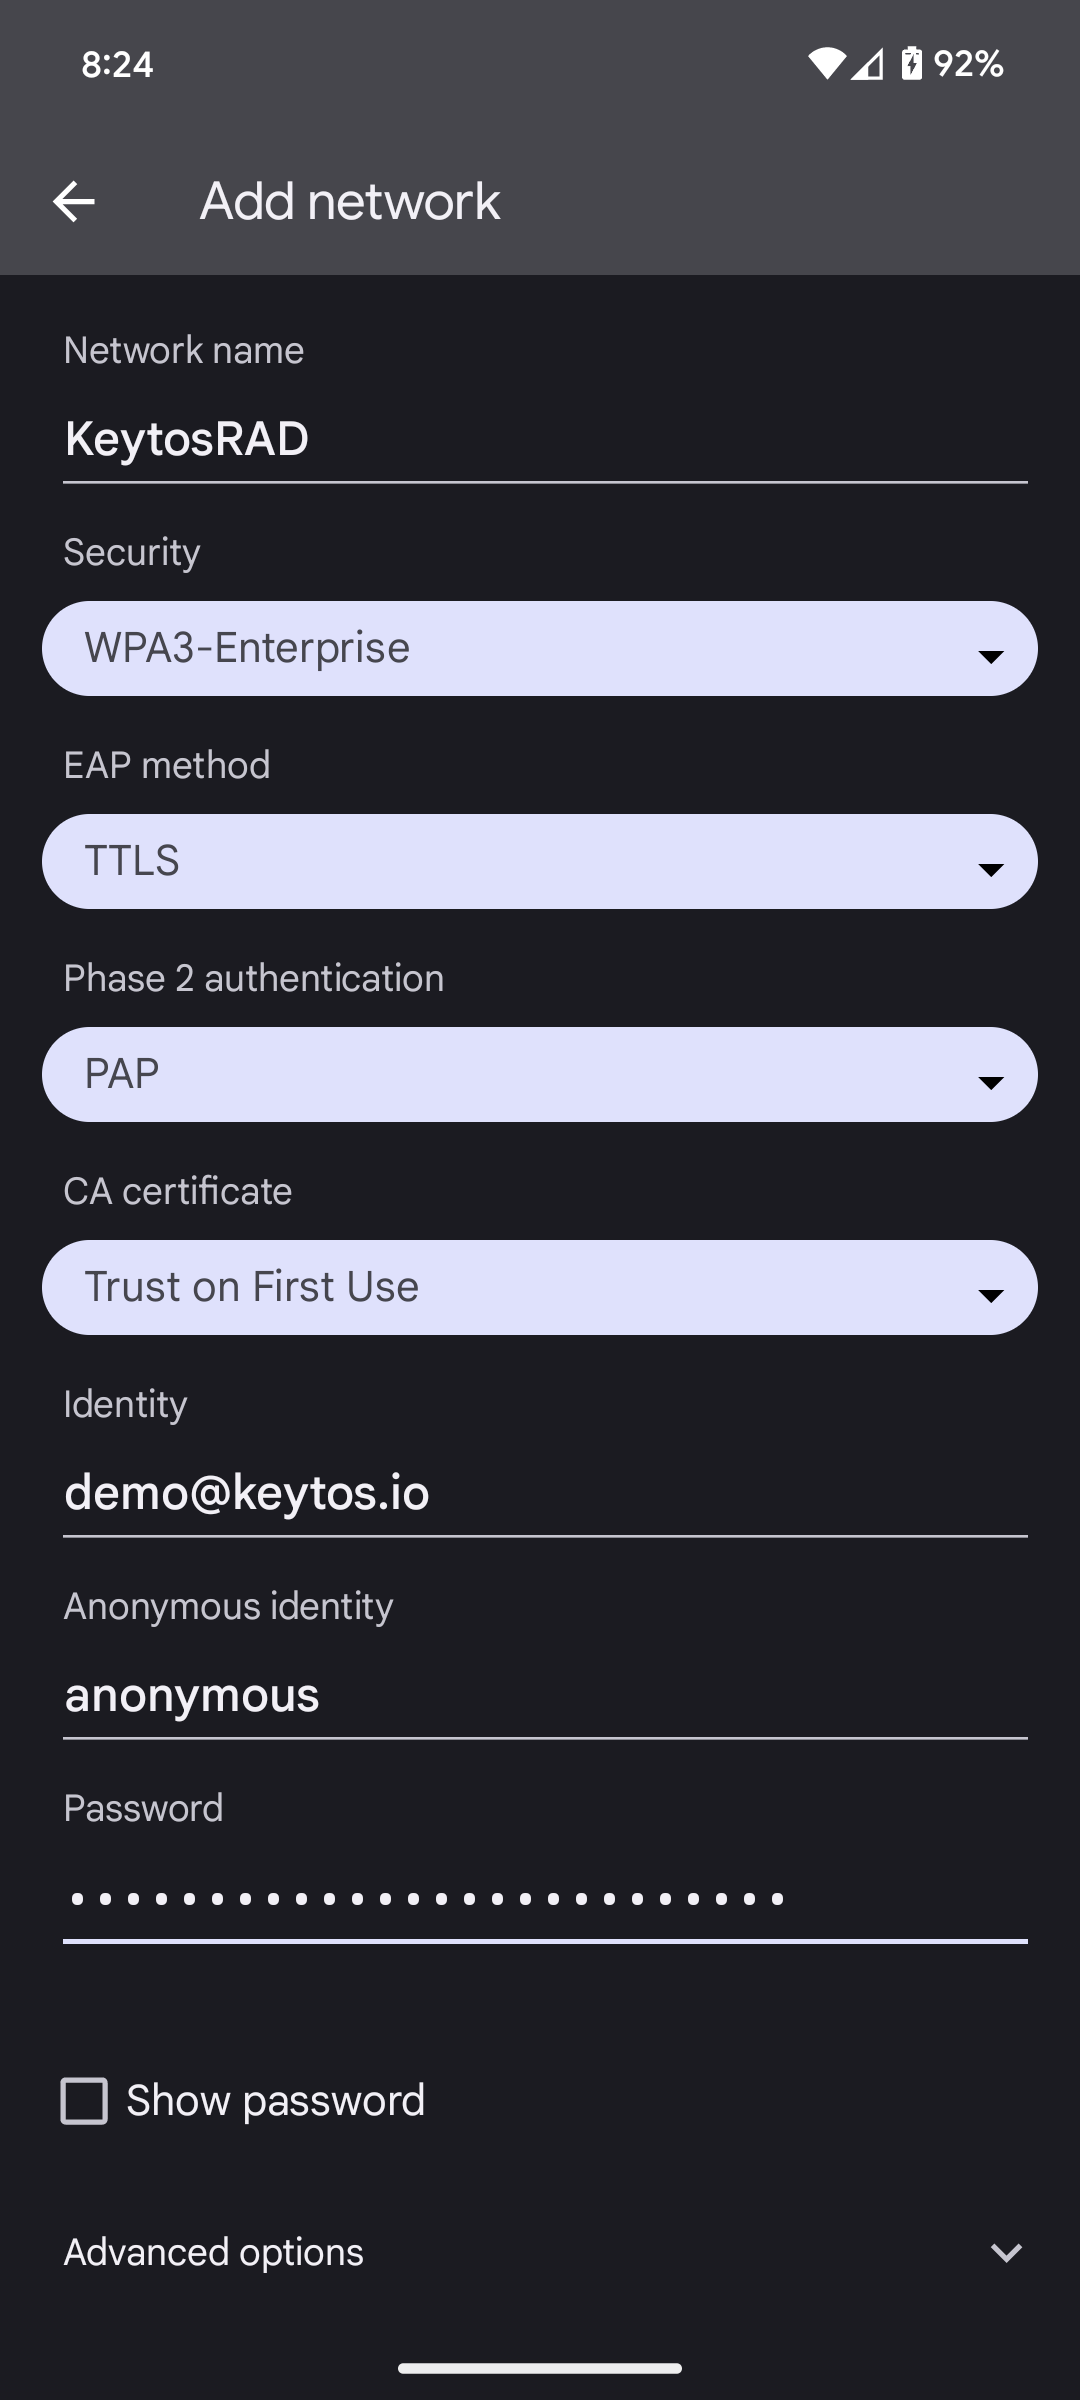
- Enter the Network Name (SSID) of your network (Case Sensitive).
- Select the Security type as either WPA2-Enterprise or WPA3-Enterprise (Depending on your network settings).
- Select the EAP Method as “TTLS”.
- Select the Phase 2 Authentication as “PAP”.
- For CA Certificate, if you have installed the certificate on your device, select “Use system certificates”. If not, select “Trust on First Use”.
- in the Identity field, enter your Entra ID username.
- In the Password field, enter your Entra ID password.
- It should look like this:
- Click Save at the bottom right.