Keytos Documentation > EZRADIUS Cloud Based RADIUS Documentation > How To Setup RADIUS Authentication in MDM > How To Setup RADIUS Authentication in Intune > How to Enable WiFi Certificate Authentication in Intune
How to Enable WiFi Certificate Authentication in Intune
Prerequisites
- Registering the application in your tenant
- Creating Cloud Radius Instance
- Being a Subscription Owner or Network Administrator
- Being an MDM Administrator.
How to Enable WiFi Certificate Authentication in Intune - Video Version
How to Enable WiFi Certificate Authentication in Intune
This guide assumes that you have already setup your trusted certificate authority and SCEP profiles in your Intune portal. If you have not done so, please follow the guide on how to create Intune Trusted Certificates and SCEP profiles, or watch this 5 minute video where we guide you through the whole process.
- Go to your Intune portal: https://aka.ms/Intune
- Click on Devices.
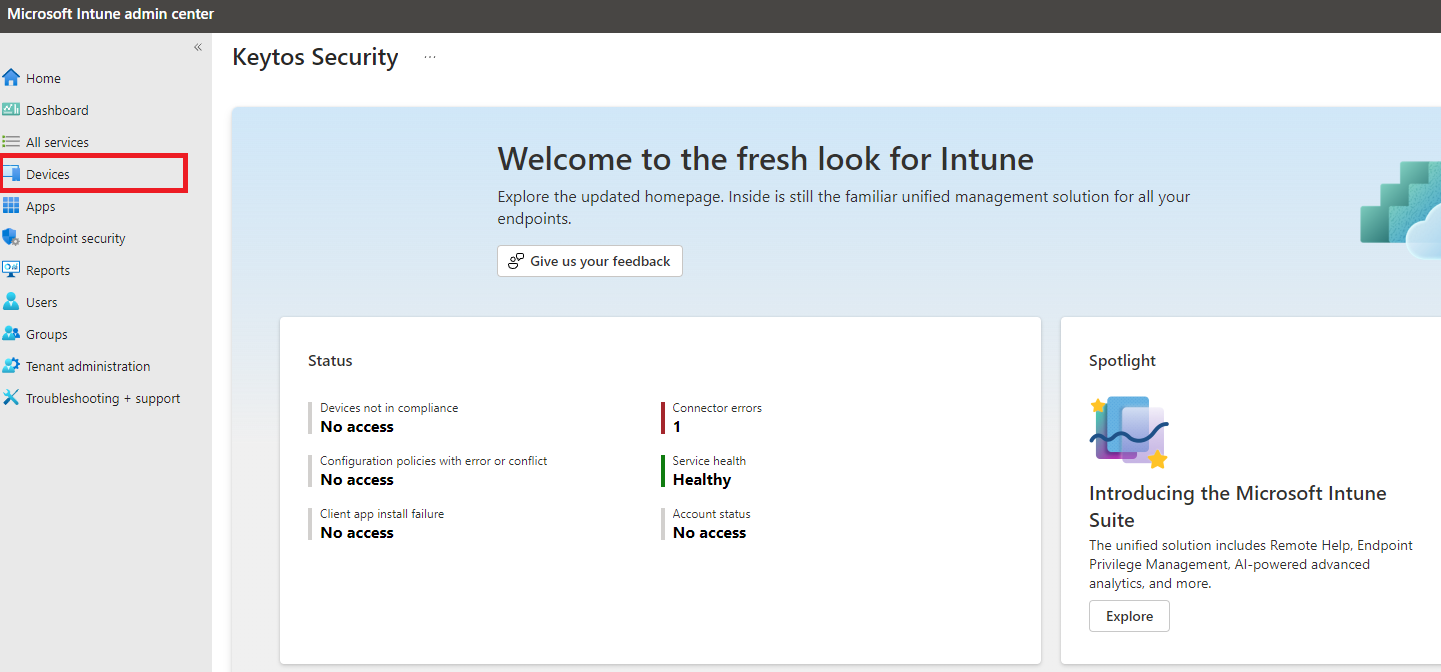
- Select the OS you want to configure. In this case we will select Windows, but the setup is similar for other OS.
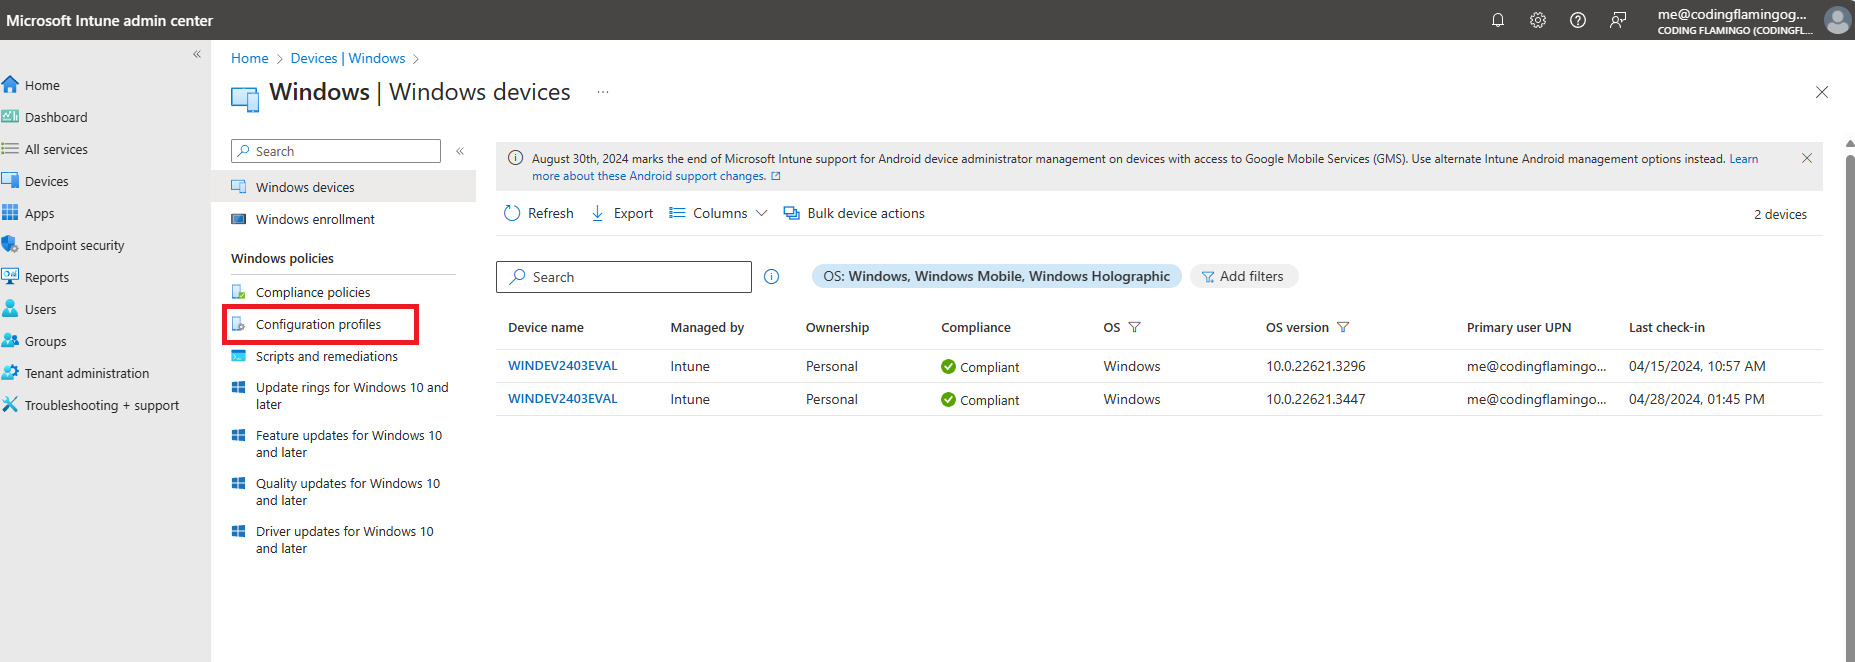
- Click on Configuration Profiles.
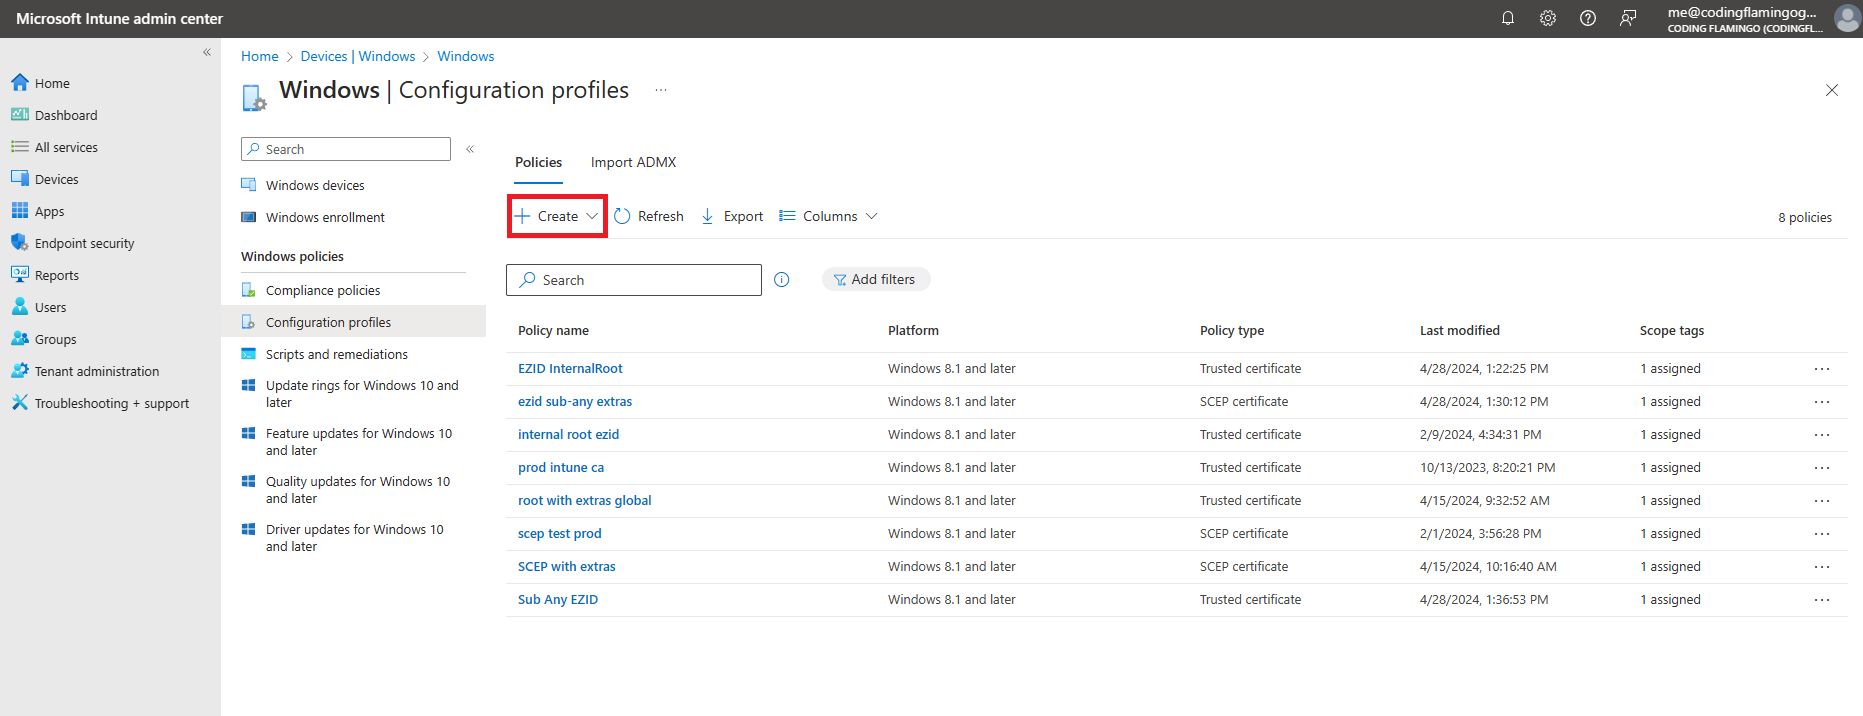
- Click on the “Create” Button at the top of the list.
- Select “Windows 10 and later” as the platform.
- Select “Templates” as the profile type.
- Select “Wi-Fi” as the template.
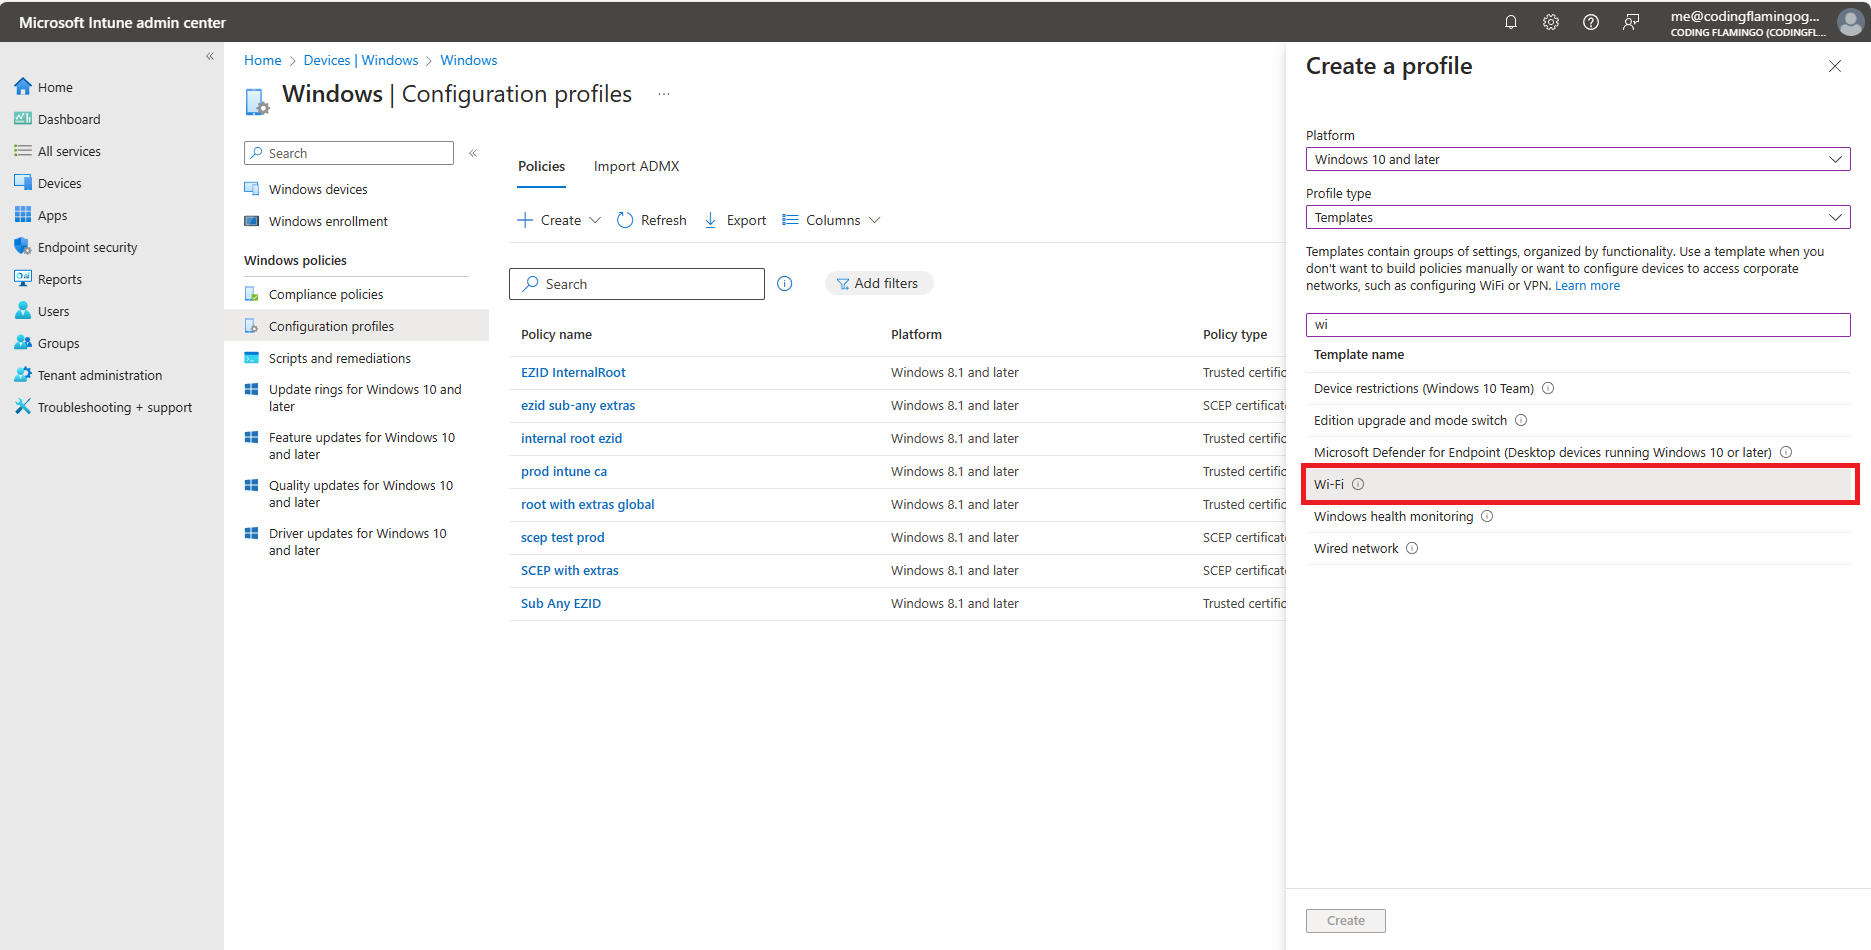
- Click on “Create” at the bottom of the page.
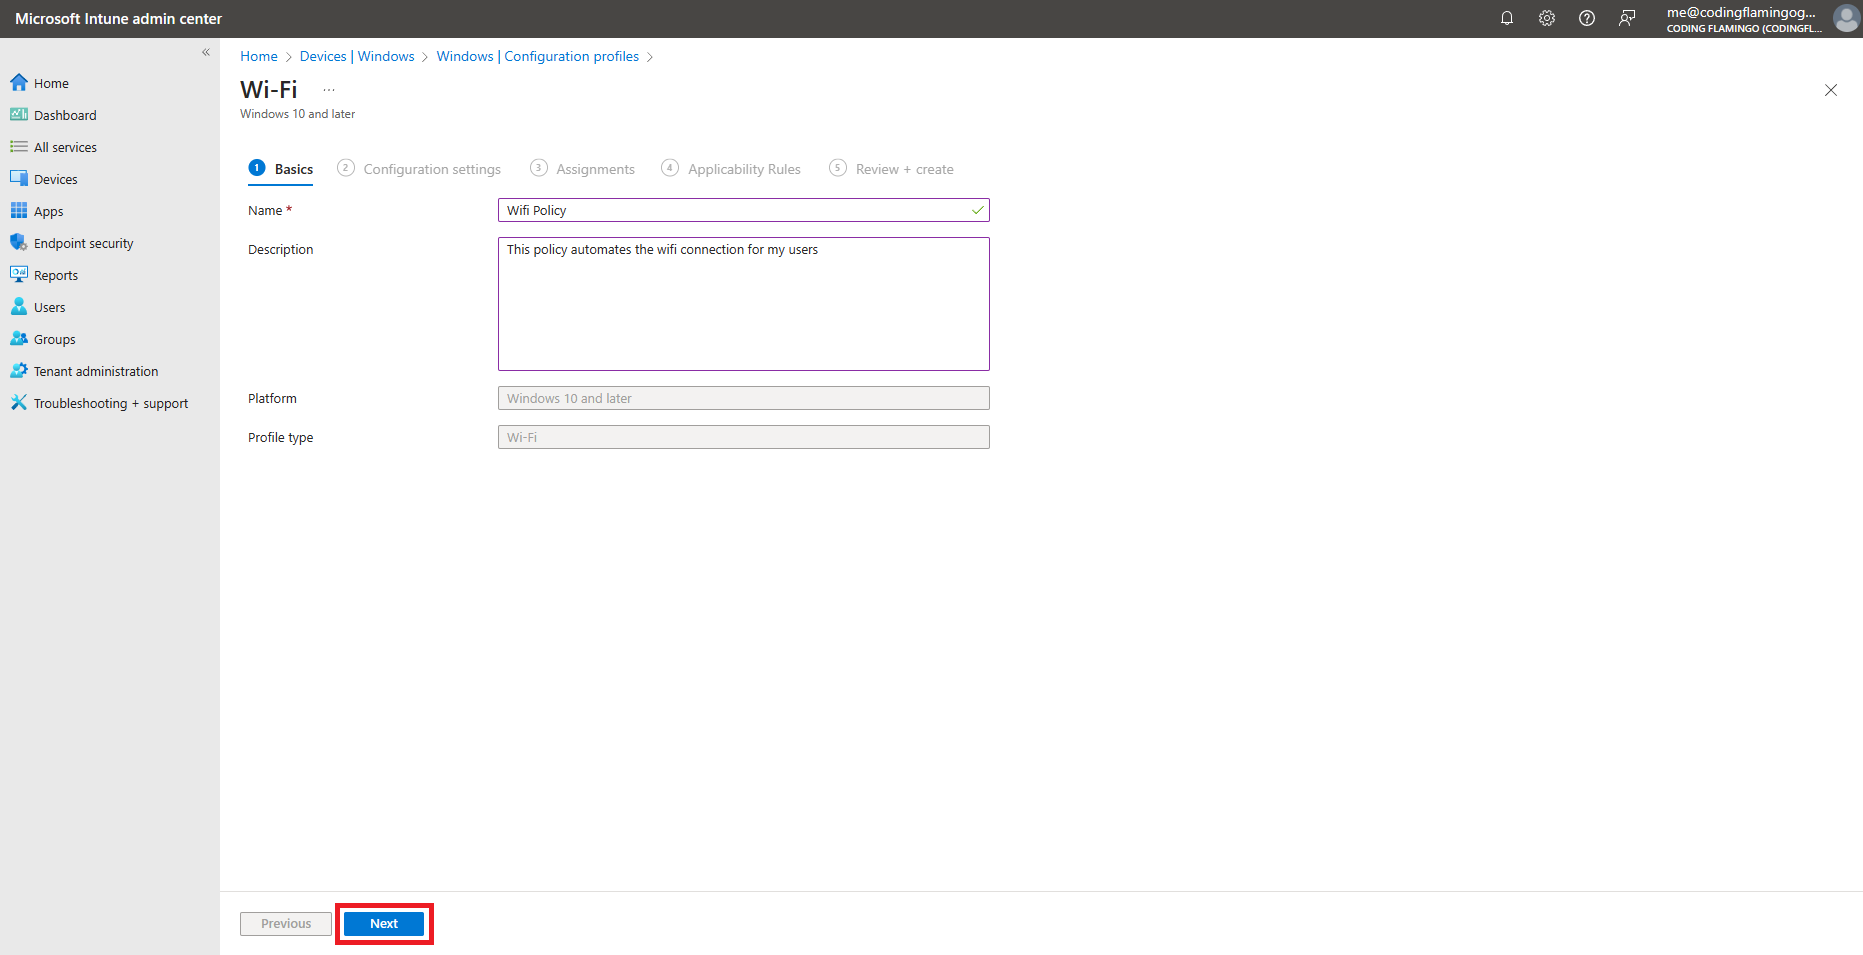
- Fill in the “Name” and “Description” fields.
- Click on “Next”.
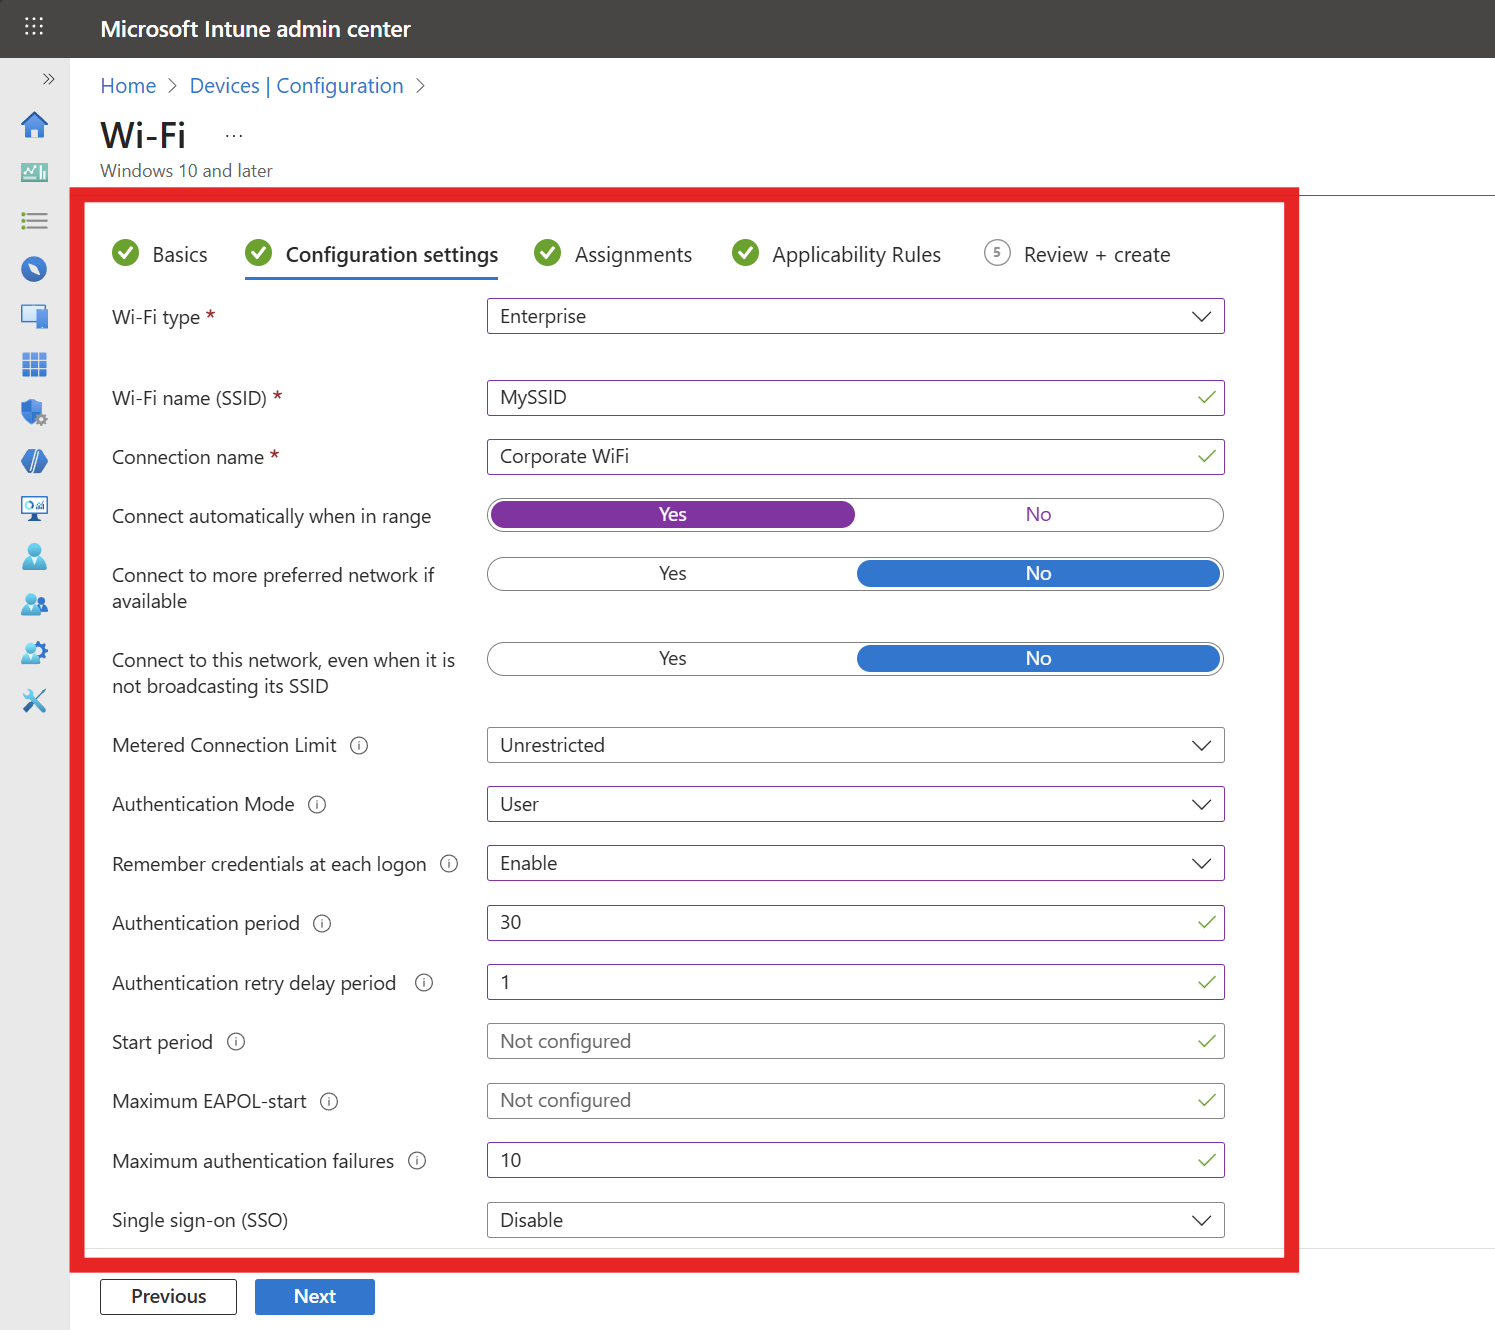
- Select “Enterprise” as the Wi-FI type.
- Fill in the SSID of your Wi-Fi network (Case sensitive).
- Enter the connection name (This is a friendly name for your users).
- Select your connection preferences (if you want it to automatically connect when in range, etc.).
- Select the authentication mode (User or Machine). This is usually set by how you are issuing the SCEP certificate, either to the user or to the machine.
- Select if you want want to cache the user credentials (Not needed for certificate authentication).
- Set the authentication period (how long before the authentication fails) to 60 seconds.
- Set the authentication retry delay to how many seconds you want to wait before retrying the authentication.
- Set the number of maximum authentication attempts.
- Set Single Sign-On to “Disable”.
- Leave “Enable pairwise master key (PMK) caching” set as “No”.
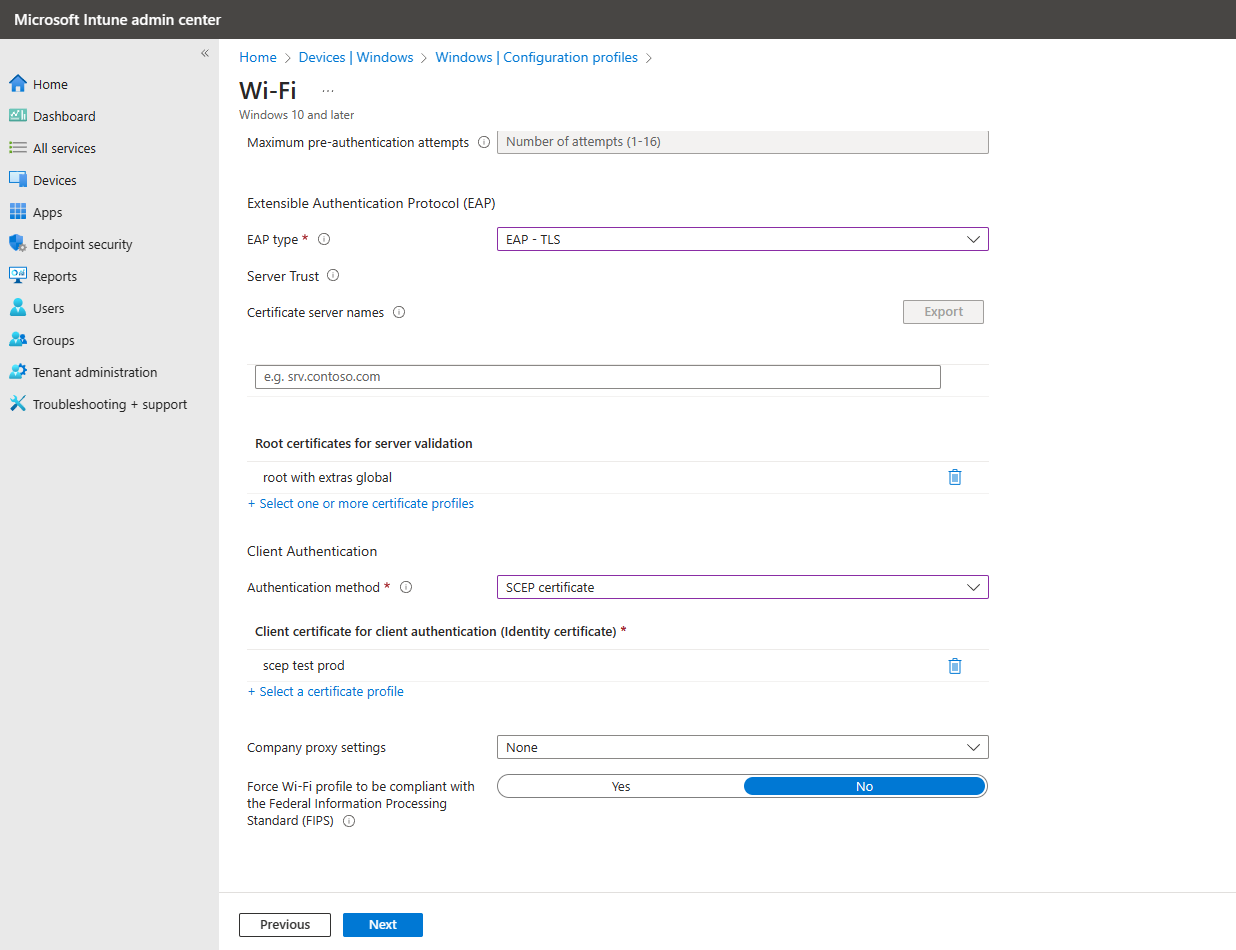
- Set the EAP type to “EAP-TLS”.
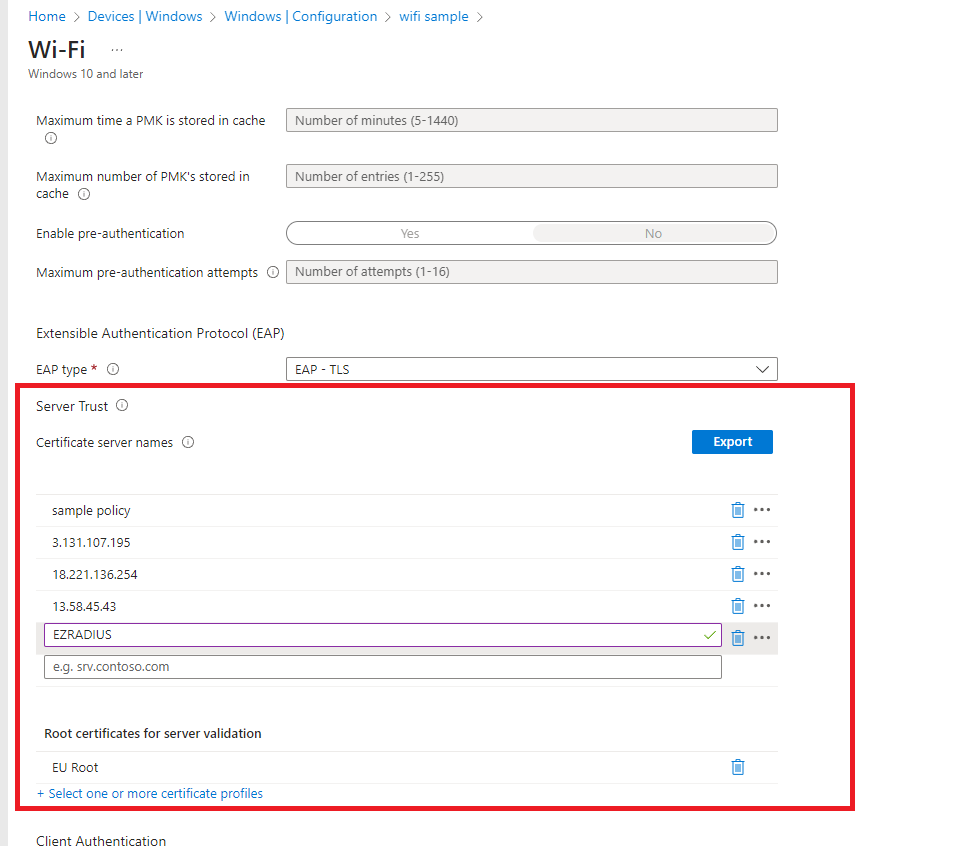
- For “Server Trust” we have to enter the values of the certificate, these are:
- The IP addresses of your RADIUS instance (All of them even if you are only using one)
- The CN of the certificate (which you can get from your EZRADIUS Policy and while you are there download the Root Certificate for Server validation, we will need it for the next step).

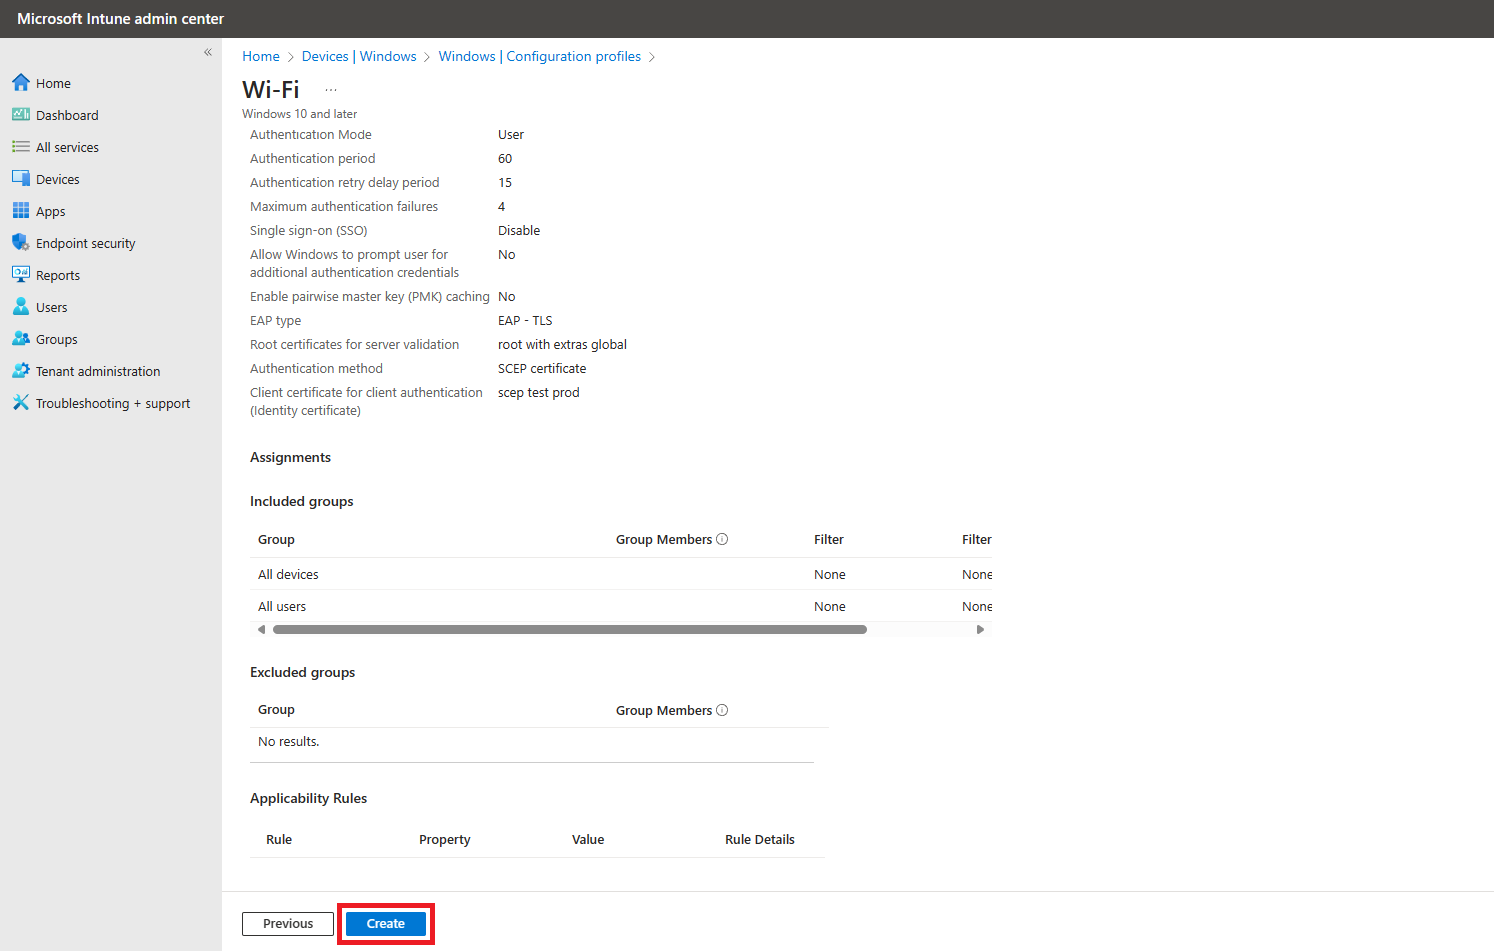
- Then for “Root Certificates for Server validation” You have to use the certificate Authority (if it is a 2 tier PKI, I recommend uploading both CAs here since some OS do the validation differently) that created your RADIUS Server certificate. If you used the EZRADIUS Automatically generated certificate you can download it from your EZRADIUS Authentication Policy and Upload it as a trusted CA in Intune. This is how your policy should look like:
- Set “SCEP Certificate” as the Authentication Method.
- Select the SCEP profile you created in the prerequisites (This is the magical part of doing Wi-Fi authentication with certificates in Intune it magically connects and does everything without any input from the user).
- Click on “Next”.
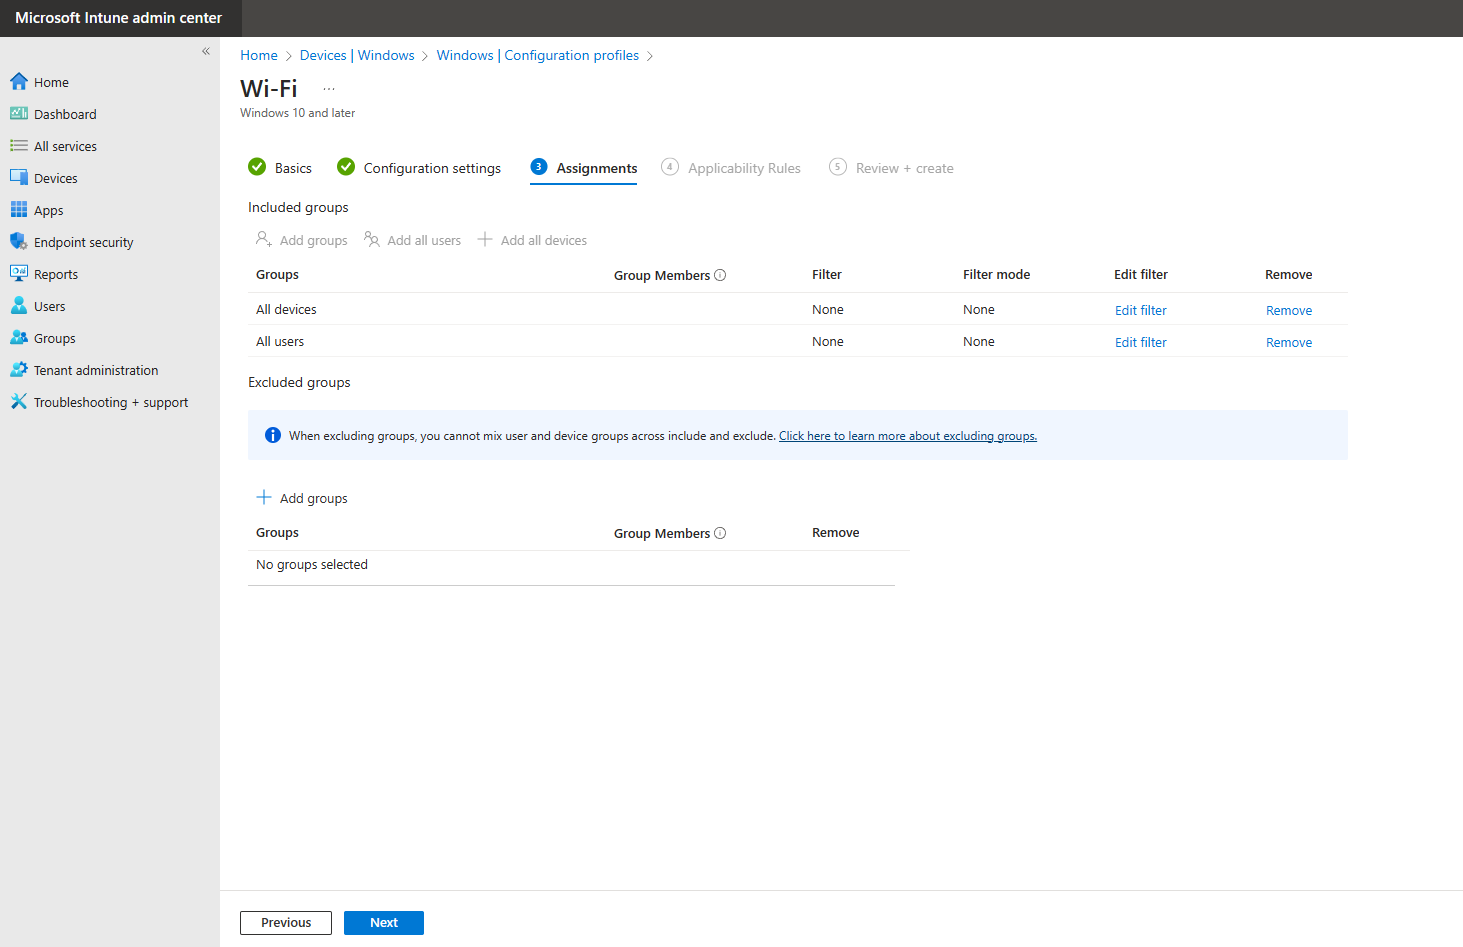
- Select the users, groups or devices you want to deploy this profile to.
- Click on “Next”.
- Review your settings and click on “Create”.
