Keytos Documentation > EZCA Azure's PKI Documentation > How To Connect SCEP CA To MDM > Intune SCEP CA > How To Create JAMF Pro CA
How To Create JAMF Pro CA
Prerequisites
- Registering the application in your tenant
- Create EZCA Resource In Azure or Select Plan in EZCA
- Create Your SCEP CA
How To Configure JAMF Pro SCEP Certificate Authority - Video Version
- Once you have Created your Cloud SCEP CA, and downloaded your CA certificate, you will need to upload it to your JAMF Pro server.
- Log in to your JAMF Pro instance.
- Click on the Computer Icon and select “Configuration Profiles”.
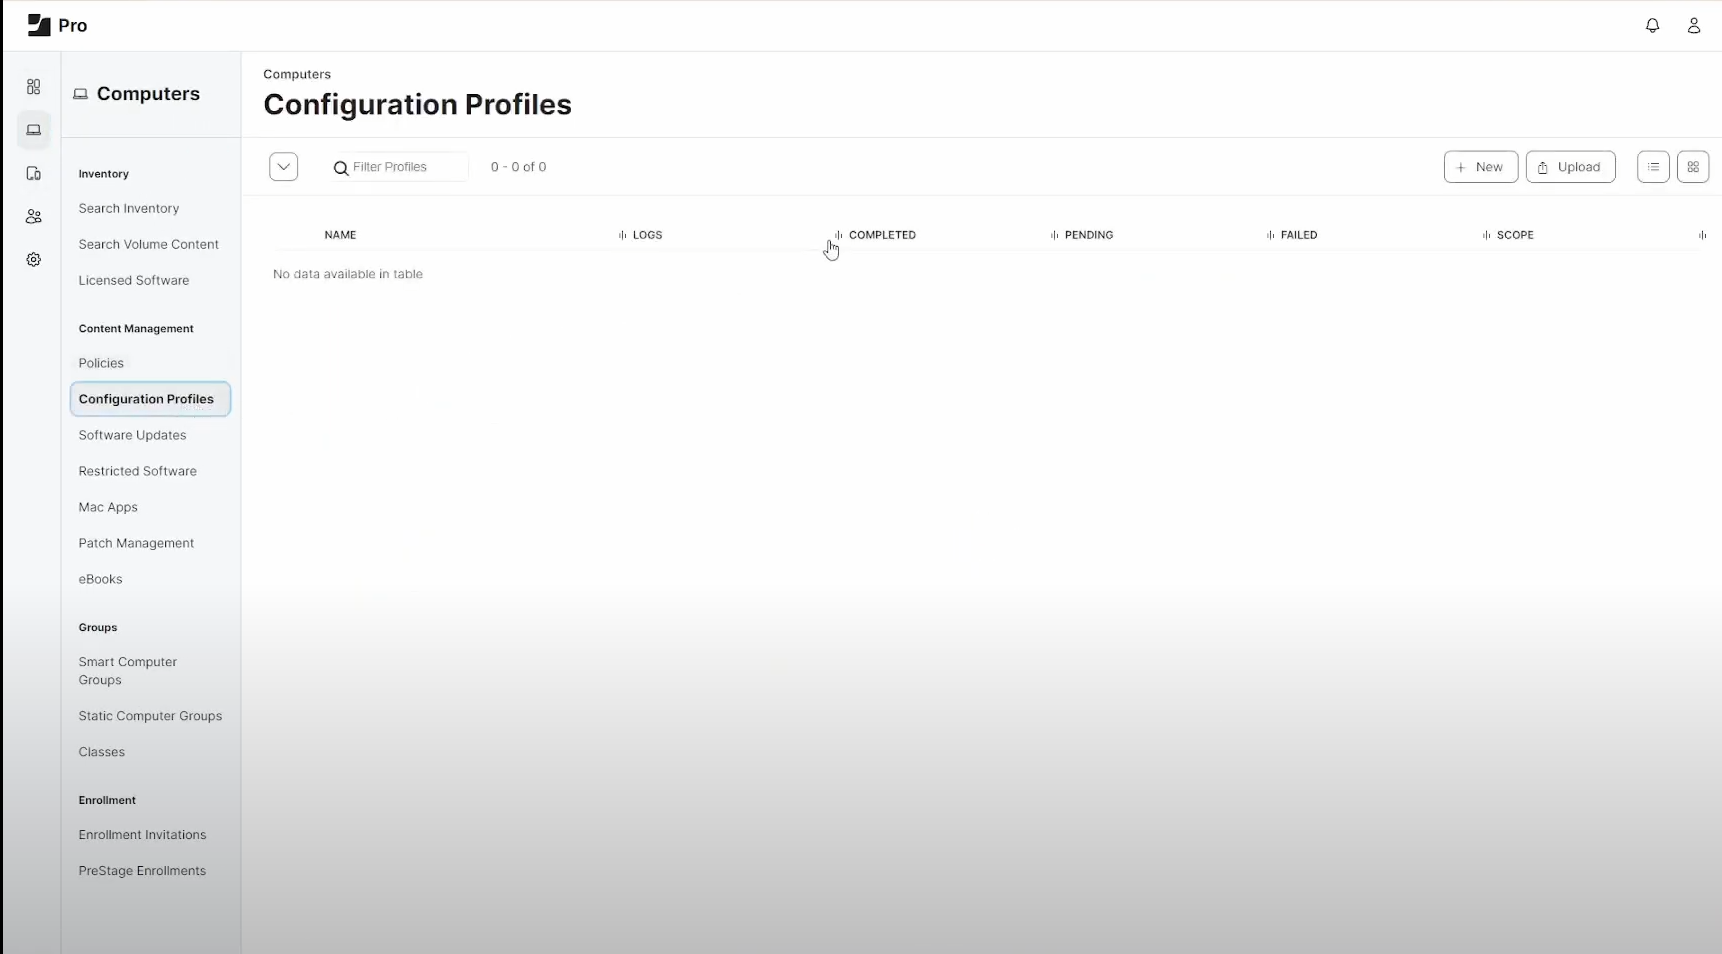
- Click on the “+ New” to add a new profile.
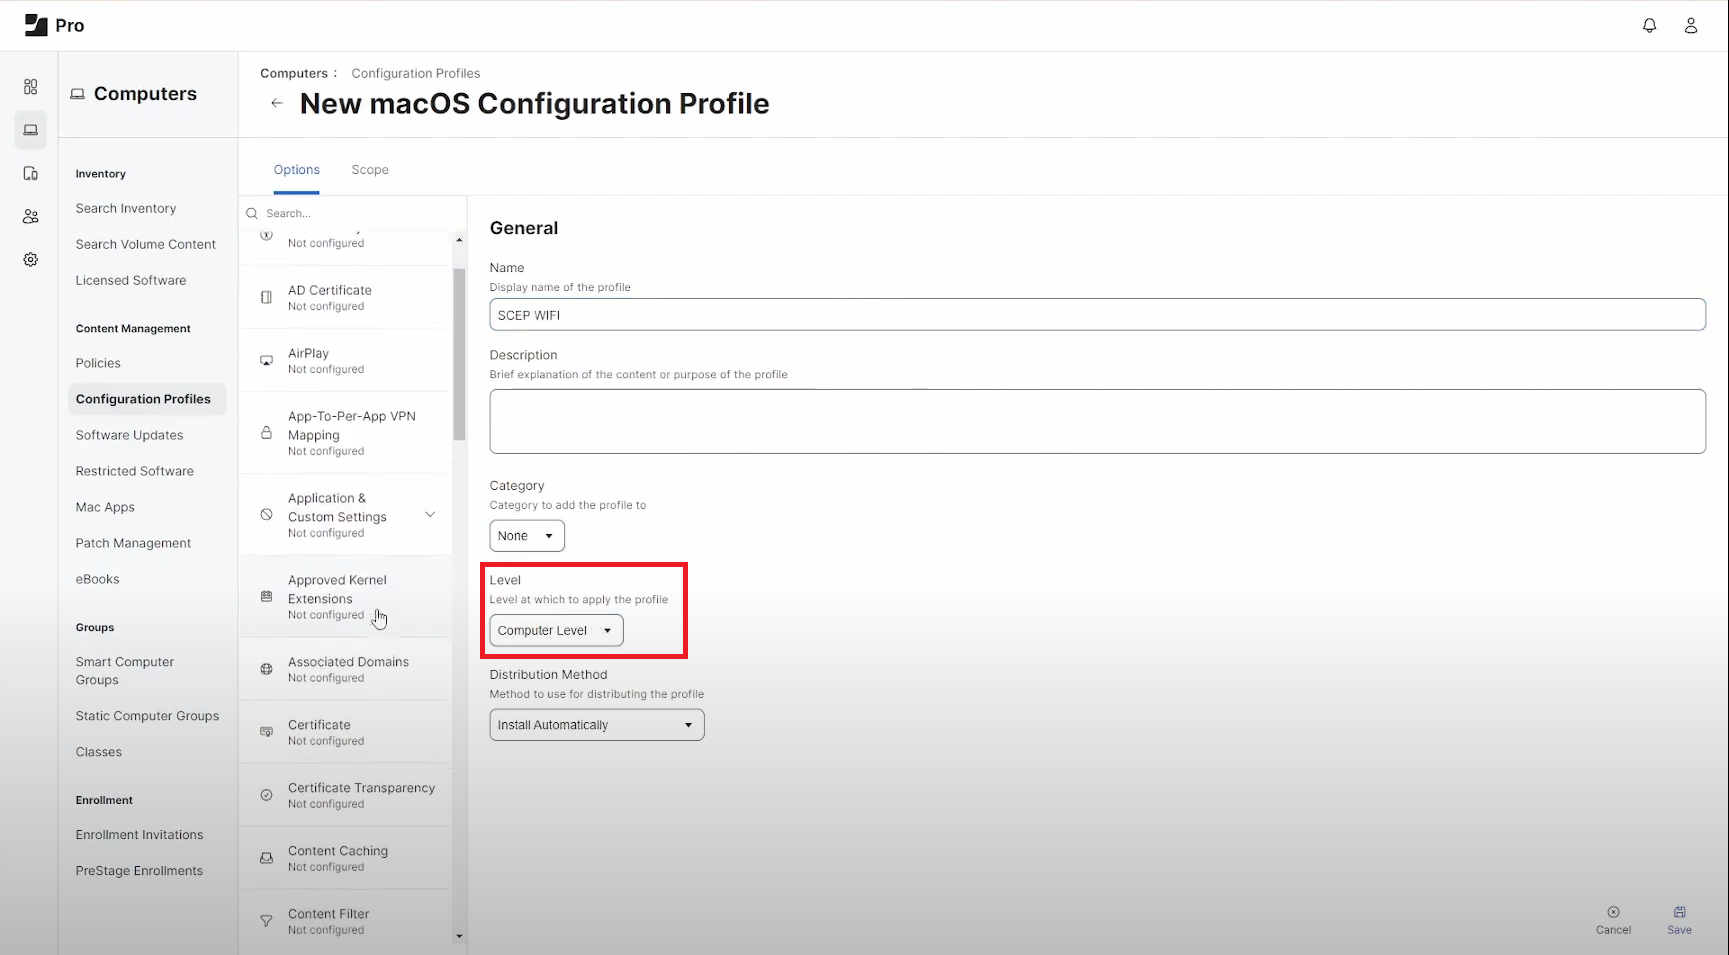
- Enter a name for the profile. Make sure that the level is set to “Computer”.
How to Add Trusted Certificate in JAMF Pro
- First we will add the CA certificate to the profile. Click on the “Certificates” menu on the left.
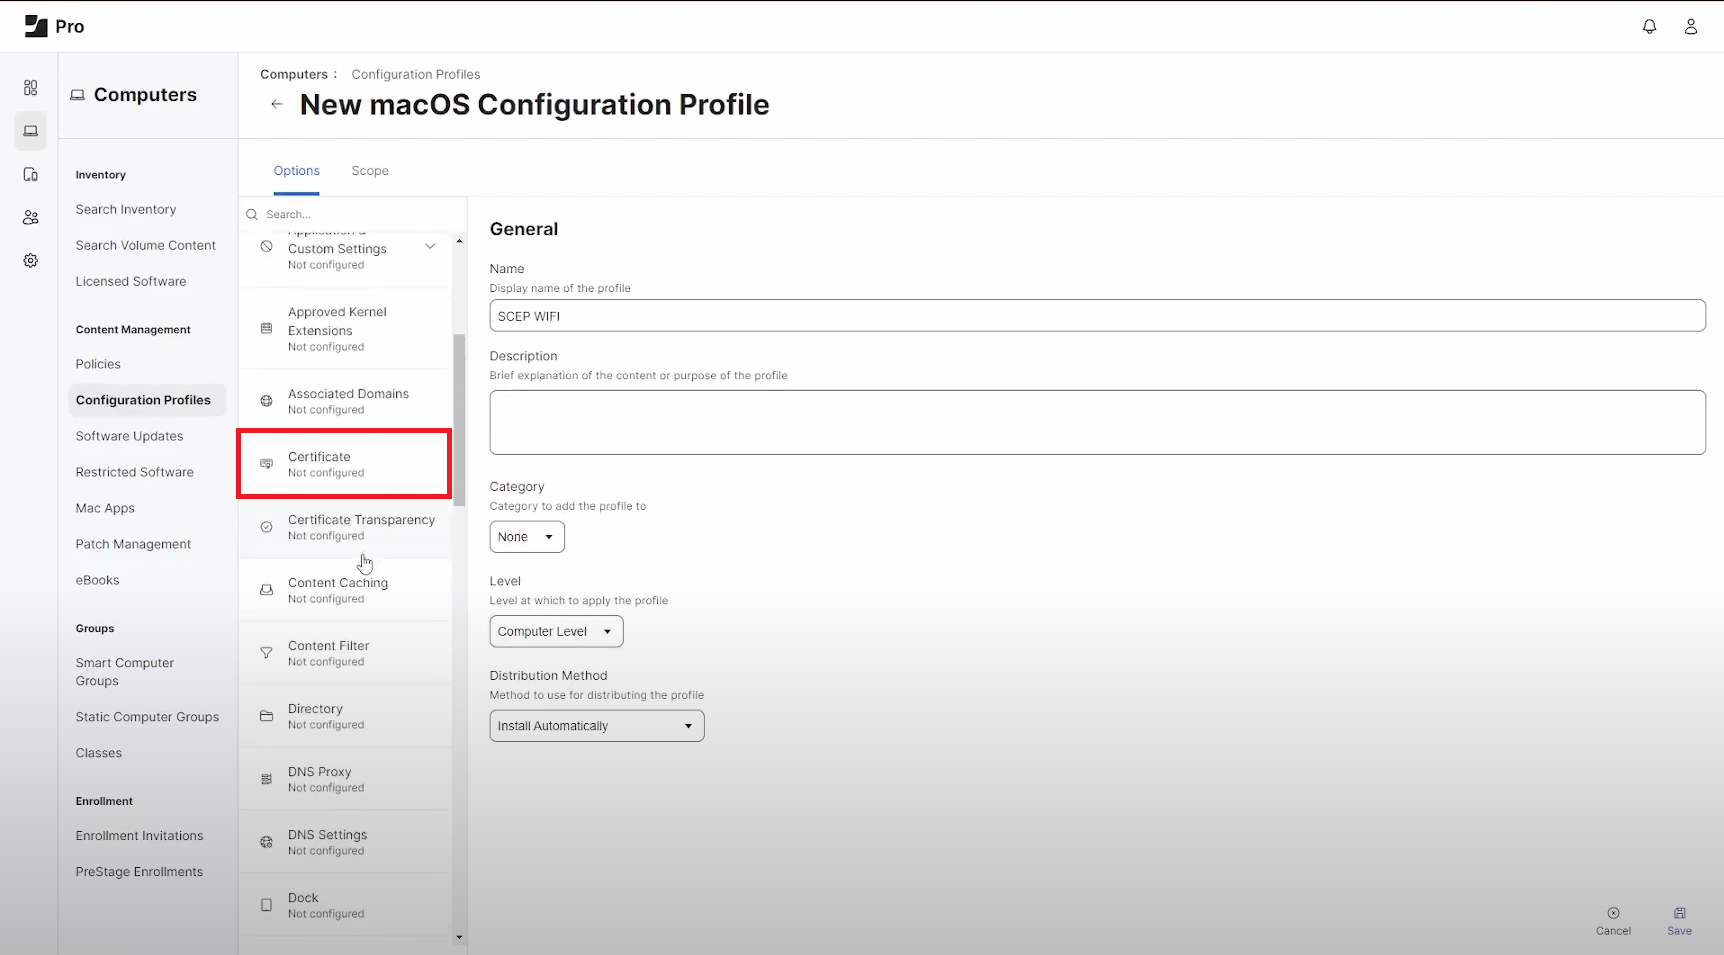
- Click on “Configure” to add a new certificate.
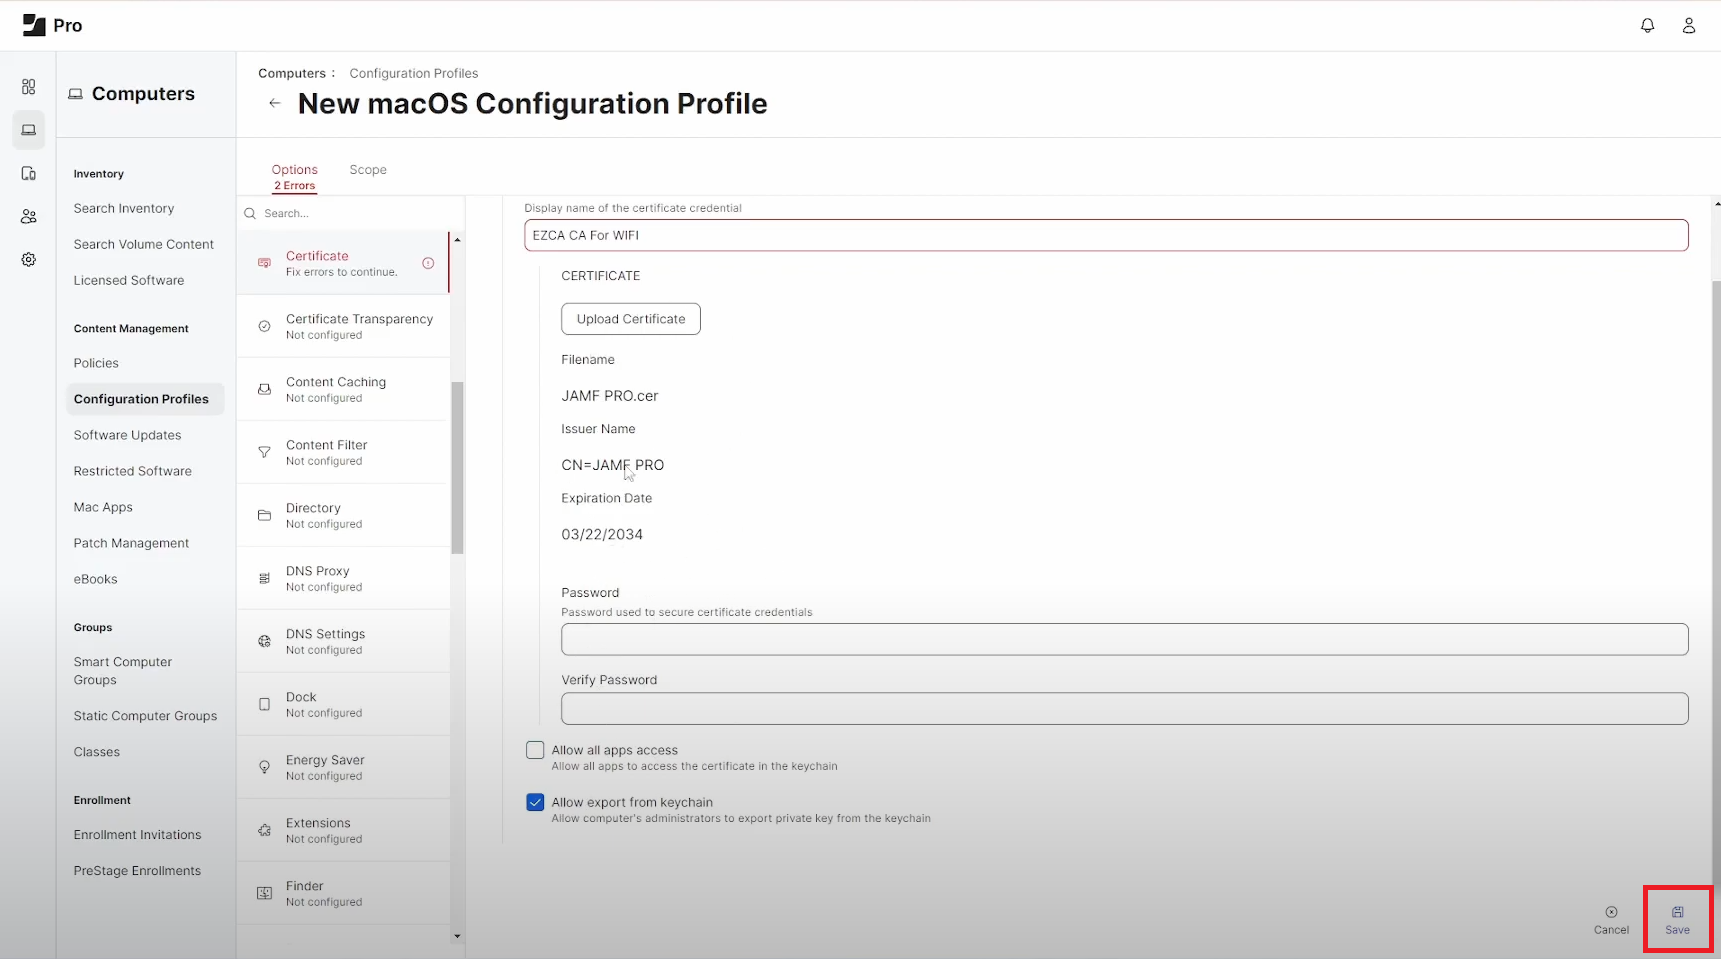
- Enter a name for the certificate.
- Click on “Upload” to upload the CA certificate you downloaded from EZCA.
- Leave the password field blank.
- Click “Save”.
How to Add SCEP Profile in JAMF Pro
- Next, we will add the SCEP profile. Click on the “General” menu on the left.
- Select “SCEP” from the list of profiles on the left.
- Click on “Configure” to add a new SCEP profile.
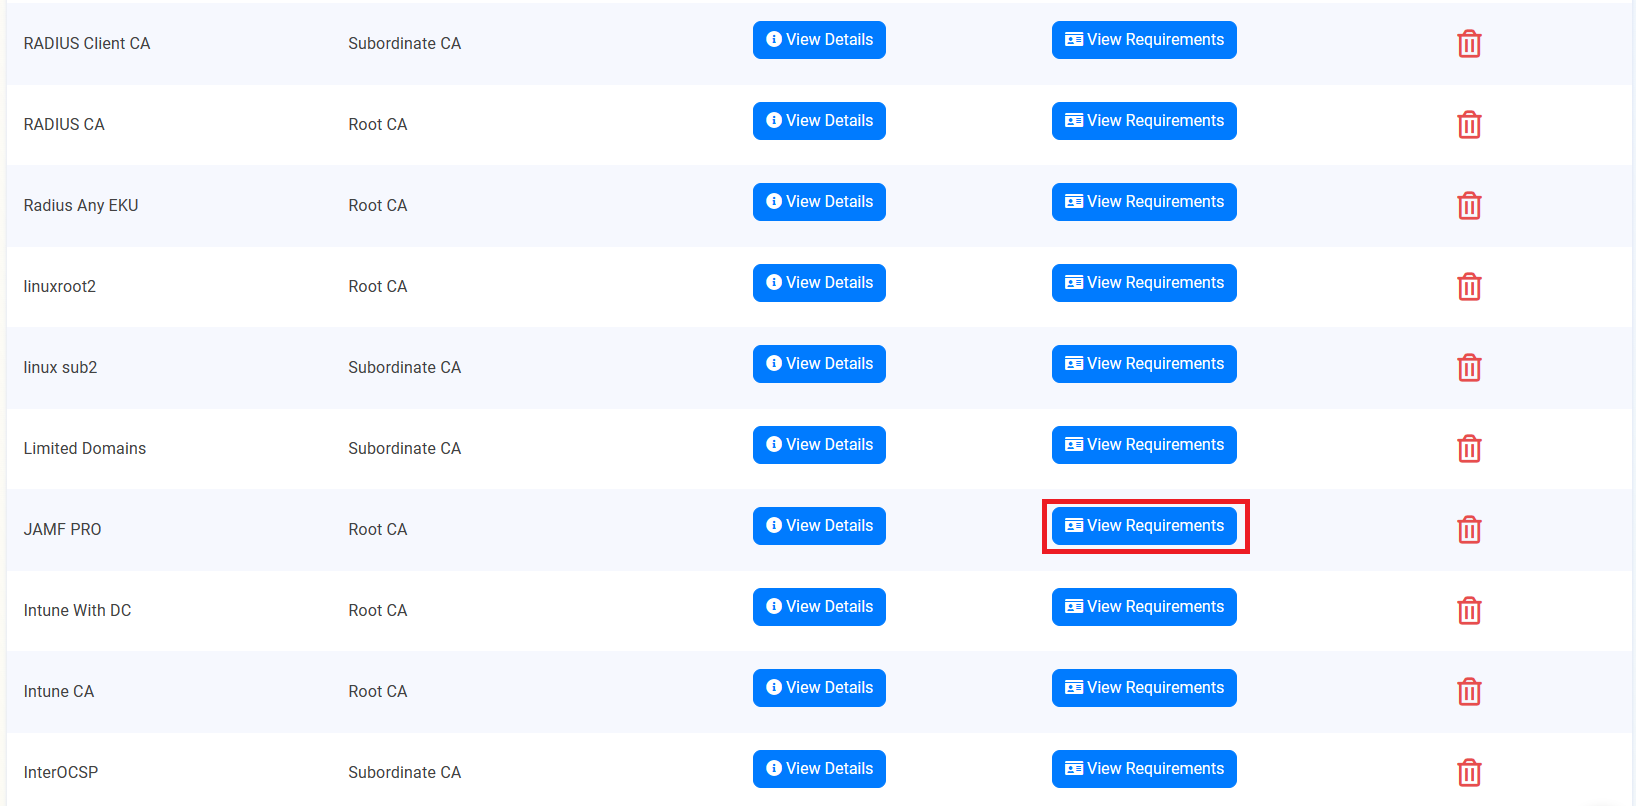
- Now we have to get your SCEP URL. In another tab, navigate to your EZCA portal, click on “Certificate Authorities”, and select your SCEP CA.
- Copy the Static Challenge SCEP URL.
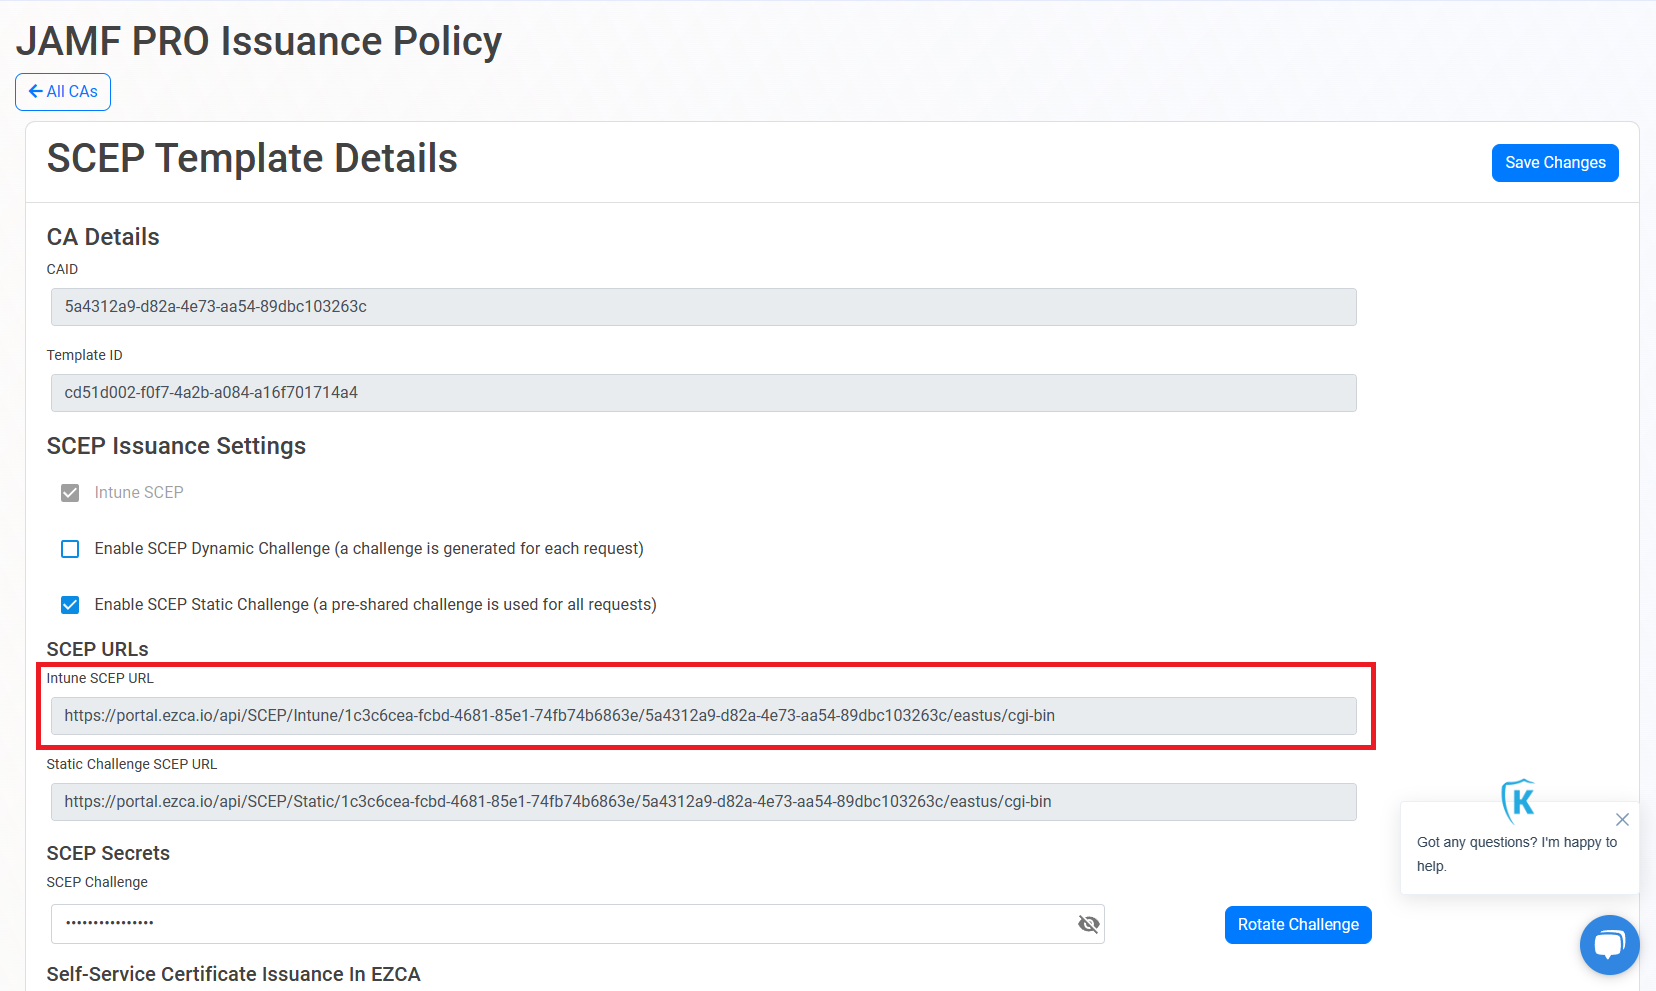
- Paste the URL into the “URL” field in JAMF Pro.
- Name the CA in the “Name” field.

- The Set how many days before the certificate expires JAMF Pro should renew the certificate (we recommend 30-60 days before).
- Then we have to build how the certificate will be built you can see the full list of Jamf supported dynamic values here.
- Use those variables and any static values you want to build the certificate.
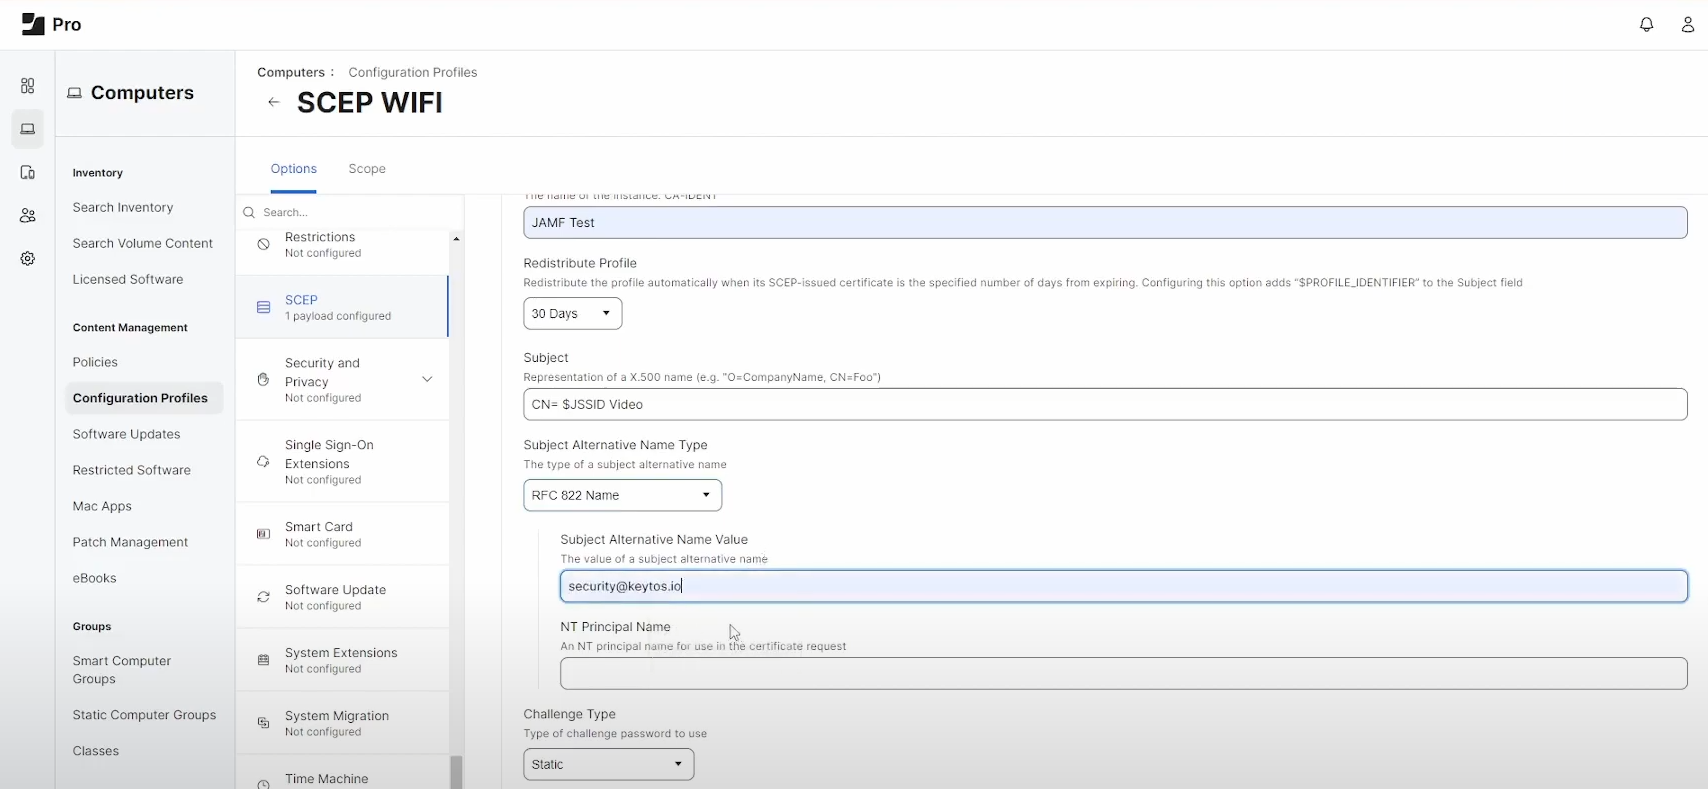
- For the challenge, ensure that the challenge is set to “Static”.
- Now go back to the EZCA portal and copy the Static Challenge.
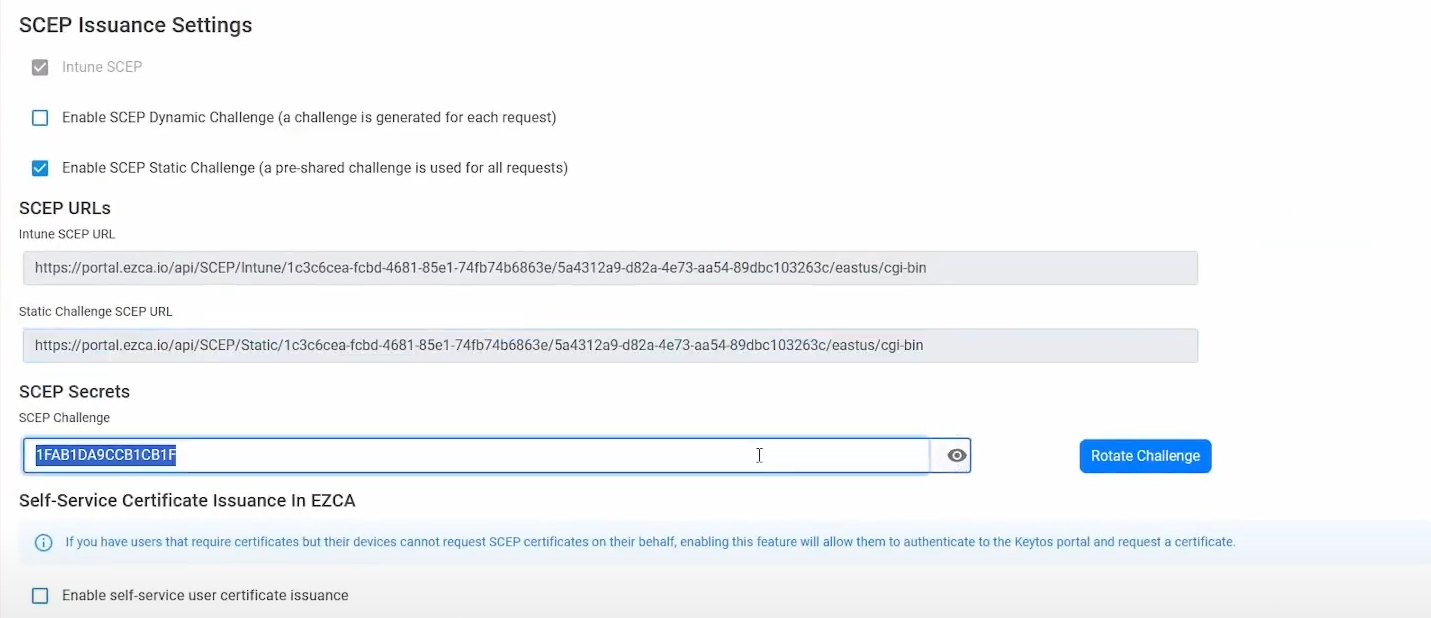
- Paste the challenge into the “Challenge” field in JAMF Pro. This is the password JAMF Pro will use to authenticate with the SCEP server.
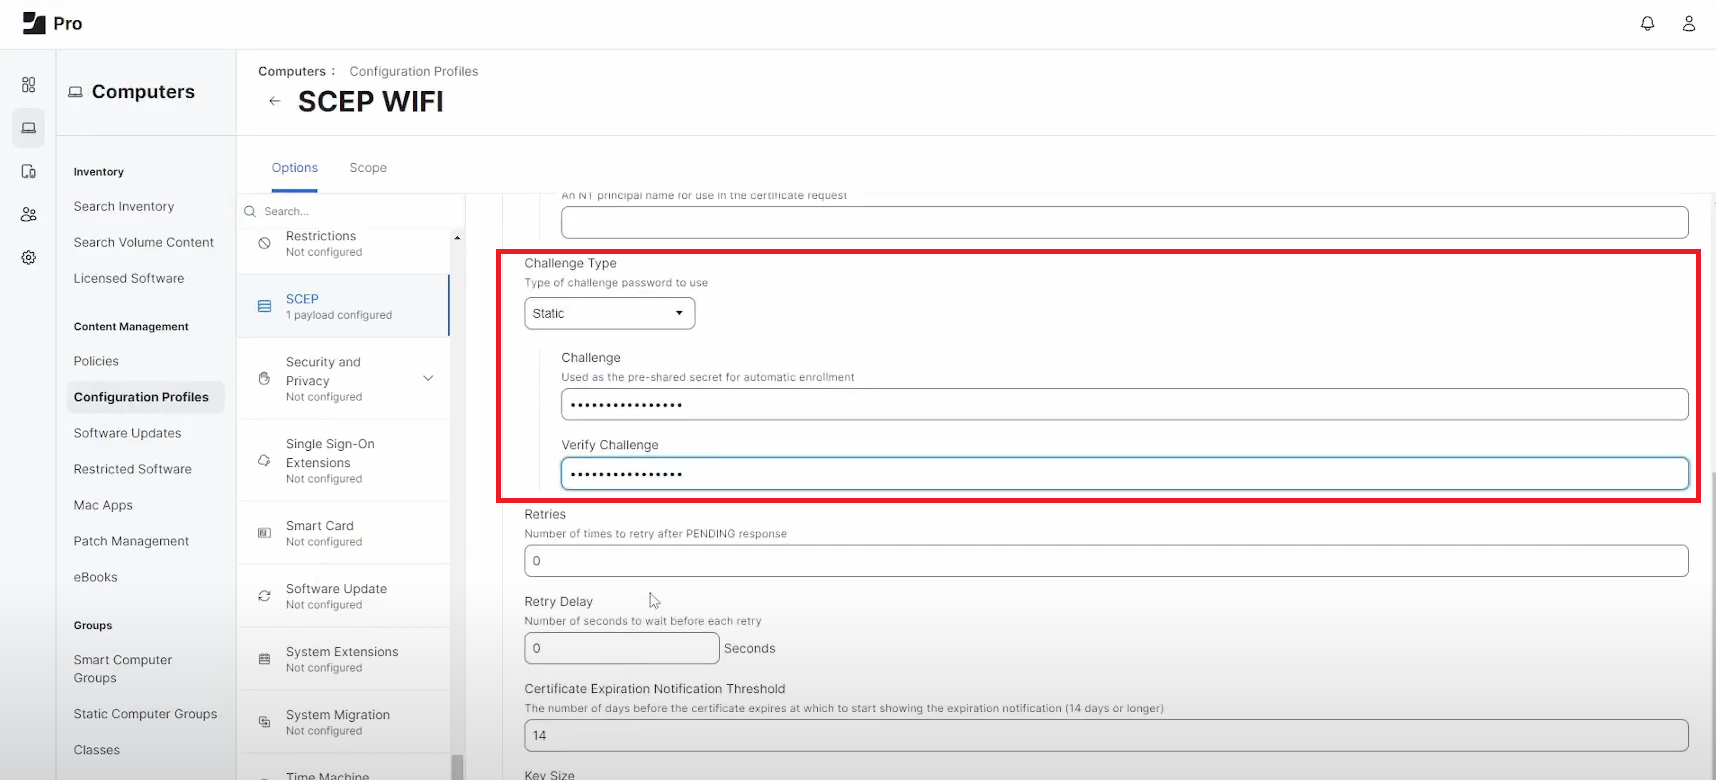
- Enter the number of retries JAMF Pro should attempt if the SCEP server is unavailable.
- Enter the number of seconds JAMF Pro should wait between retries.
- Select the key size your certificate should be (4096 is recommended).
- Select how you want the key to be used (usually “Digital Signature, Key Encipherment”).
- Select whether the certificate should be accessible through other apps and if it should be exportable.
- Use the “Upload Certificate” button to upload the CA certificate you uploaded earlier.
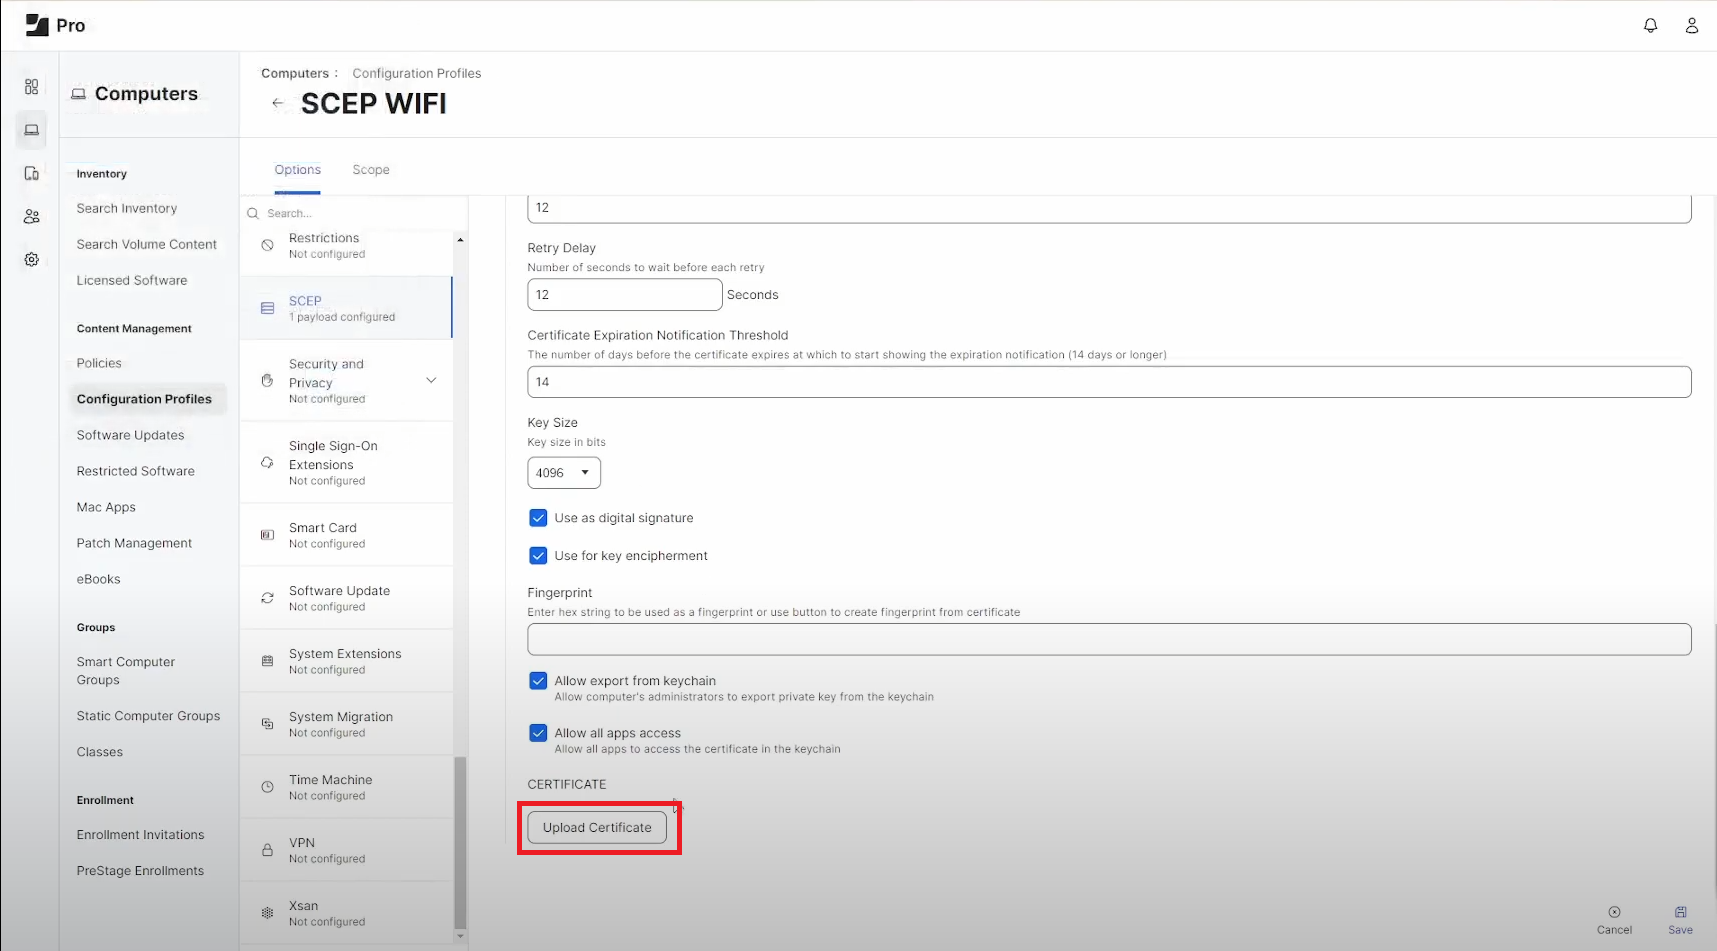
- Click “Save”.
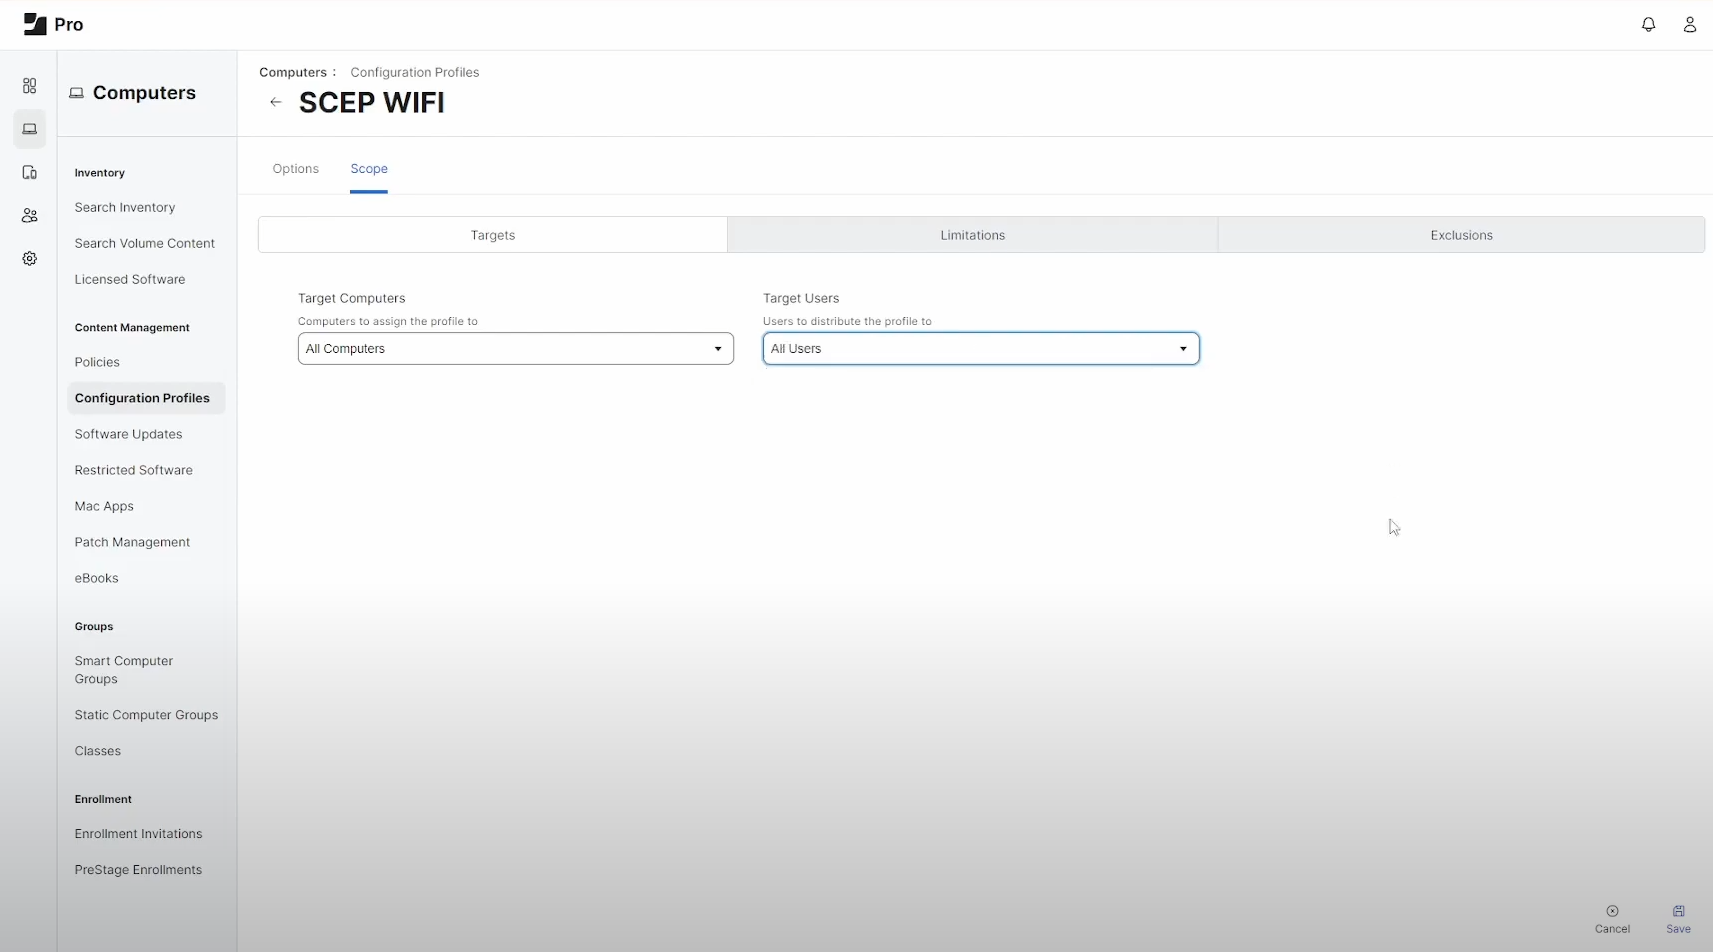
- Now that we have the trusted certificate and the SCEP profile, we want to scope the profile to the devices we want to receive the certificate.
- Click on the “Scope” tab.
- Select the devices you want to receive the certificate.
- Click “Save”.
- After a few minutes, the devices you scoped the profile to will receive the certificate. In the image below, you can see the trusted CA in red and the SCEP profile in green.
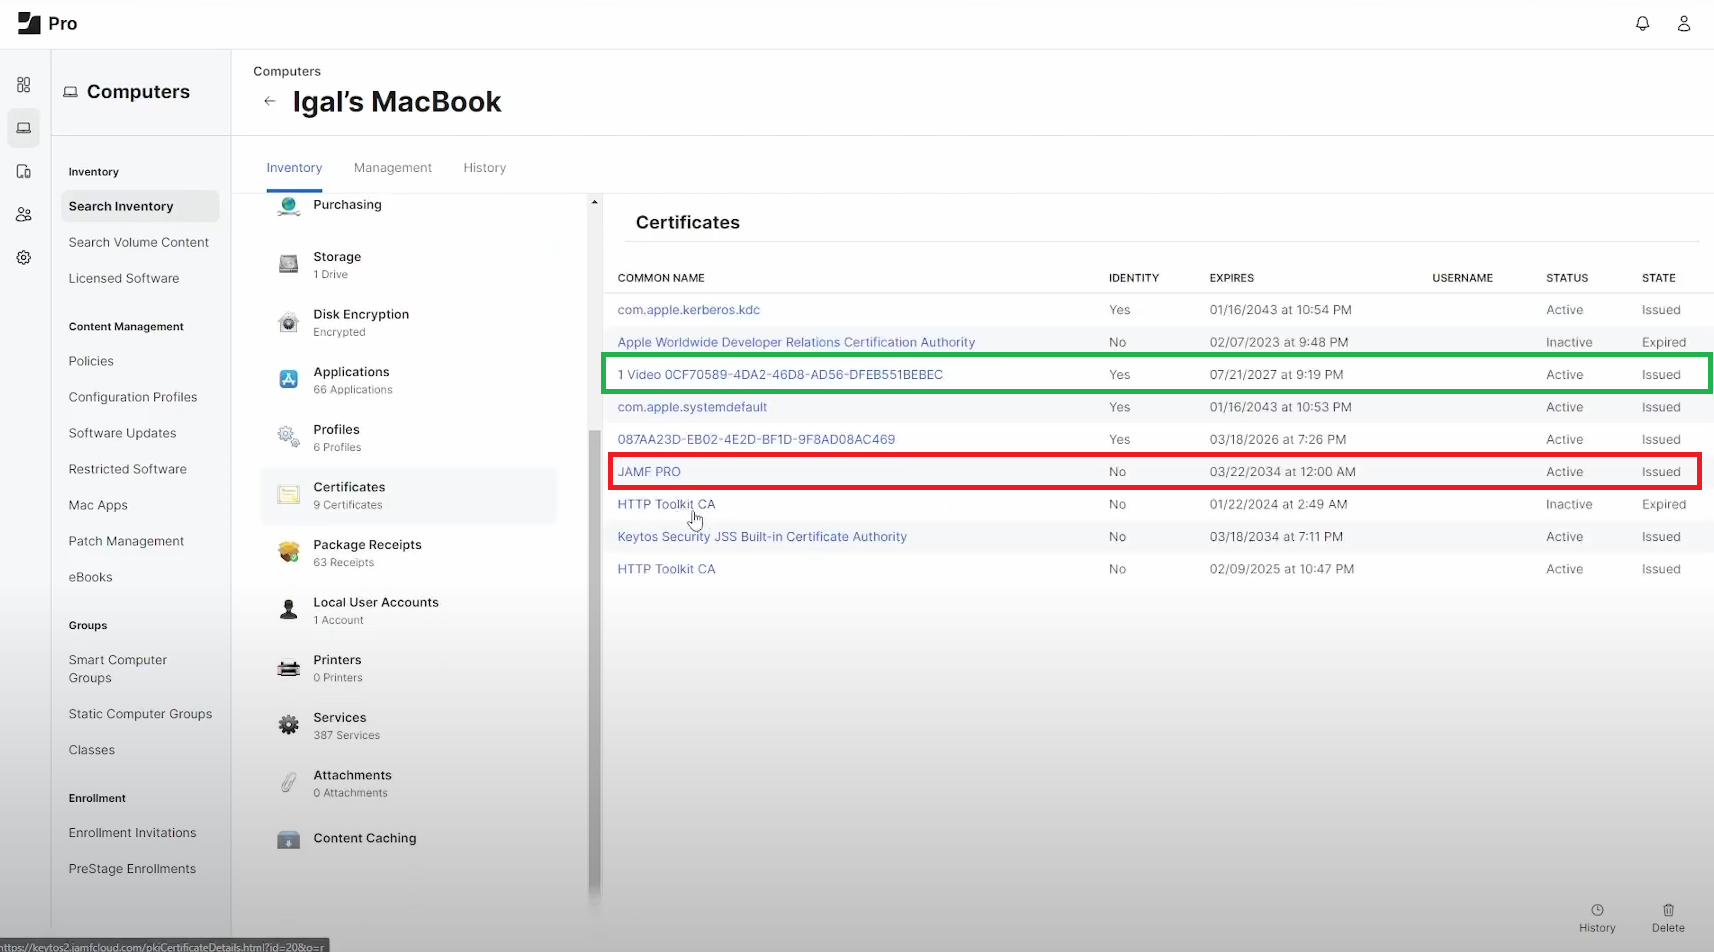
- You can now use the certificate to secure your devices.