Keytos Documentation > EZCA Azure's PKI Documentation > How To Create New Certificate in EZCA The Azure CA > How To Create a User Certificate
How To Create a User Certificate
How to create a user certificate
If your administrator has enabled self service user certificates, you can follow this guide to create your own certificates for authentication and encryption. go to the EZCA portal (If you have your private instance go to that specific portal) and login with your credentials. Once logged in, follow these steps to create your certificate.
- Click on the “User Certificate” button.
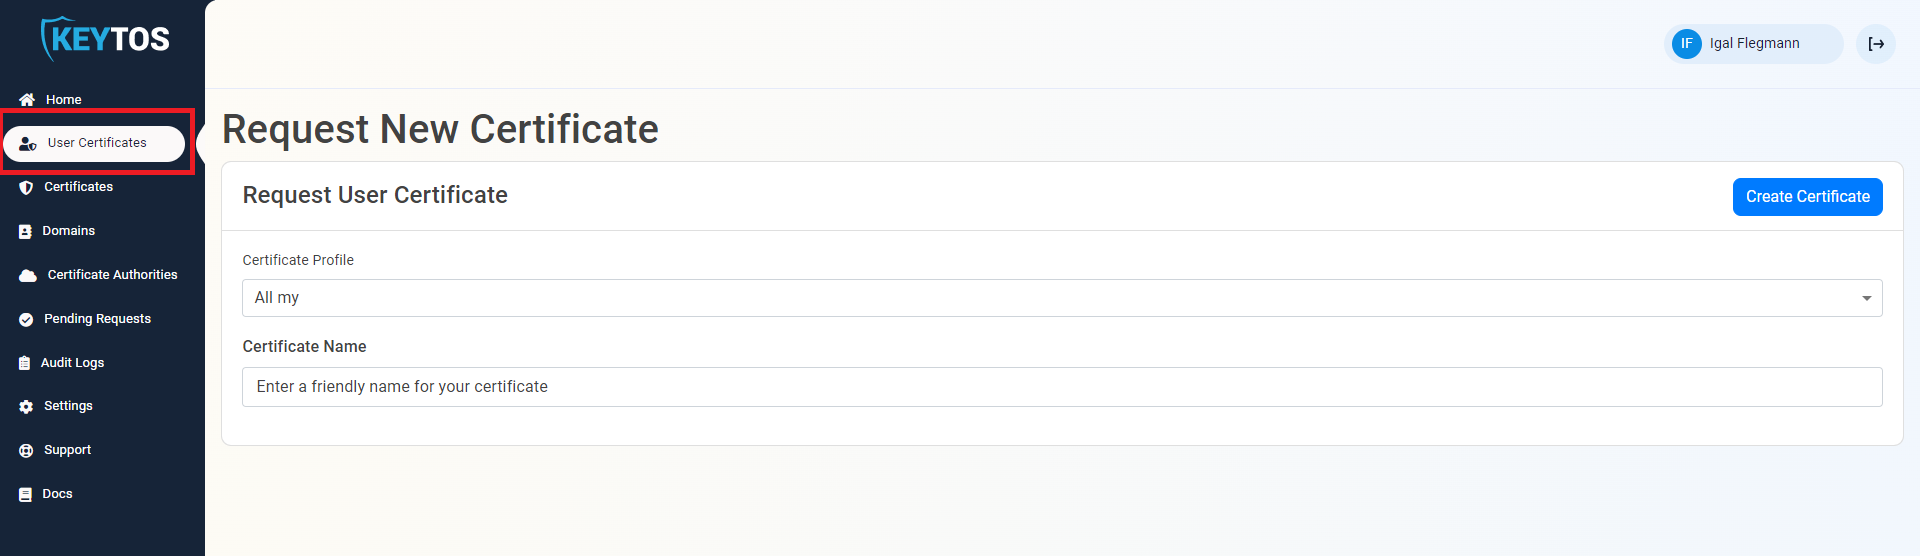
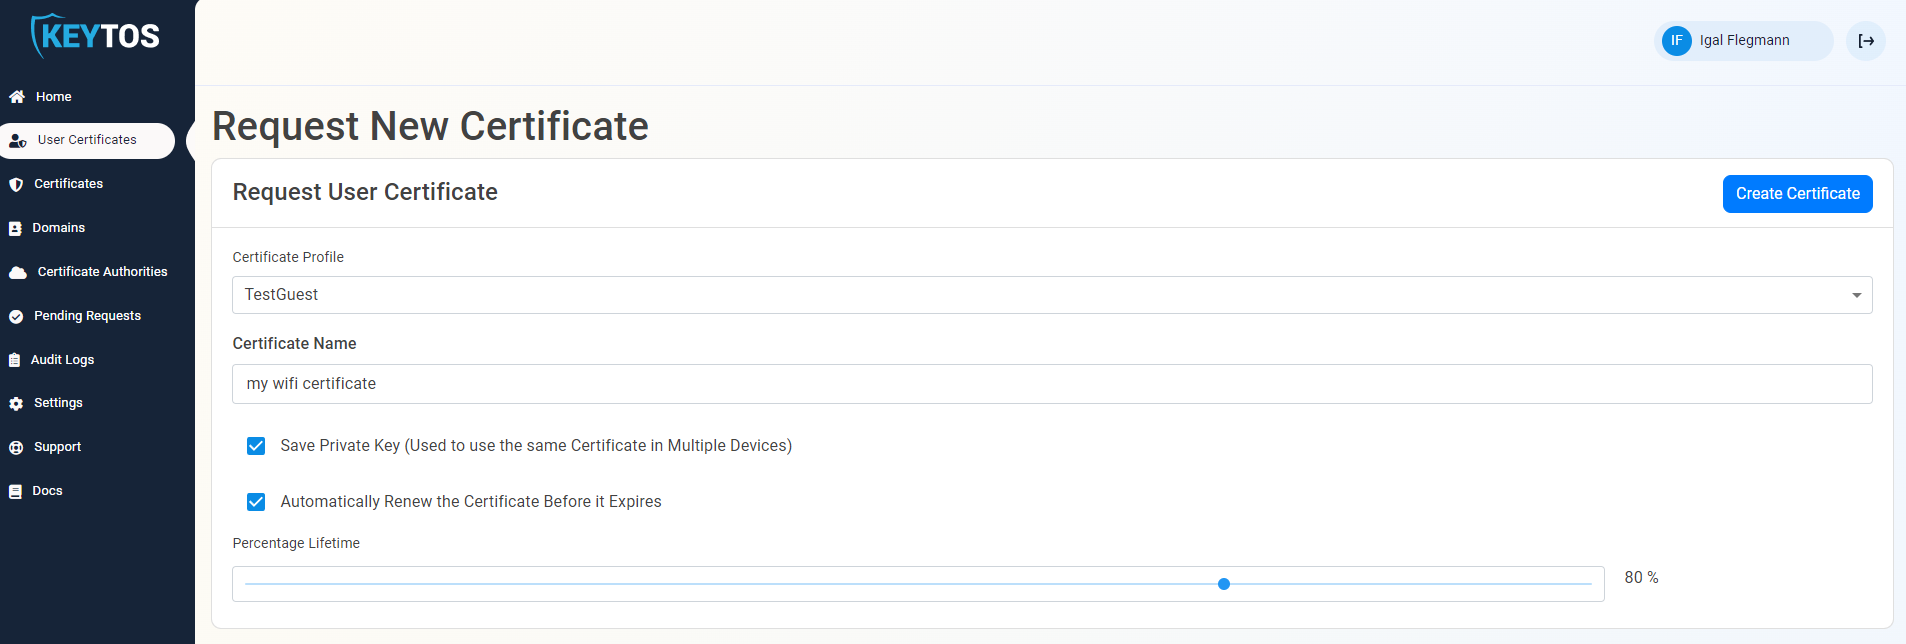
- If you have multiple profiles, you will see a Certificate Profile dropdown. Select the profile you want to use. (If you only have one profile, you will not see this dropdown).
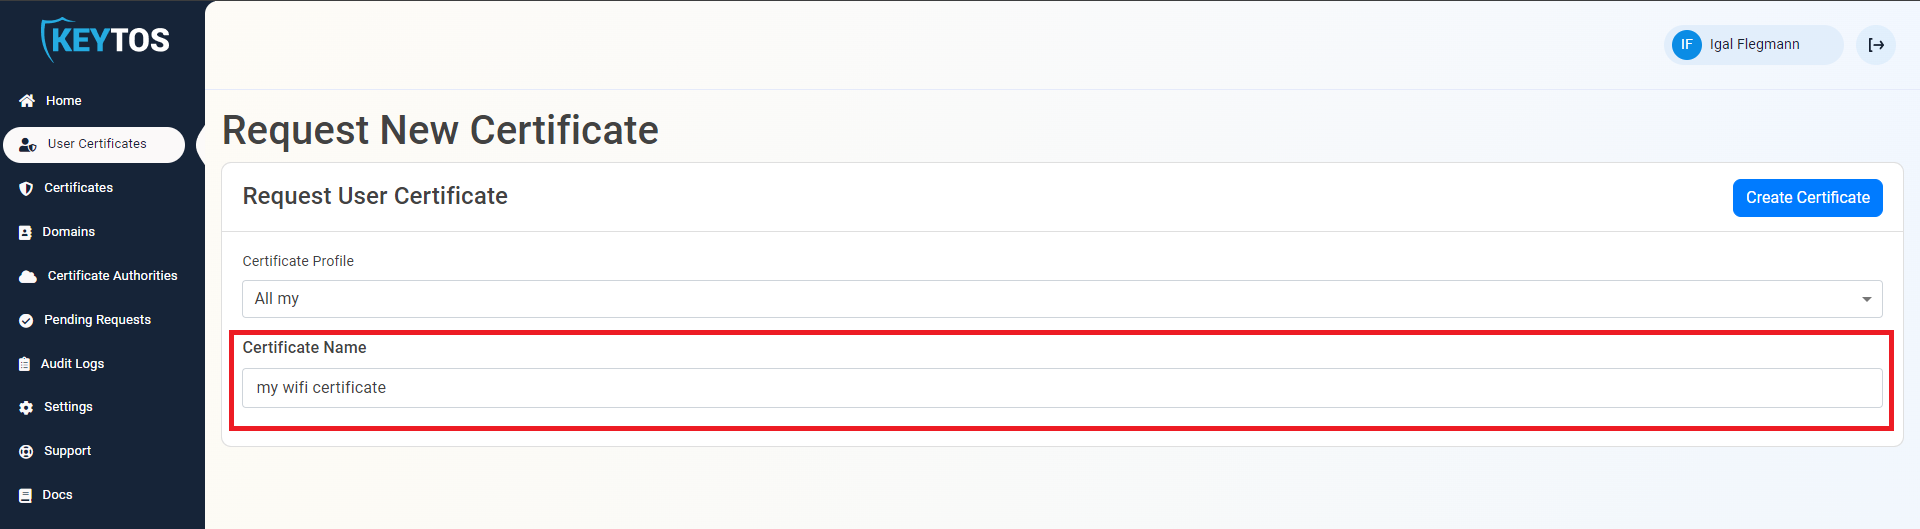
- Enter a Certificate Name (this is just for your reference).
- If your administrator has enabled the option to save the private key in EZCA (this is used for S/MIME or encryption certificates where having a backup of the private key is important), you will see the option to save the private key in EZCA. If you do not see this option, please continue to create your certificate.

- One of the advantages of saving your private key in EZCA is that you can have EZCA automatically rotate your certificate when it is about to expire. If you want to enable this option, check the “Automatically Renew Certificate Before it Expires” option. This option will automatically renew your certificate and send you an email instructing you to download the new certificate.
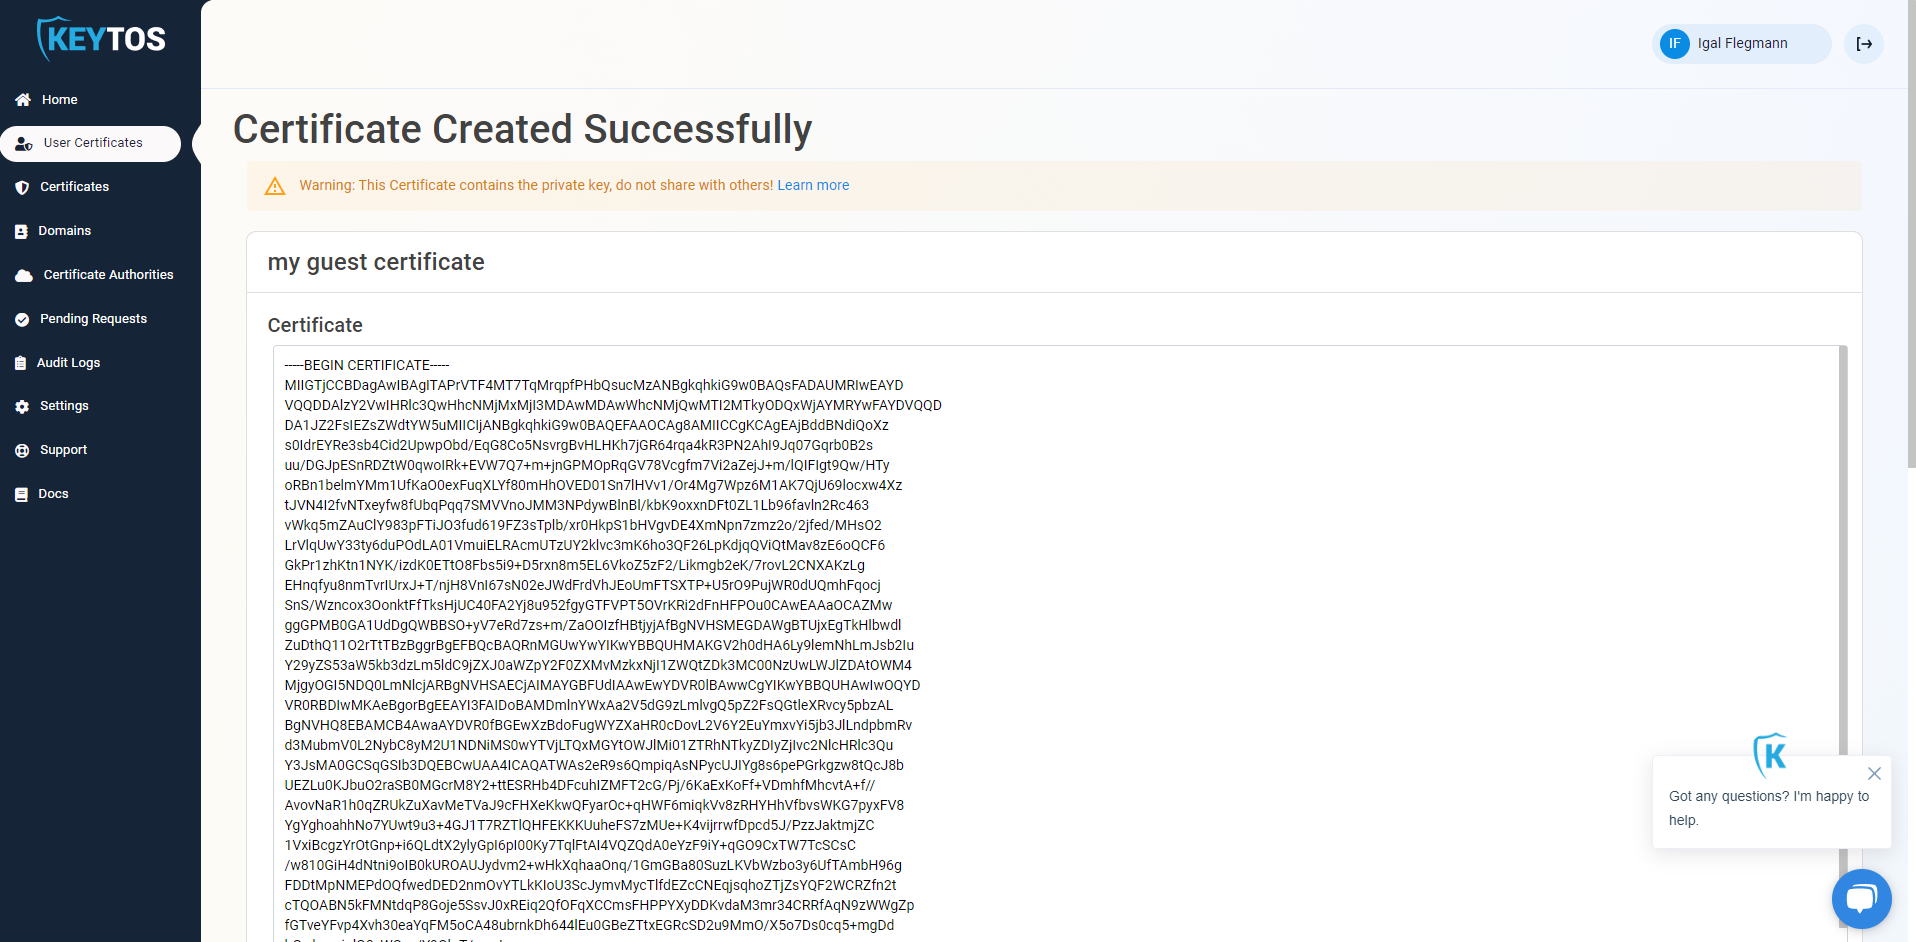
- Click the “Create Certificate” button on the top right of the page, this might freeze your browser a few seconds while it creates your secure cryptographic key. Once you have created your certificate, you will see a page with the details of your certificate.
- Now you are ready to install your certificate