How To Create EST Certificates for Azure IoT Hub
Prerequisites
Overview - How to Authenticate with Certificates to Azure IoT Hub
X509 Certificates are the most secure way for IoT devices to authenticate with Azure IoT Hub. In this tutorial, we will show you how to create an Certificate Authority in Azure using EZCA and connect your IoT devices to Azure IoT Hub in a secure and compliant way. Once the bootstrap certificate is created, we must think about the renewal process. EZCA has multiple ways to achieve this, one is using our EZCA Nuget Packet with Code Samples, you can see the documentation for that and code samples here. Another way is using EST (Enrollment over Secure Transport) to renew the certificates. In this tutorial, we will show you how to create a certificate using EST and connect it to Azure IoT Hub.
How Azure IoT Device Certificate Works with EST
Microsoft Documentation and our IoT Security Best Practices recommend creating a long term certificate in the factory to authenticate the device to the EST server. This certificate is used to authenticate the device to the EST server and request a new certificate. This certificate is then used to authenticate the device to Azure IoT Hub. This process is done to ensure that the device is the same device that was issued the certificate in the factory. When the certificate is about to expire, the device must request a new certificate from the EST server. This process is done to ensure that the device is still in the possession of the original owner.
How To Create The Bootstrap Certificate For IoT devices and EST
As mentioned in the overview, the first step is to create the bootstrapping certificate (while some EST servers support username and password bootstrapping, we recommend using a certificate). For this you have a programming station in the factory that will issue the first certificate on behalf of the device. To do this you can use our create certificate API with an Entra ID identity (we recommend and MSI or a service principal) (you can see it in our swagger page (RequestSSLCertificate API under CA)), or you can use the EZCA Nuget Packet with Code Samples to create the certificate. Once you have created the bootstrap certificate and installed it in the IoT device, the device is ready to leave the factory.
How to Create the First EST Certificate
Once the device is in the field, the device will need to create it’s first certificate (for the first certificate, it will use the bootstrap certificate, after the first the same process will be repeated but it will use the latest certificate to authenticate). Let’s talk about how we can write the code for this.
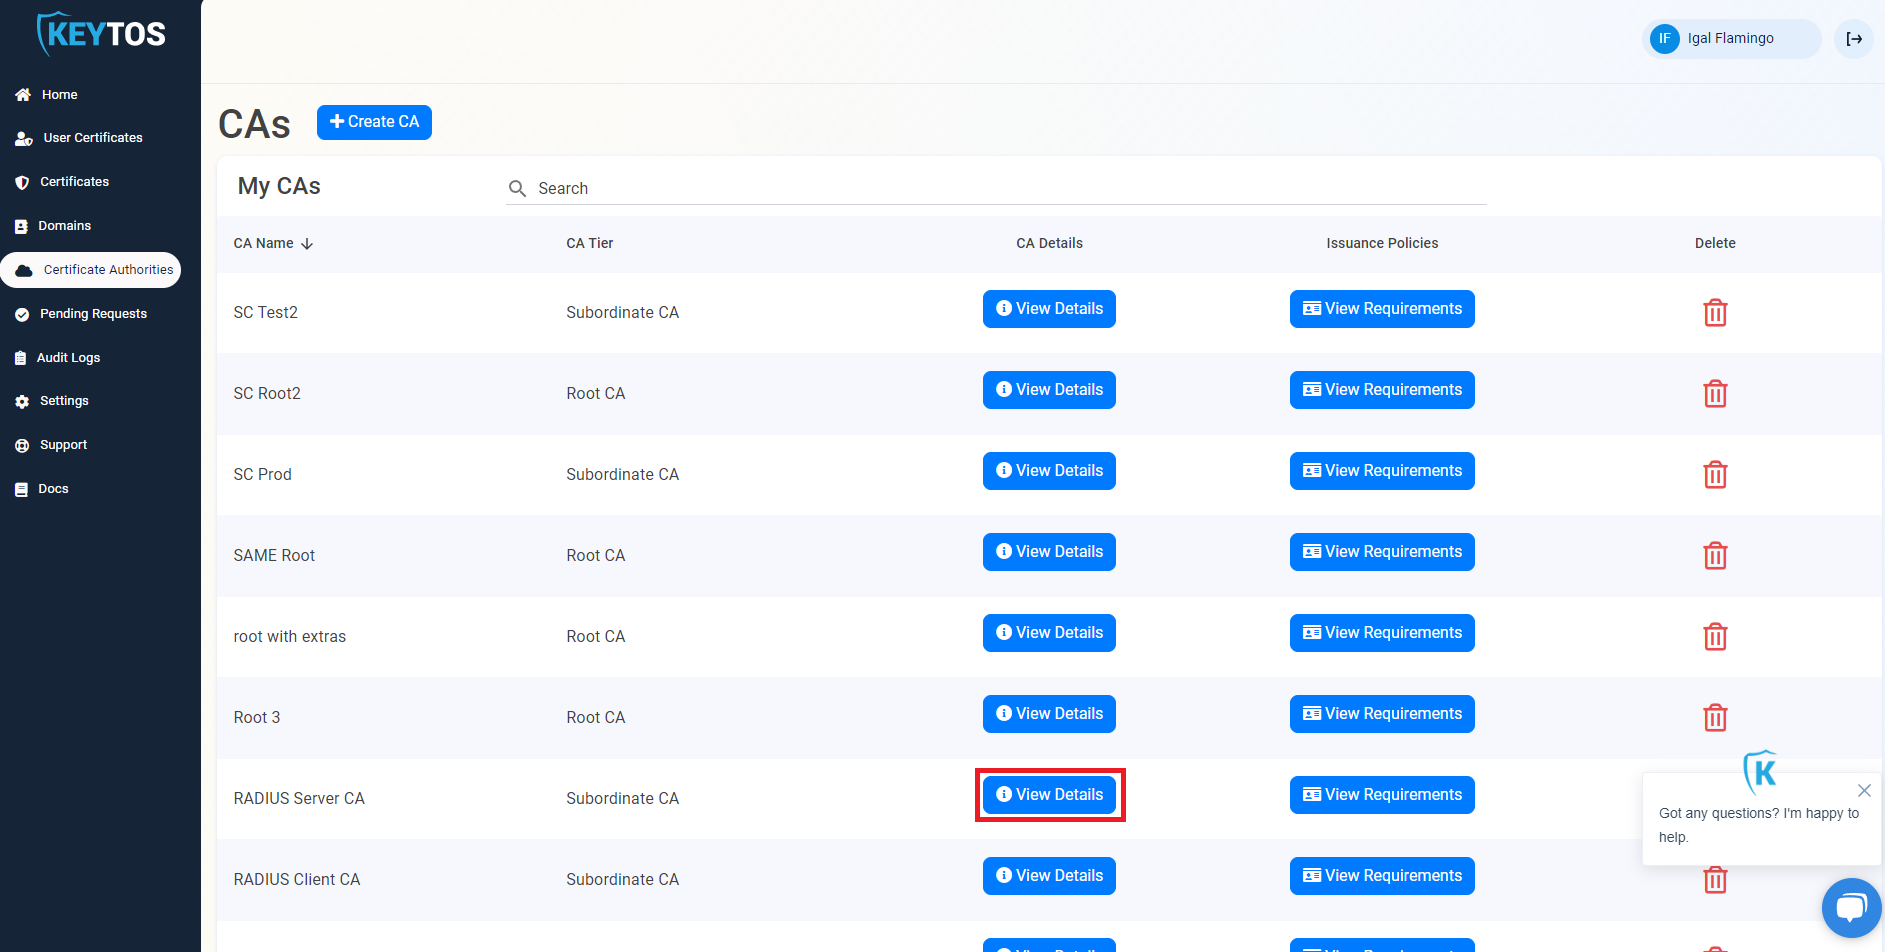
- The first thing we have to do is get the EST URL from the Cloud CA. Go to the EZCA Portal and click on Certificate Authorities on the left side of the screen and click on “View Details” on the CA you want to use.
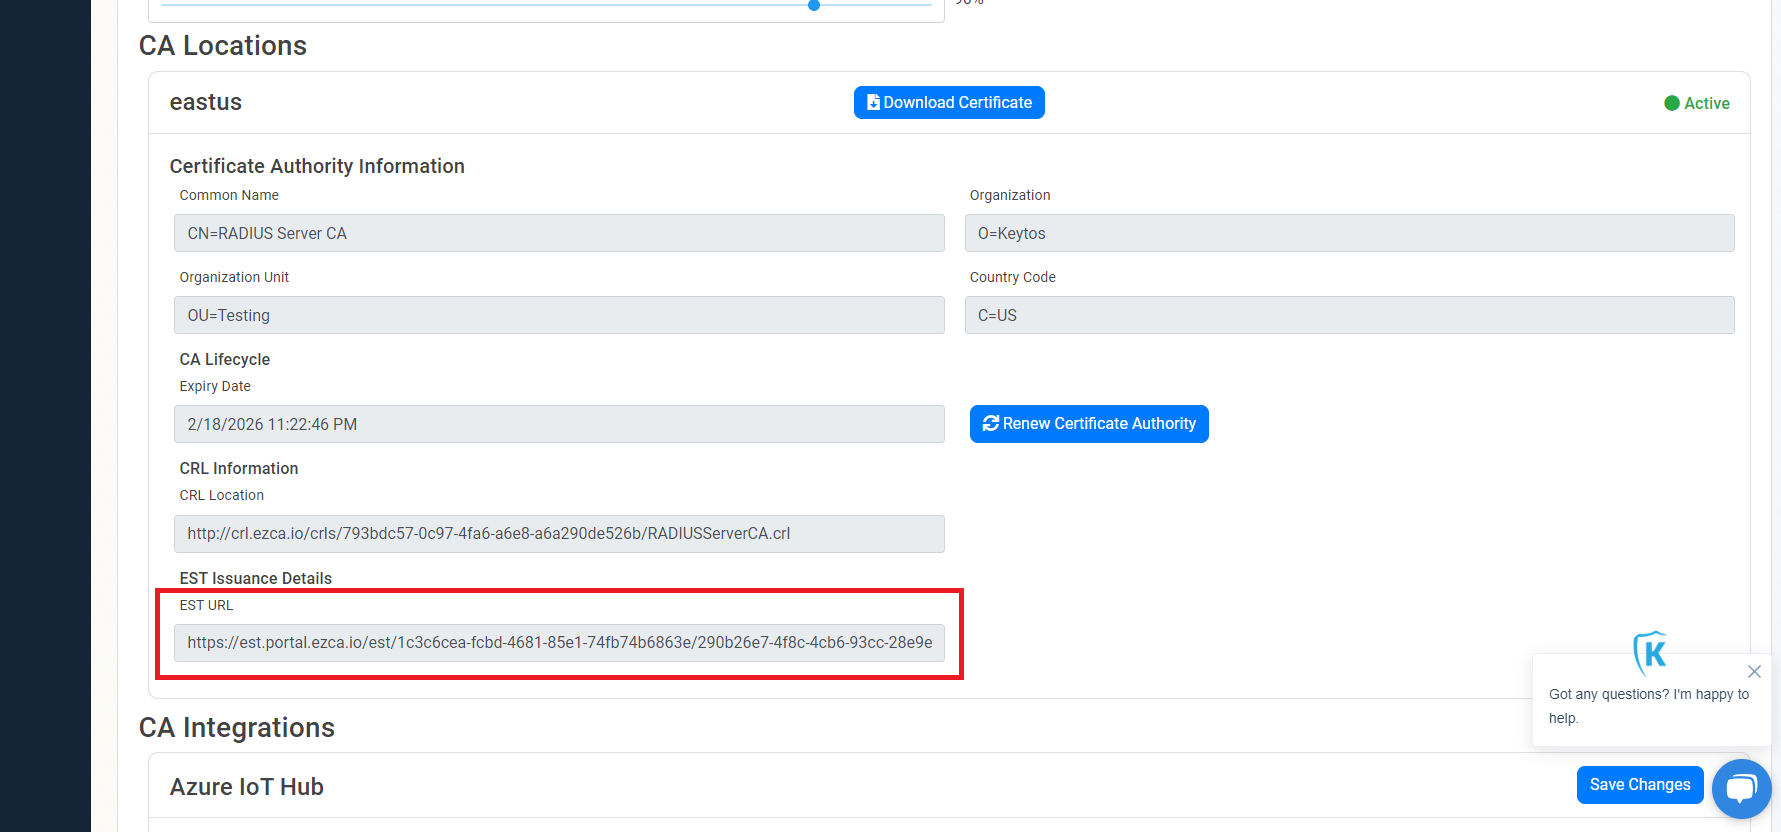
- Scroll down to your CA location and copy the EST URL (Note each region will have a different URL).
- Now that we have the EST URL we can write some code to get the certificate. You can get the full code sample from our open-source EST C# Client (To save you some time here is the renew function). But I will also go through the high-level steps here.
How EST Certificate Renewal Works
EST renewal uses mTLS (mutual TLS) to authenticate the device to the EST server. The device will send a CSR (Certificate Signing Request) to the EST server. The EST server will sign the CSR and send the certificate back to the device. The device will then install the certificate and use it to authenticate to Azure IoT Hub. The device will then use the certificate to authenticate to the EST server to renew the certificate. The process is repeated until the device is decommissioned.
How to do mTLS in C# client
The easiest way is to create an HttpClient with the client certificate as shown below (This assumes that “clientCertificate” is a X509Certificate2 object with the private key):
services.AddHttpClient<HttpClient>("ESTClient").ConfigurePrimaryHttpMessageHandler(() => new HttpClientHandler
    {
        ClientCertificates = { clientCertificate },
    }).AddStandardResilienceHandler(options =>
    {
        options.TotalRequestTimeout.Timeout = TimeSpan.FromSeconds(60);
        options.CircuitBreaker.SamplingDuration = TimeSpan.FromSeconds(60);
        options.AttemptTimeout.Timeout = TimeSpan.FromSeconds(20);
    });
Once we have created the client we can test that we are sending the proper certificate by sending a request to the EST server test API which will return the certificate you used in PEM format (This assumes that “estURL” is the URL of the EST server copied from the EZCA portal):
int index = estUrl.IndexOf('/', estUrl.IndexOf("//", StringComparison.Ordinal) + 2);
HttpResponseMessage testResponse = await _httpClient.GetAsync(estUrl[..index] + "/health/certificate");
if (testResponse.IsSuccessStatusCode)
{
    string responseString = await testResponse.Content.ReadAsStringAsync();
    Console.WriteLine("Connected to the EST server " + responseString);
}
else
{
    Console.WriteLine("Failed to connect to the EST server " + testResponse.StatusCode + " " + await testResponse.Content.ReadAsStringAsync());
}
How To Renew the Certificate
Now that we have have validated that the client can talk to the EST server, we can now send a CSR (Certificate Signing Request) to the EST server to get a new certificate. The EST server will sign the CSR and send the certificate back to the device. The device will then install the certificate and use it to authenticate to Azure IoT Hub. In this documentation I will skip how to create the CSR but our open-source EST C# Client has all the code you need to create the CSR. Once you have the CSR you can send it to the EST server to get a new certificate.
string csrBase64 = Convert.ToBase64String(csrBytes);
//Send the request to the EST server
StringContent content = new(csrBase64, Encoding.UTF8, "application/pkcs10");
HttpResponseMessage csrResponse = await _httpClient.PostAsync(estUrl + "/simpleenroll", content);
if (!csrResponse.IsSuccessStatusCode)
{
    string responseString = await csrResponse.Content.ReadAsStringAsync();
    _logger.LogError("Failed to send CSR to the EST server " + csrResponse.StatusCode + " " + responseString);
    return 1;
}
string certResponseString = await csrResponse.Content.ReadAsStringAsync();
If the API call is successful, the EST server will return the certificate inside a CMS (Cryptographic Message Syntax) envelope. You can use the following code to extract the certificate from the CMS envelope: First we will convert the response to a CsmSignedData object:
// Step 1: Decode the Base64 string back to bytes
byte[] cmsDataBytes = Convert.FromBase64String(certResponseString);
// Step 2: Create a CMSSignedData object from the byte array
CmsSignedData cmsSignedData = new CmsSignedData(cmsDataBytes);
Then we will extract the certificate from the signed data which is stored as the first certificate in the signed data certificates collection:
IStore<X509Certificate> certStore = cmsSignedData.GetCertificates();
List<X509Certificate> certificates = certStore.EnumerateMatches(null).ToList();
X509Certificate2 newCert =  certificates.Select(cert => new X509Certificate2(cert.GetEncoded())).First();
Once you have the certificate you can install it (note the returned certificate only contains the public certificate you will need to merge it with the private key) on the device and use it to authenticate to Azure IoT Hub. The device will then use the certificate to authenticate to the EST server to renew the certificate. The process is repeated until the device is decommissioned.