How To Distribute WiFi Profiles to non managed devices For Entra ID
How to Distribute WiFi Profiles to non managed Windows devices with EZRADIUS
While this is not necessary since you can setup windows for Entra ID Wifi Authentication, If your organization has enabled self-service wifi profiles you can create your own Wi-Fi profile for your Windows devices. There are three ways to obtain them: EZRADIUS sent you an email with the profile, you downloaded the profile from the EZRADIUS portal, or request an email with your profile from the EZRADIUS portal.
Option 1: Email Received from EZRADIUS
If you received an email from EZRADIUS with 2 different files: Root CA certificate (root.cer) and the Windows Wi-Fi Profile (wifi-profile.xml) each file will be used to install the profile on your Windows device.
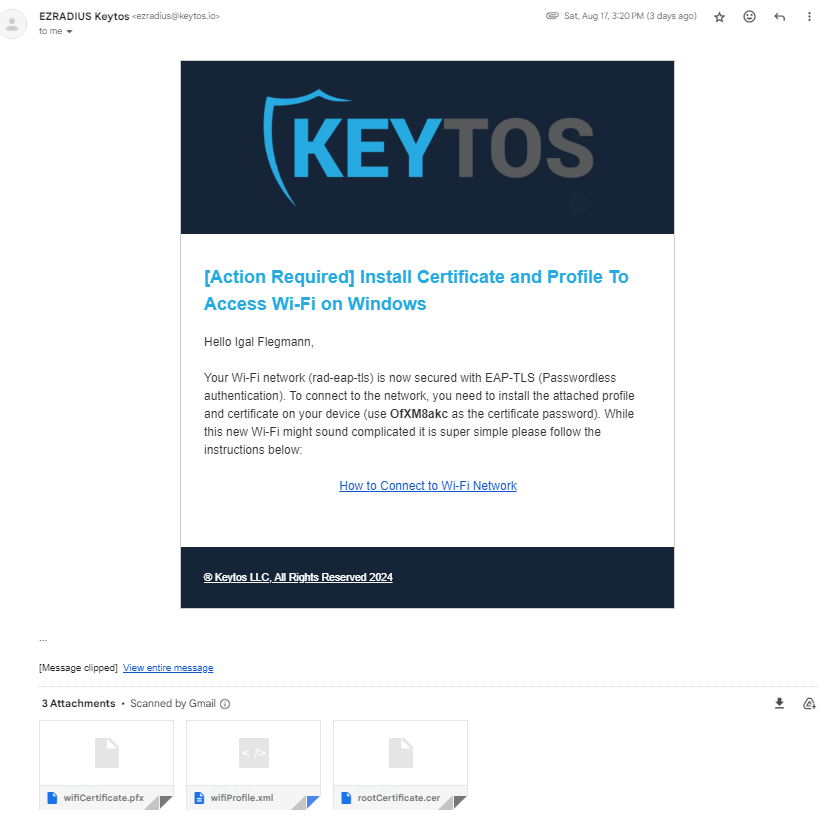
How to Install Wi-Fi Root CA Profile on Windows
You only have to install the Root CA certificate if when you open it has a red X on the top left corner. If it doesn’t have a red X, you can skip this step.
- The Root CA certificate (root.cer) will be installed in the Trusted Root Certification Authorities store. To install the certificate, double-click on the root.cer file and click on the Install Certificate button.
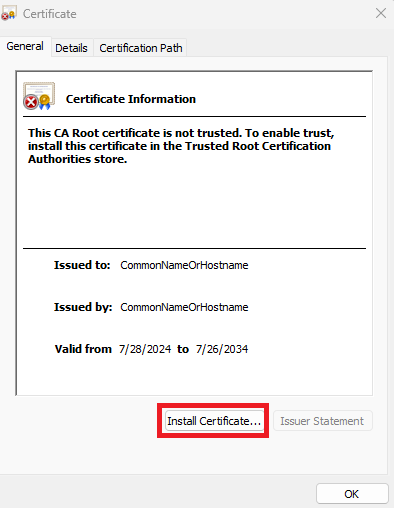
- Click Next on the Certificate Import Wizard.
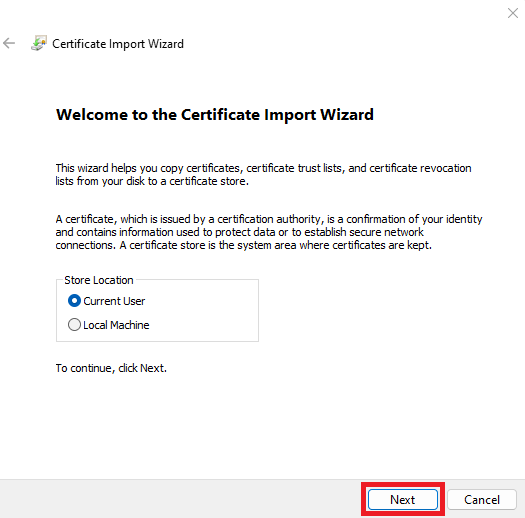
- Select the Place all certificates in the following store option and click Browse.
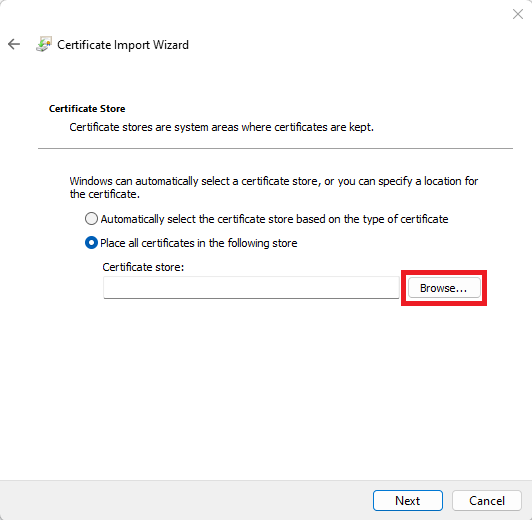
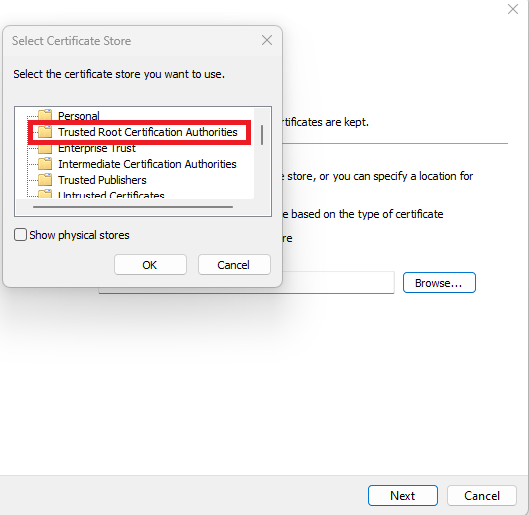
- Select the Trusted Root Certification Authorities store and click OK.
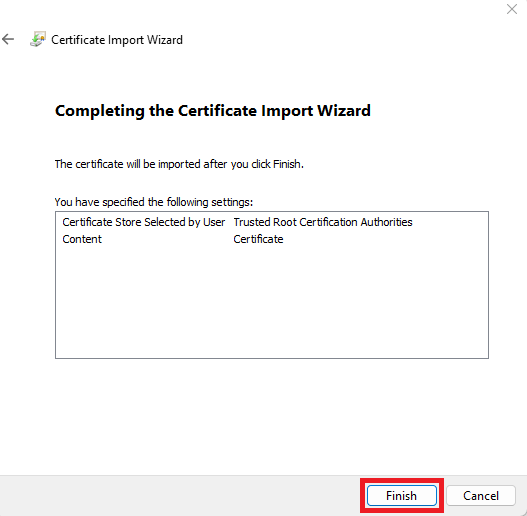
- Click Next and then Finish.
How to Install Wi-Fi Profile on Windows
find the wifi-profile.xml full path, for example, C:\Users\Marcos\Desktop\wifi-profile.xml, and run the following command in PowerShell:
netsh wlan add profile filename="C:\Users\Marcos\Desktop\wifi-profile.xml" user=current
Your wifi profile is now installed on your Windows device. You can now connect to the network using Entra ID username and password.
Option 2: Request an Email with your Profile from the EZRADIUS Portal
If need access to your Wifi and your administrator has requested self service profile distribution in EZRADIUS, you can request an email with your profile from the EZRADIUS portal.
- Go to the EZRADIUS portal (this URL will be provided by your organization) and click on the ‘WiFi Profiles’ button.
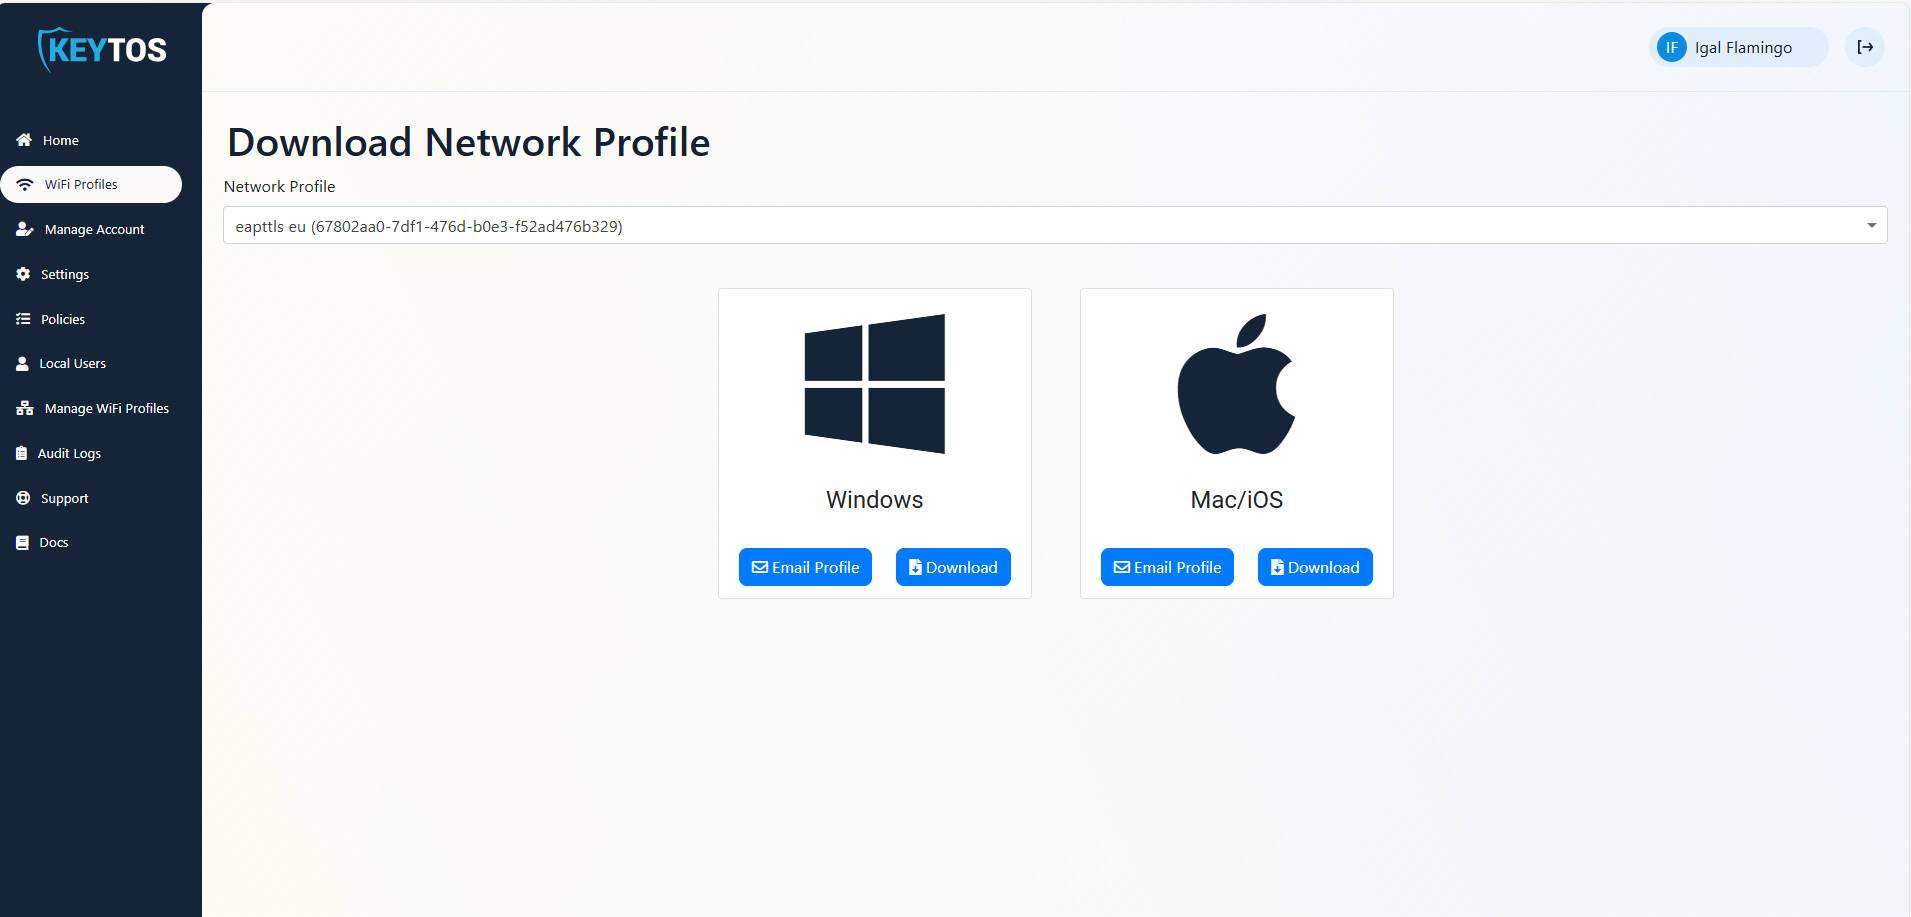
- If your organization has multiple profiles available, select the profile you want to request.
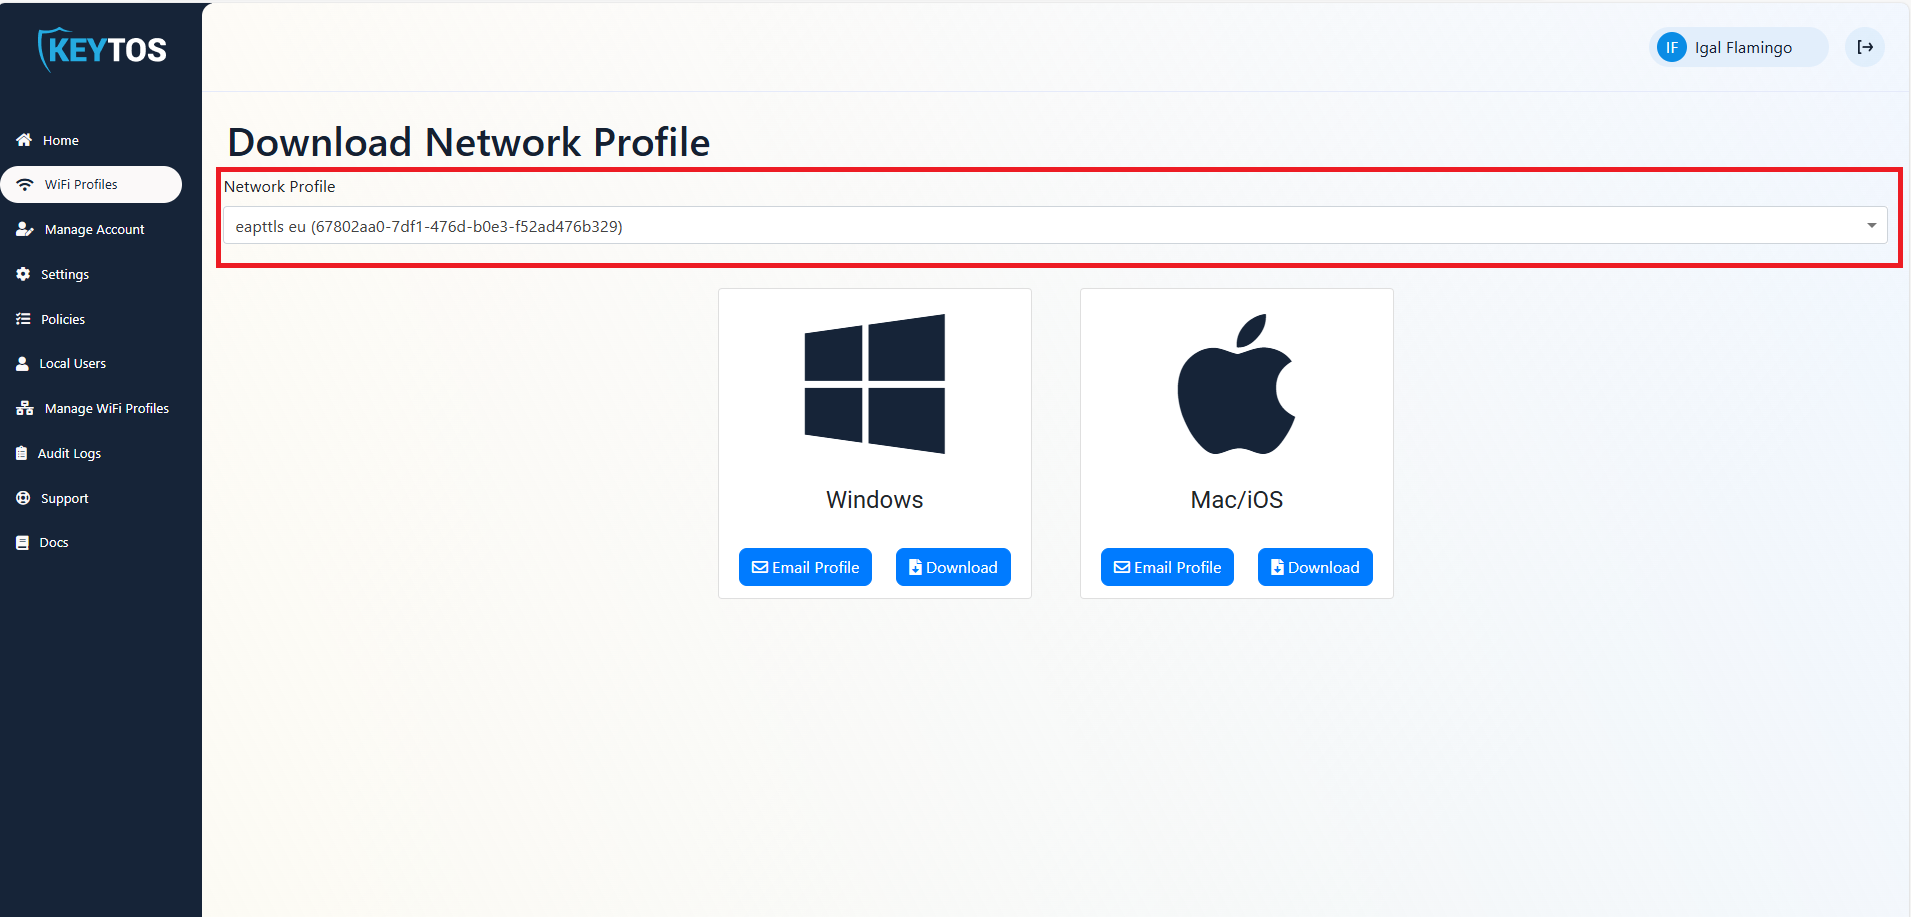
- Click on the ‘Email Profile’ button.
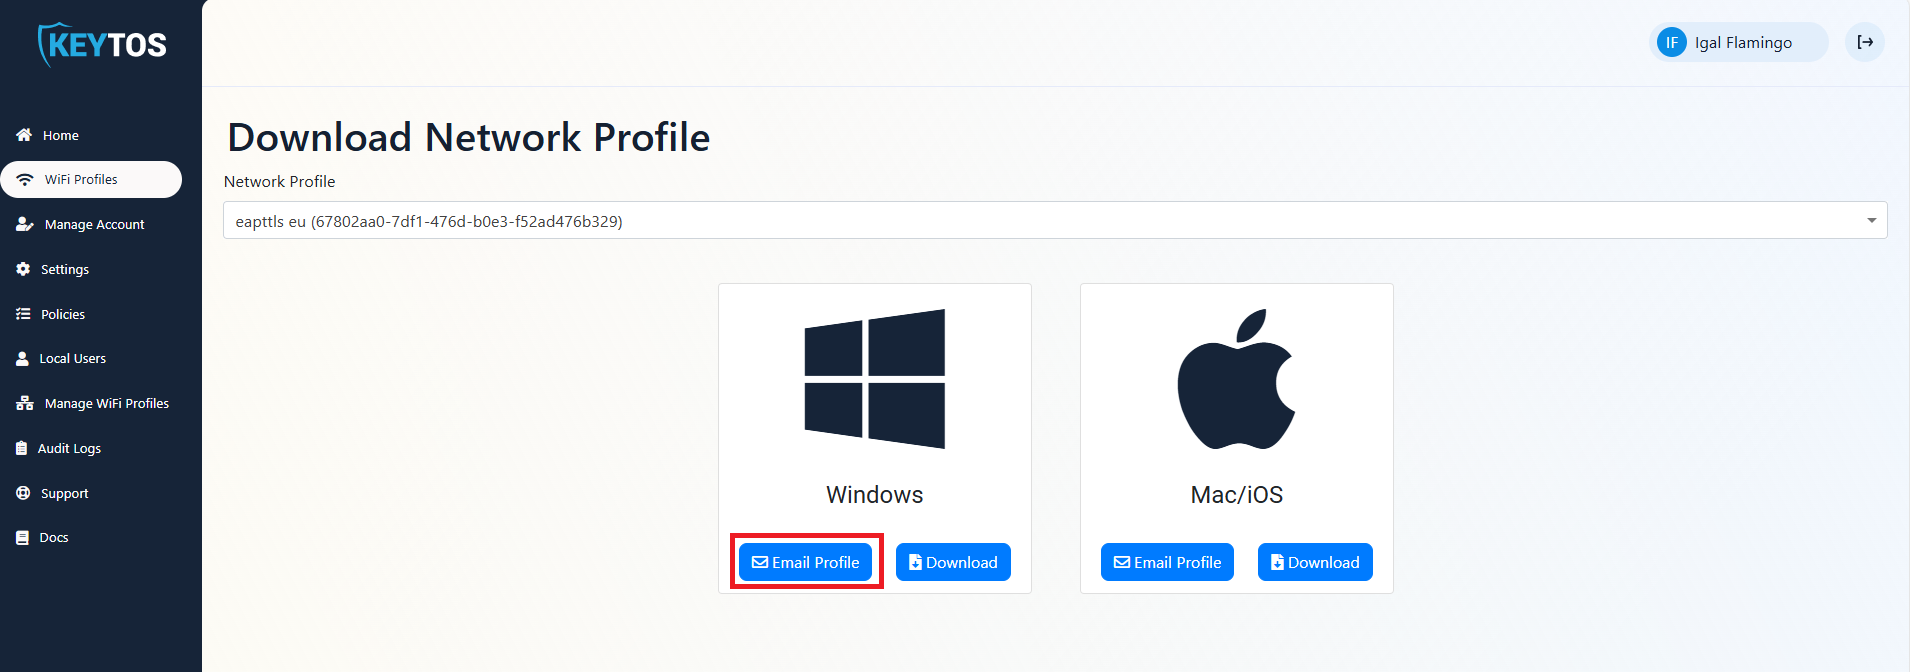
- Open the email from EZRADIUS on your Windows device and download the attached files.

How to Install Wi-Fi Root CA Profile on Windows
You only have to install the Root CA certificate if when you open it has a red X on the top left corner. If it doesn’t have a red X, you can skip this step.
- The Root CA certificate (root.cer) will be installed in the Trusted Root Certification Authorities store. To install the certificate, double-click on the root.cer file and click on the Install Certificate button.

- Click Next on the Certificate Import Wizard.

- Select the Place all certificates in the following store option and click Browse.

- Select the Trusted Root Certification Authorities store and click OK.

- Click Next and then Finish.

How to Install Wi-Fi Profile on Windows
find the wifi-profile.xml full path, for example, C:\Users\Marcos\Desktop\wifi-profile.xml, and run the following command in PowerShell:
netsh wlan add profile filename="C:\Users\Marcos\Desktop\wifi-profile.xml" user=current
Your wifi profile is now installed on your Windows device. You can now connect to the network using Entra ID username and password.
Option 3: Download Wifi Profile from the EZRADIUS Portal
If need access to your Wifi and your administrator has requested self service profile distribution in EZRADIUS, you can request an email with your profile from the EZRADIUS portal.
- Go to the EZRADIUS portal (this URL will be provided by your organization) and click on the ‘WiFi Profiles’ button.

- If your organization has multiple profiles available, select the profile you want to request.

- Click on the ‘Download’ button.
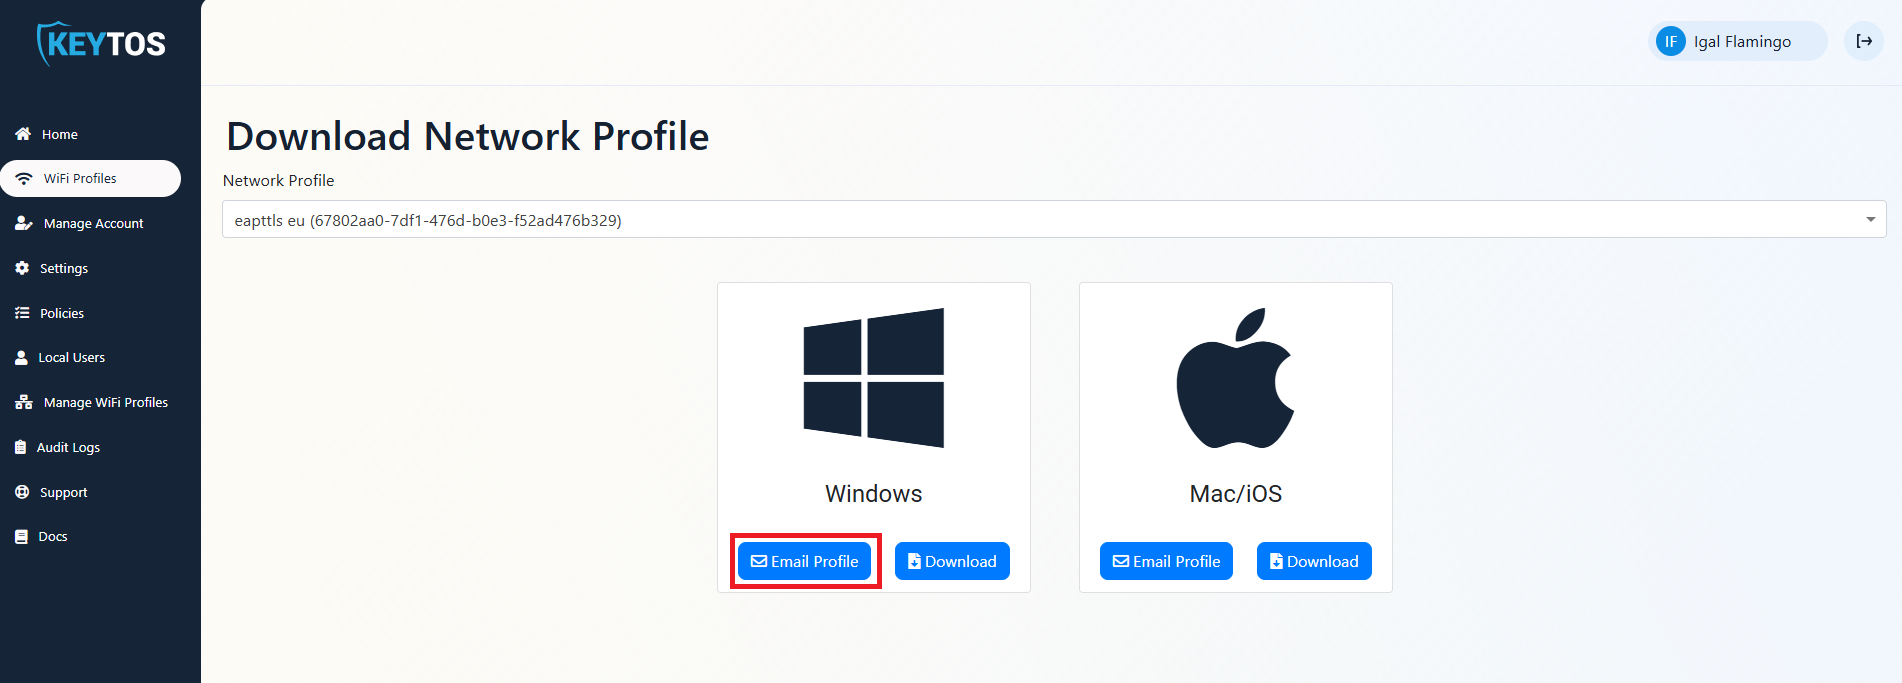
- This will download a zip file with the Root CA certificate (root.cer) and the Windows Wi-Fi Profile (wifi-profile.xml).
How to Install Wi-Fi Root CA Profile on Windows
You only have to install the Root CA certificate if when you open it has a red X on the top left corner. If it doesn’t have a red X, you can skip this step.
- The Root CA certificate (root.cer) will be installed in the Trusted Root Certification Authorities store. To install the certificate, double-click on the root.cer file and click on the Install Certificate button.

- Click Next on the Certificate Import Wizard.

- Select the Place all certificates in the following store option and click Browse.

- Select the Trusted Root Certification Authorities store and click OK.

- Click Next and then Finish.

How to Install Wi-Fi Profile on Windows
find the wifi-profile.xml full path, for example, C:\Users\Marcos\Desktop\wifi-profile.xml, and run the following command in PowerShell:
netsh wlan add profile filename="C:\Users\Marcos\Desktop\wifi-profile.xml" user=current
Your wifi profile is now installed on your Windows device. You can now connect to the network using Entra ID username and password.