How To Create IoT Edge EST Certificate Authority
Prerequisites
- An Azure IoT Hub Instance
- An Azure IoT Device Provisioning Service Instance
- A Linux Machine running IoT Edge (For this one just install IoT Edge, once you get to the provisioning the device with it’s cloud identity section, jump to this guide)
Overview - Create IoT Edge Certificates Using a Cloud Based EST Certificate Authority
Azure IoT Edge devices need a secure way to authenticate to the cloud, however, managing certificates in IoT devices can be a challenge. Azure IoT Edge supports the Enrollment over Secure Transport (EST) protocol which allows devices to request certificates from a Certificate Authority (CA) in a secure way. This guide will walk you through creating a CA in EZCA that can issue certificates to IoT Edge devices using the EST protocol.
What is Enrollment over Secure Transport (EST)?
Enrollment over Secure Transport (EST) RFC 7030 is a cryptographic protocol that automates the issuance of x.509 certificates. It’s used for public key infrastructure (PKI) clients, like IoT Edge that need client certificates associated to a Certificate Authority (CA). EST replaces the need for manual certificate management, which cannot scale in large IoT deployments.
How To Create an IoT Edge EST Certificate Authority in Azure
The First step for setting up EST for IoT Edge is to create a Certificate Authority that can issue certificates to IoT Edge devices. While the Microsoft EST documentation creates a self-signed CA in the IoT Edge device, this does not meet the security and compliance requirements for most deployments, this is why we are going to use EZCA the best cloud-based CA for Azure IoT to create a CA that can issue certificates to IoT Edge devices.
Do I Need A Root CA or an Intermediate CA for Azure IoT EST?
When creating a CA for IoT Edge, you have to decide if you want to create a Root CA that issues the certificates or if you have a Root CA and want to create an Intermediate CA that issues the certificates. If it is a small the deployment, a Root CA is recommended, however, if you have a large deployment, a 2 tier PKI with a Root and Intermediate CAs is recommended, this will allow you to create a long term Root Certificate Authority and a short term Intermediate CAs that can be rotated more frequently, as well as you IoT deployment scales, you can create more Intermediate CAs for different regions or products.
In this guide, we will assume you have already created your cloud CA subscription in Azure.
- Go to your EZCA portal (it is usually https://portal.ezca.io/ but you might be using our regional offerings such as https://eu.ezca.io/ or https://au.ezca.io/ or if you are using a self-hosted EZCA, go to your organization’s EZCA URL)
- Login with an account that is registered as a PKI Admin in EZCA.
- Navigate to Certificate Authorities.
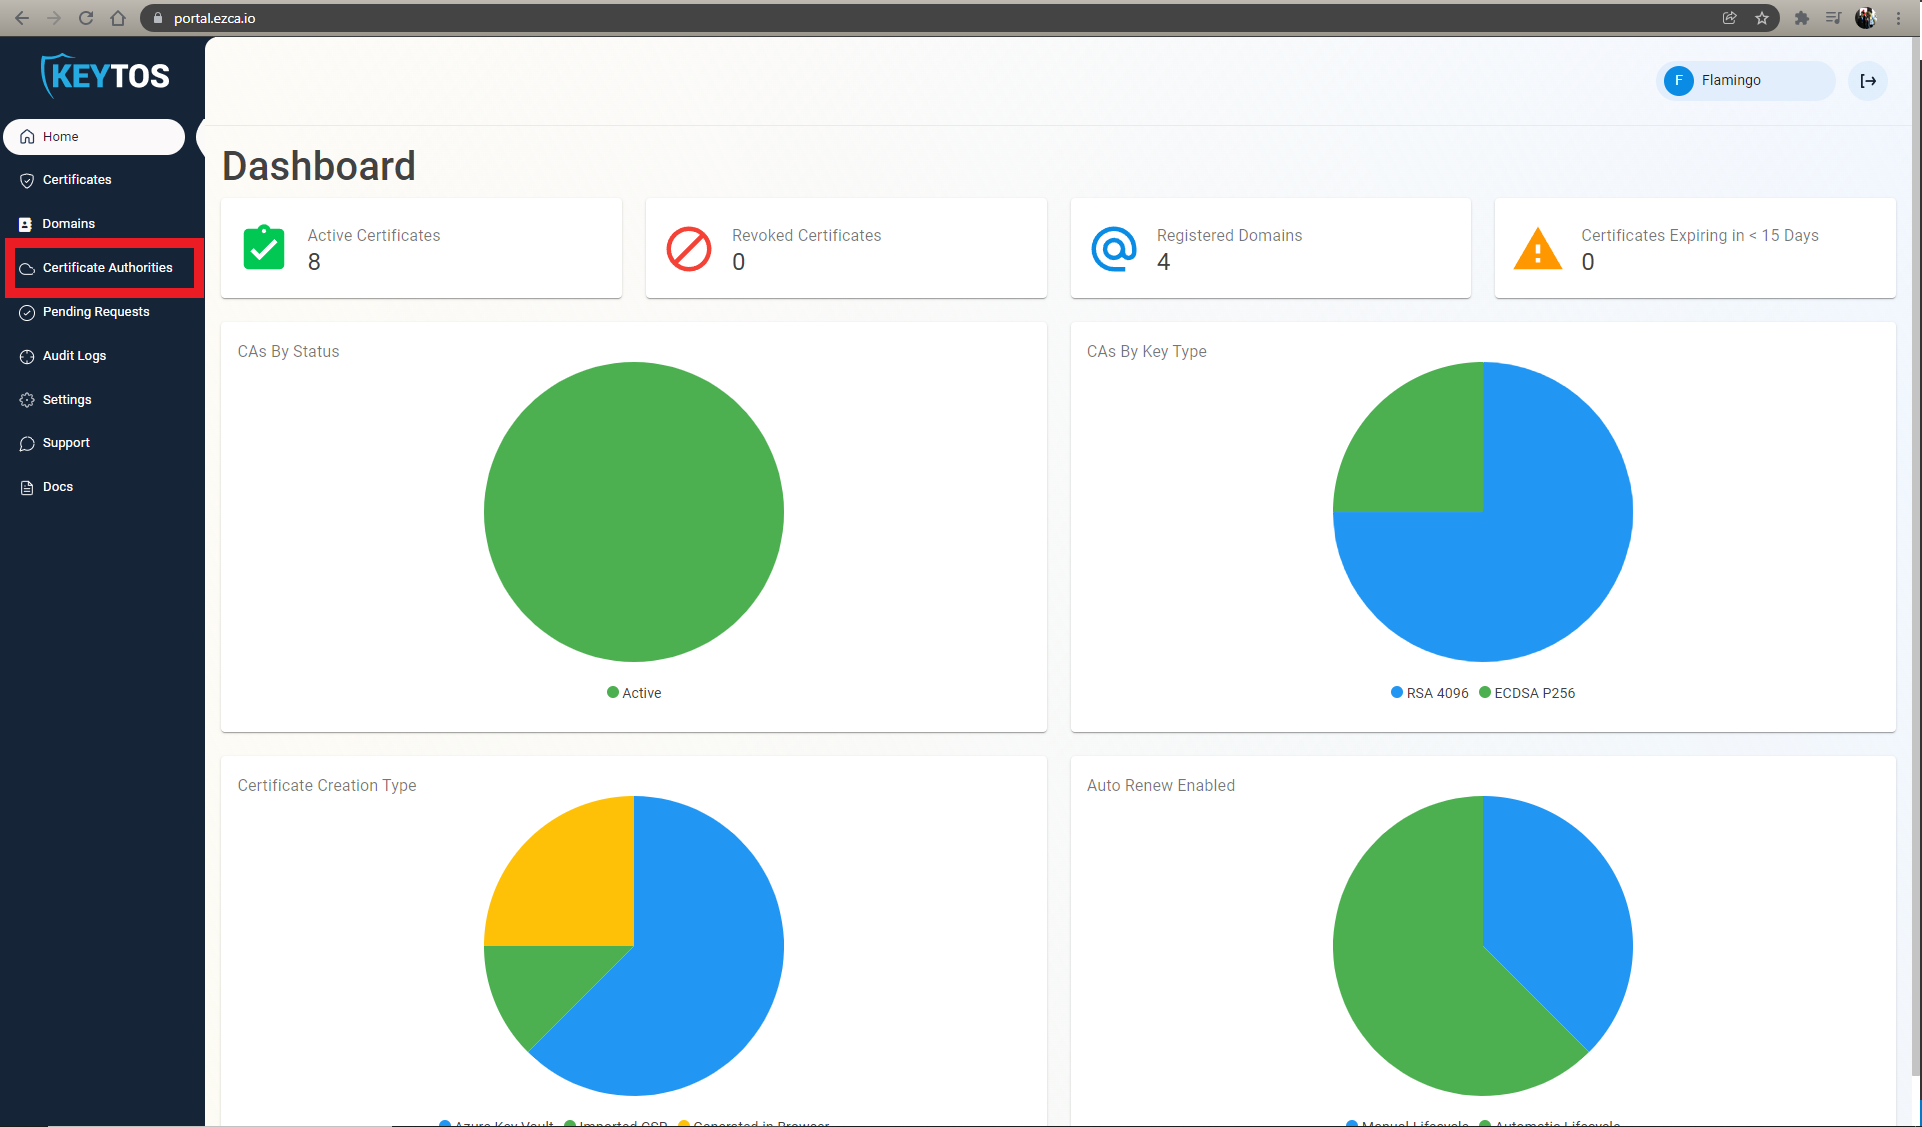
- Click on the “Create CA”
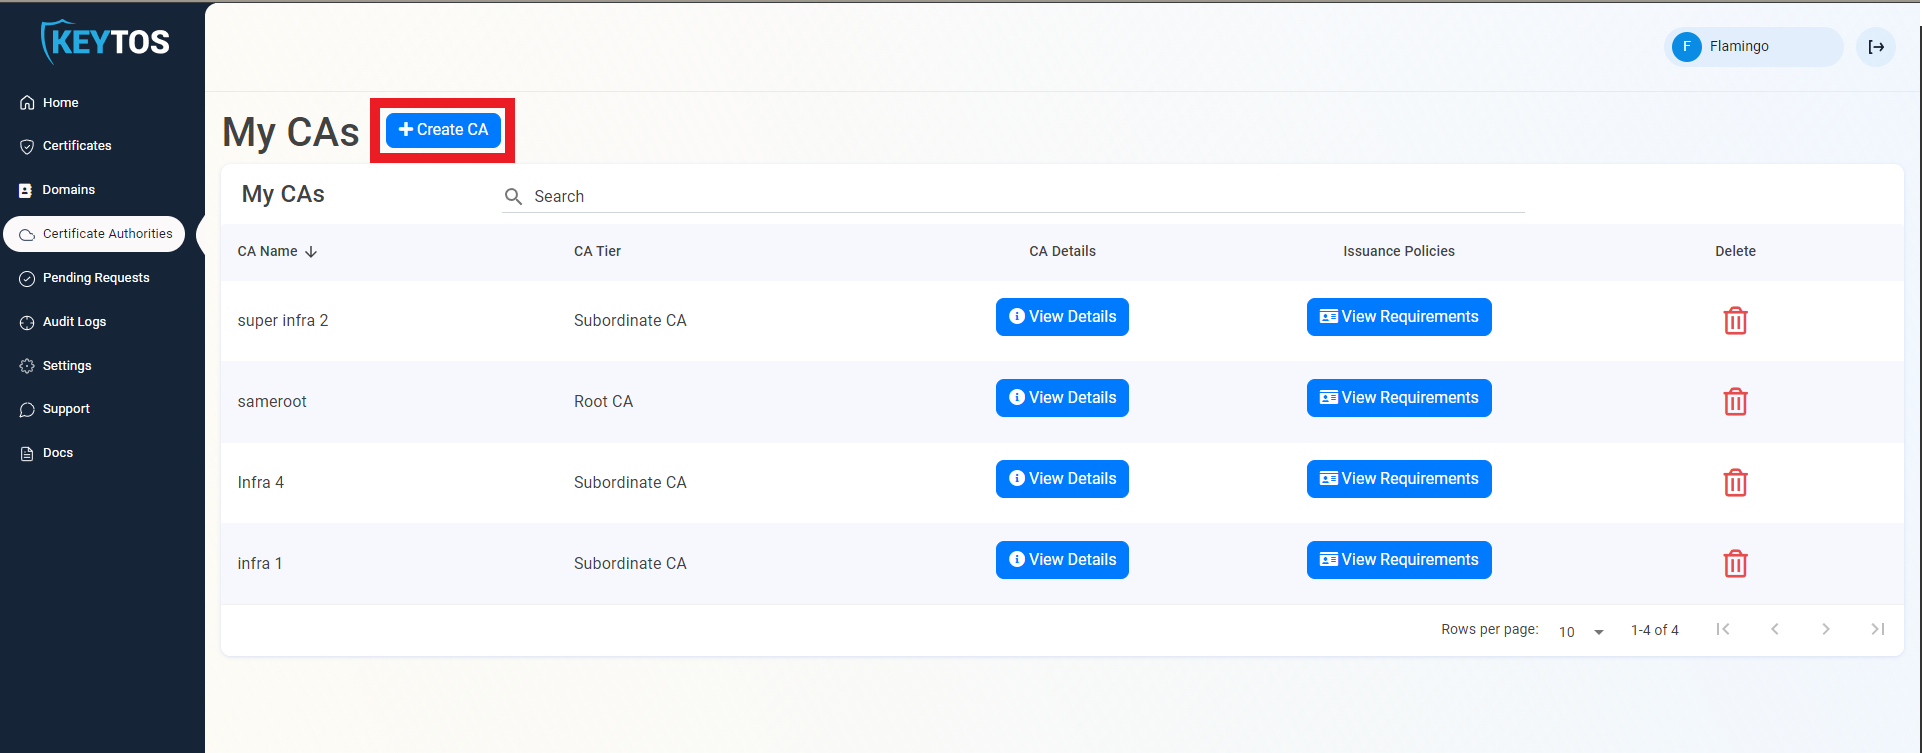
- Select Root CA.

- Click Next
Entering EST CA Information
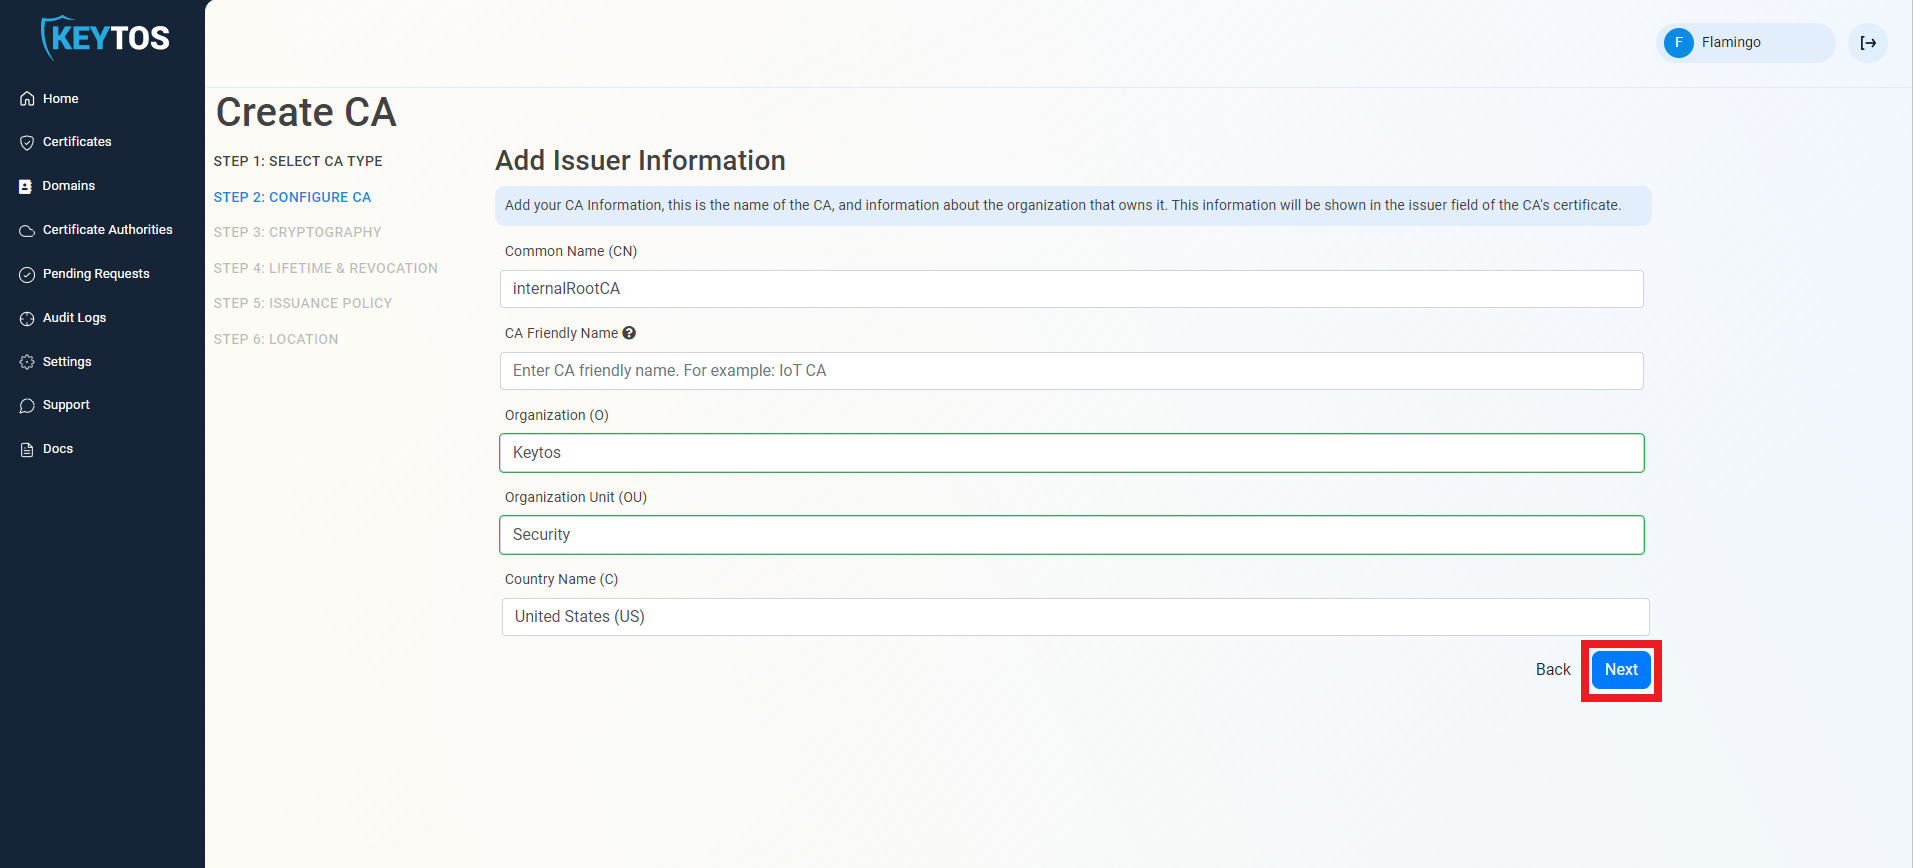
- Enter Common Name: This is the name of the CA how it will appear in the certificate.
- (Optional) Enter CA Friendly Name This is the name that will appear in the EZCA portal, by default we will use the Common Name
- (Optional) Enter the Organization The Organization field is an optional certificate field that usually has the company name.
- (Optional) Enter the Organization Unit The Organization Unit field is an optional certificate field that usually contains the unit that runs this CA (For example: IT or HR).
- (Optional) Enter the Country Code The Country Code field is an optional certificate field that identifies the country where this CA is located.
- Click Next.
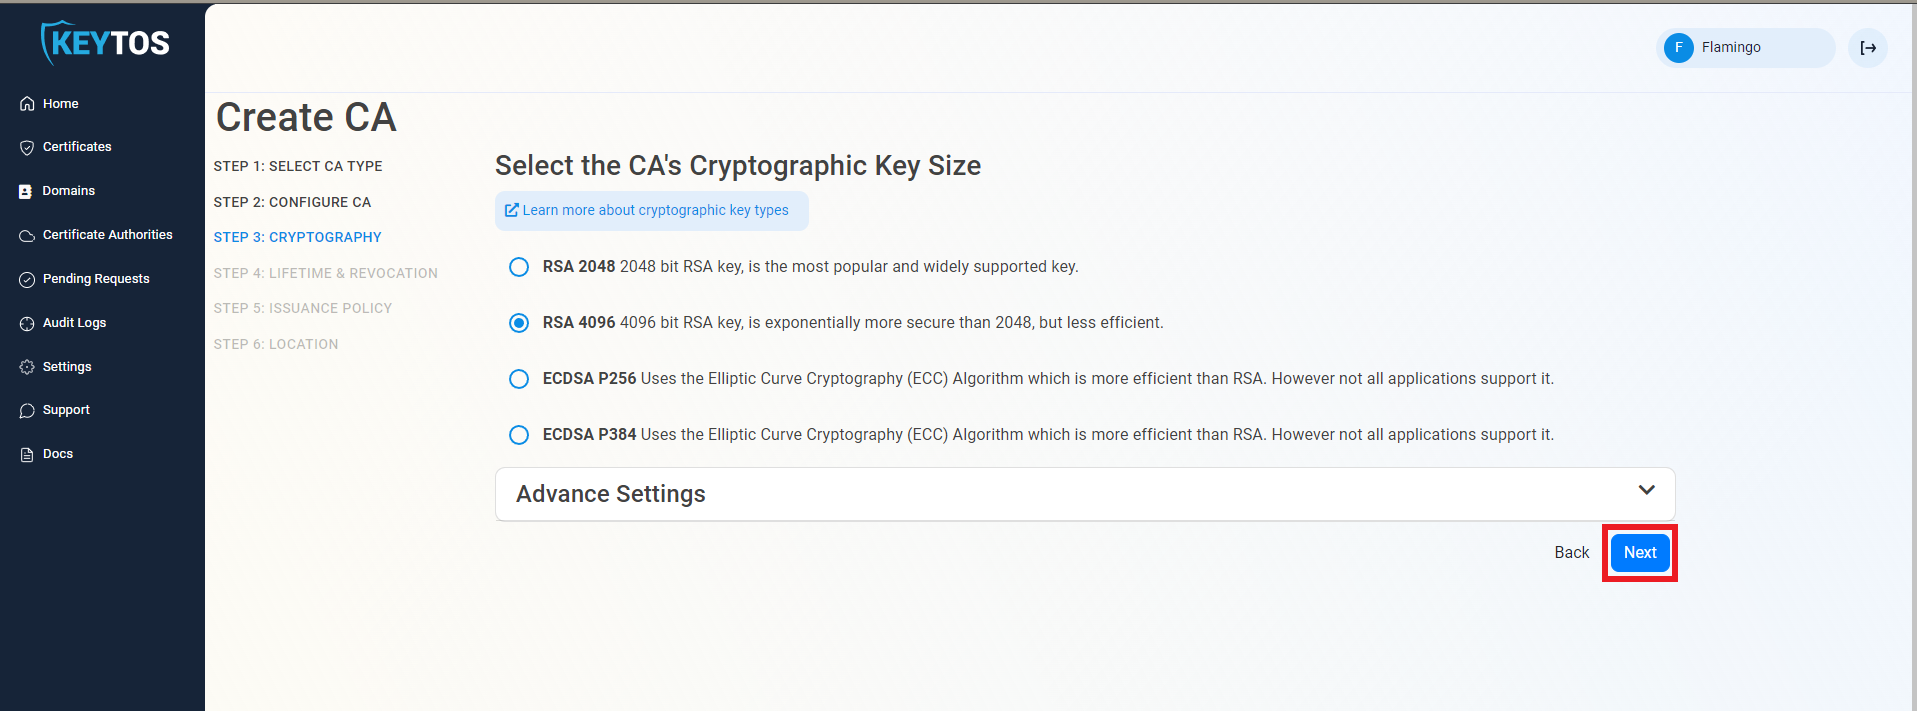
Cryptographic Requirements
- Unless you have specific compliance or security requirements, leave the default cryptographic values for best security and compatibility.
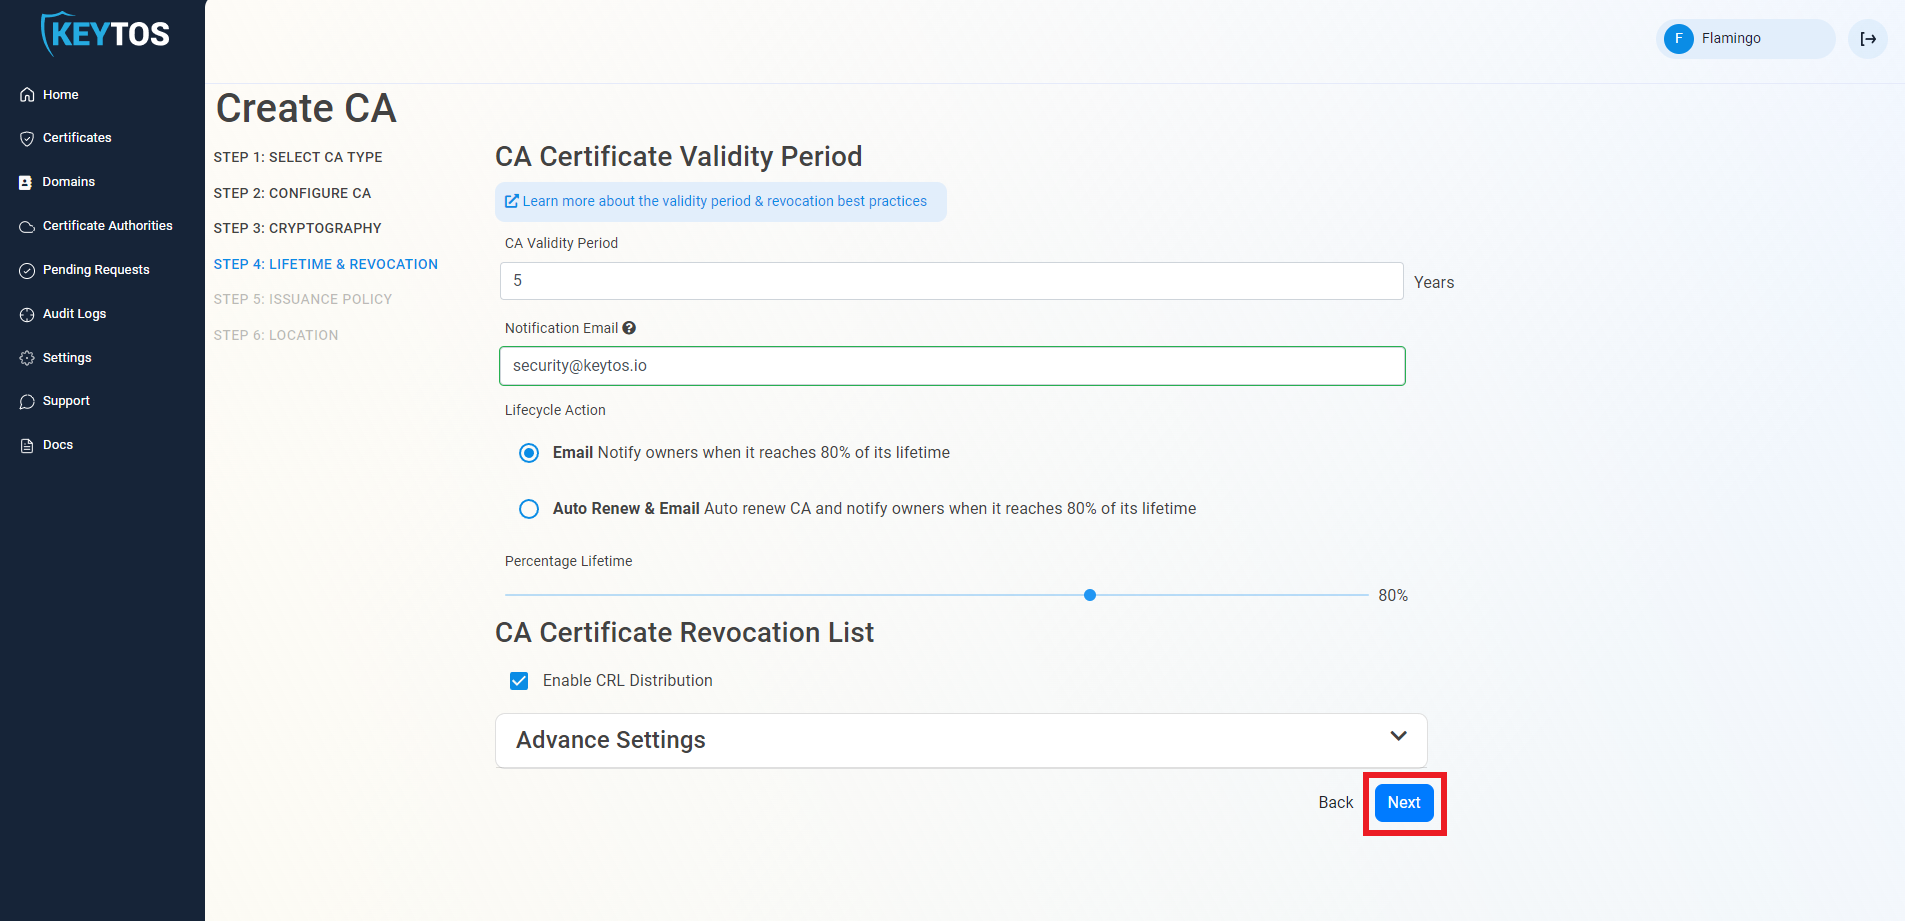
Validity Period
- Select your Validity Period Learn more about Validity Period best practices, keep in mind how you will update this certificate in your IoT devices and the lifetime of your IoT devices.
- Enter a Notification Email this email address (as well as the PKI Administrators) will get all the notifications for the lifecycle of the CA.
- Select the lifecycle action you want EZCA to take when expiry of the CA is approaching
For Root CAs we recommend to have a manual Lifecycle since the new Root will have to be added to the trusted root stores of your clients which requires manual steps from the IT team.
- Select the percentage of lifetime of the certificate when you want EZCA to start taking Lifecycle actions.

CA Certificate Revocation List
- Select if you want this CA should issue a CRL (Highly recommended)
- Click Next.
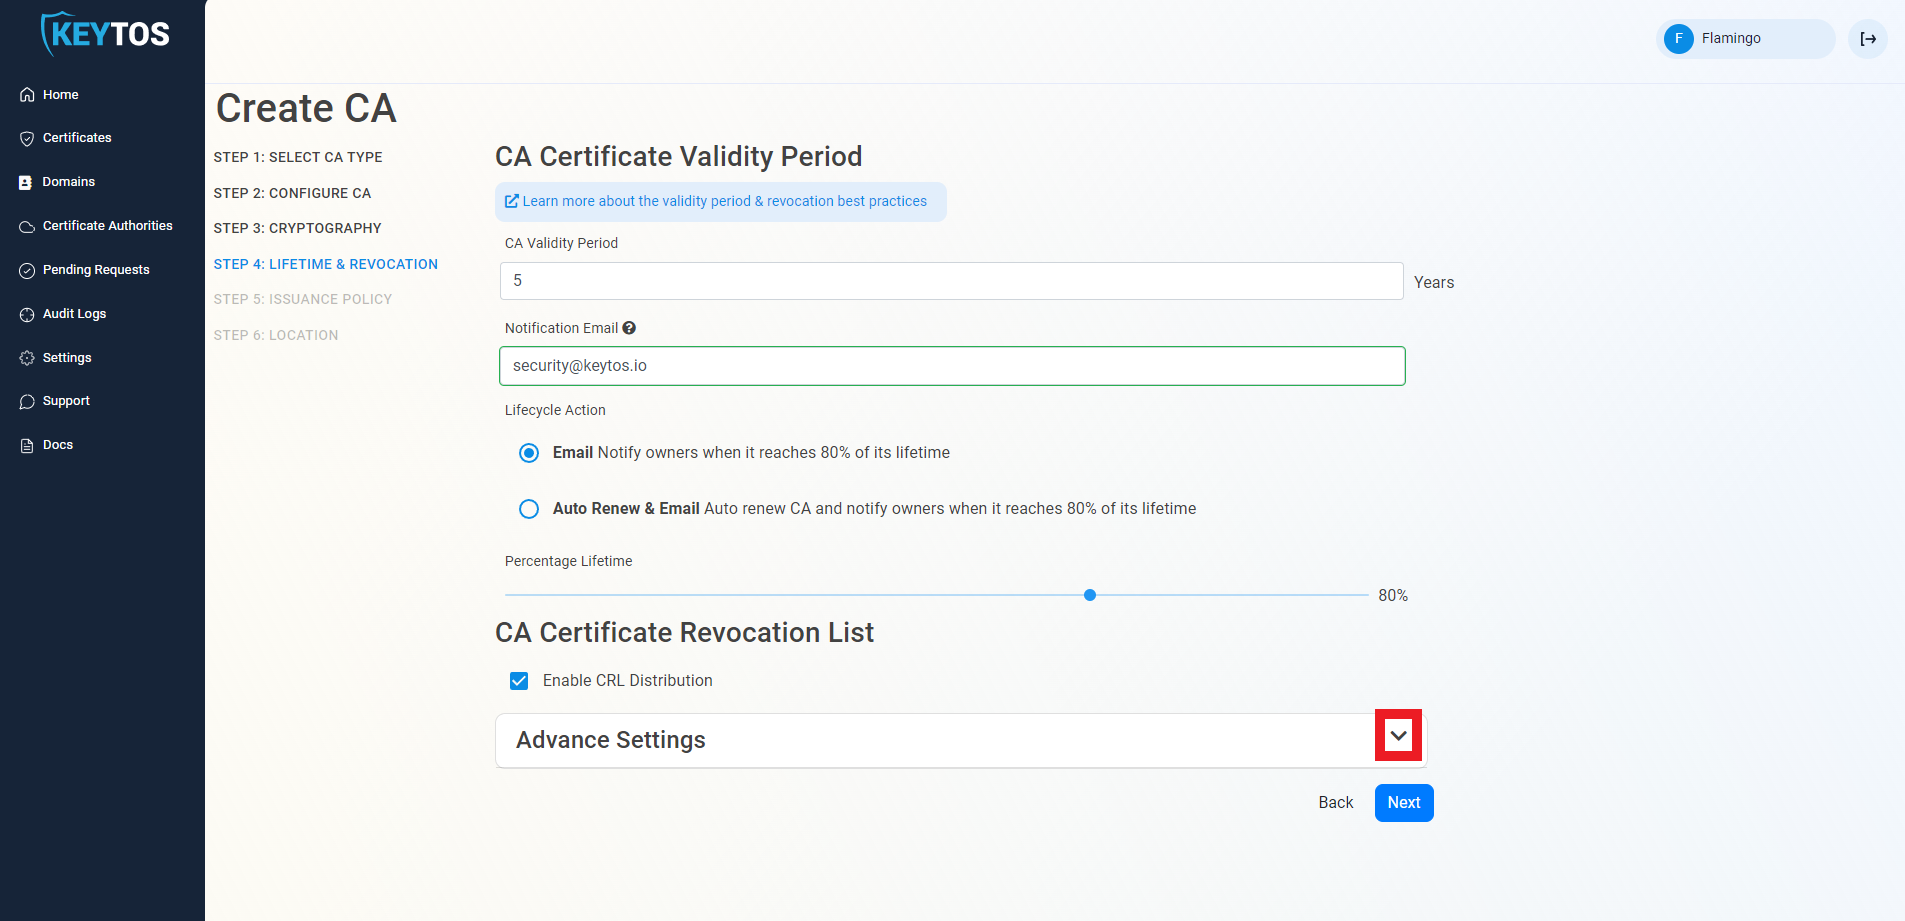
CA Certificate Revocation List Advance Settings
Changes to this section are only recommended for PKI experts with specific requirements.
- Click the expand button
- Enter the desired CRL Validity Period in days
- Enter the desired CRL Overlap Period in hours
- (Optional) Enter the CRL endpoint where you will publish your CRLs
Custom CRL endpoints are supported by EZCA by adding the CRL endpoint as the CRL endpoint in the certificate. However, your PKI admins are responsible from getting the CRL from EZCA and posting it in that specific endpoint.
- Click Next.

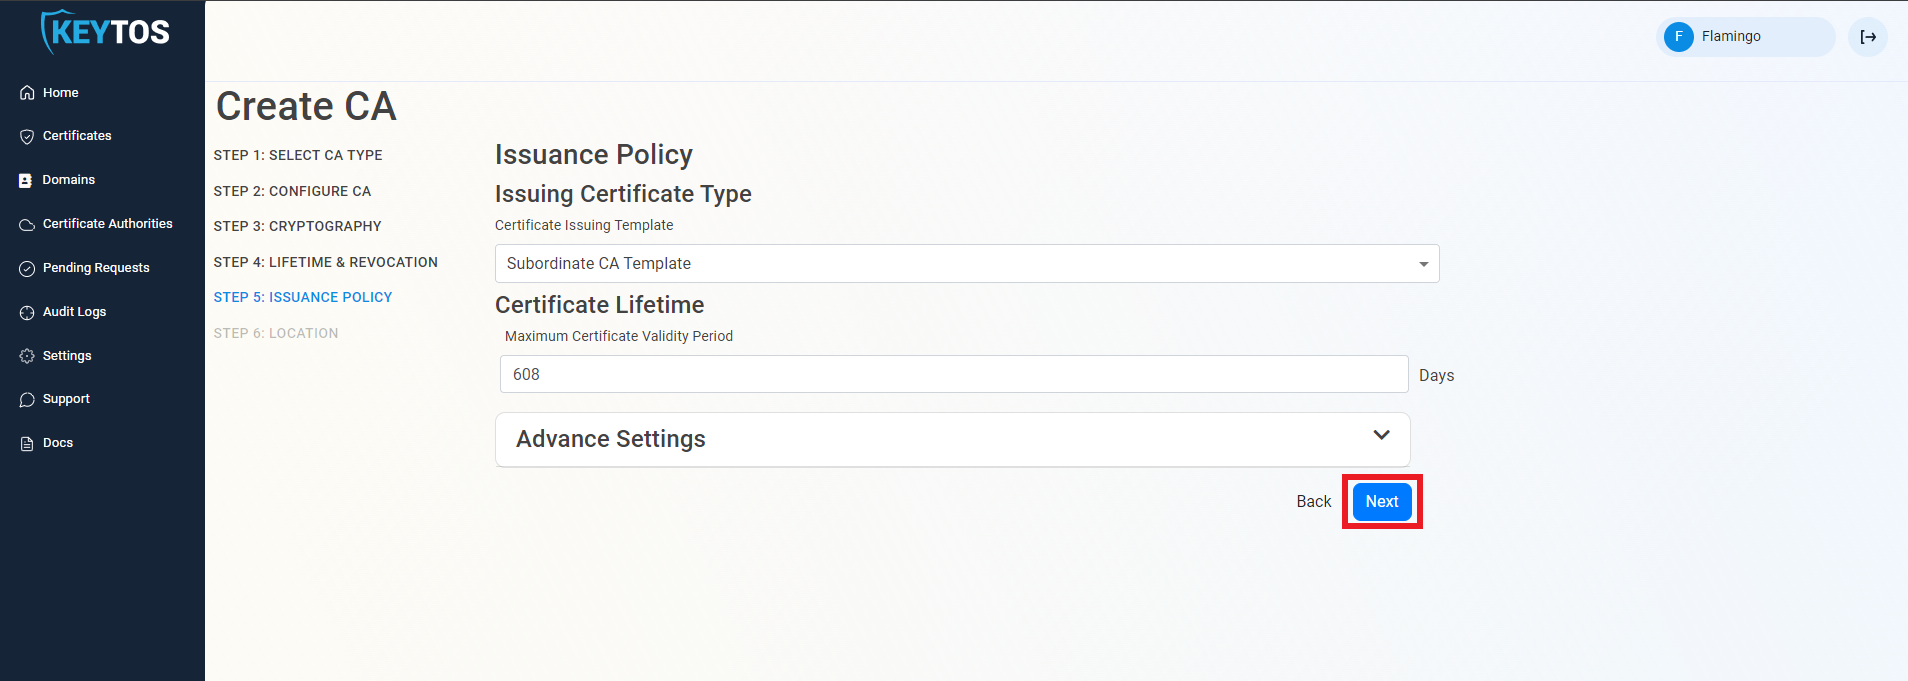
Issuance Policy
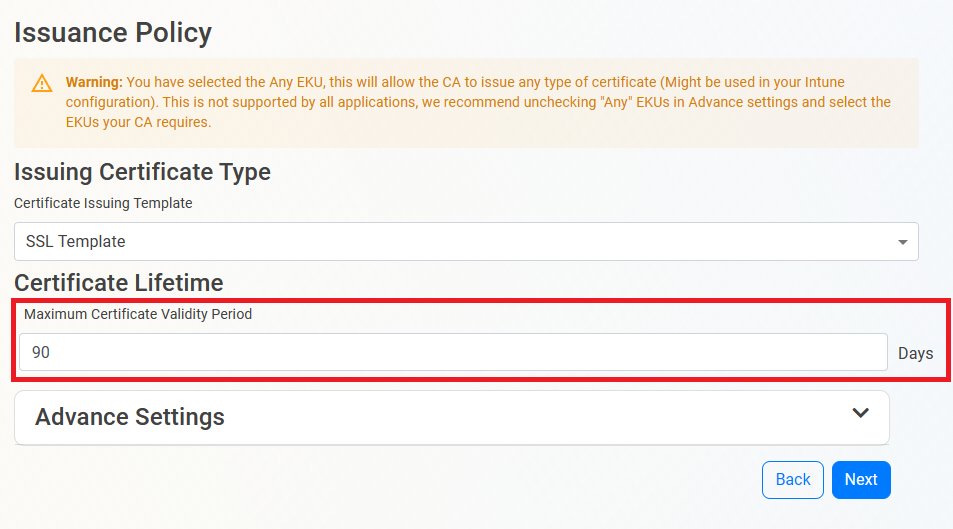
- Select the Certificate Template you want this CA to Issue. Leave as “Subordinate CA Template” unless creating a 1 tier PKI (Not Recommended)

- Enter the largest certificate lifetime that this CA can issue. EZCA automatically calculates the recommended maximum based on CA lifecycle best practices.
- Click Next.
Select Location
- Select the location where you want your CA to be created.
- Click Create

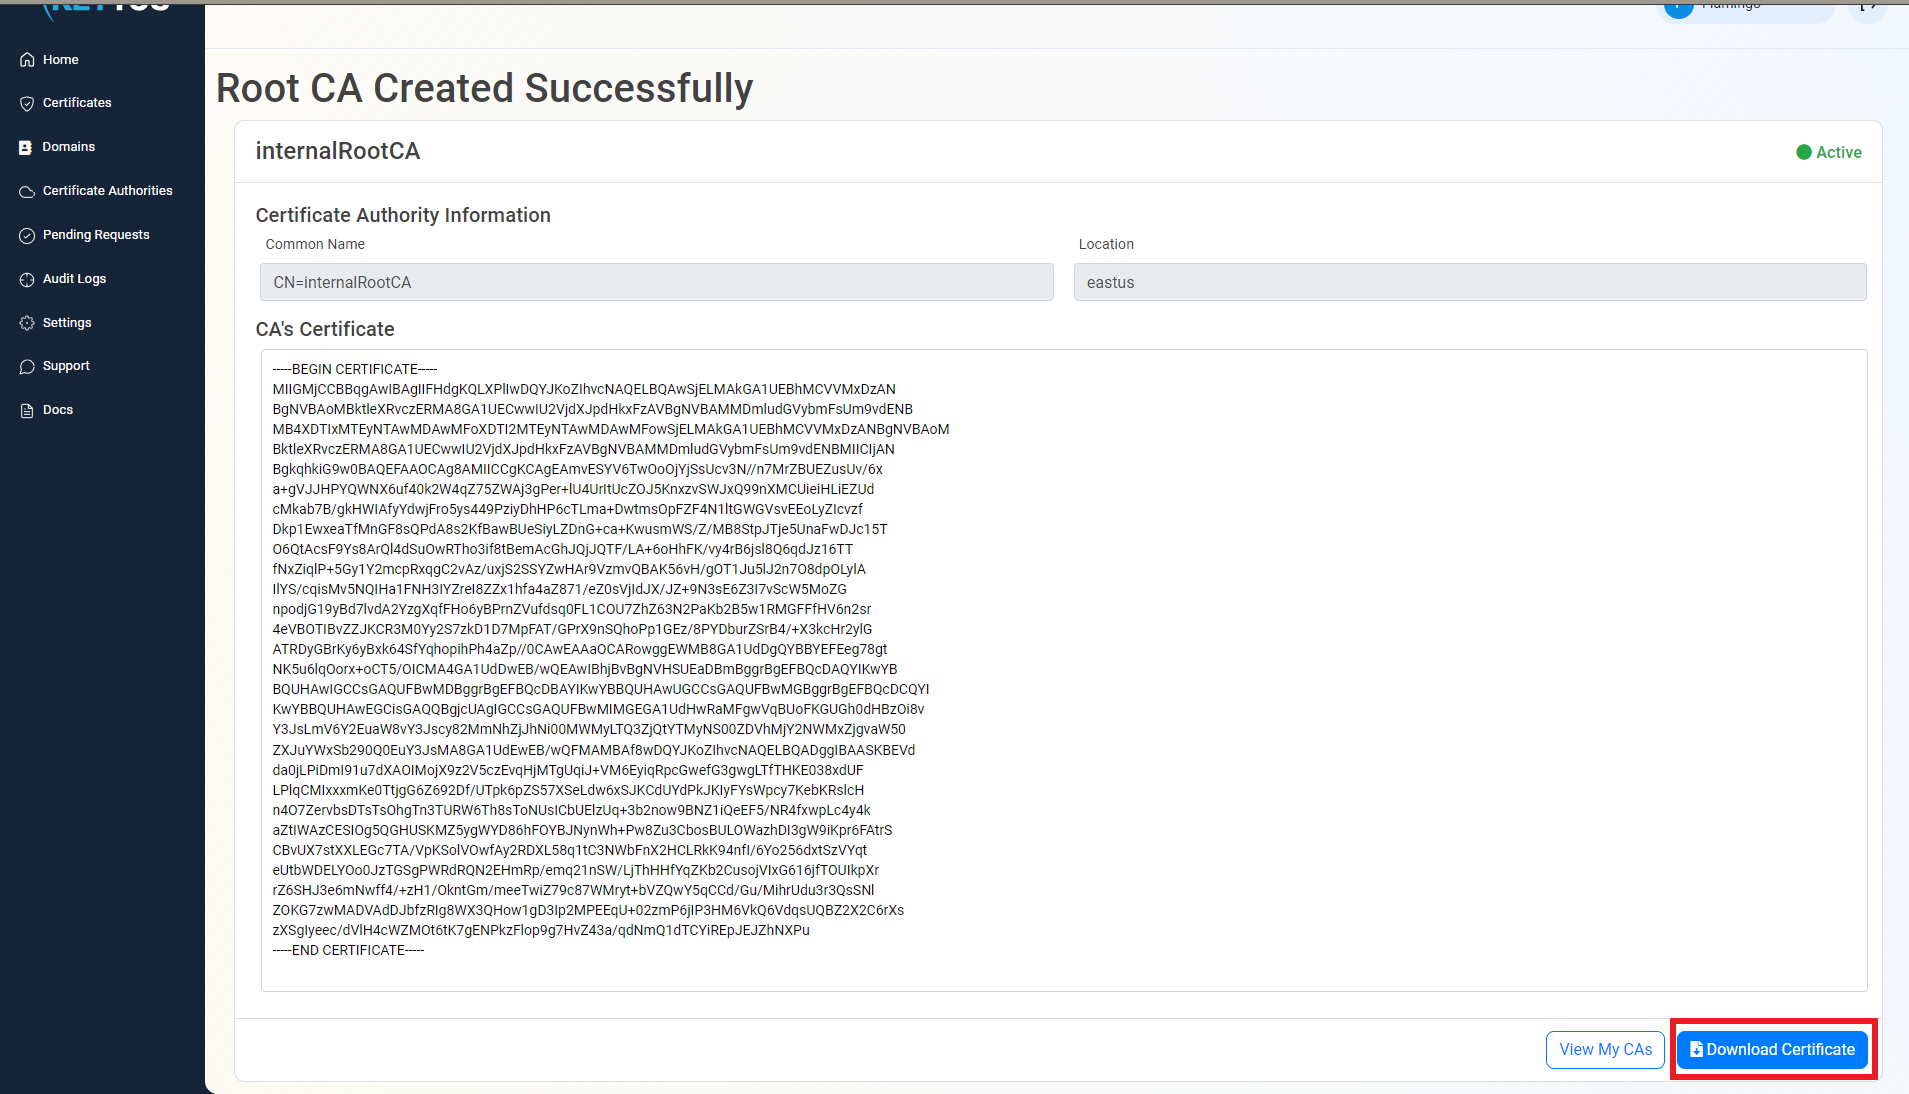
Download Certificate
- Once the CA is created download to certificate and push it to all your devices and Azure IoT Hub as a trusted root.
How to Create the Intermediate CA for Azure IoT EST
Getting Started
- Go to your EZCA portal (it is usually https://portal.ezca.io/ but you might be using our regional offerings such as https://eu.ezca.io/ or https://au.ezca.io/ or if you are using a self-hosted EZCA, go to your organization’s EZCA URL)
- Login with an account that is registered as a PKI Admin in EZCA.
- Navigate to Certificate Authorities.

- Click on the “Create CA”

- Select Subordinate/Intermediate CA.

- Click Next
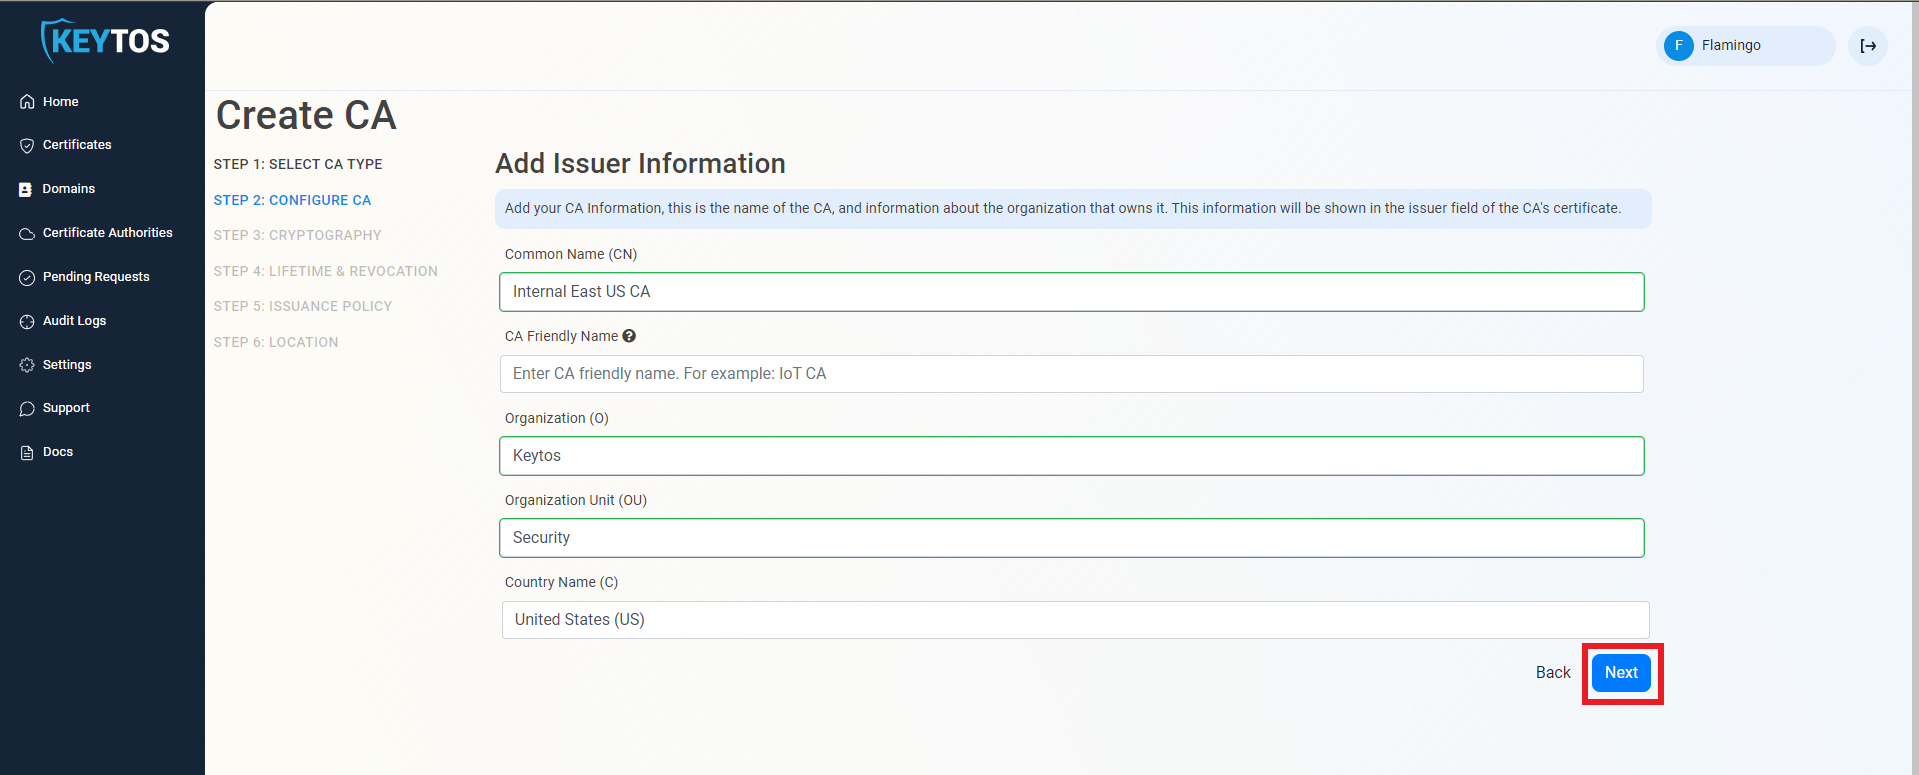
Entering CA Information
- Enter Common Name: This is the name of the CA how it will appear in the certificate.
- (Optional) Enter CA Friendly Name This is the name that will appear in the EZCA portal, by default we will use the Common Name
- (Optional) Enter the Organization The Organization field is an optional certificate field that usually has the company name.
- (Optional) Enter the Organization Unit The Organization Unit field is an optional certificate field that usually contains the unit that runs this CA (For example: IT or HR).
- (Optional) Enter the Country Code The Country Code field is an optional certificate field that identifies the country where this CA is located.
- Click Next.
Cryptographic Requirements
- Unless you have specific compliance or security requirements, leave the default cryptographic values for best security and compatibility.

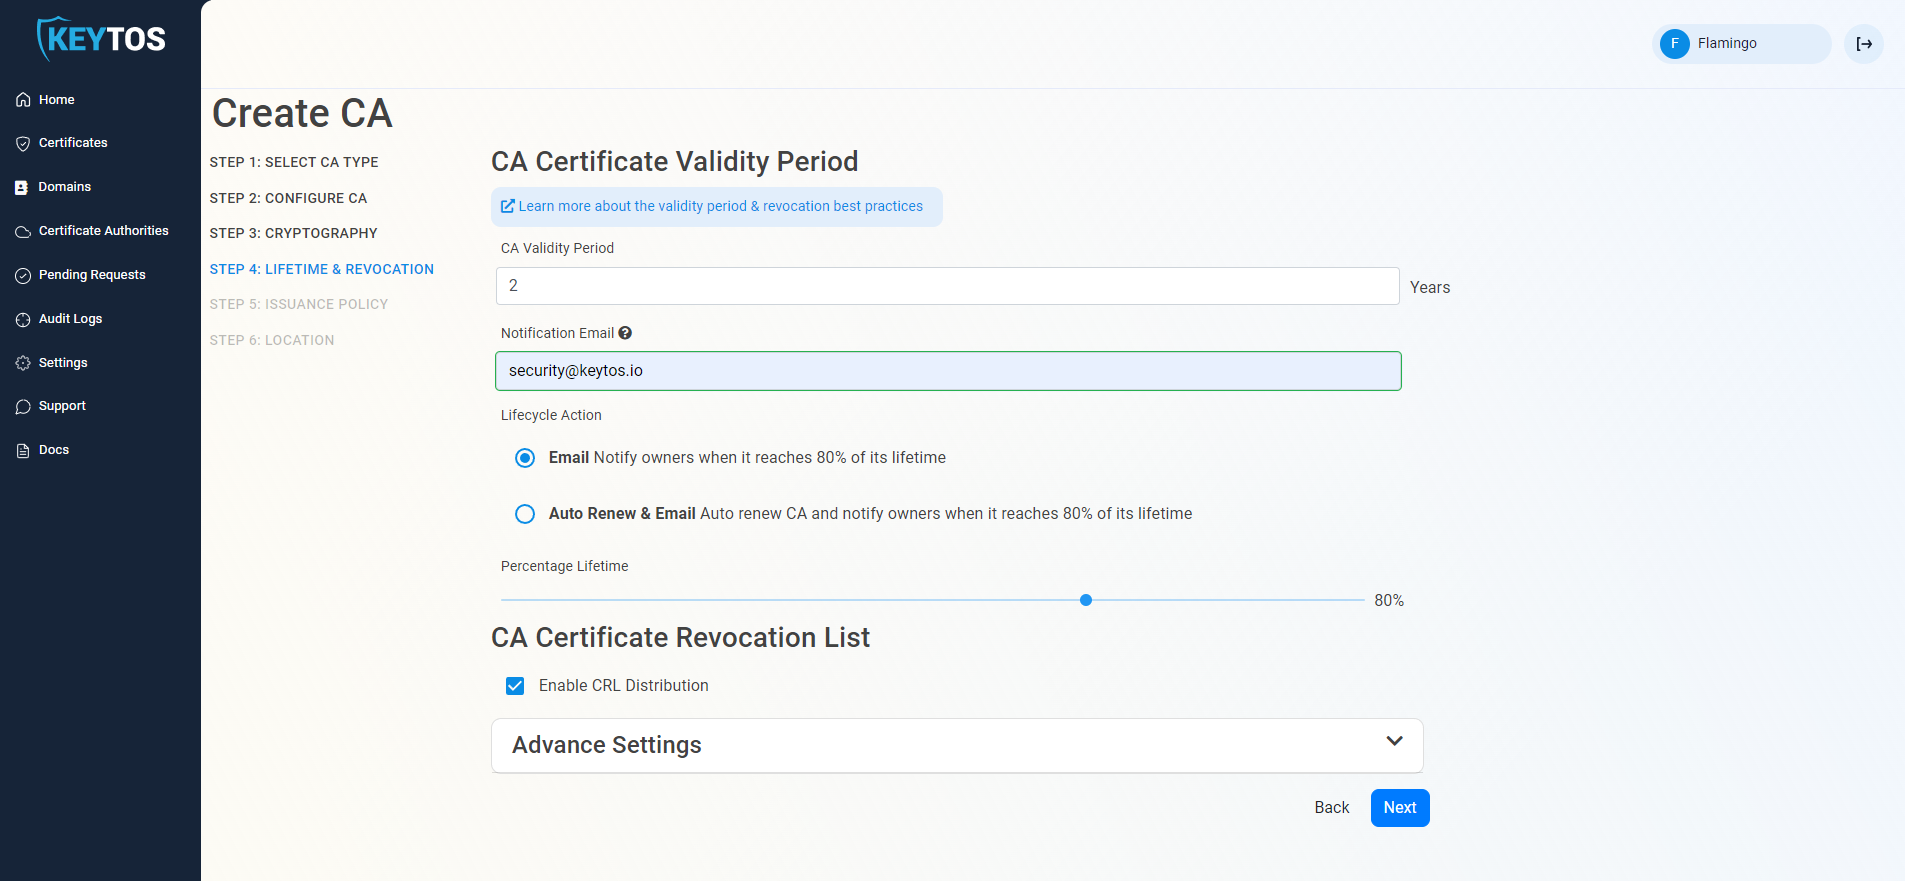
Validity Period
- Select your Validity Period Learn more about Validity Period best practices
- Enter a Notification Email this email address (as well as the PKI Administrators) will get all the notifications for the lifecycle of the CA.
- Select the lifecycle action you want EZCA to take when expiry of the CA is approaching
- Select the percentage of lifetime of the certificate when you want EZCA to start taking Lifecycle actions.
CA Certificate Revocation List
- Select if you want this CA should issue a CRL (Highly recommended)
- Click Next.

CA Certificate Revocation List Advance Settings
Changes to this section are only recommended for PKI experts with specific requirements.
- Click the expand button

- Enter the desired CRL Validity Period in days
- Enter the desired CRL Overlap Period in hours
- (Optional) Enter the CRL endpoint where you will publish your CRLs
Custom CRL endpoints are supported by EZCA by adding the CRL endpoint as the CRL endpoint in the certificate. However, your PKI admins are responsible from getting the CRL from EZCA and posting it in that specific endpoint.
- Click Next.

Issuance Policy
- Leave the Certificate issuance template as “SSL Template”.
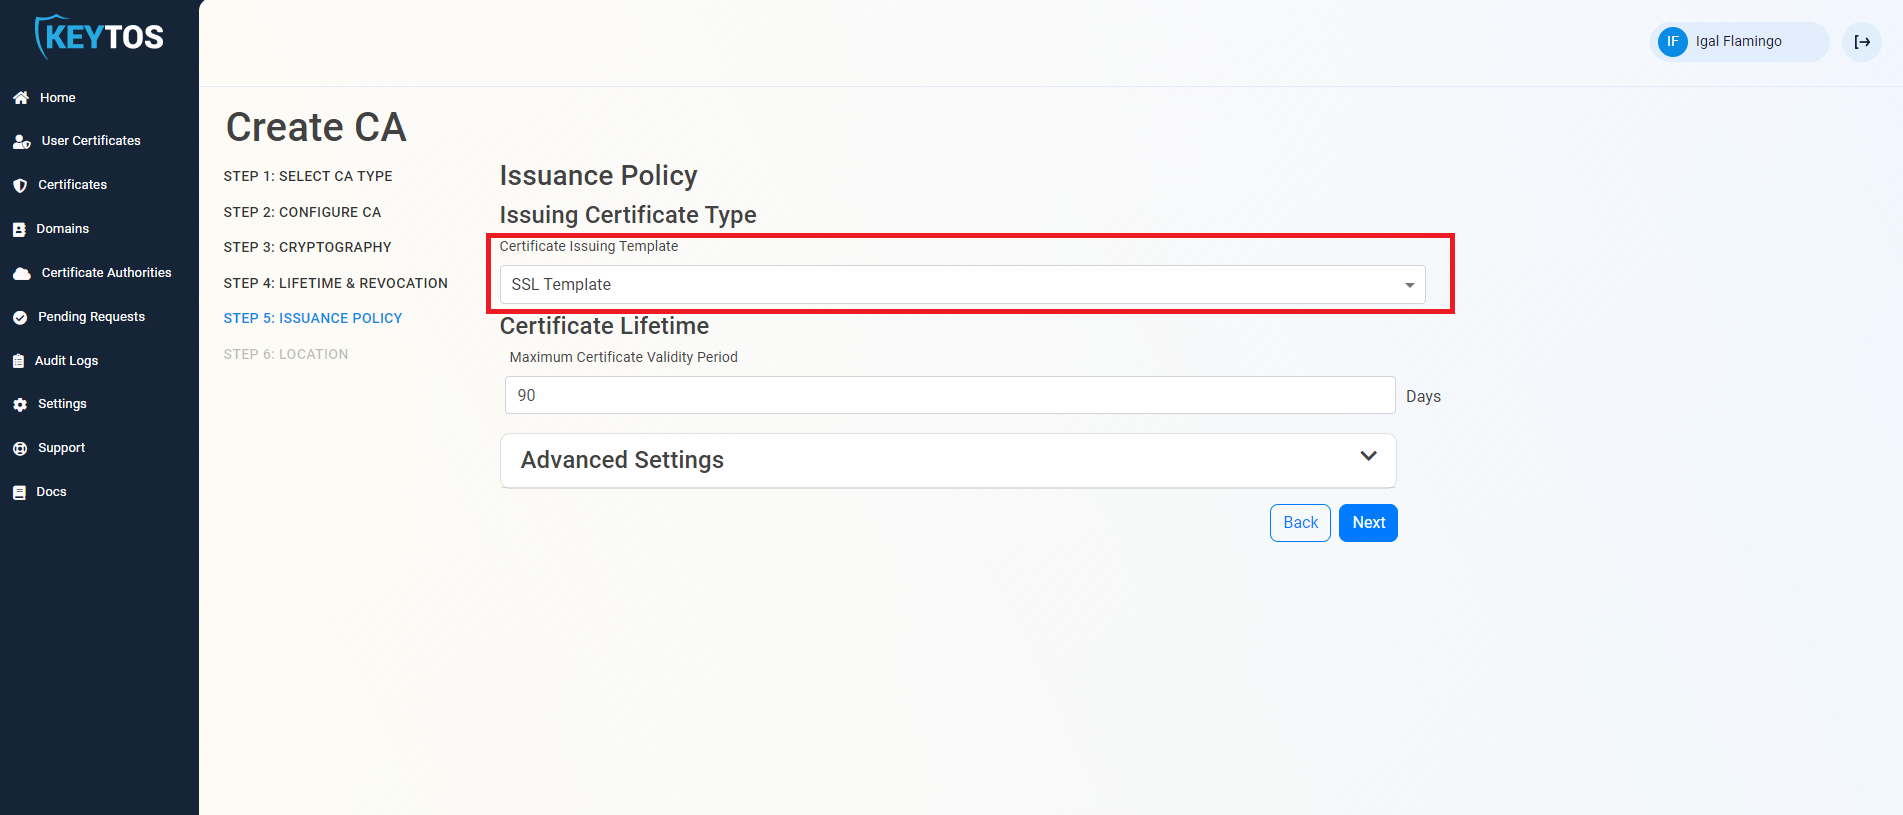
- Enter the largest certificate lifetime that this CA can issue. EZCA automatically calculates the recommended maximum based on CA lifecycle best practices.
- Click Next.
Select Location
- Select the location where you want your CA to be created.

Add Geo-Redundancy
EZCA Allows you to create multiple CAs across many regions to create Geo-Redundancy and scalability.
Each location will be charged as an extra Certificate Authority.
- Click the “Add Secondary Location” Button.

- Enter the Location information.
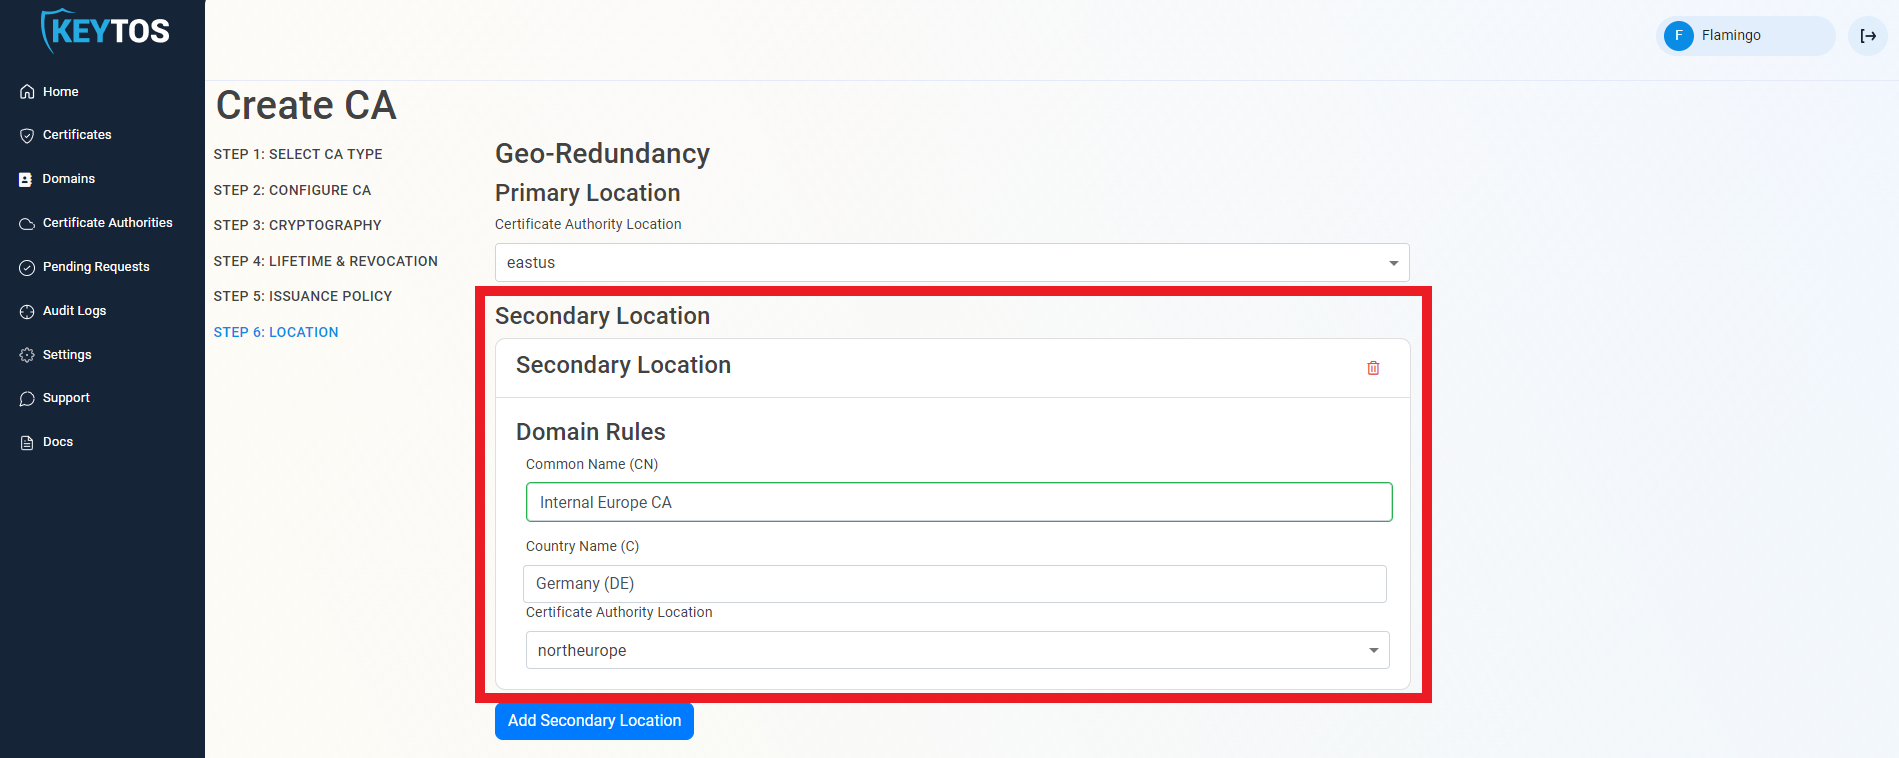
- Add as many locations as needed.
Create CA
- Click Create.

Chaining to EZCA Root CA
- Once the CA is requested, a Certificate Signing Request (CSR) will be created for each location.
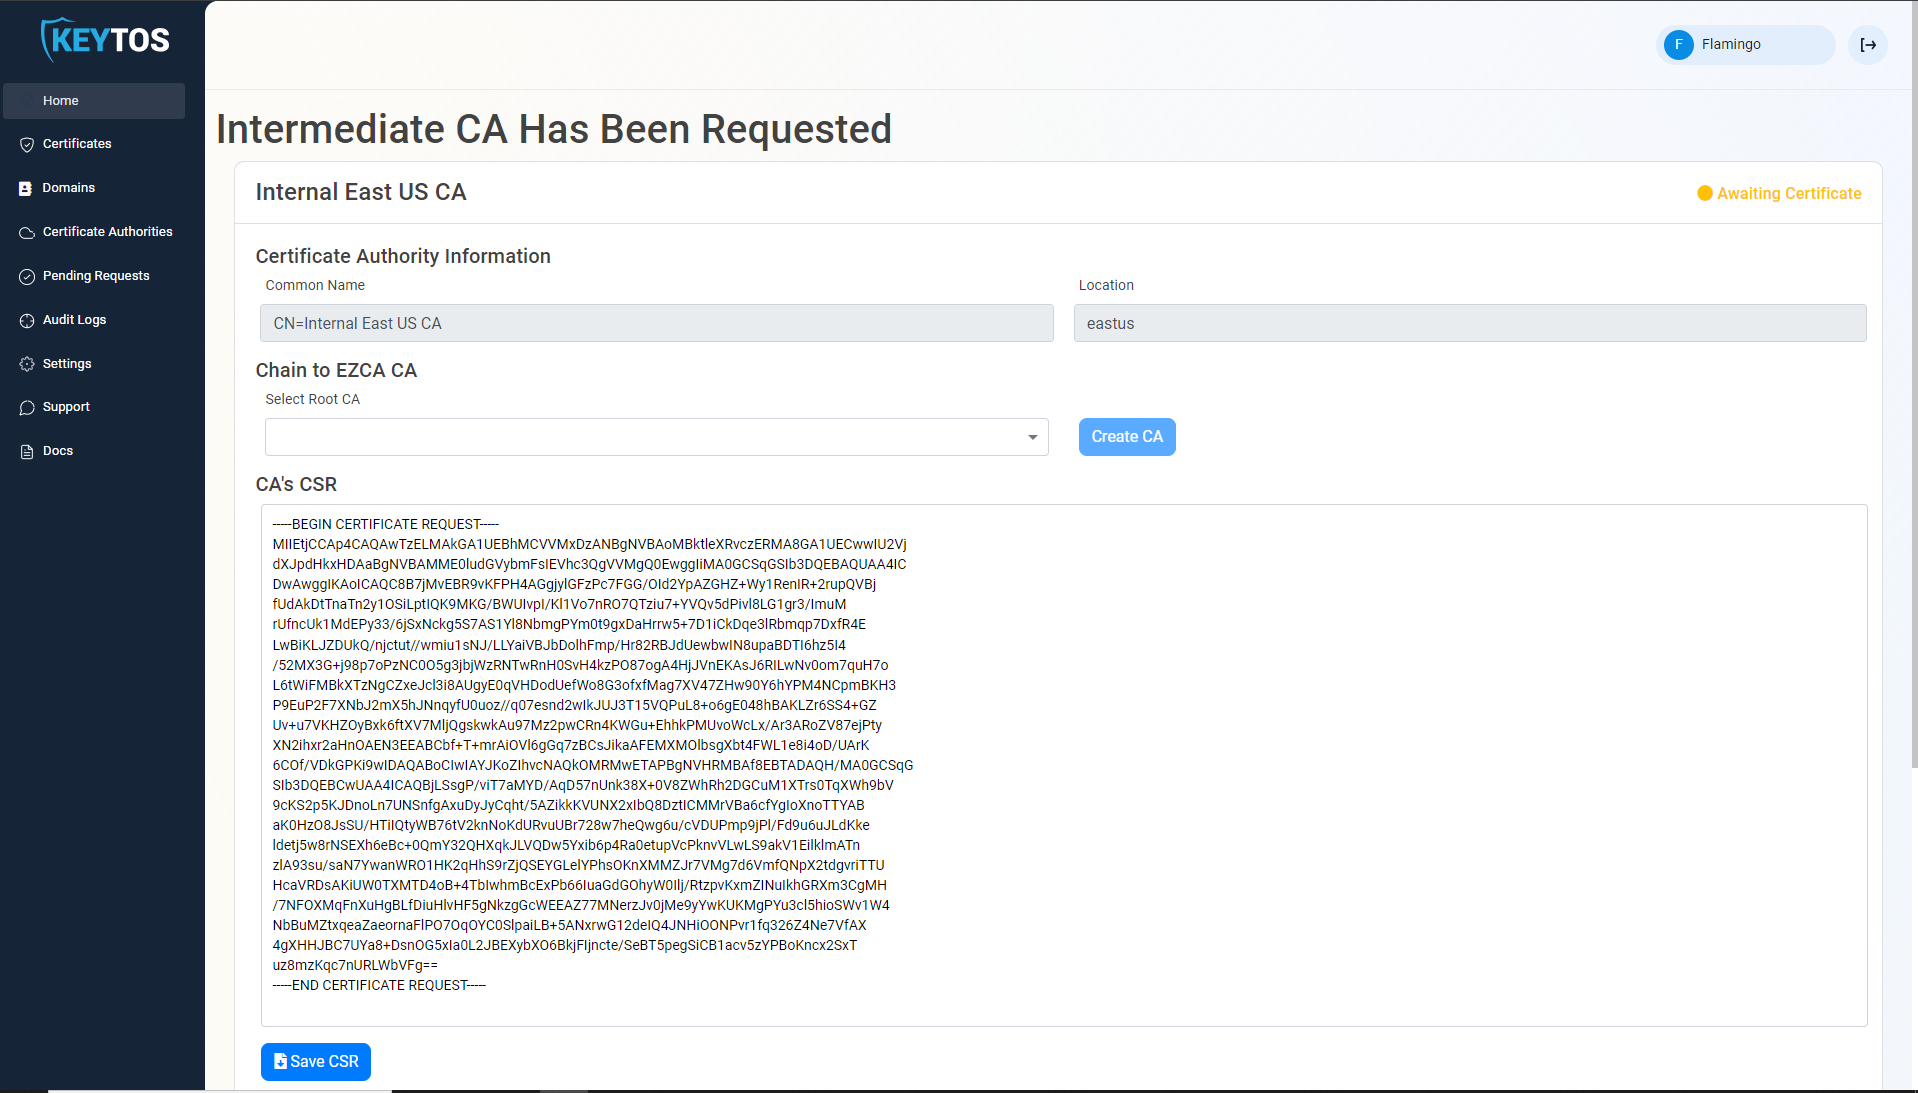
- If your desired Root CA is an EZCA CA, Select it from the dropdown and click create CA.
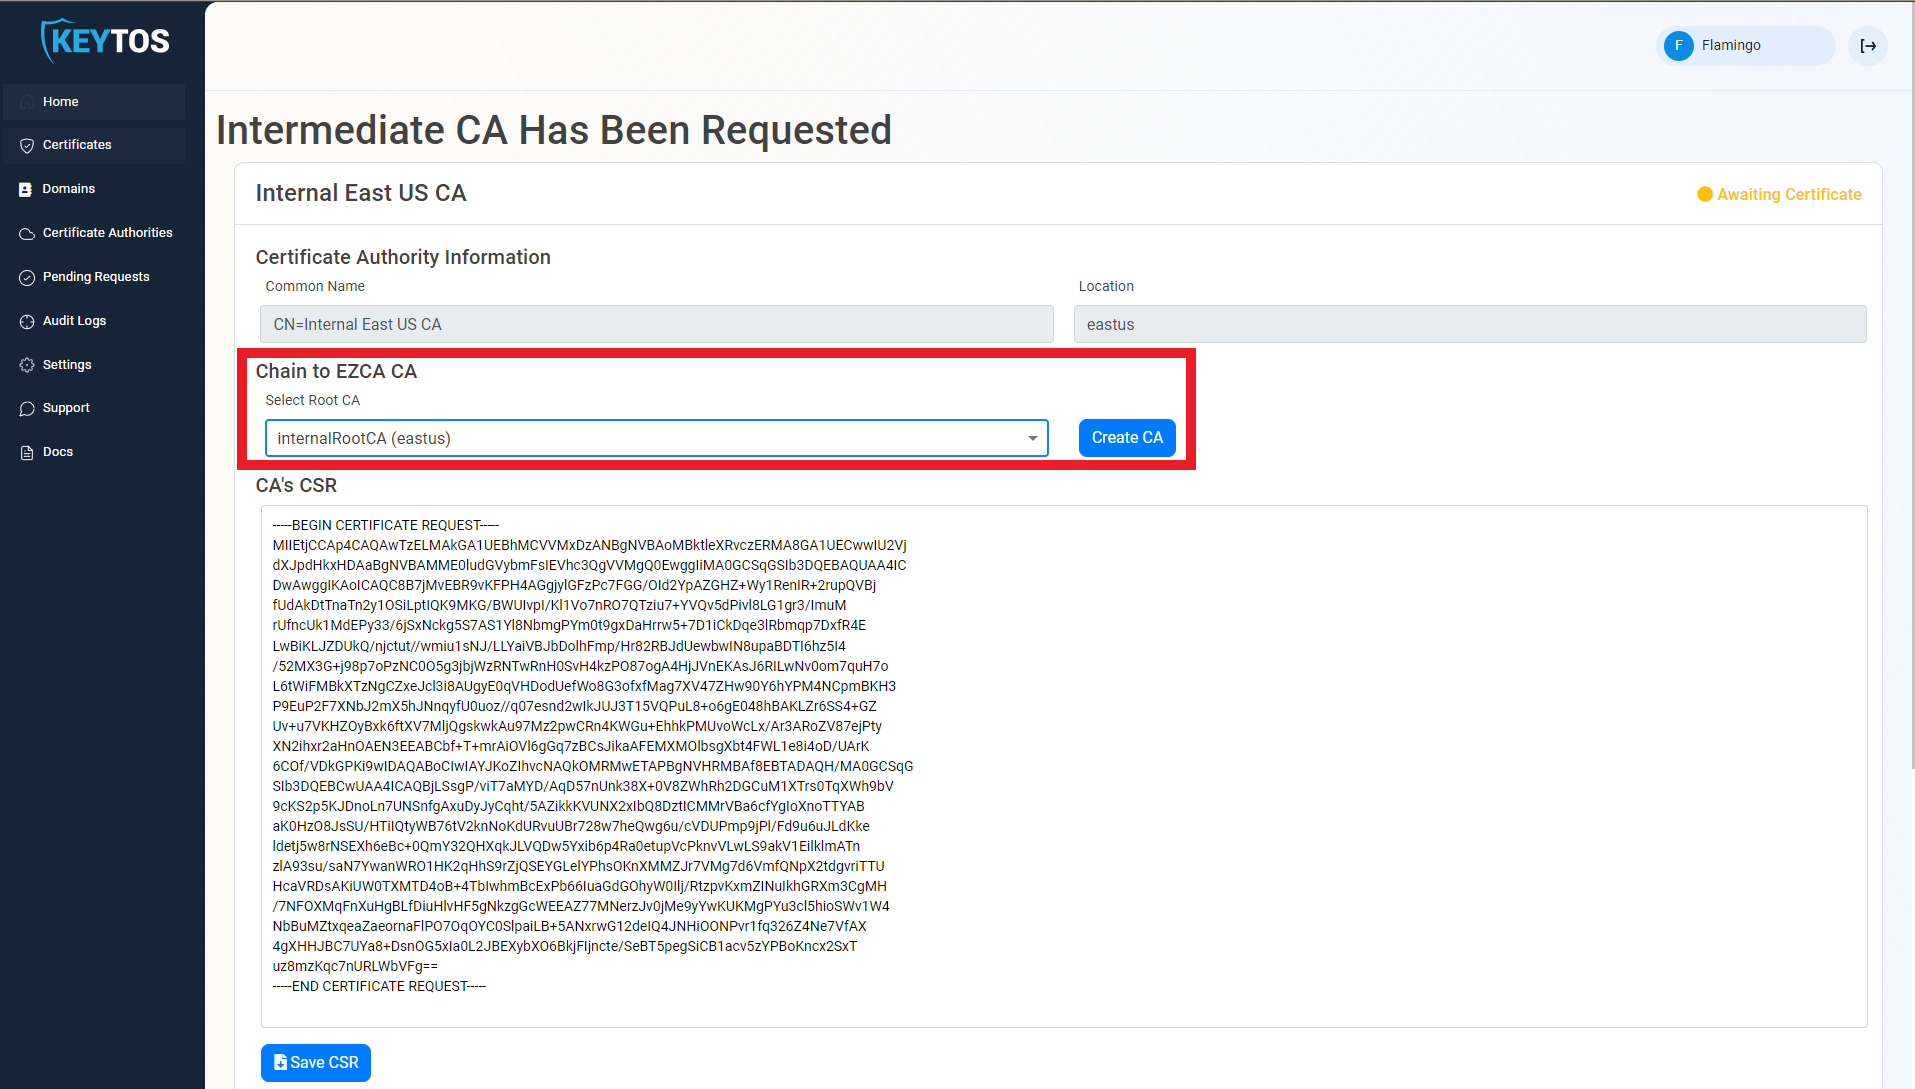
- Repeat these steps for each location.
- Your CA is ready to be used!
How to Create IoT Edge Device Certificates Using EST
Once you have created your cloud CA for Azure IoT, we need to get the EST URL that will be used by the IoT Edge device to request the certificate.
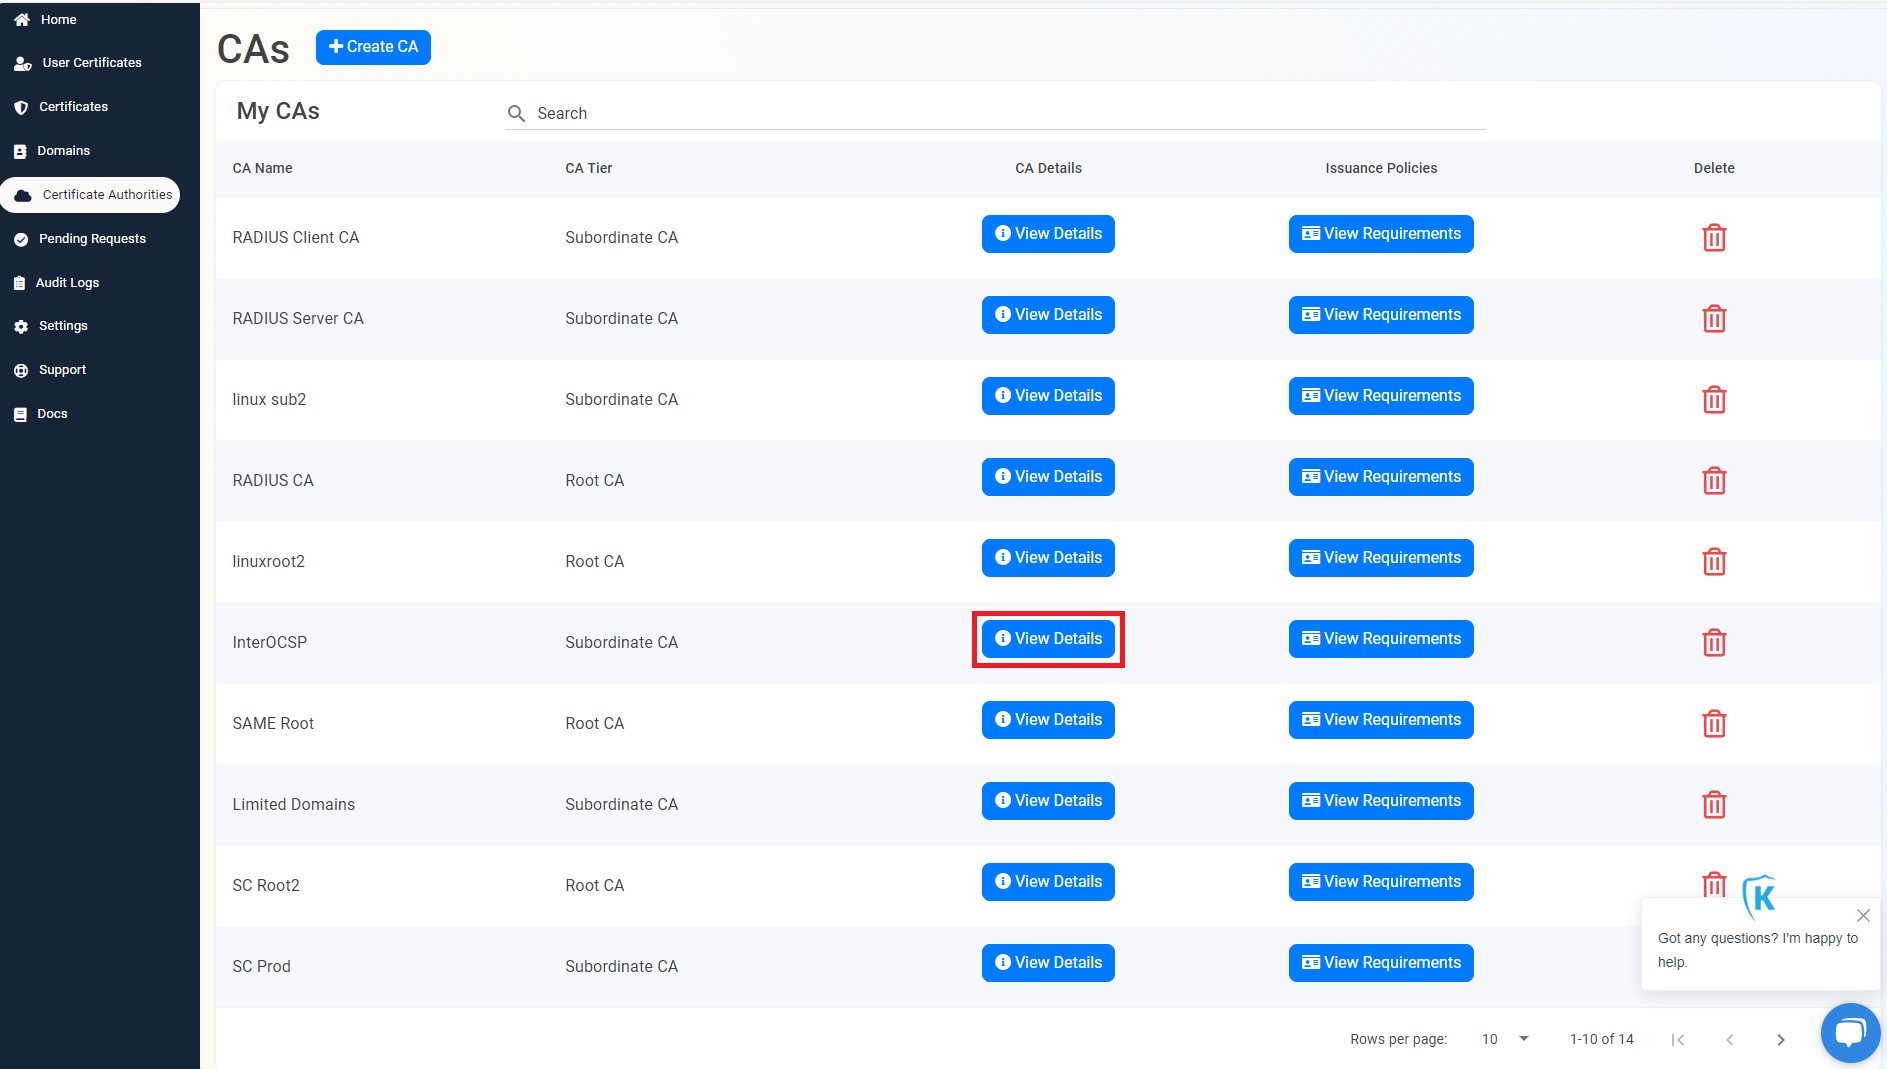
- From the EZCA portal, go to the Certificate Authorities menu.

- Click on “View Details” of the CA you want to use for your IoT Edge devices.
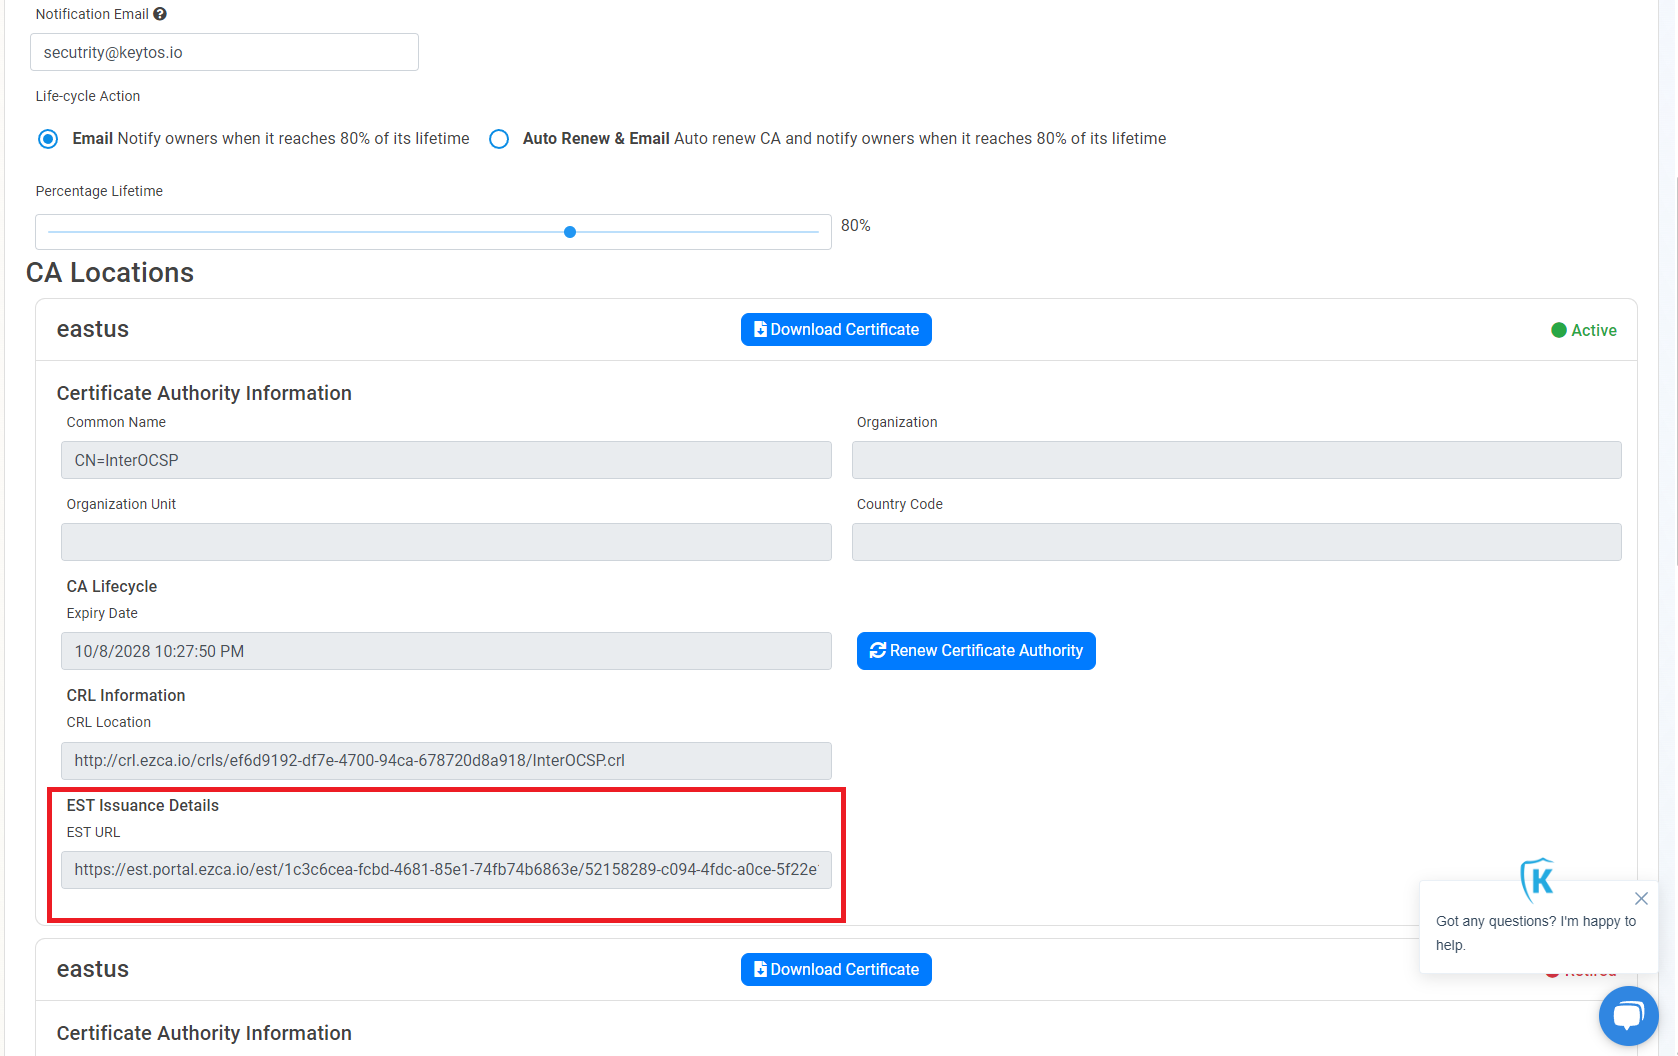
- Copy the EST URL.
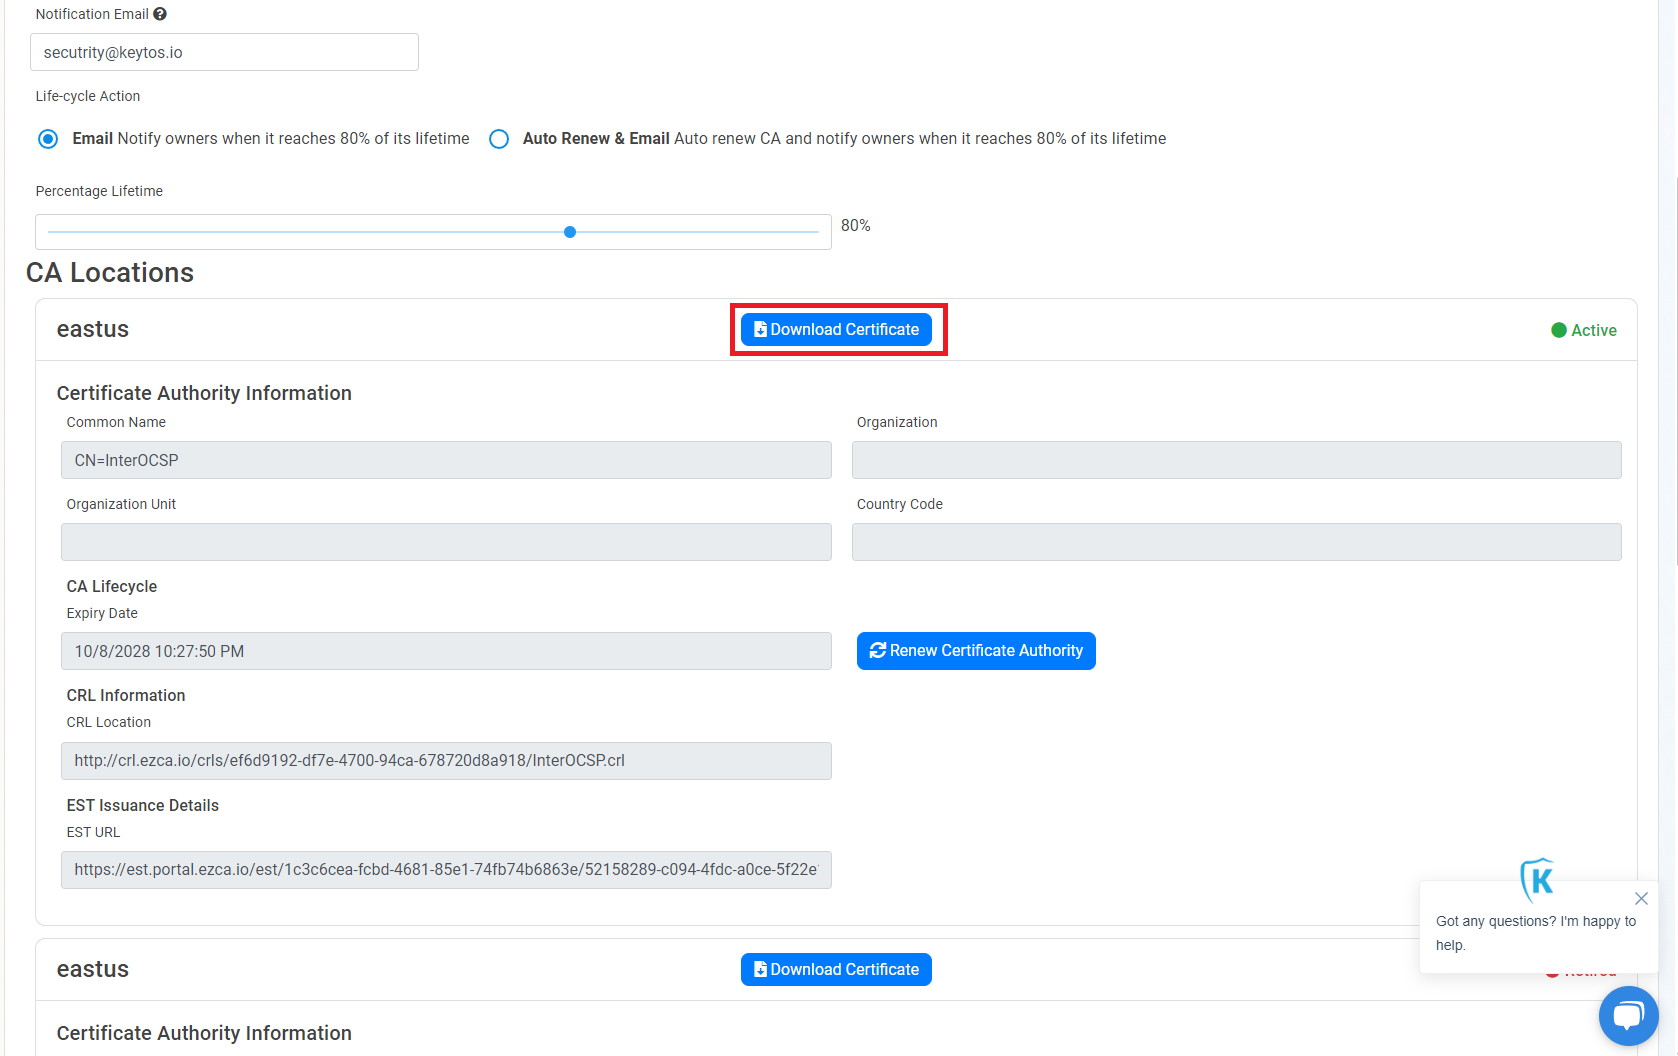
- We also want to get the CA Certificate (and any other CA certificates) to be used as a trusted root in the IoT Edge device we will download it and then save it in the IoT Edge device in “/var/aziot/certs” in this tutorial I will save it as “ca.pem”.
- After we have saved the certificate in the IoT Edge device, we need to give the
aziotcsuser access to the certificate.sudo chown -R aziotcs:aziotcs /var/aziot/certs # Read and write for aziotcs, read-only for others sudo find /var/aziot/certs -type f -name "*.*" -exec chmod 644 {} \;
How to Configure Azure DPS to Use the Azure IoT EST Certificate Authority
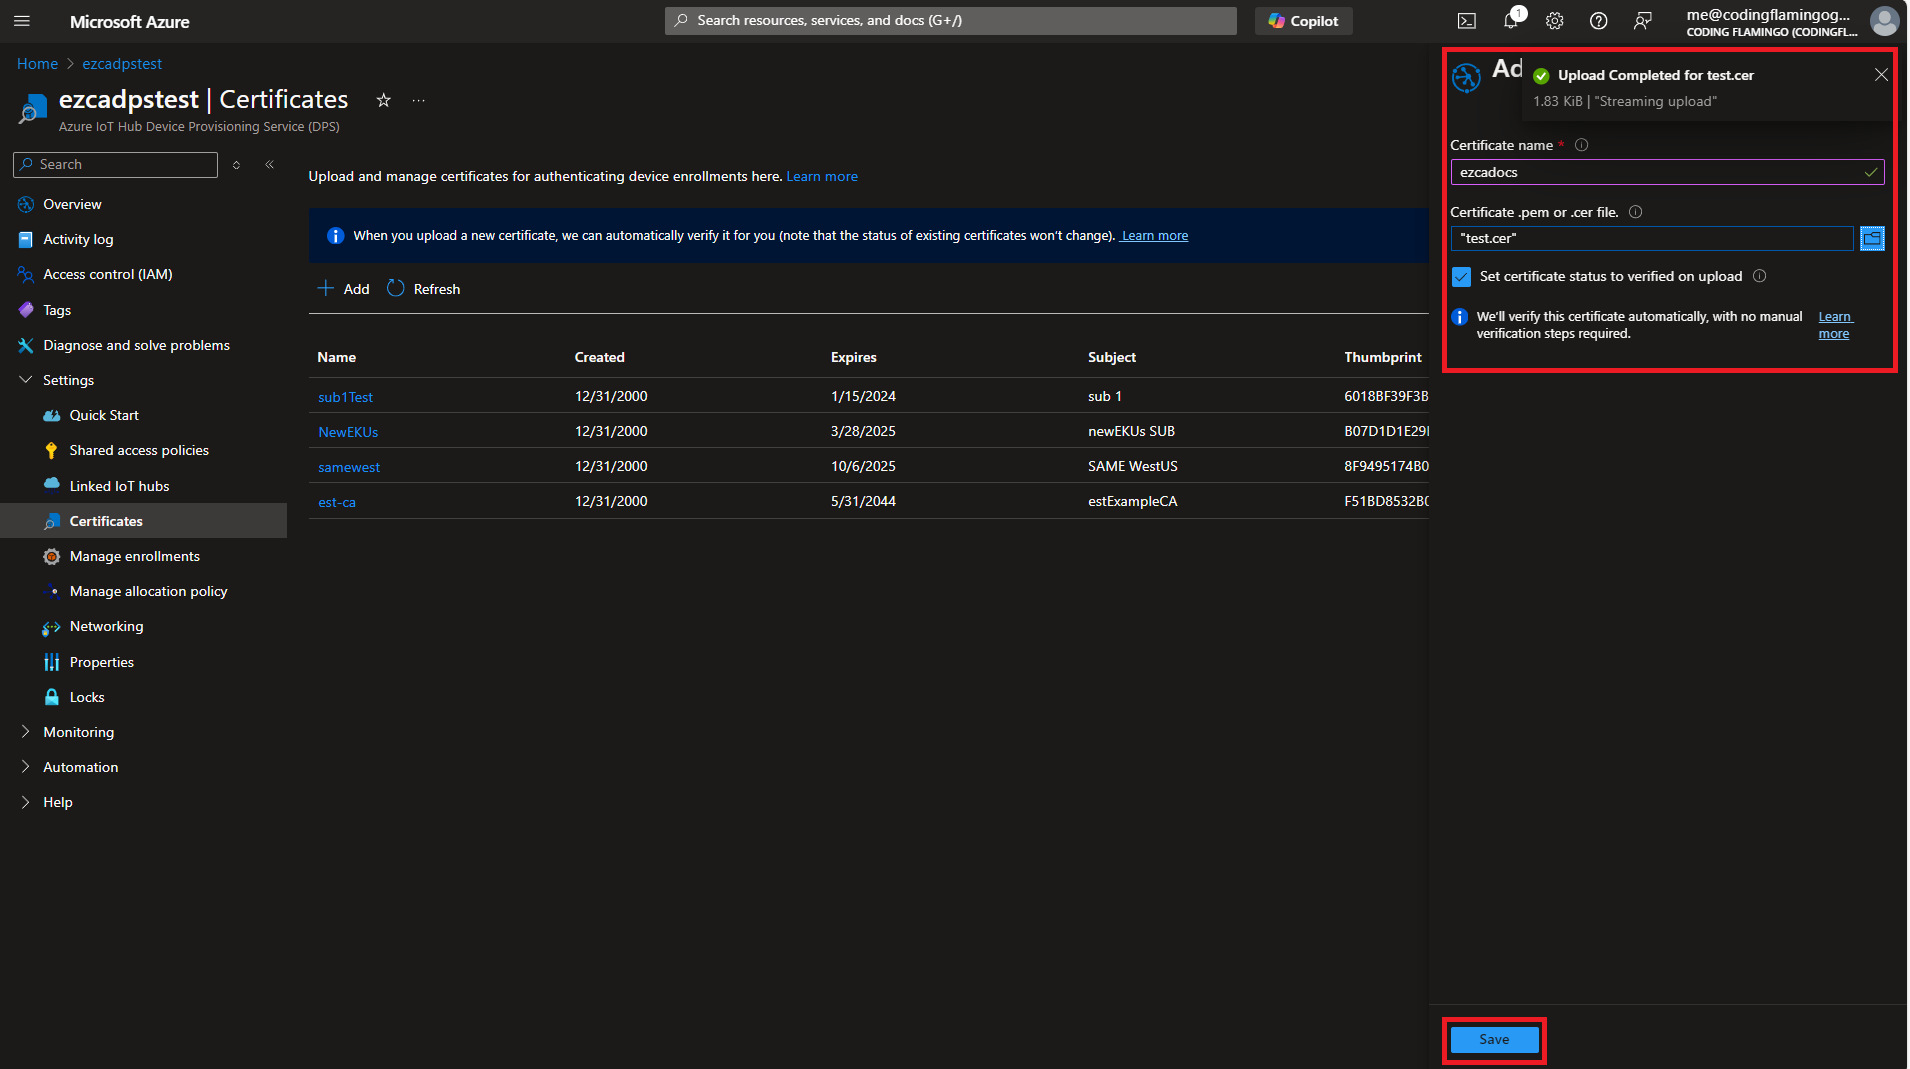
- Next, we need to configure the Device Provisioning Service to accept the certificates from our CA. For that we are going to go to the Azure Portal and go to the IoT DPS that we are using for our IoT Edge devices.
- Then we are going to go to settings and then to “Certificates” and add the CA certificate that we just downloaded. (Make sure to check the boc that says “Set certificate status to verified on upload”) and click save.
- Now that we have added the CA, we must create an enrollment group that will use this CA to issue the certificates to the IoT Edge devices. Go to “Manage enrollments” on the left menu and click on “Add enrollment group”.
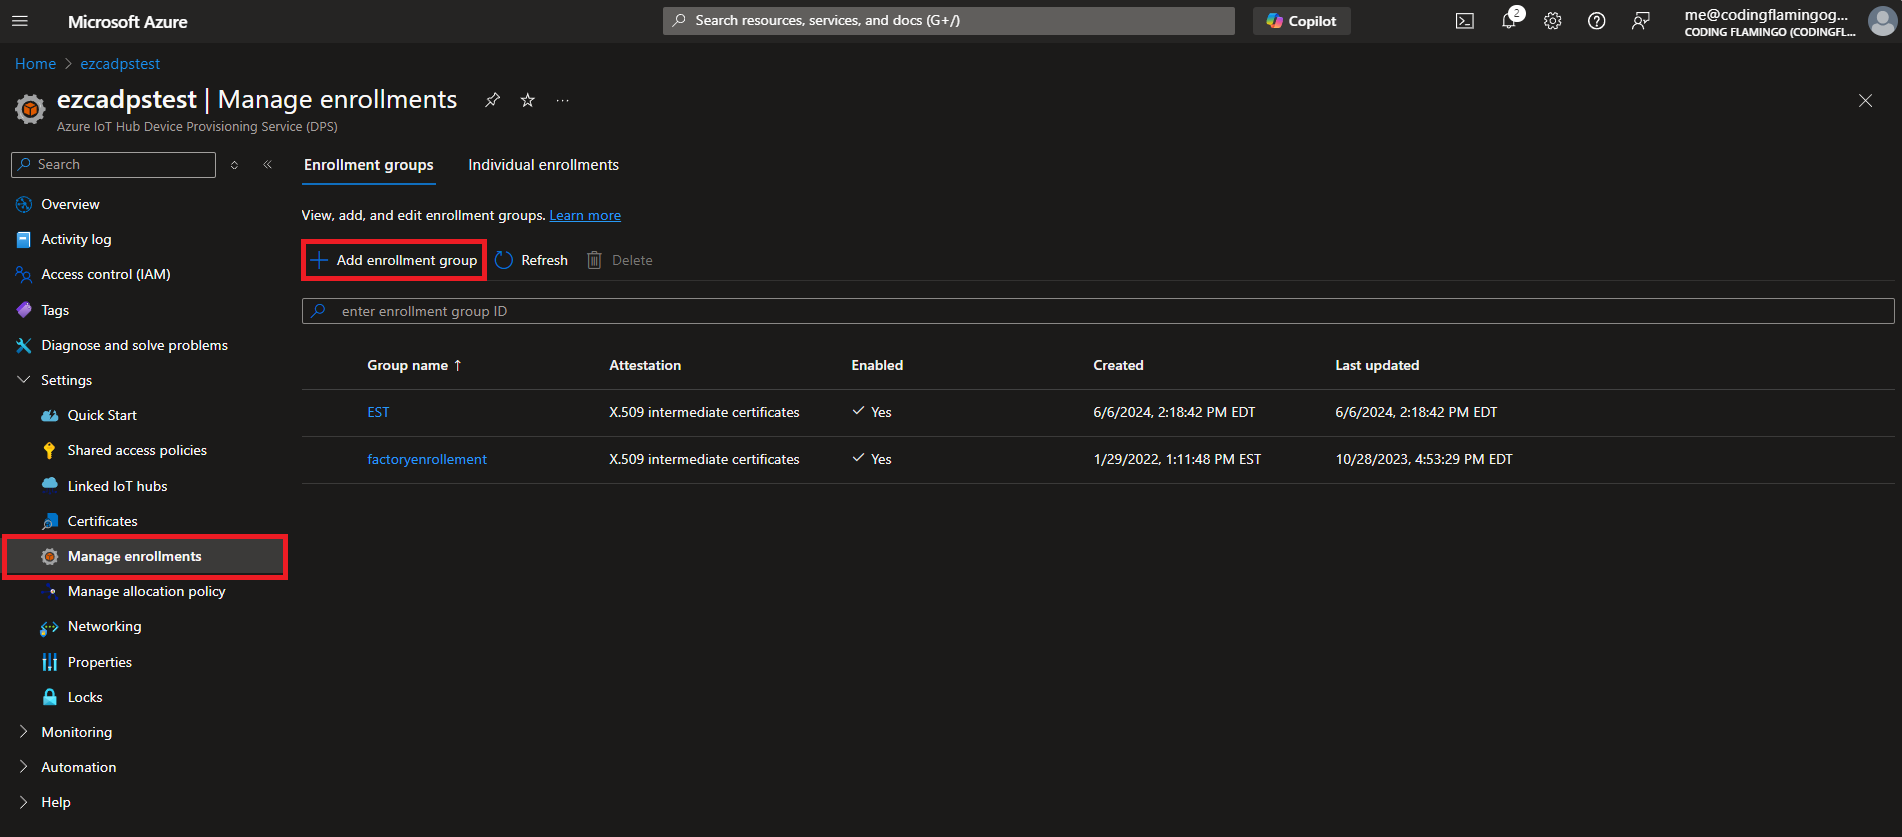
- Then select “X.509 certificates uploaded to this Device Provisioning Service instance” and put the primary certificate as the CA certificate that we uploaded before (If you also have other CAs, you would also add them as secondary but in this case I am doing a single tier CA).

- Then select a name for this enrollment group.
- THen we are going to select the IoT Hubs Tab at the top and select the IoT Hub that we want to use with this enrollment group (If you have multiple IoT Hubs, you can select them all and select how the traffic will be distributed).
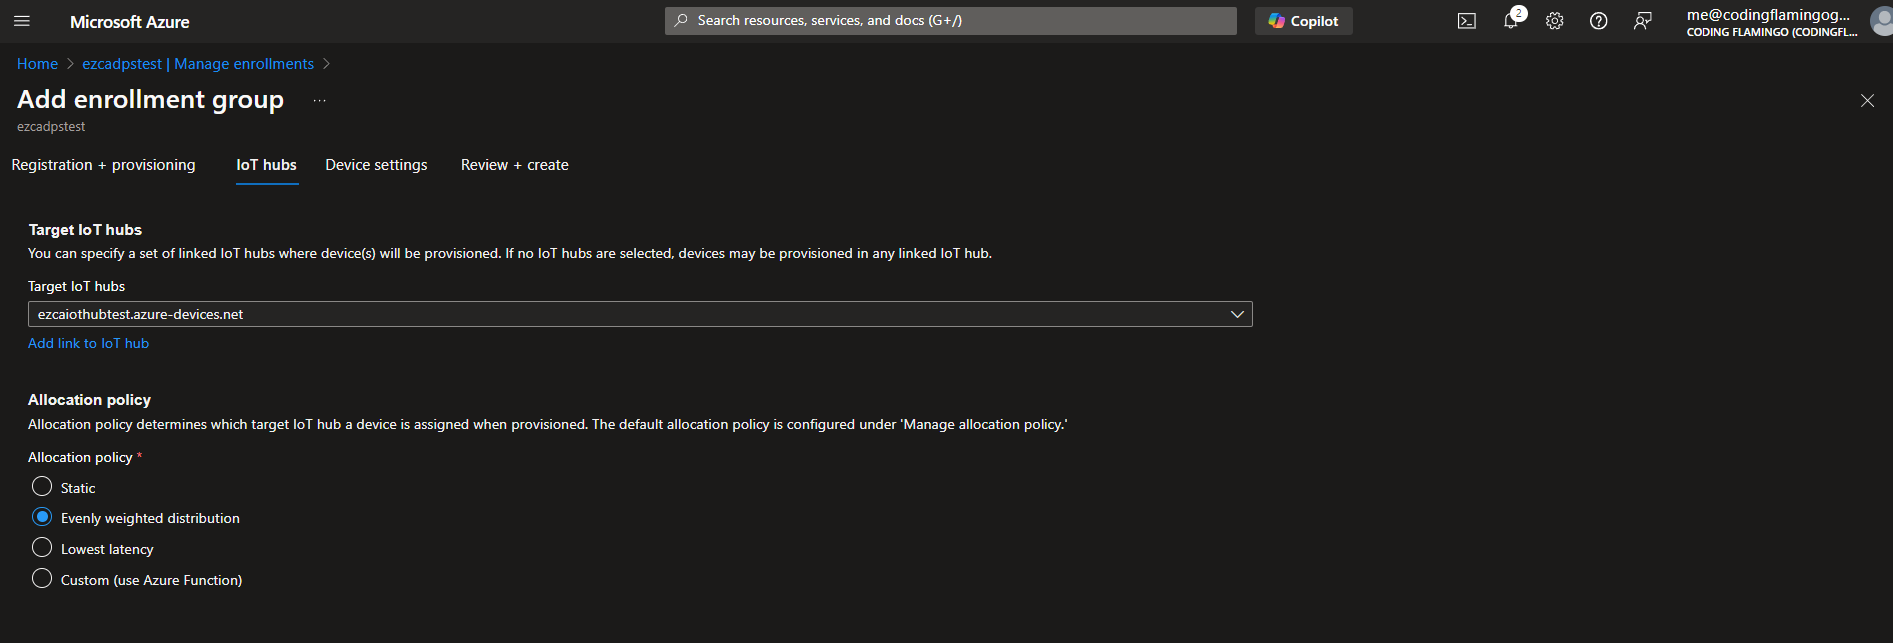
- Last we are going to select the “Device Settings” Tab at the top and Select “Enable IoT Edge on provisioned devices” and then click save.
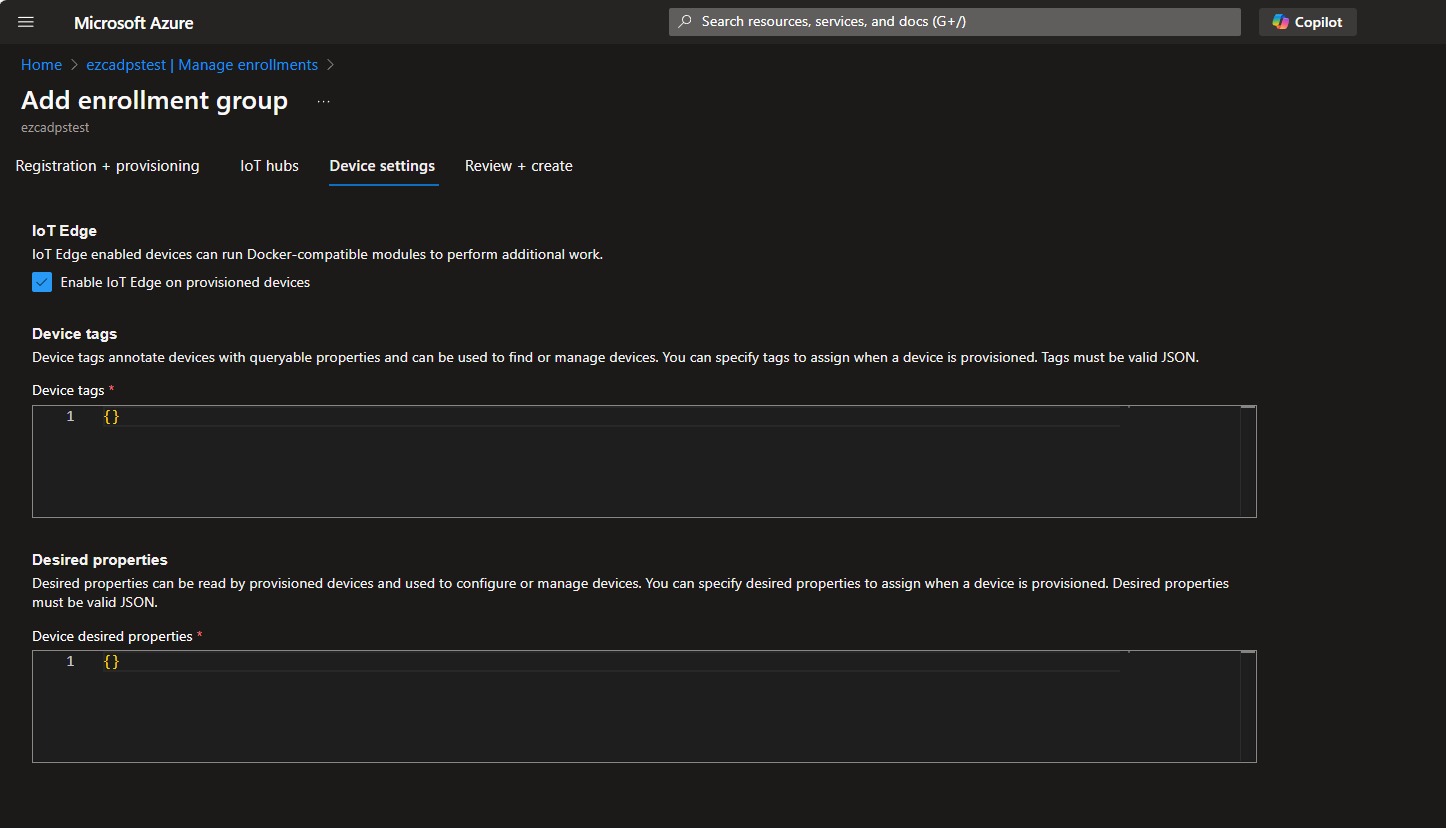
How to Configure IoT Edge Device to Use the Azure IoT EST Certificate Authority
The last step is to configure the IoT Edge device to use the EST protocol to request the certificate from the CA and then register to the Azure IoT Hub using the DPS. While in the Microsoft sample they use username and password, they say that it is not recommended for production, so instead we are going to manually create the “bootstrap” certificate and then use the EST protocol to request the certificate from the CA.
This is a manual version of the process, for the automatic version you can use the our Azure IoT Security Best Practices to design your automatic bootstrapping process using our easy to use APIs, code samples and NuGet Package.
How To Create the Bootstrap Certificate for Azure IoT EST
As mentioned in the Azure IoT Security Best Practices this should be done in a secure environment and the private key should be stored in a secure location. But for sake of simplicity, we are going to manually create the certificate in the IoT Edge device.
- Let’s go to the EZCA portal, and go to the certificates page and click “Create Certificate”.
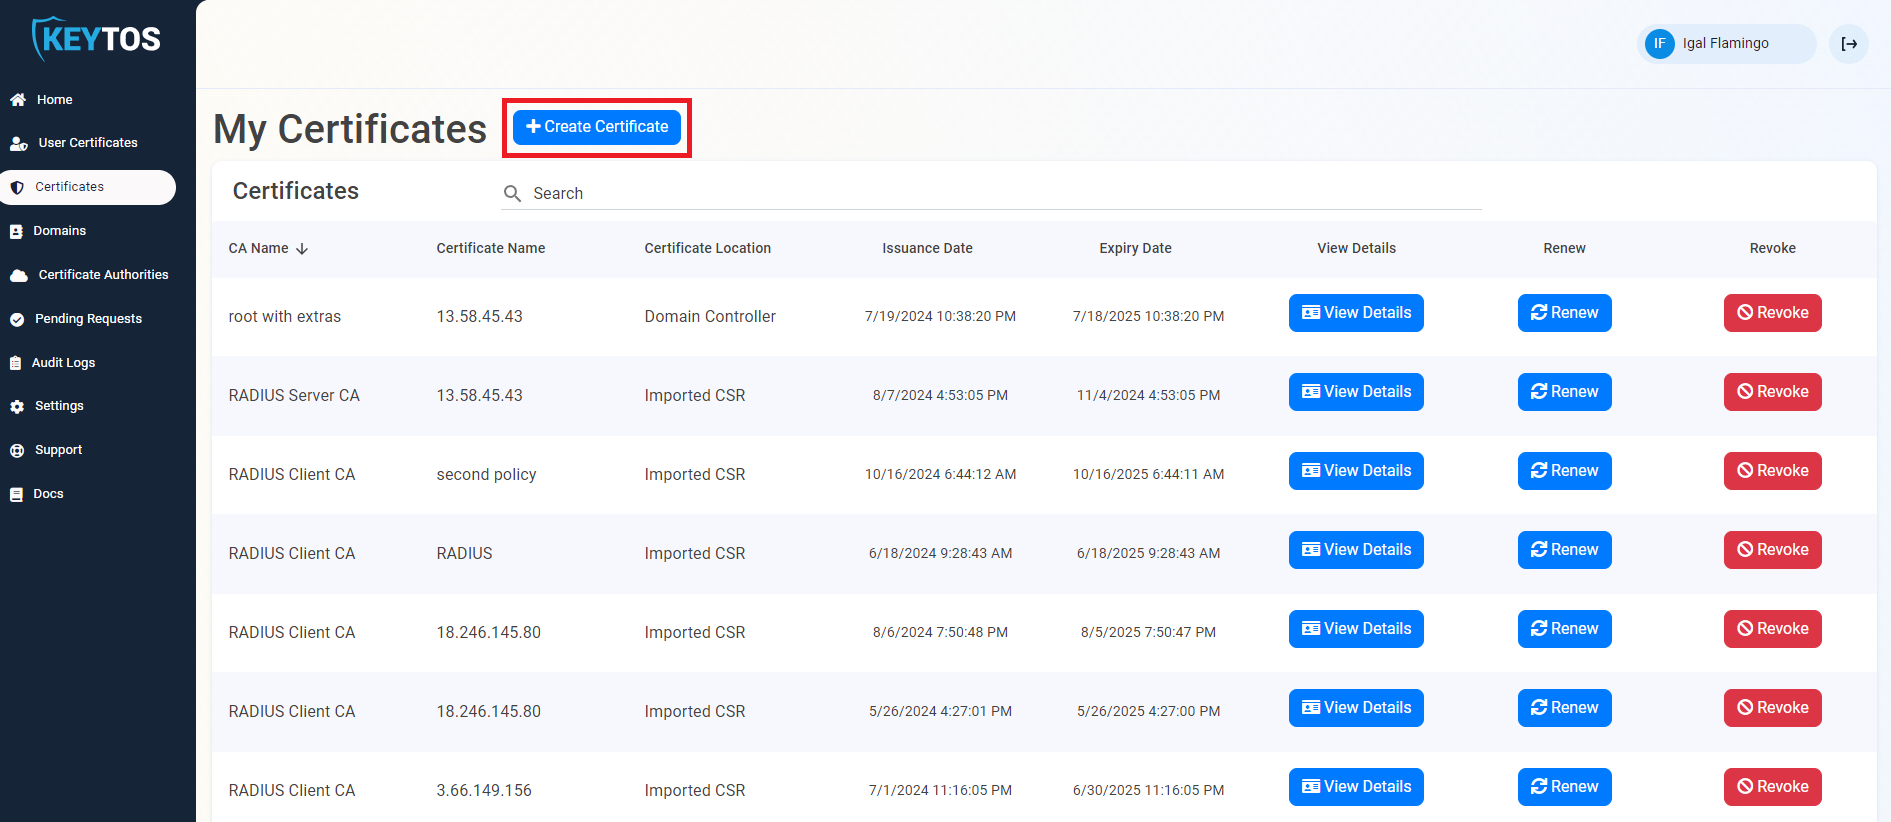
- If you have multiple CAs, select the CA that you want to use to issue the certificate.
- Enter the device ID of the IoT Edge device that you want to create the certificate for as the common name. and as a DNS name.
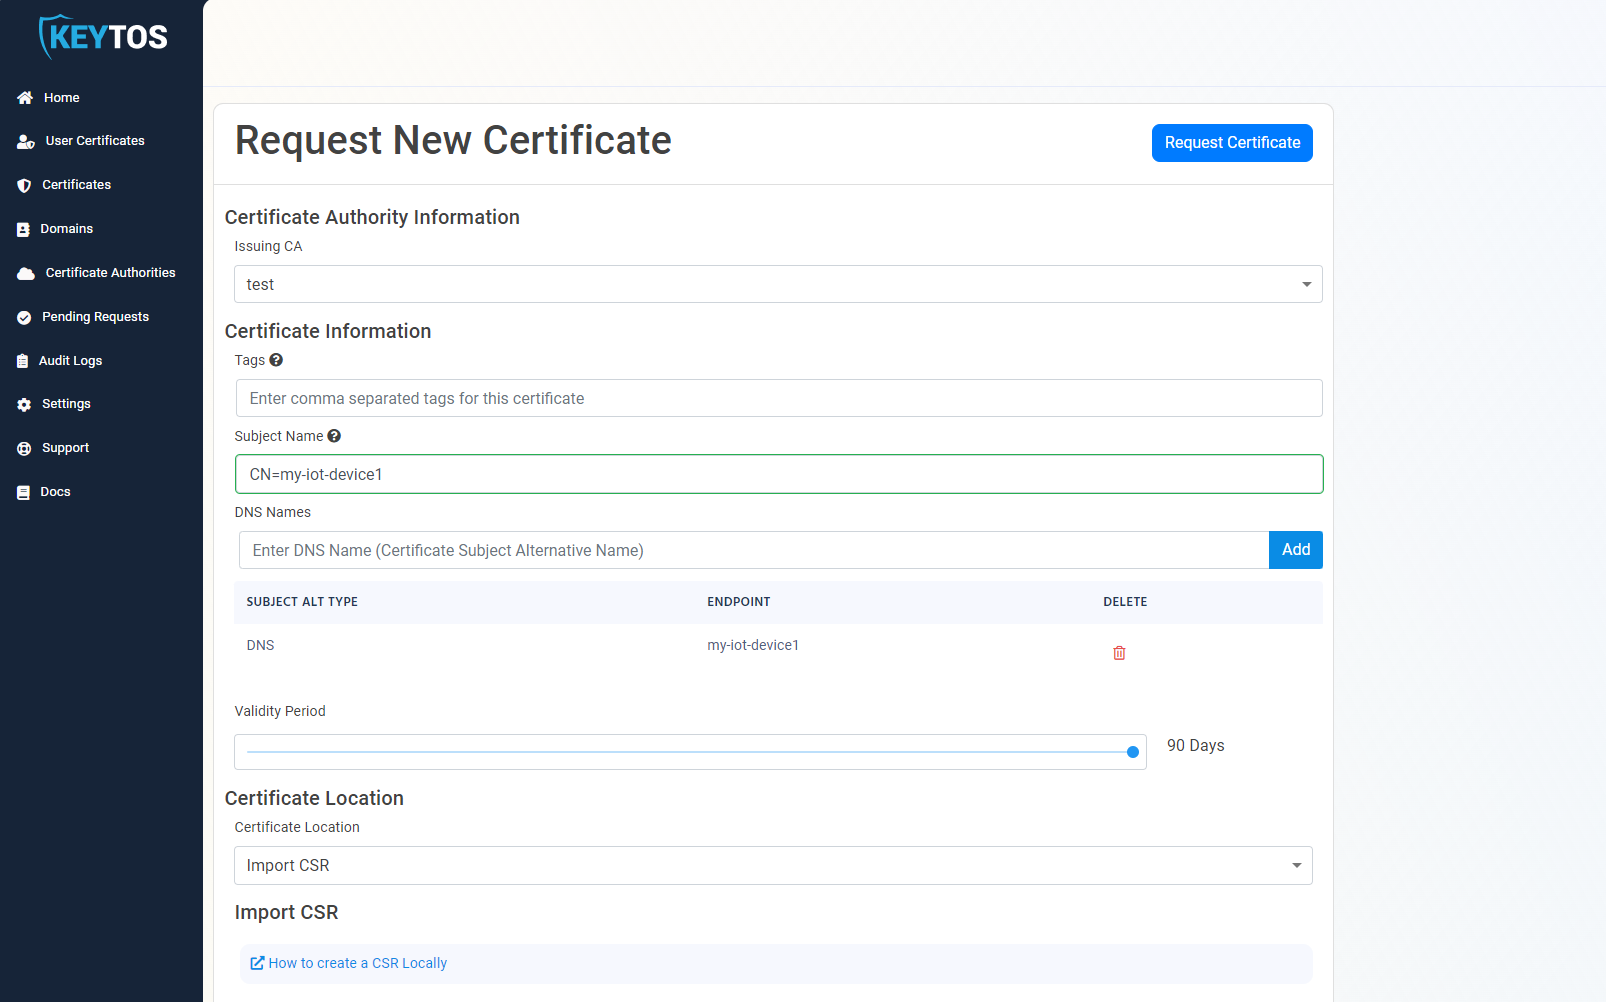
- Click on “How to create CSR Locally” and copy the OpenSSL command.
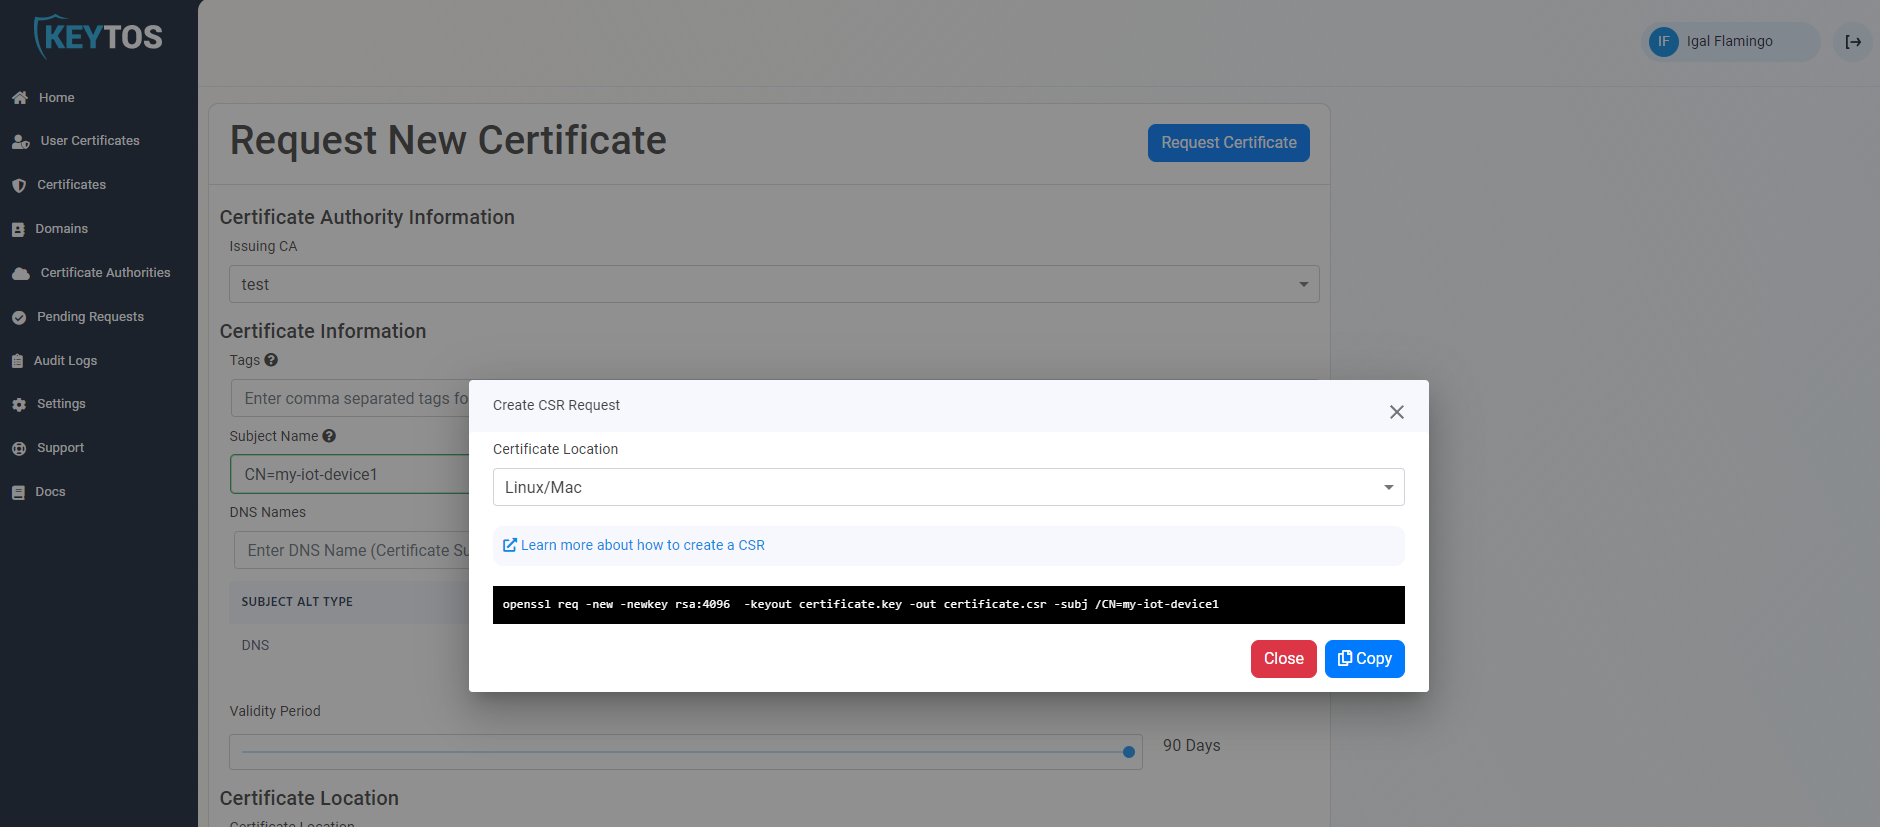
- SSH into the IoT Edge device, and navigate to the folder where you want to save the certificate, for this example I will use
/var/aziot/authcertsand run the command to create the CSR. I used the following commands to create the directory and give read and write permissions to both Azure IoT users:sudo mkdir -p /var/aziot/authcerts sudo chown -R aziotks:aziotks /var/aziot/authcerts sudo find /var/aziot/authcerts -type f -name "*.*" -exec chmod 777 {} \; cd /var/aziot/authcerts - Here are the commands I ran, note how I added
-nodessince currently Azure IoT Edge does not support encrypted private keys:cd /var/aziot/authcerts openssl req -new -newkey rsa:4096 -nodes -keyout certificate.key -out certificate.csr -subj /CN=my-iot-device1 cat certificate.csr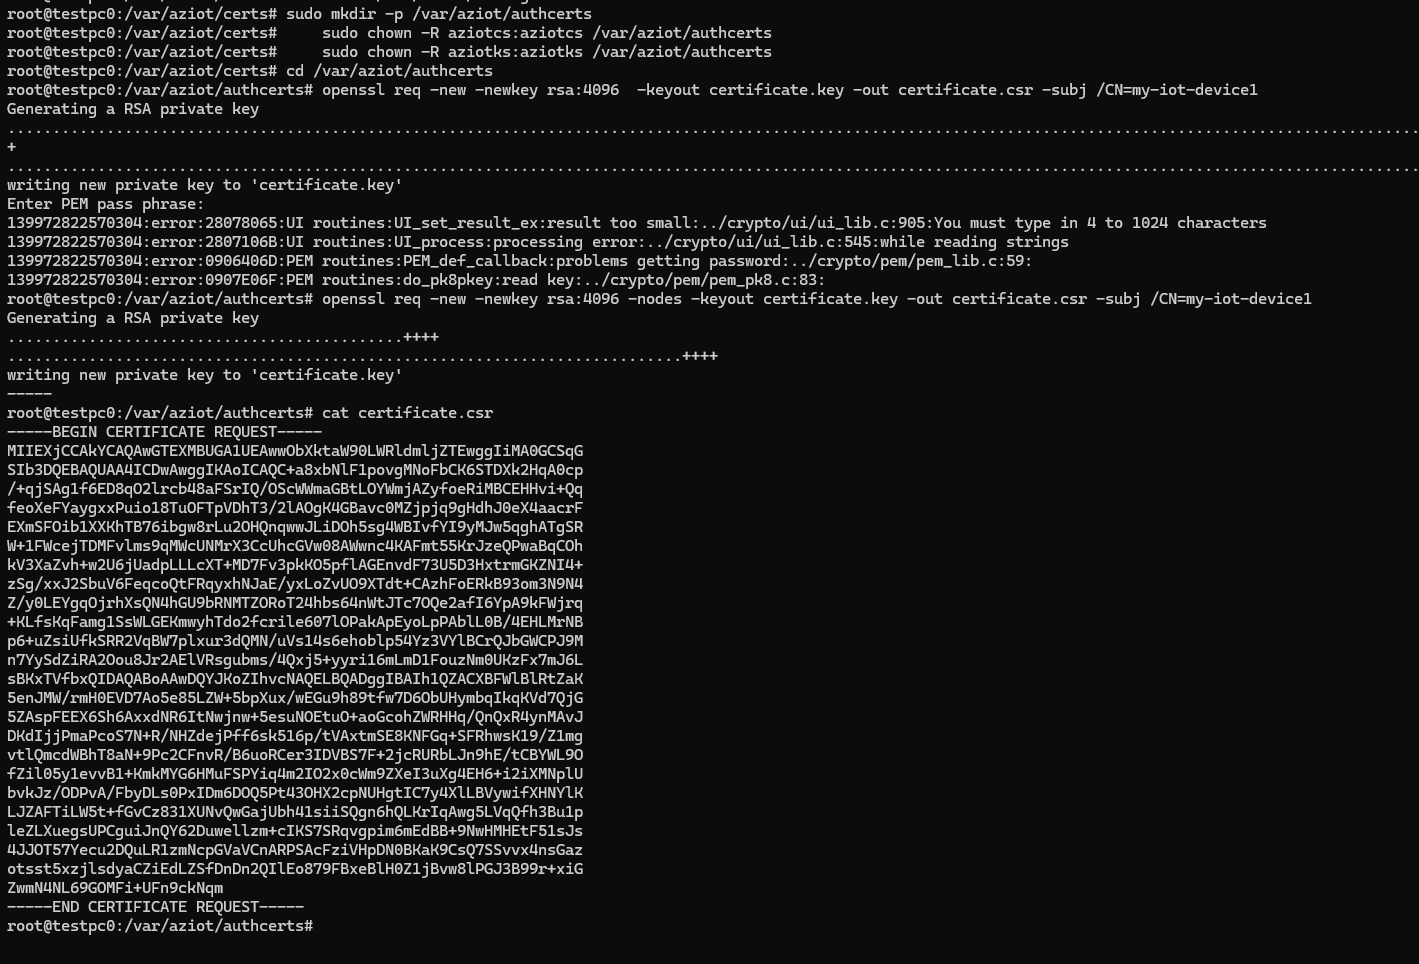
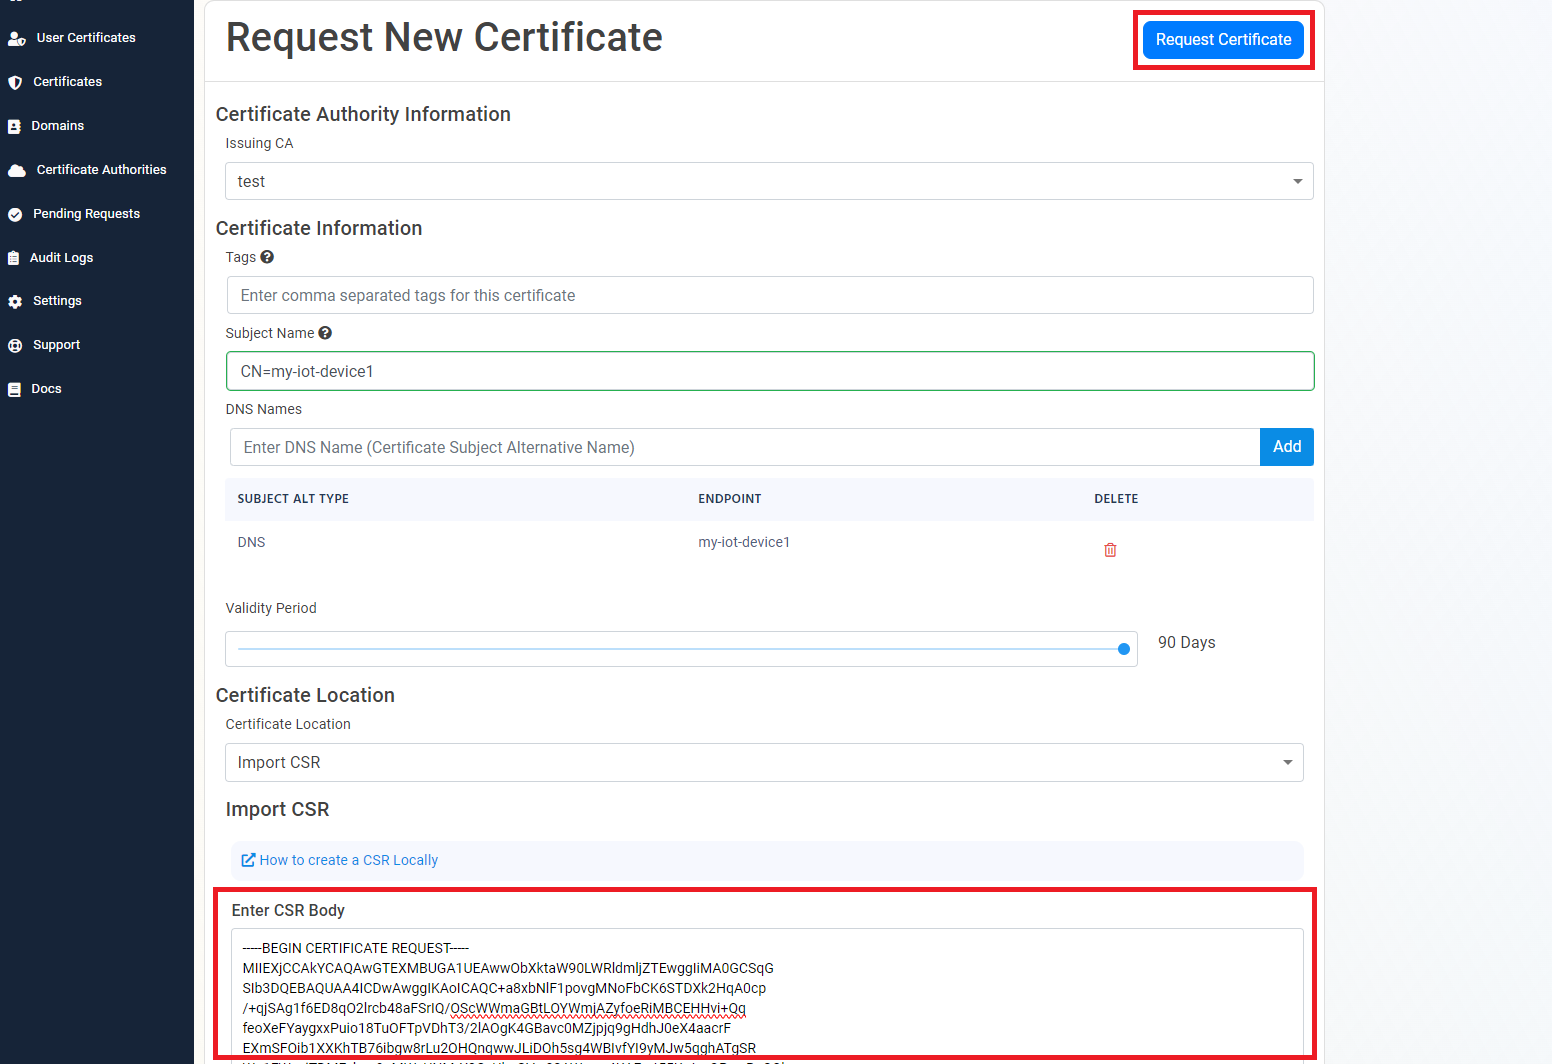
- Copy the CSR and paste it in the CSR field in the EZCA portal and click “Request Certificate”.
- This will create the certificate, download it and save it in the IoT Edge device in the same folder as the CSR (I am lazy and I just copy the text into the certificate.pem file by creating one with nano using
nano certificate.pem).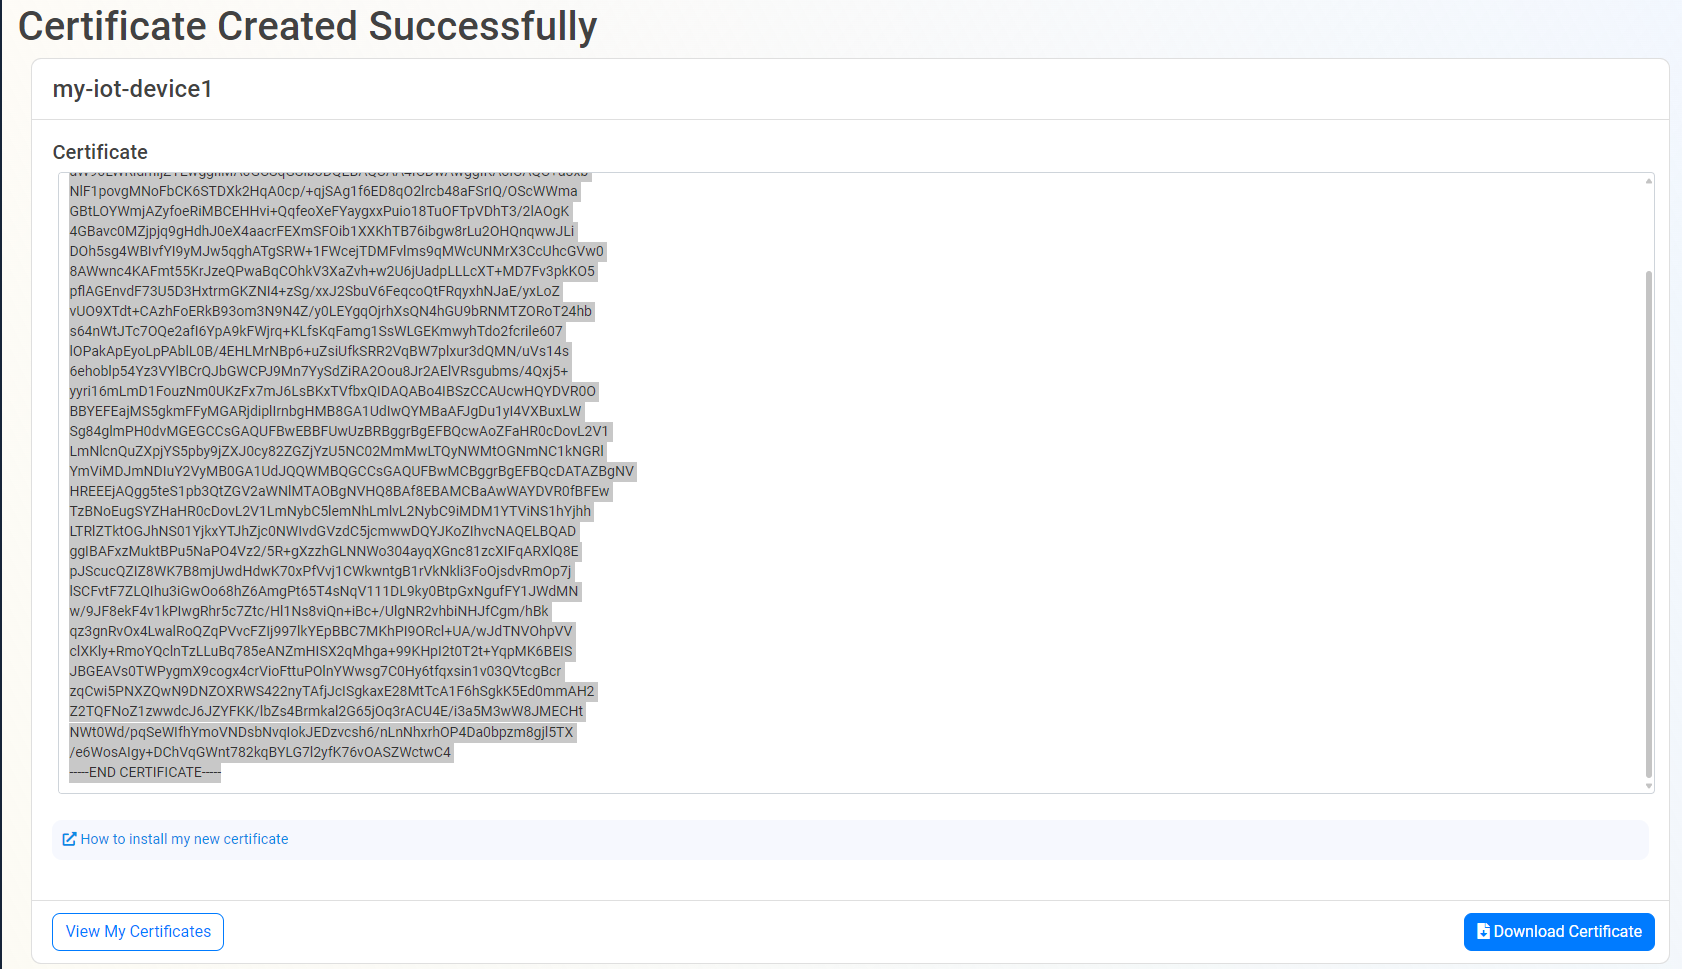
How To Configure IoT Edge Device to Use the Azure IoT EST Certificate Authority with the Bootstrap Certificate
Now that we have the bootstrap certificate (Reminder for you final design you will want to do that in the factory), we can configure the IoT Edge device to use the EST protocol to request the certificate from the CA by modifying the /etc/aziot/config.toml file in the IoT Edge device. With the file below (replace the placeholders with the actual values):
# Replace with ID Scope from your DPS
[provisioning]
source = "dps"
global_endpoint = "https://global.azure-devices-provisioning.net"
id_scope = "<DPS-ID-SCOPE>"

[provisioning.attestation]
method = "x509"
registration_id = "<myiotedgedevice>"

# ==============================================================================
# Cert issuance
# ==============================================================================
#
[provisioning.attestation.identity_cert]
method = "est"
common_name = "<myiotedgedevice>"

# Auto renewal settings for the identity cert
# Available only from IoT Edge 1.3 and above
[provisioning.attestation.identity_cert.auto_renew]
rotate_key = true
threshold = "80%"
retry = "4%"

[cert_issuance.est]

# Trusted root certificates to validate the EST server's TLS certificate; please add all your CA certificates here.
trusted_certs = [
    "file:///var/aziot/certs/ca.pem",
]

# Provides a default URL if the EST URL is not provided for a certificate (This is the one we got from EZCA at the beginning).
[cert_issuance.est.urls]
default = "https://est.eu.ezca.io/est/1c3c6cea-fcbd-4681-85e1-74fb74b6863e/44934e59-64e3-4987-a54a-d4a30097c62b/westeurope/.well-known/est"

# Below are options for authenticating with the EST server. The required options will depend on the EST
# server's configuration. These global settings apply to all certificates that don't configure auth separately.

[cert_issuance.est.auth]
# Authentication with TLS client certificate. Provide the path of the client cert and its corresponding
# private key. These files must be readable by the users aziotcs and aziotks, respectively.
identity_cert = "file:///var/aziot/authcerts/certificate.pem"
identity_pk = "file:///var/aziot/authcerts/certificate.key"

# Authentication with a TLS client certificate which will be used once to create the initial certificate.
# After the first certificate issuance, an identity_cert and identity_pk will be automatically created and
# used. Provide the path of the bootstrap client cert and its corresponding private key. These files must
# be readable by the users aziotcs and aziotks, respectively.
bootstrap_identity_cert = "file:///var/aziot/authcerts/certificate.pem"
bootstrap_identity_pk = "file:///var/aziot/authcerts/certificate.key"

## Controls the renewal of EST identity certs. These certs are issued by the EST server after
## initial authentication with the bootstrap cert and managed by Certificates Service.
[cert_issuance.est.identity_auto_renew]
rotate_key = true
threshold = "80%"
retry = "4%"
- After you have modified the file, apply the configuration by running
sudo iotedge config apply. - Run
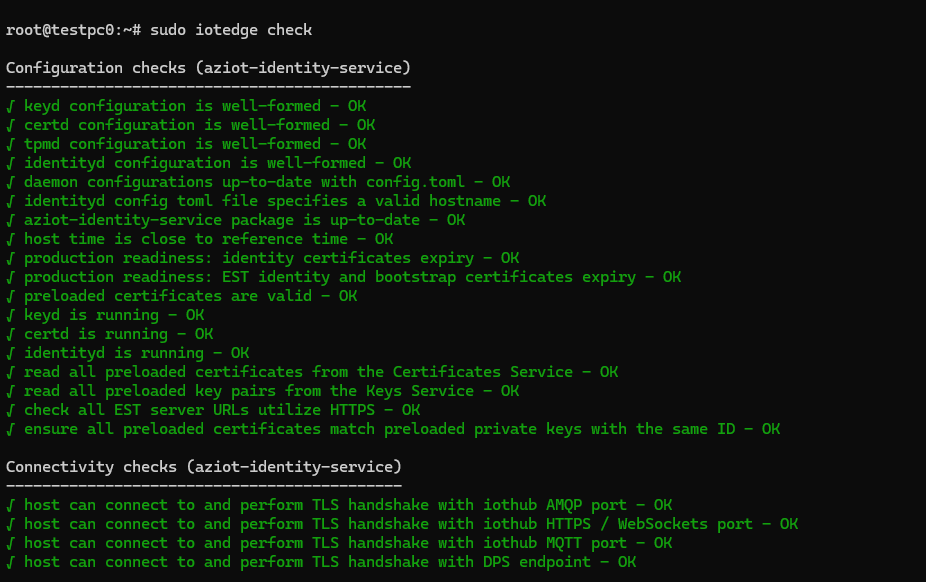
sudo iotedge checkto verify the configuration.