How to Enable RADIUS with Radsec Authentication in Ubiquiti Unifi
Prerequisites for Setting Up Entra ID Authentication With RADIUS in Ubiquiti Unifi
- Registering the application in your tenant
- Creating Cloud Radius Instance
- Being a Subscription Owner or Network Administrator or Log Reader
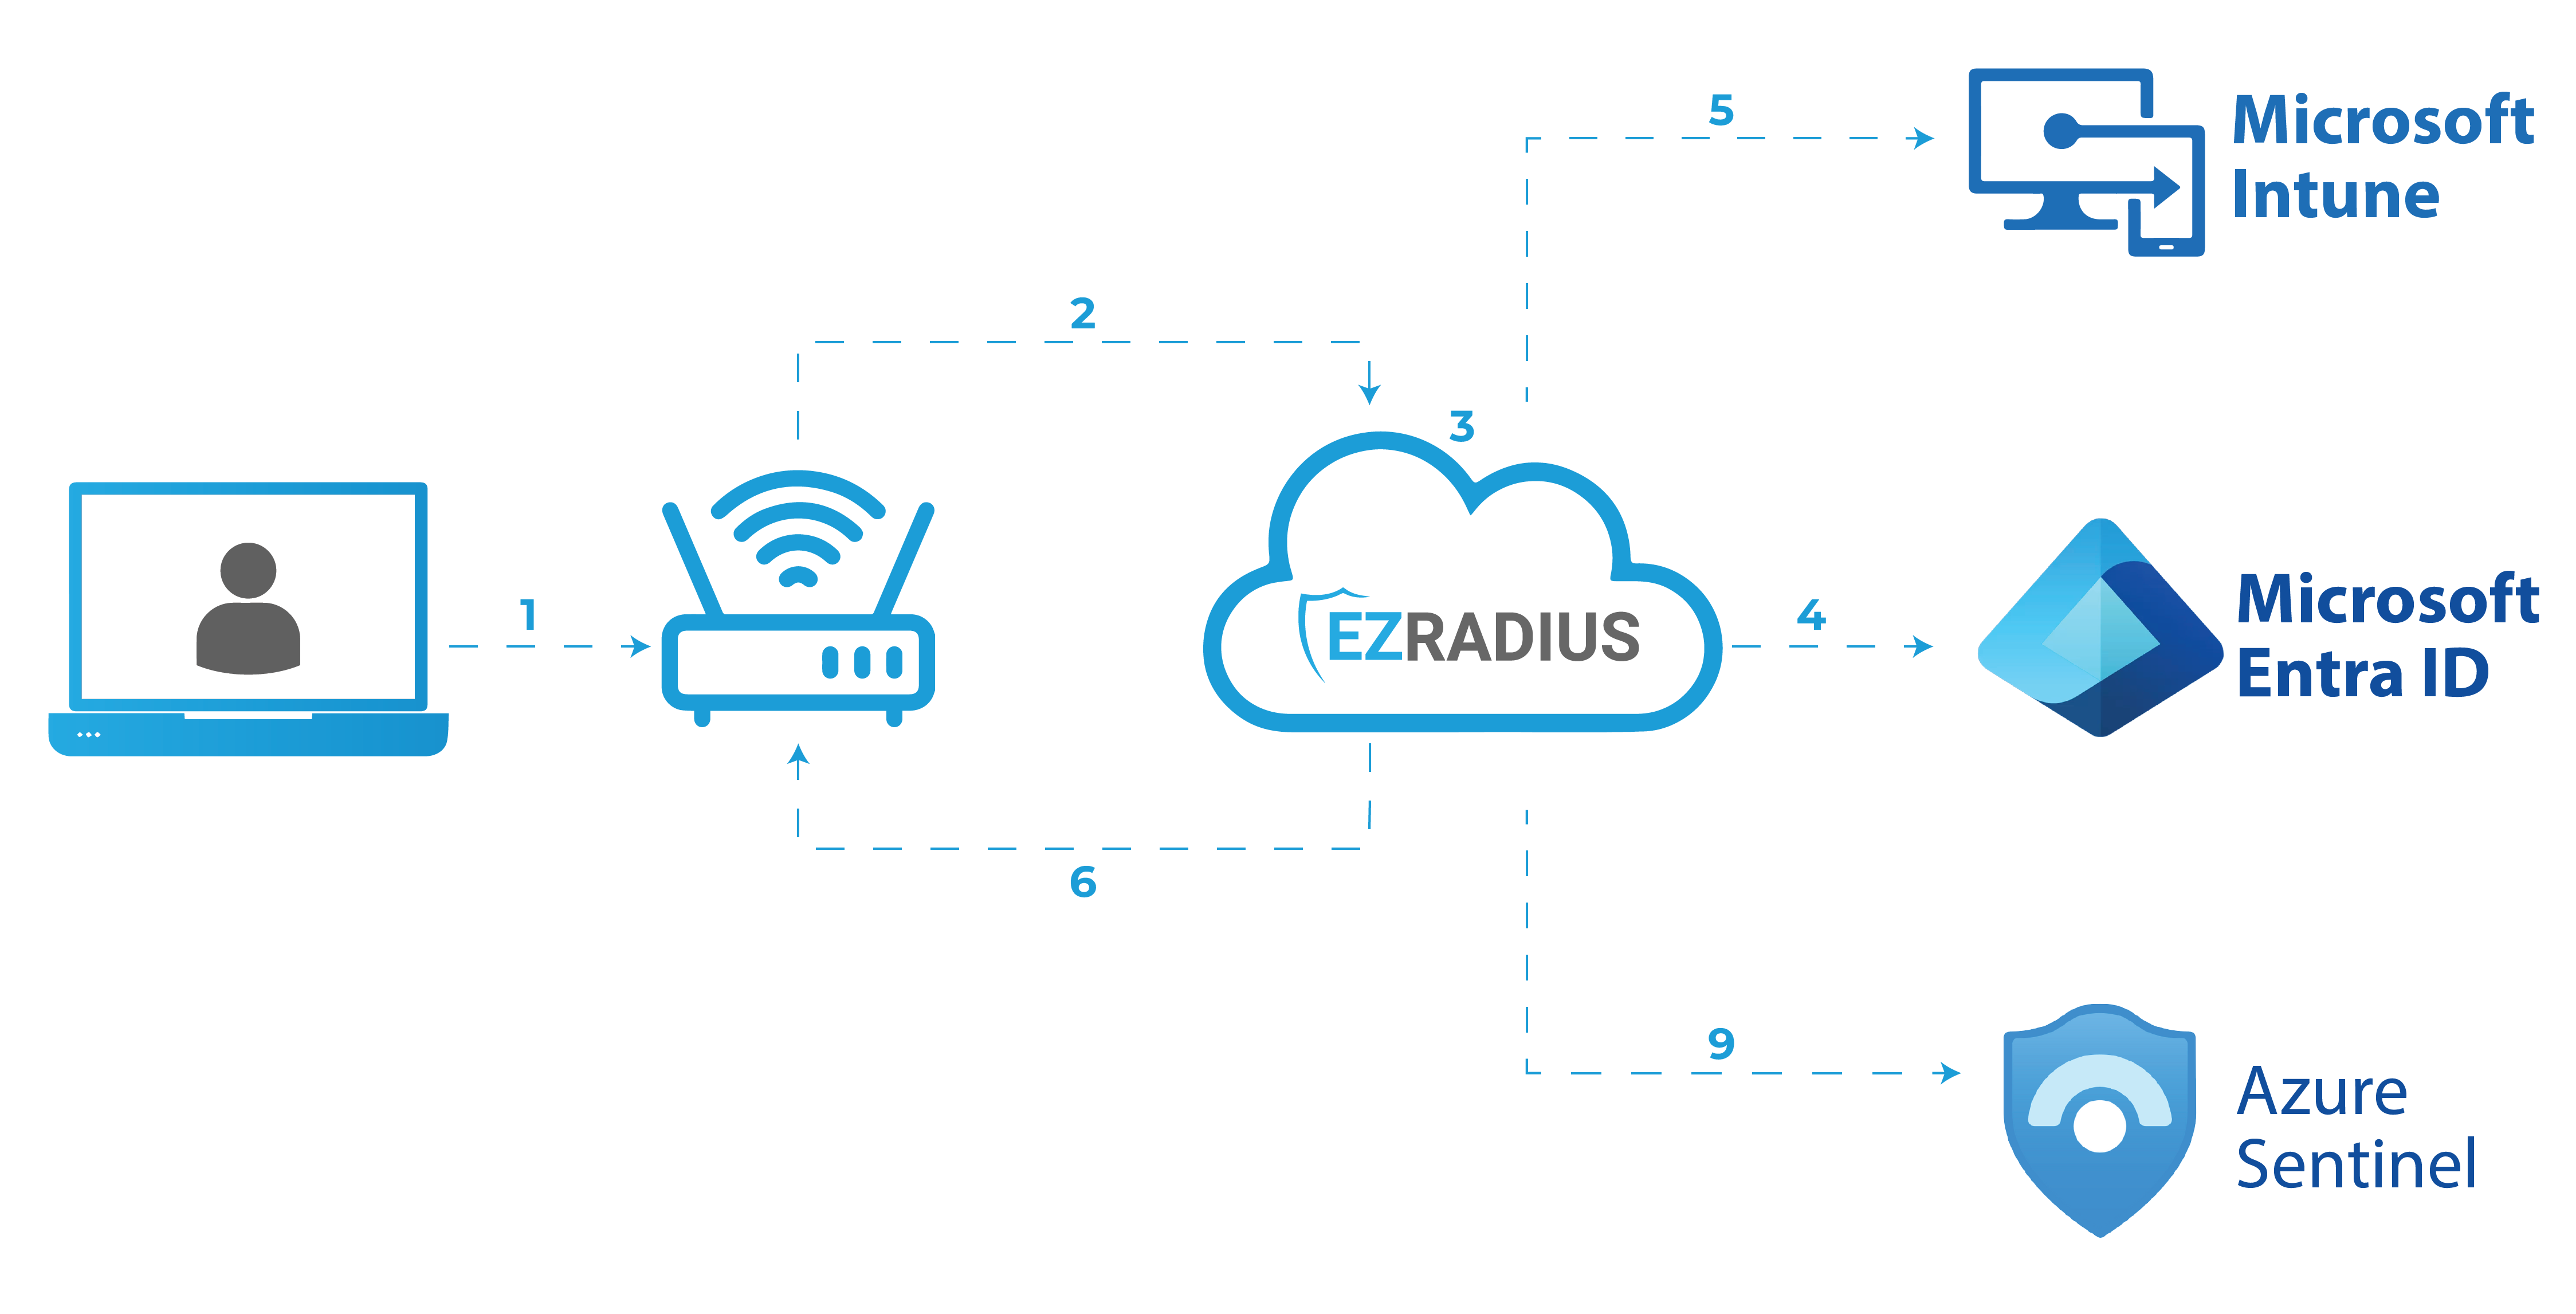
Introduction - How RADIUS Authentication Works in Ubiquiti Unifi and EZRADIUS
For your Ubiquiti network to authenticate users with Entra ID, you need to enable RADIUS authentication and connect it to a RADIUS service that supports Entra ID. You can do it with regular RADIUS which uses the IP address and a share secret to authenticate your Unifi network with the RADIUS server, or you can use RadSec (or radius over TLS) which is a protocol that provides RADIUS over TLS giving you all the RADIUS features but with TLS around it. In this guide, we setup RADIUS with RadSec in Ubiquiti Unifi using EZRADIUS.
What are the Different Types of Entra ID Authentication for Network?
When using Entra ID for network authentication, you can choose between two types of authentication: EAP-TLS (Certificate Based Authentication), and EAP-TTLS (Password Based Authentication). EAP-TLS is the most secure and convenient method of authentication, as it uses certificates to authenticate users meaning that the user does not have to enter their password or do anything. If you are using an MDM, you can use it to distribute the certificates to the user and setup automatic wifi authentication. EAP-TTLS is a password-based authentication method that allows your users to authenticate with their Entra ID username and password (Note: You might have to do some changes to enable EAP-TTLS with Entra ID).
How to Enable RADIUS Radsec Authentication in WPA-Enterprise In Your Ubiquiti Unifi Network - Step by Step (Using EZCA CA)
- Go to your EZRADIUS dashboard.
- Click on “Policies” on the left menu.
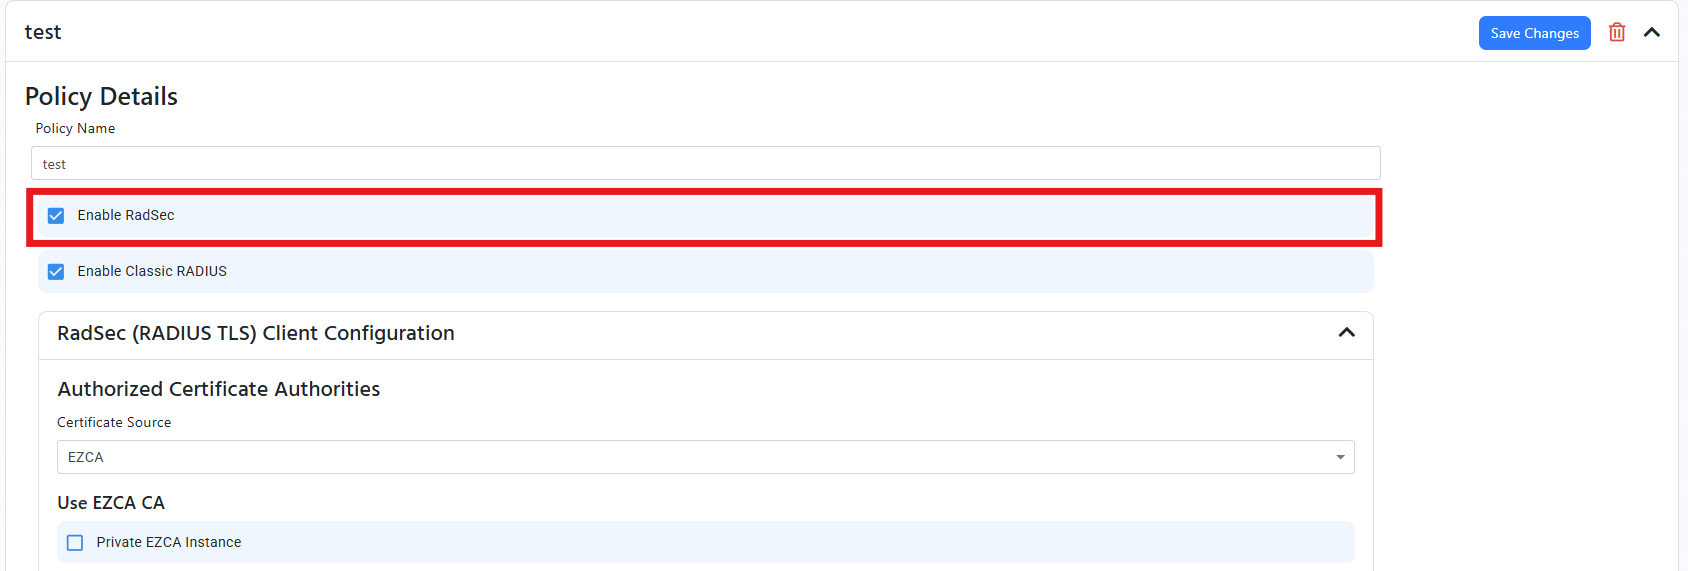
- In your EZRADIUS Policy Click on Enable RadSec.
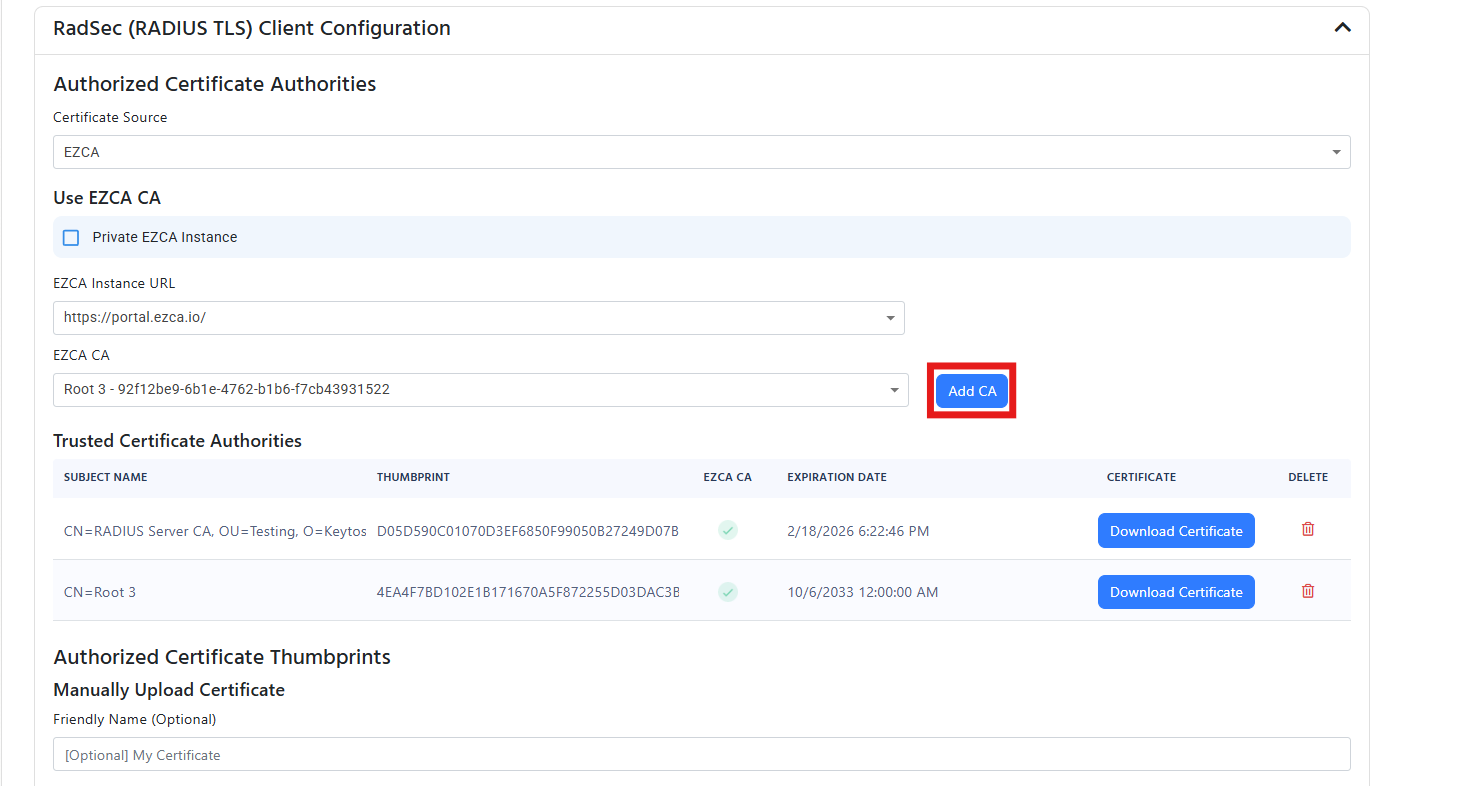
- Now in the Radsec Section, you will add your EZCA CAs by selecting them from the dropdown and clicking on “Add CA”.
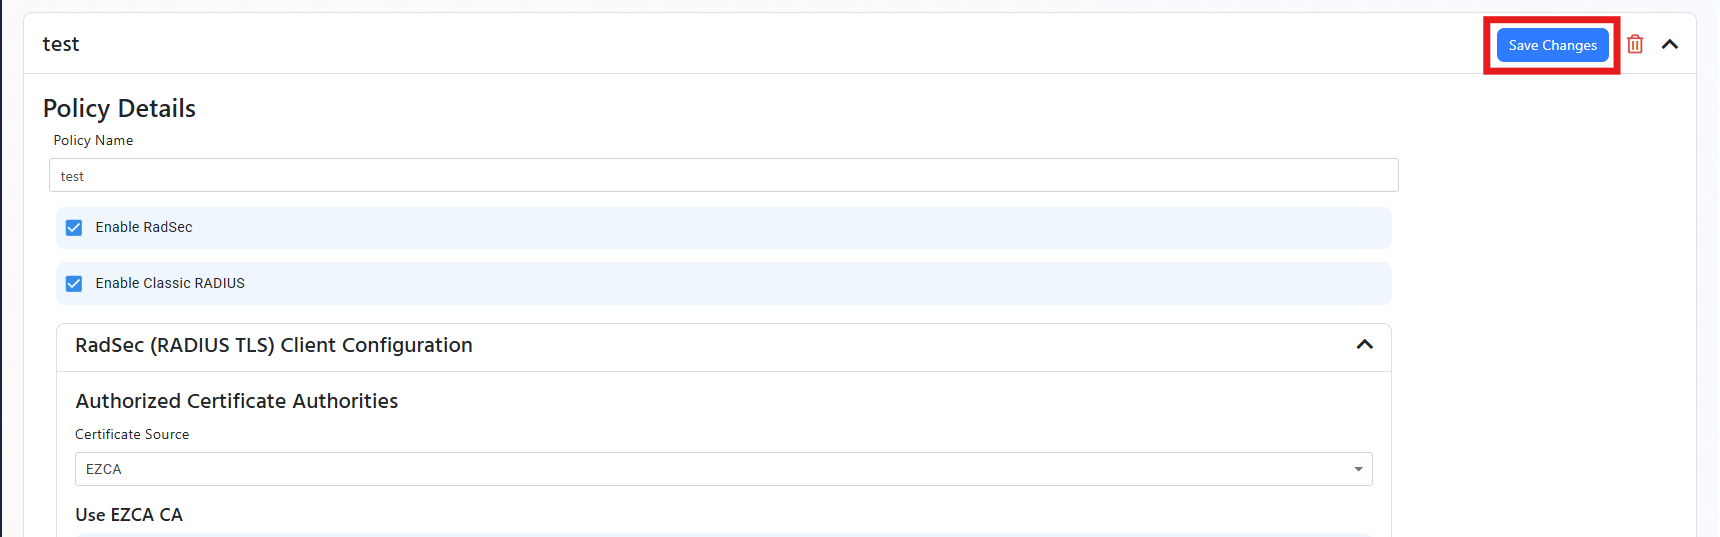
- Now Scroll to the top of your policy and click on “Save Changes”.
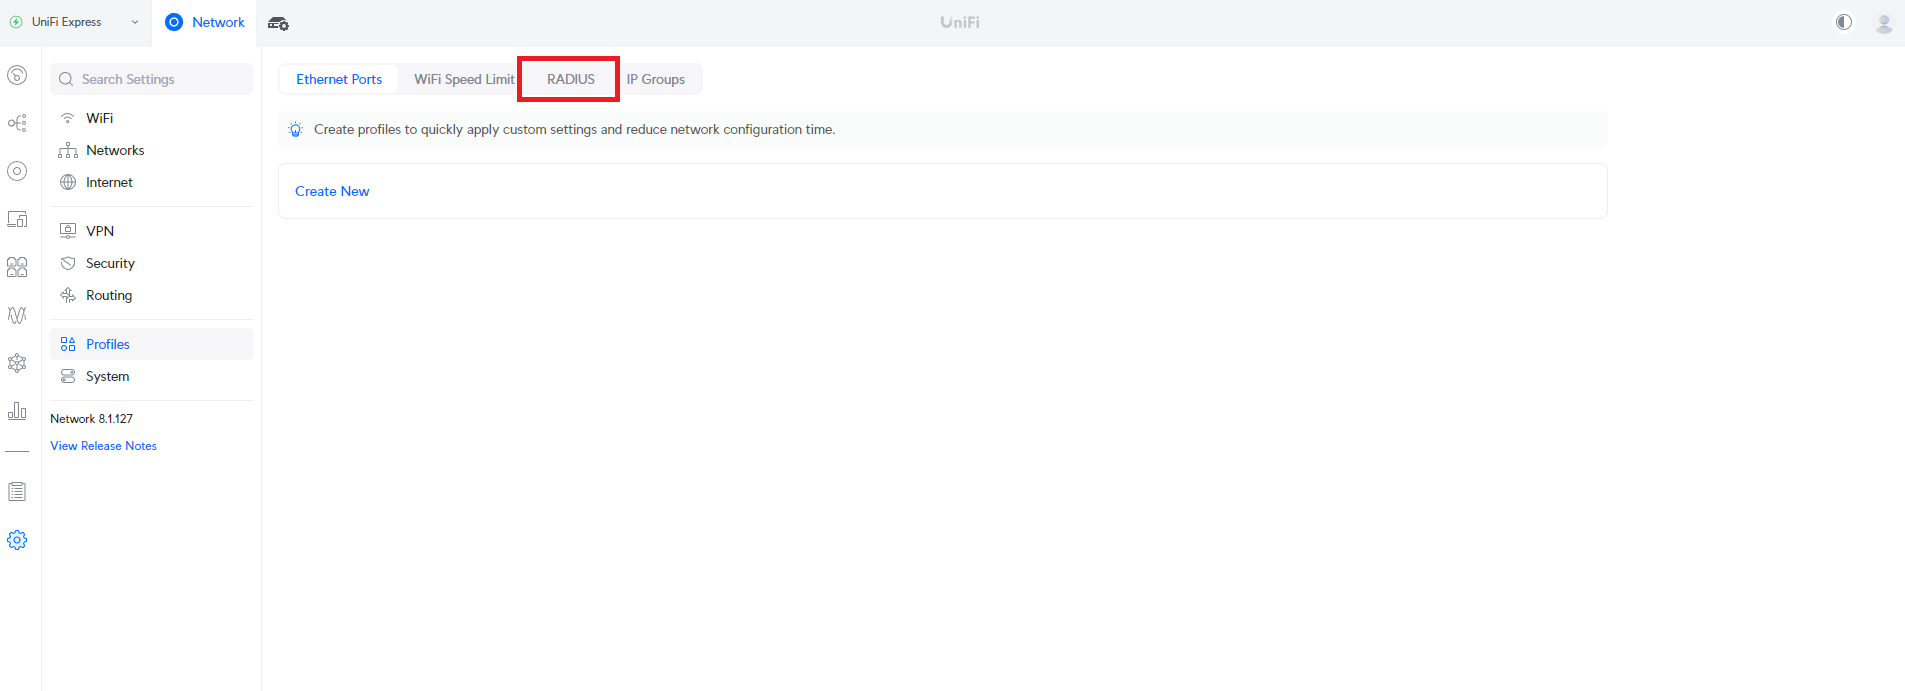
- Go to your Ubiquiti Unifi Controller.
- Click on “Network” on the top menu.
- Click on “Profiles” on the left menu.
- Click on the “RADIUS” button.
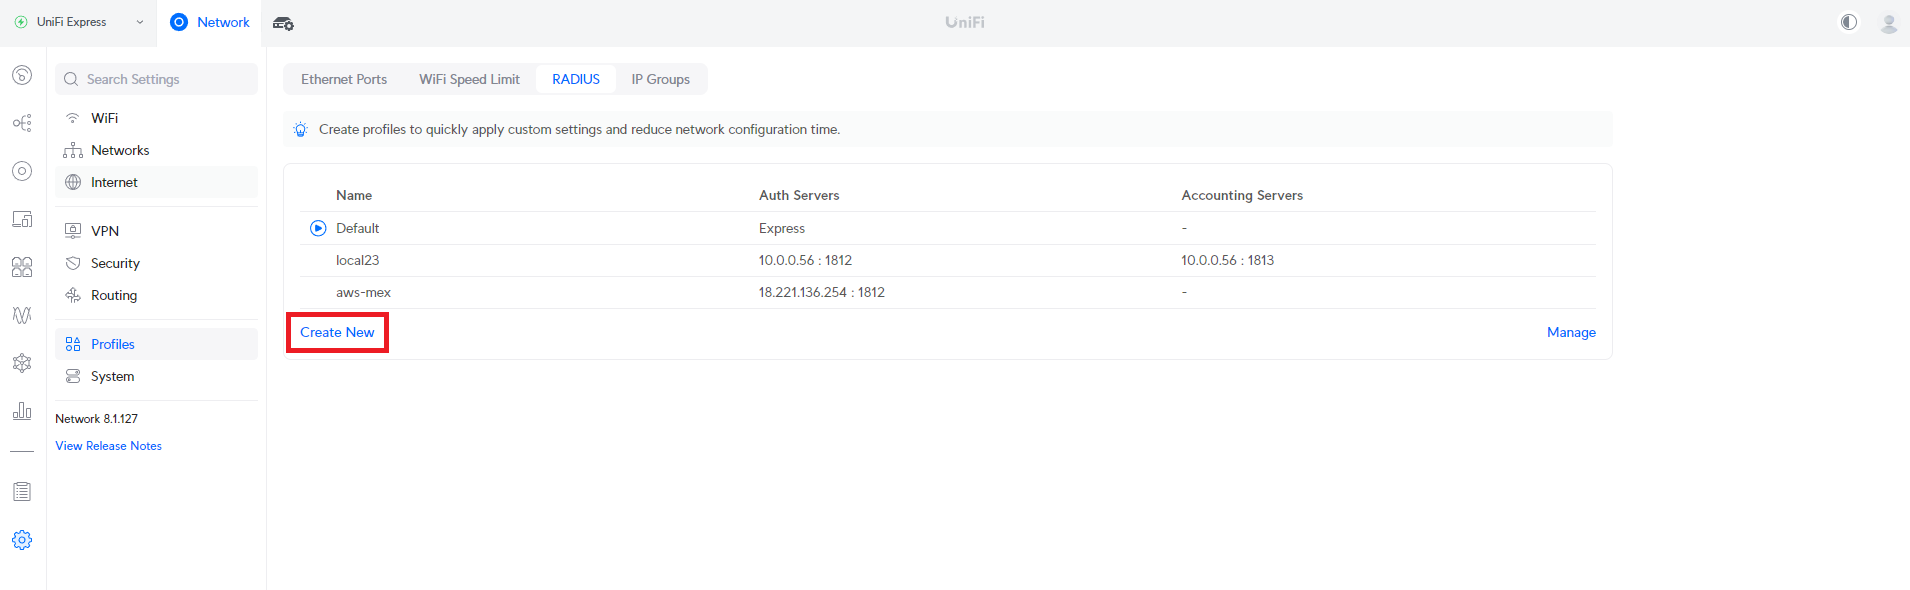
- Click on “Create New”.
- In the “Profile Name” field, enter a name for your RADIUS profile.
- Click on the “Wireless Networks” and/or “Wired Networks” checkbox based on where you want this profile to be used.
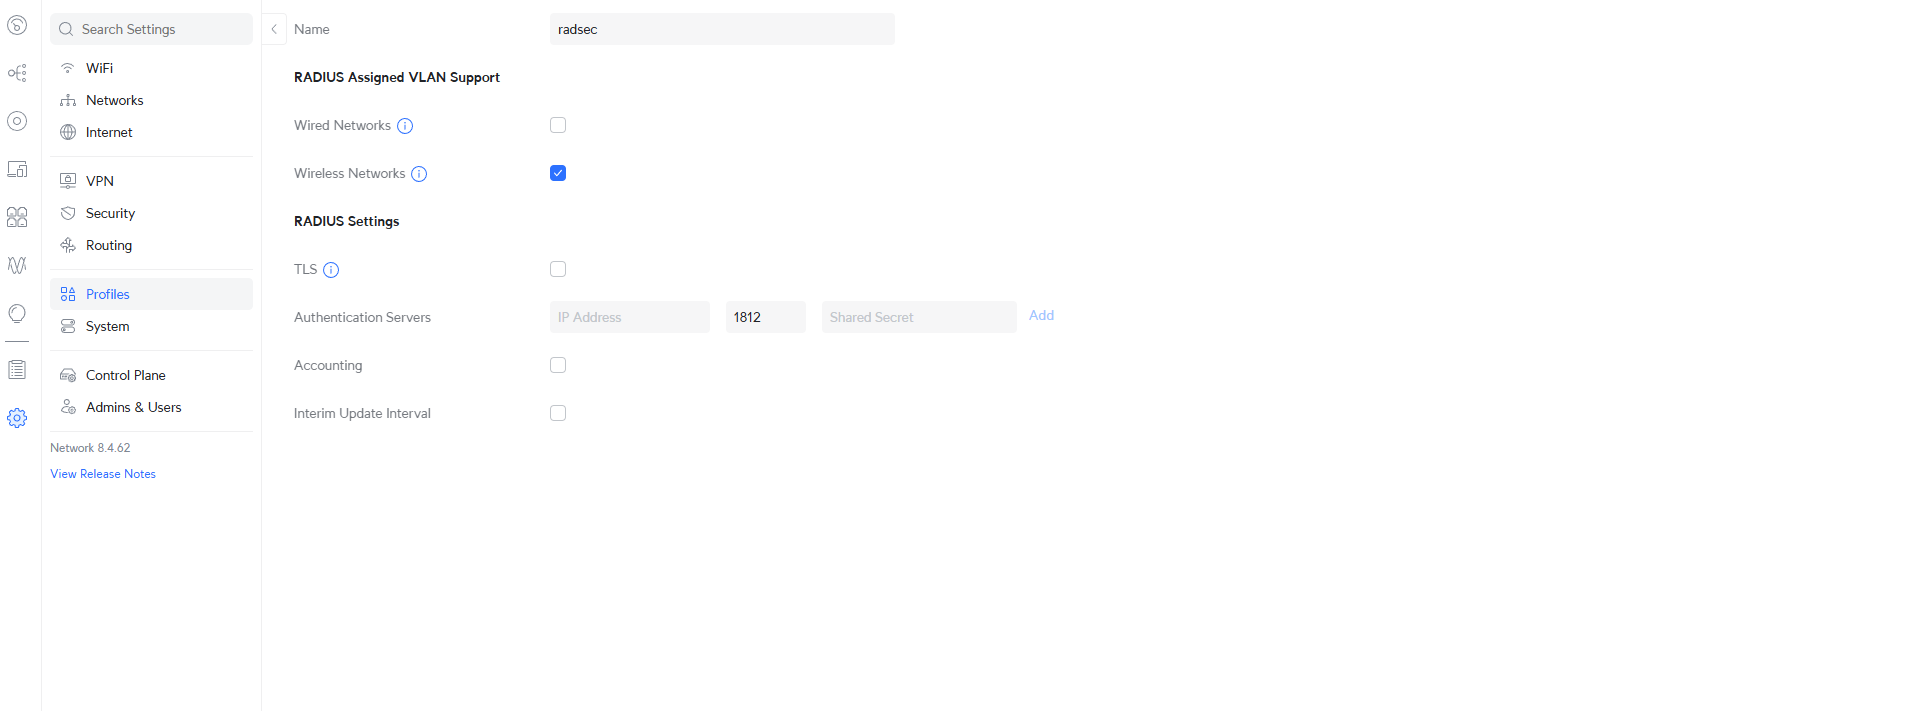
- Click the TLS checkbox.
- In another Tab, go to your EZRADIUS dashboard and copy the “RADIUS Server IP” from the “Policies” page (You can repeat this step for the three IPs for higher availability, if your instance supports multiple regions we recommend 1 IP from each region).
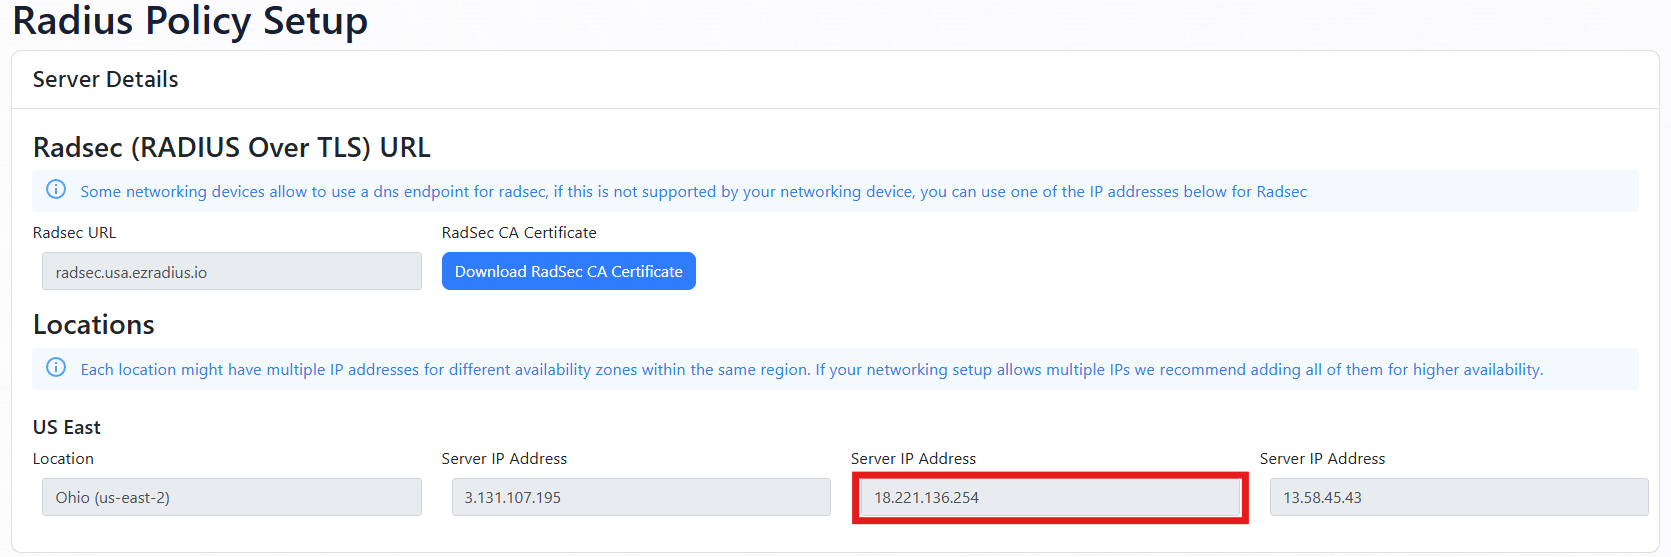
- From the same section, we are also going to download the RadSec CA Certificate by clicking on the “Download RadSec CA Certificate” button.

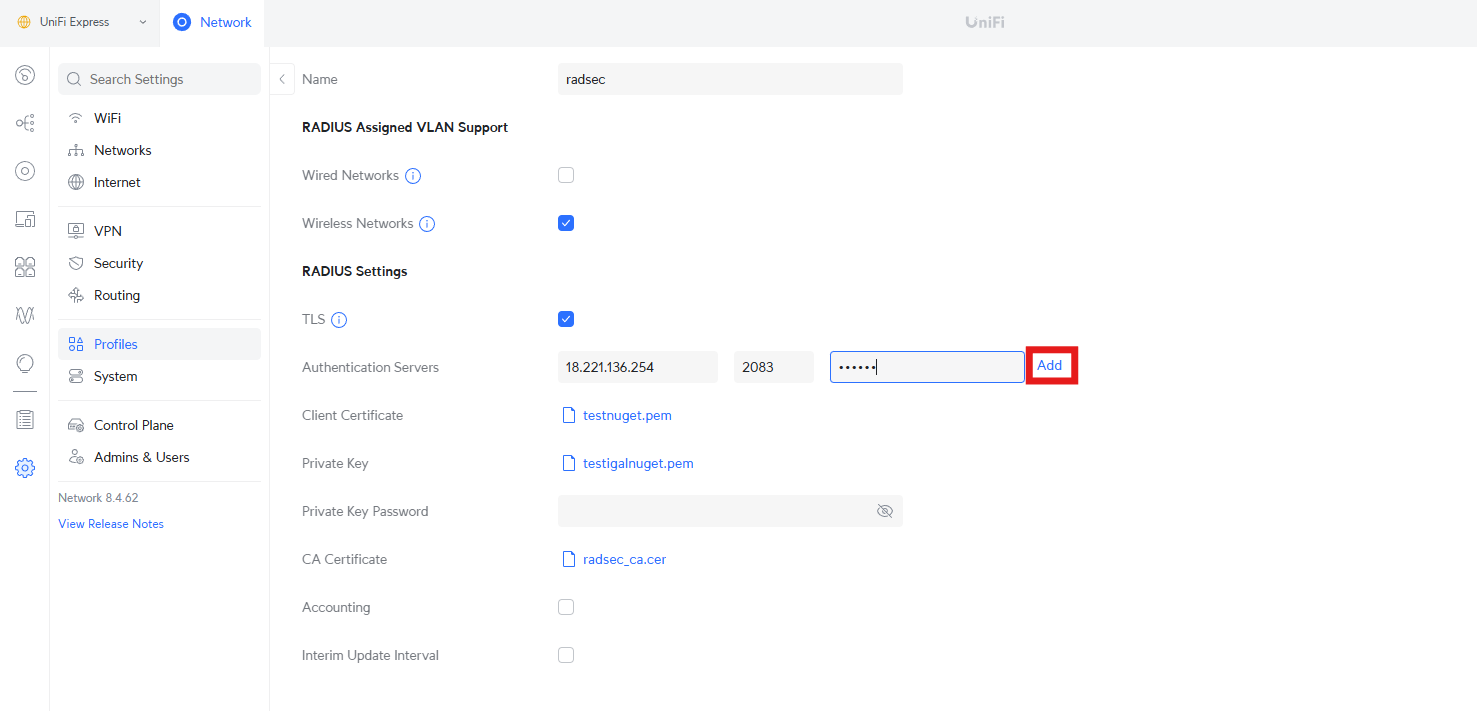
- Now we will go back to the Ubiquiti Unifi Controller and paste the “RADIUS Server IP” in the “RADIUS Server” field.
- In the “Port” field, enter “2083”.
- In the “Shared Secret” field, enter “radsec”. Note: Since Radsec uses certificate authentication, the shared secret is not used for authentication but is required by the Unifi Controller and the Radsec RFC requires it to be “radsec”.
- Click on Add.
- Repeat the steps for the other IPs in the EZRADIUS portal. This is not required but it can give you higher availability.
- Now we have to create the certificate that will be used to authenticate the Unifi Controller with the RADIUS server. In the EZRADIUS dashboard, click on “Create Radsec Certificate” on the left menu.
- Enter at least one IP address of your Unifi Controller in the “IP Address” field and click Add.
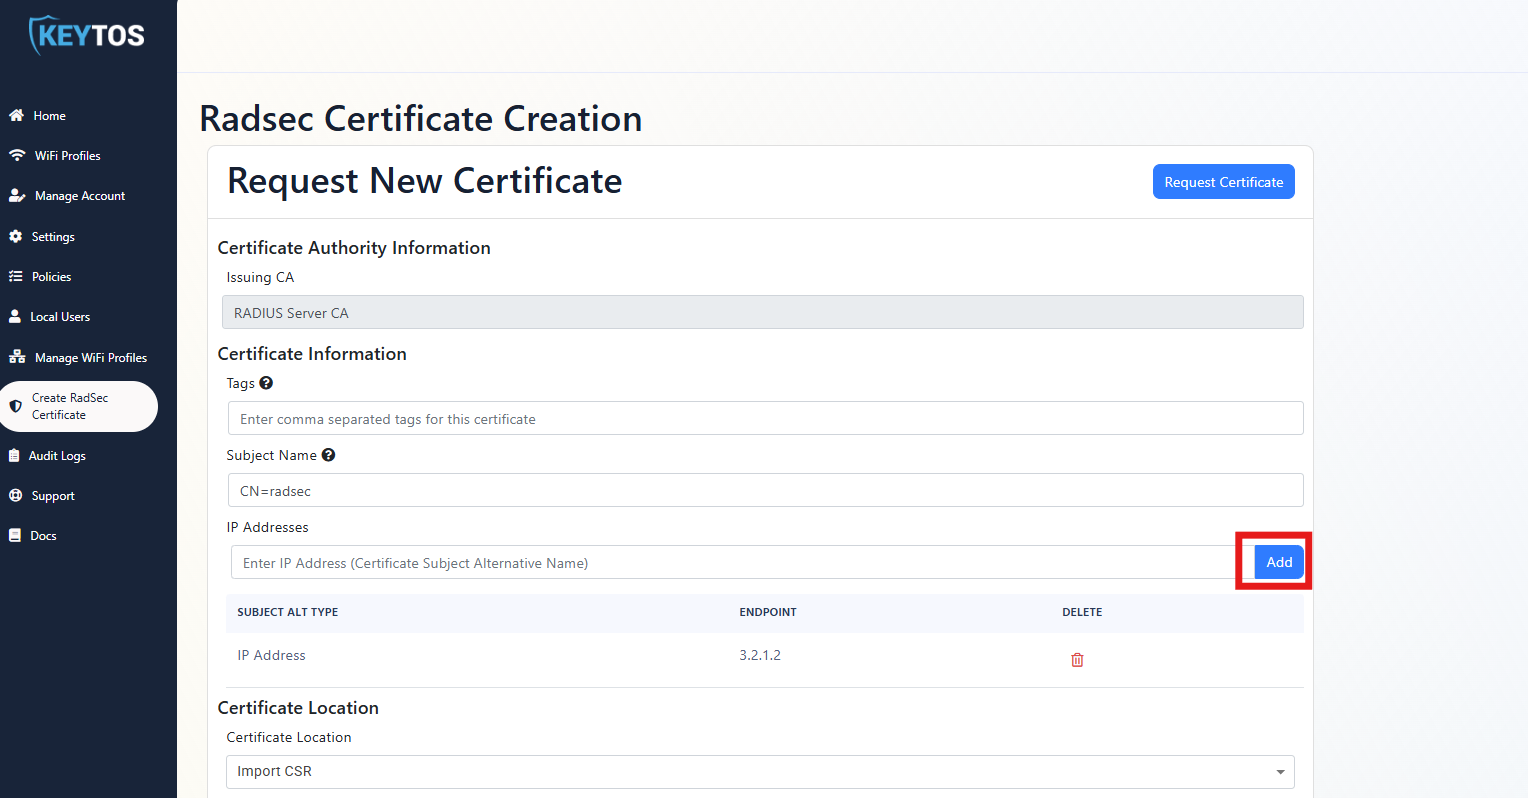
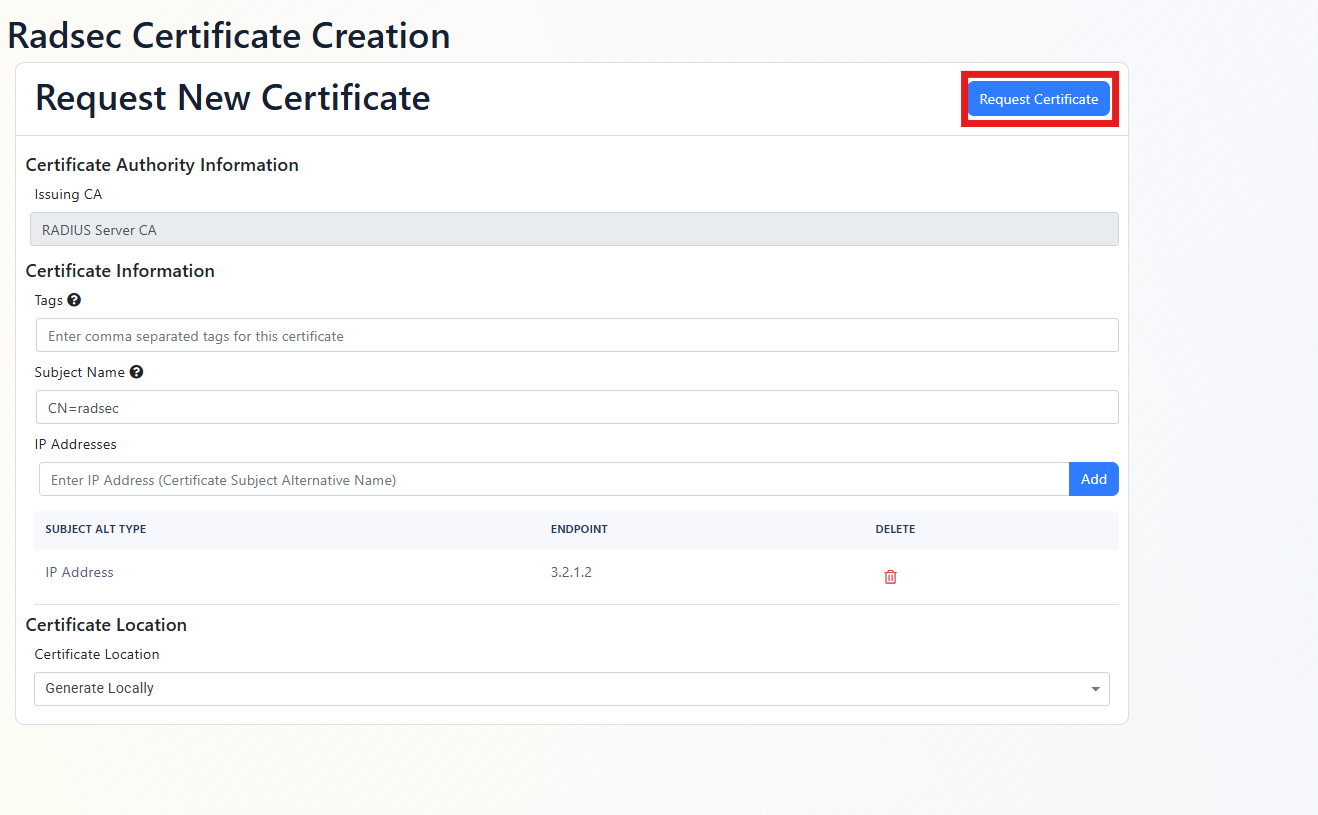
- In the certificate location dropdown, select the “generate locally” option.
- Click on “Request Certificate”.
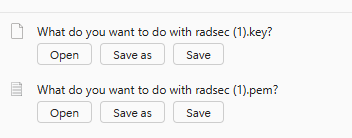
- Click on “Download Full Certificate”.
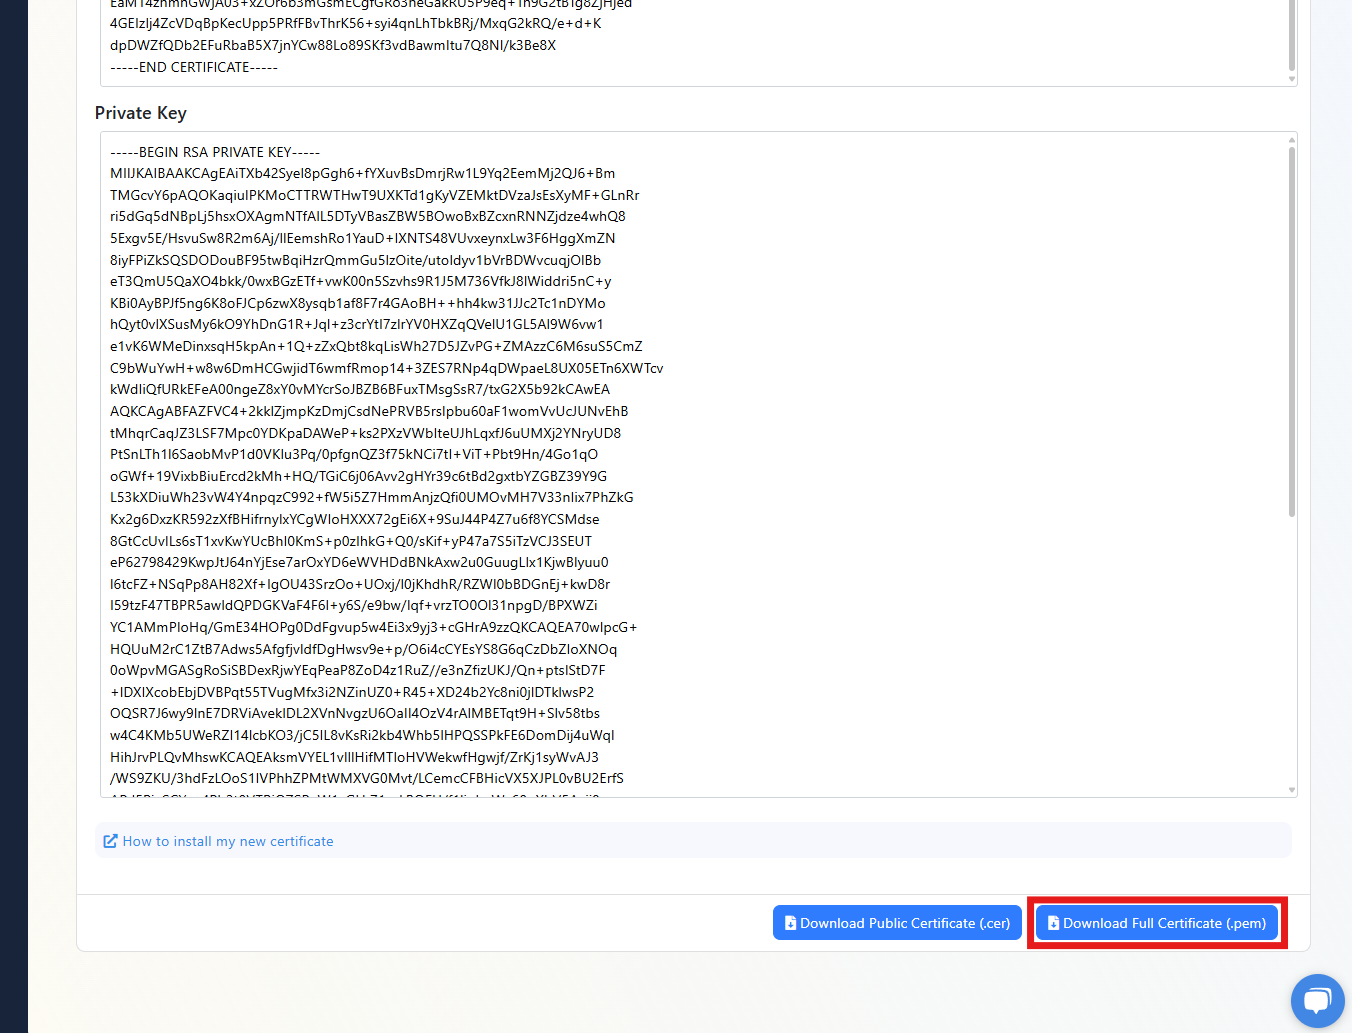
- This is going to download 2 files the “.key” file is the private key and the “.pem” file is the certificate.
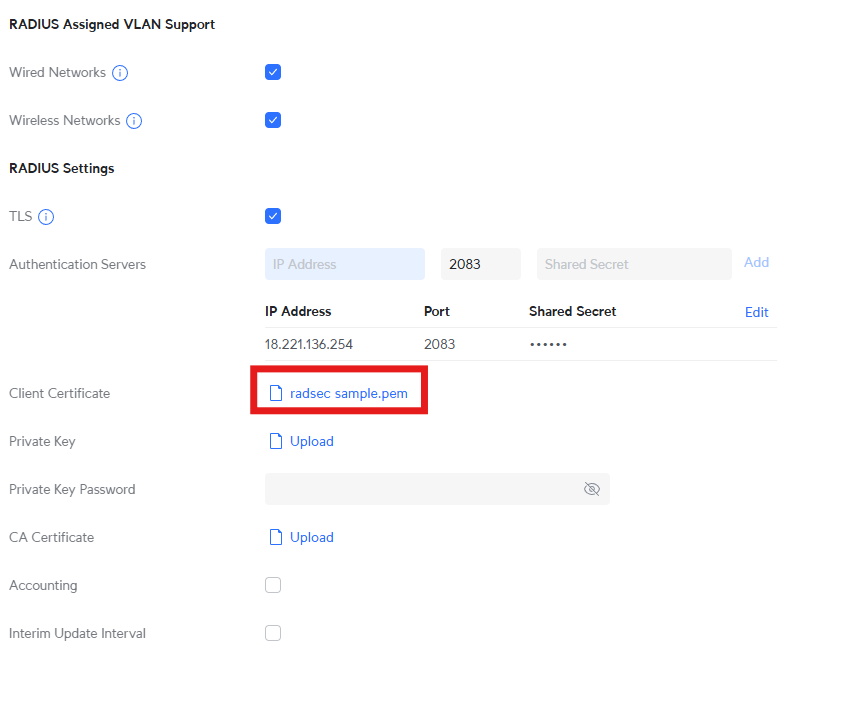
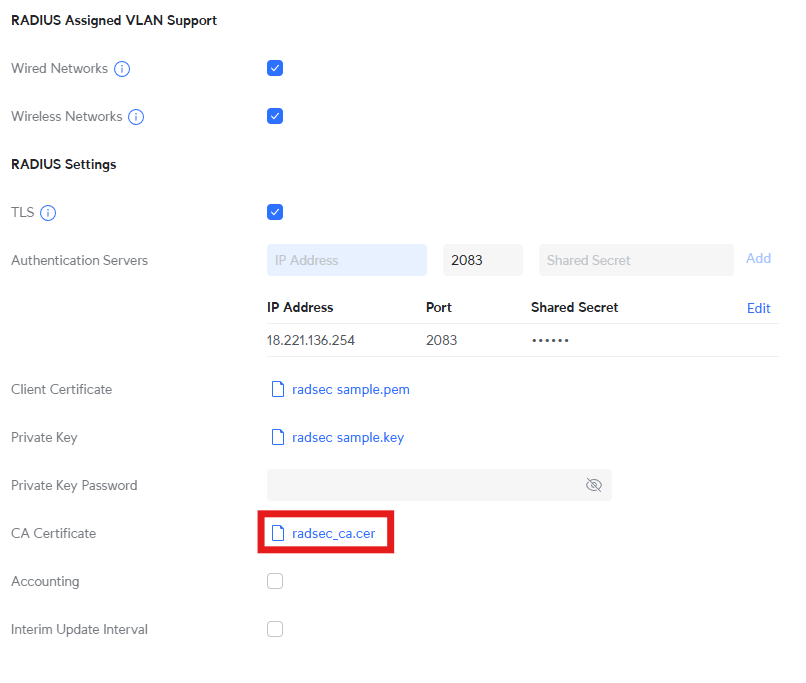
- Now we are going to upload the files to the Unifi Controller. Go back to the Unifi Controller and click on “Upload” on the “Client Certificate” field and select the certificate file (in my case radsec sample.pem).
- Click on “Upload” on the “Private Key” field and select the private key file (in my case radsec sample.key).
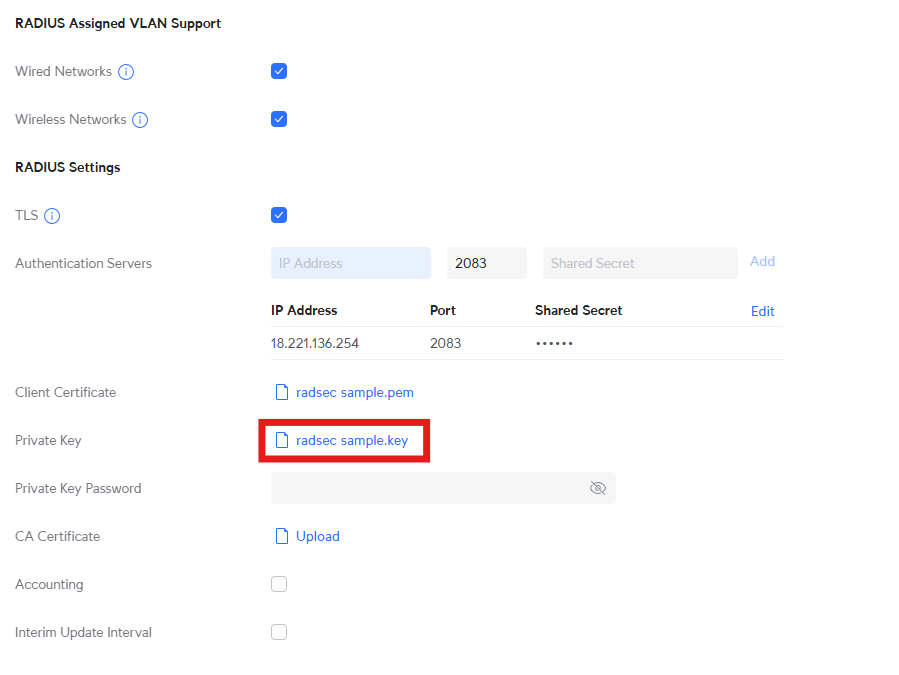
- If you have protected the private key with a password, you will have to enter it in the “Private Key Password” field.
- Then we have to upload the Radsec CA Certificate that we downloaded earlier from the EZRADIUS server details section. Click on “Upload” on the “CA Certificate” field and select the certificate file.
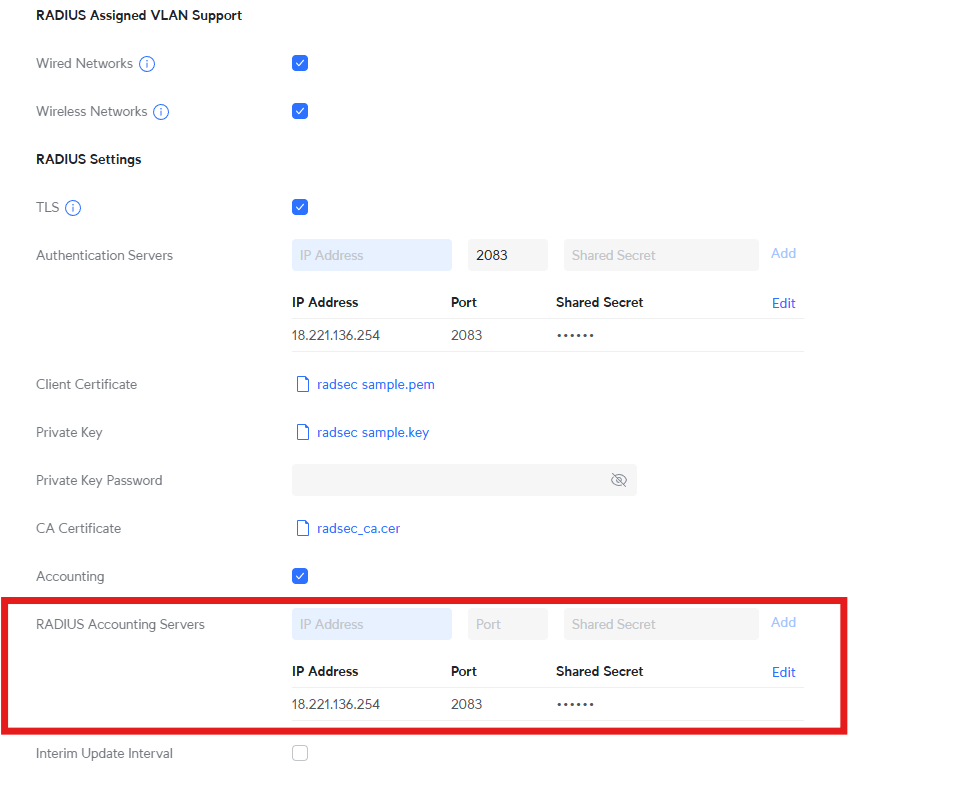
- If you want to enable Accounting (It gives you more information about each session such as data used, connection time, etc.), you can do so by clicking on the “Accounting” checkbox and enabling it.
- Add the same IPs and Shared Secrets for Accounting and port for accounting.
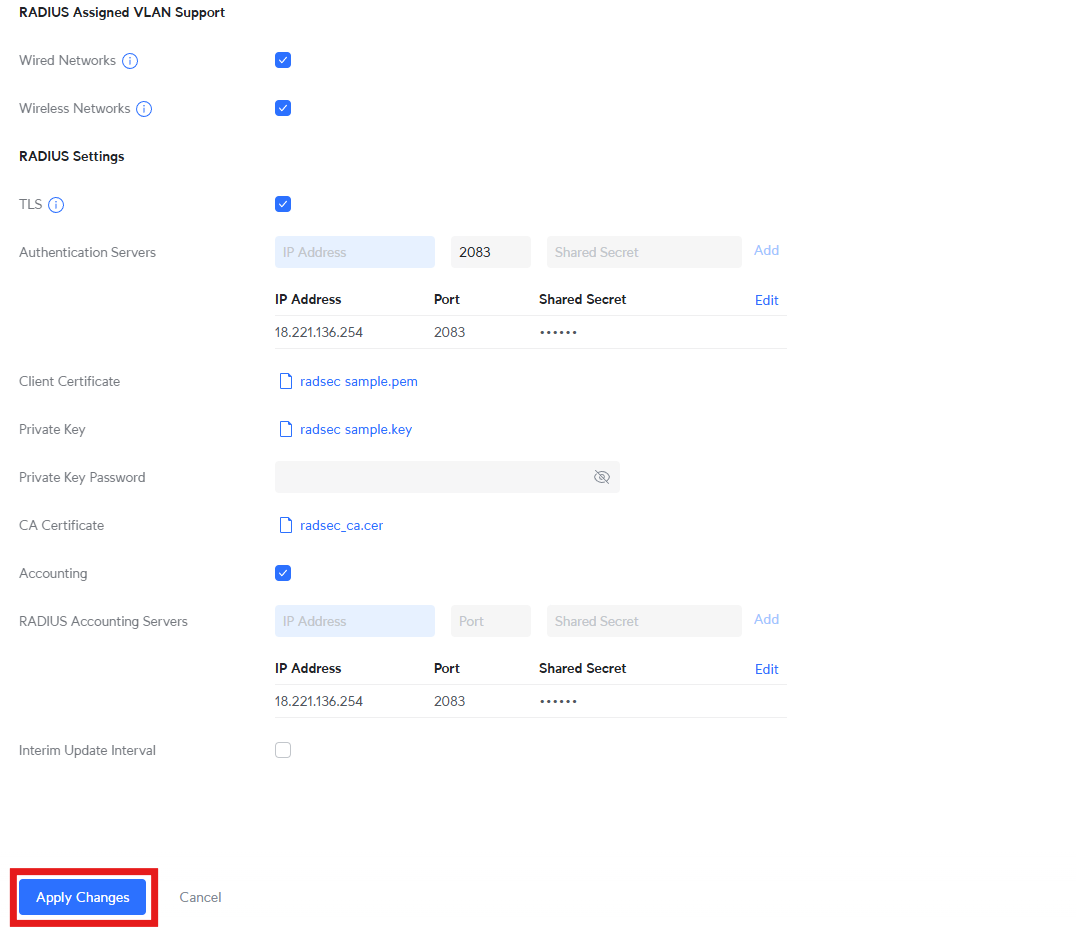
- Click on “Apply Changes” In the bottom left.
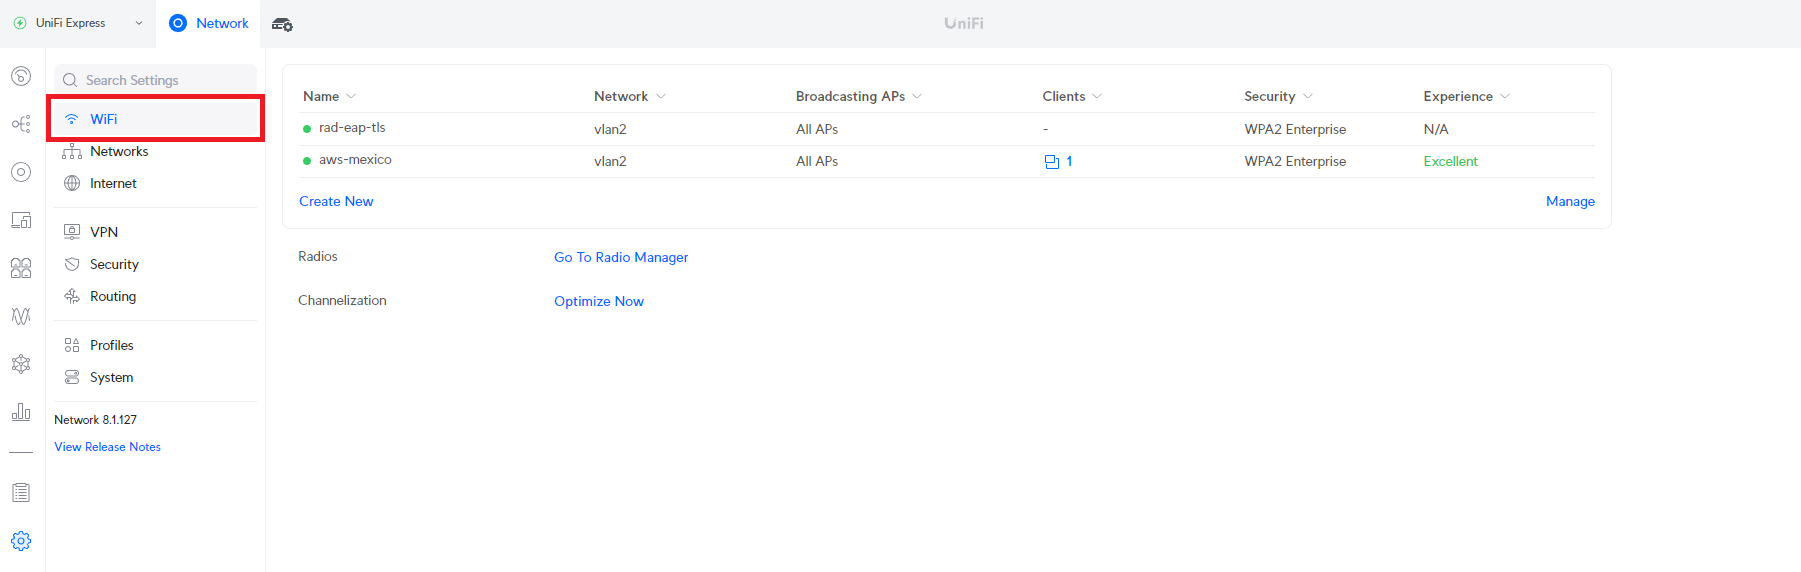
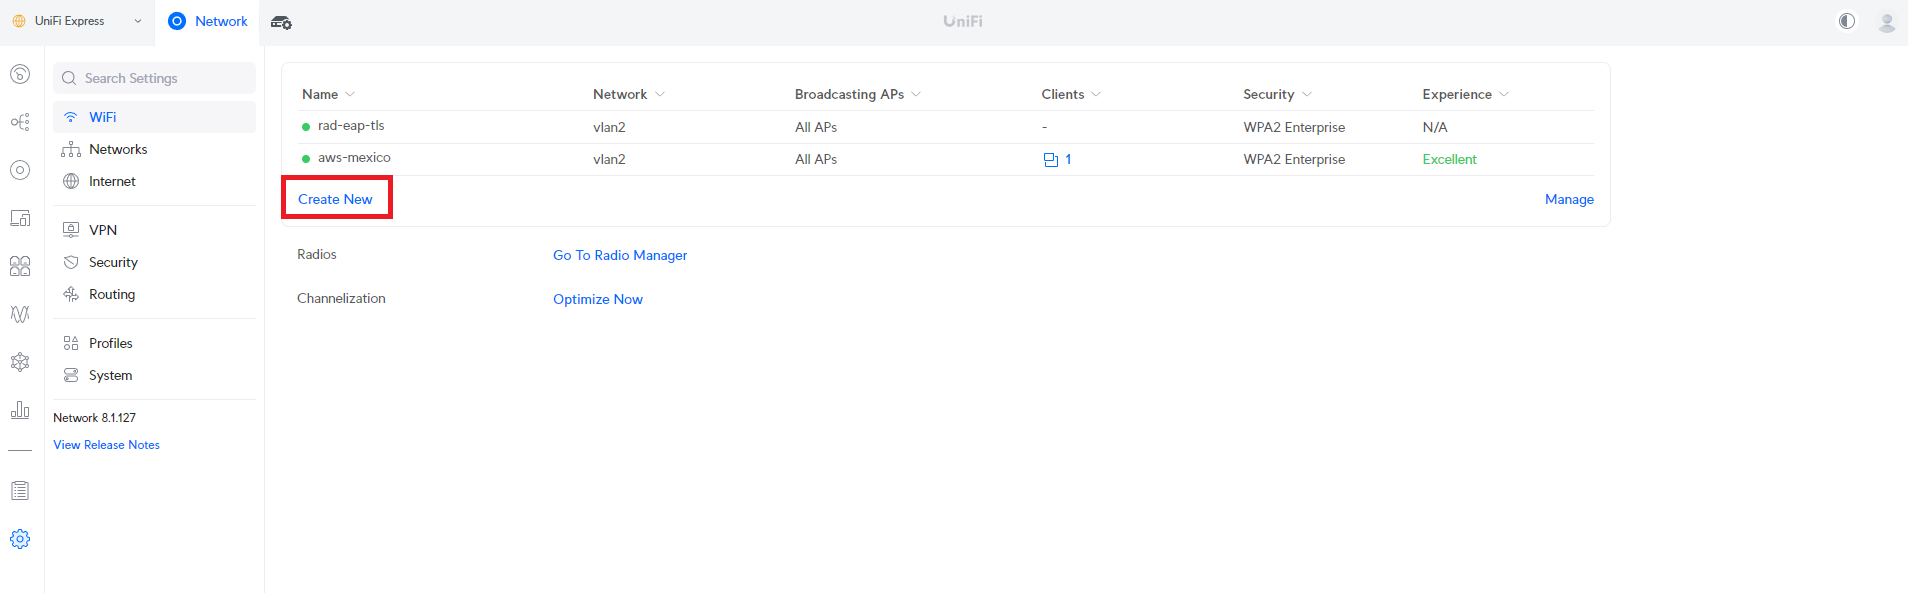
- Now that we have added the RADIUS server, we need to go to the “Wifi” menu on the left.
- Click the “Create New” button.
- Enter the “SSID” for your network.
- Leave the password field empty.
- Select if you want a specific VLAN for this network.
- In “Advanced” Select “Manual”.
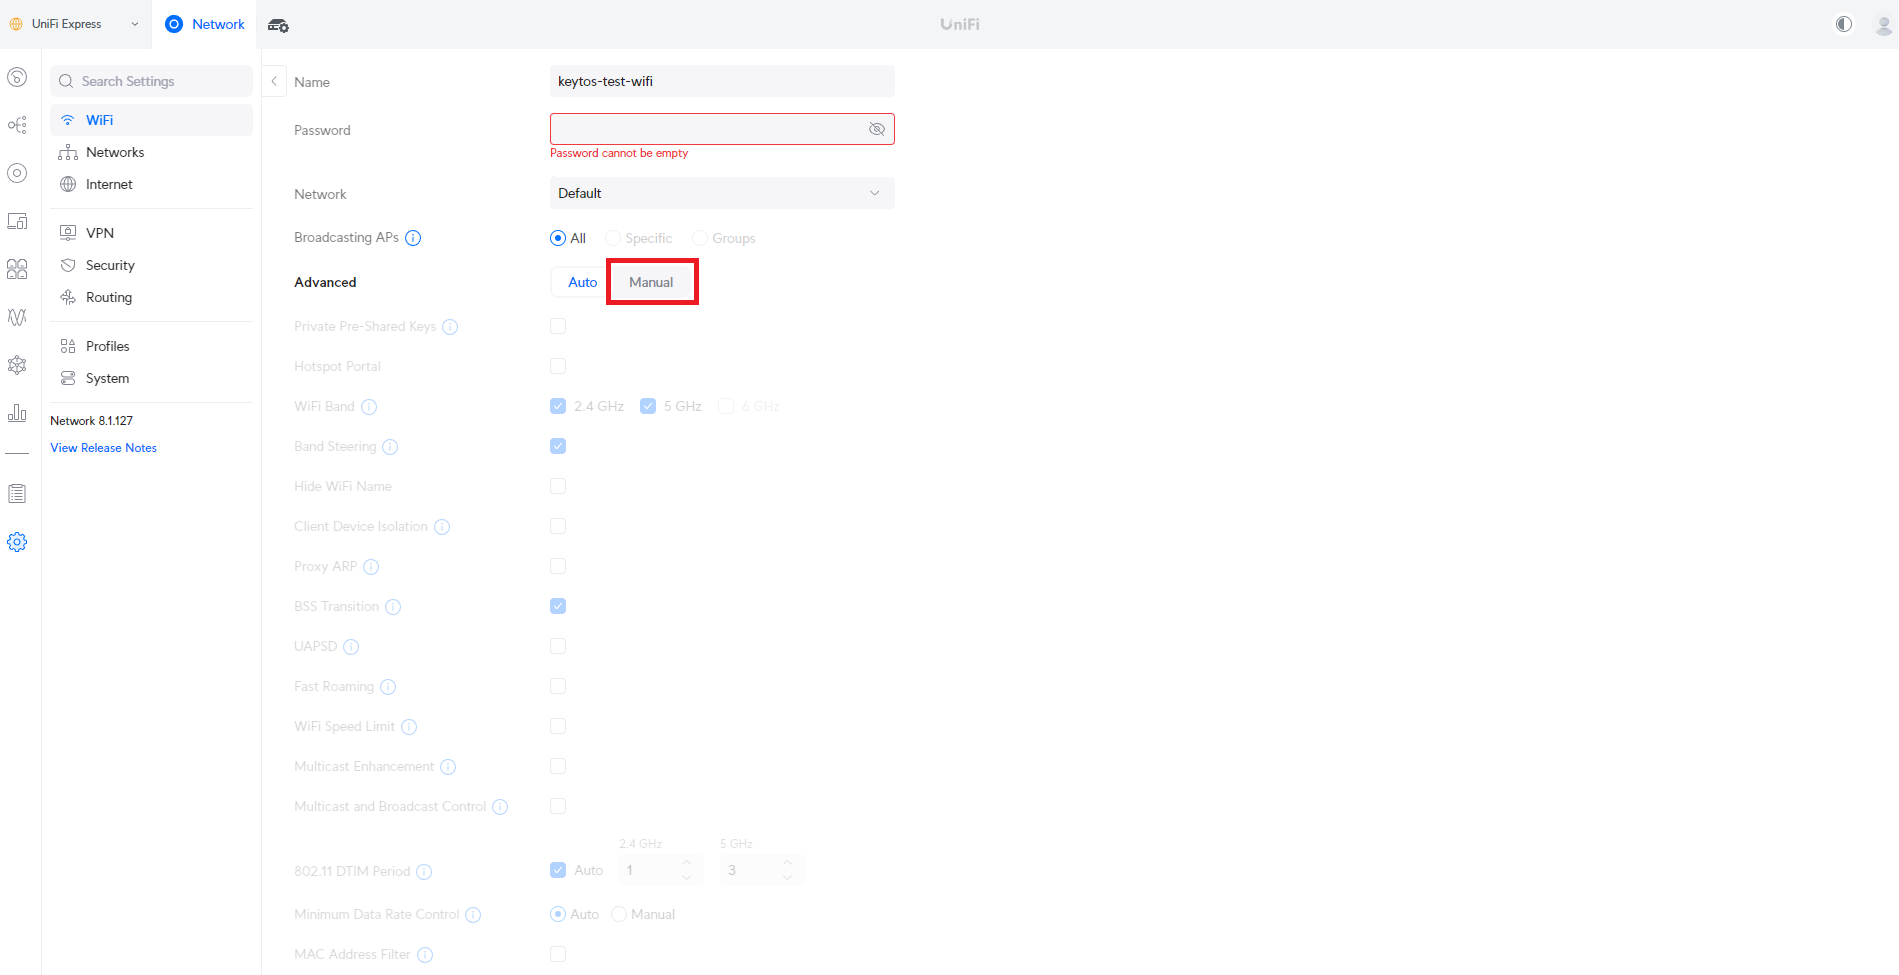
- Scroll down to “Security Protocol” and select “WPA3 Enterprise” (if you have legacy devices or passwords Select “WPA2 Enterprise”).
- In RADIUS Profile, select the profile you created earlier.

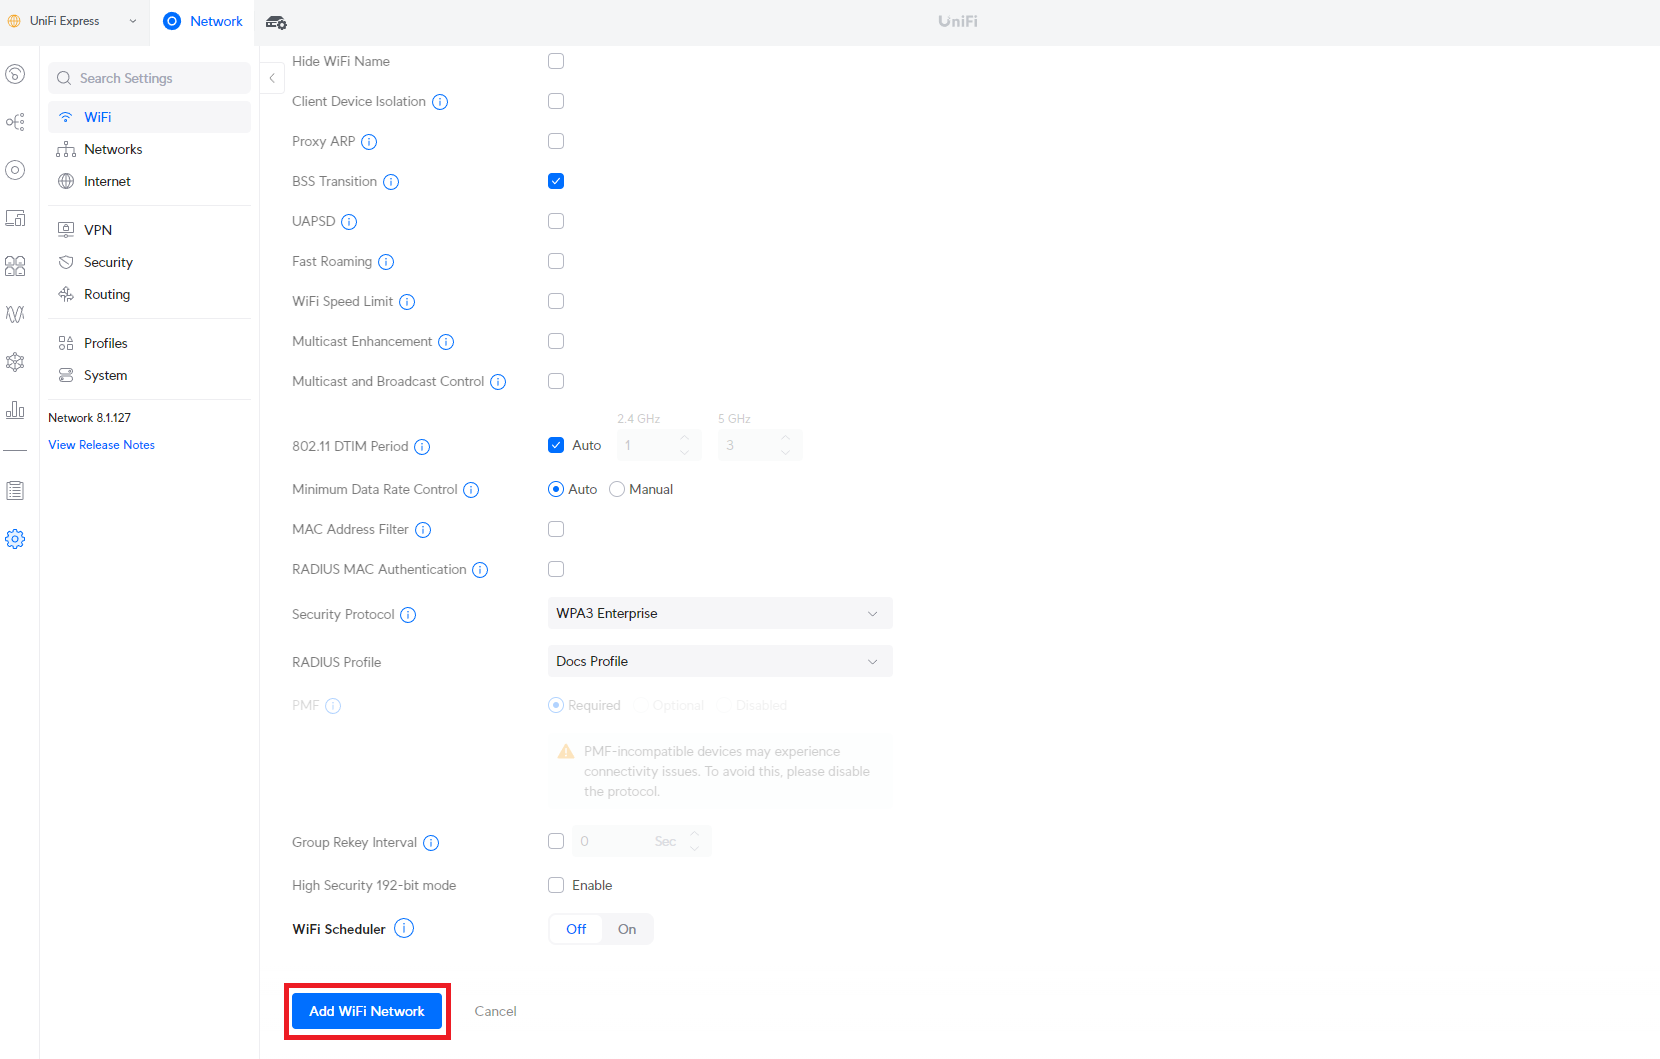
- Click on “Apply Changes”.
Connecting Your Devices to Your Ubiquiti Unifi Network with Entra ID Authentication
Now that we have setup your Ubiquiti Unifi network with RADIUS authentication, you can connect your devices to your network using Entra ID by either using EAP-TLS or EAP-TTLS. If you are using EAP-TLS, you can use an MDM to distribute the certificates to your devices (if you are using EZCA, you can also create a self-service user certificate to test). If you are using EAP-TTLS with password you might have to setup your device for EAP-TTLS PAP Authentication to be able to test your network using your Entra ID username and password.