How-To: Automate Azure Key Vault Certificate Rotation with EZCA
Automate Certificate Rotation in Azure Key Vault
EZCA can automate the process of rotating certificates stored in Azure Key Vault. This ensures that your applications always have access to valid certificates without manual intervention. In order to enable this feature, you need to grant EZCA access to your Azure Key Vault(s) via Azure RBAC and/or Key Vault Access Policies.
Required Access for Automated Certificate Rotation
Azure Key Vault automatic certificate rotation requires EZCA to have access to your Key Vaults via two sets of permissions:
- Permission to read authorized users
- EZCA requires an RBAC
Readerrole to verify the user requesting the certificate has access to the Key Vault.
- EZCA requires an RBAC
- Permission to manage certificates
- EZCA also requires either an Access Policy with
Get,Update, andCreate, or an RBACKey Vault Certificates Officerrole to manage the certificates in the Key Vault.
- EZCA also requires either an Access Policy with
This guide will walk you through the steps required to give EZCA access to your Azure Key Vaults to enable automated certificate rotation.
Prerequisites
Add RBAC Reader Role to Key Vault
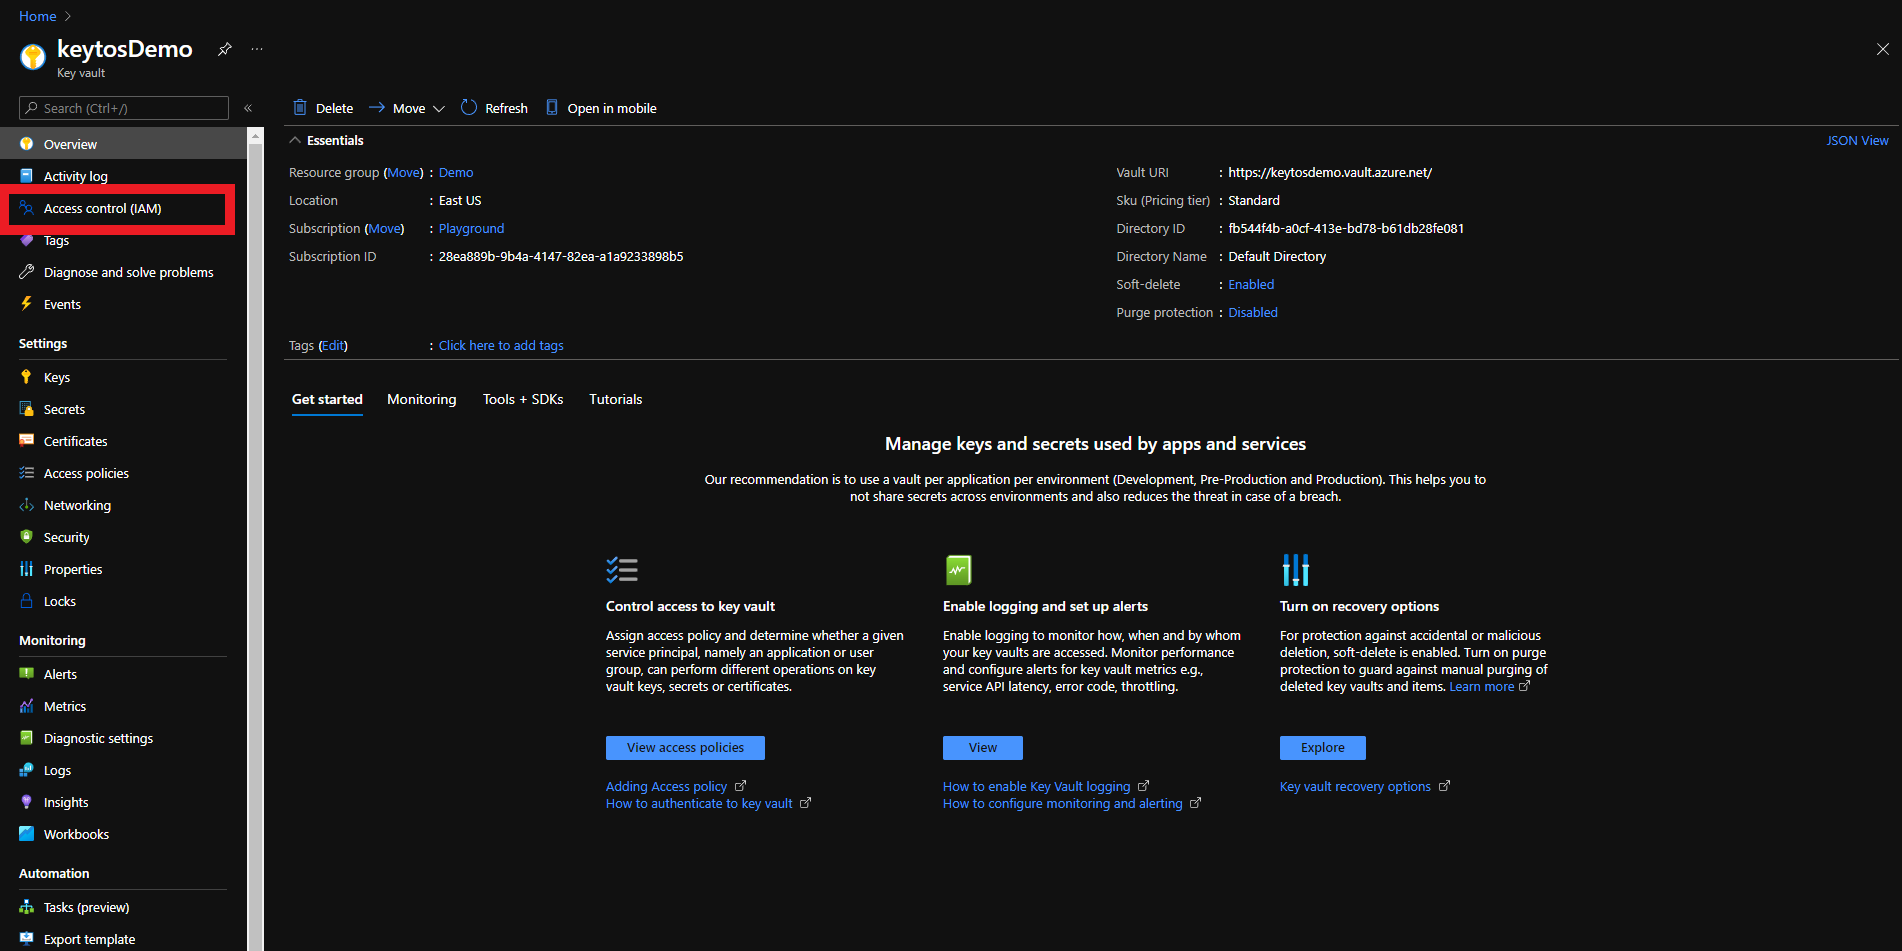
The first step is to give EZCA the Reader role on the Key Vault. This will allow EZCA to read the list of authorized users for the Key Vault to verify that the user requesting the certificate has access to the Key Vault.
- Login to https://portal.azure.com
- Navigate to the Key Vault you want EZCA to manage.
- Click on the Access control (IAM) menu option
- Click on + Add
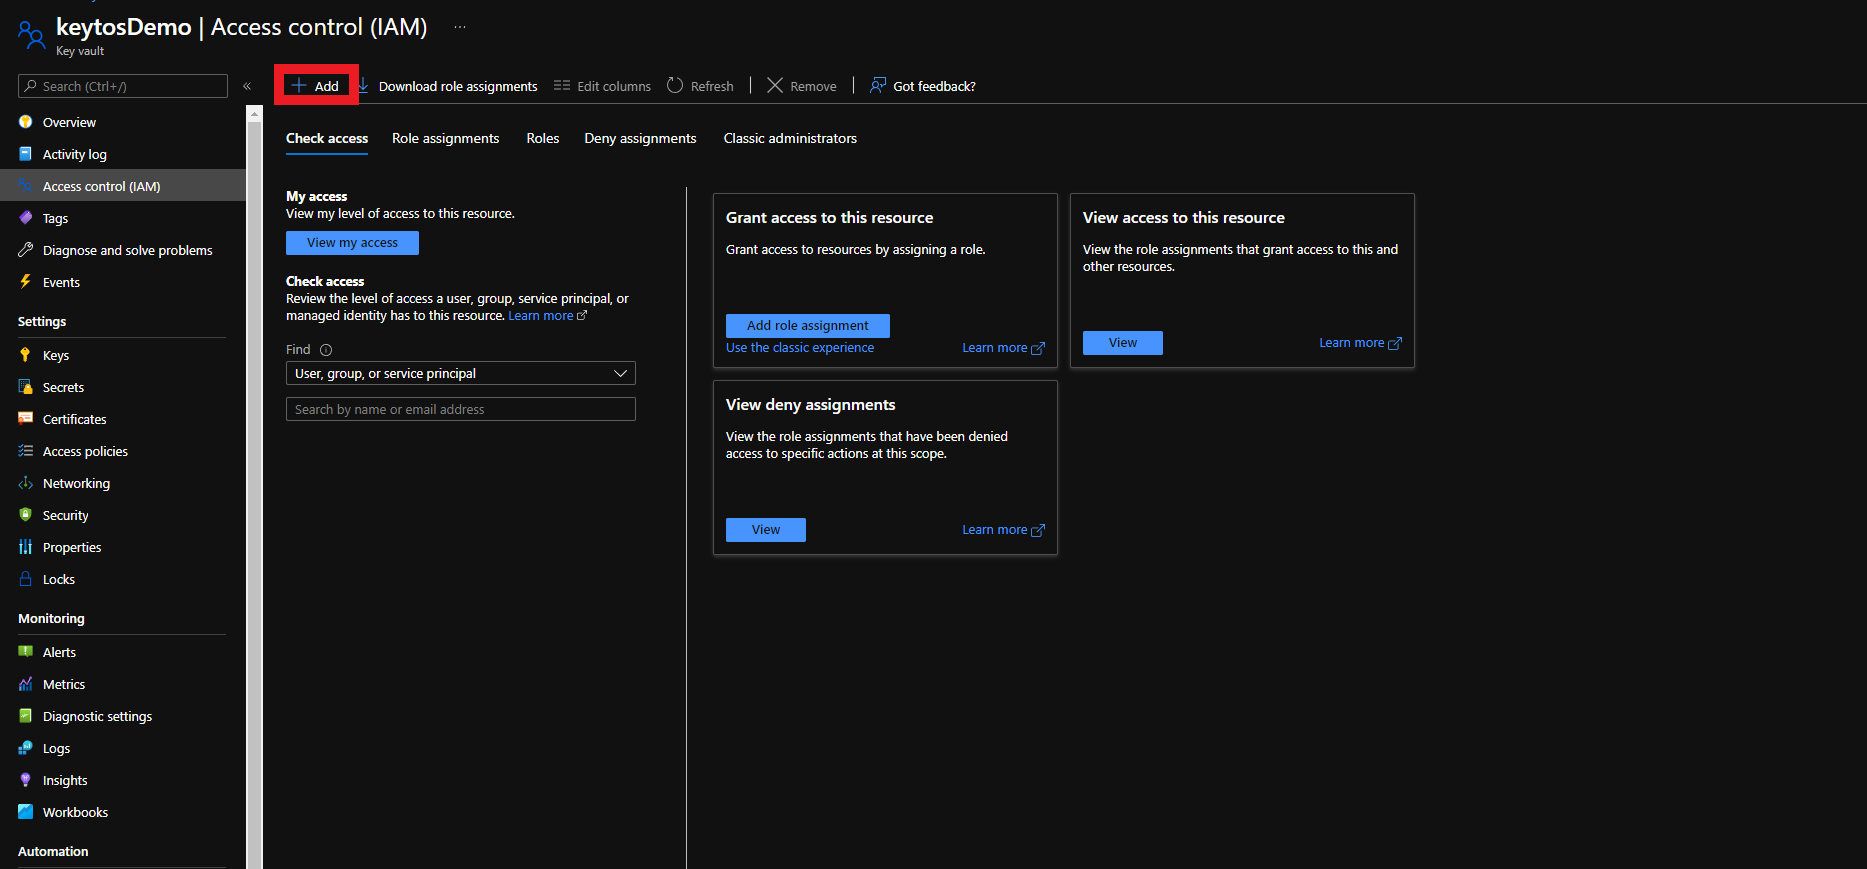
- Select the Add Role Assignment Option
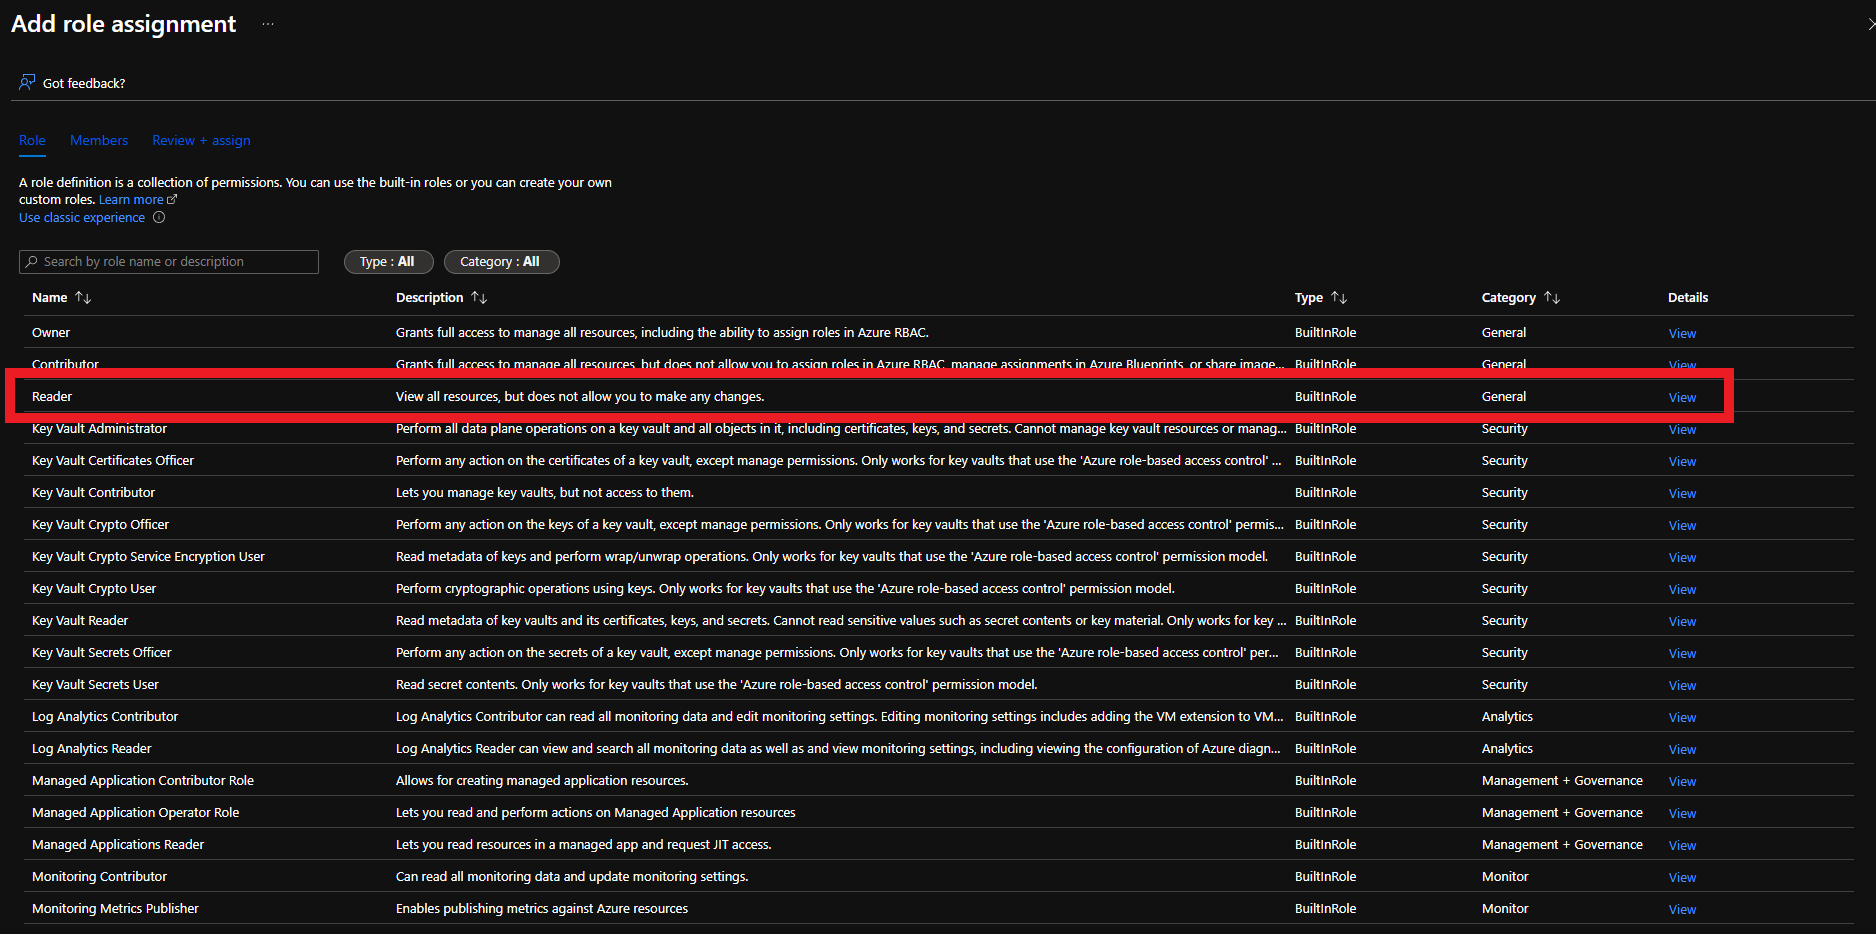
- Select the Reader role
- Click on Members
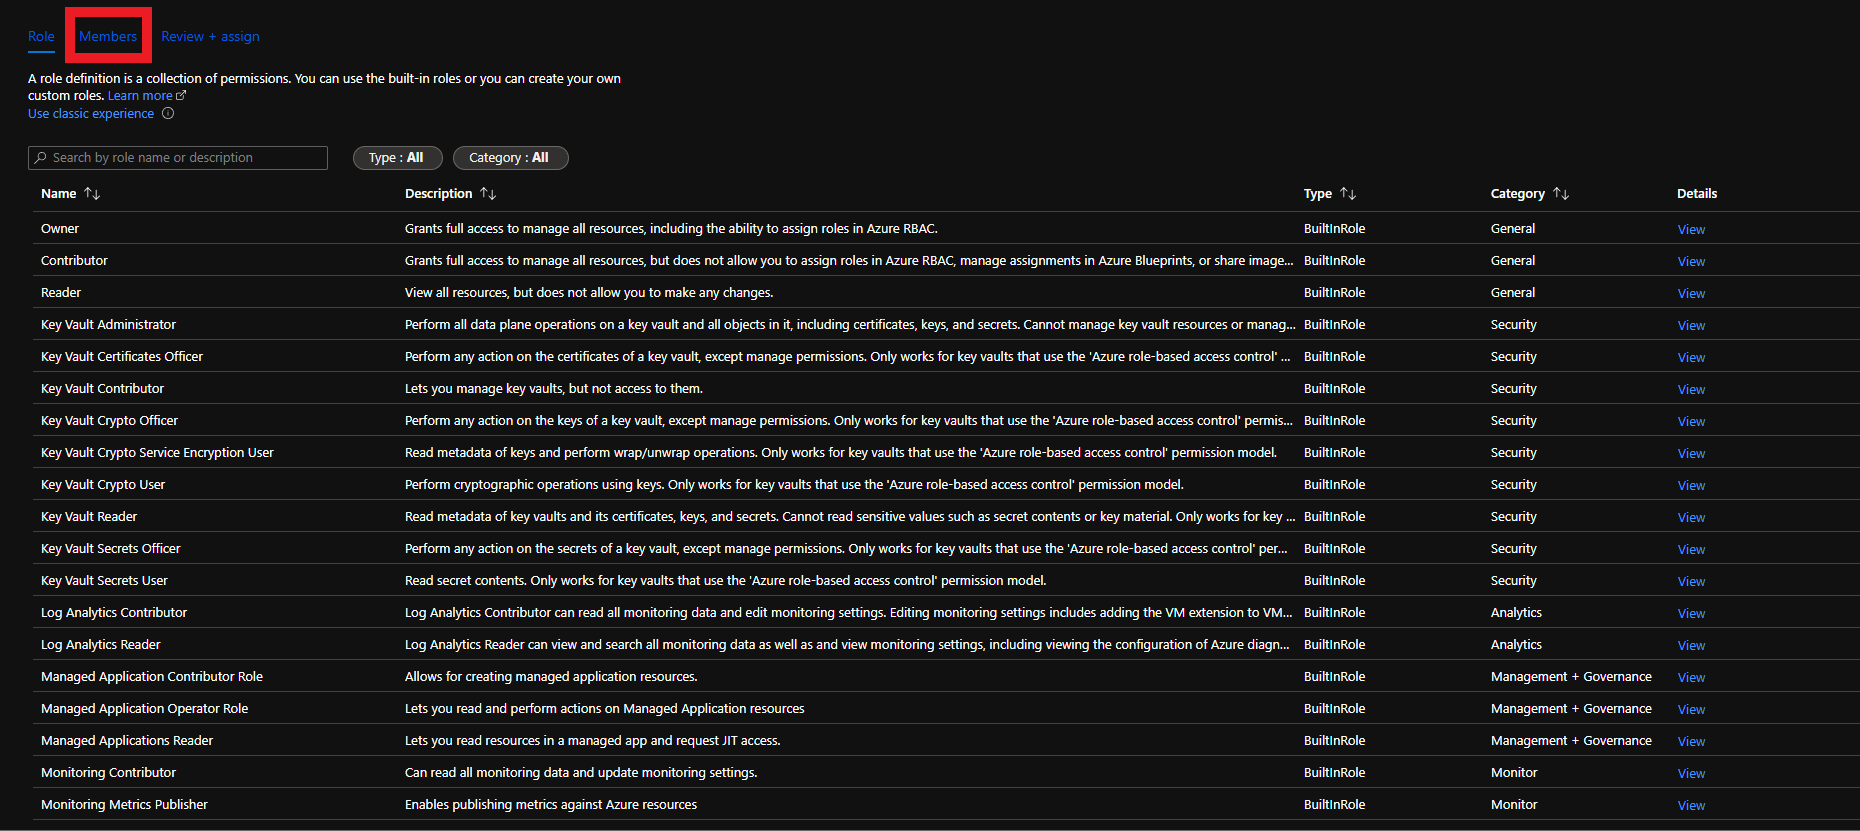
- Click on + Select members
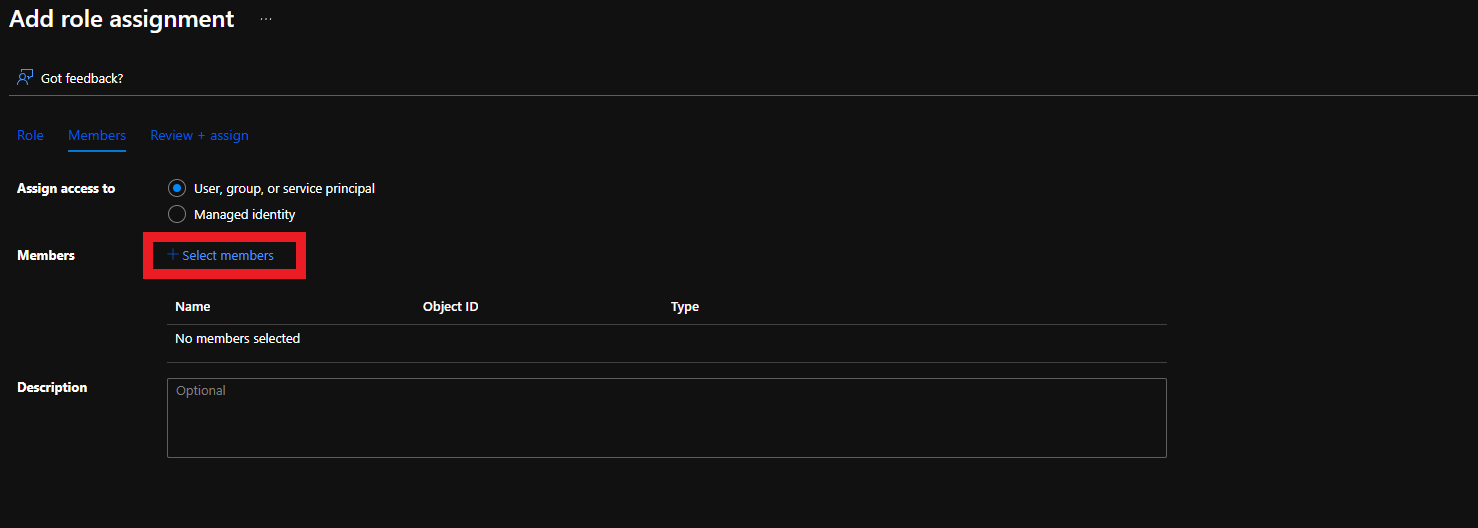
- Search for “keytos” and select the Keytos application
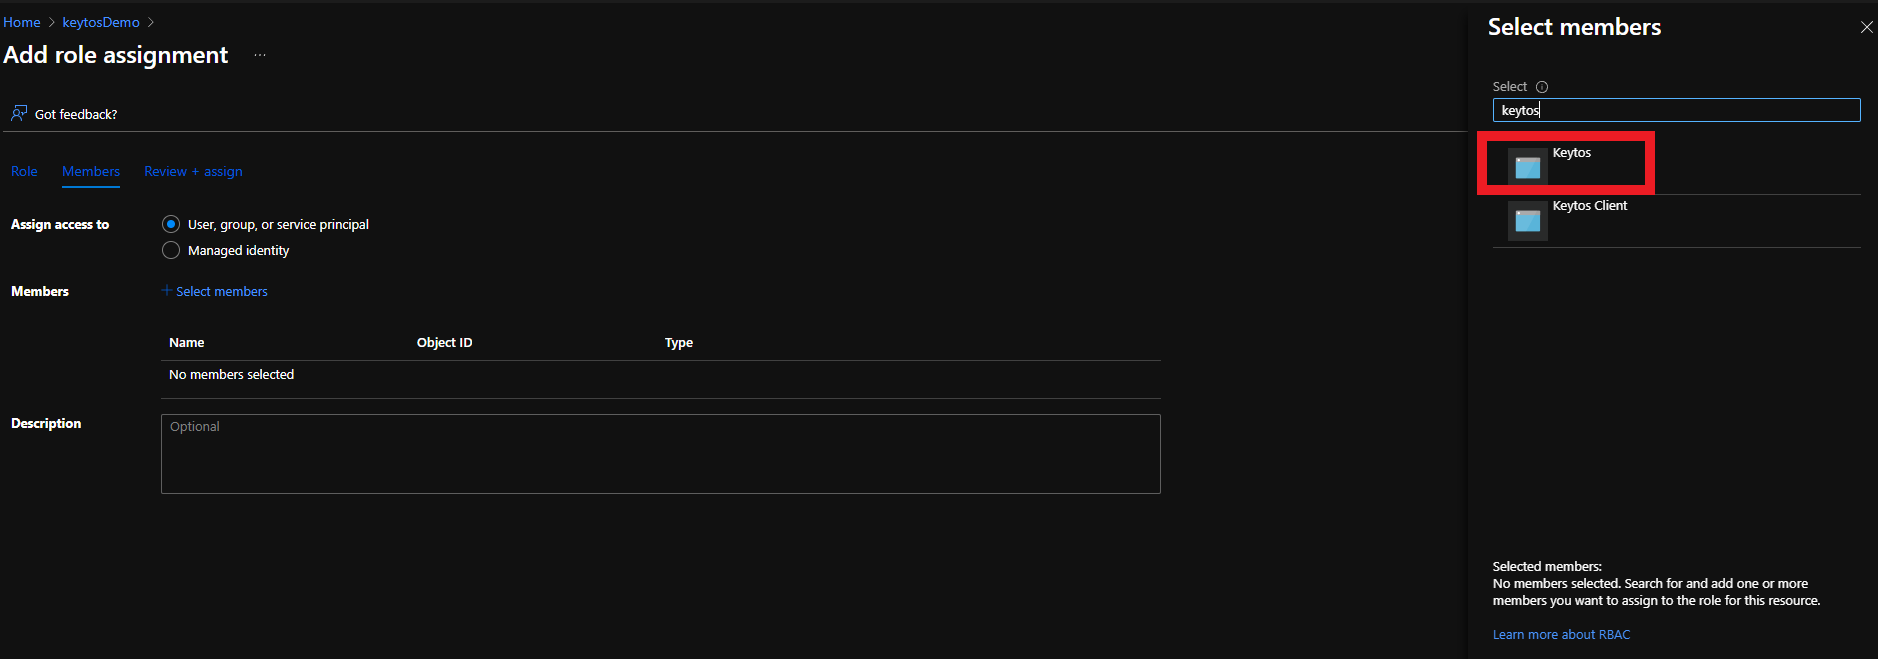
- Click the Select button
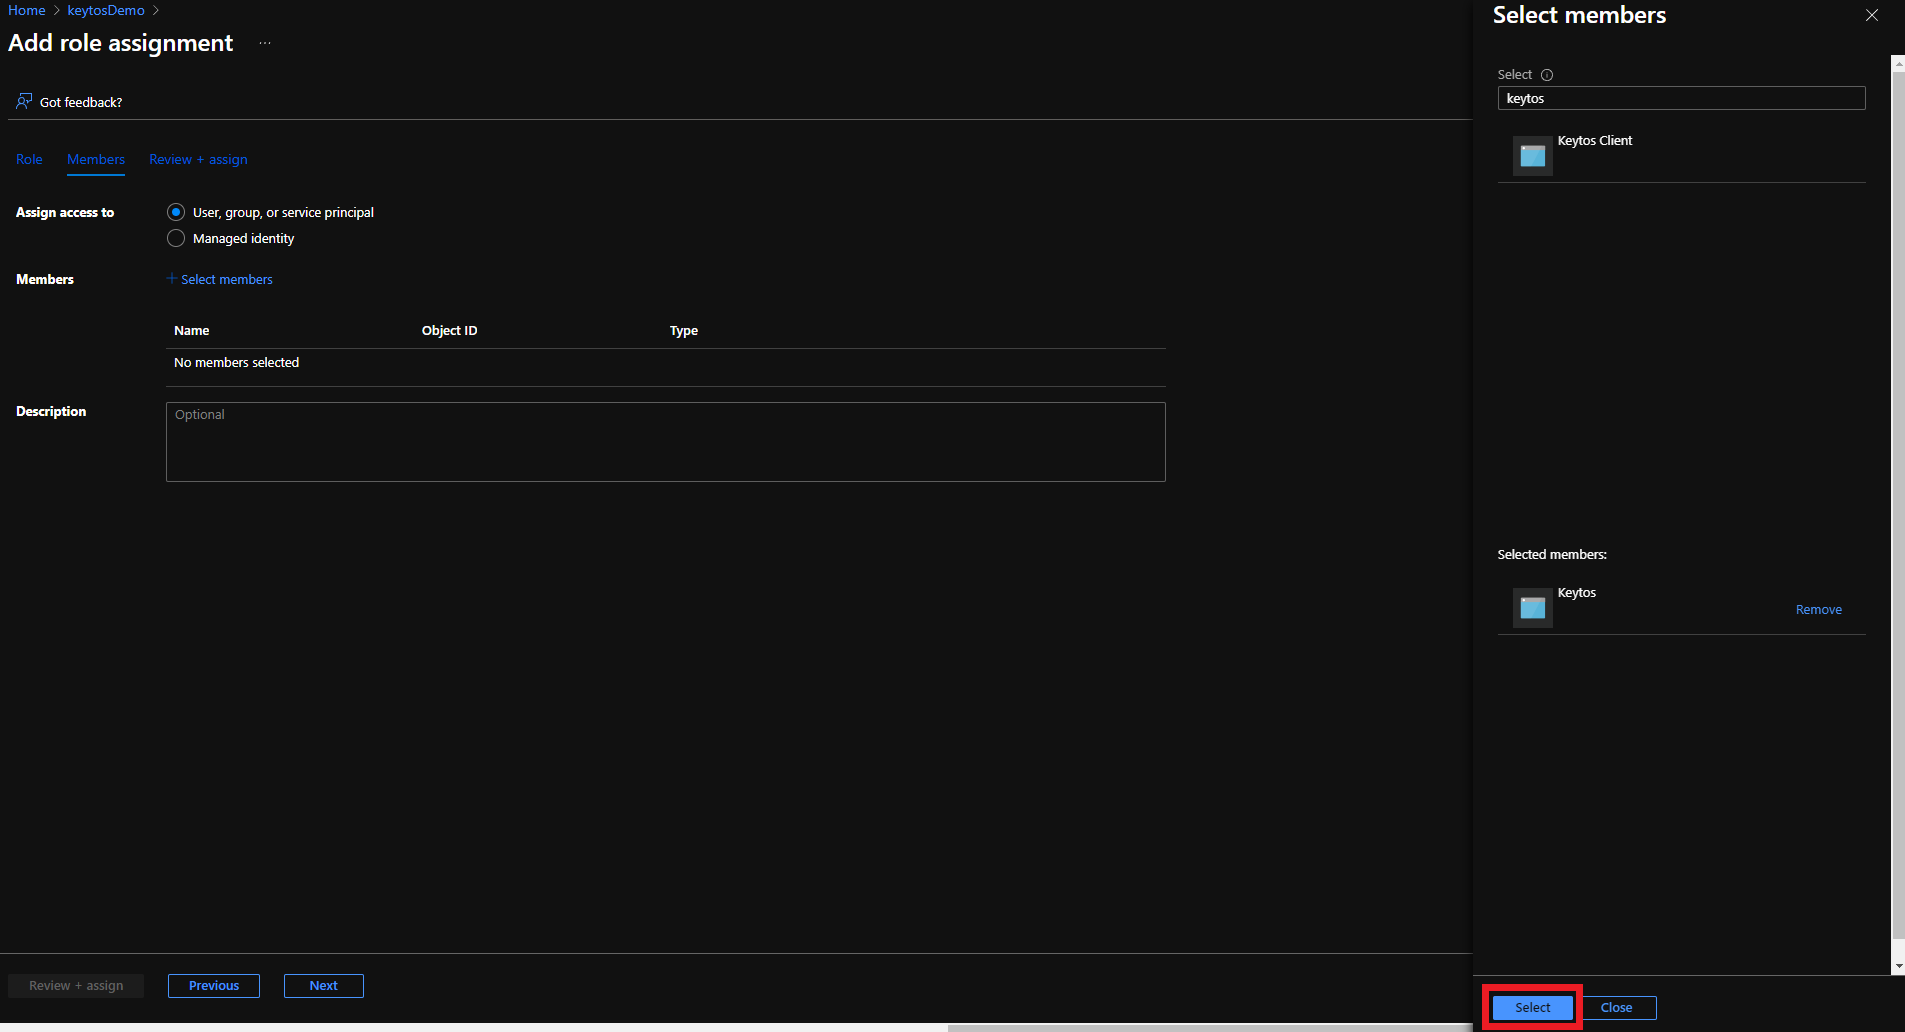
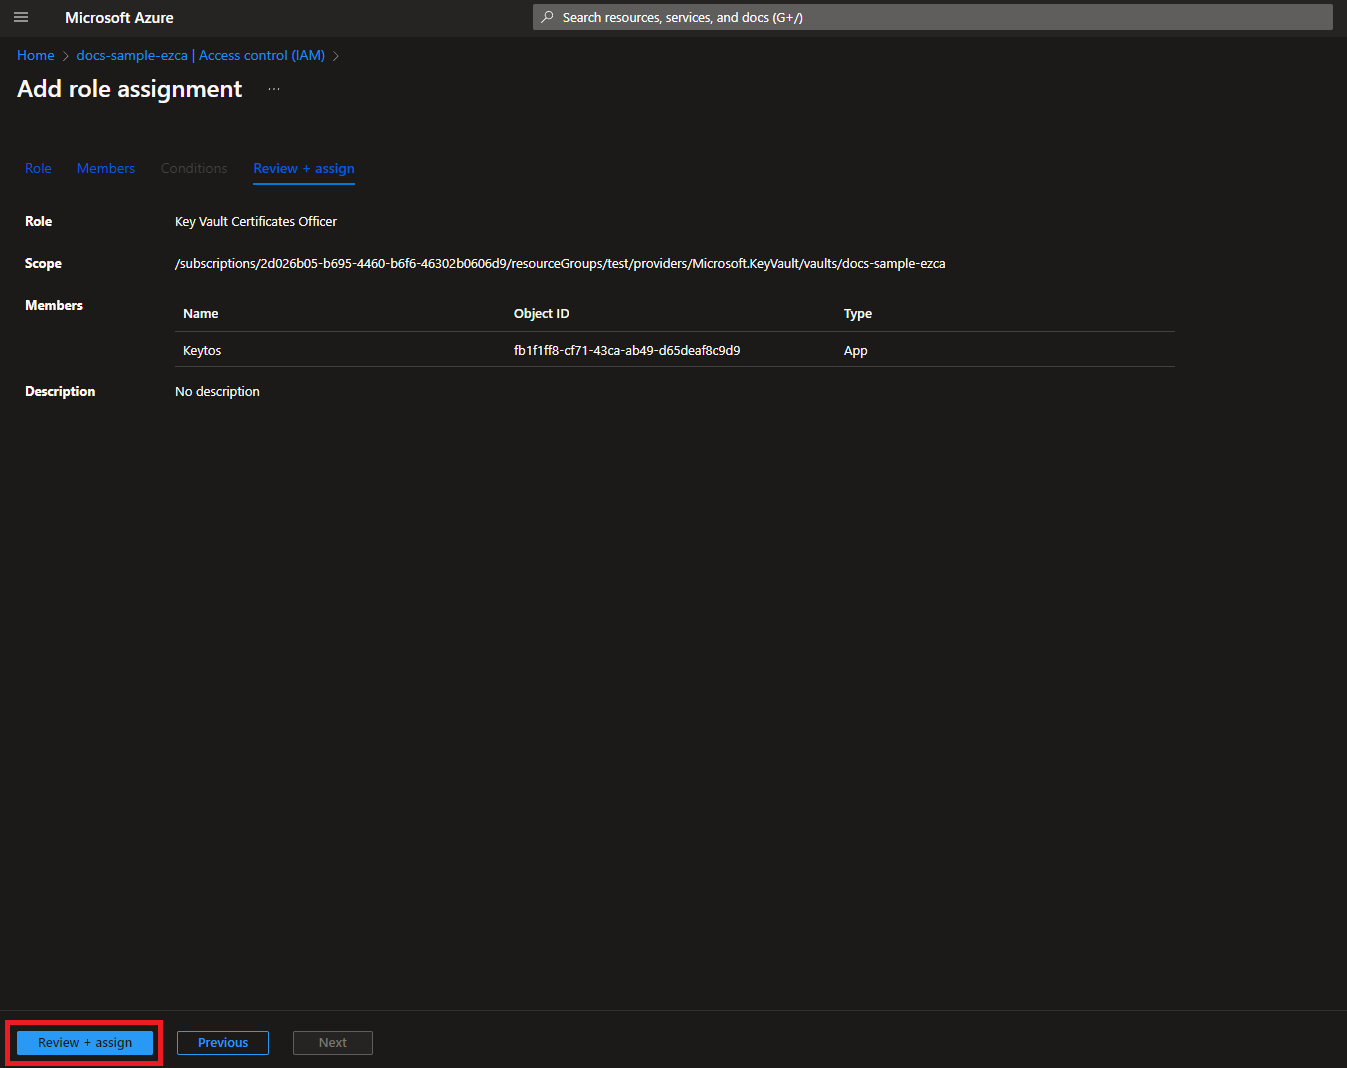
- Click the Review + assign button

- Click the Review + assign button

Add Certificate Management Access to Key Vault
There are two ways to give EZCA access to manage certificates in your Key Vault. You can either use Key Vault Access Policies or Azure RBAC, depending on your Key Vault configuration. If you have previously disabled Access Policies on your Key Vault, you must use Azure RBAC to grant access.
Make sure to only use the option below which matches your existing Key Vault configuration. If you’re unsure, refer to the Access configuration section in your Azure Key Vault:

Option 1: Azure RBAC
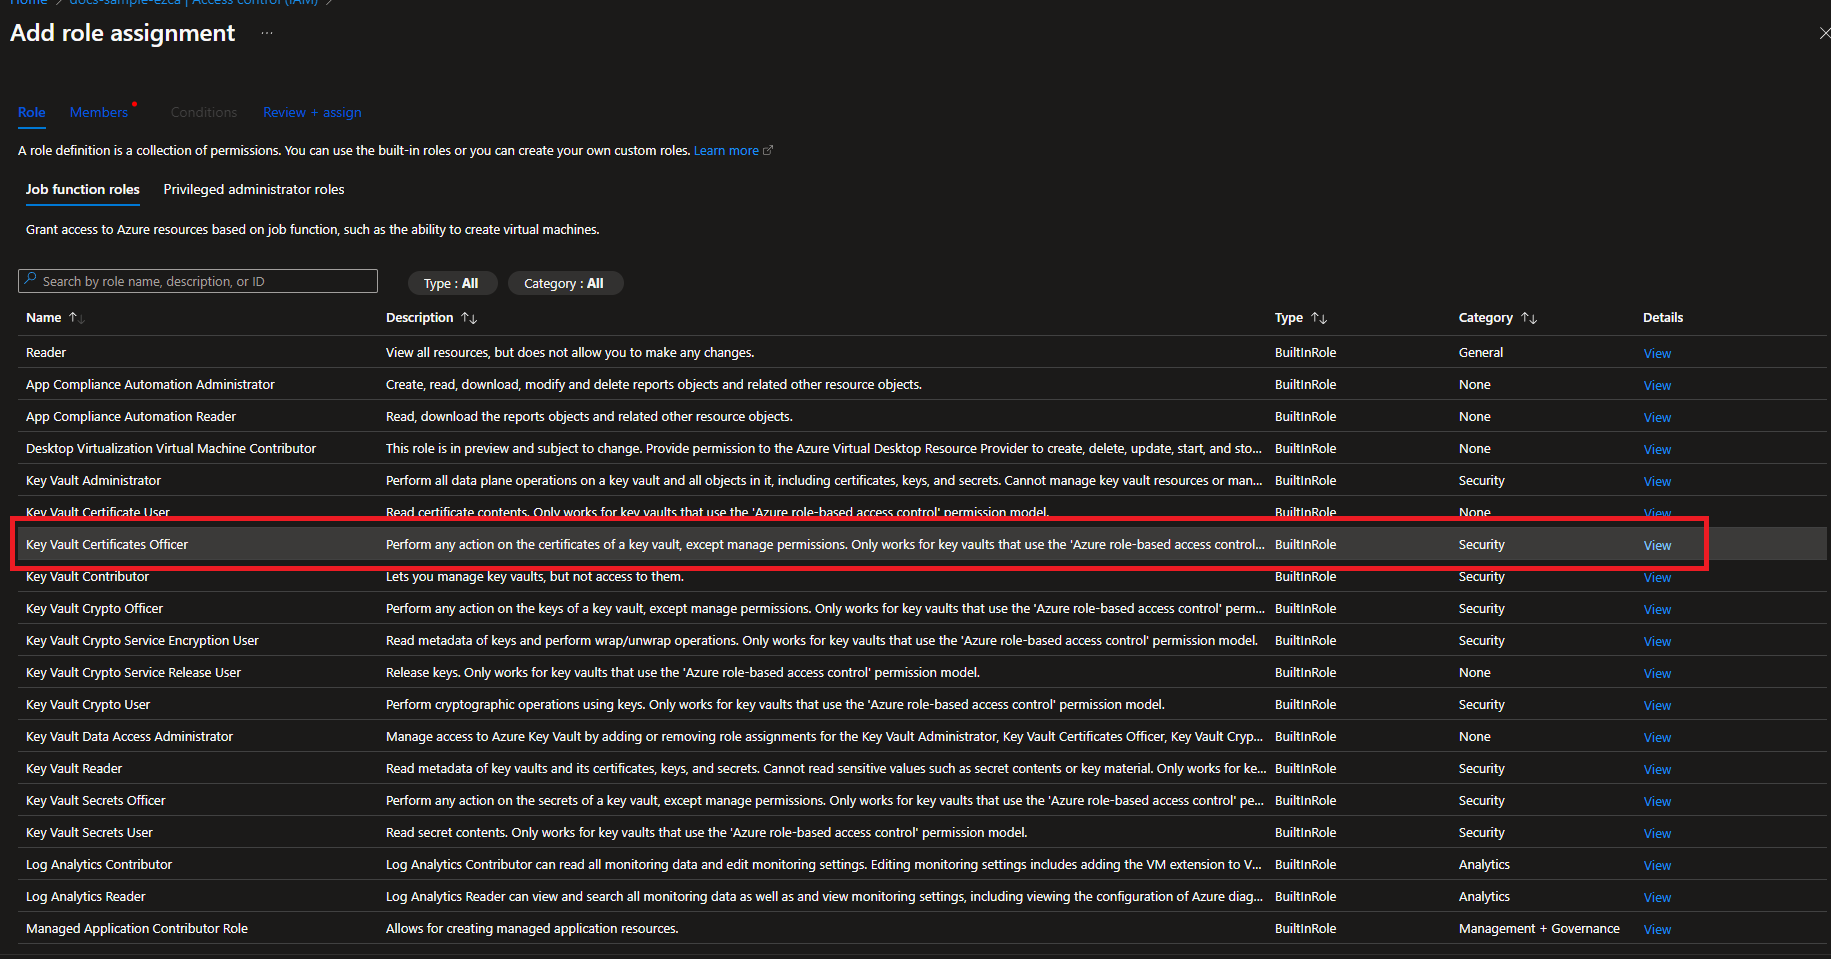
If your Key Vault has RBAC enabled, you will need to add the “Key Vault Certificates Officer” Key Vault RBAC permission to allow EZCA to manage the certificates in the Key Vault.
- Login to https://portal.azure.com
- Navigate to the Key Vault you want EZCA to manage.
- Click on the Access control (IAM) menu option
- Click on + Add
- Select the Key Vault Certificates Officer Role
- Click on Members
- Click on Select Members
- Search for “keytos” and select the Keytos application
- Click the Select button
- Click the Review + assign button

- Click the Review + assign button
Option 2: Key Vault Access Policies
To get the most granular control over the permissions that EZCA has to your Key Vault, you can add an access policy to the Key Vault. This will allow you to specify the exact permissions that EZCA has to the Key Vault.
- Login to https://portal.azure.com
- Navigate to the Key Vault you want EZCA to manage.
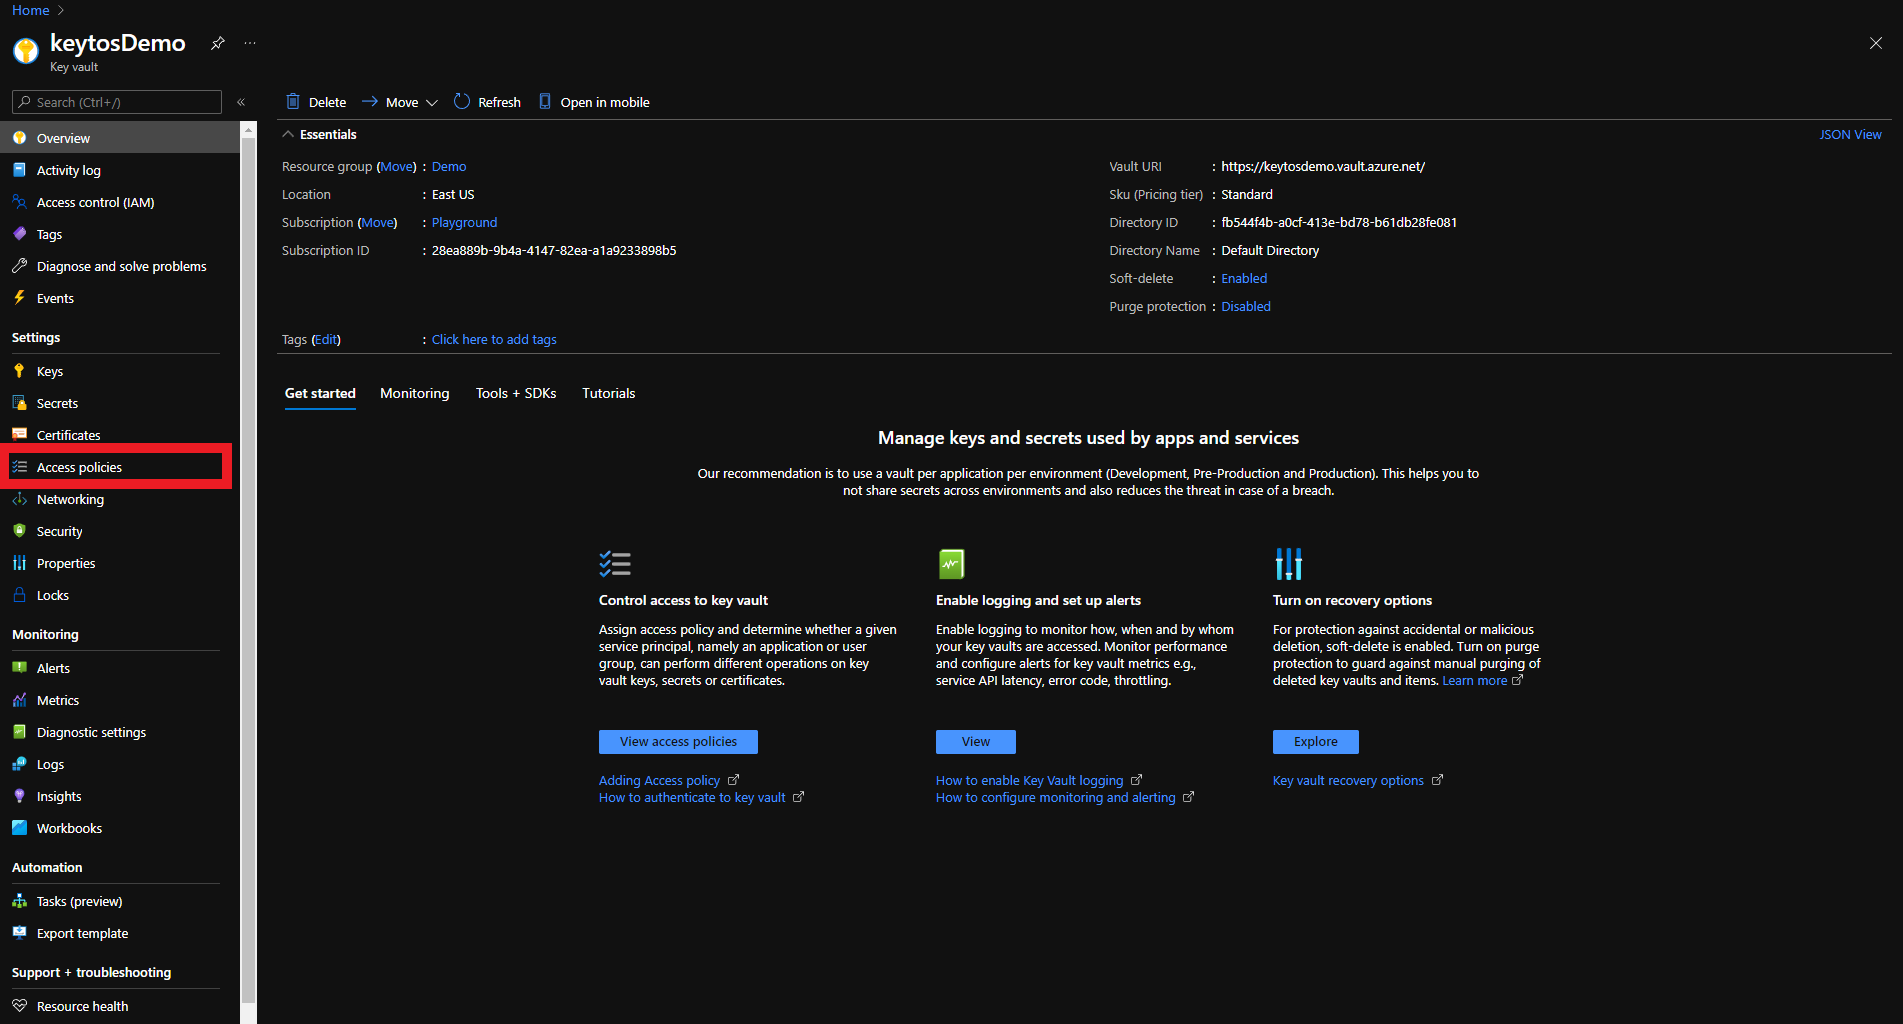
- Click on the Access policies menu option
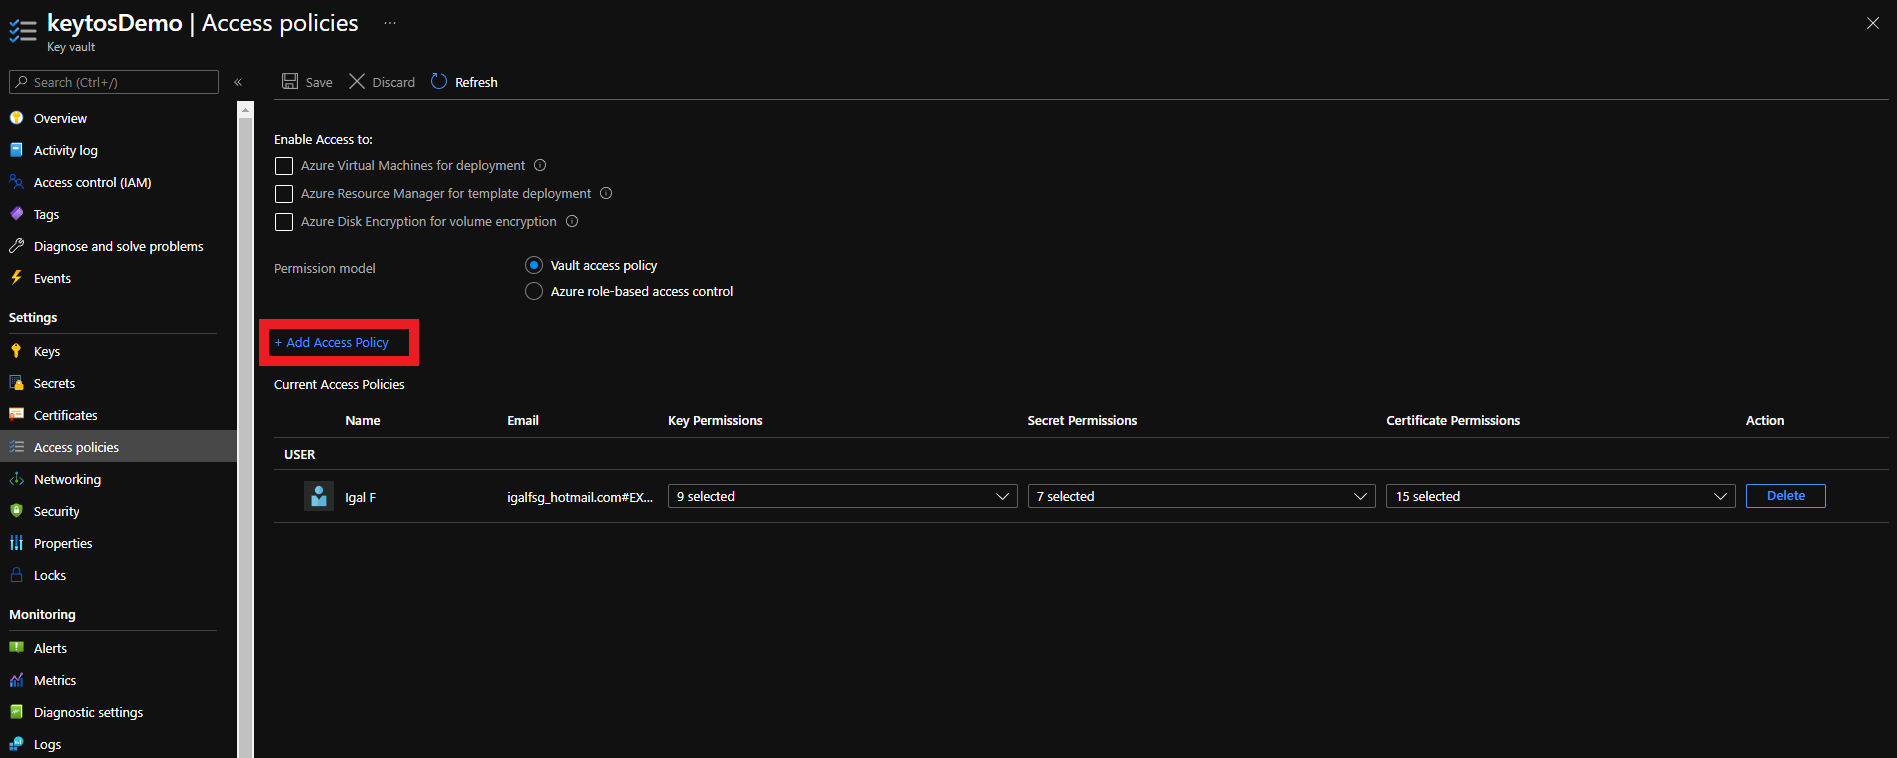
- Click on + Add Access Policy
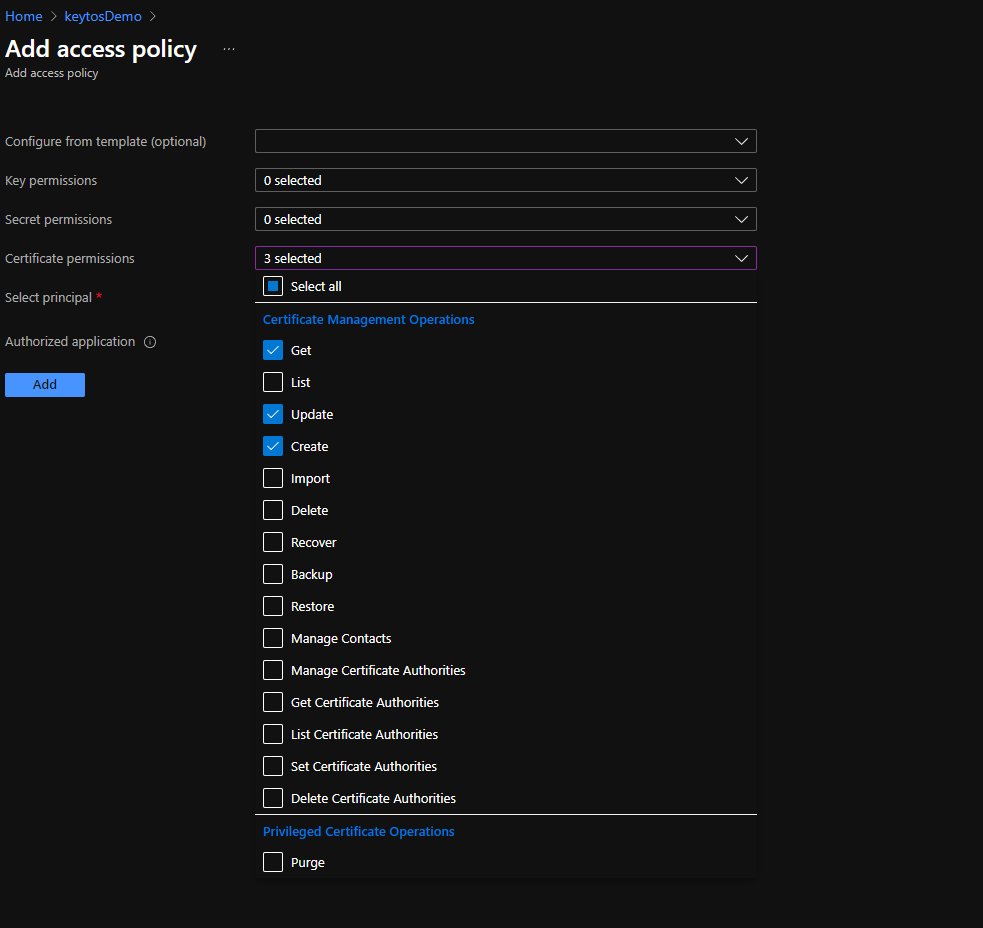
- Under Certificate permissions select: Get, Update, and Create.
- Click on the None selected link to the right of Select Principal
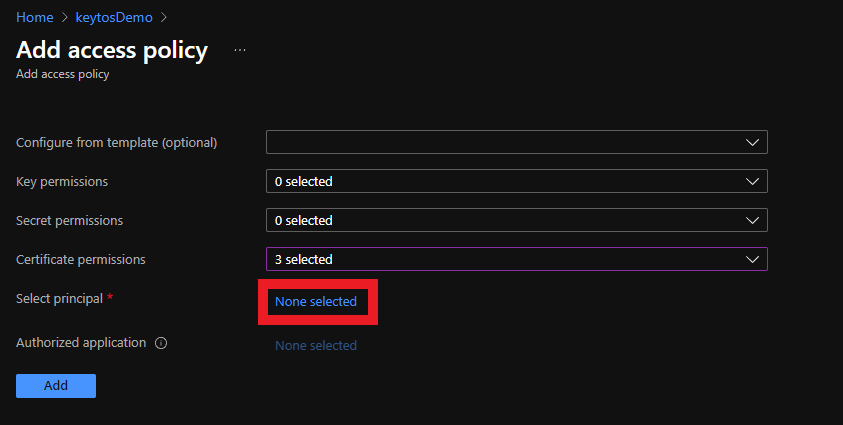
- Click on the None selected link to the right of Select Principal
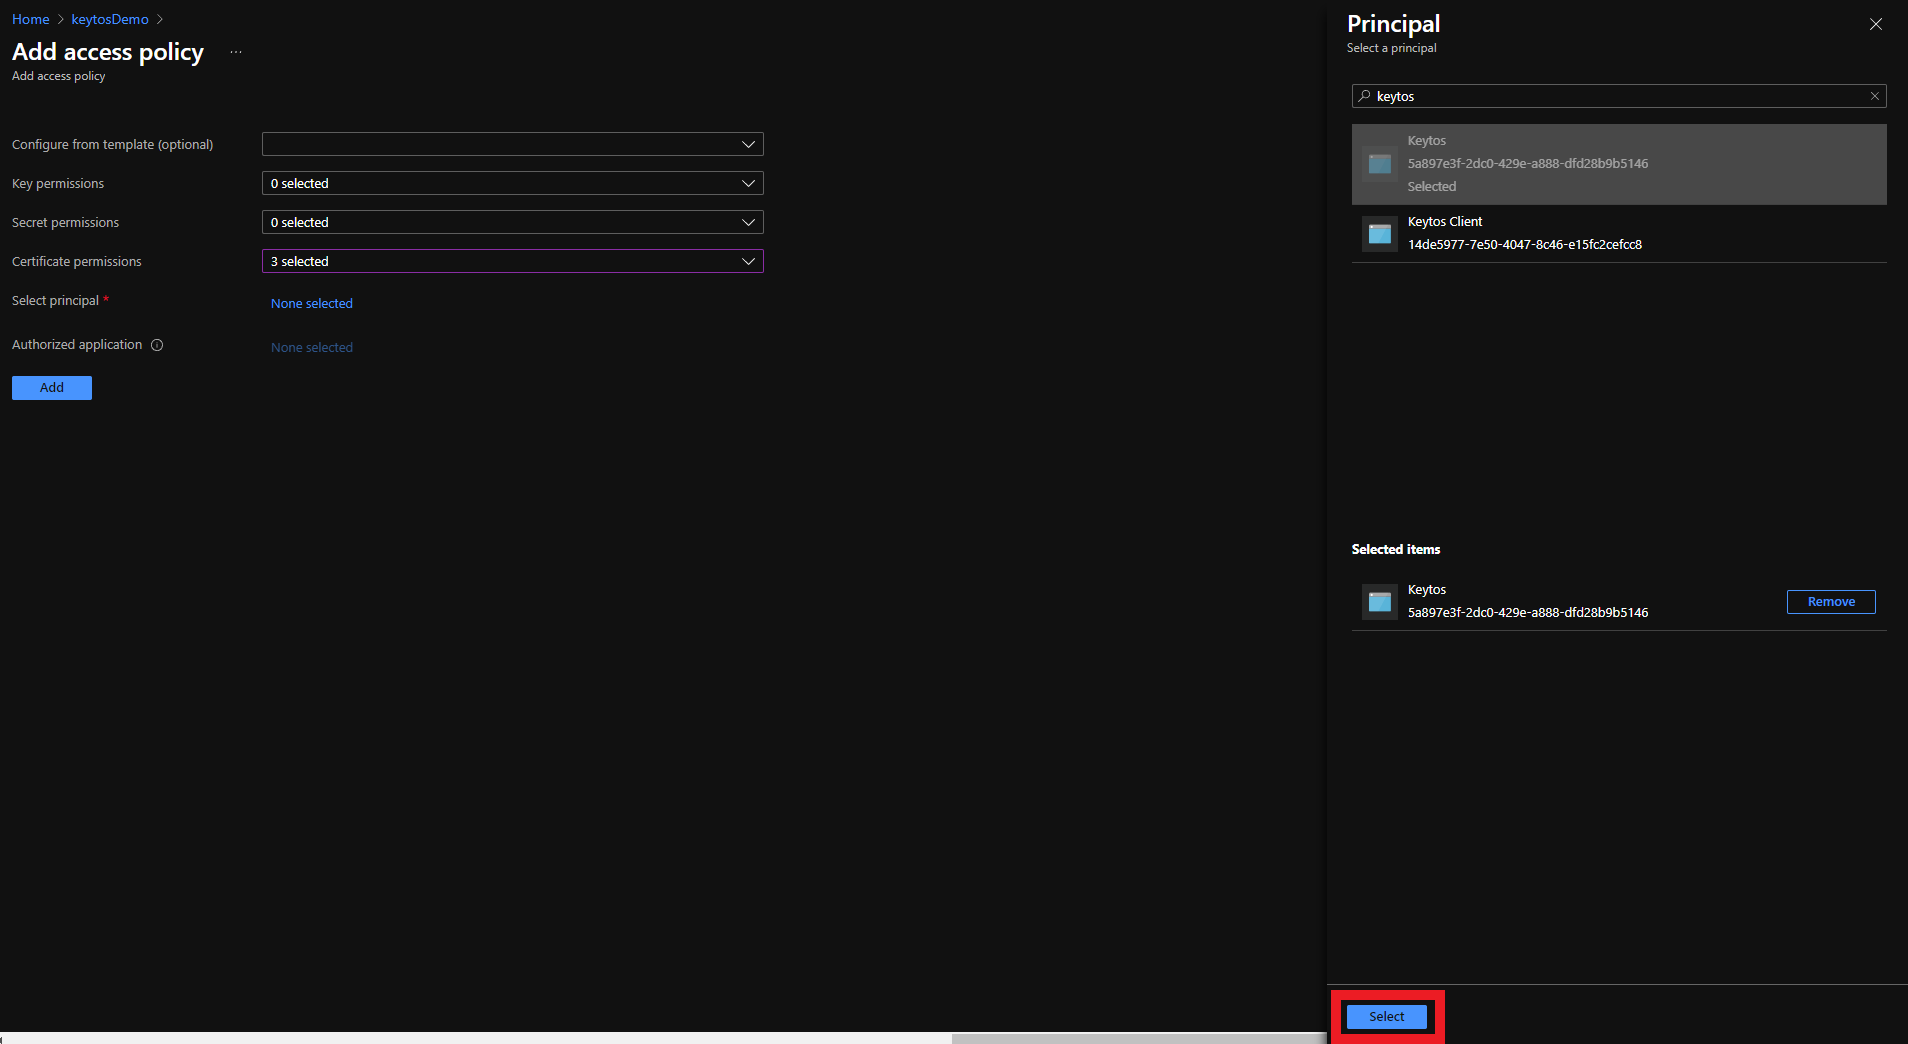
- Search for “keytos” and select the Keytos application
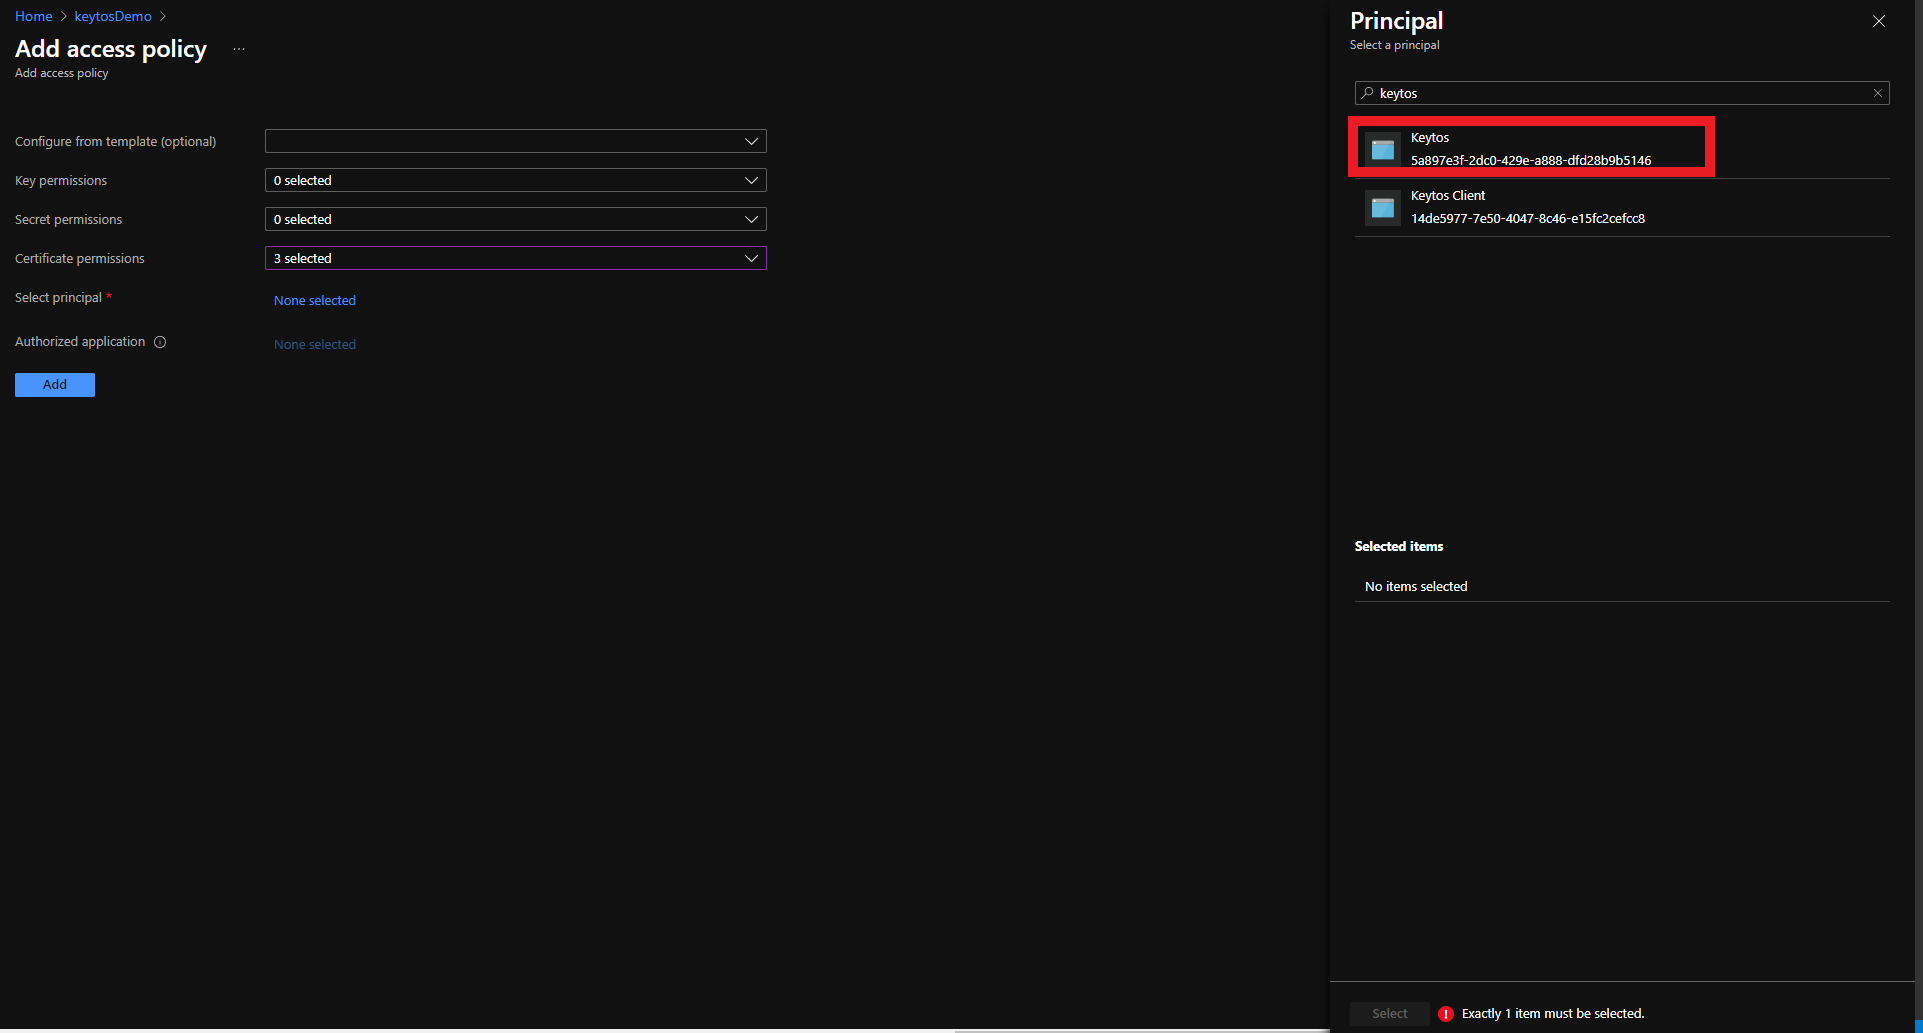
- Click the Select button
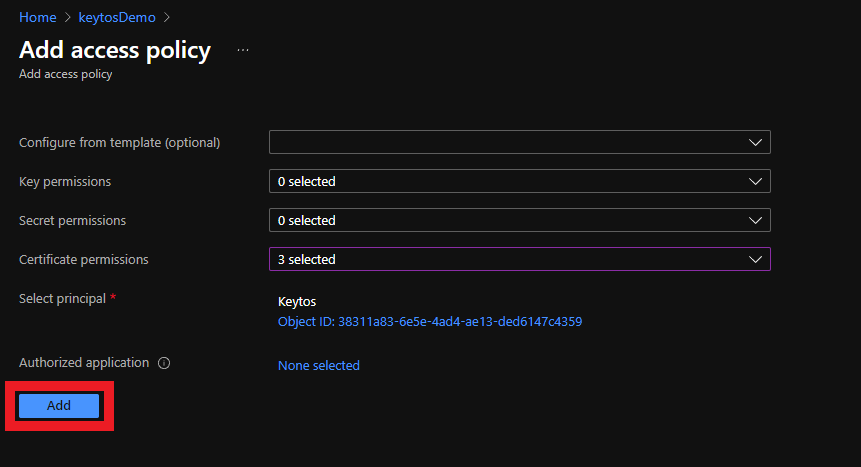
- Click the Add button
- Click the Save button
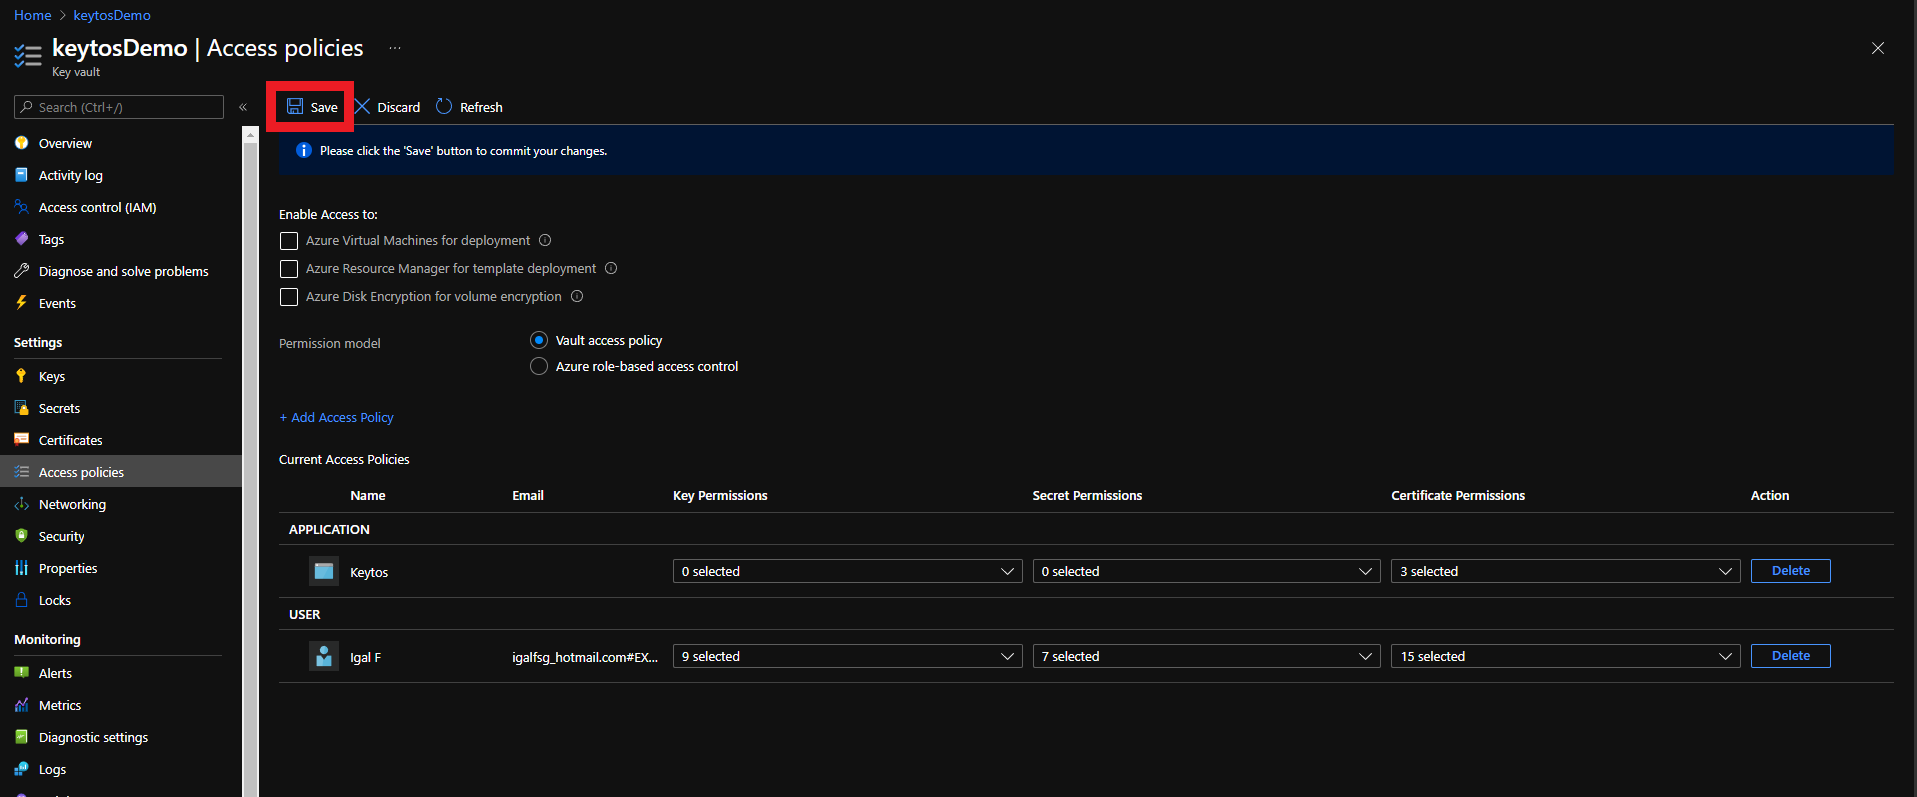
- Your Azure Key Vault is ready to be managed by EZCA!
Add the EZCA IP addresses to Azure Key Vault Firewall
If your Key Vault has a firewall enabled, you will need to add the EZCA IP address to the Key Vault firewall to allow EZCA to manage the certificates in the Key Vault.
Retrieve the EZCA IP Addresses
To find the EZCA IP addresses, please go to the EZCA portal status of your instance for example: https://portal.ezca.io/status and copy the IP addresses from the Outbound IP Addresses section.
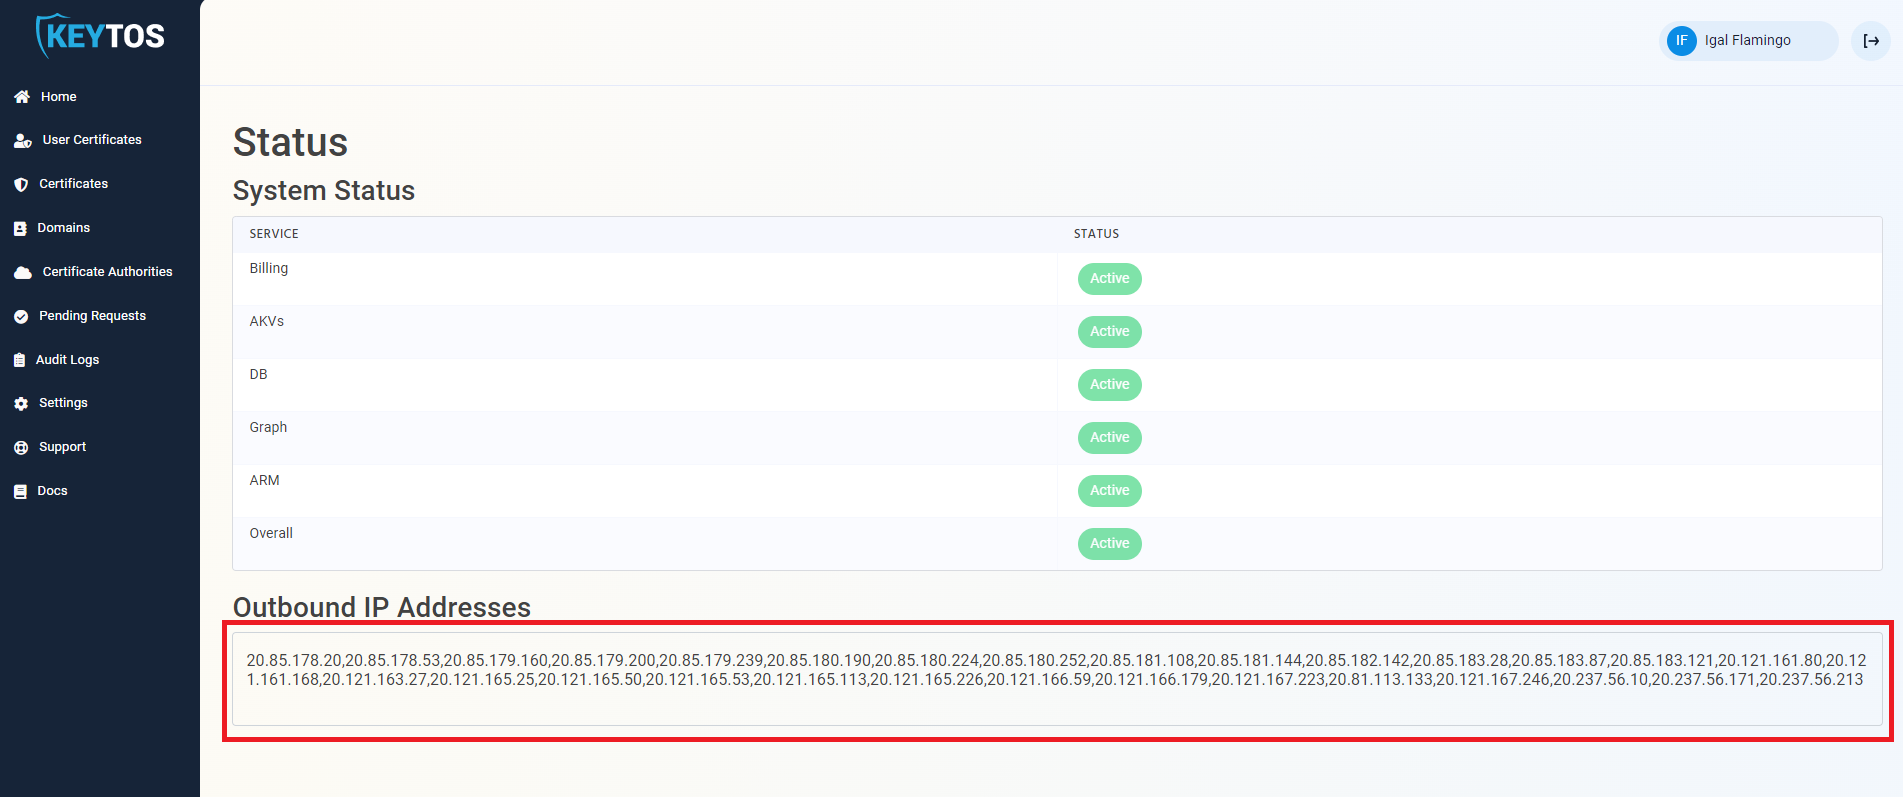
Add the EZCA IP Addresses to the Key Vault Firewall
You can now add the IP addresses to the Key Vault firewall. Since the EZCA IP addresses are subject to change, we recommend adding the entire IP range to the Key Vault firewall. To do this, you can use the following PowerShell script to add the IP range to the Key Vault firewall. Replace the $ipRange variable with the IP range from the EZCA portal status page:
Connect-AzAccount
$ipRange = ""
$resourceGroupName = "" # Replace with your resource group name
$keyVaultName = "" # Replace with your Key Vault name
$ipArr = $ipRange.Split(",")
Add-AzKeyVaultNetworkRule -VaultName $keyVaultName -ResourceGroupName $resourceGroupName -IpAddressRange $ipArr