

















How To Create an EZCA Cloud PKI Subscription in the EZCA Portal
Prerequisites to Create an EZCA Cloud PKI Subscription
Before you can create an EZCA cloud PKI subscription, you will need to ensure the following prerequisites are met:
How To Create an EZCA Cloud PKI Subscription in the EZCA Portal - Video Tutorial
Follow along with our video tutorial to learn how to create an EZCA cloud PKI subscription in the EZCA portal, with a fully-featured free trial plan that allows you to test out the service before committing to a paid plan:
How To Create an EZCA Cloud PKI Subscription in the EZCA Portal - Step-by-Step Guide
The following steps will guide you through creating an EZCA cloud PKI subscription in the EZCA portal, with a fully-featured free trial plan that allows you to test out the service before committing to a paid plan:
-
To register for an EZCA subscription with 1-month free trial, begin by navigating to the portal corresponding with your desired EZCA instance and log in with your Entra ID credentials. The following instances are available:
- EZCA Global - Global instance hosted in a variety of global datacenters.
- EZCA EU - European instance hosted only in datacenters within the European Union.
- EZCA Australia - Australian instance hosted only in Australian datacenters.
- EZCA US Government (GCC High) - US Government instance hosted only in Azure Government GCC High datacenters.
-
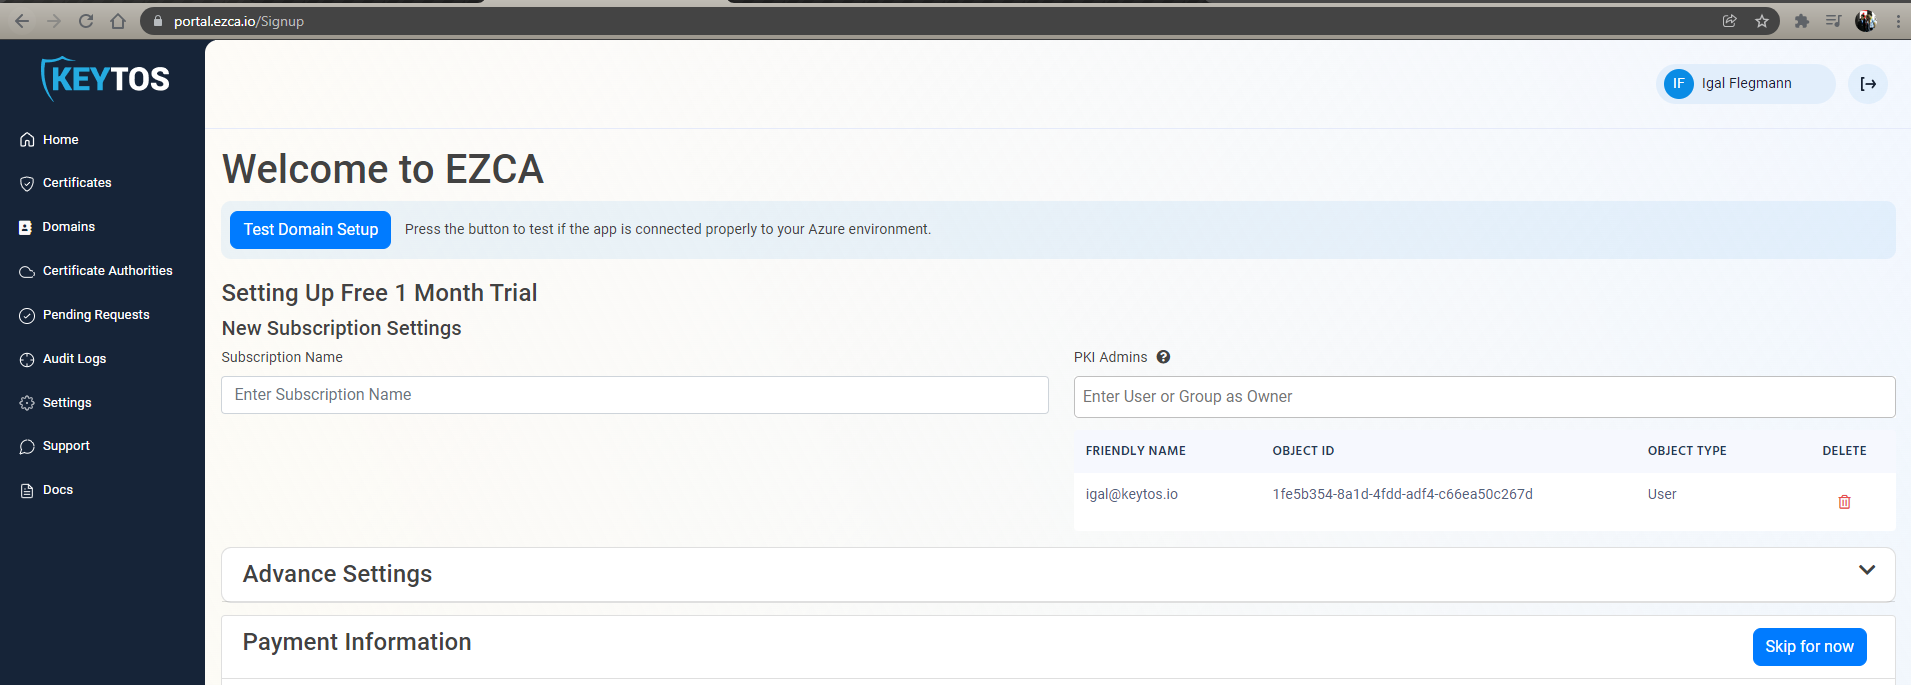
Once you have logged in, you will be presented with the EZCA subscription and free trial registration page.
-
Enter a Subscription Name to easily identify your subscription in the EZCA portal.
-
Enter additional PKI Admins who will be allowed to administer your EZCA subscription. These users will be able to create, manage, and delete Certificate Authorities in your subscription. You can add additional PKI Admins later in the EZCA portal.
WarningPKI Administrators will be able to create, manage, and delete Certificate Authorities (CAs) and issue certificates in your subscription. Please ensure you only add trusted users as PKI Administrators.
-
Under Advanced Settings you can set the location of where we keep your certificates by default. This can be overridden on a per-CA basis later on.
-
Under Payment Information select a plan (Basic or Premium).
-
Enter your credit card information, or click Skip for now to start your free 1-month trial. You will not be charged during the free trial period, but you can add your credit card information later in the EZCA portal.
-
Click Register to complete your subscription registration. You will be redirected to the EZCA portal where you can manage your subscription and create your first CA.
-
Done!
Next Steps After Creating Your EZCA Cloud PKI Subscription
Once you are registered, you are ready to create your first CA: