How To Create a Local Proxy for Cloud RADIUS
Prerequisites to Create a Local Proxy for Cloud RADIUS
- EZRADIUS Subscription (This is included in all EZRADIUS tiers).
- Setup your Access Policies.
- EZCA SCEP or SSL CA to issue client certificates to the proxy.
- Local Server (Linux) to host the proxy
- Permissions to create an Entra ID Application
Note
Please note that setting up the Local RADIUS Proxy is self service and not included in our basic support, if you need help from Keytos engineers you will need to purchase our professional services.
Create your Local Proxy Entra ID Application
- Go to the Azure Portal.
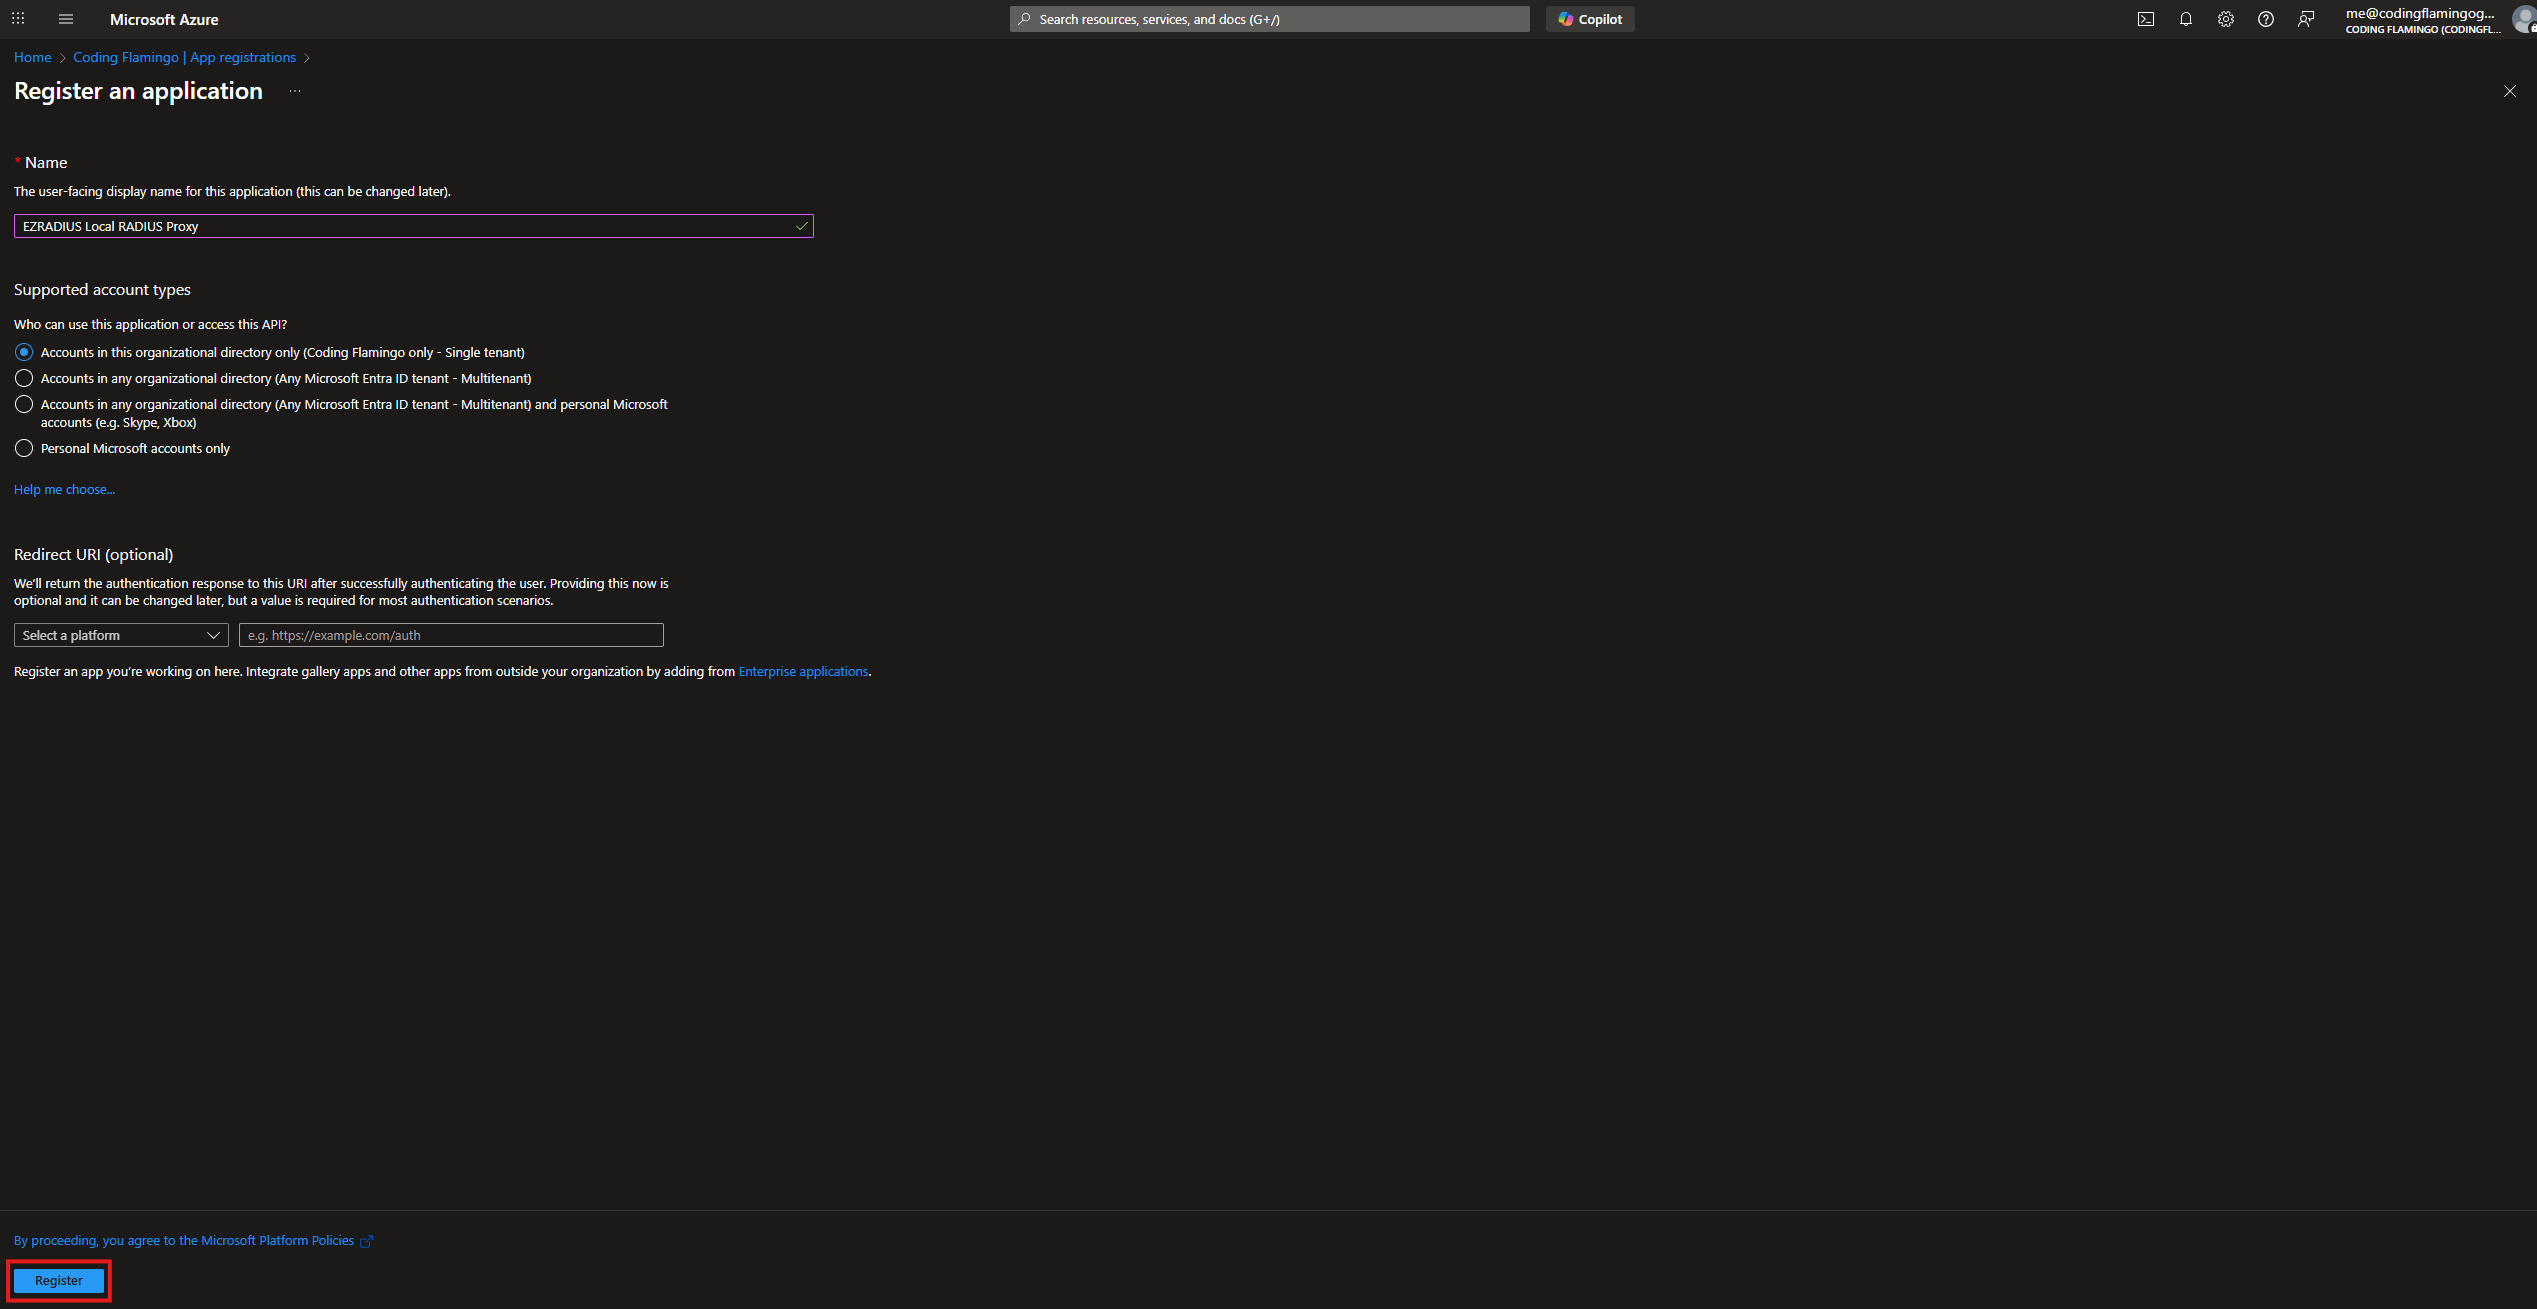
- Navigate to “Entra ID” > “App registrations” > “New registration”.
- Fill in the details for your application:
- Name:
EZRADIUS Local RADIUS Proxy - Supported account types:
Accounts in this organizational directory only
- Name:
- Click “Register”.

How to Add API Permission For Entra ID Username and Password Validation in Cloud RADIUS
If you are using your Cloud RADIUS for Entra ID username and password, you need to add the delegated permission for the application to authenticate against EZRADIUS to validate the Entra ID user credentials. If you are only using certificate based authenication skip to the next section to add the other permissions.
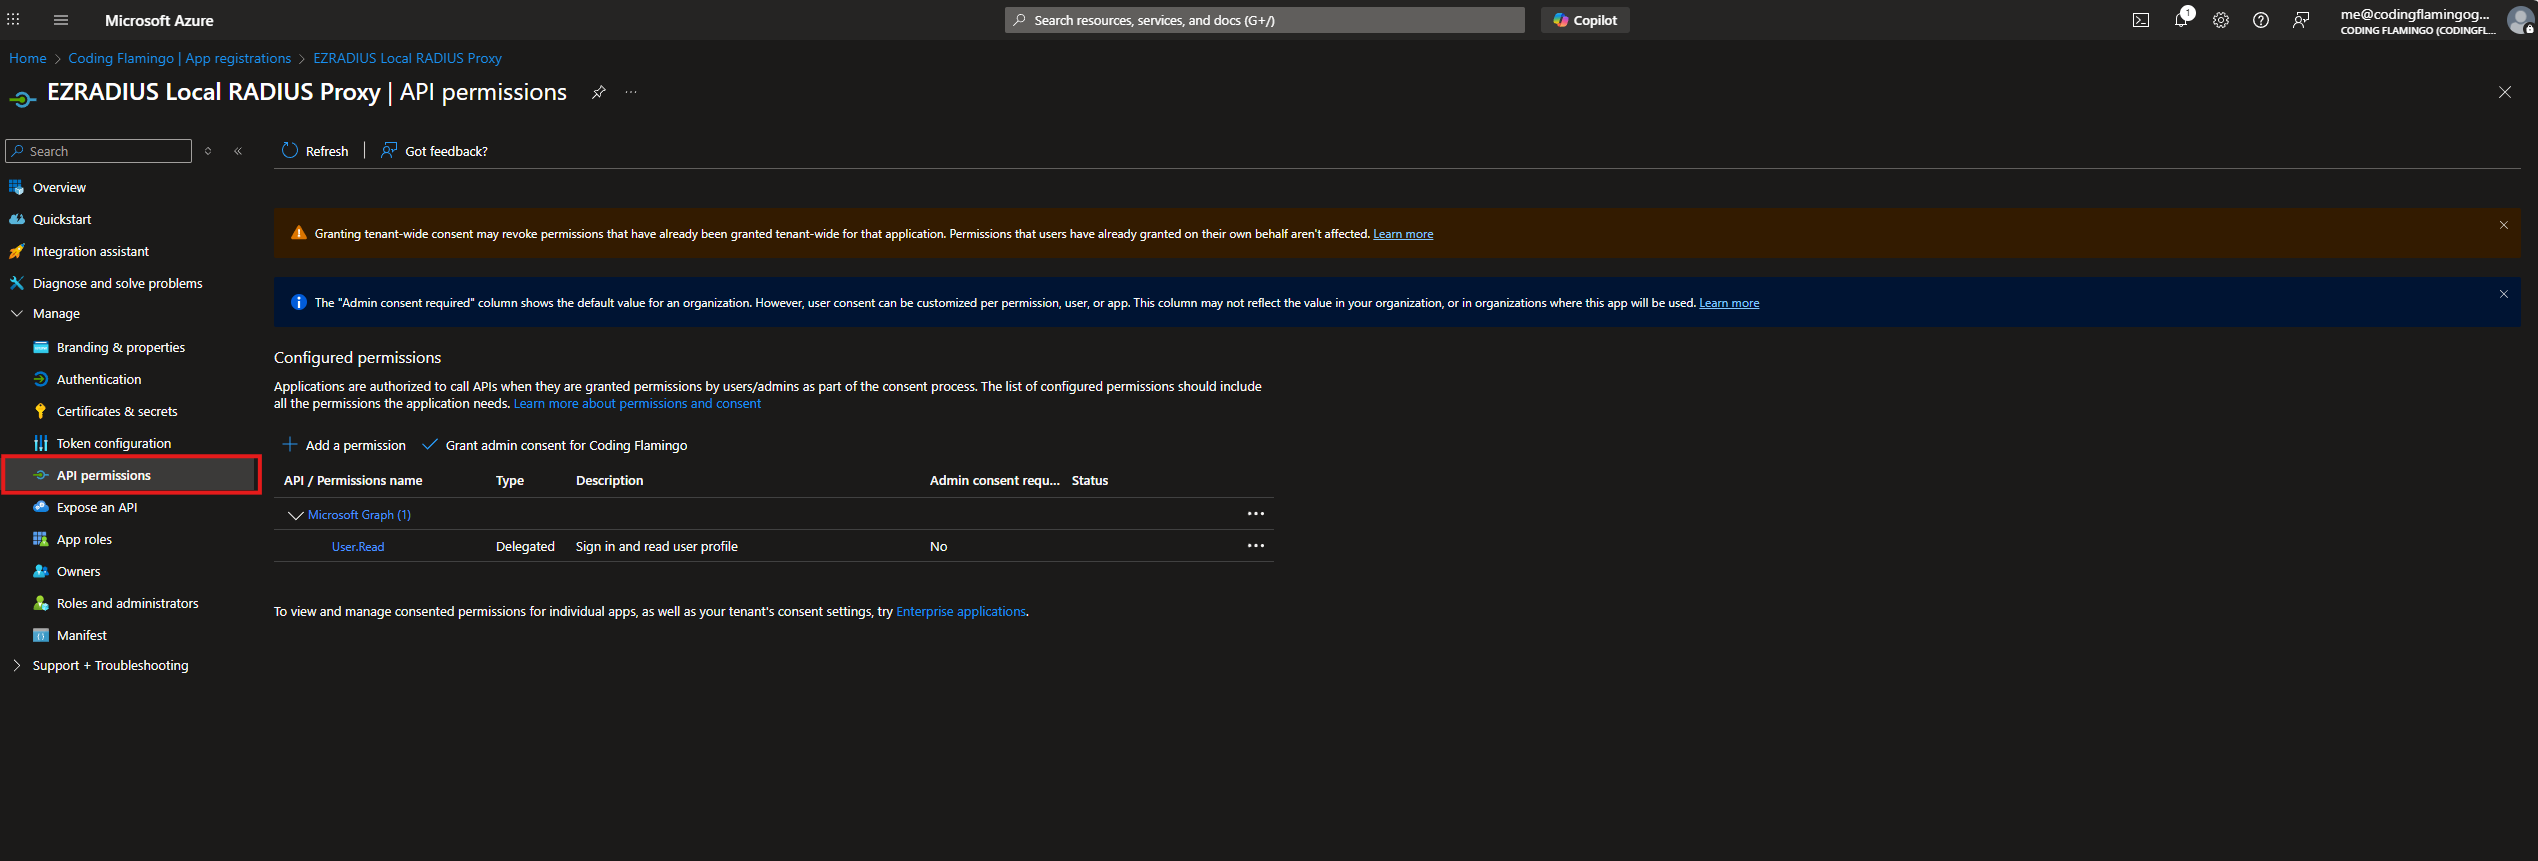
- Then in that same application we are going to go to “API permissions”.

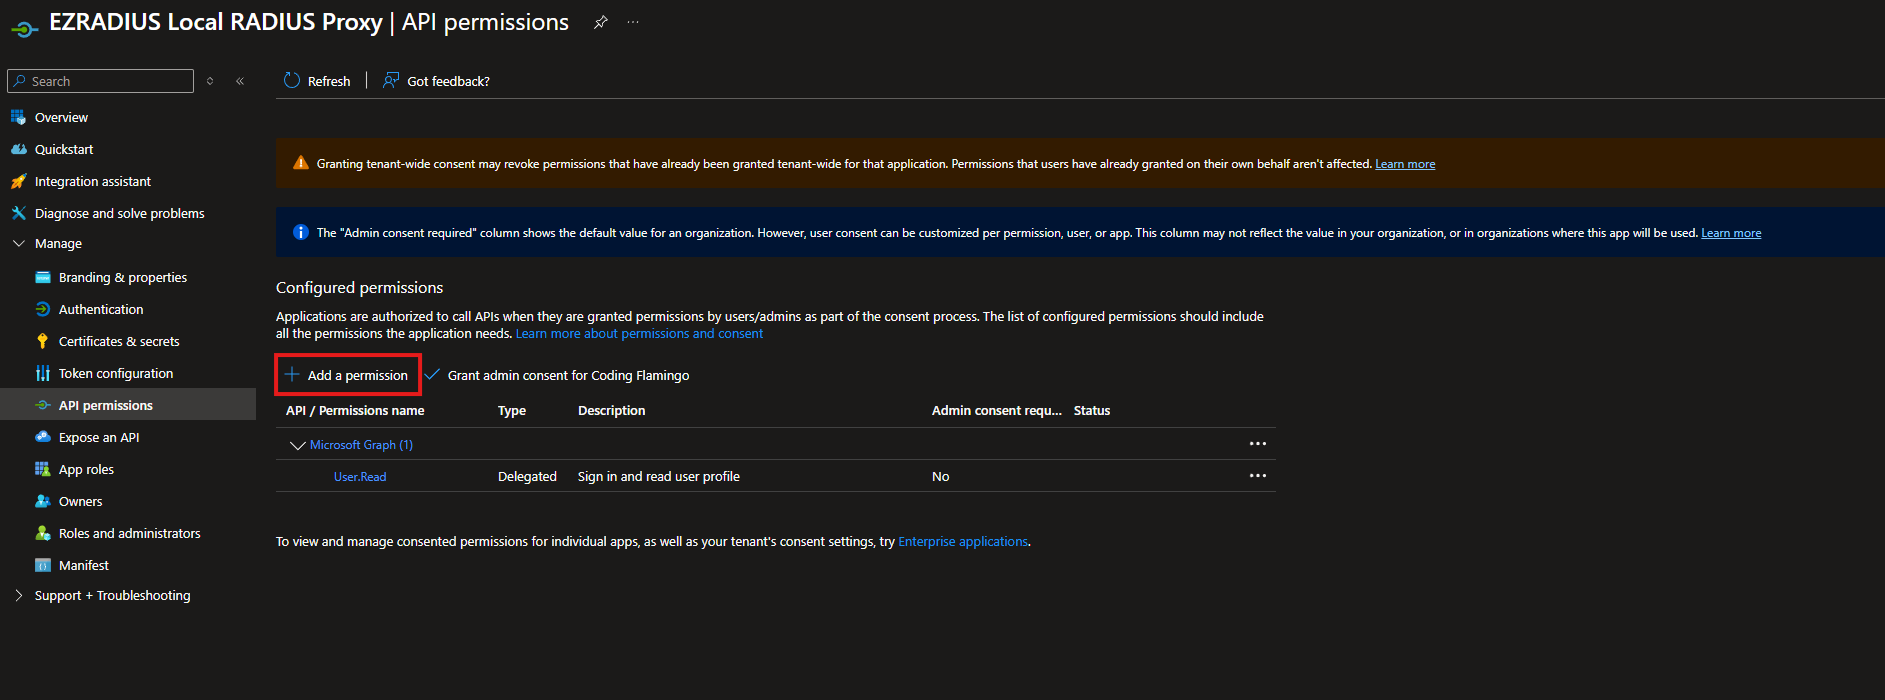
- Click on “Add a permission”.

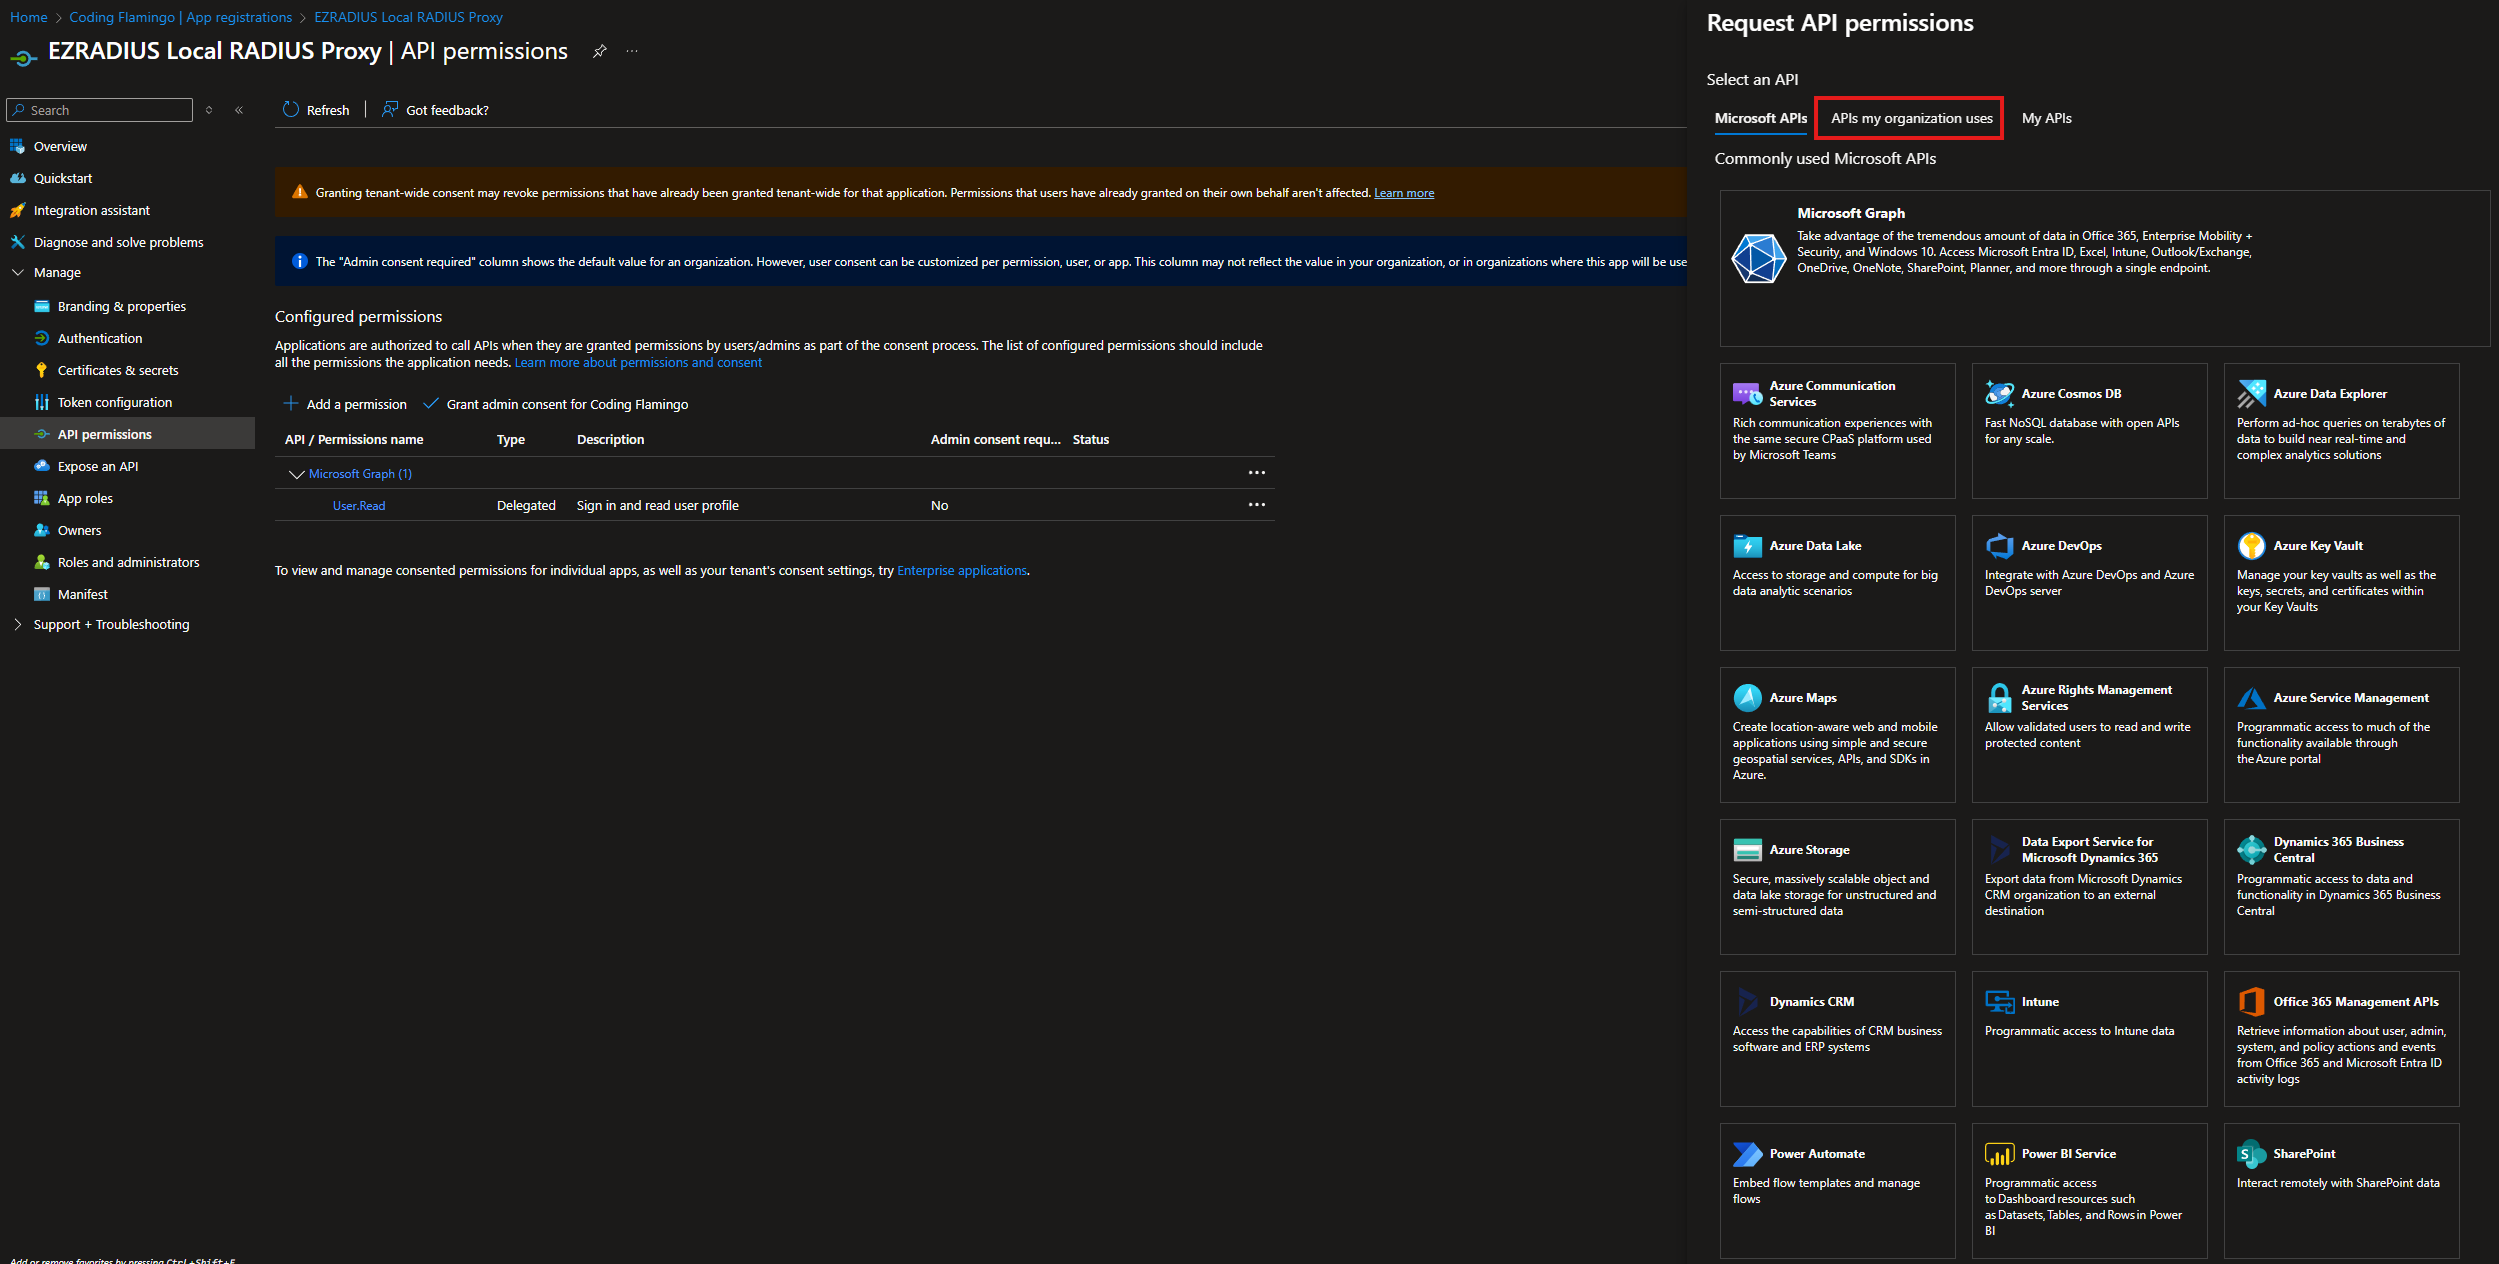
- At the Top Select “APIs my organization uses”.

- Search for “EZRADIUS” and select the “EZRADIUS” API.


- Select “Delegated permissions”.


- Select
API.Accesspermission and Click Add permission.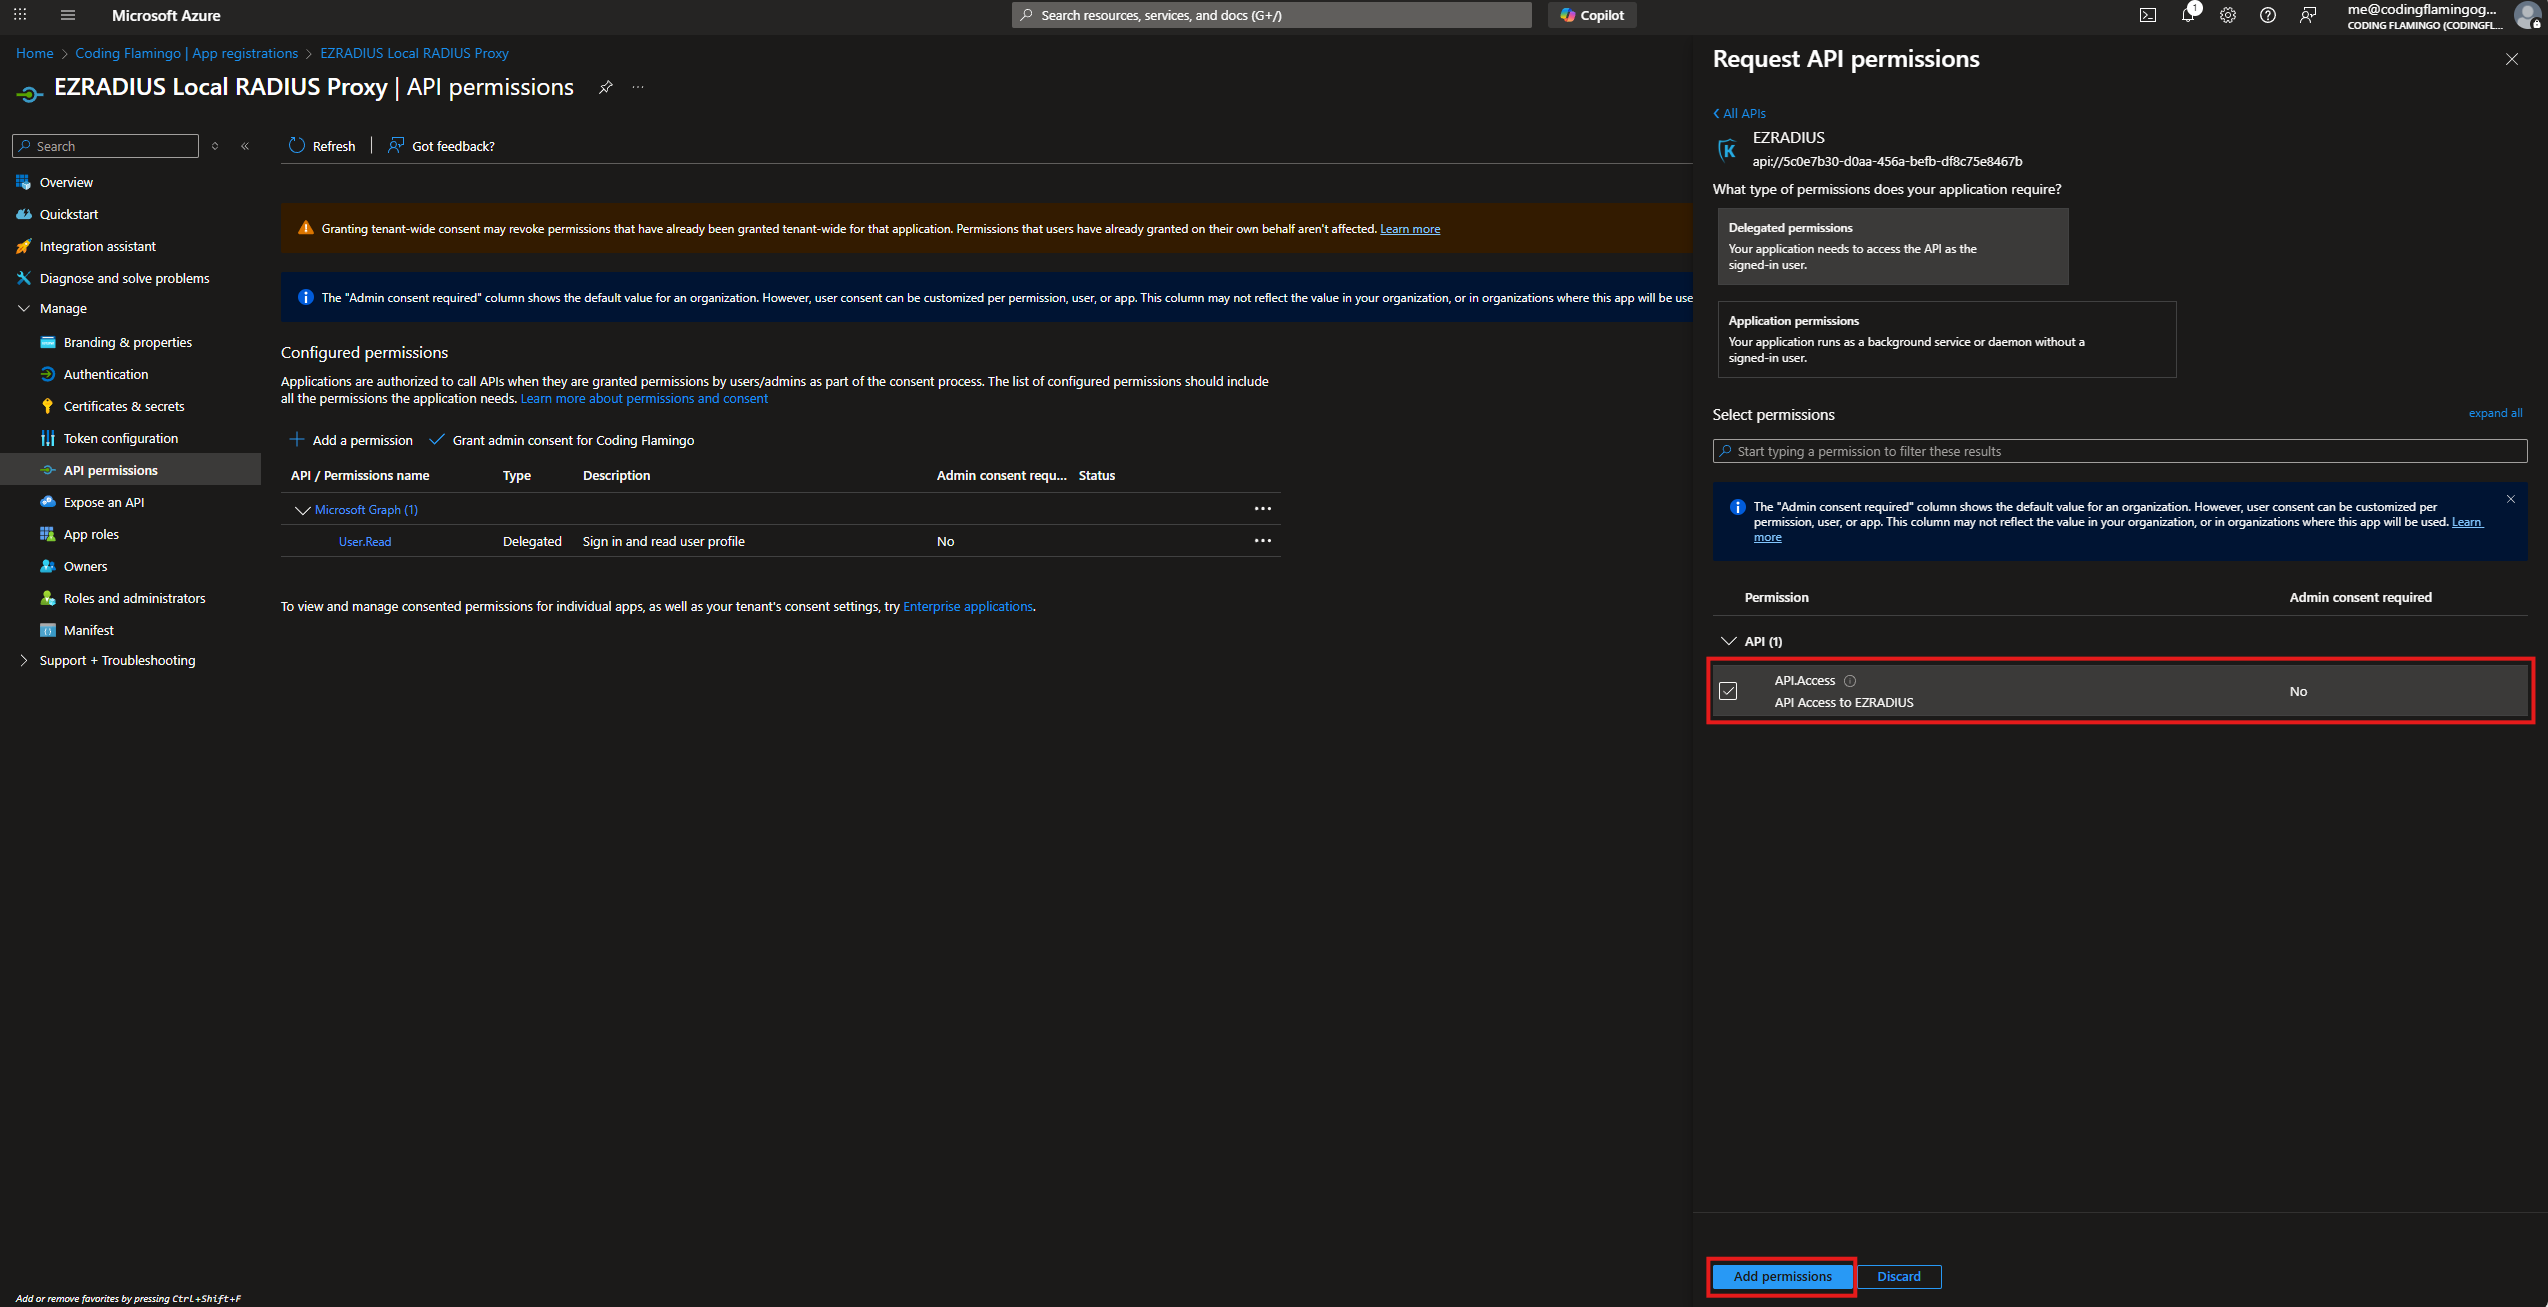

- Now we have to give it admin consent so each user doesn’t have to grant consent. Go back to Entra ID and Select Enterprise Applications.
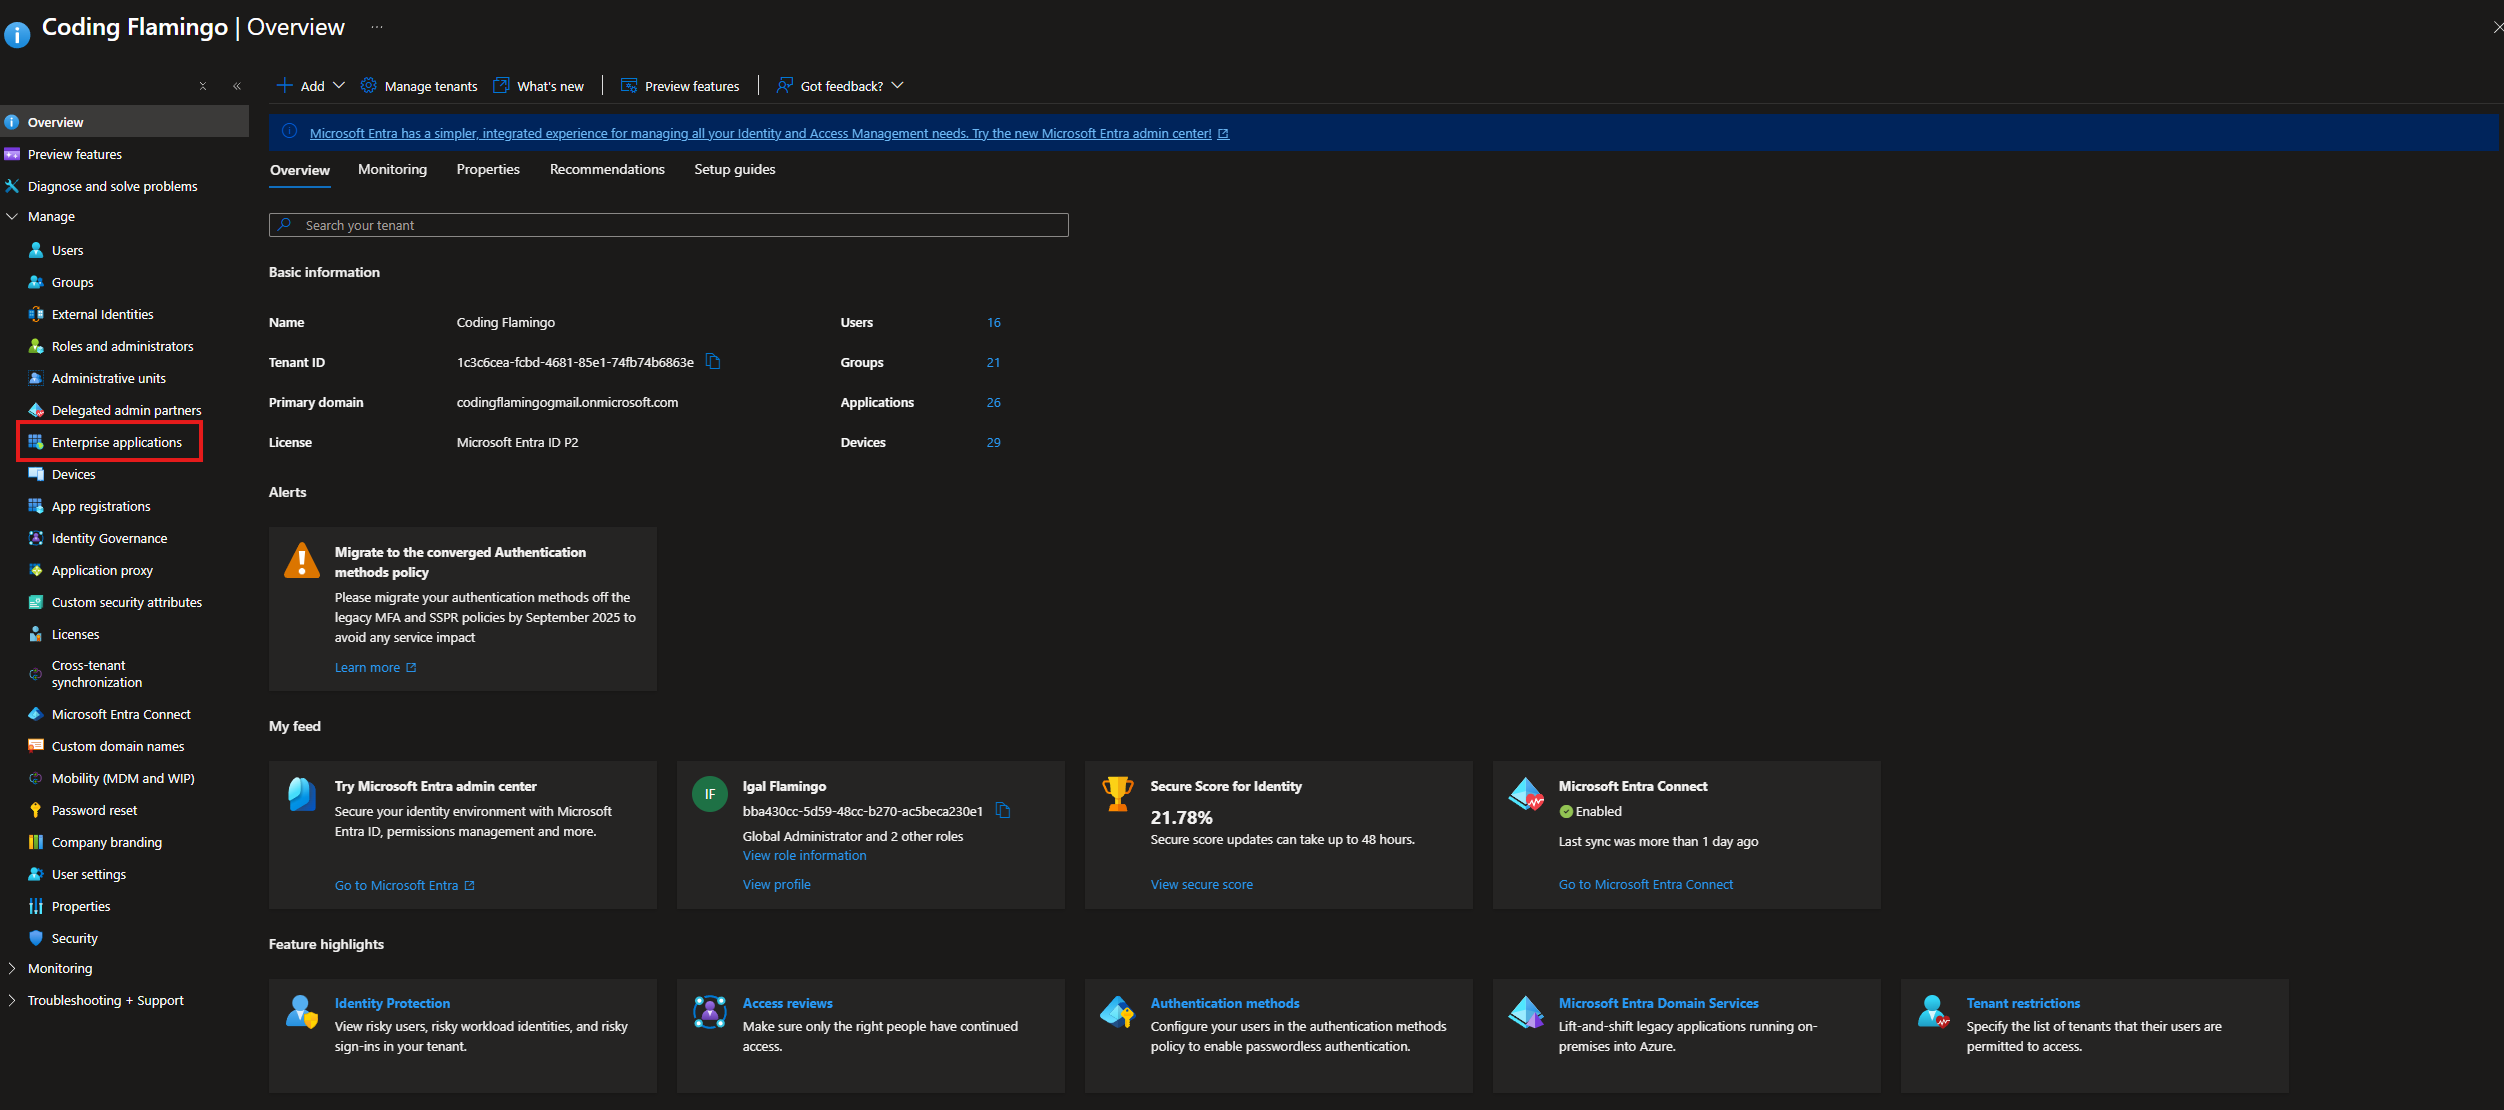

- Search for your application > Permissions > Grant admin consent for [Your Organization].
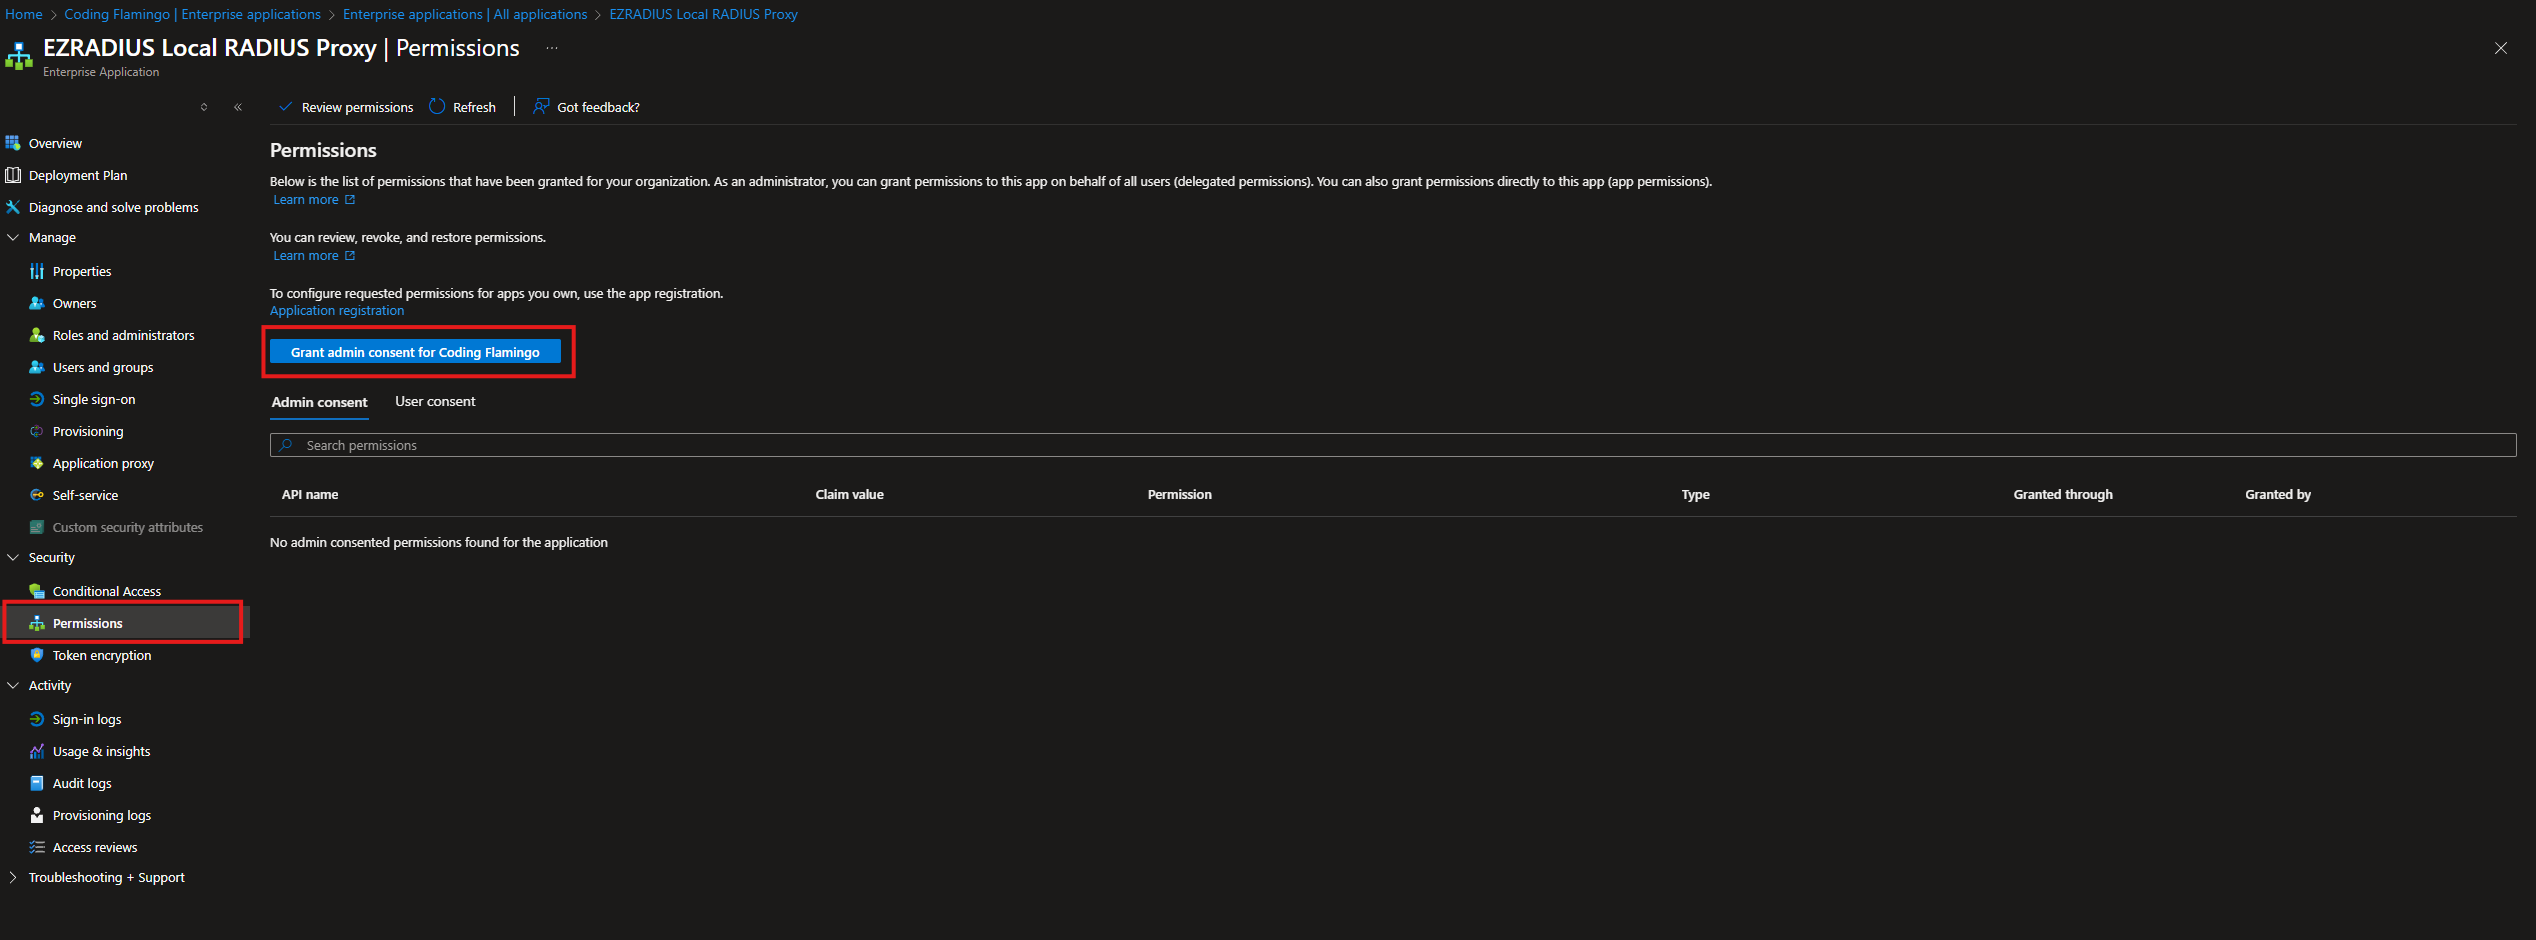

- Authenticate with a Global Administrator account.
- Click “Next”.
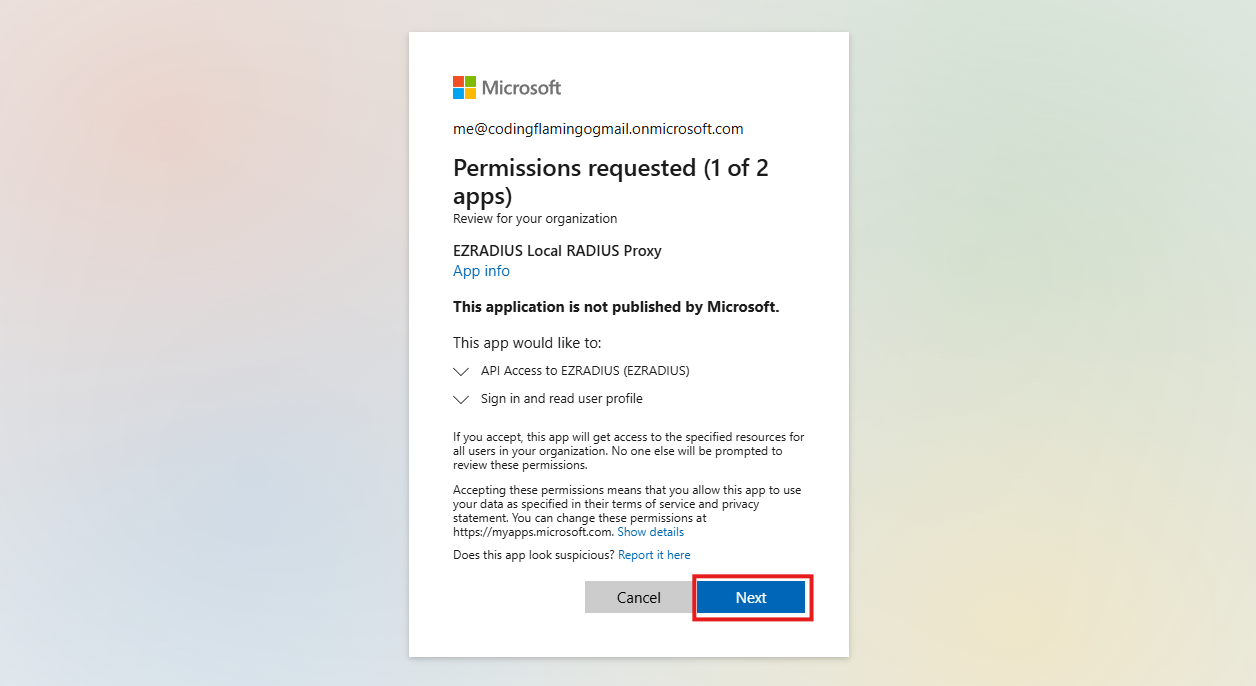

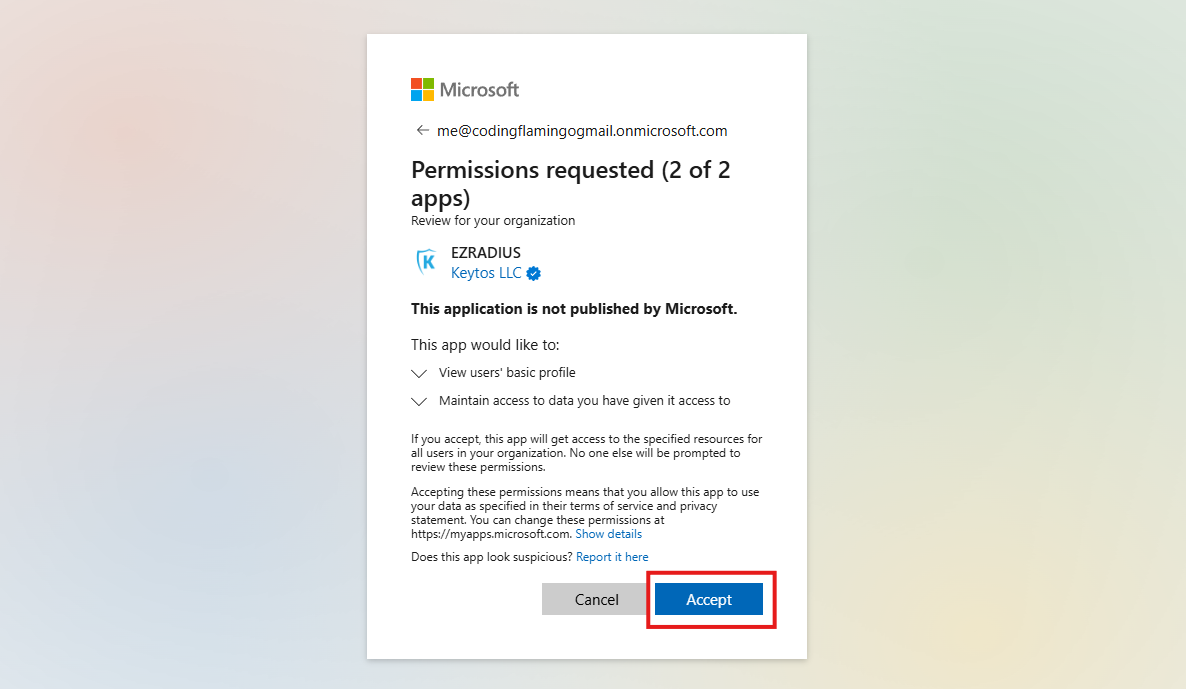
- Click “Accept” to grant the permissions.

How to Enable Cloud RADIUS to Read Entra ID and Intune Device Information
Then we have to give the local application permission to read Entra ID and Intune device information. This will allow it to do the complex network segmentation and authentication tasks that EZRADIUS is famous for.
- Go to the Application we created in Entra ID.
- Go to “API permissions” > “Add a permission”.


- Click on “Add a permission”.


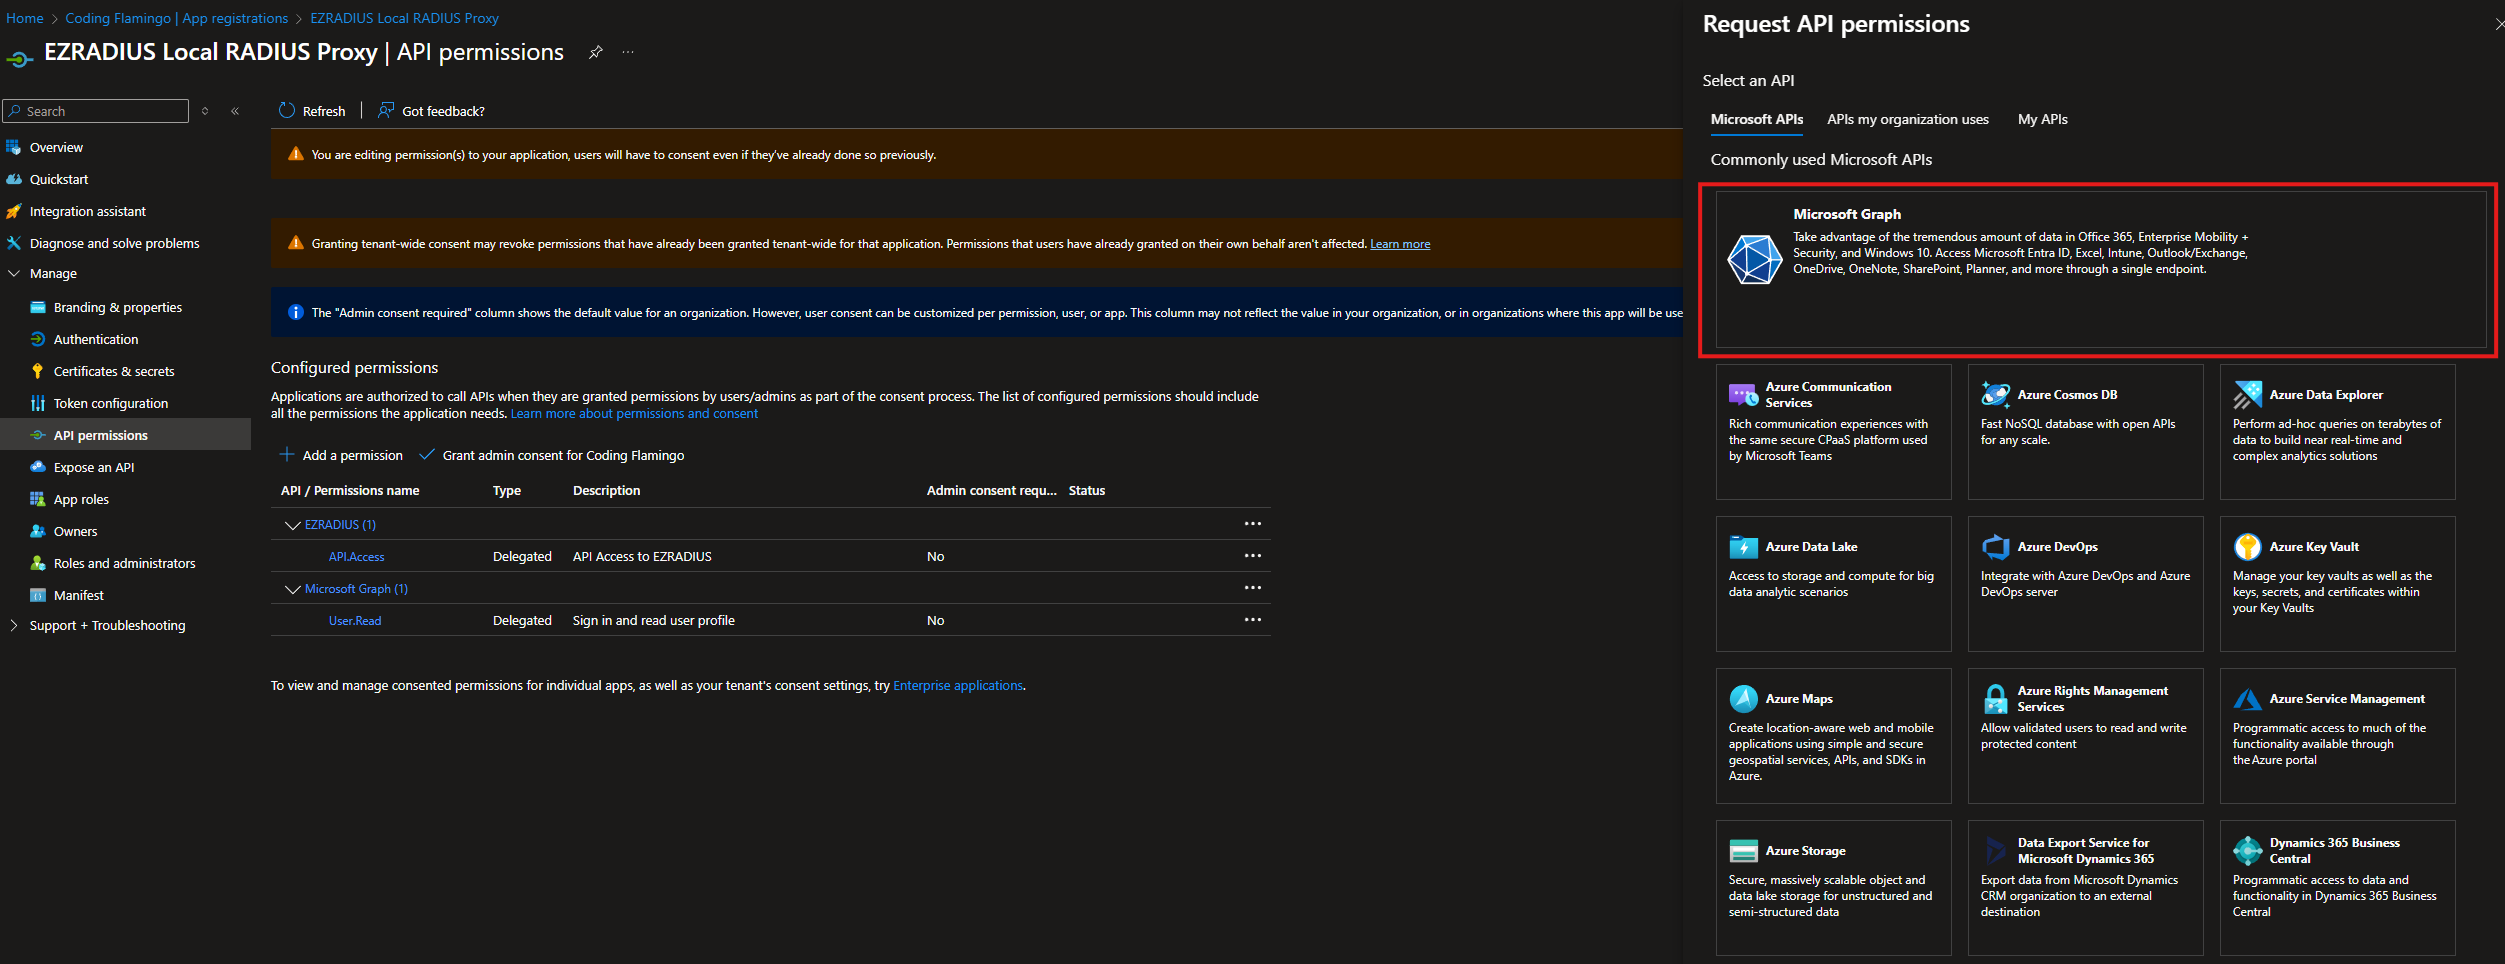
- Click on Microsoft Graph.

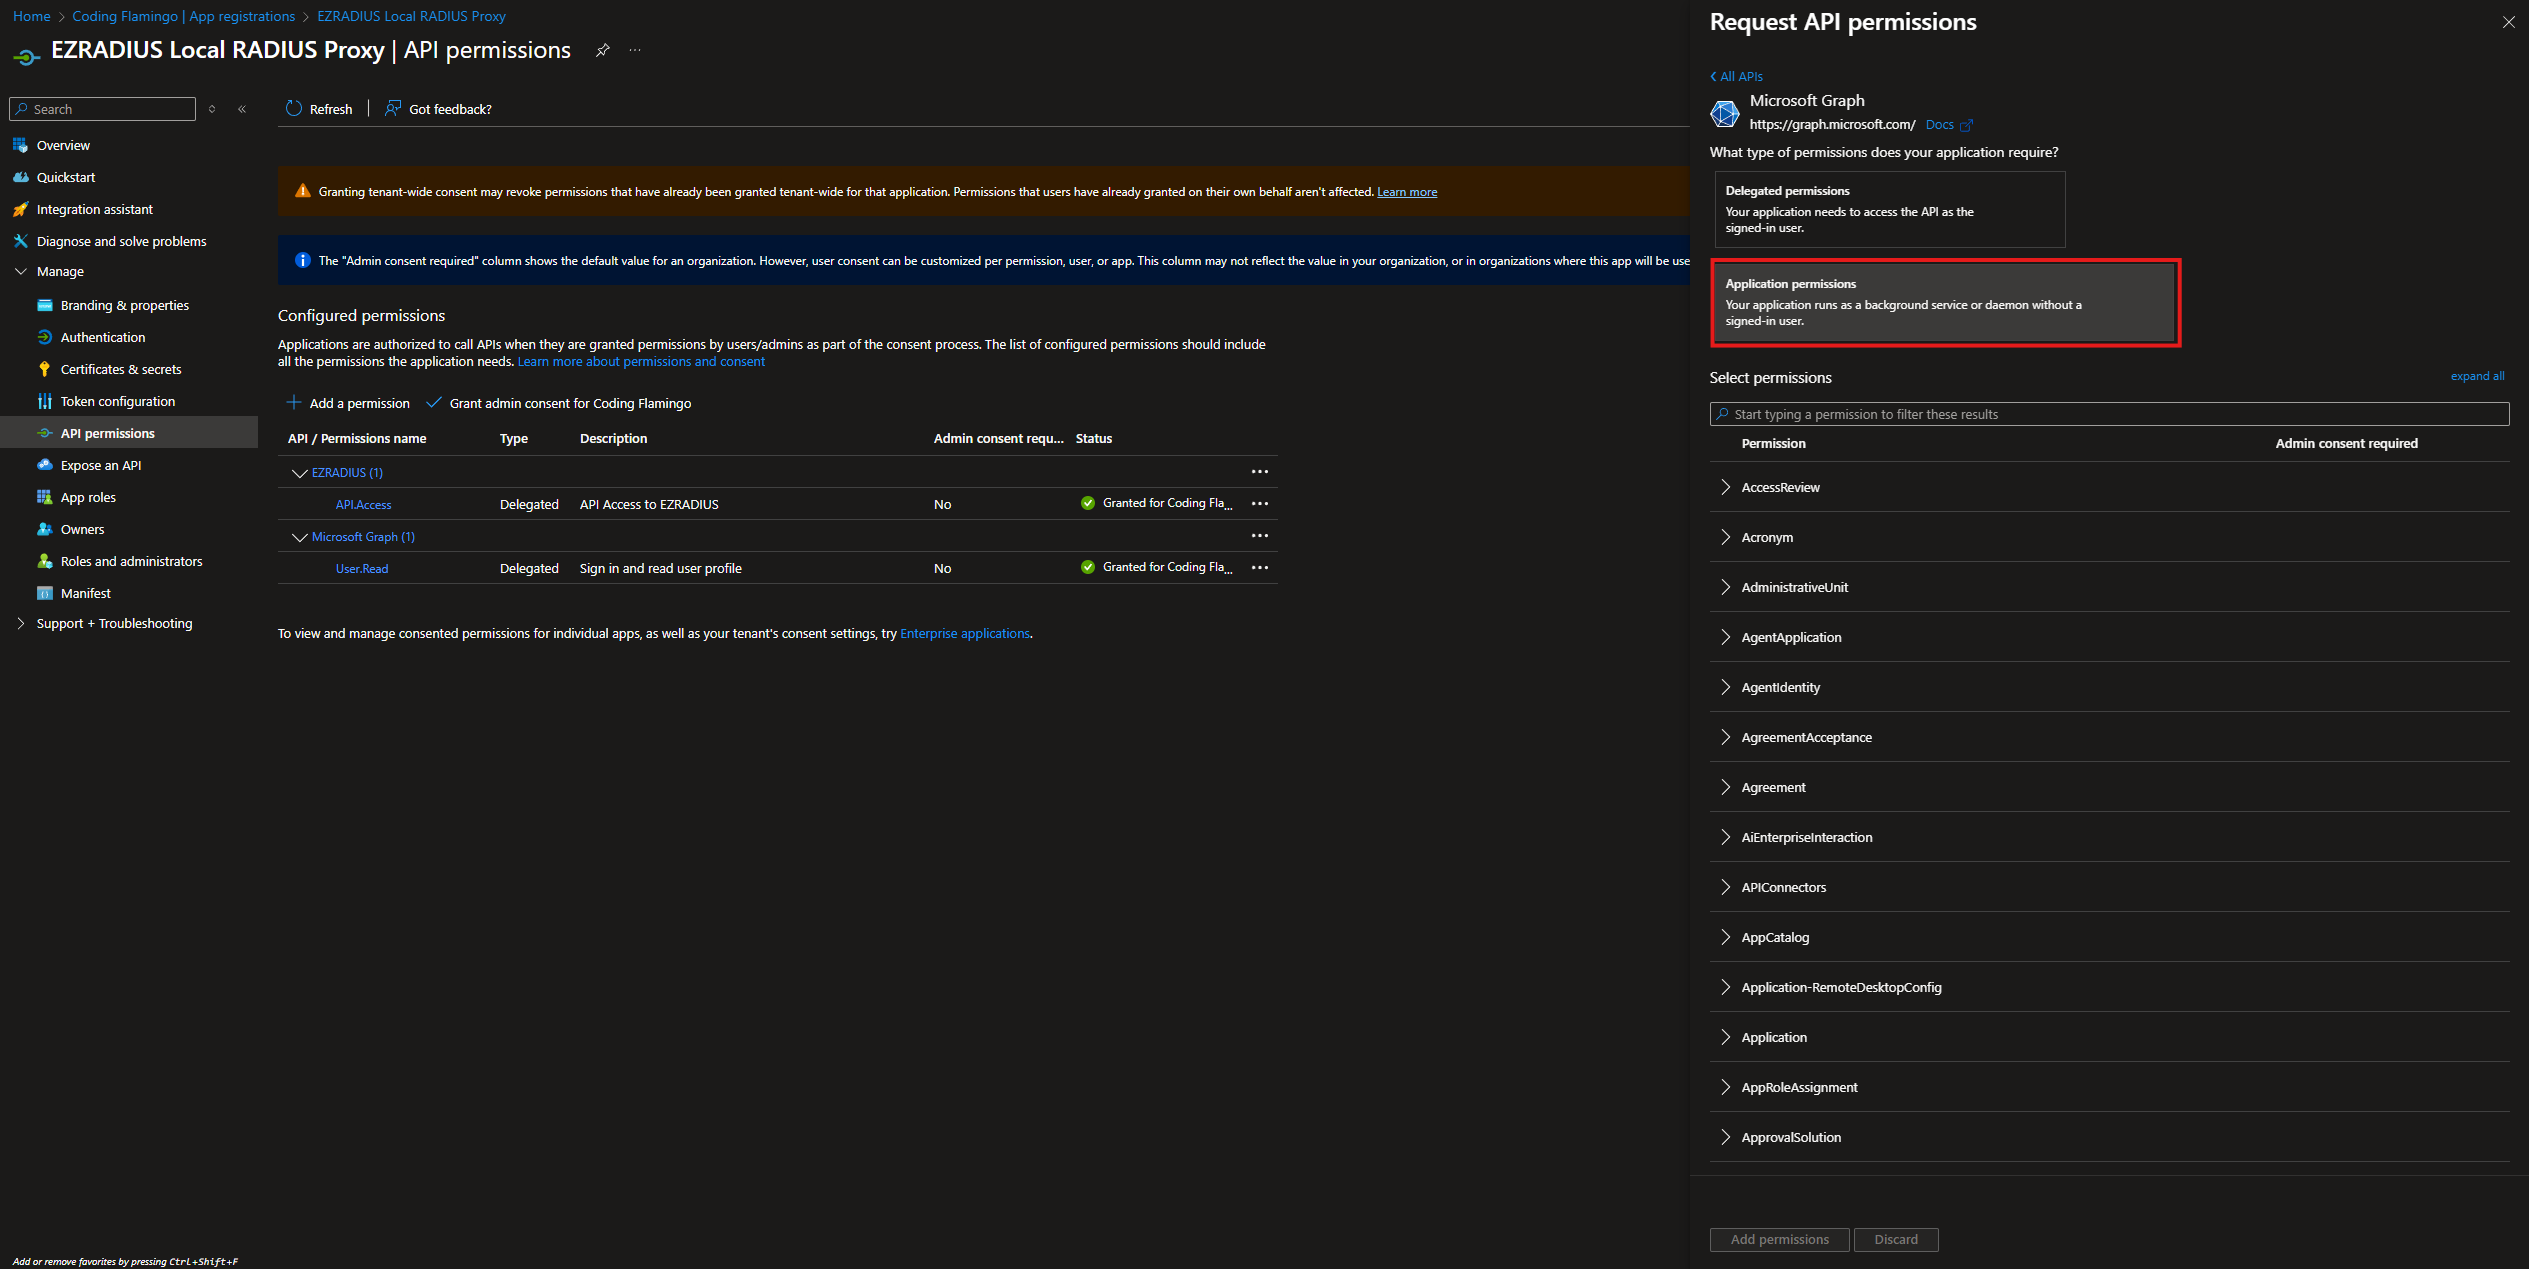
- Select “Application permissions”.

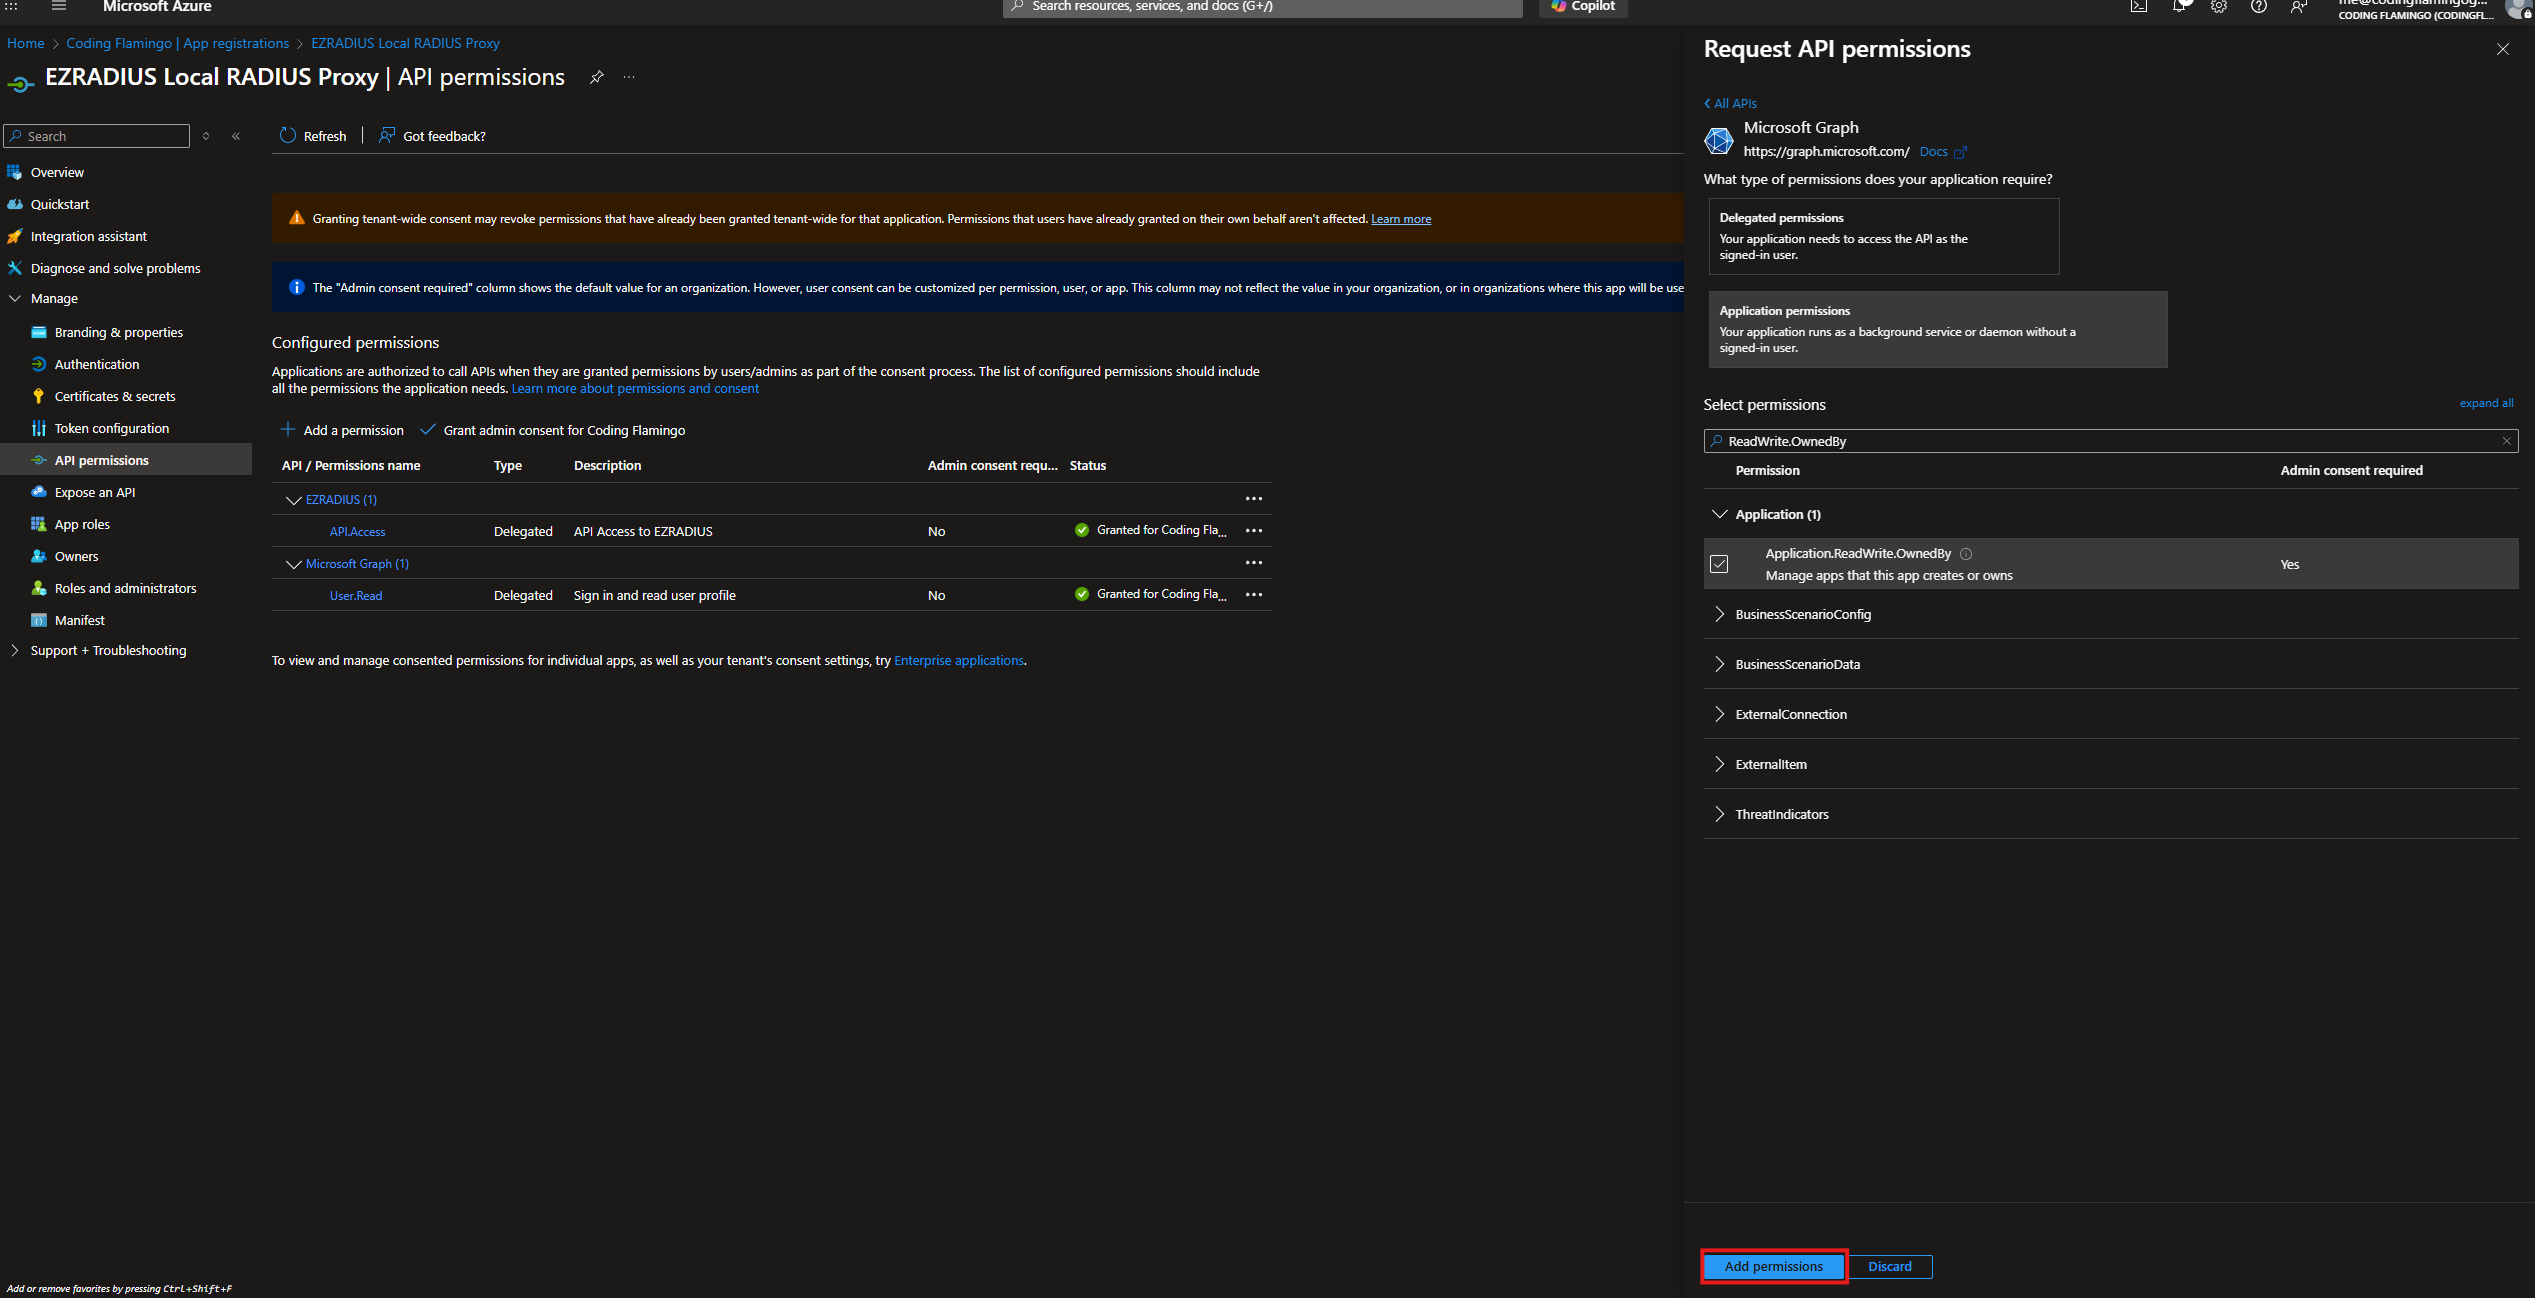
- Select the following permissions:
Application.ReadWrite.OwnedByAllows it to automatically rotate its own certificate when EZRADIUS Proxy renews it.DeviceManagementManagedDevices.Read.AllAllows it to check the device status on your Intune devices when using the Intune Device compliance check.Directory.Read.AllAllows it to read all directory data in your Entra ID tenant for Group membership checks and to check if the device or user is still active.
- Click “Add permissions”.

- Now your application should look like this:


- Now we have to give it admin consent so it can read the directory data. With a global admin account login and grant admin consent for the application.


- Click “Yes”.

 Now that we have created the application and granted the necessary permissions, we can proceed to configure the local RADIUS proxy.
How to Register a new RADIUS Proxy for Cloud RADIUS
- In another tab, Go to your EZRADIUS instance.
- Navigate to the “Local Server” section.
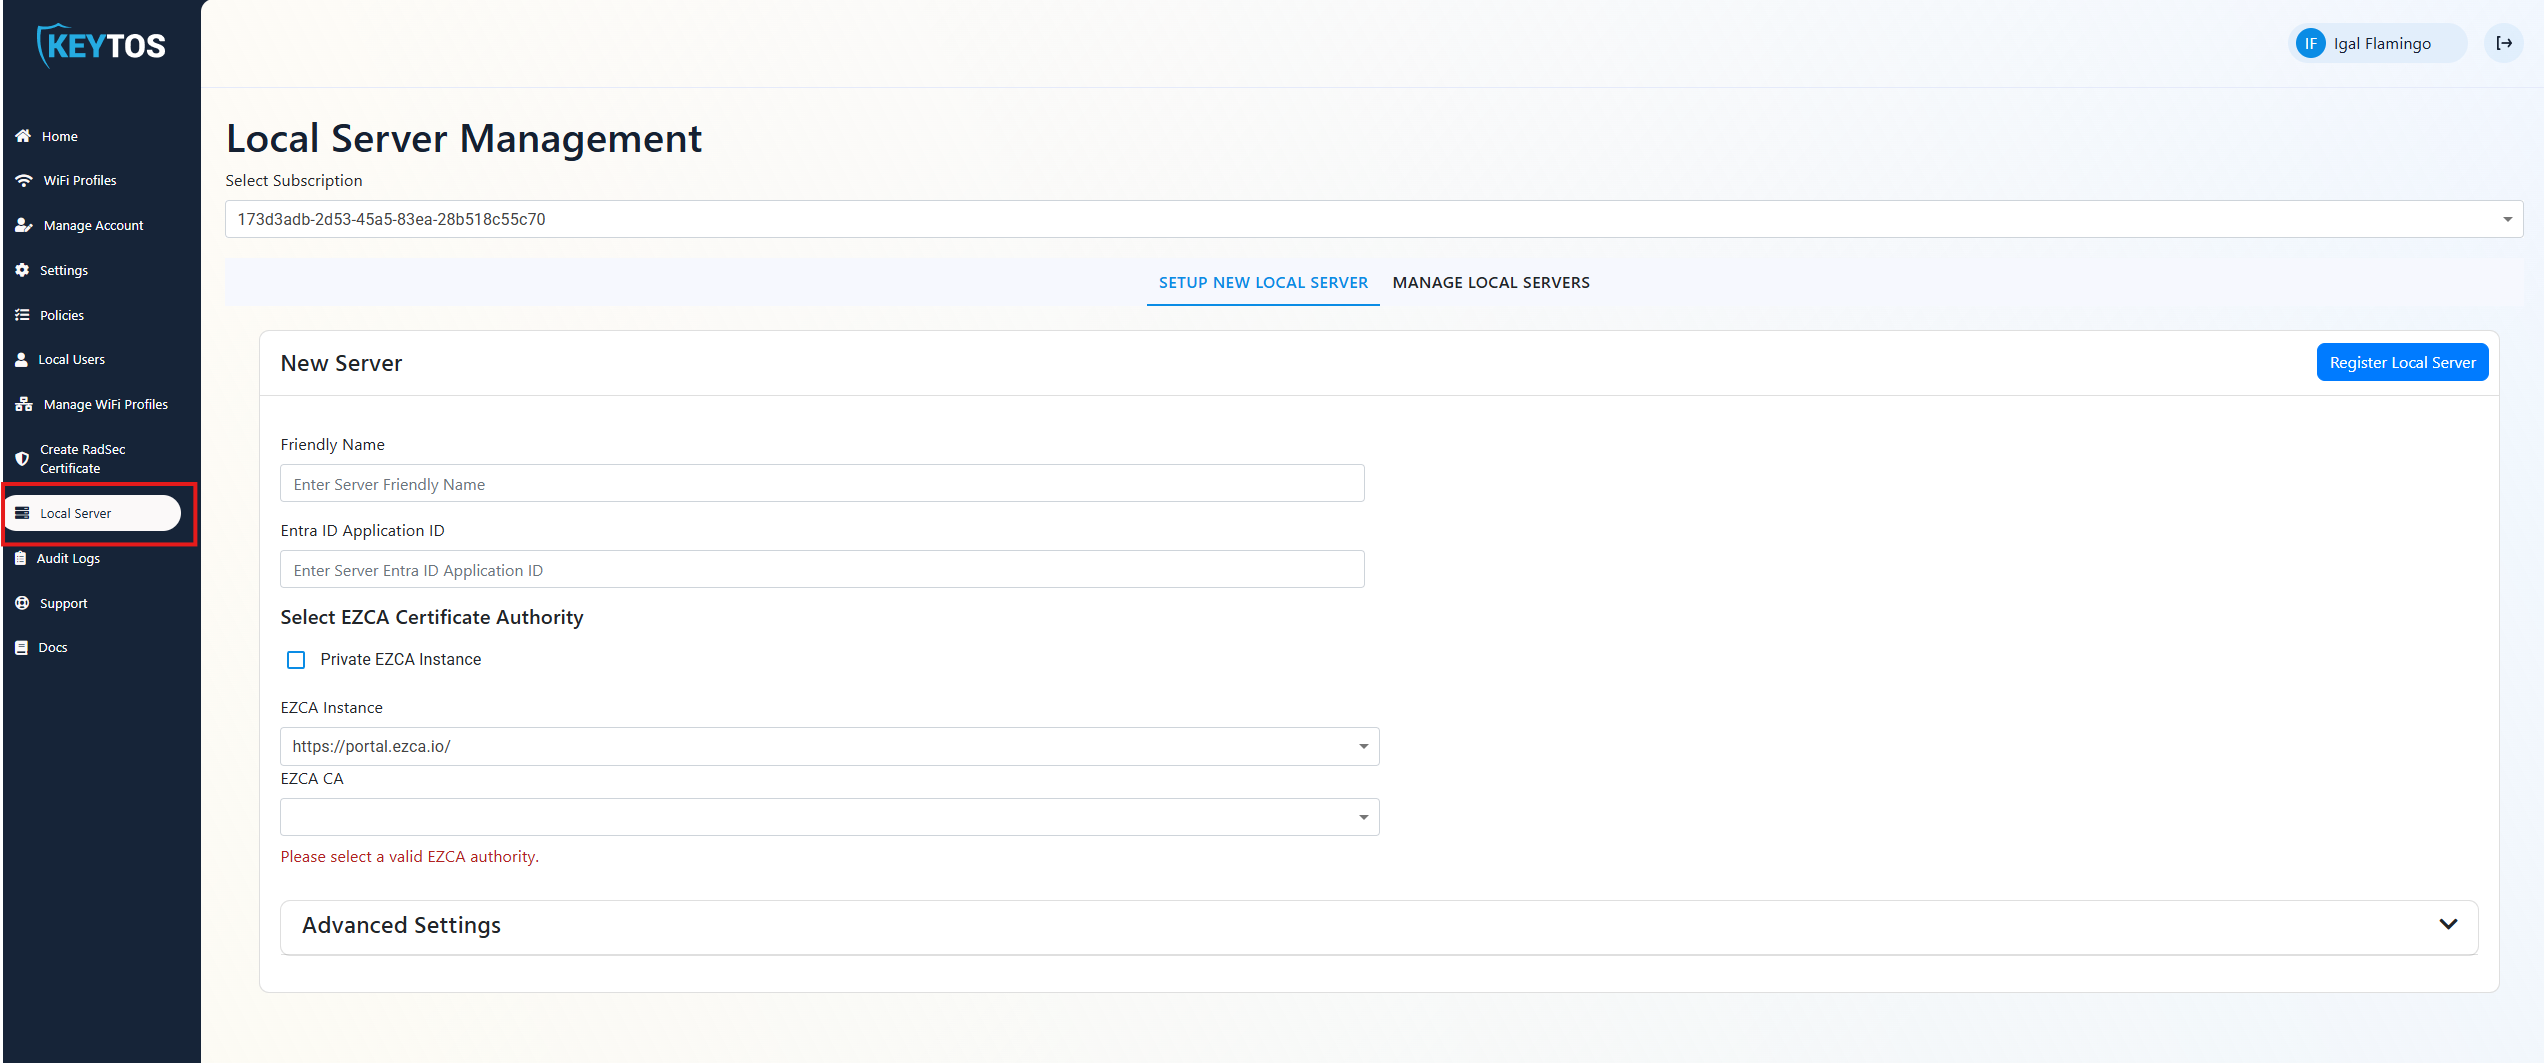

- Enter a friendly name for the new RADIUS proxy.
- In Another Tab, navigate to the Entra ID Application we created earlier.
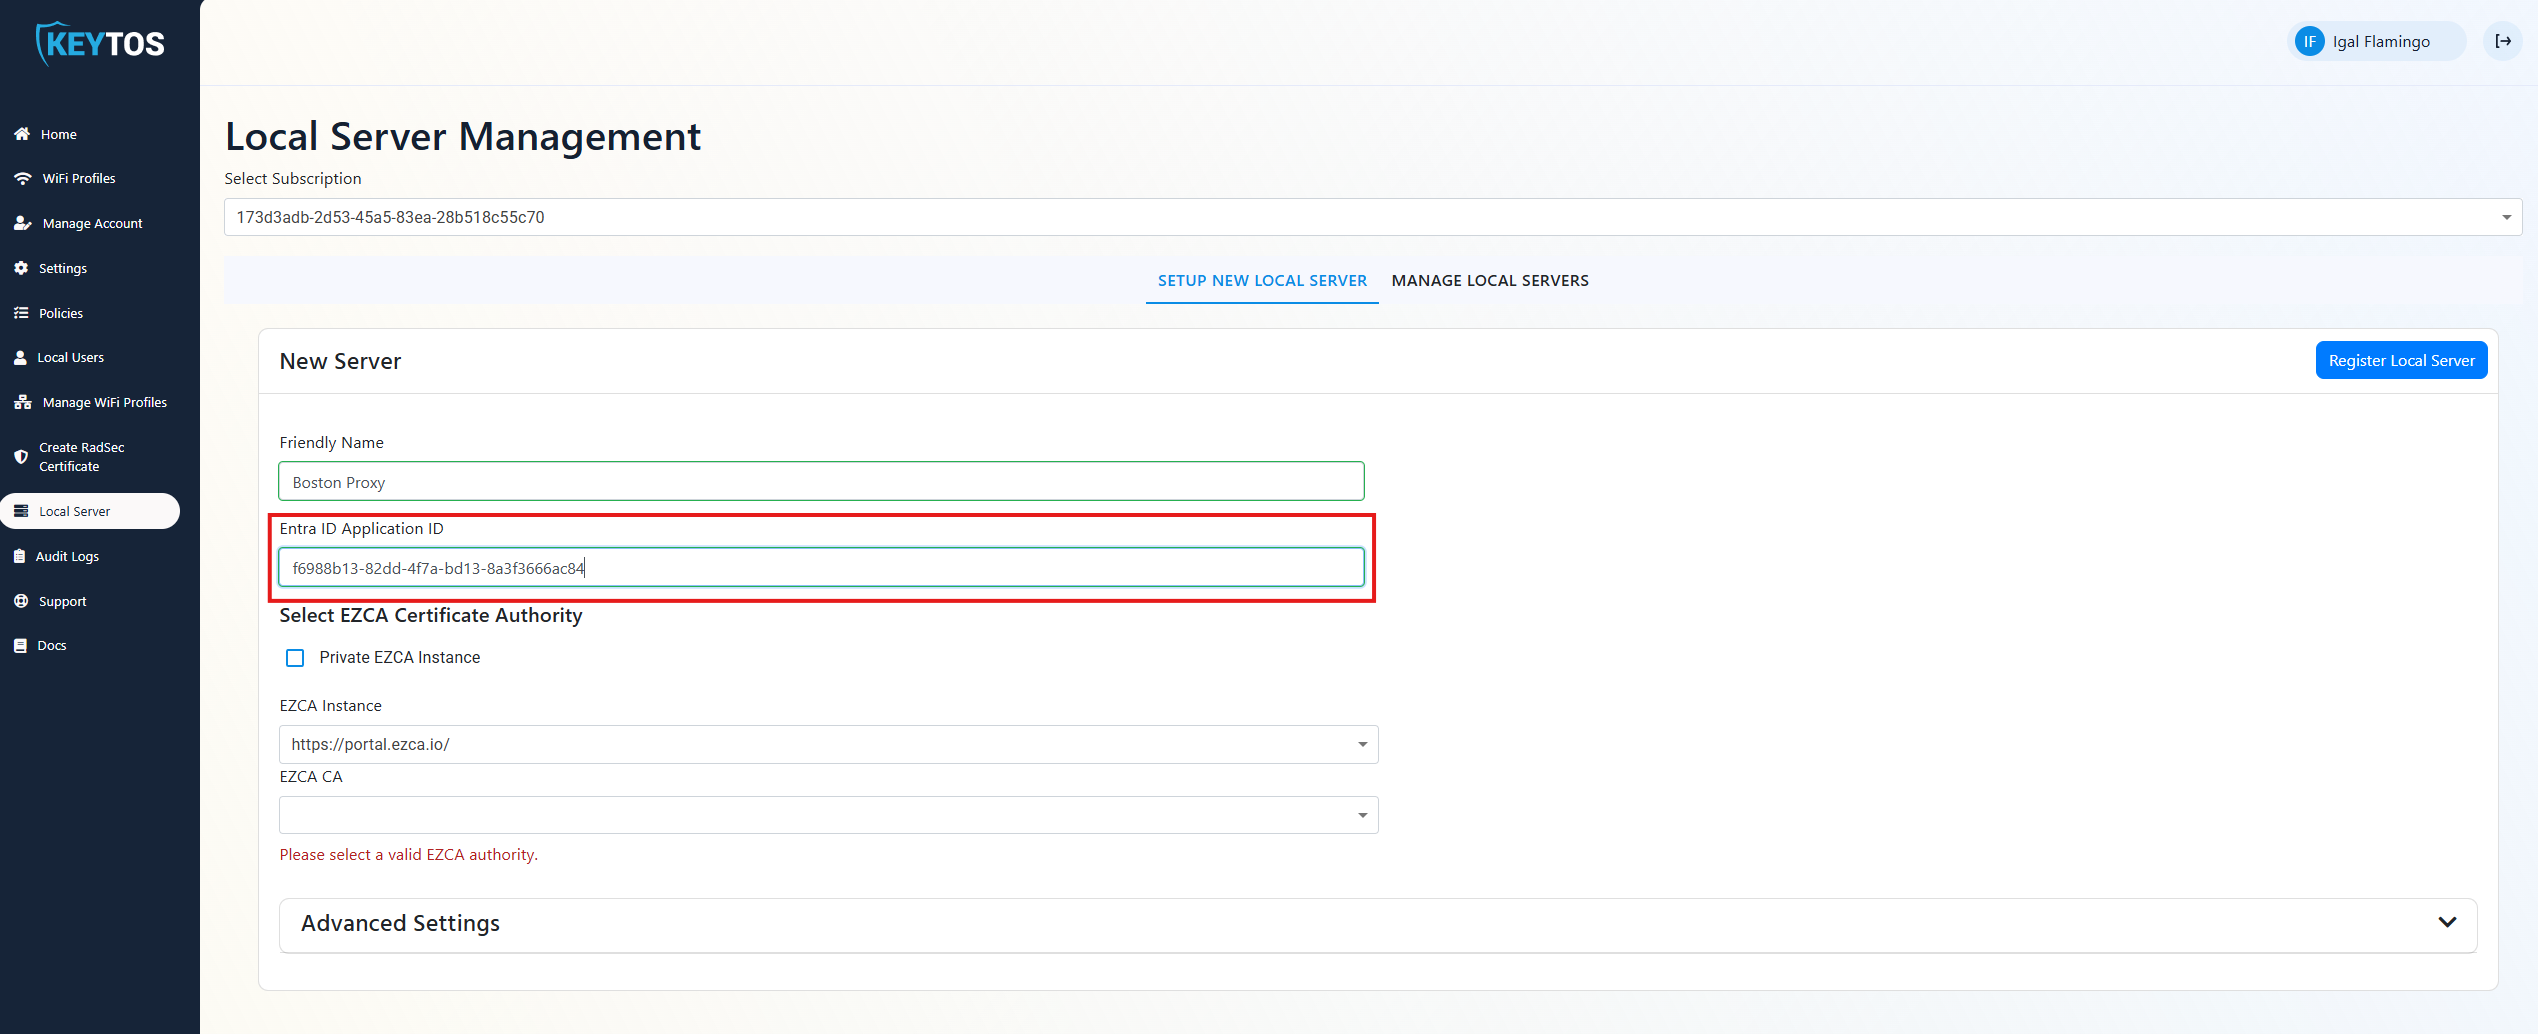
- Copy the Application (client) ID from the Overview page.


- Paste the Application (client) ID into the “Entra ID Application ID” field in EZRADIUS.

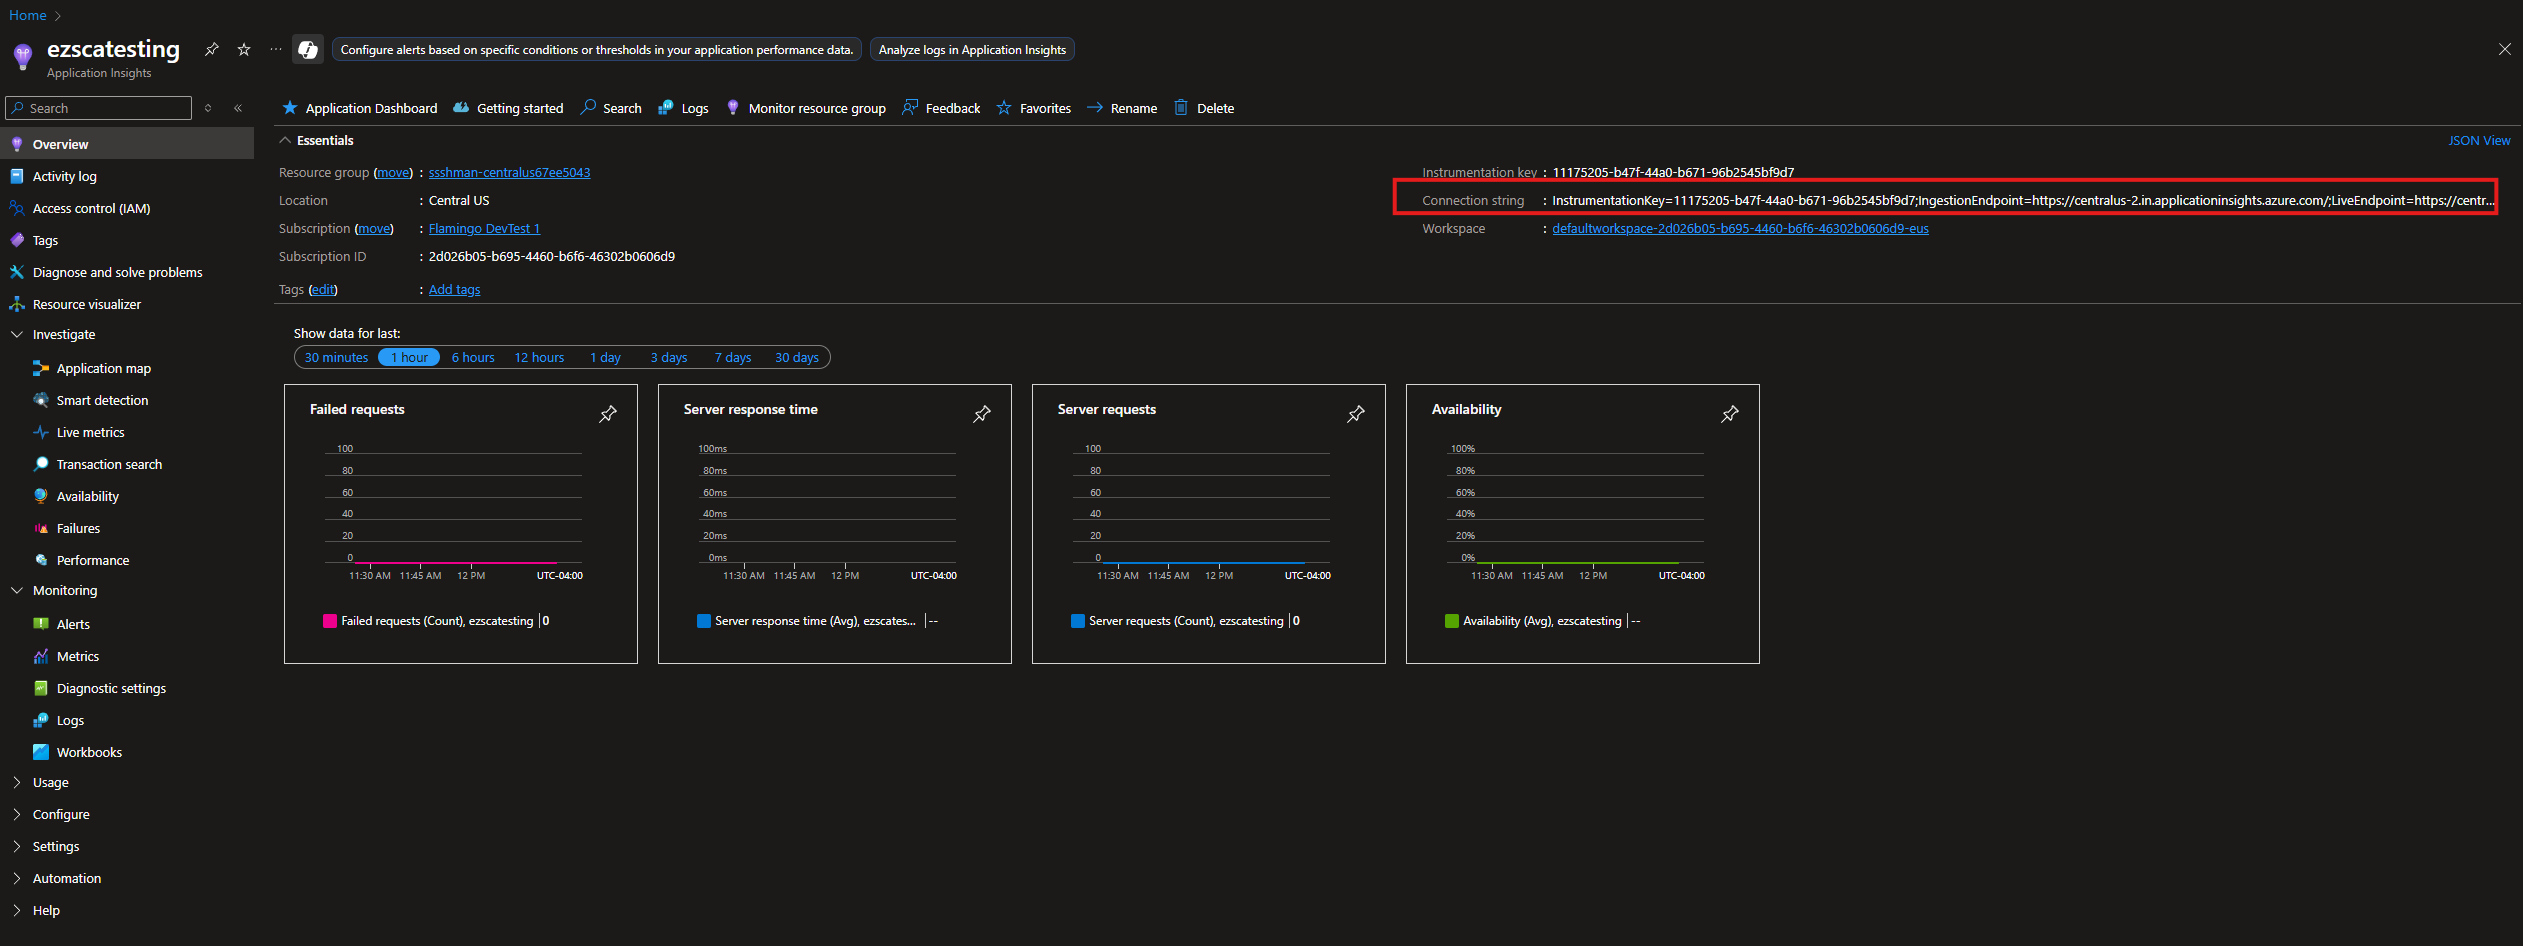
- In Azure, Create an application insights resource for your RADIUS proxy.
- Copy your application insights connection string.

- Add your Application Insights Connection String.
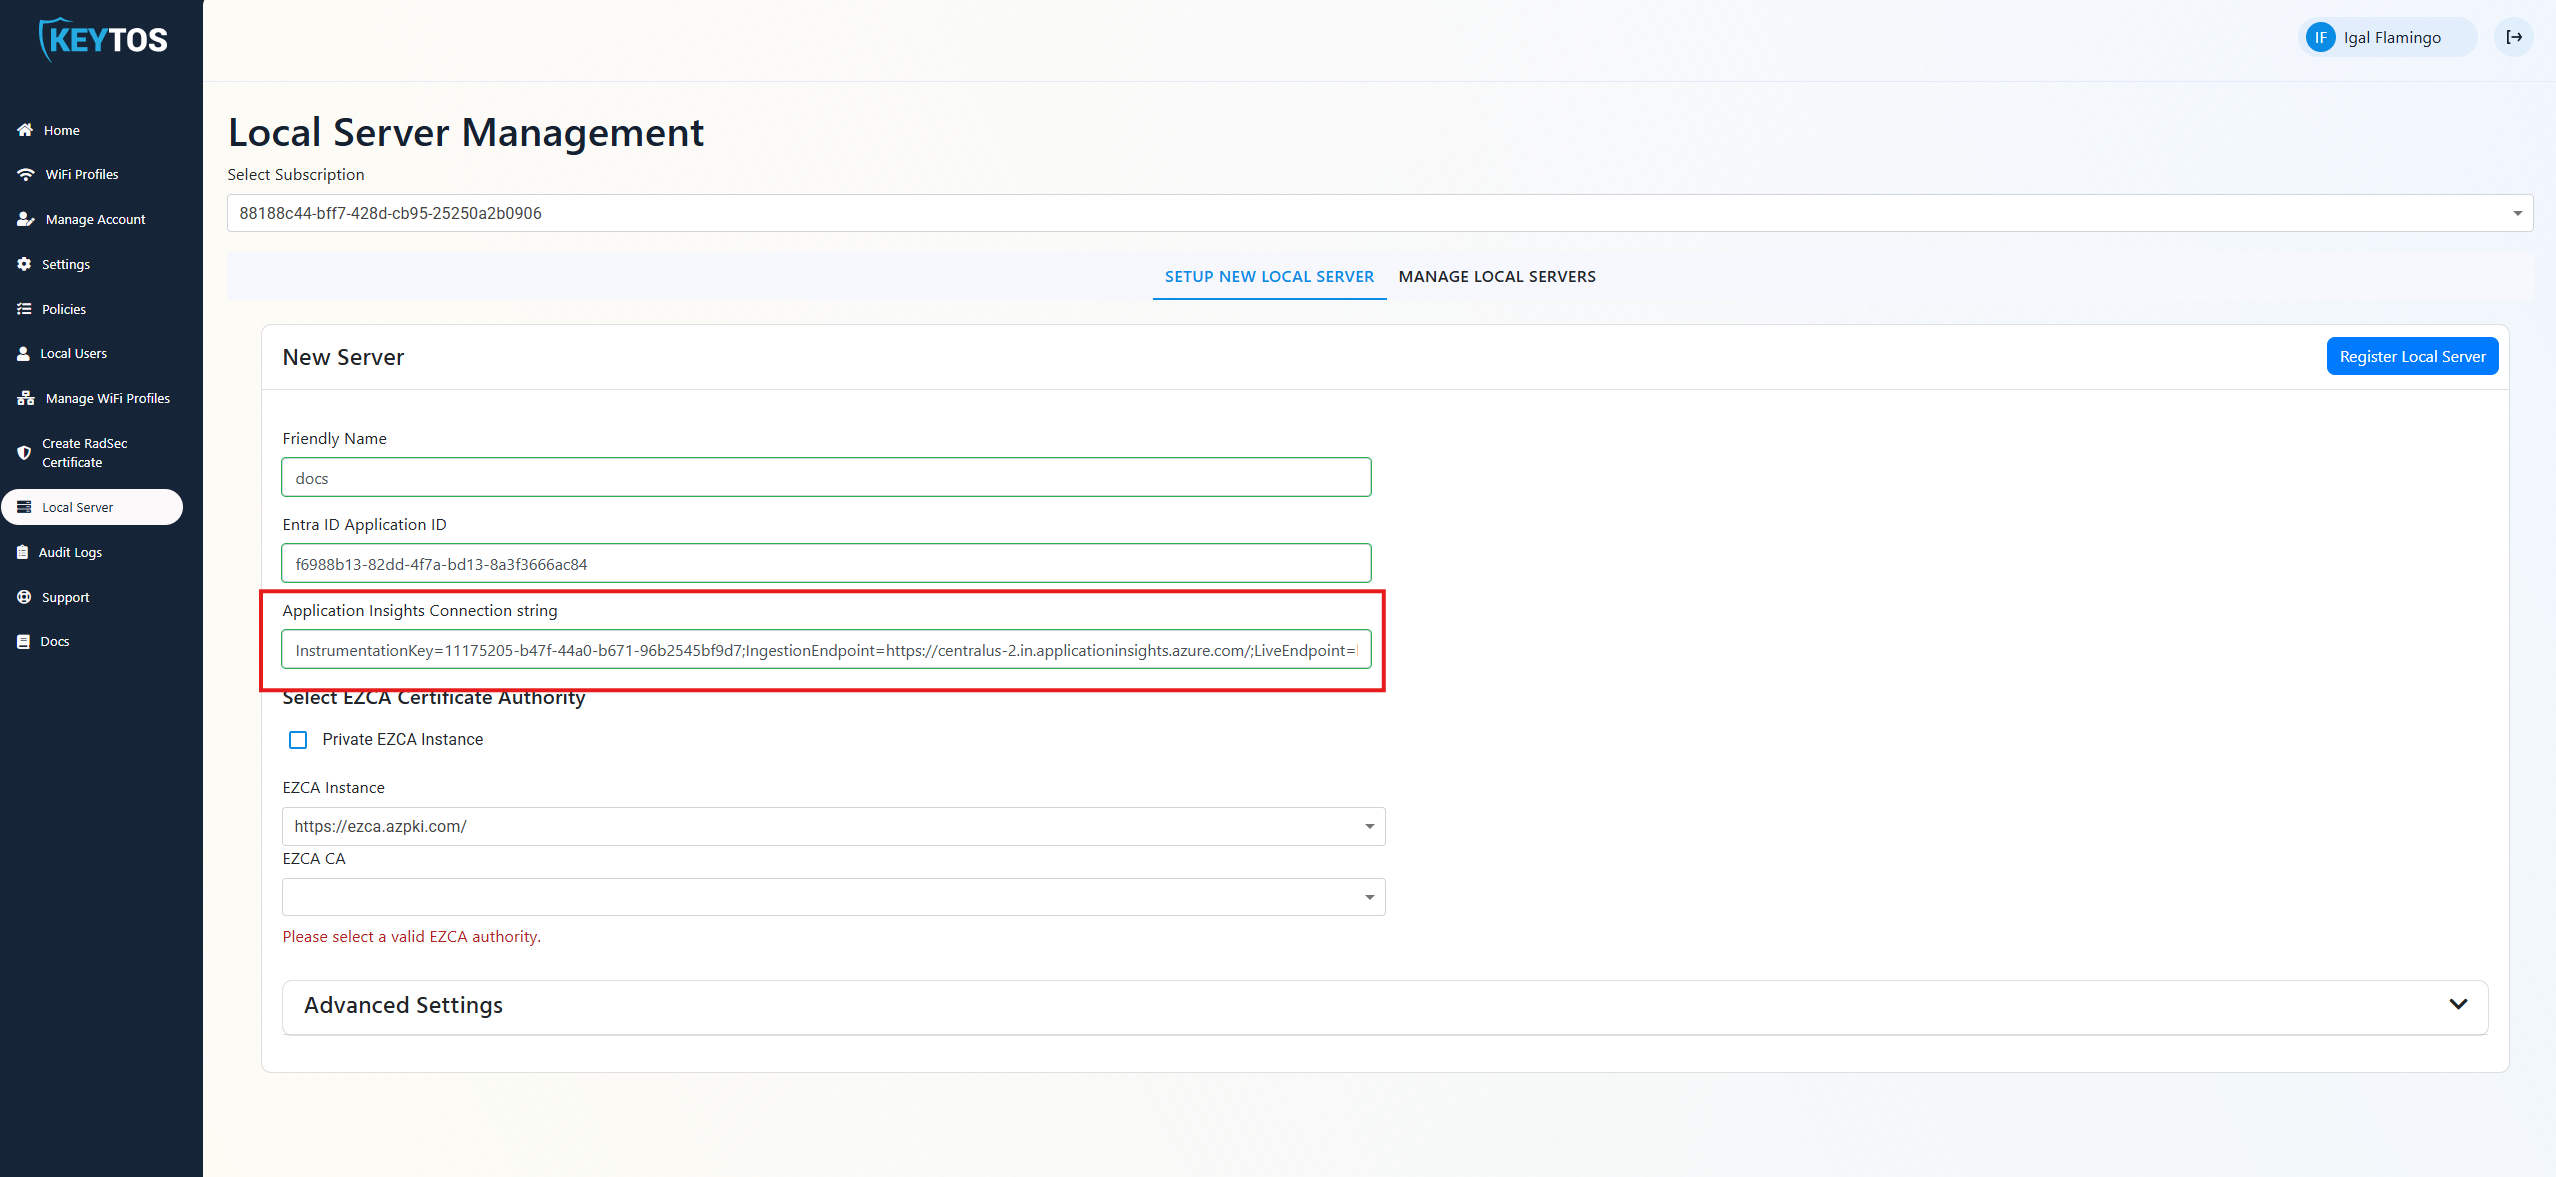

- Select your EZCA Instance and EZCA CA you would like to use for the RADIUS proxy.


- If you want, you can expand the “Advanced” section to configure additional settings. Such as: Proxy caching (How long the proxy keeps the information), Certificate length (don’t go too short on this because EZRADIUS will renew the certificate and if there are many certificates in an Entra ID application it breaks Entra ID).
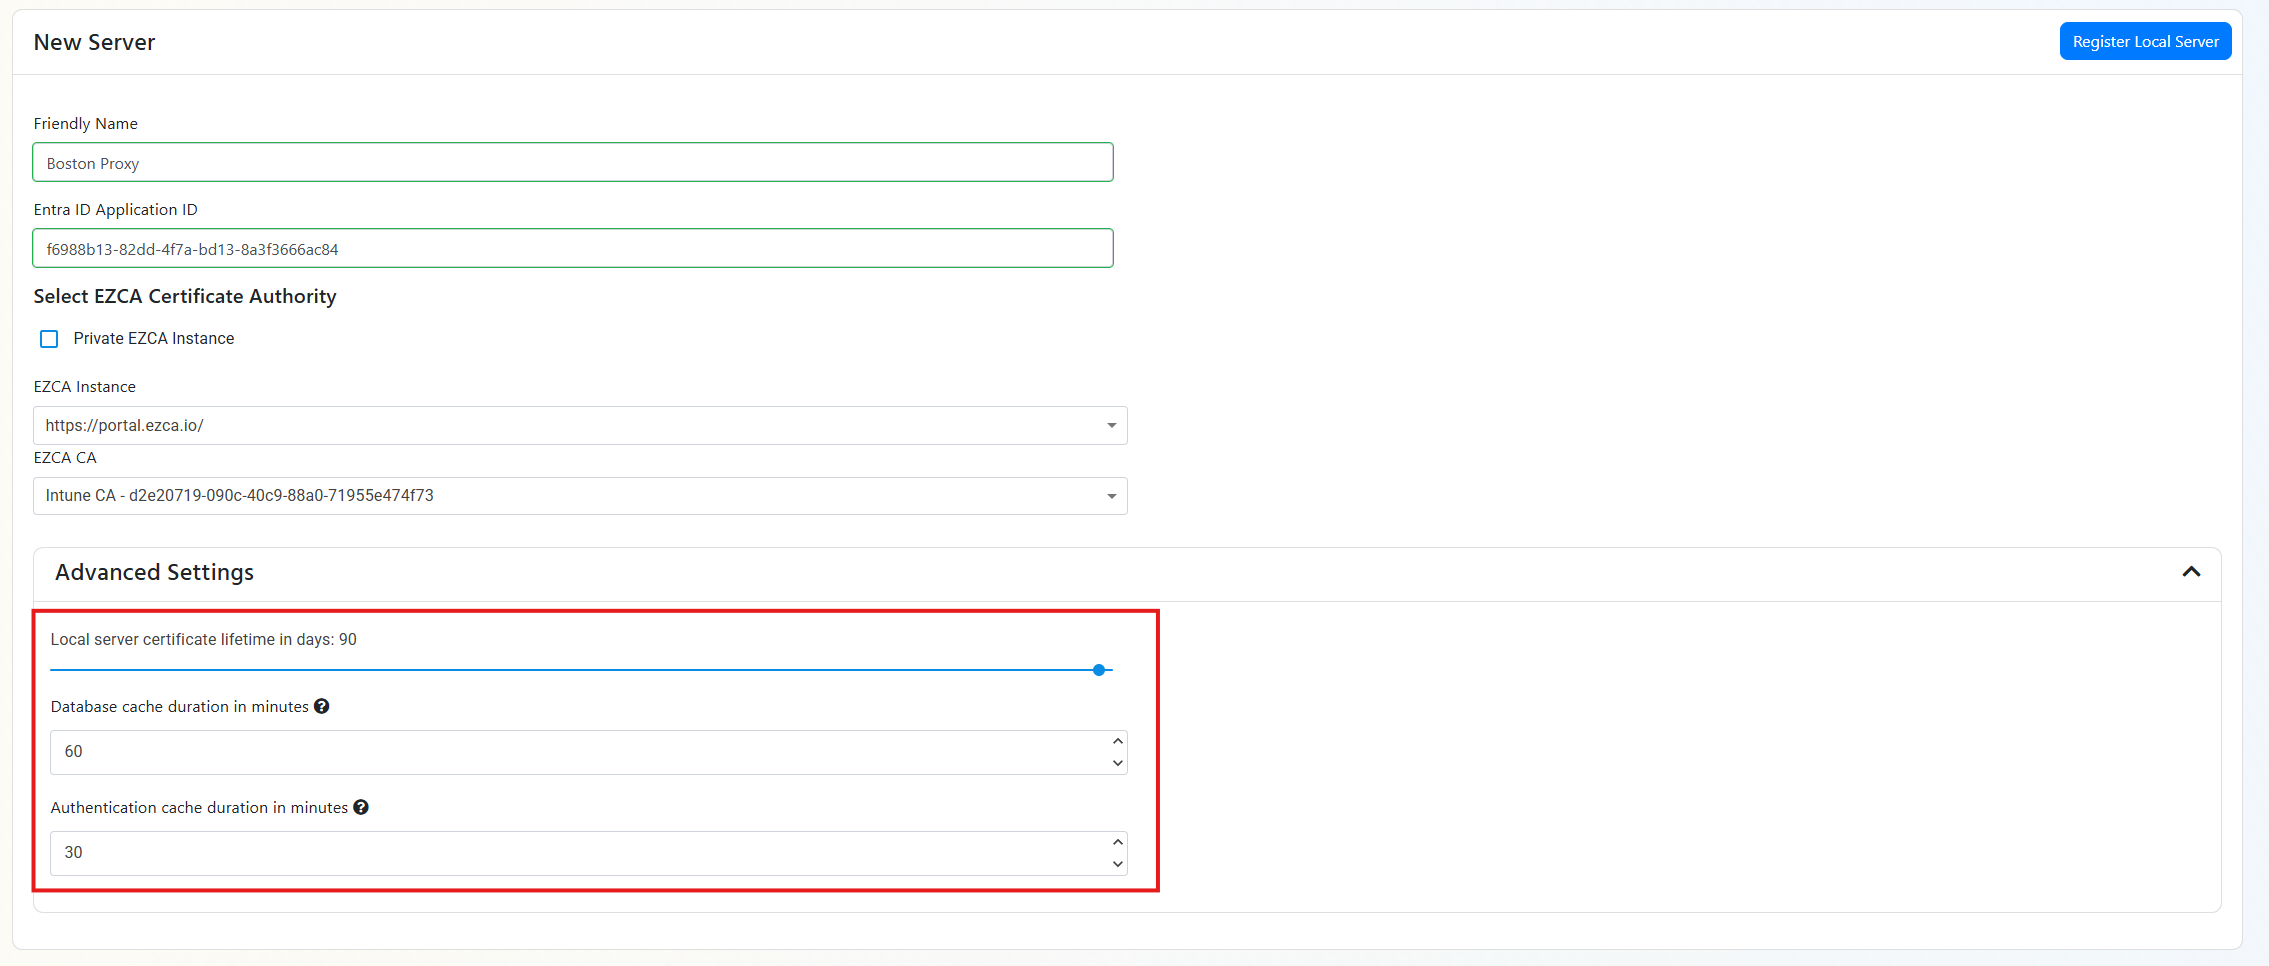

- Click “Register Local Server”.


- This will download a Zip file. The zip file will contain:
- The RADIUS proxy configuration file
script.sh. - a PEM file with the certificate Note: This file has the private key and should be kept secure.
- a .cer file with the public certificate.
- A README file with instructions on how to set up the RADIUS proxy.
- The RADIUS proxy configuration file
- Extract the zip file, and go back to the tab where you have your Entra ID Application open.
- Click on
Certificates & secrets.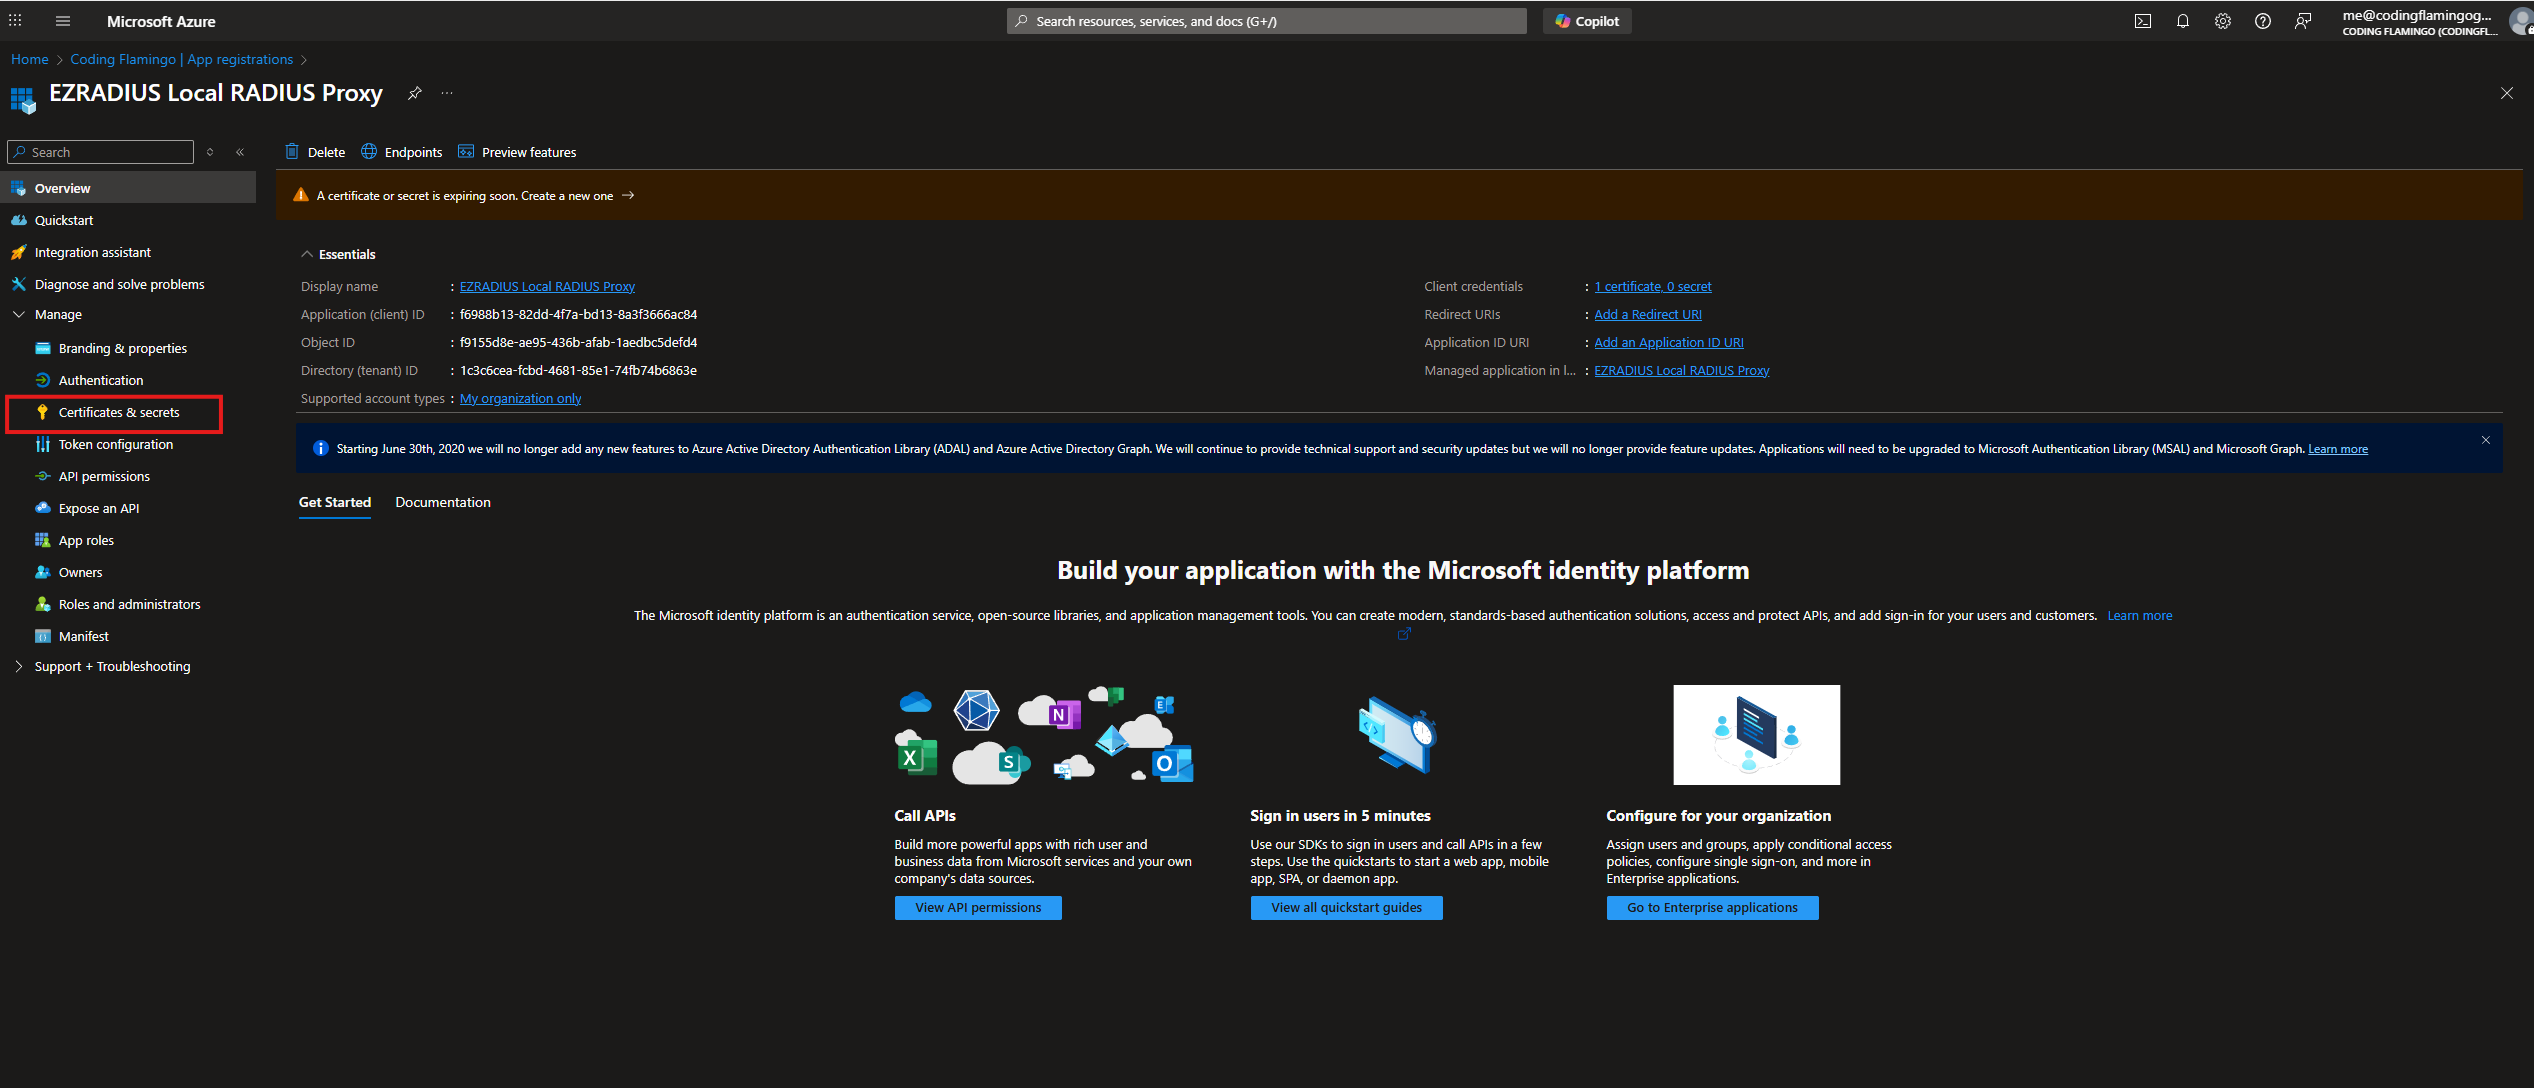

- Click on
Upload Certificate.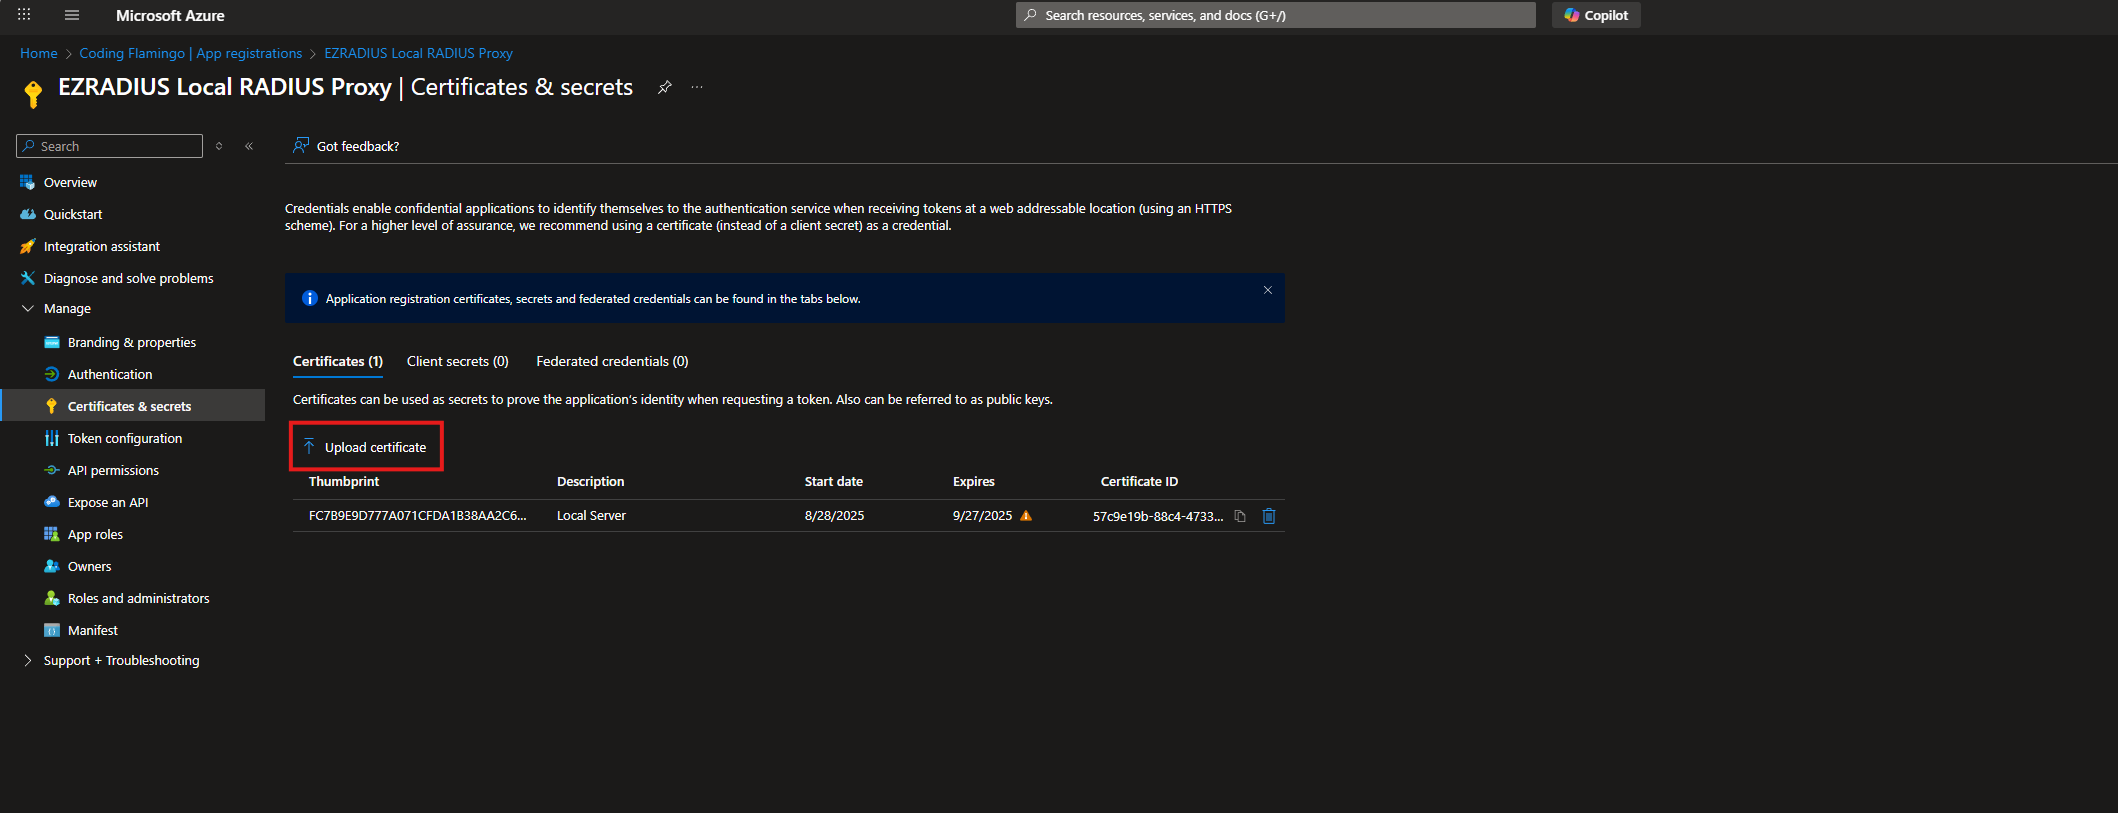

- Upload the
.cerfile from the zip file you downloaded from EZRADIUS.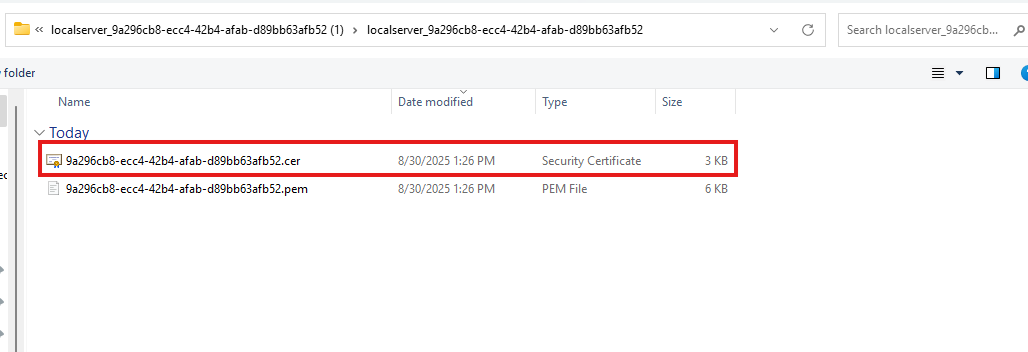

- Click on
Add.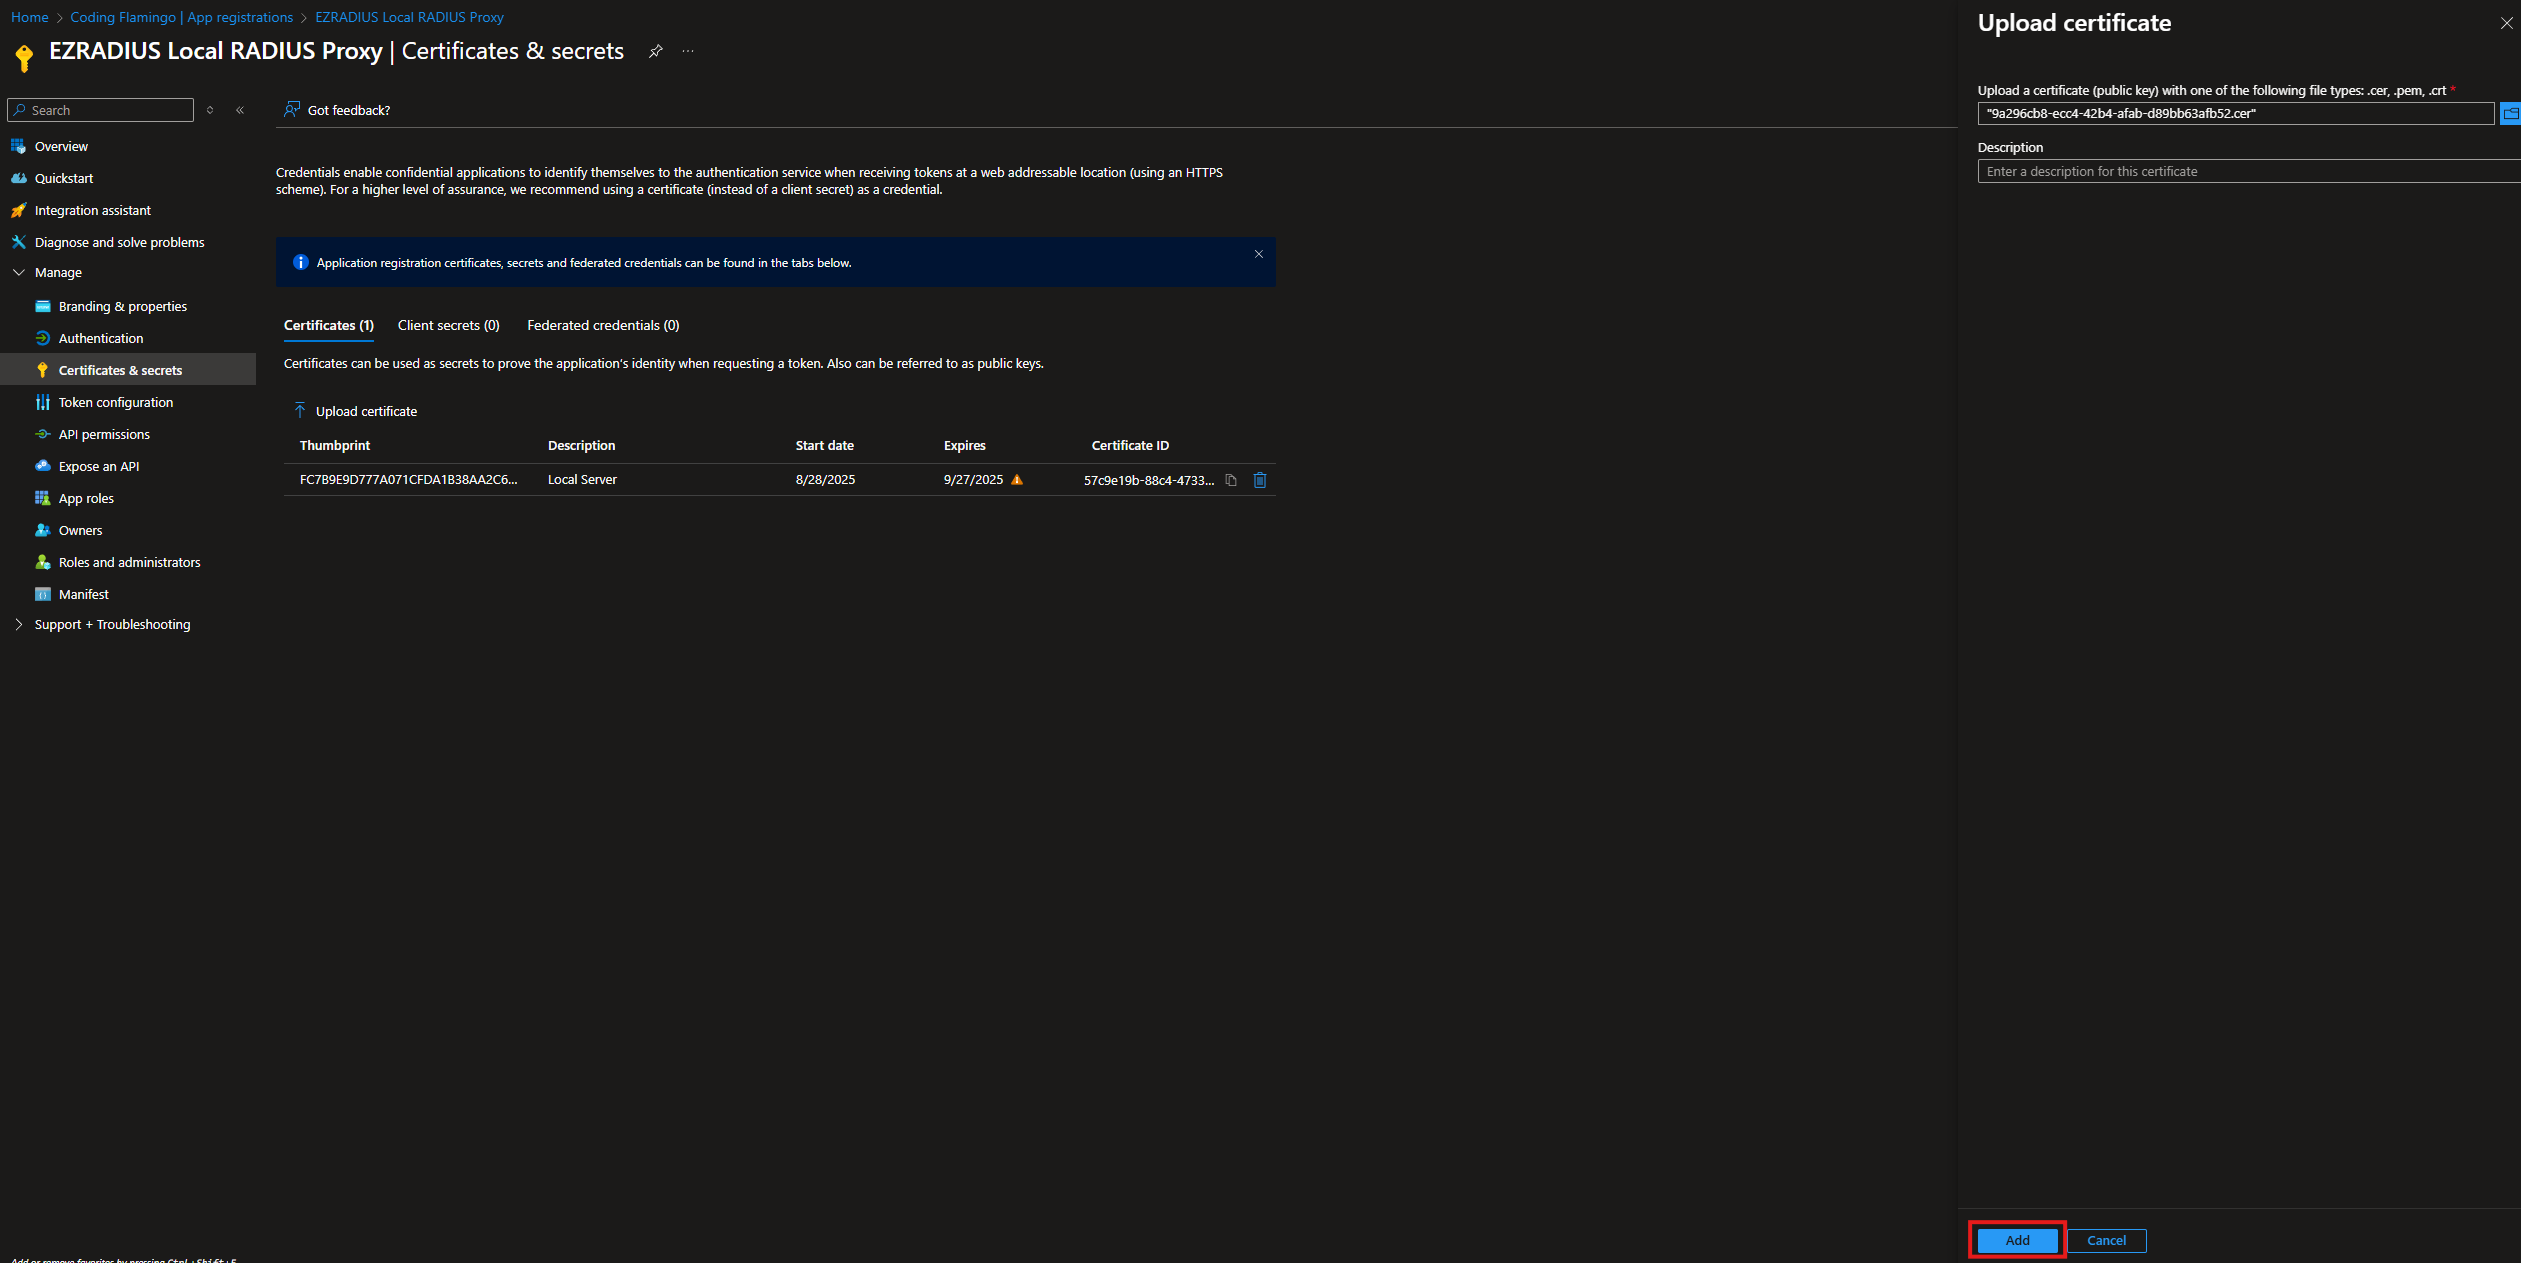

How to Configure the RADIUS Proxy for Cloud RADIUS
Now that we have the files and we have registered the RADIUS proxy, we can proceed to configure it.
- SSH into the server where you want to deploy the RADIUS proxy.