How-To: Create Server Certificates with SCEP Cloud CA
How to Create a Server Certificate with Cloud PKI
While you are mostly using your EZCA SCEP Cloud CA for SCEP certificates issued by your MDM solution such as Intune or Jamf, you can also use it to create server certificates for your servers that require certificate authentication such as RADIUS servers, VPN servers, Web Servers, etc.
EZCA enables you to create this without the need of running ADCS (Active Directory Certificate Services) offloading all your PKI needs to Azure.
Prerequisites
- Create a SCEP CA. By default the CA will have the required EKUs. However, if you change this, please make sure you have the KDC Authentication, Smart Card Logon, Client Authentication, and Server Authentication.
When Should I create an SSL CA in addition to my SCEP CA?
One of the most common questions we get is when to create a separate SSL CA in addition to the SCEP CA. It comes down to a simple question. Are your server certificates will be issued by the PKI administrators only? Or will you also have other users (such as help desk or other IT staff) that will also need to issue server certificates?
- If only PKI administrators will issue server certificates, you can use the SCEP CA for both SCEP and server certificates.
- If other users (such as help desk or other IT staff) will also need to issue server certificates, we recommend creating a separate SSL CA for server certificates. This will allow you to have more granular control over who can issue server certificates and will also help you prevent a user or device impersonation by someone creating a “Server Certificate” with the identity of a user or device.
How to Create a Server Certificate in a SCEP Cloud CA
- navigate to the EZCA portal (If you have your private instance, or using our localized EZCA portals go to that specific portal)
- Login with an account that is registered as a PKI Admin in EZCA.
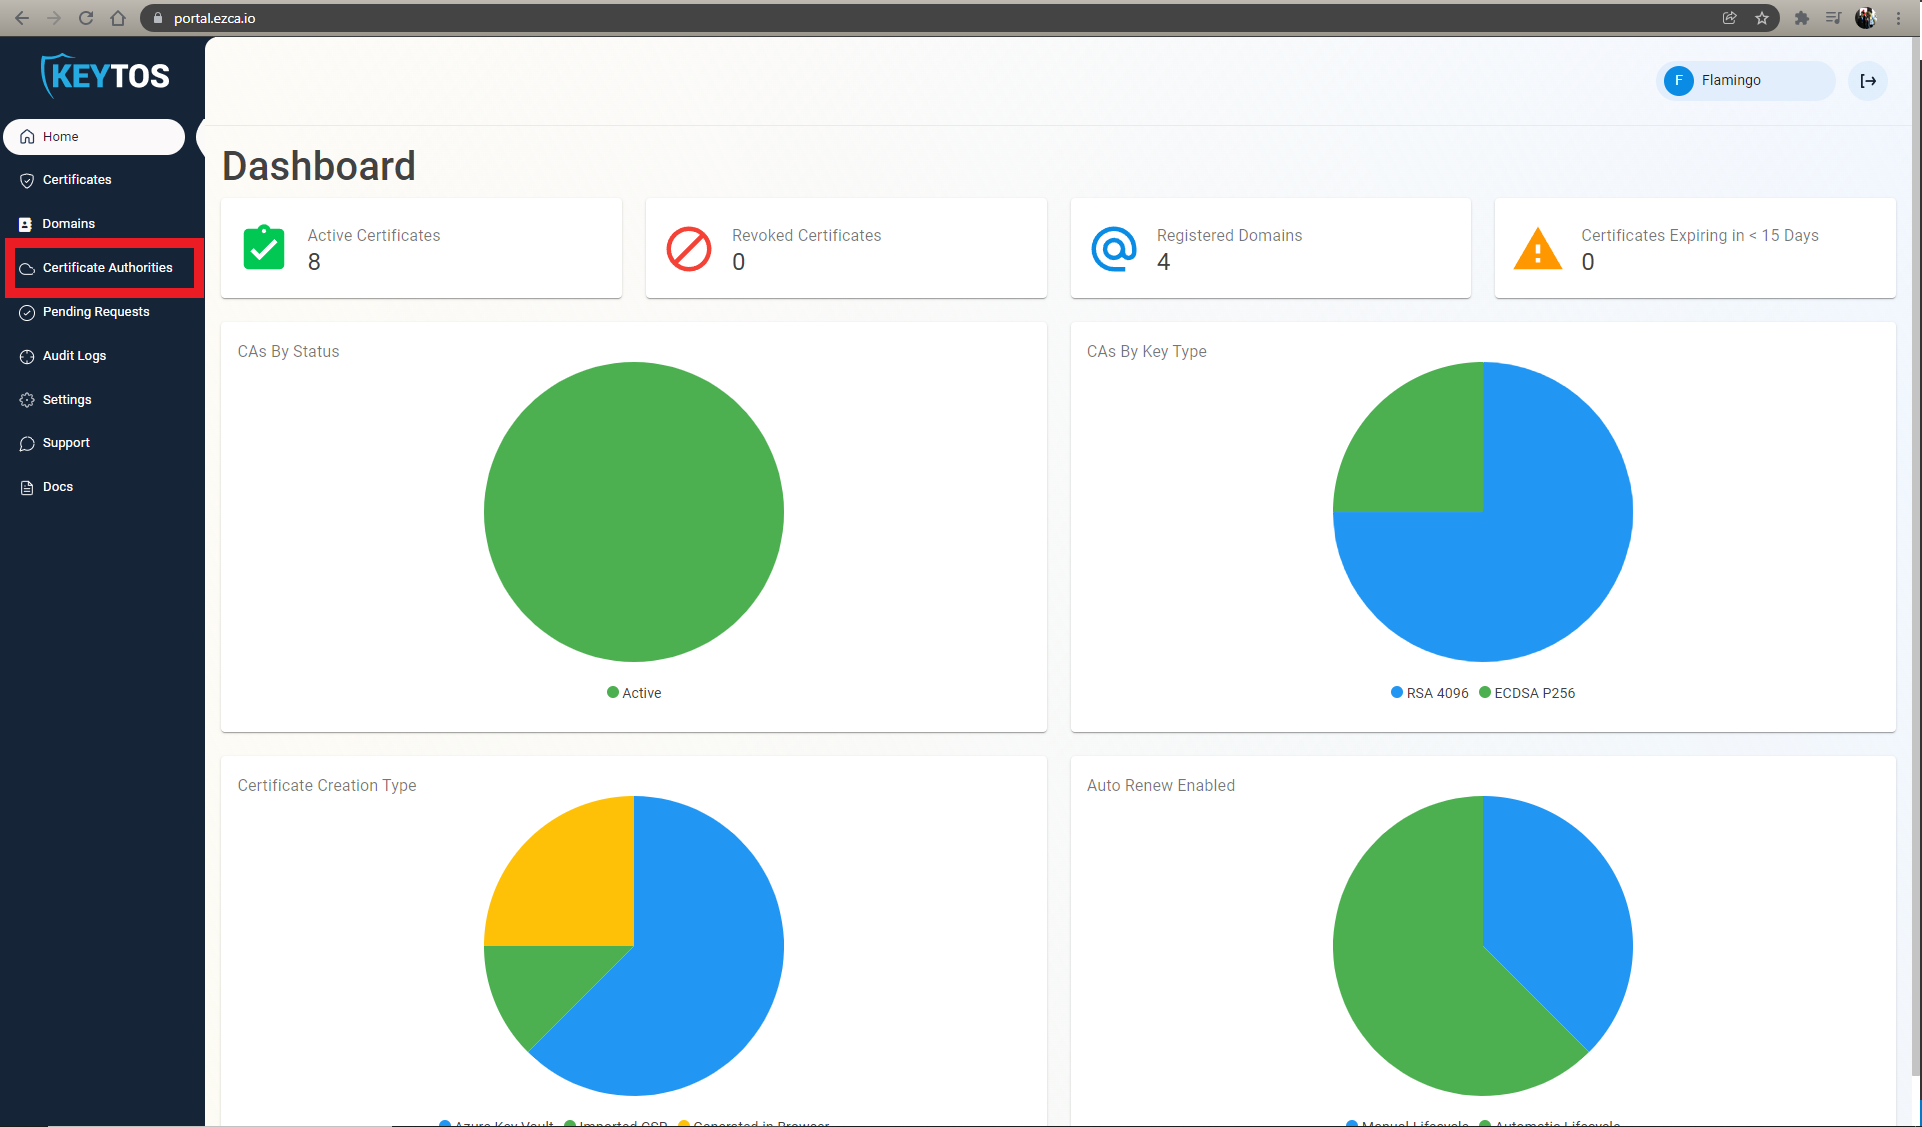
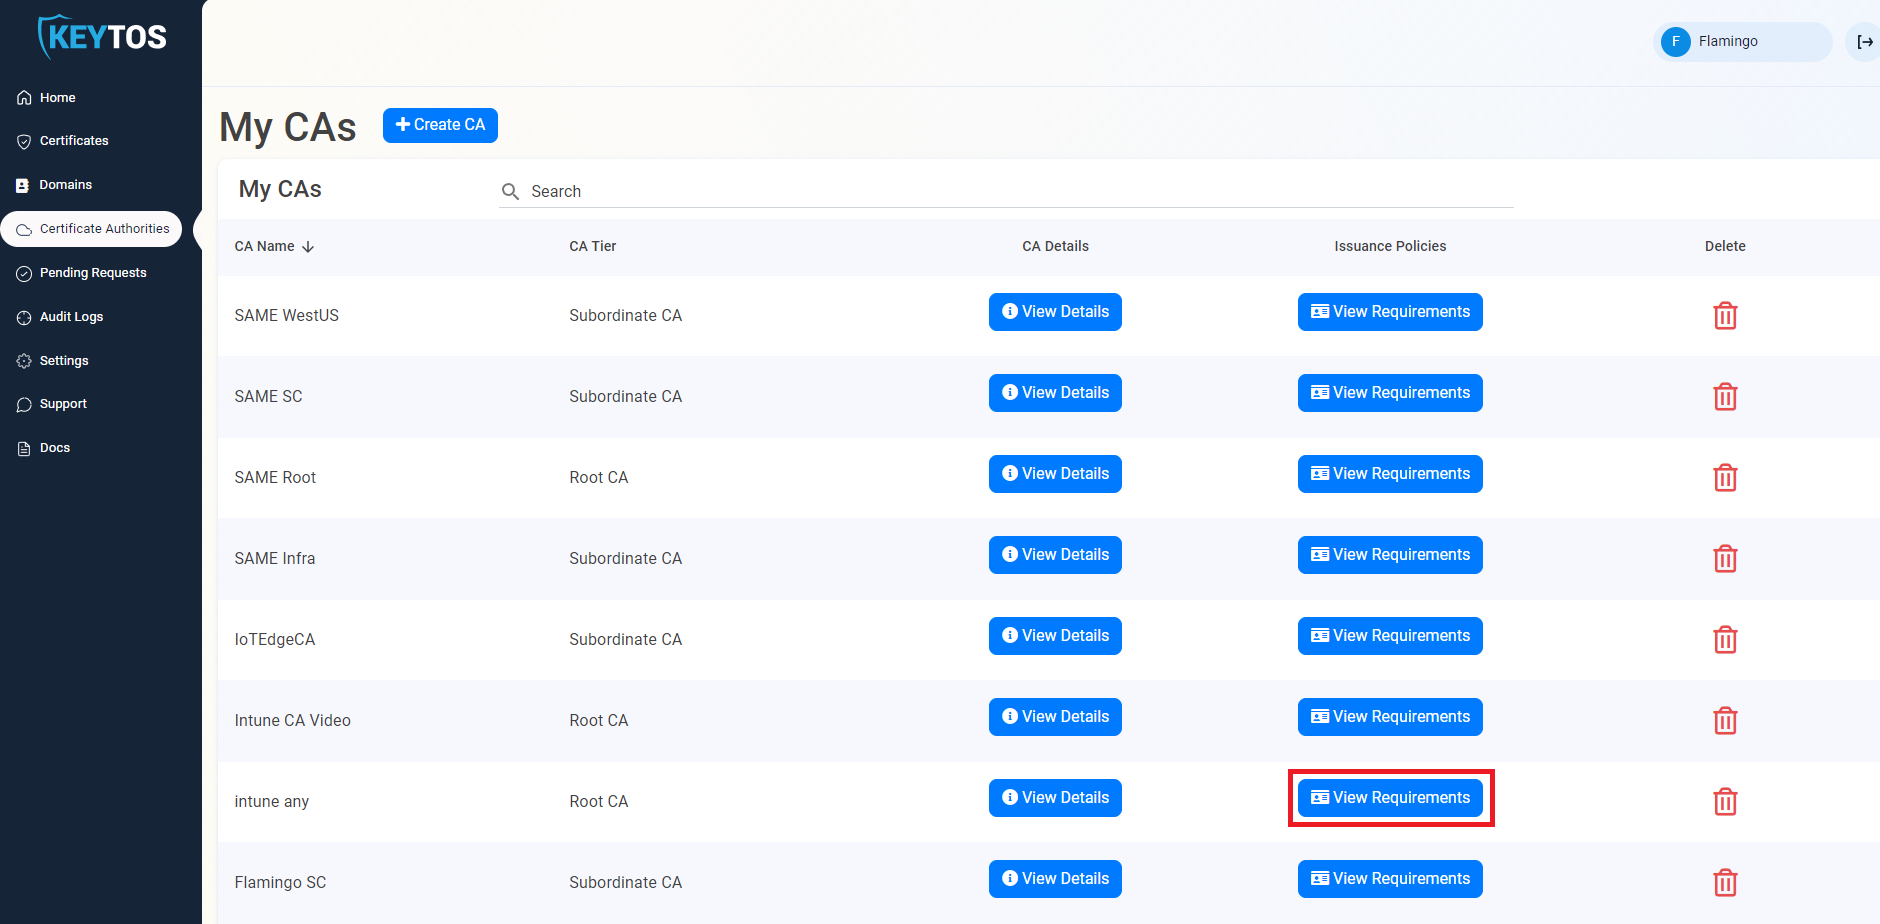
- Navigate to Certificate Authorities.
- Select the “View Requirements” button for your CA
- Select the “Request Certificate as Administrator” Button
- Enter The Subject Name in format
CN=server1.contoso.com OU=Your OU DC=contoso DC=com - Enter your host name.
- Select the validity lifetime of your certificate.
- Follow the instructions to create your CSR.
- Request the certificate.
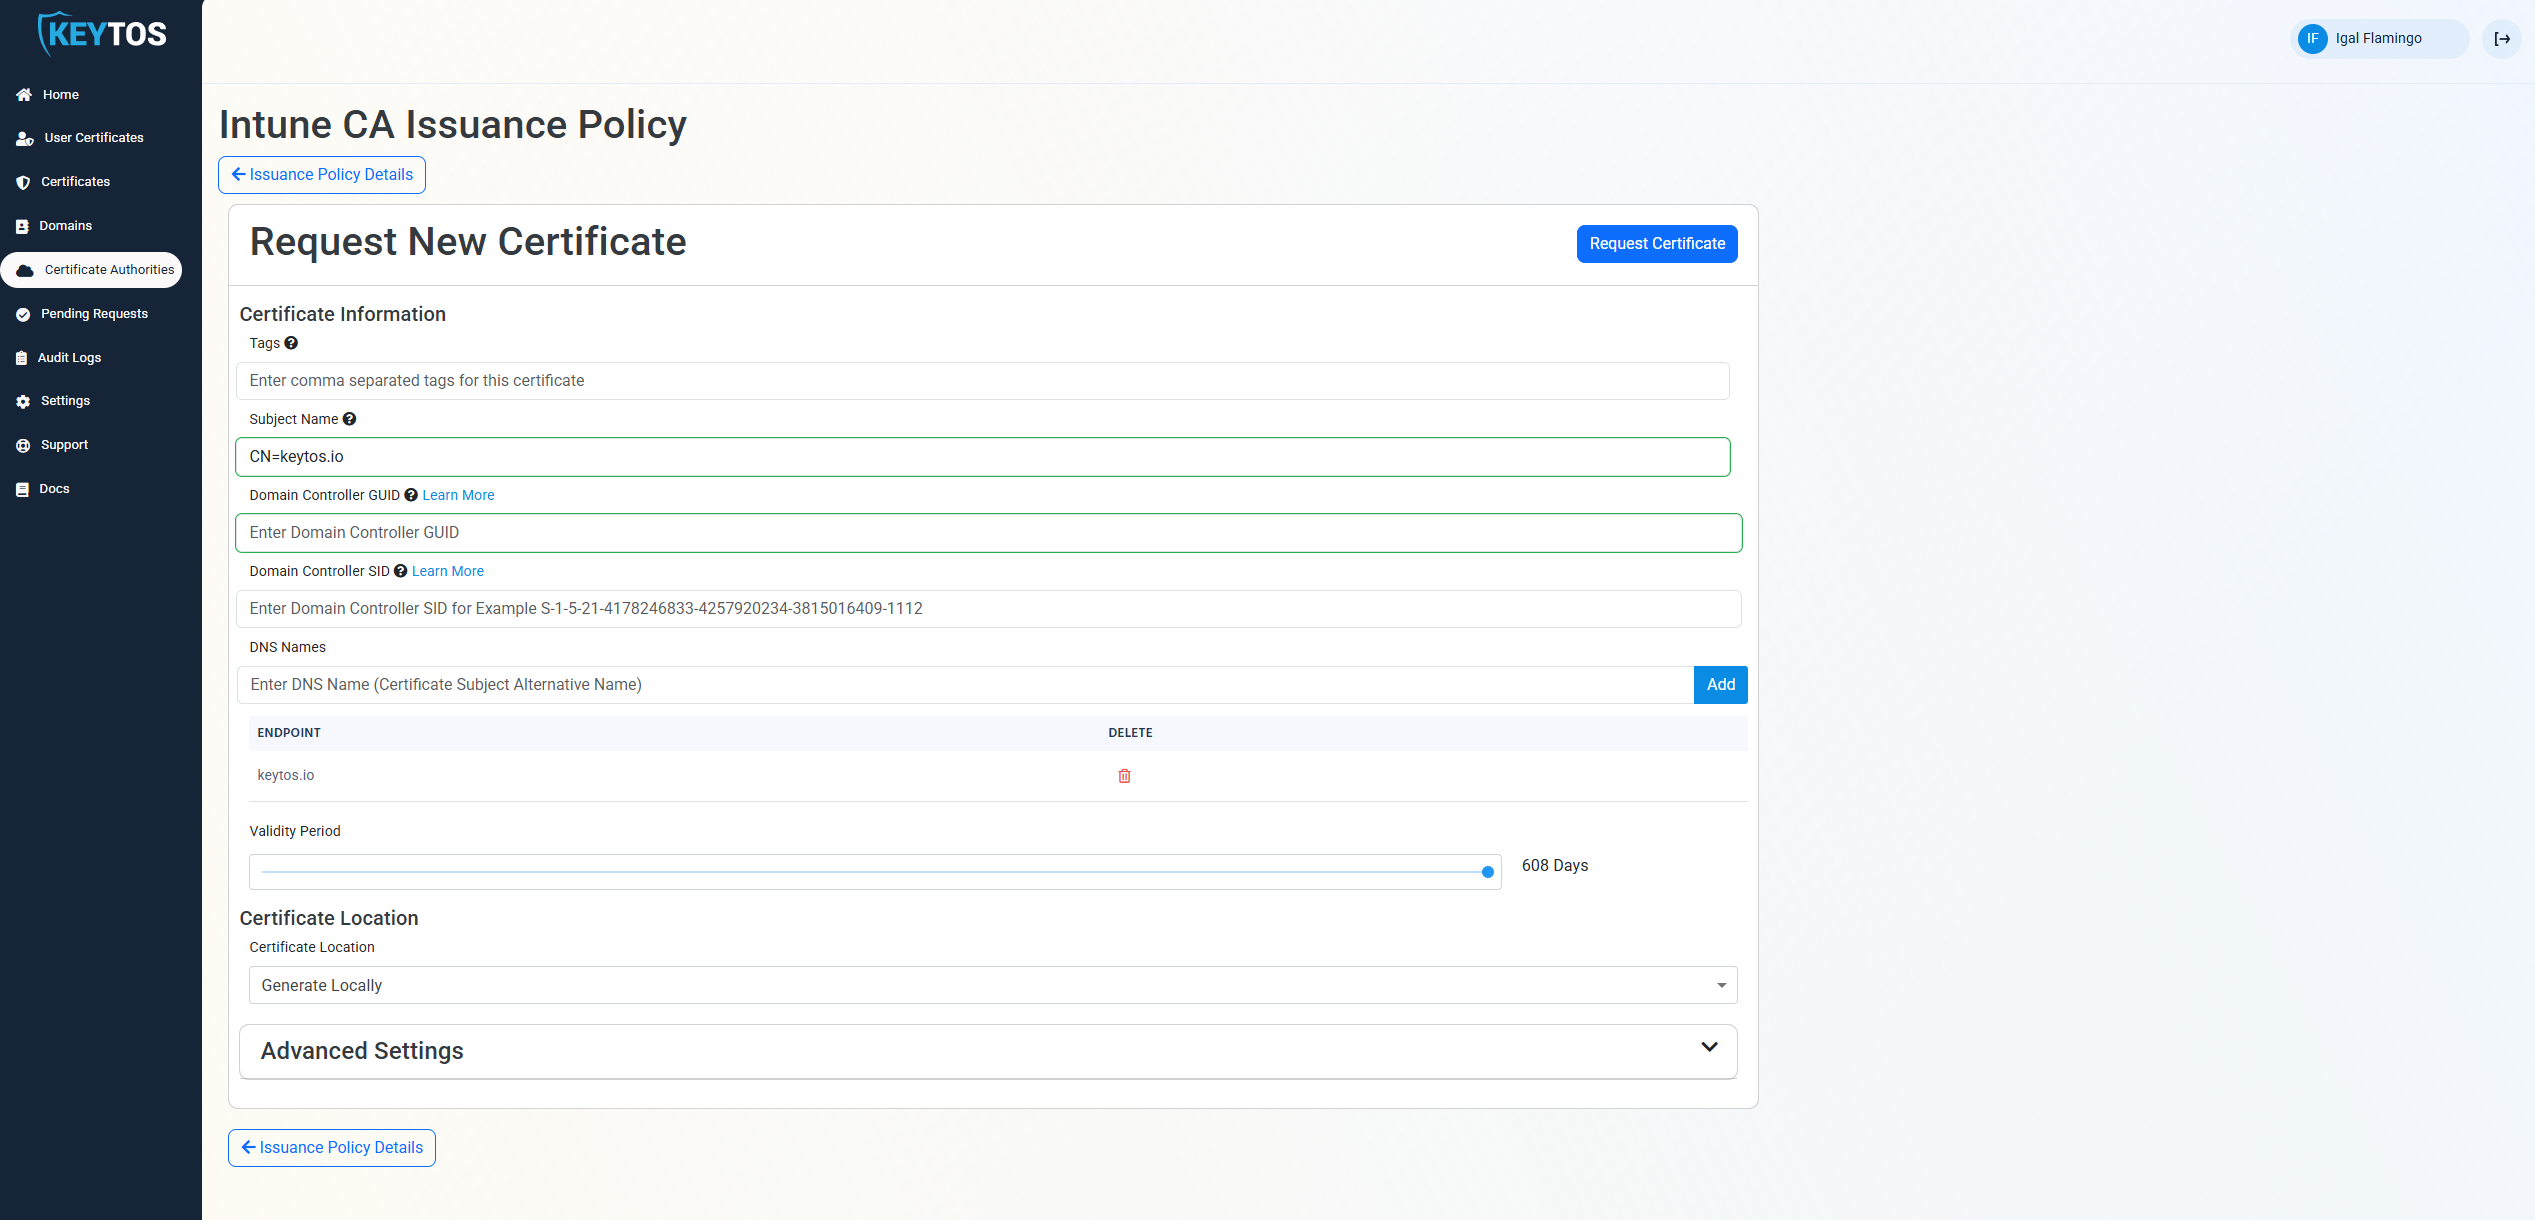
- Download an Install the certificate.
How to Set Your Server Certificate for Automatic Rotation
Once you have created your first certificate for the server, we have to set a schedule task to run the renewal command:
.\EZCACertManager.exe renew -s \"CN=server1.contoso.com\" --LocalStore
the following options are available for this command:
   -r, --RDP             (Default: false) whether this certificate should be added as the computer's RDP certificate

  -s, --SubjectName     Required. SubjectName for the certificate you want to renew

  --AppInsights         Azure Application Insights connection string to send logs to

  -e, --EZCAInstance    (Default: https://portal.ezca.io/) EZCA instance url

  --LocalStore          (Default: false) If the certificate should be stored in the computers Local Store. If false certificate will be stored in the user store

  -t, --Template        (Default: ) Certificate Template Name

  -i, --Issuer          (Default: ) Certificate Issuer Name

  --help                Display this help screen.

  --version             Display version information.
If you have multiple certificates with the same subject name we recommend using the Issuer name or template name to specify the certificate you want to renew.