

















How-To: Automatically Rotate Entra ID (AAD) Application Certificates Using EZCA
Introduction - Why You Should Automatically Rotate Your Application Certificates
Did you know 80% of organizations have reported certificate related outage in the last two years? The reason is that computers are outnumbering humans at a ratio where manually managing certificates is impossible. One of the certificates that are easy to miss are certificate used for service to service authentication in Azure. While EZCA enables automatic Azure Key Vault certificate rotation, Azure does not currently support subject based certificate authentication, meaning that each new certificate must be registered in Azure AD before being used by an application. To solve this issue, we created a feature that automatically rotates your certificates when they are renewed. Giving you a fully automated credential rotation experience.
How to Configure Automatic Certificate Rotation for Entra ID Applications - Video Tutorial
Follow along with our video tutorial to see how to configure automatic certificate rotation for your Entra ID applications:
How To Configure Automatic Certificate Rotation for Entra ID Applications - Step-by-Step Guide
Follow these steps to enable automatic certificate rotation for your Entra ID application.
Step 1 - How to Give Your Application Permission to Rotate Its Own Credentials
To enable Entra ID automatic certificate rotation, we must give your application permission to rotate and manage its own credentials.
Microsoft has enforced that Entra ID applications can only manage their own credentials, so don’t attempt to use one central Entra ID application to rotate many other application credentials.
How to Get Your Application’s Object ID
Let’s begin by getting your application’s object ID, which is required to give it permission to manage its own credentials. Follow these steps:
-
First go to the Azure portal
-
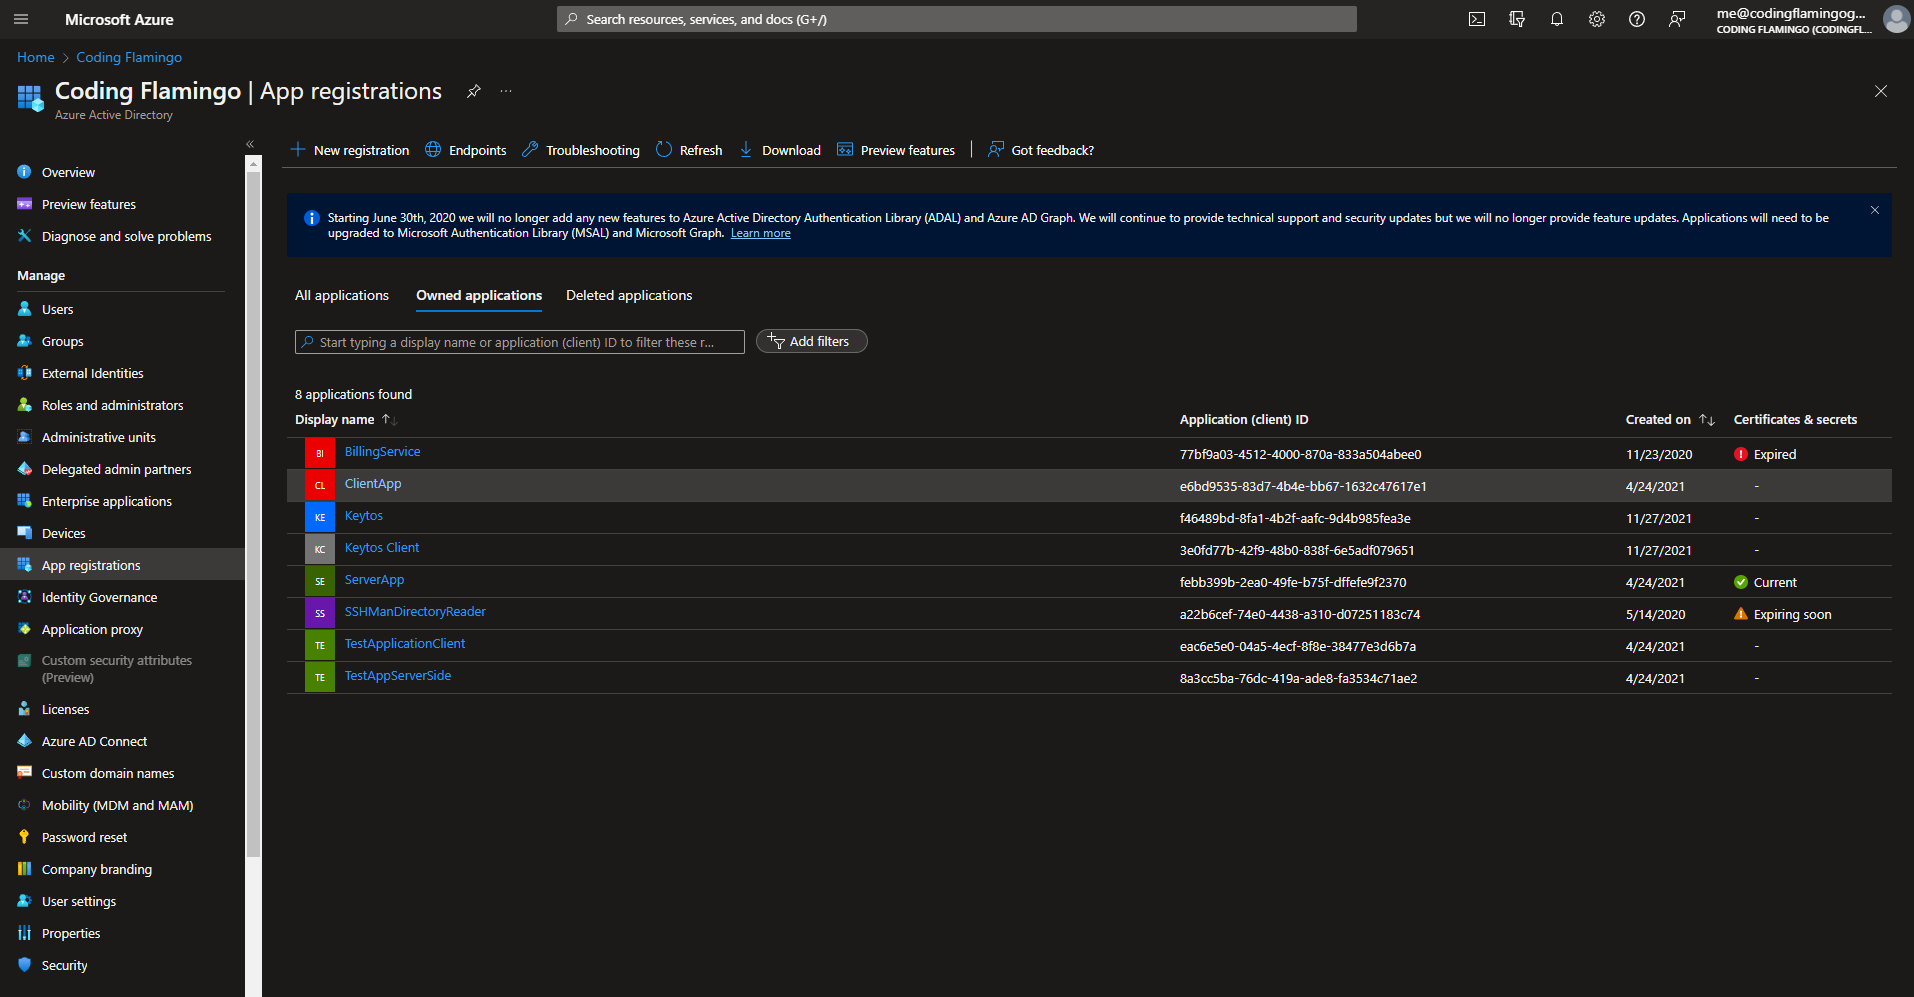
Navigate to Entra ID > App registrations and select your application.
-
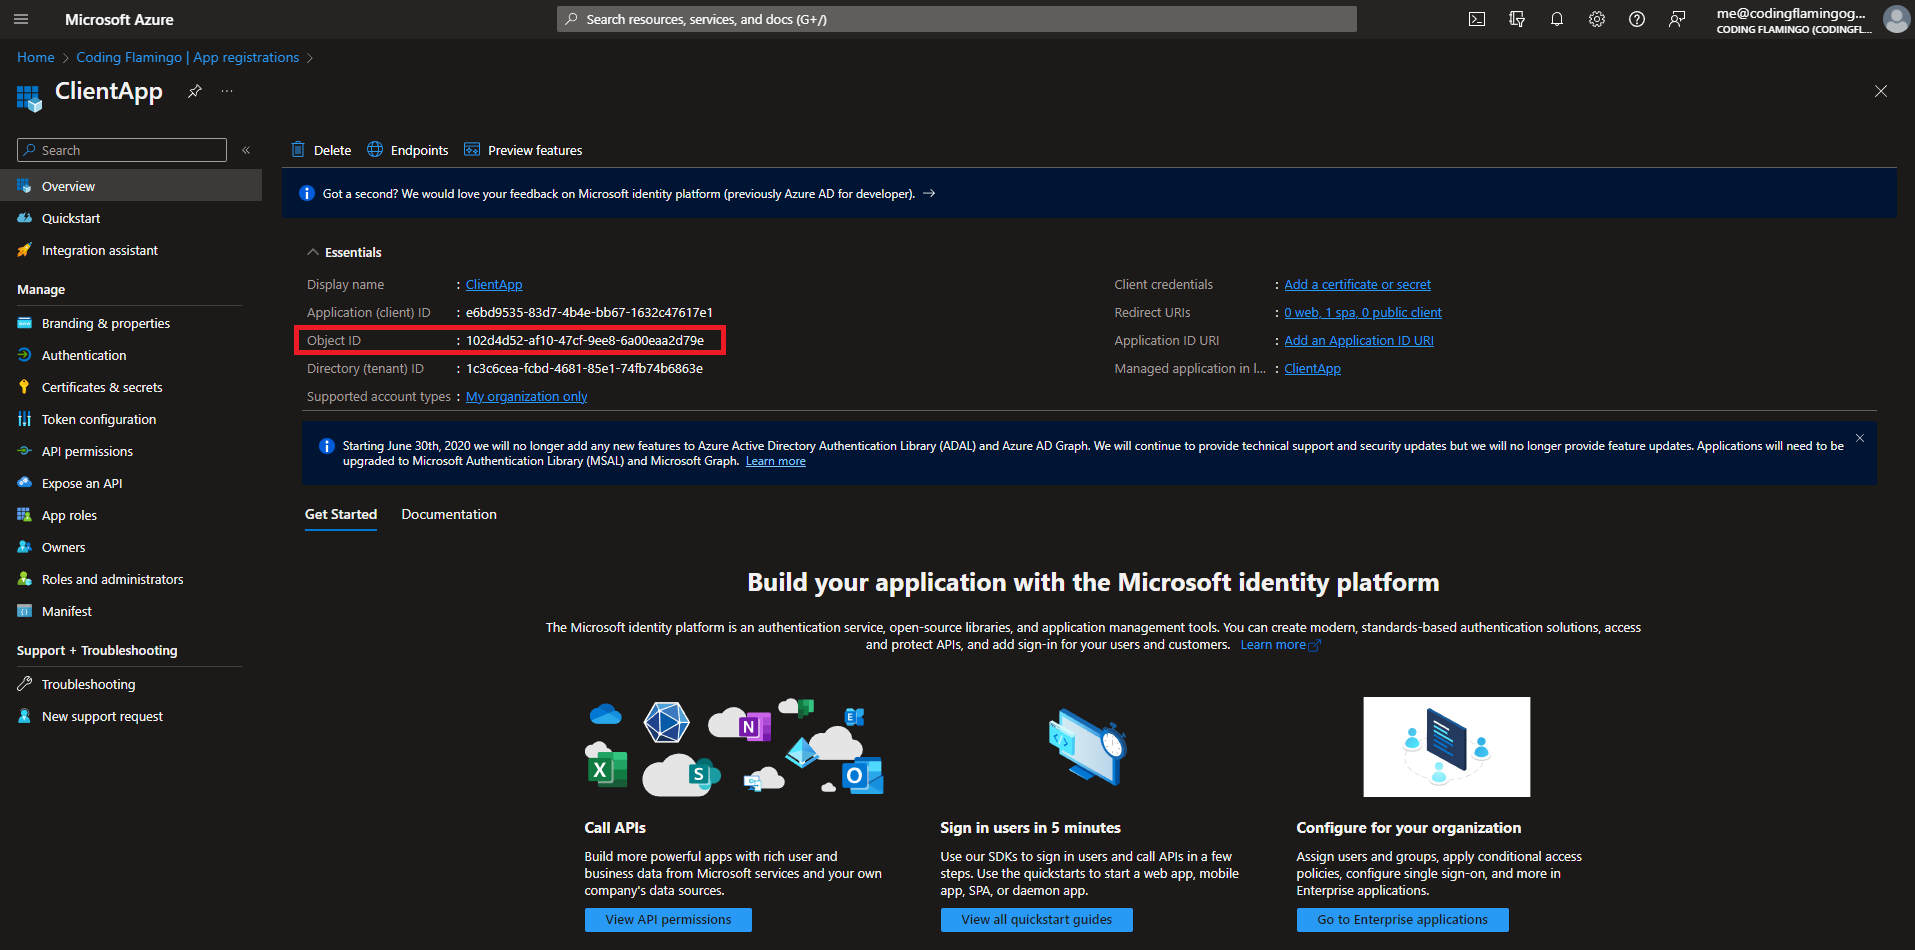
Copy your application’s object ID.
How to Update Your Application’s Permissions
Use the following script to give your application permission to manage its own credentials:
$YourApplicationsObjectId = "<Your Application's object ID>"
$YourEnterpriseApplicationsObjectId = "<Your Application's object ID (from enterprise app)>"
#set graph permissions
$adgraph = Get-AzureADServicePrincipal -Filter "AppId eq '00000002-0000-0000-c000-000000000000'"
Write-Host "-ResourceId $($adgraph.ObjectId)"

# Manage apps that this app creates or owns (Role: Application.ReadWrite.OwnedBy)
$rdscope = "824c81eb-e3f8-4ee6-8f6d-de7f50d565b7"
Connect-AzureAD
New-AzureADServiceAppRoleAssignment -Id $rdscope -PrincipalId $YourEnterpriseApplicationsObjectId -ObjectId $YourEnterpriseApplicationsObjectId -ResourceId $adgraph.ObjectId
#Add Application as owner of itself
Add-AzureADApplicationOwner -ObjectId $YourApplicationsObjectId -RefObjectId $YourEnterpriseApplicationsObjectId
Step 2 - How to Grant EZCA Access to Sign Certificate Requests on Behalf of Your Application
For EZCA to be able to rotate your certificates, it requires a set of permissions on your Azure Key Vault to manage certificates and sign requests. Follow one of the following options to give EZCA the necessary permissions:
How to Grant Key Vault Reader Access to EZCA
Begin by granting EZCA Reader access to your Key Vault.
-
Login to the Azure portal.
-
Navigate to the Key Vault you want your application certificates to be stored in.
-
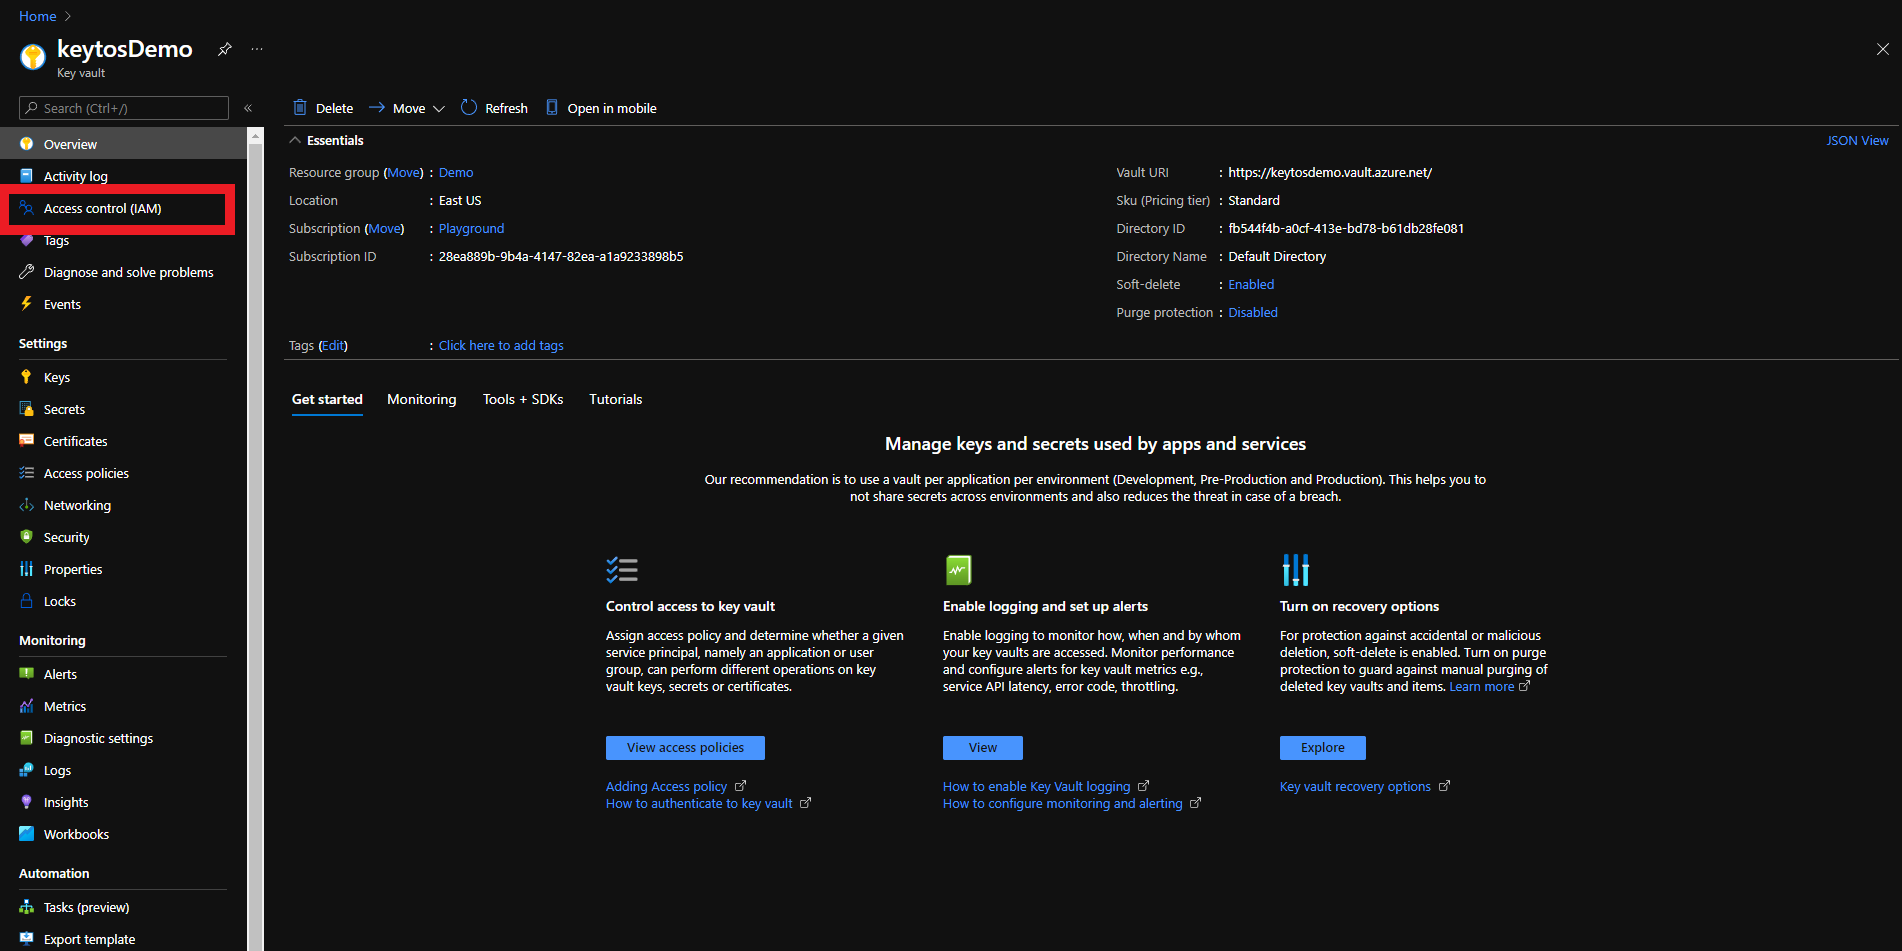
Click on the Access control (IAM) menu option
-
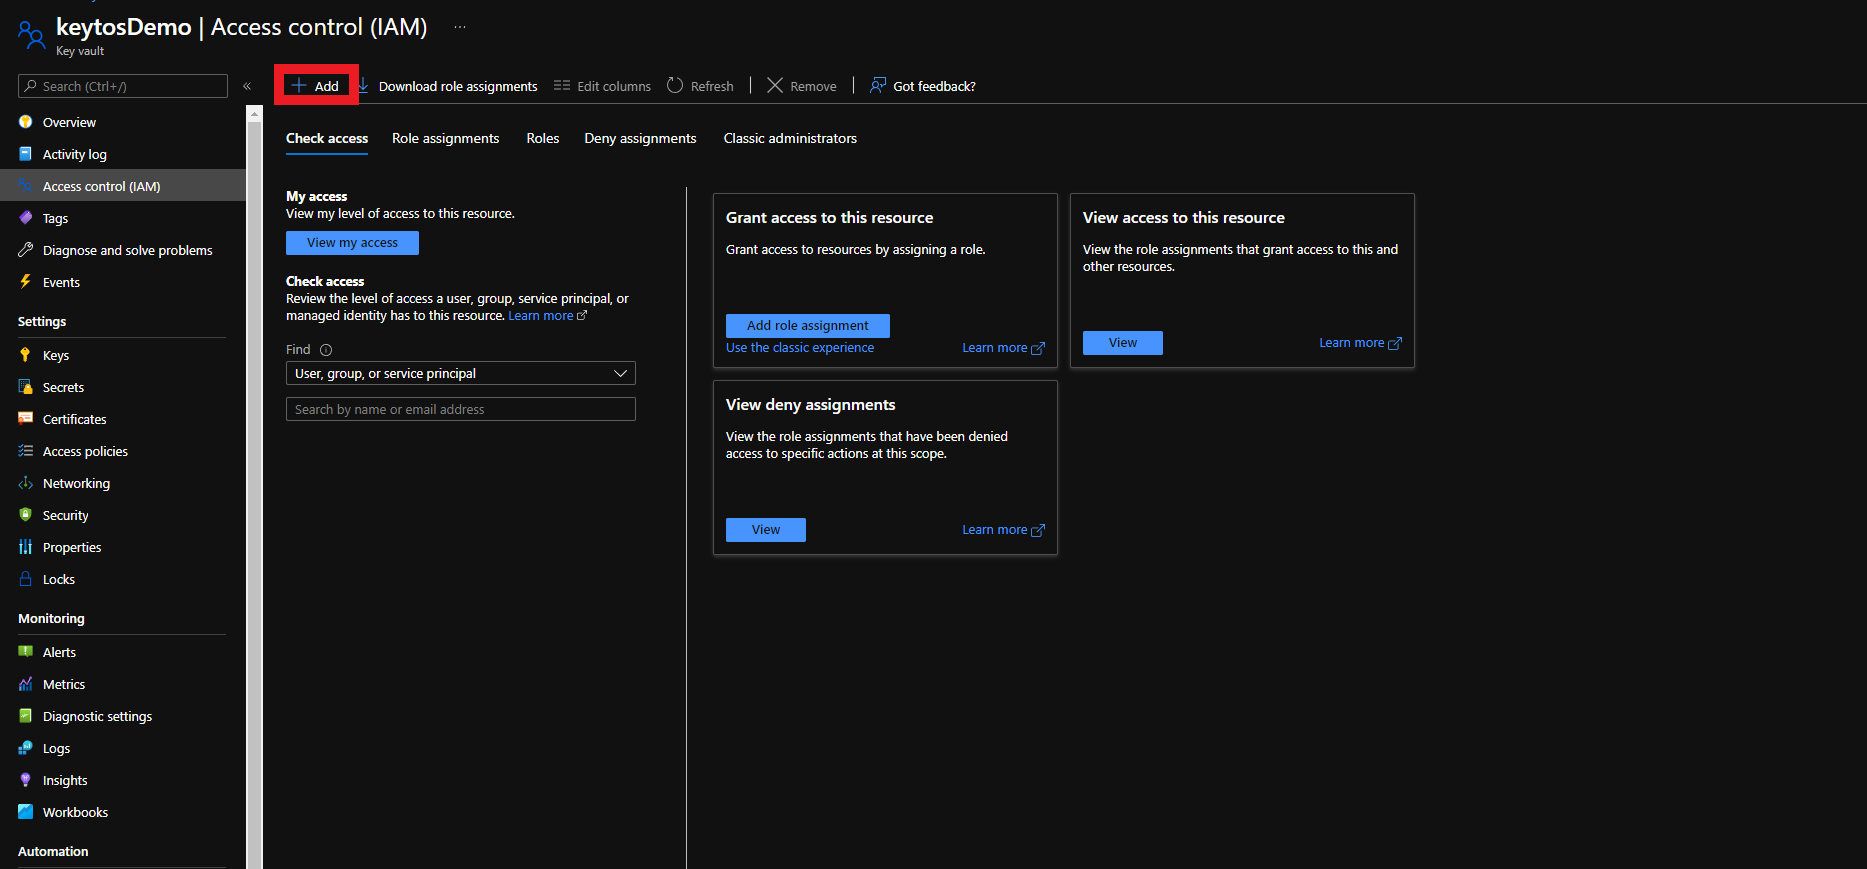
Click on + Add
-
Select the Add Role Assignment Option
-
Select the Reader role
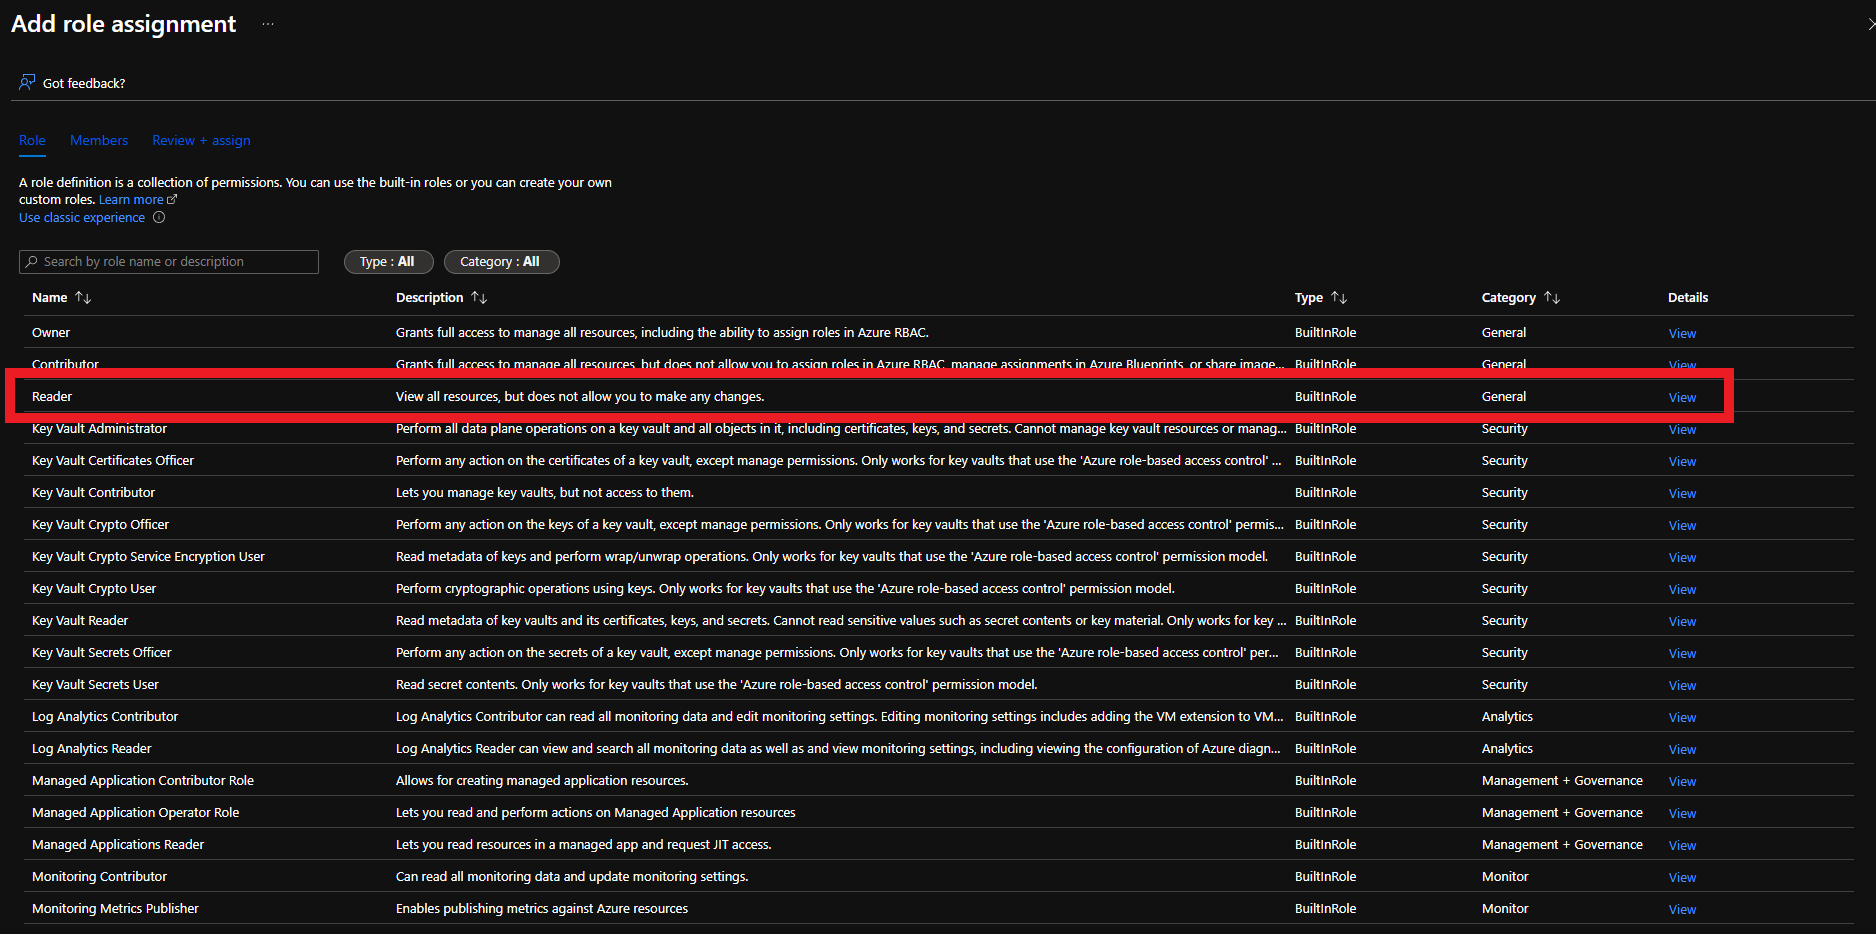
-
Click on Members
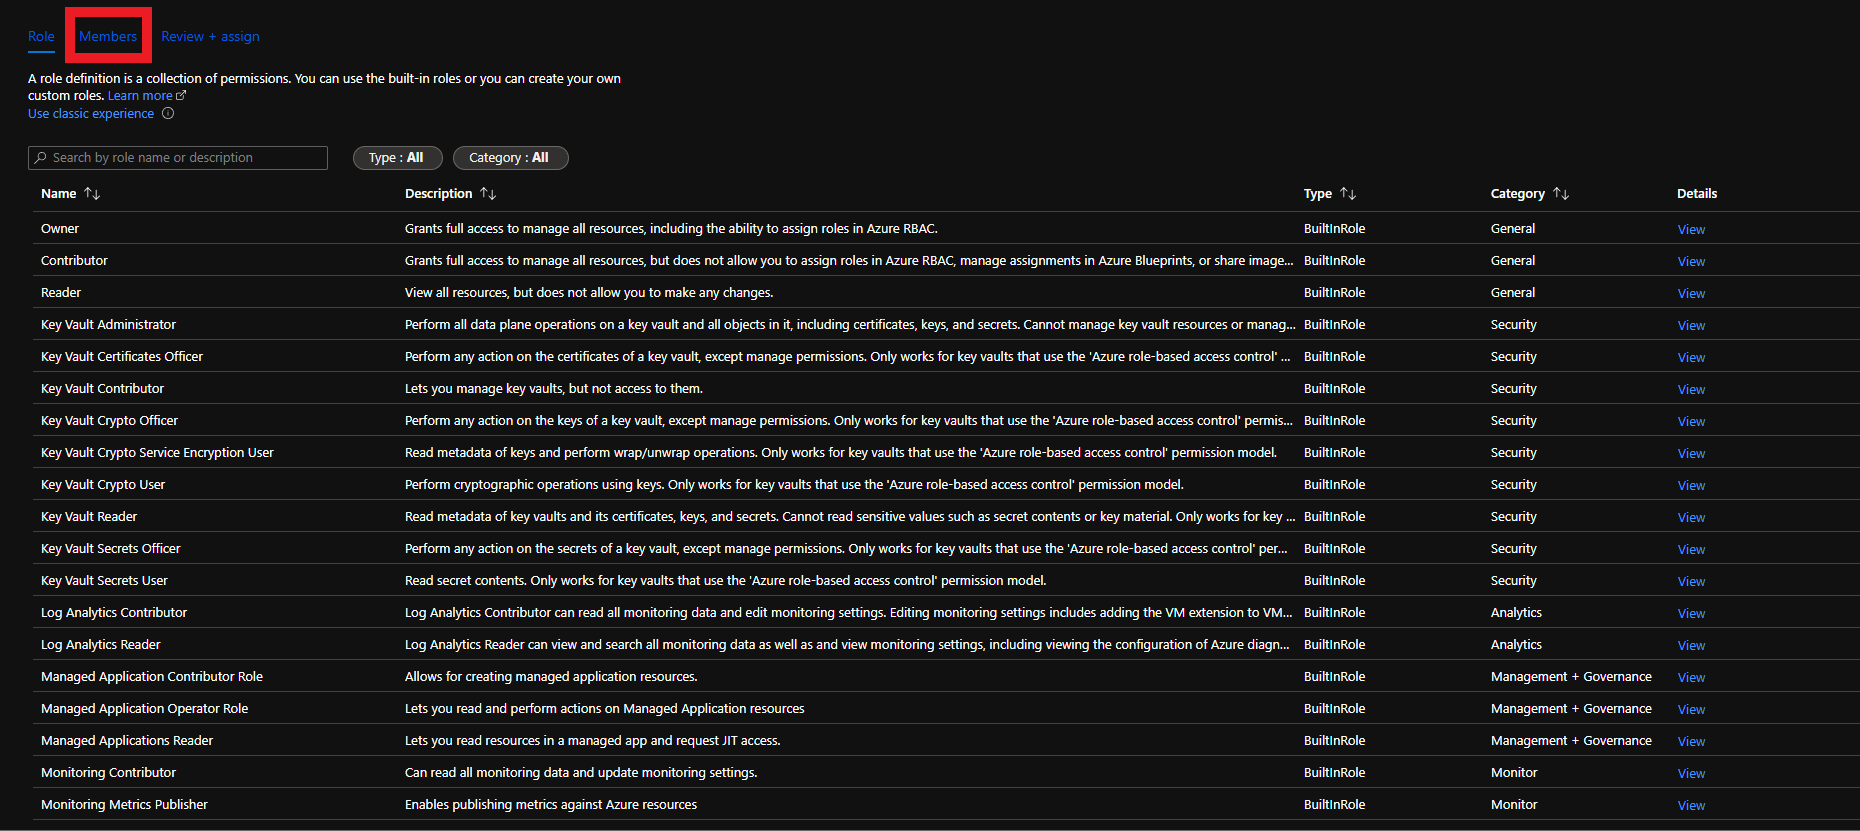
-
Click on + Select members
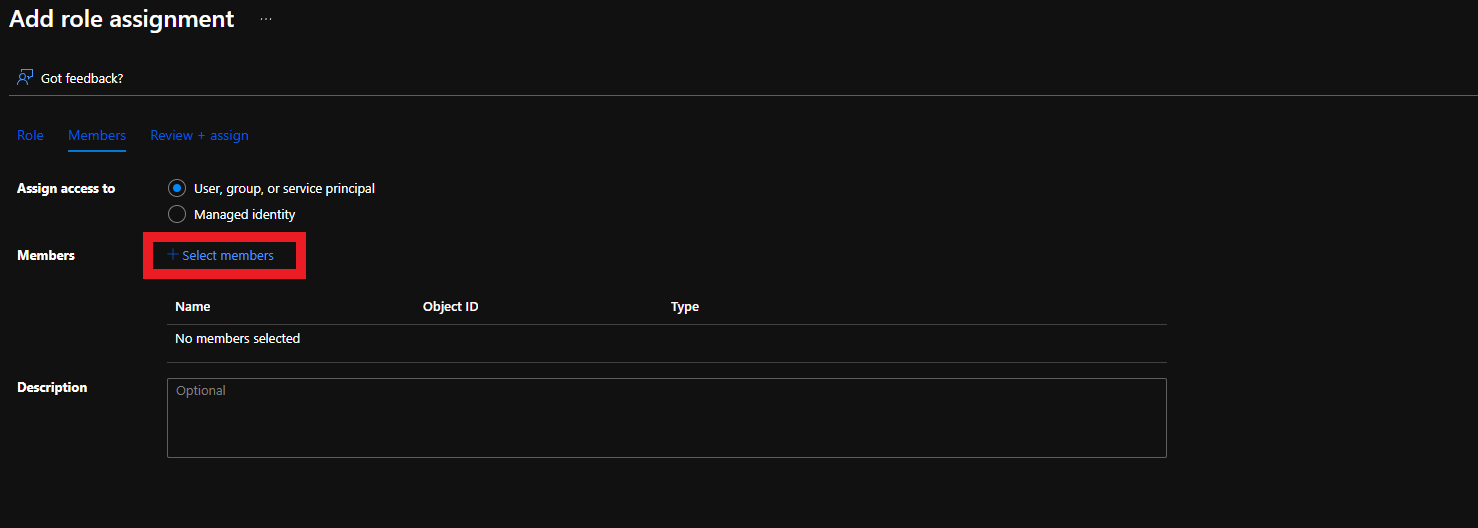
-
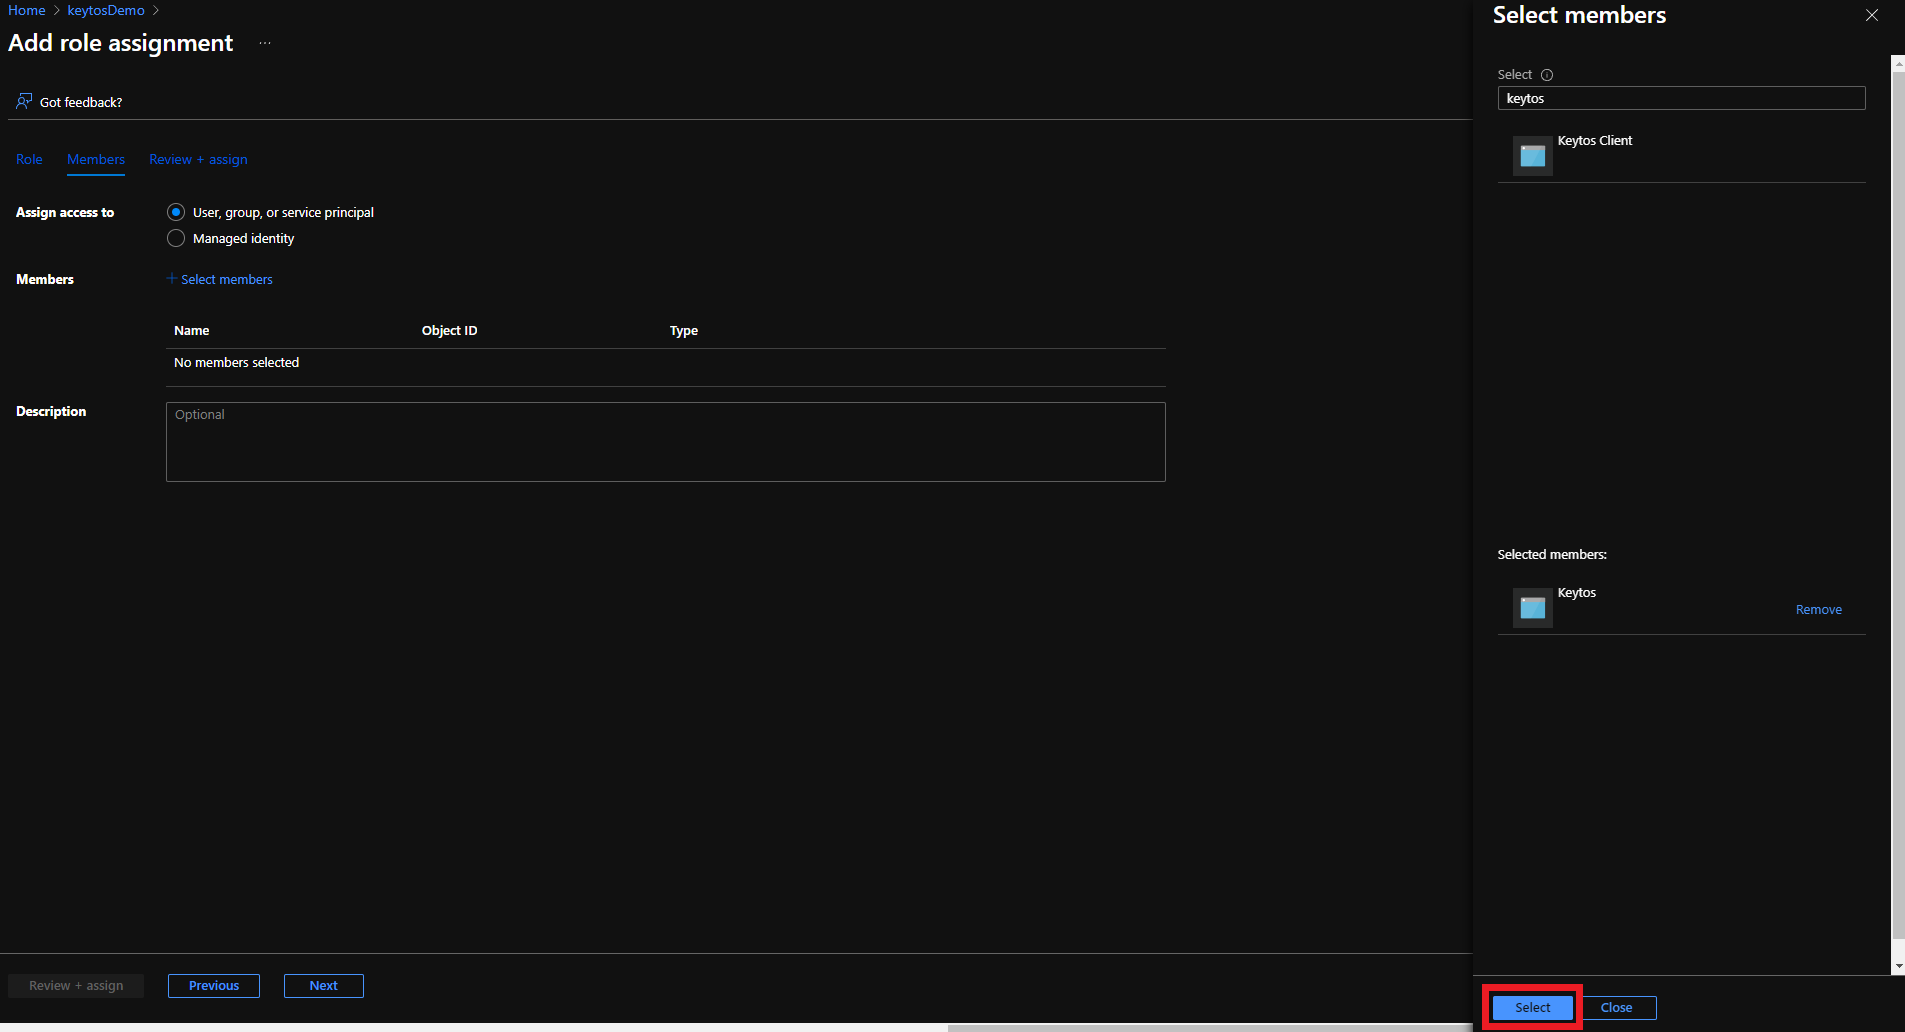
Search for “keytos” and select the Keytos application
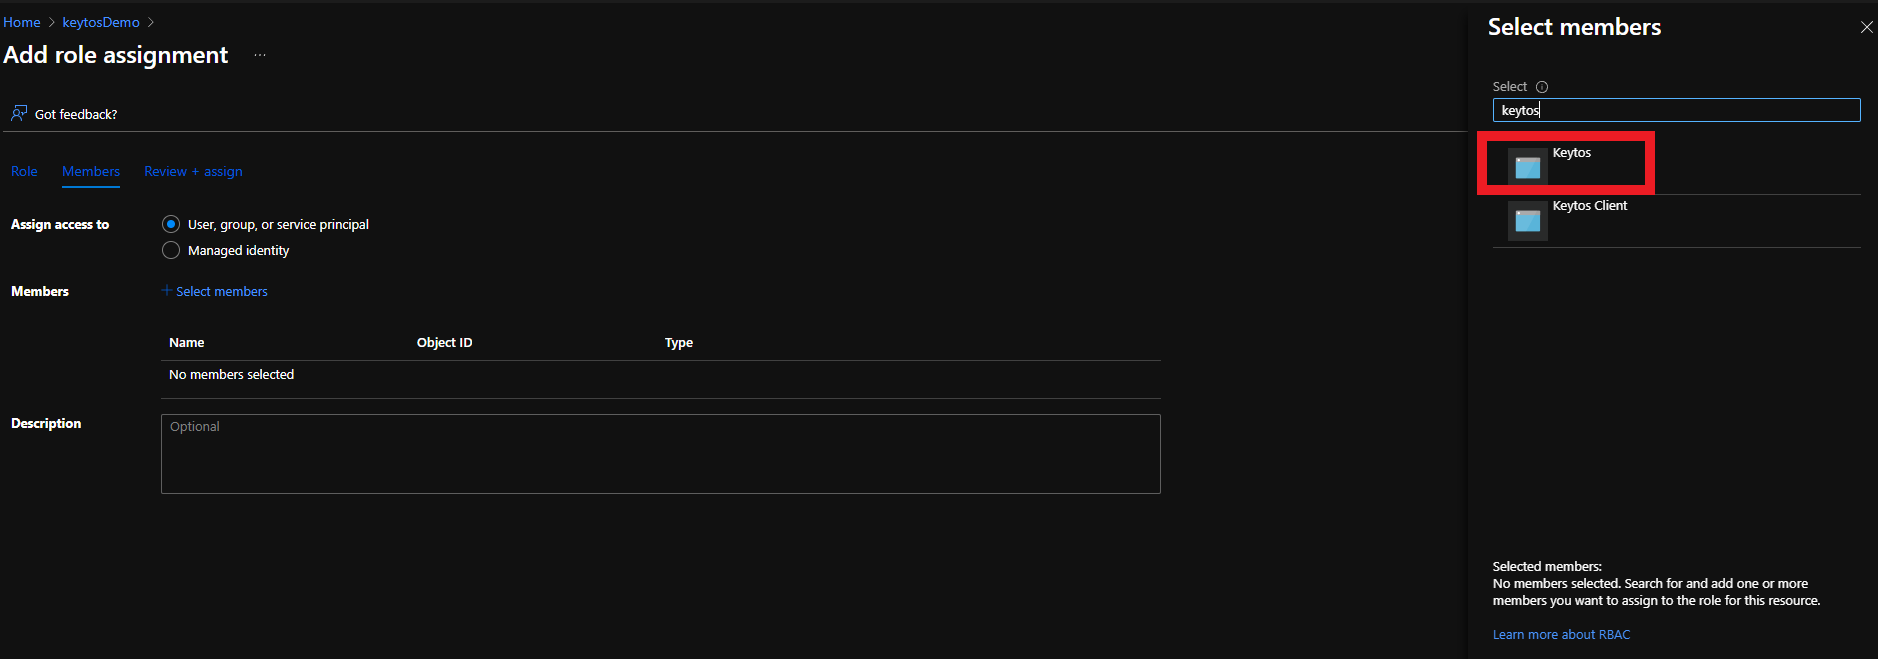
-
Click the Select button
-
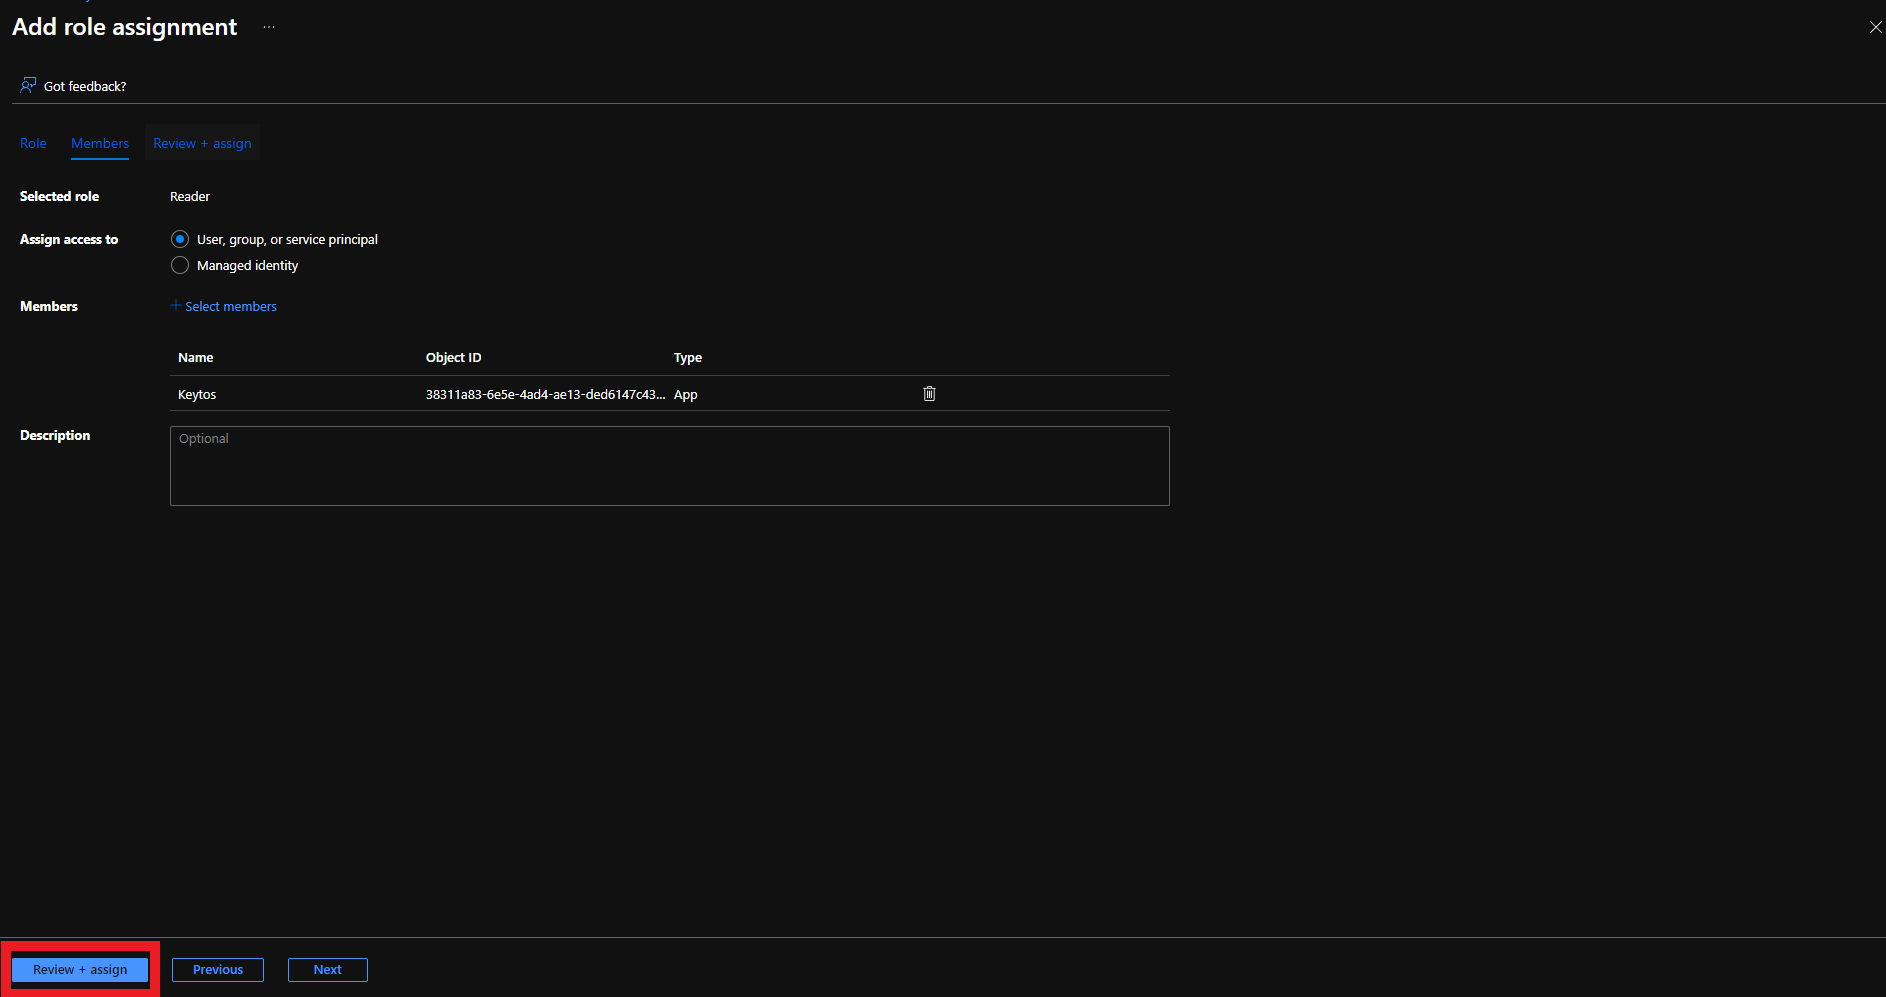
Click the Review + assign button
-
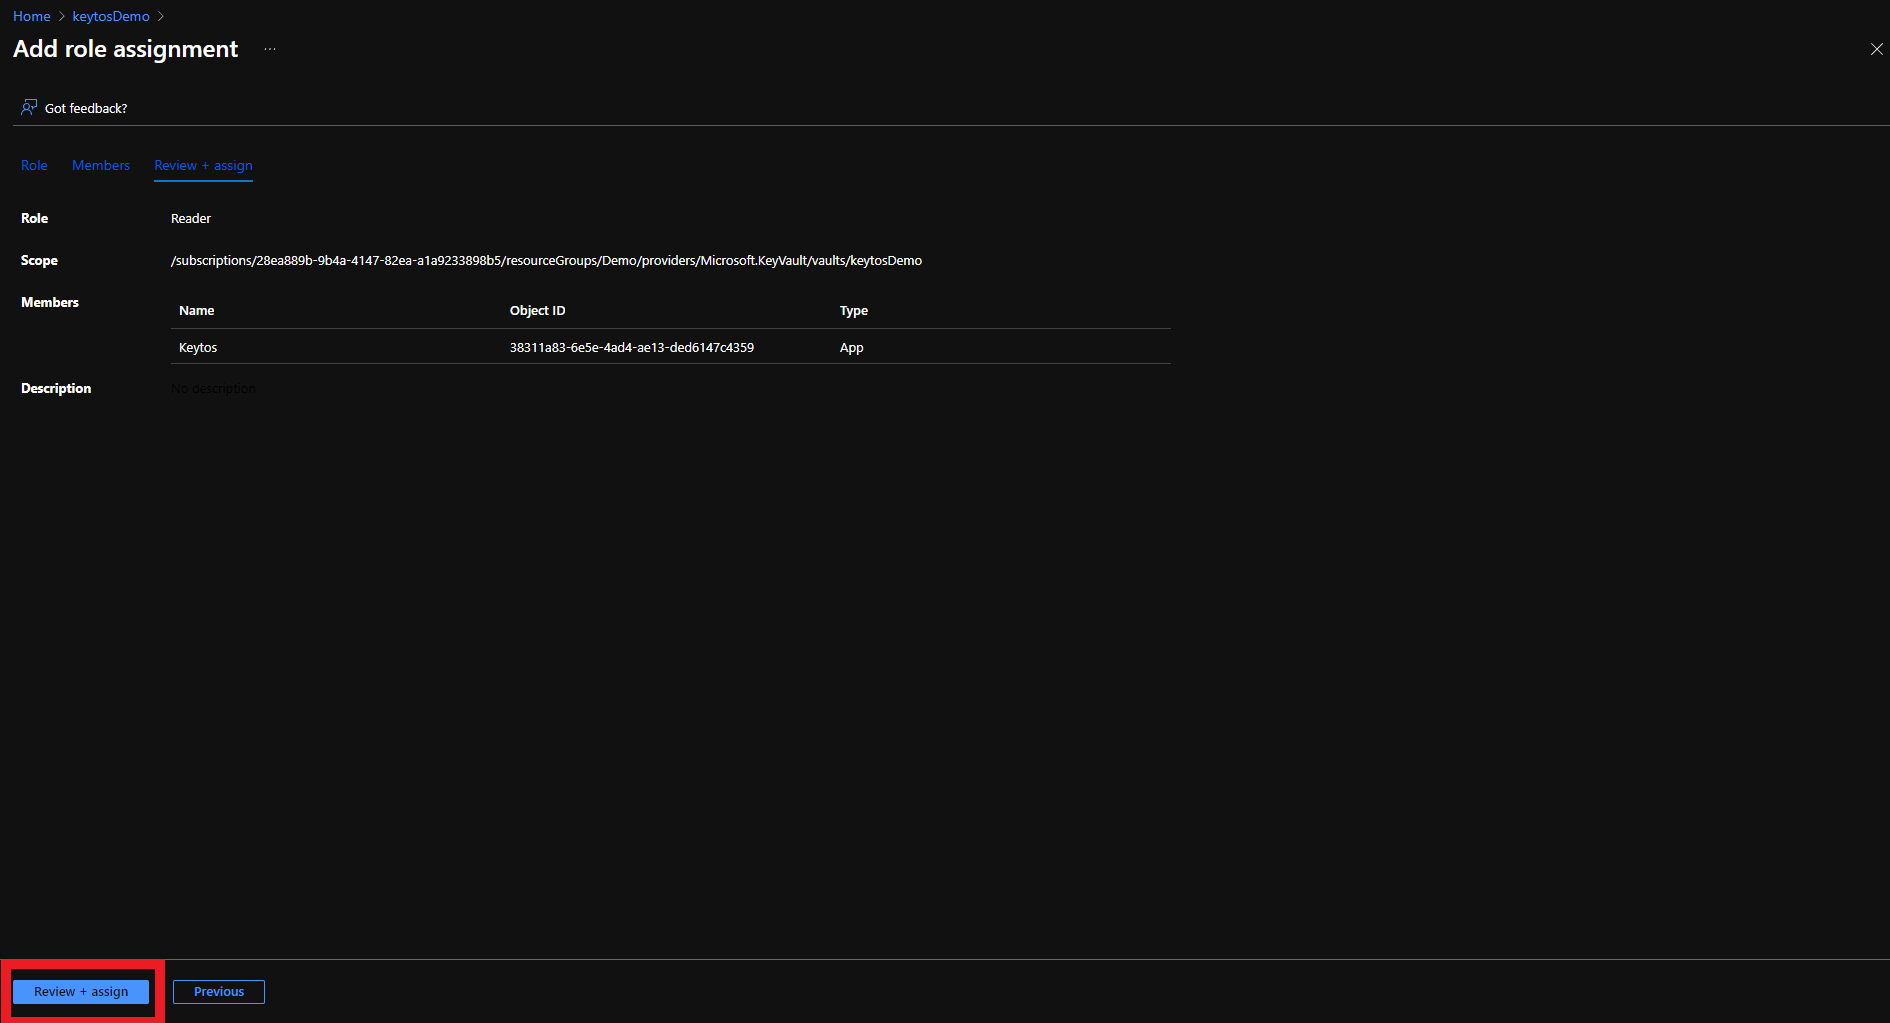
Click the Review + assign button
How to Grant Certificate Management Access to EZCA
In addition to Reader access, you need to also grant EZCA permissions to manage certificates in your Key Vault. You can either use RBAC or Access Policies to do this. We recommend using RBAC as it is the more modern and flexible approach, but we support both methods to give you the flexibility to choose the one that works best for your organization.
-
Login to the Azure portal.
-
Navigate to the Key Vault you want EZCA to manage.
-
Click on the Access control (IAM) menu option
-
Click on + Add
-
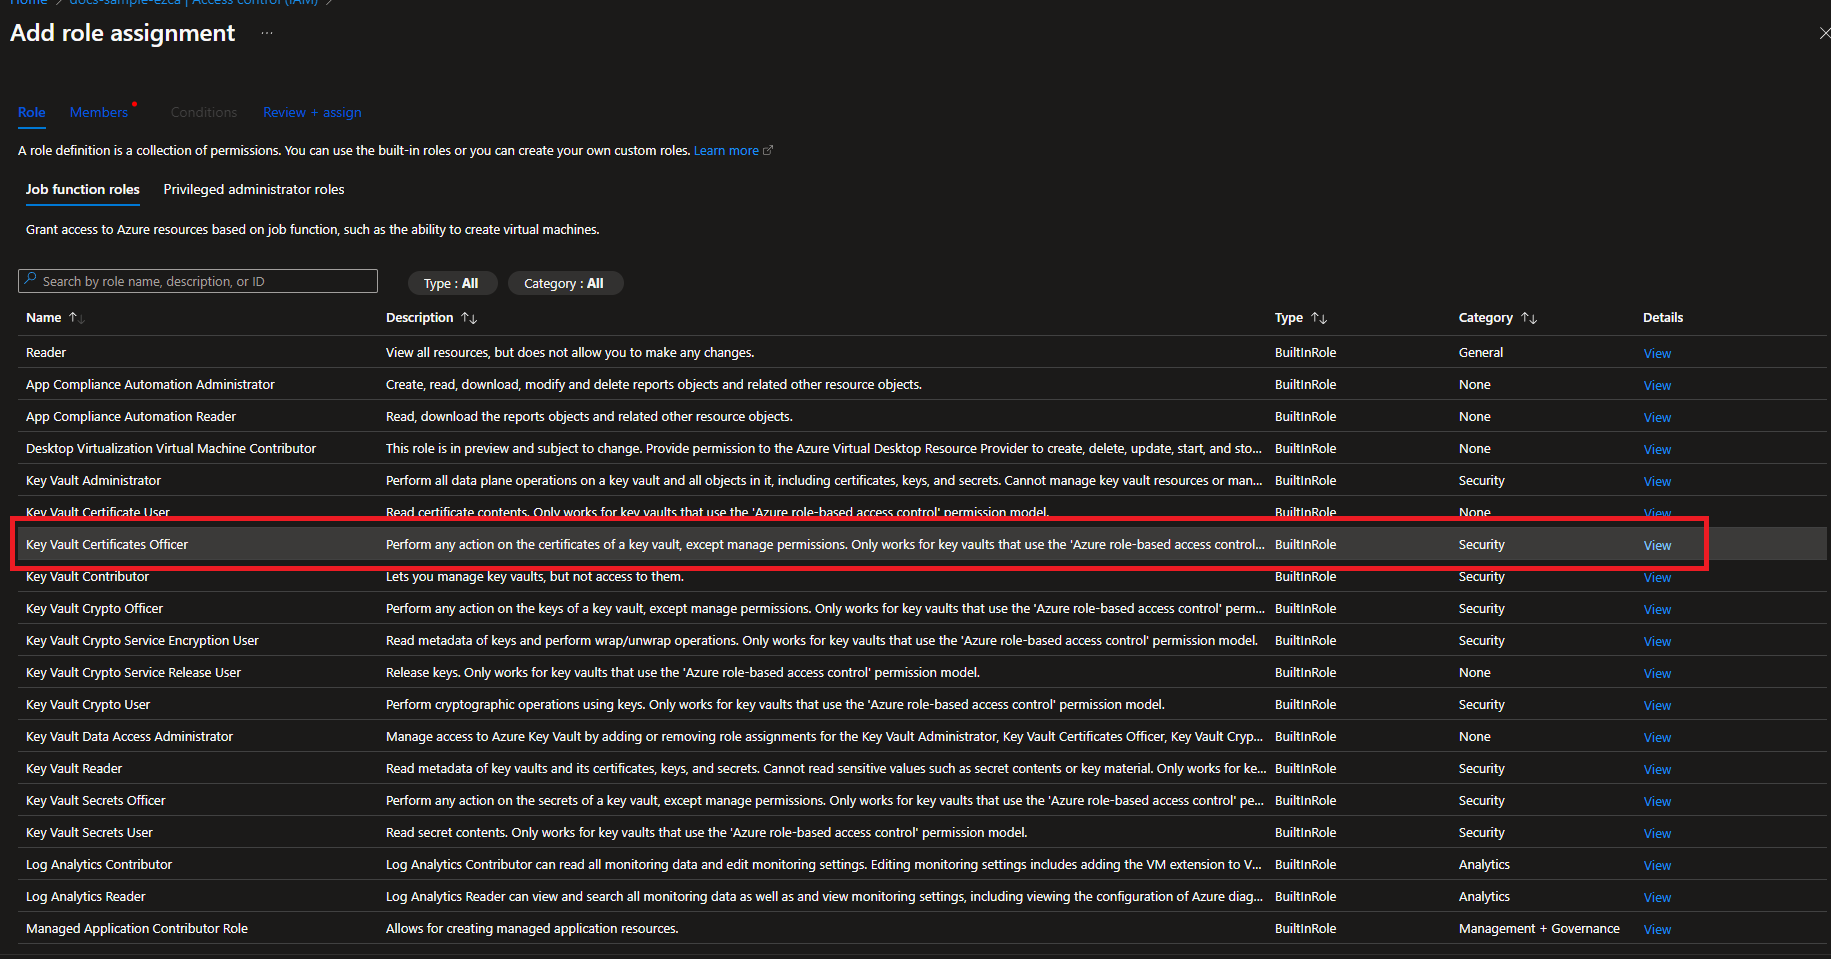
Select the Key Vault Certificates Officer Role
-
Click on Members
-
Click on Select Members
-
Search for “keytos” and select the Keytos application
-
Click the Select button
-
Click the Review + assign button
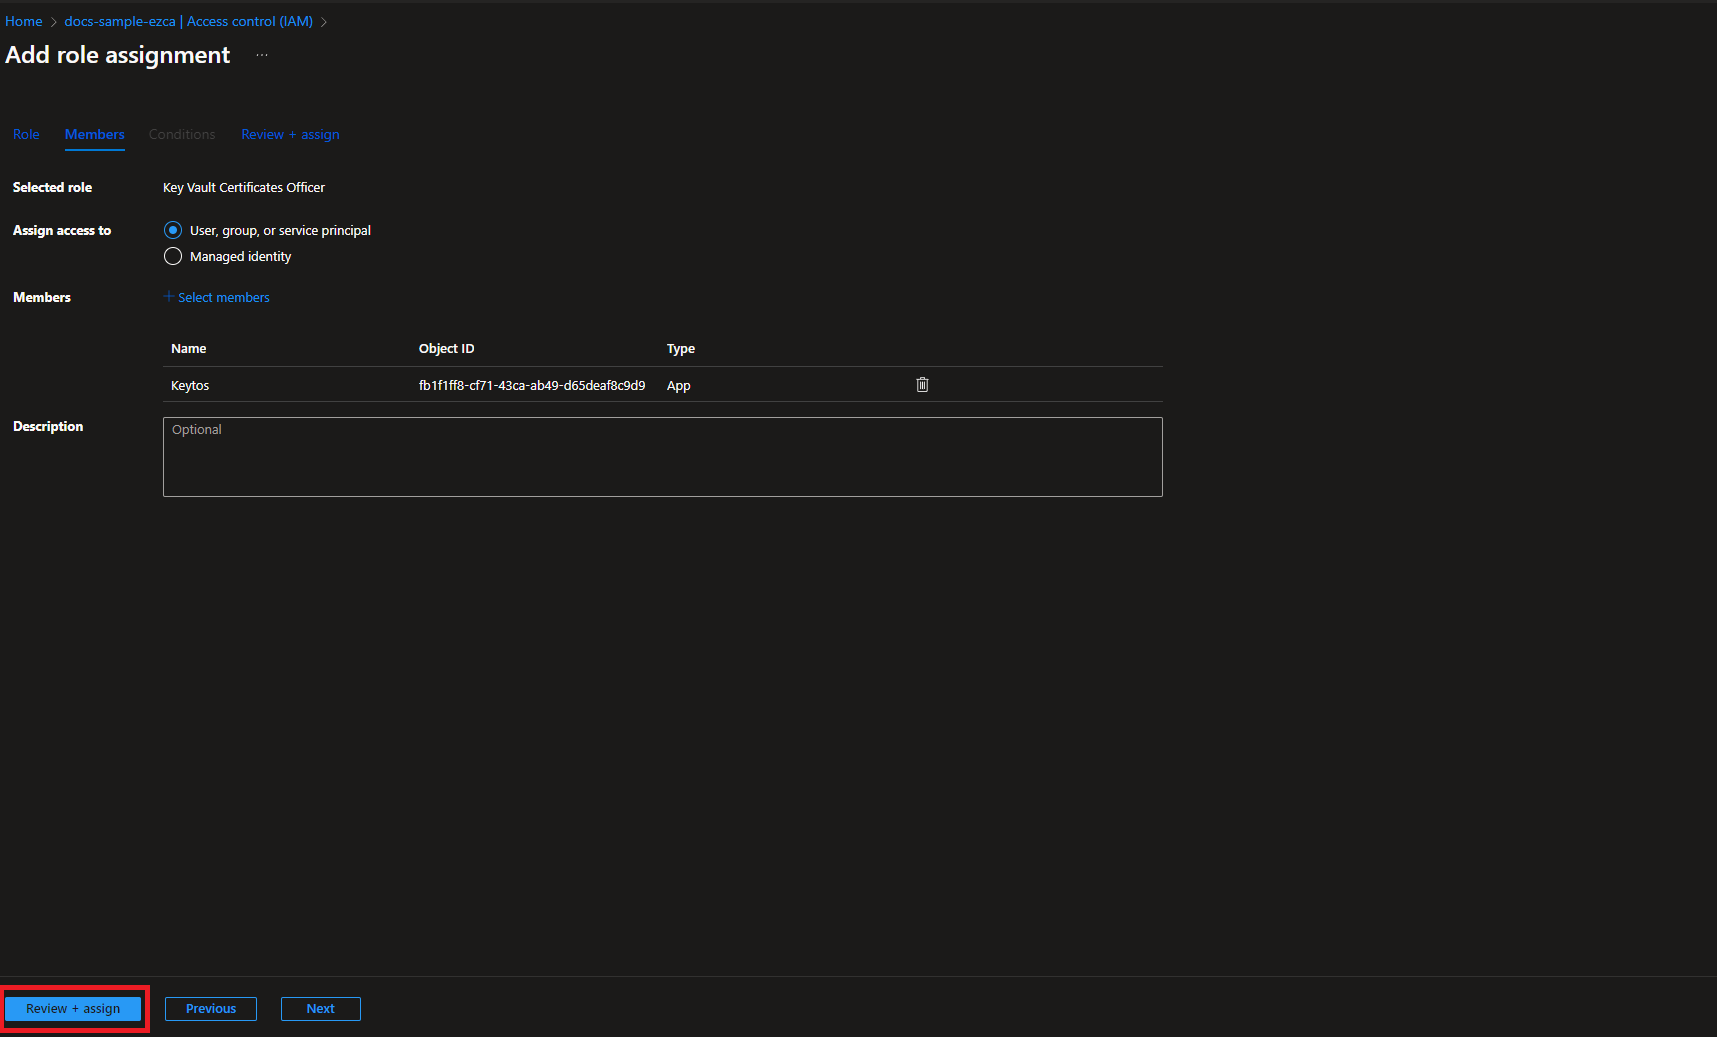
-
Click the Review + assign button
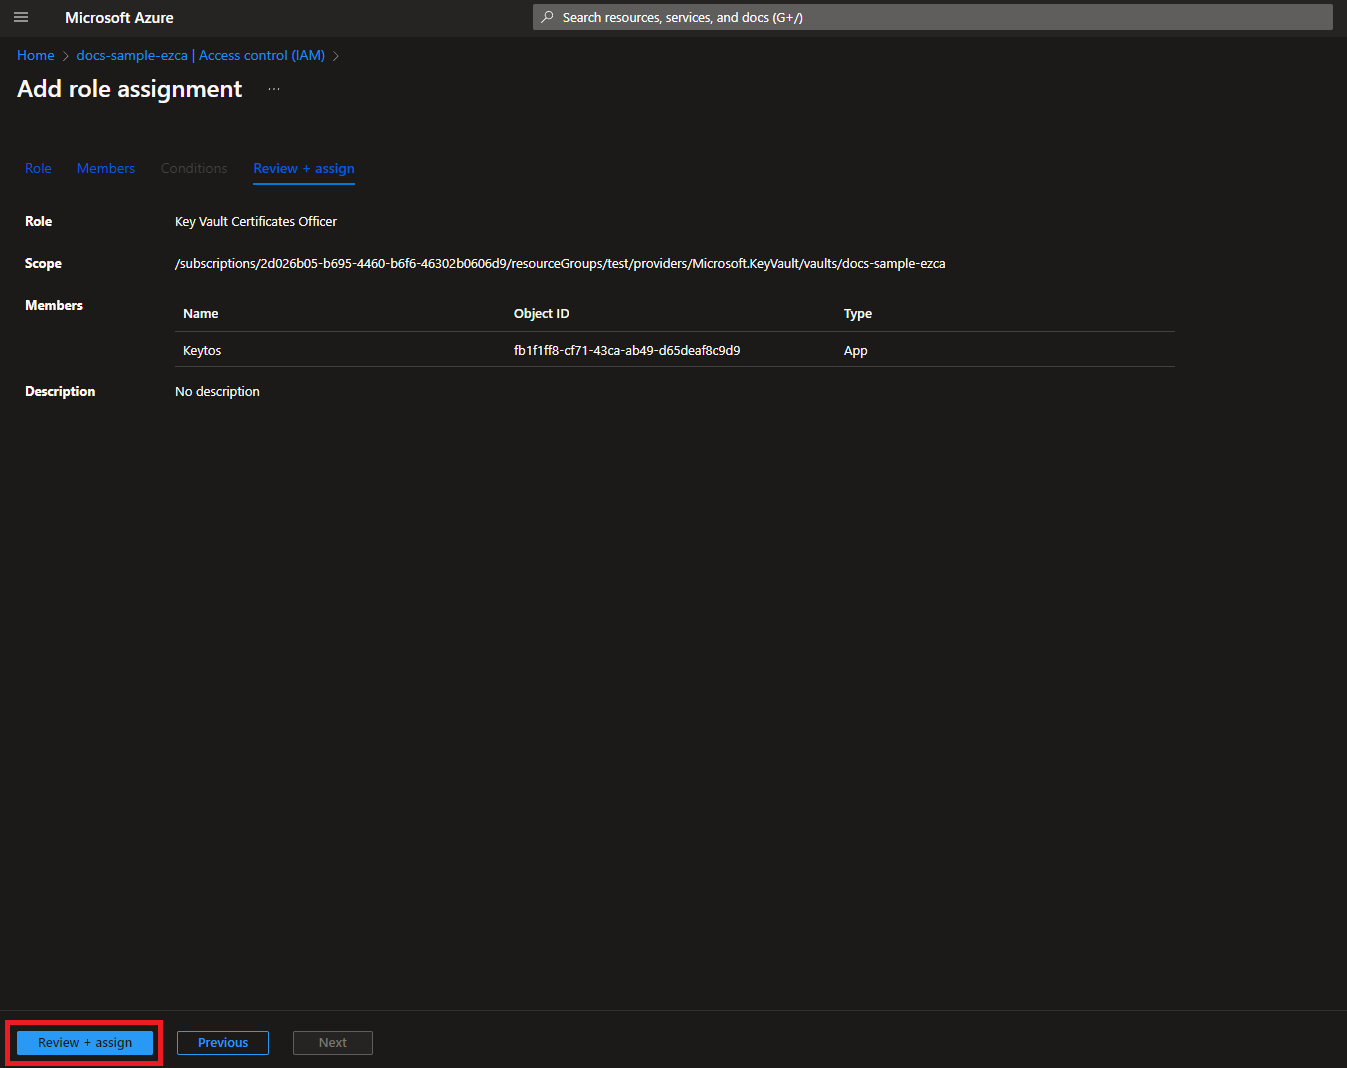
-
Repeat the same steps to also assign the Key Vault Crypto Officer role to allow EZCA to sign certificate requests on behalf of your application.
At this point you should have three role assignments for the Keytos application: Reader, Key Vault Certificates Officer, and Key Vault Crypto Officer. If you are missing any of these role assignments, EZCA will not be able to rotate your certificates. Please review the steps above to ensure you have assigned all three roles to the Keytos application.
While you can use Access Policies to grant EZCA permissions to manage certificates in your Key Vault, we recommend using RBAC as it is the more modern and flexible approach. Access Policies are a legacy method of managing permissions in Key Vault and are no longer the default option for new Key Vaults.
Check your Key Vault settings to see which mode it is using and consider switching to RBAC if you are currently using Access Policies. If you choose to use Access Policies, make sure to select the correct permissions as shown in the steps below.
-
Login to https://portal.azure.com
-
Navigate to the Key Vault you want EZCA to manage.
-
Click on the Access policies menu option
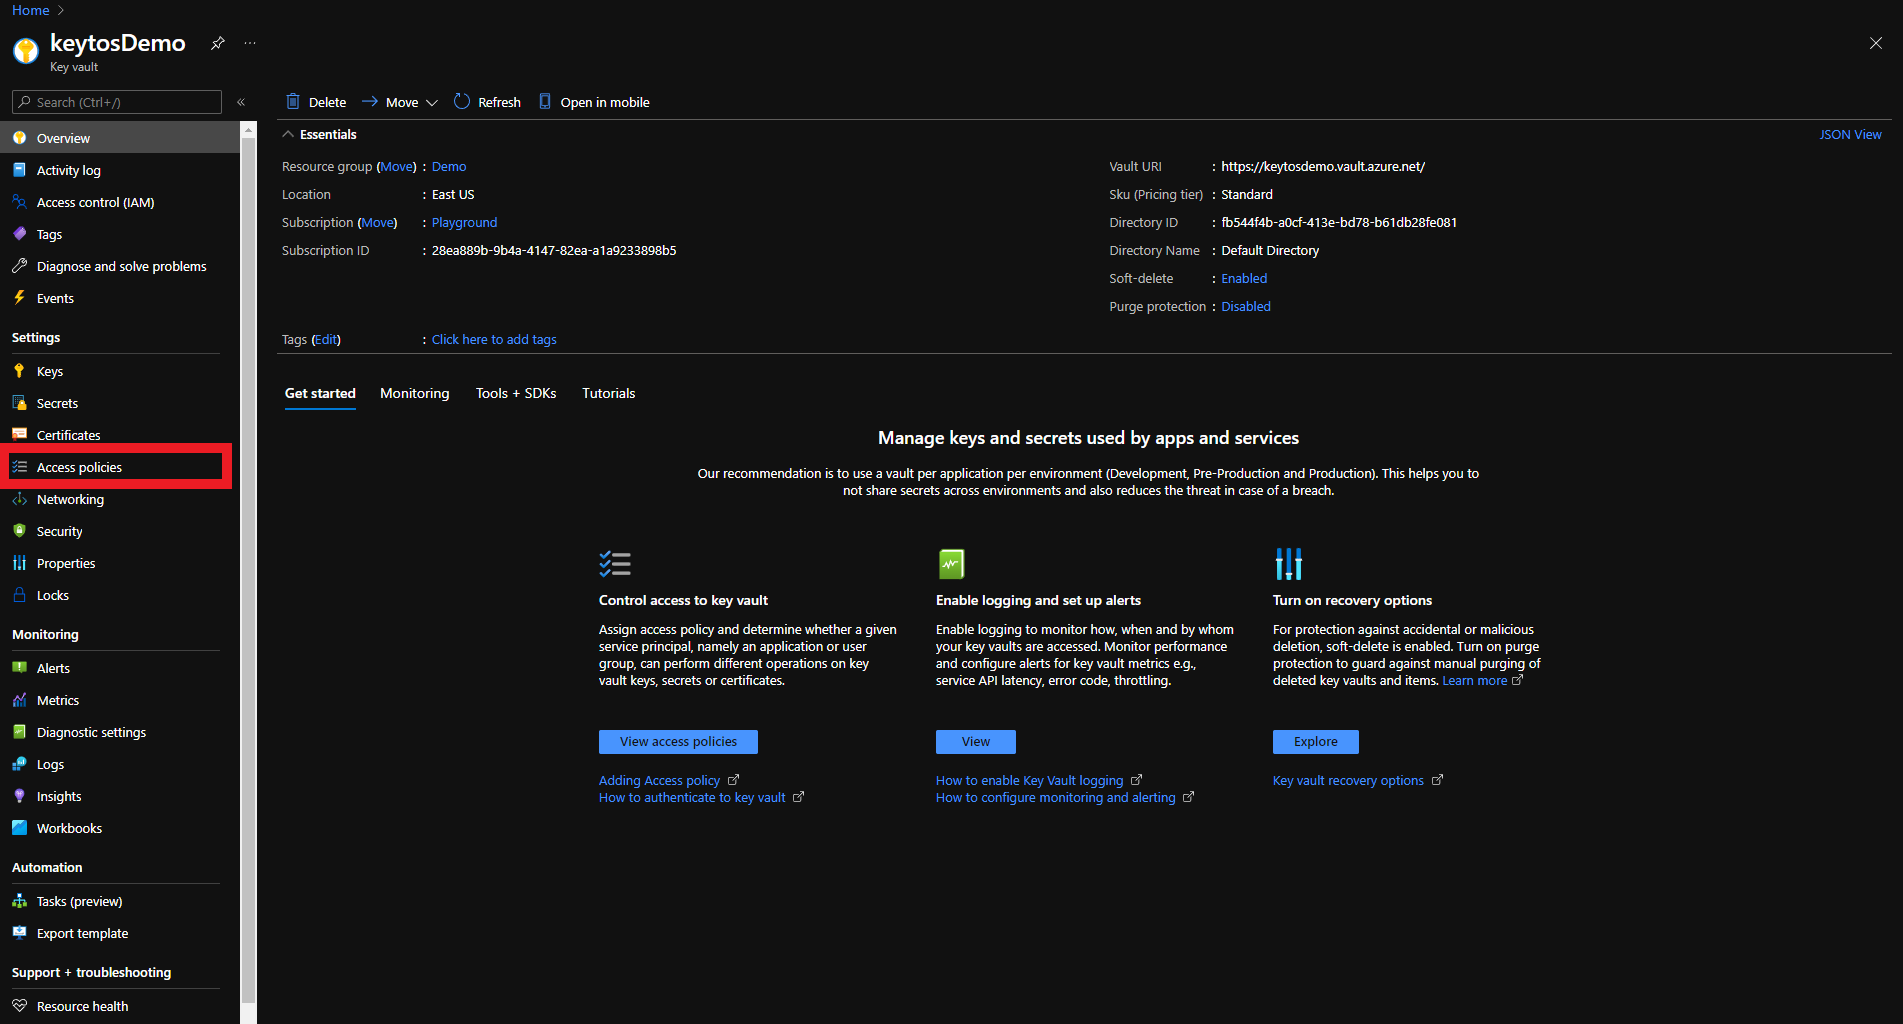
-
Click on + Add Access Policy
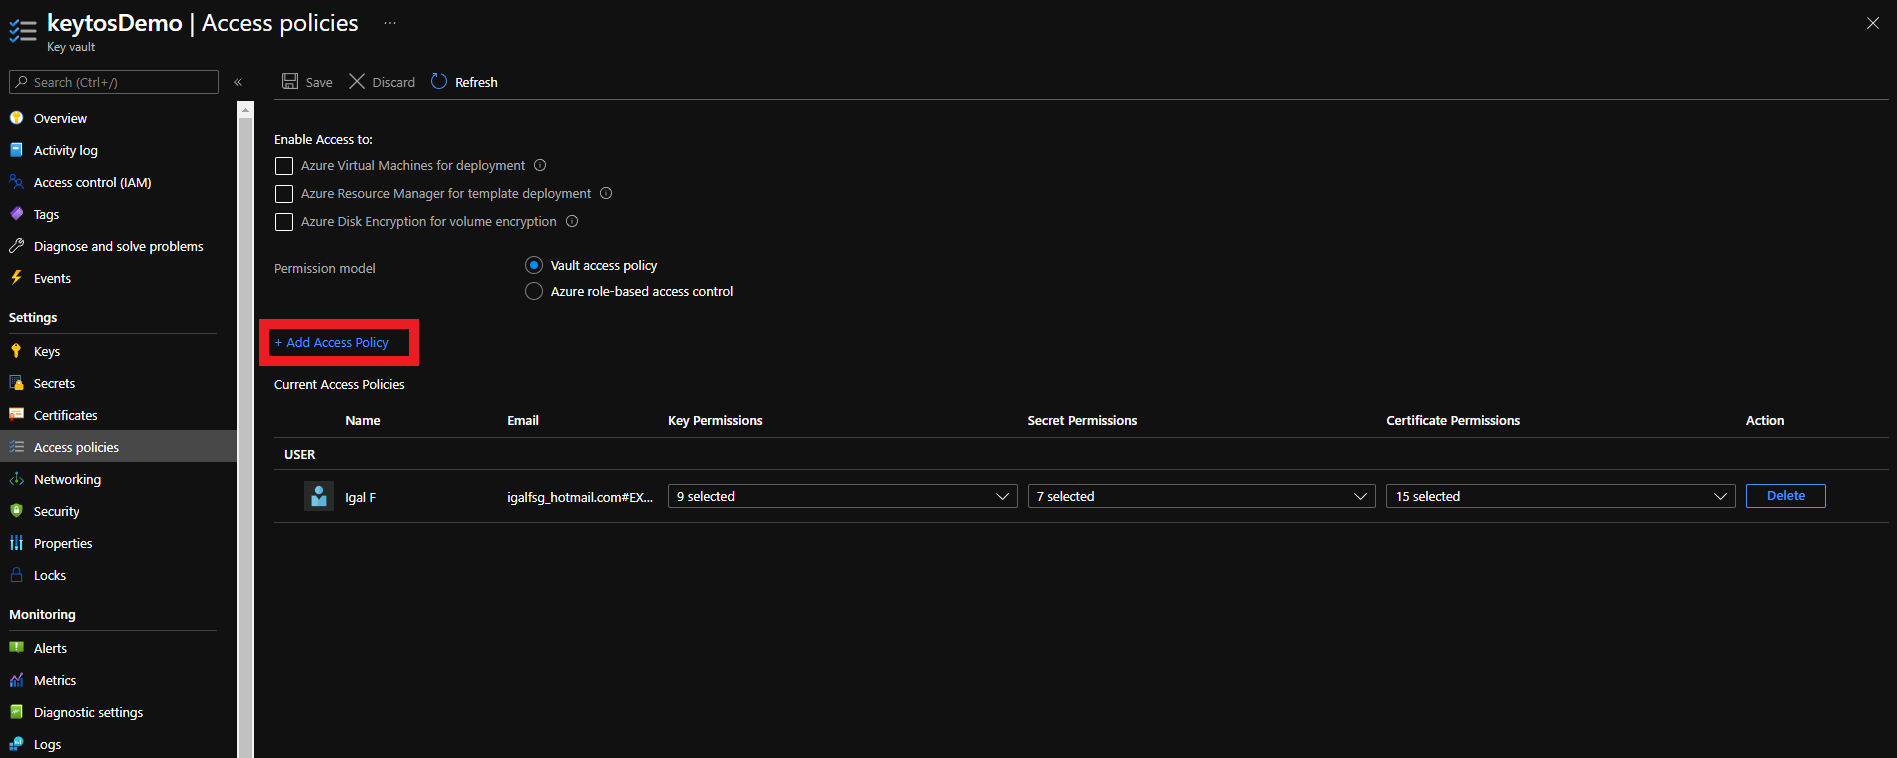
-
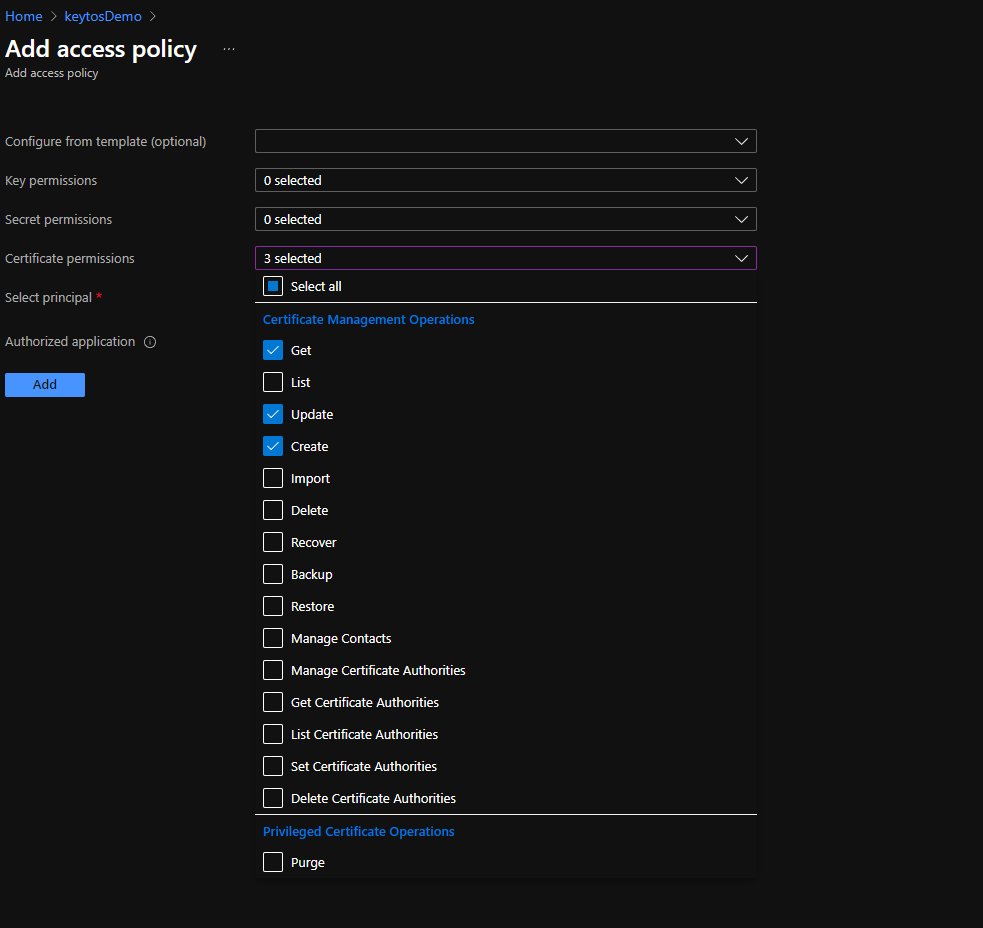
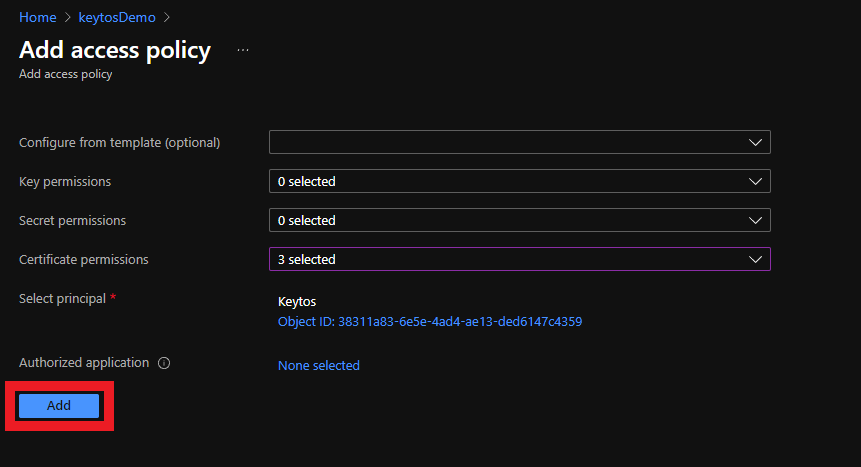
Under Certificate permissions select: Get, Update, and Create.
-
Under Key permissions select: Sign.
-
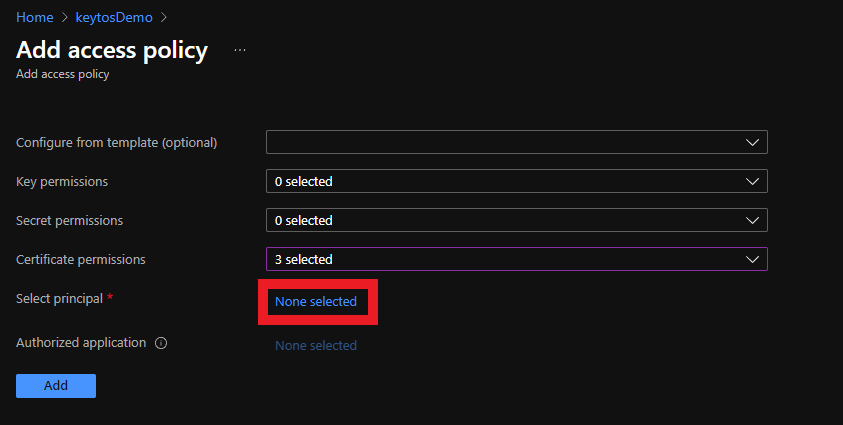
Under Select principal, click on the None selected link to choose the application you want to give these permissions to.
-
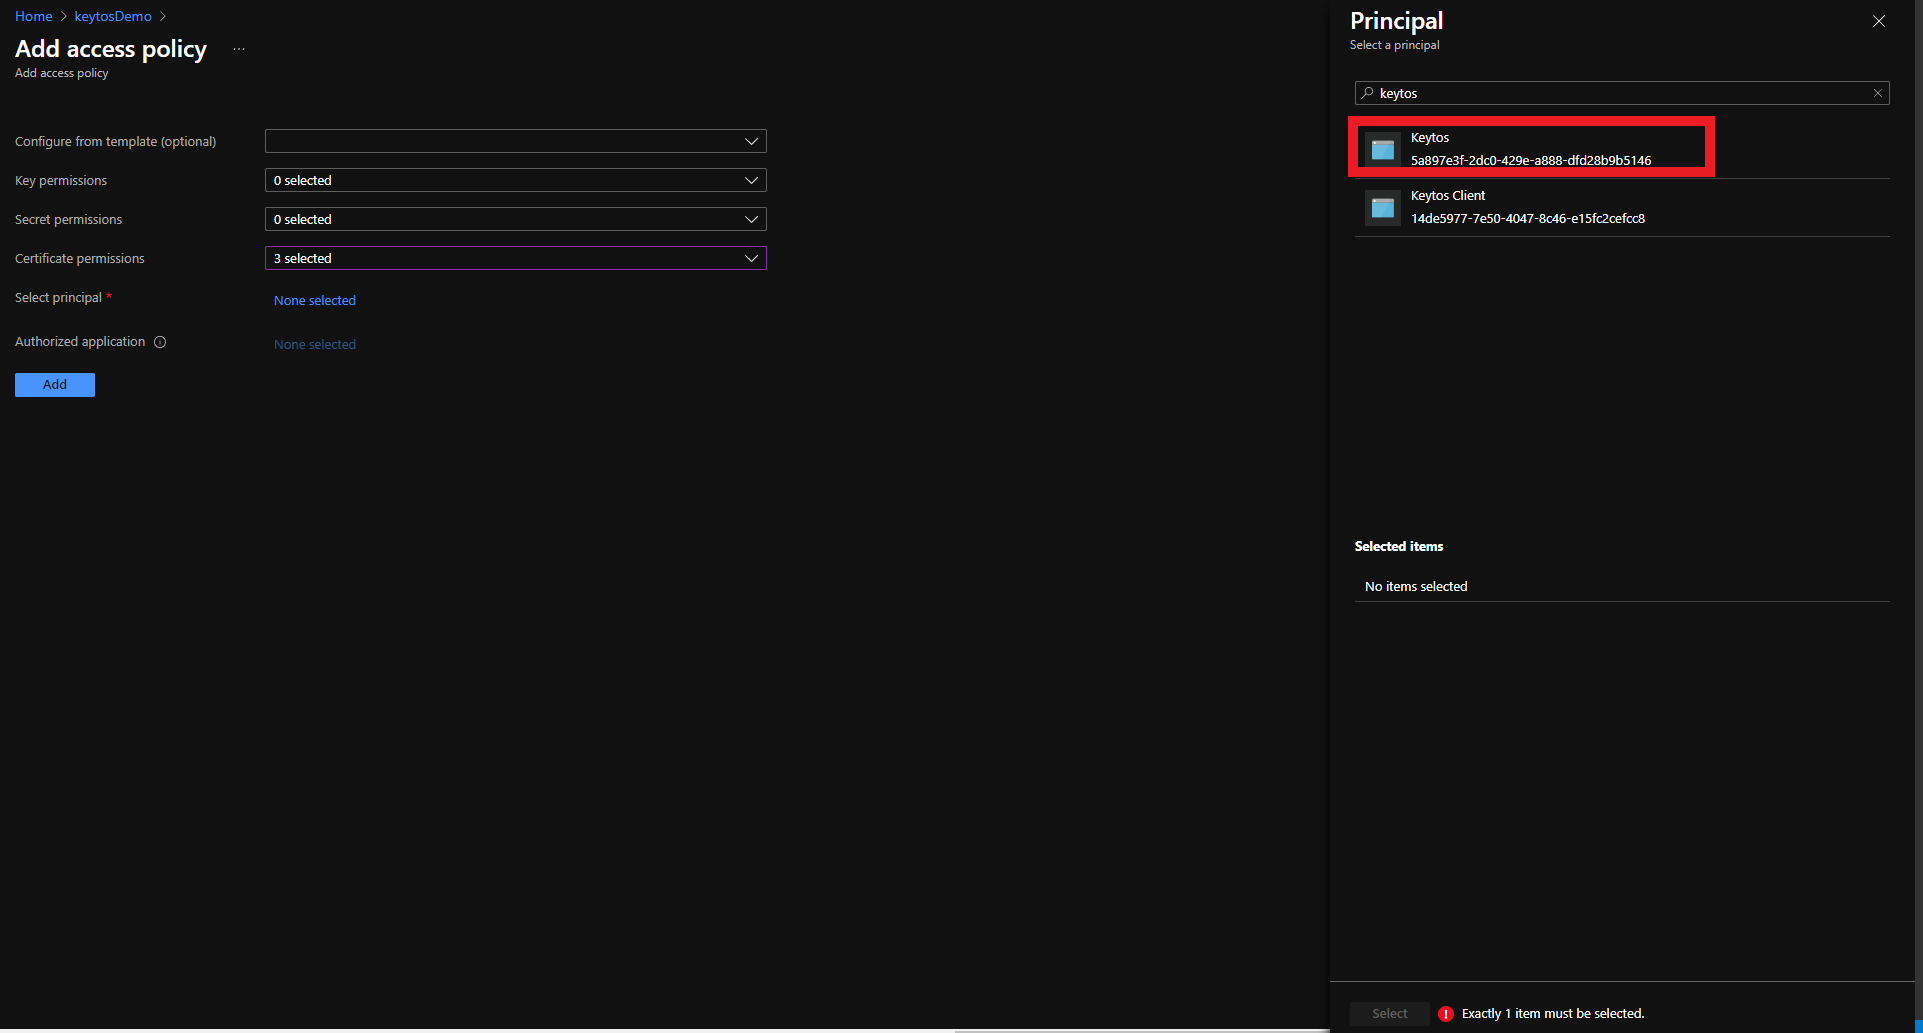
Search for “keytos” and select the Keytos application
-
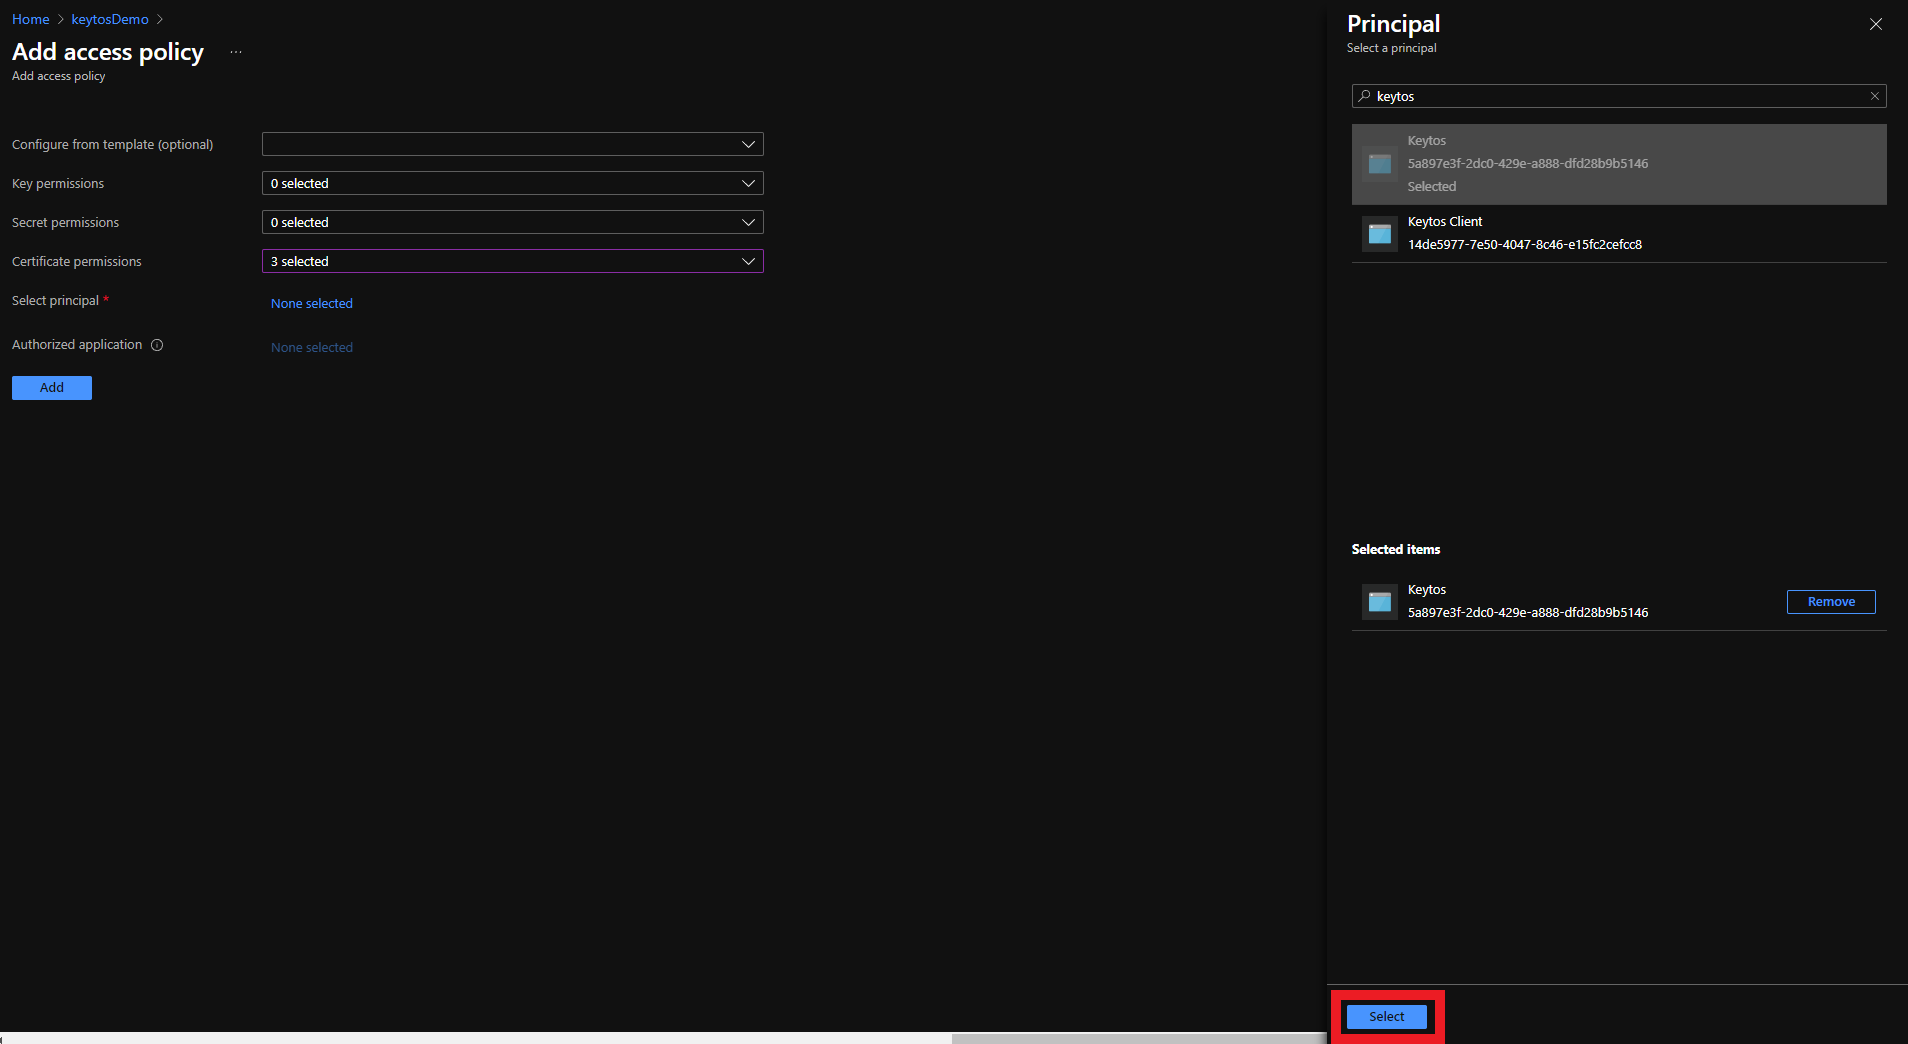
Click the Select button
-
Click the Add button
-
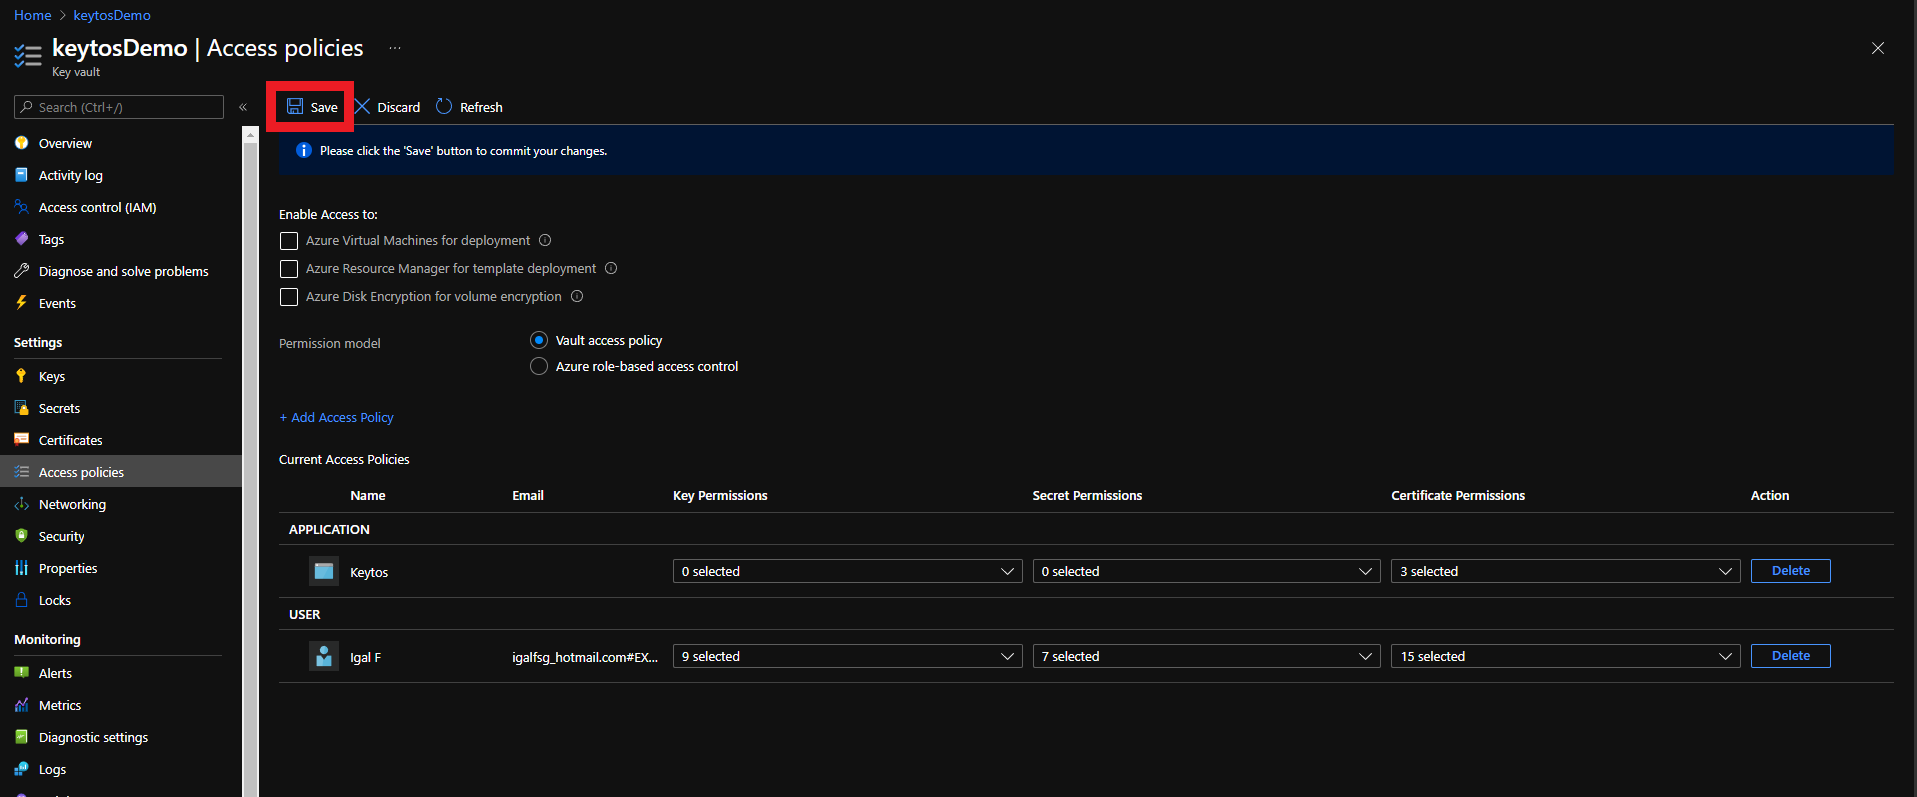
Click the Save button
Step 3 - How to Create the Entra ID Application Certificate
Once you have given your application permission to manage its own credentials and given EZCA access to manage certificates in your Key Vault, you can create your first certificate.
How to Issue Your First Certificate for Your Application
The first certificate must be created manually by you in the EZCA portal to link the certificate to your application. After the first certificate is created, EZCA will automatically rotate the certificate for you when it is close to expiring without any manual intervention required on your part. Follow these steps to create the first certificate:
-
In your EZCA portal navigate to the My Certificates page and click on the + Create Certificate button.
-
Enter a Subject Name for your certificate, such as the name of your application.
-
Enter a Subject Alternative Name for your certificate, such as the name of your application.
-
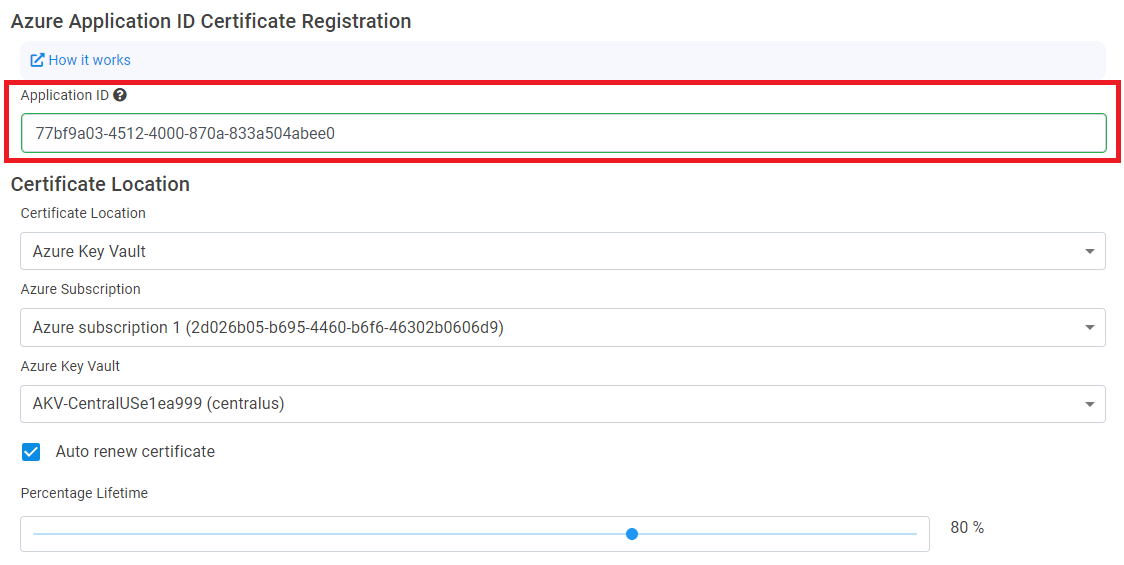
Within the Application ID field, enter your Entra ID application ID to link the certificate to your application for automatic rotation.
-
Drop down the Certificate Location field and select Azure Key Vault.
-
Select your Azure Subscription and Azure Key Vault from the dropdowns to select the Key Vault you previously granted EZCA access to.
-
Select Auto renew certificate to enable automatic certificate rotation for this certificate. This will allow EZCA to automatically rotate the certificate when it is close to expiring without any manual intervention required on your part.
-
Click the Request Certificate button to create the certificate in your Key Vault and link it to your Entra ID application.
How to Add the Certificate to Your Application
For the first certificate, you will need to manually add it to your application in Azure. This is a security requirement to ensure that EZCA only has the specific permissions you grant it. Once the first certificate is added, EZCA will automatically add the new certificates to your application when it rotates them in the future.
- Navigate to the Azure portal.
- Go to your Azure Key Vault which contains the certificate you just created.
- From the left-hand menu, navigate to Certificates and select the certificate and version you just created for your application.
- Click on the Download in CER format button to download the certificate to your local machine.
- Go to Entra ID > App registrations and select your application.
- From the left-hand menu, navigate to Certificates & secrets.
- Under the Certificates tab, click on the + Upload certificate button.
- Upload the certificate you just downloaded from your Key Vault and click Add to add the certificate to your application.
Step 4 - How to Validate Automatic Certificate Rotation is Working
We recommend manually renewing the certificate in the portal the first time to ensure your permissions are set up correctly and the certificate rotation process is working as expected. To manually renew the certificate:
-
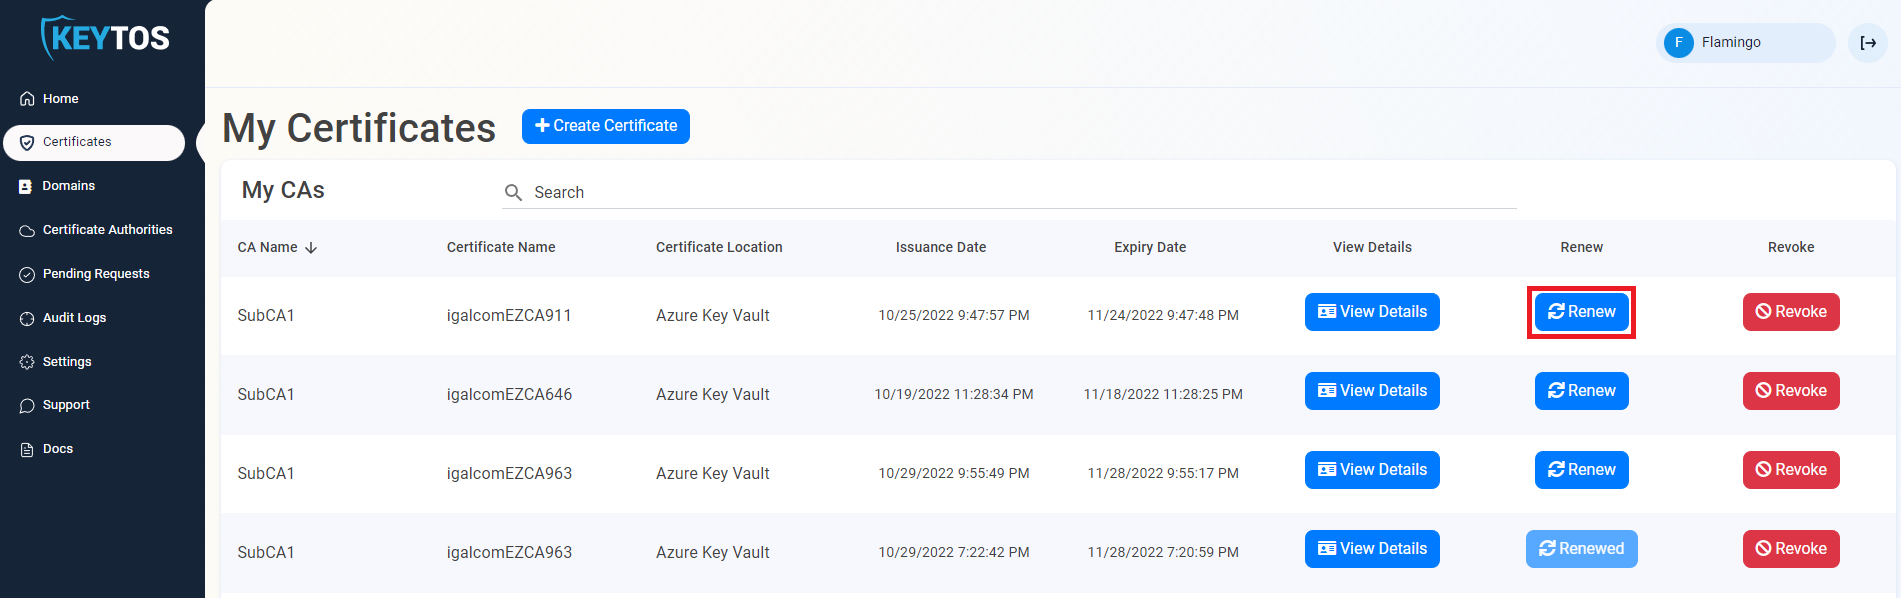
In the EZCA portal navigate to the My Certificates page
-
Click on the Renew button next to your certificate. This will trigger the certificate rotation process immediately.
-
The certificate will be renewed in your Key Vault and the new certificate will be added to your Entra ID application. You will get a success message in the EZCA portal once the rotation process is complete.