How-To: Trust a Root Certificate in Windows and macOS
As mentioned in the CA overview for a CA to be trusted by an organization it has to be added to the trusted root store of all their devices. follow these steps to trust a new root CA.
Overview - How To Install a Root CA in Windows
As mentioned in the CA Overview for a CA to be trusted by an organization it has to be added to the trusted root store of all their devices. This guide will guide you on how to install it in Windows Certificate Root Store.
Getting the Root CA Certificate from EZCA
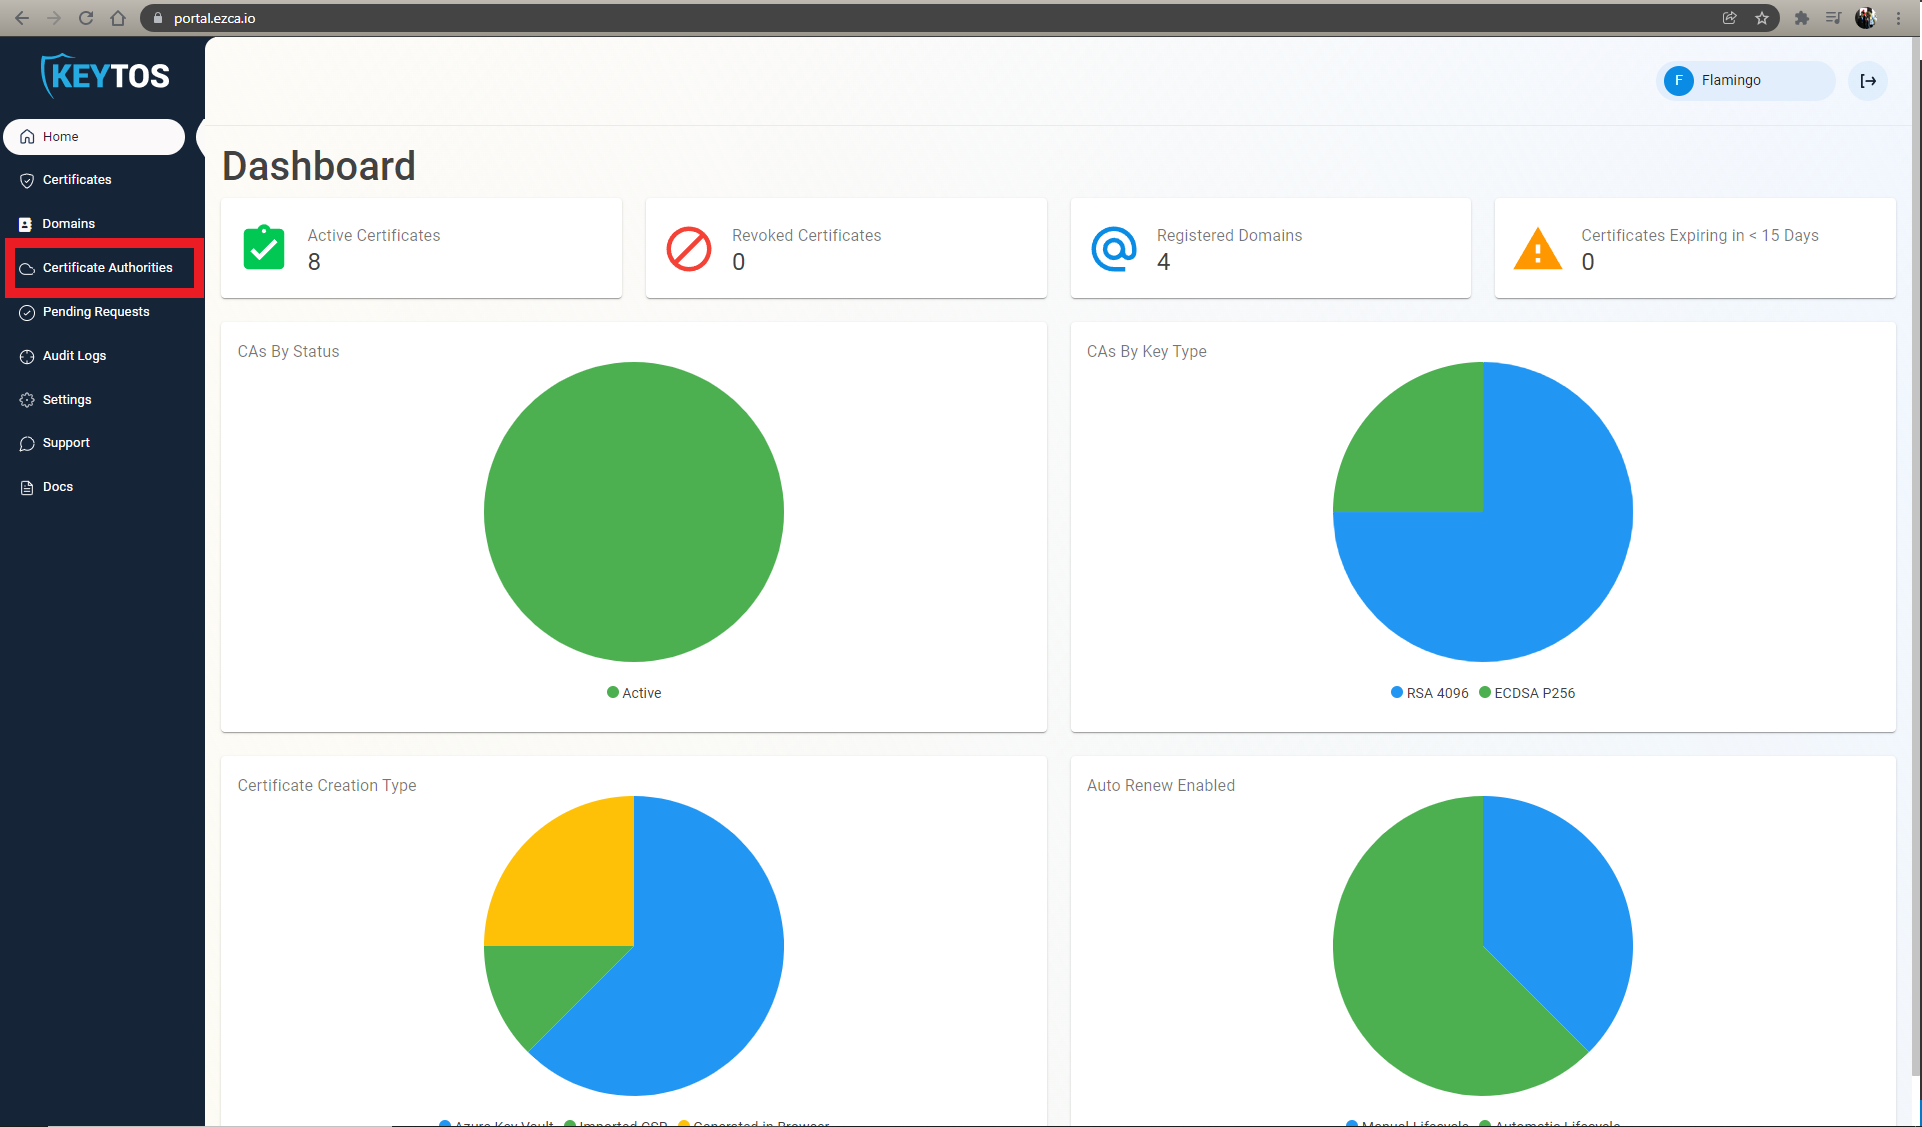
- Go to https://portal.ezca.io/
- Navigate to Certificate Authorities.
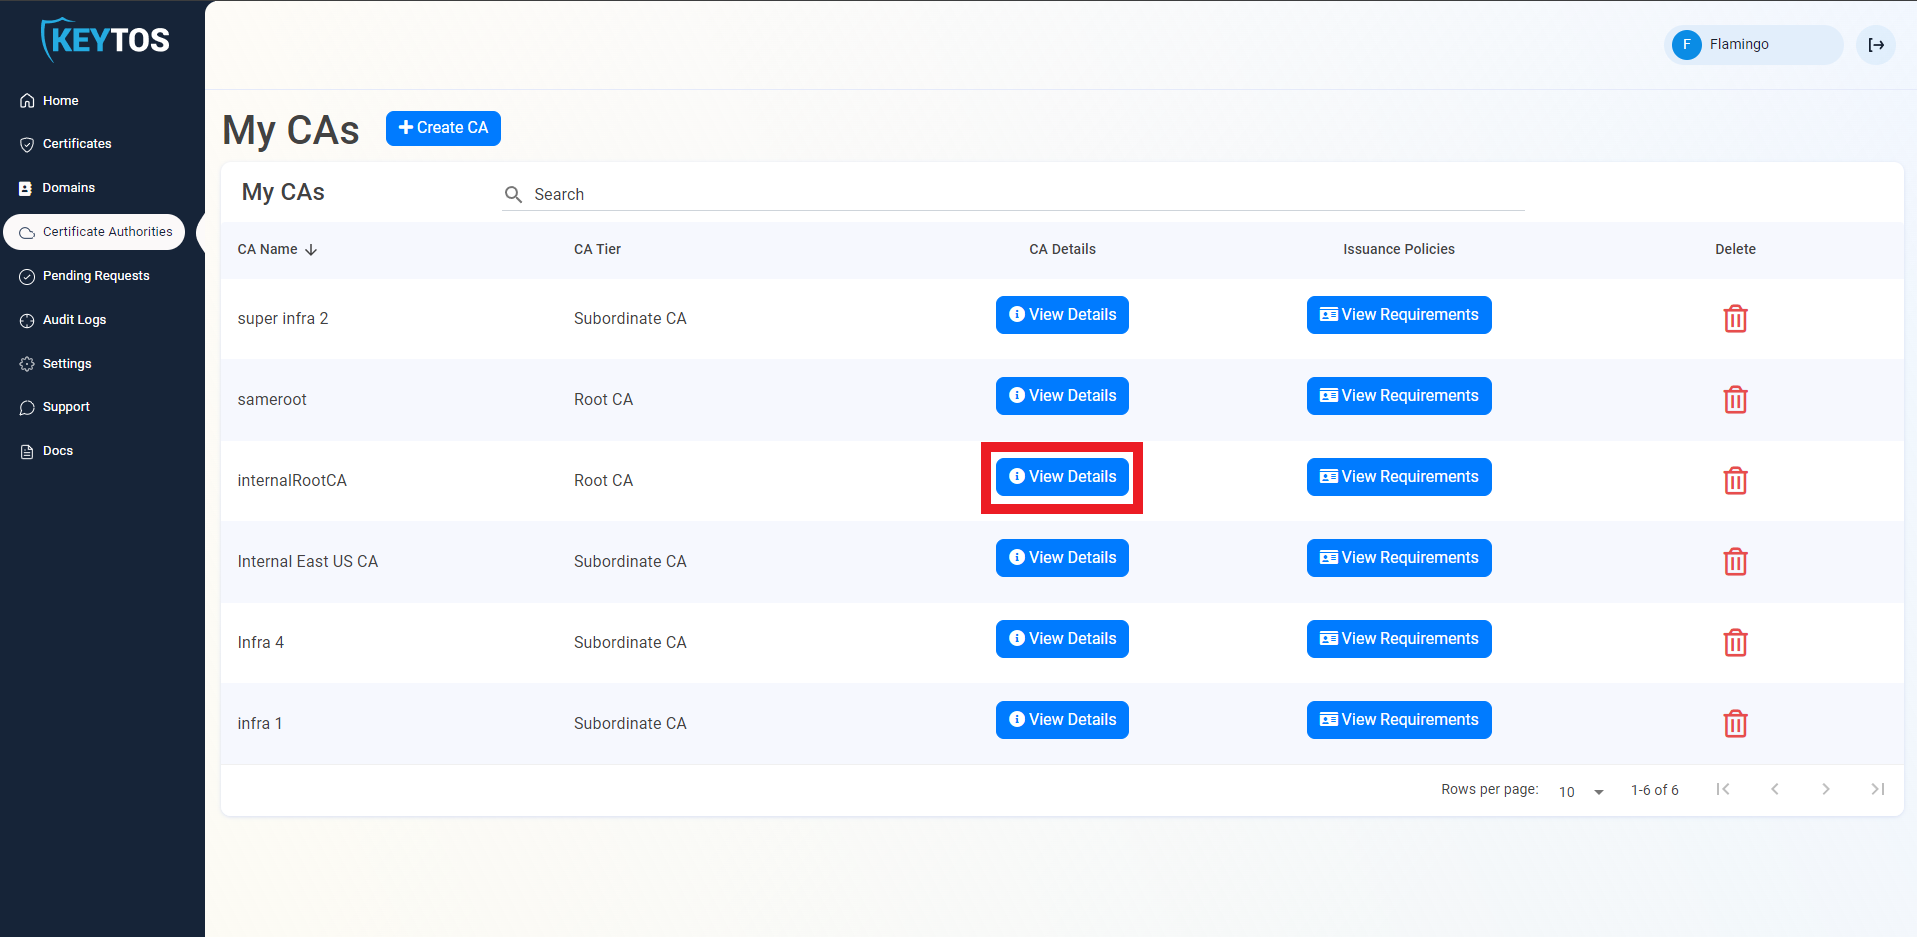
- Click the “View Details” button for the CA you want to download the certificate from.
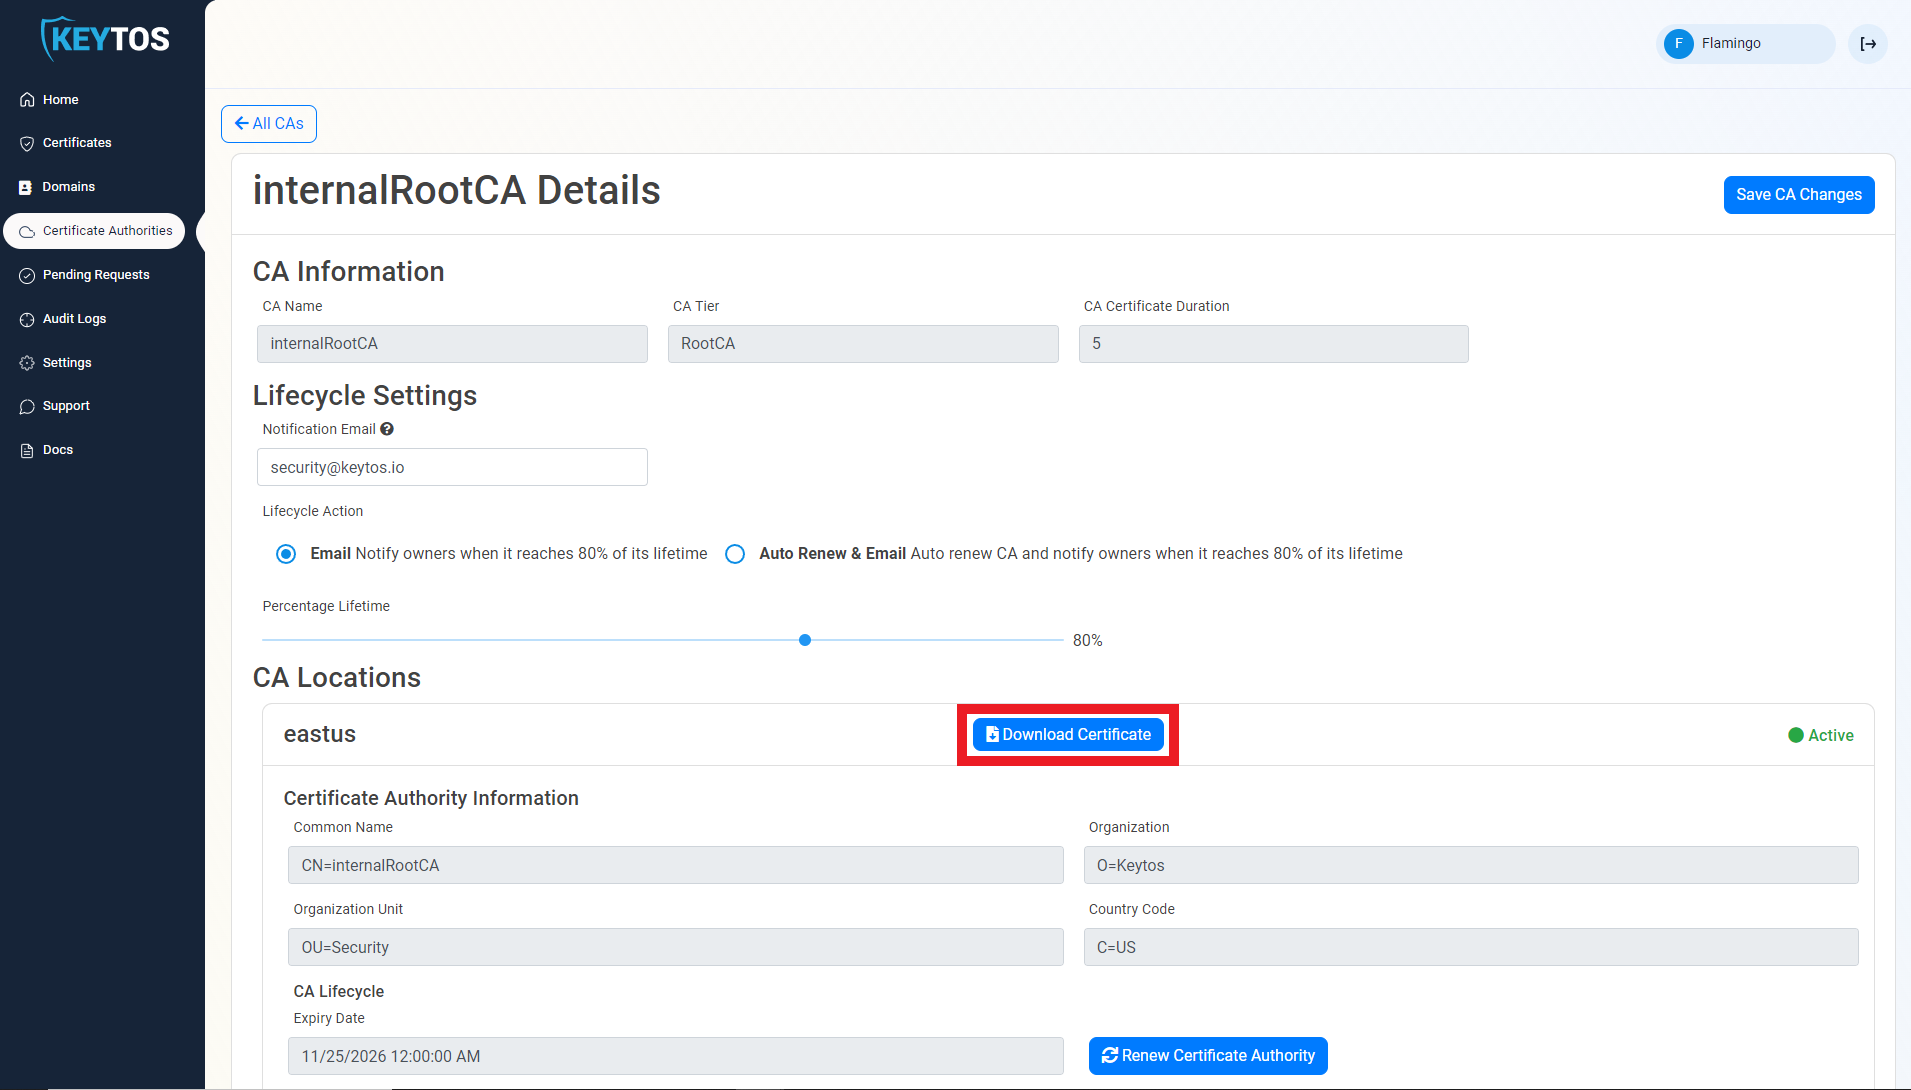
- Click the “Download Certificate” button for the location that you want to download the certificate from.
Installing Certificate Through Intune
Usually MDM solutions is the preferred way IT Admins install internal Root CAs as a trusted authority in all of the corporate devices. To do this in Microsoft Intune, follow this guide
How To Trust The Root Certificate In Windows
How To Trust a Root CA in Windows - Video Version
In Windows, Root CAs can be added in two different stores: The User store (Only for the current user), The Local Store (For all users, Require Administrator Permissions)
Installing The Root CA Certificate In The User Store
- Search in the Windows search bar for “Manage user certificate”.
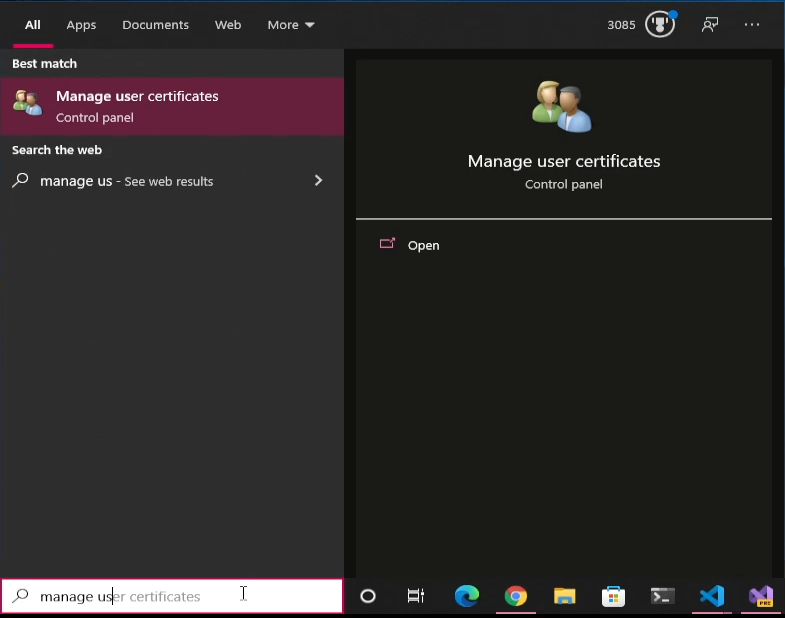
- Click on the application.
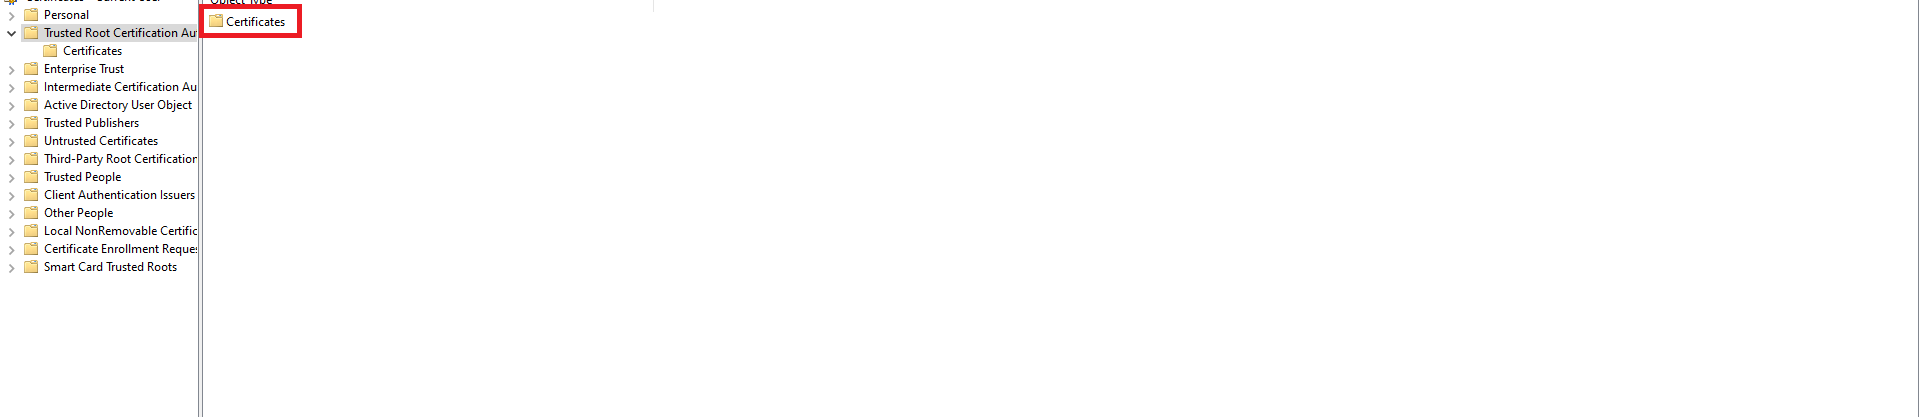
- Select the “Trusted Root Certificate Authorities” folder.

- Select the “Certificates” folder.
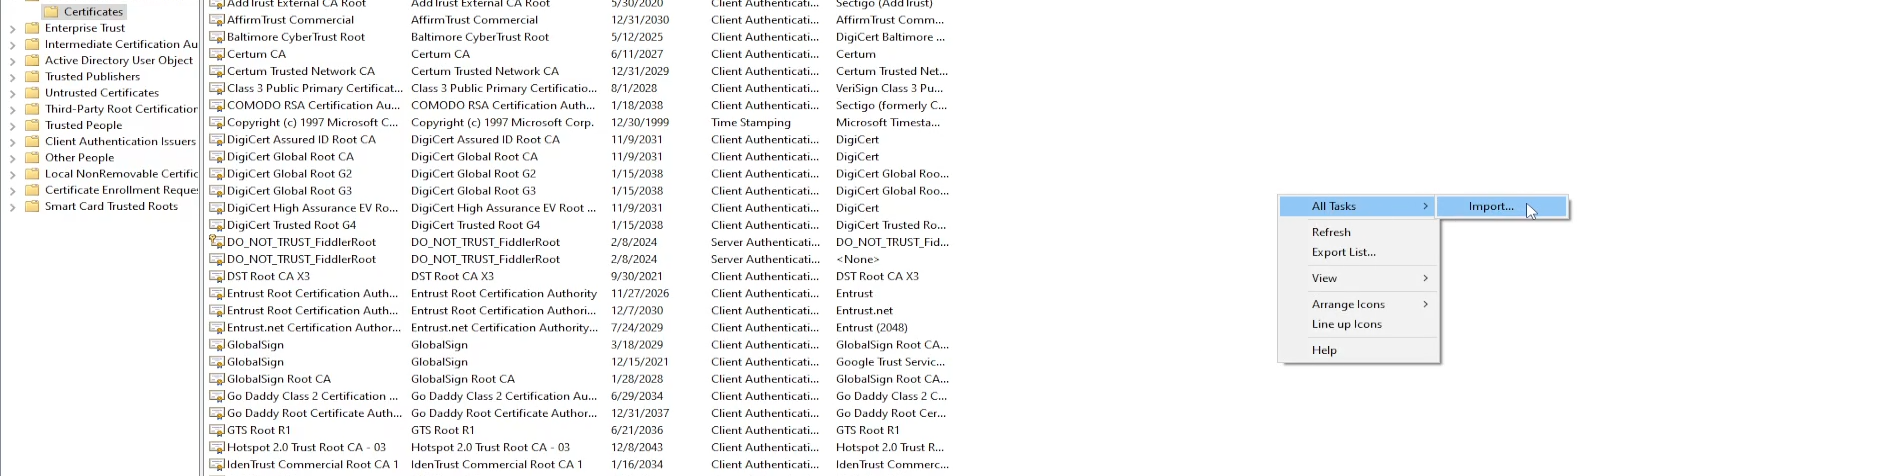
- Right Click on any whitespace.
- Select All Tasks -> Import.
- Click “Next” on the first page of the wizard.
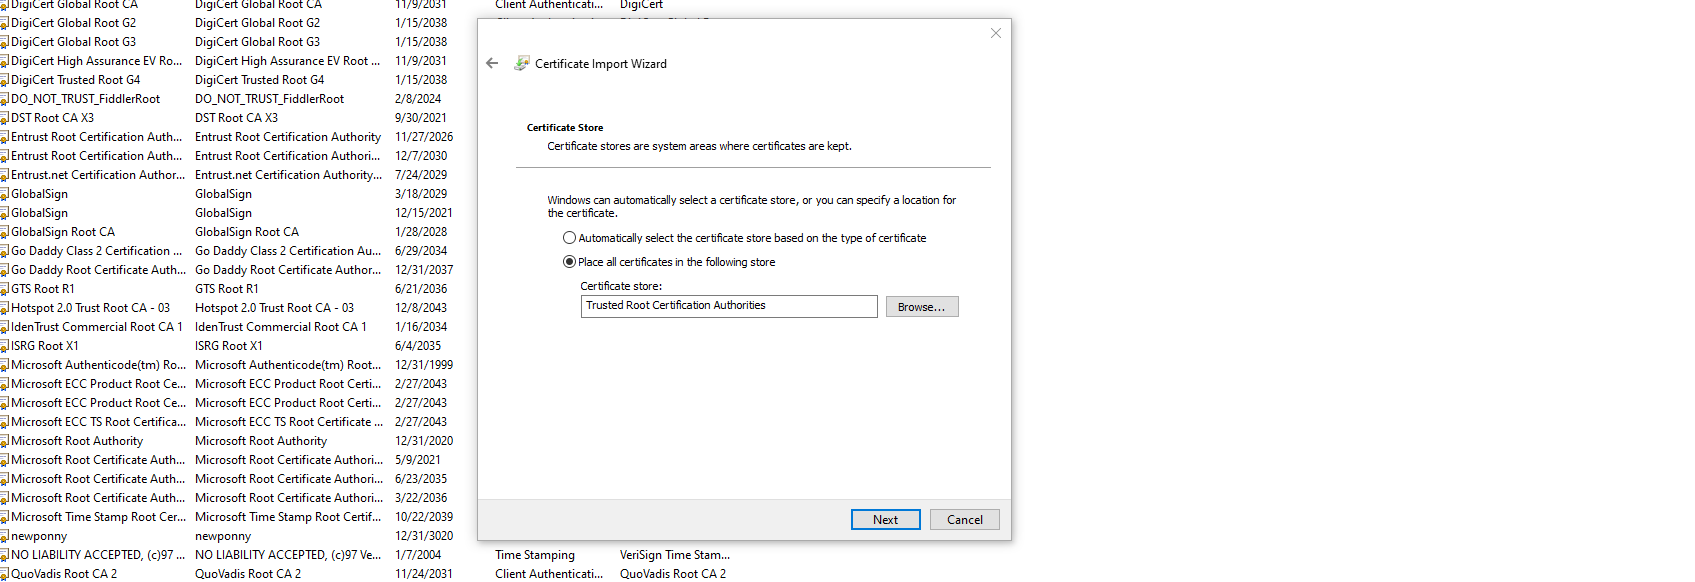
- Click the “Browse…” button

- Select The Root certificate you are trying to import.
- Click “Next”
- Click “Next”
- Click “Finish”, now certificates issued by this CA will be trusted by your user.

Installing In The Local Store
- Search in the Windows search bar for “Manage computer certificate”.
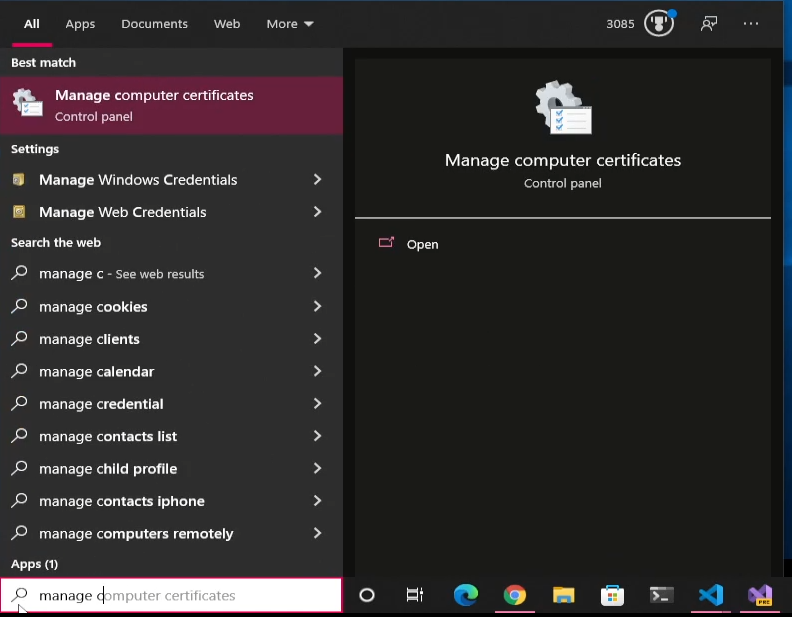
- Click on the application.
- Select the “Trusted Root Certificate Authorities” folder.
- Select the “Certificates” folder.
- Right Click on any whitespace.
- Select All Tasks -> Import.
- Click “Next” on the first page of the wizard.
- Click the “Browse…” button
- Select The Root Certificate you are trying to import.
- Click “Next”
- Click “Next”
- Click “Finish”, now certificates issued by this CA will be trusted by all users on this machine.
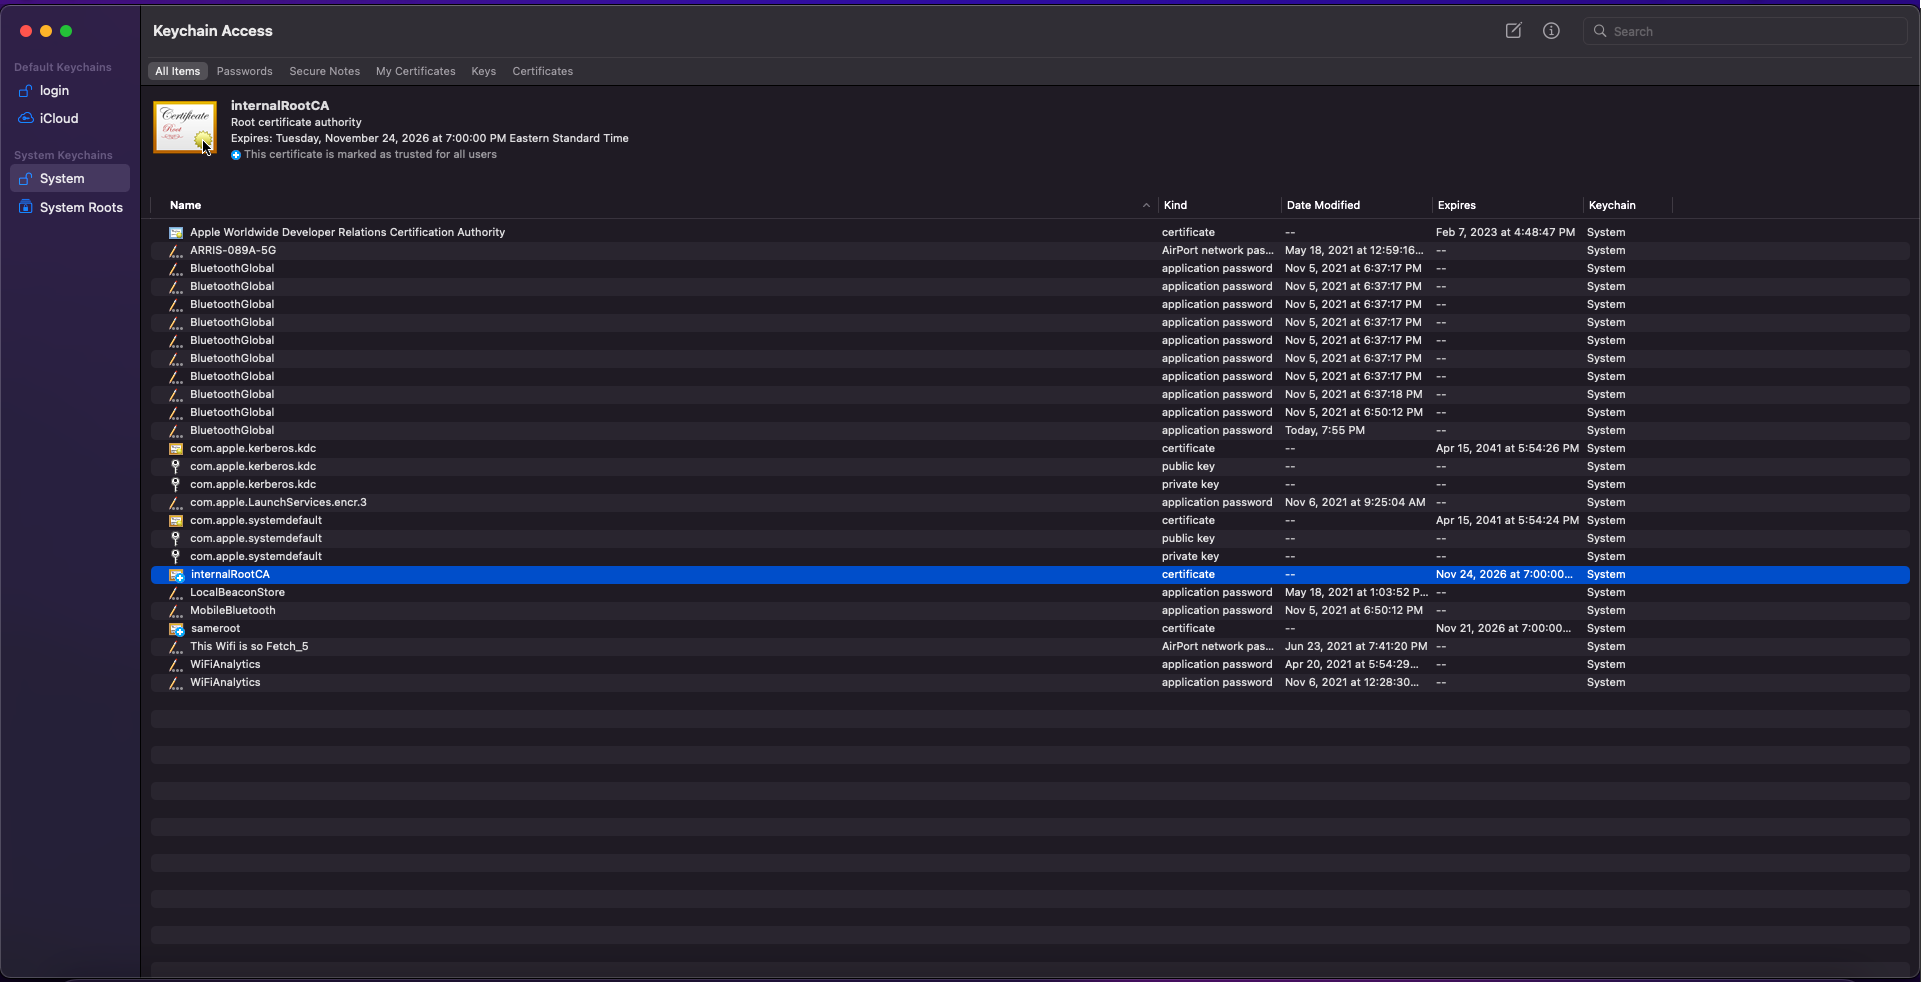
Installing Root Certificate In MacOS
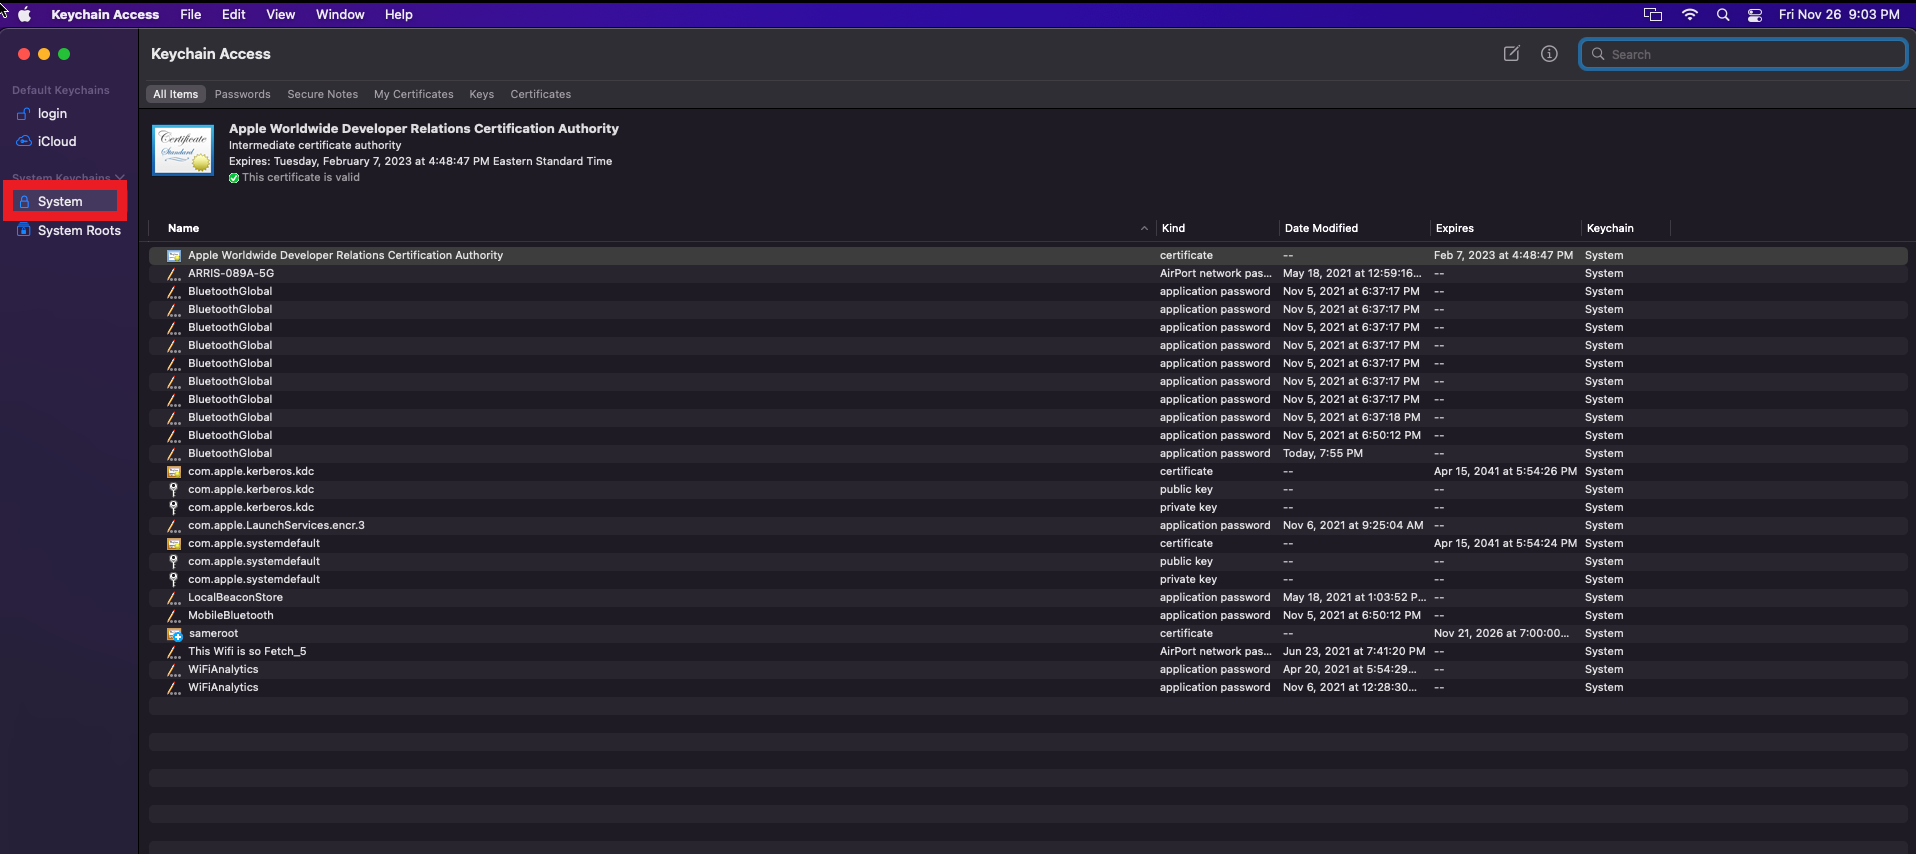
- Search and open “Keychain Access”.
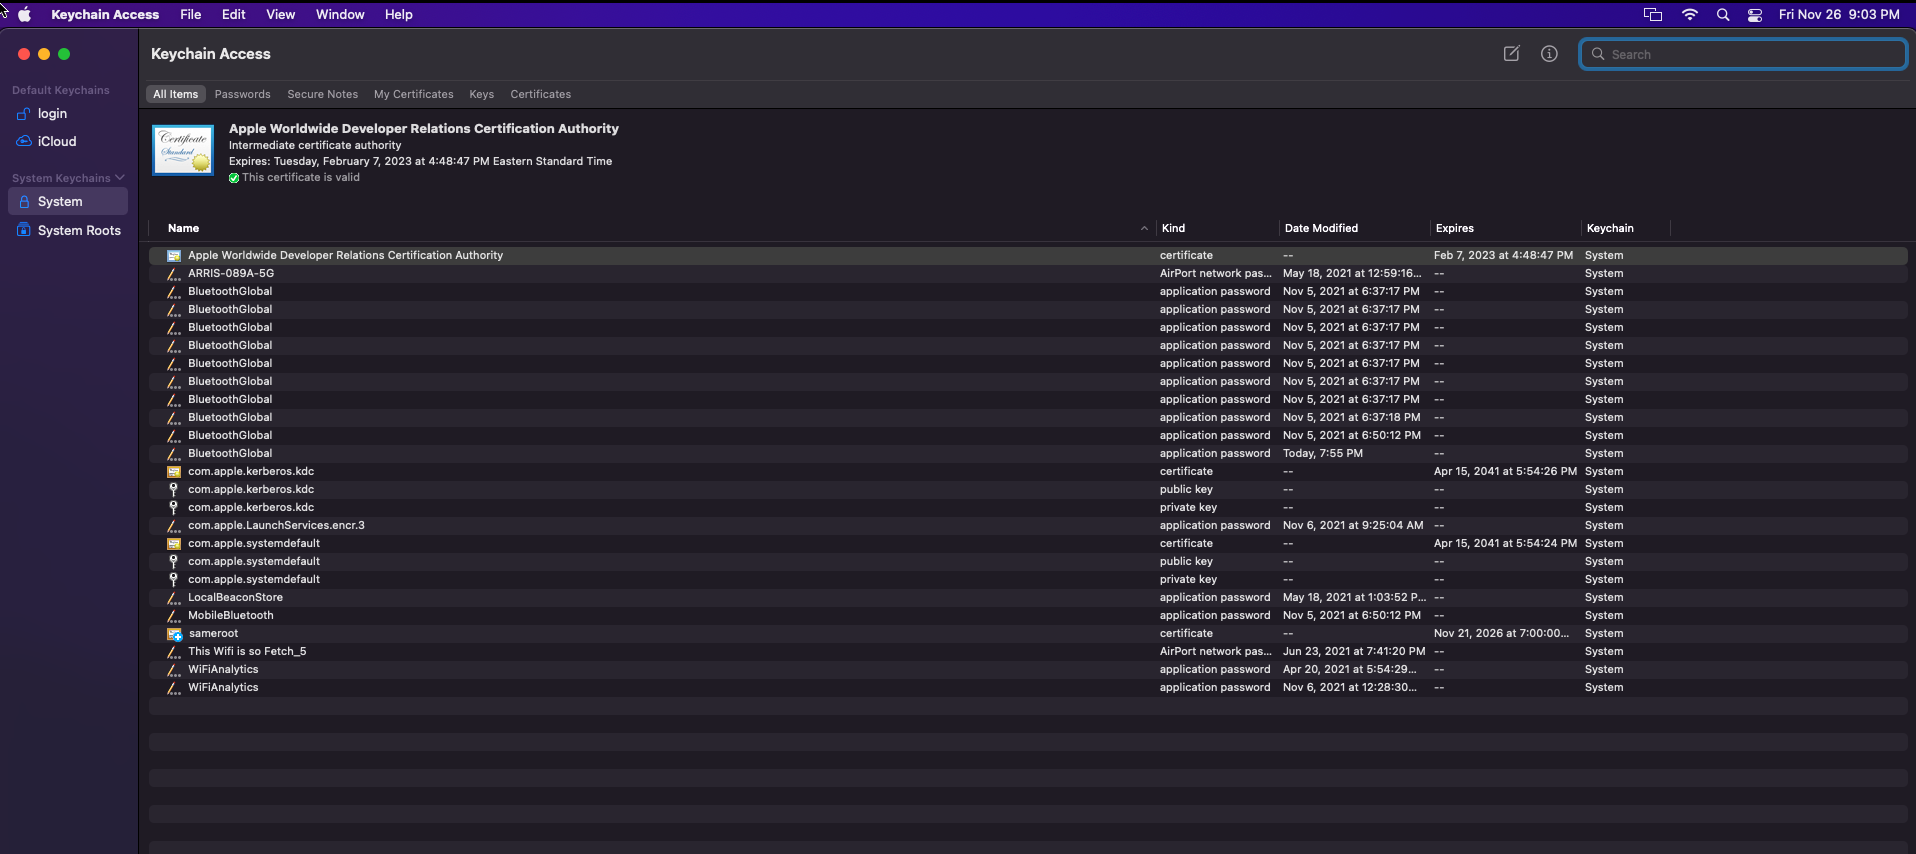
- On the left menu click on System.
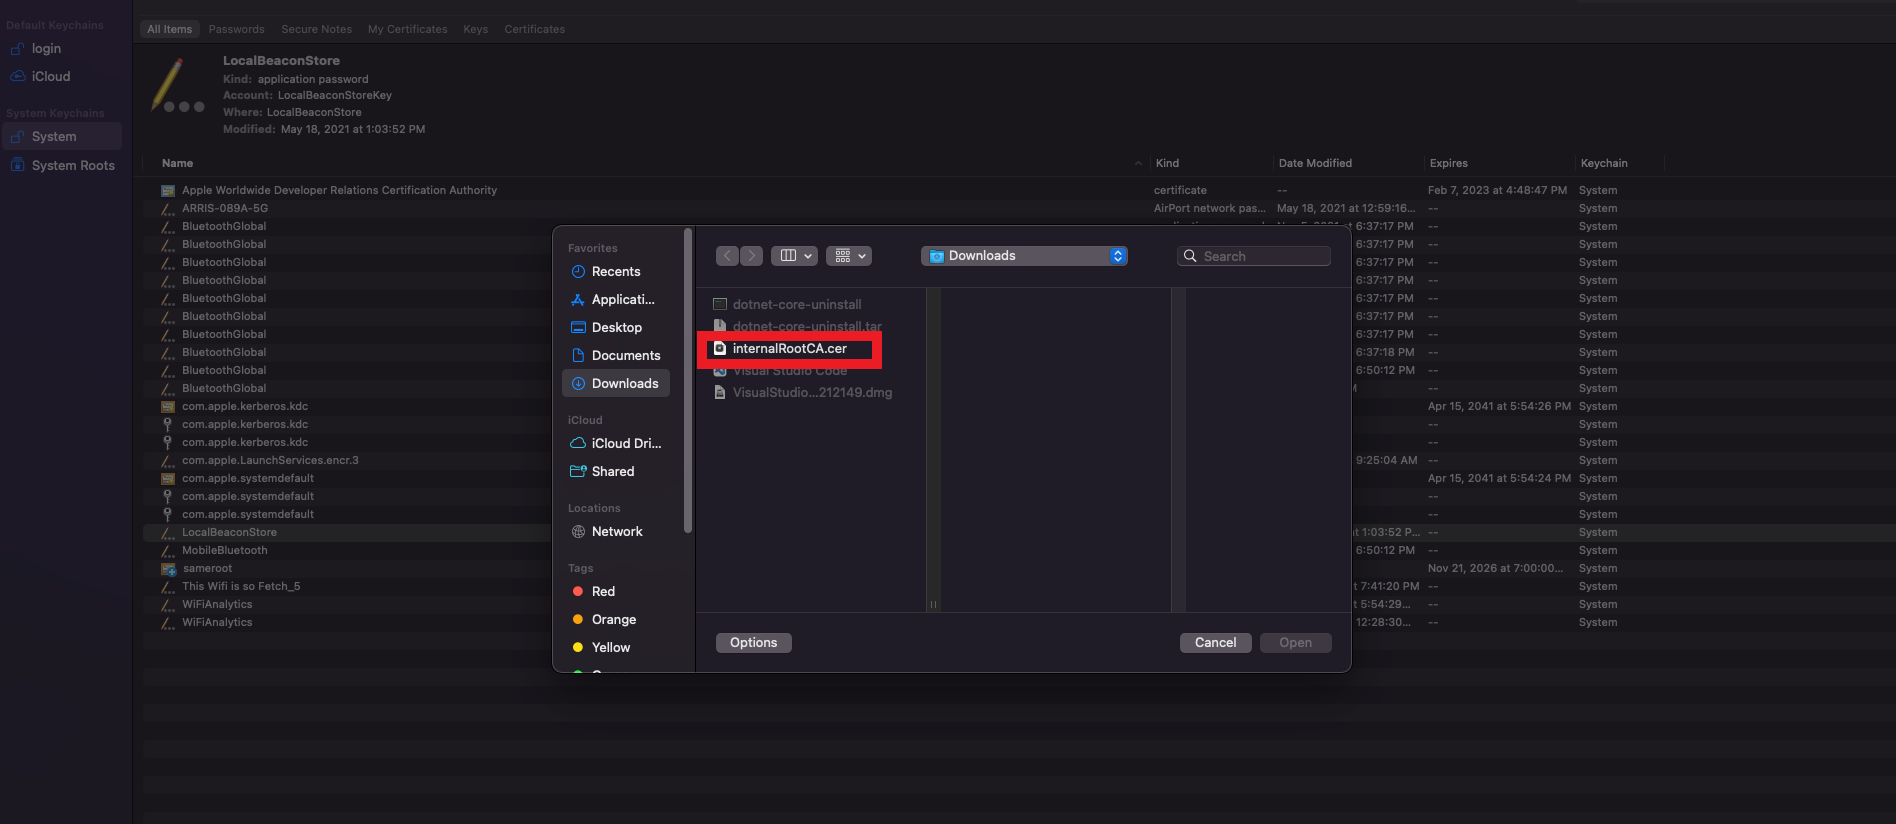
- On the top menu click File -> Import Items.
- Select the Certificate you want to import.
- Enter your Admin Password
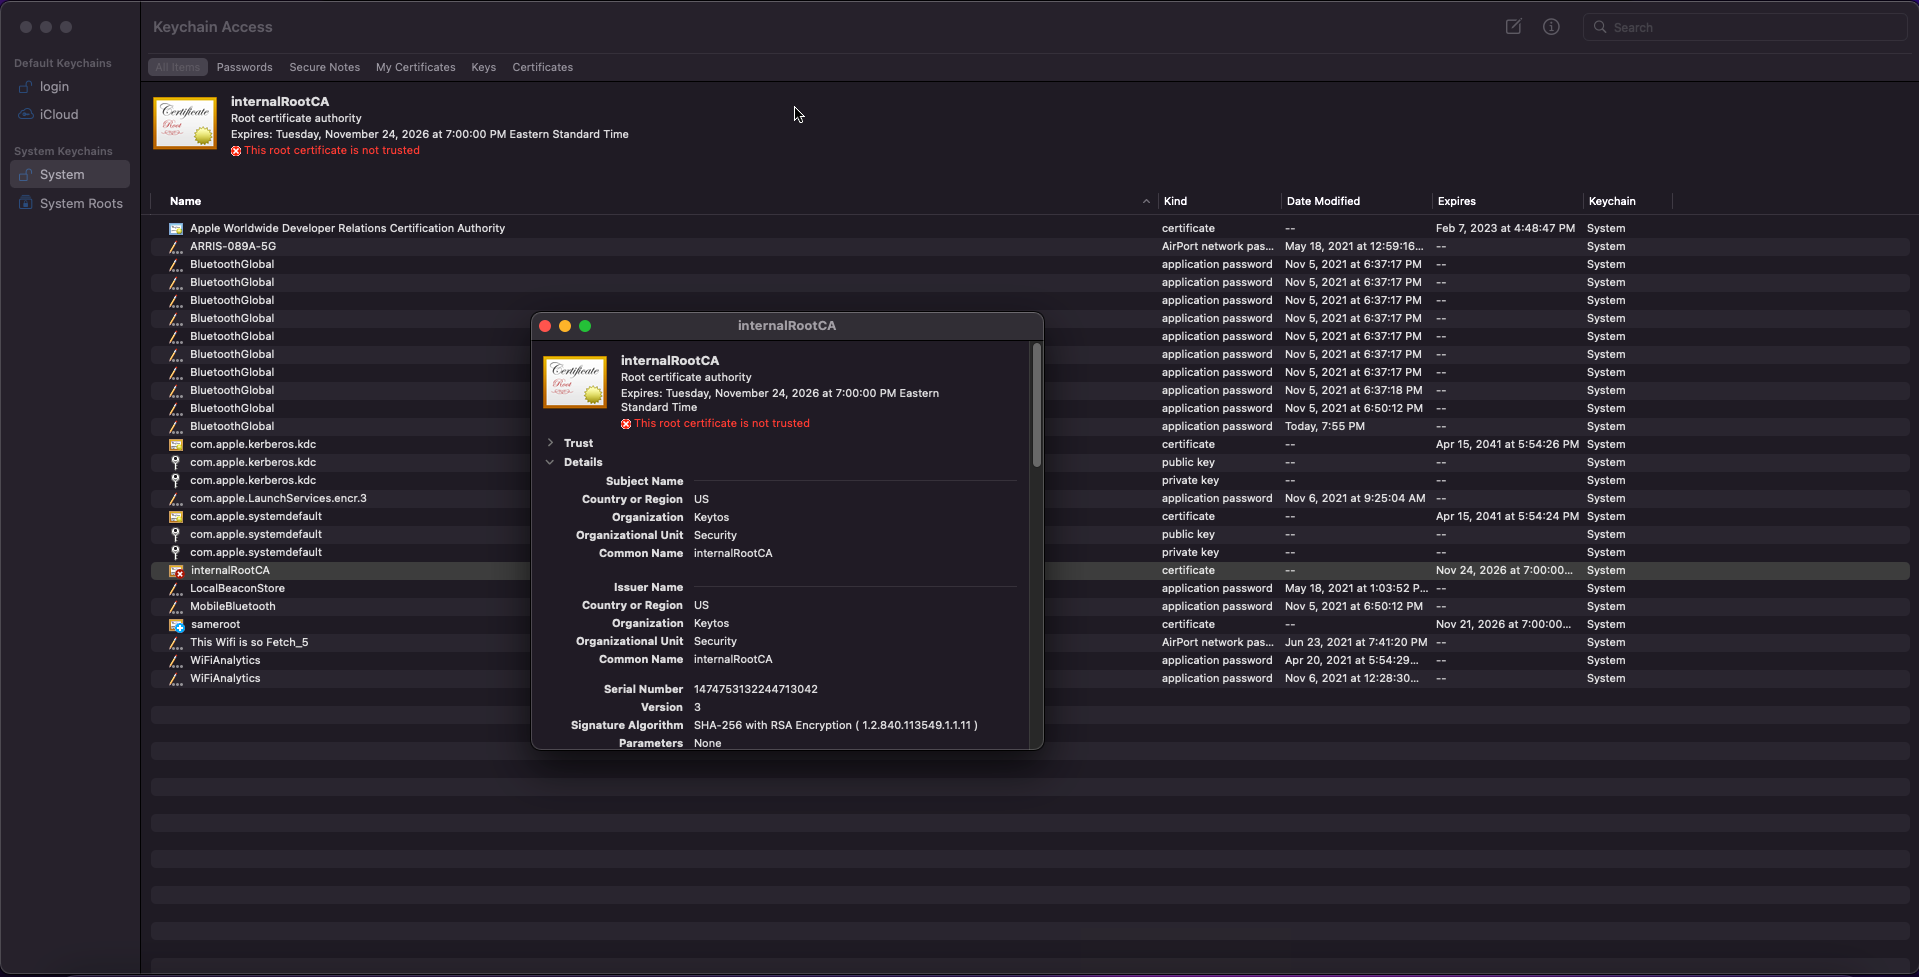
- This will add the certificate but it will not be trusted by the system.

- double click the certificate in the certificate list.
- A window with the certificate details will be opened.
- Expand the Trust menu.
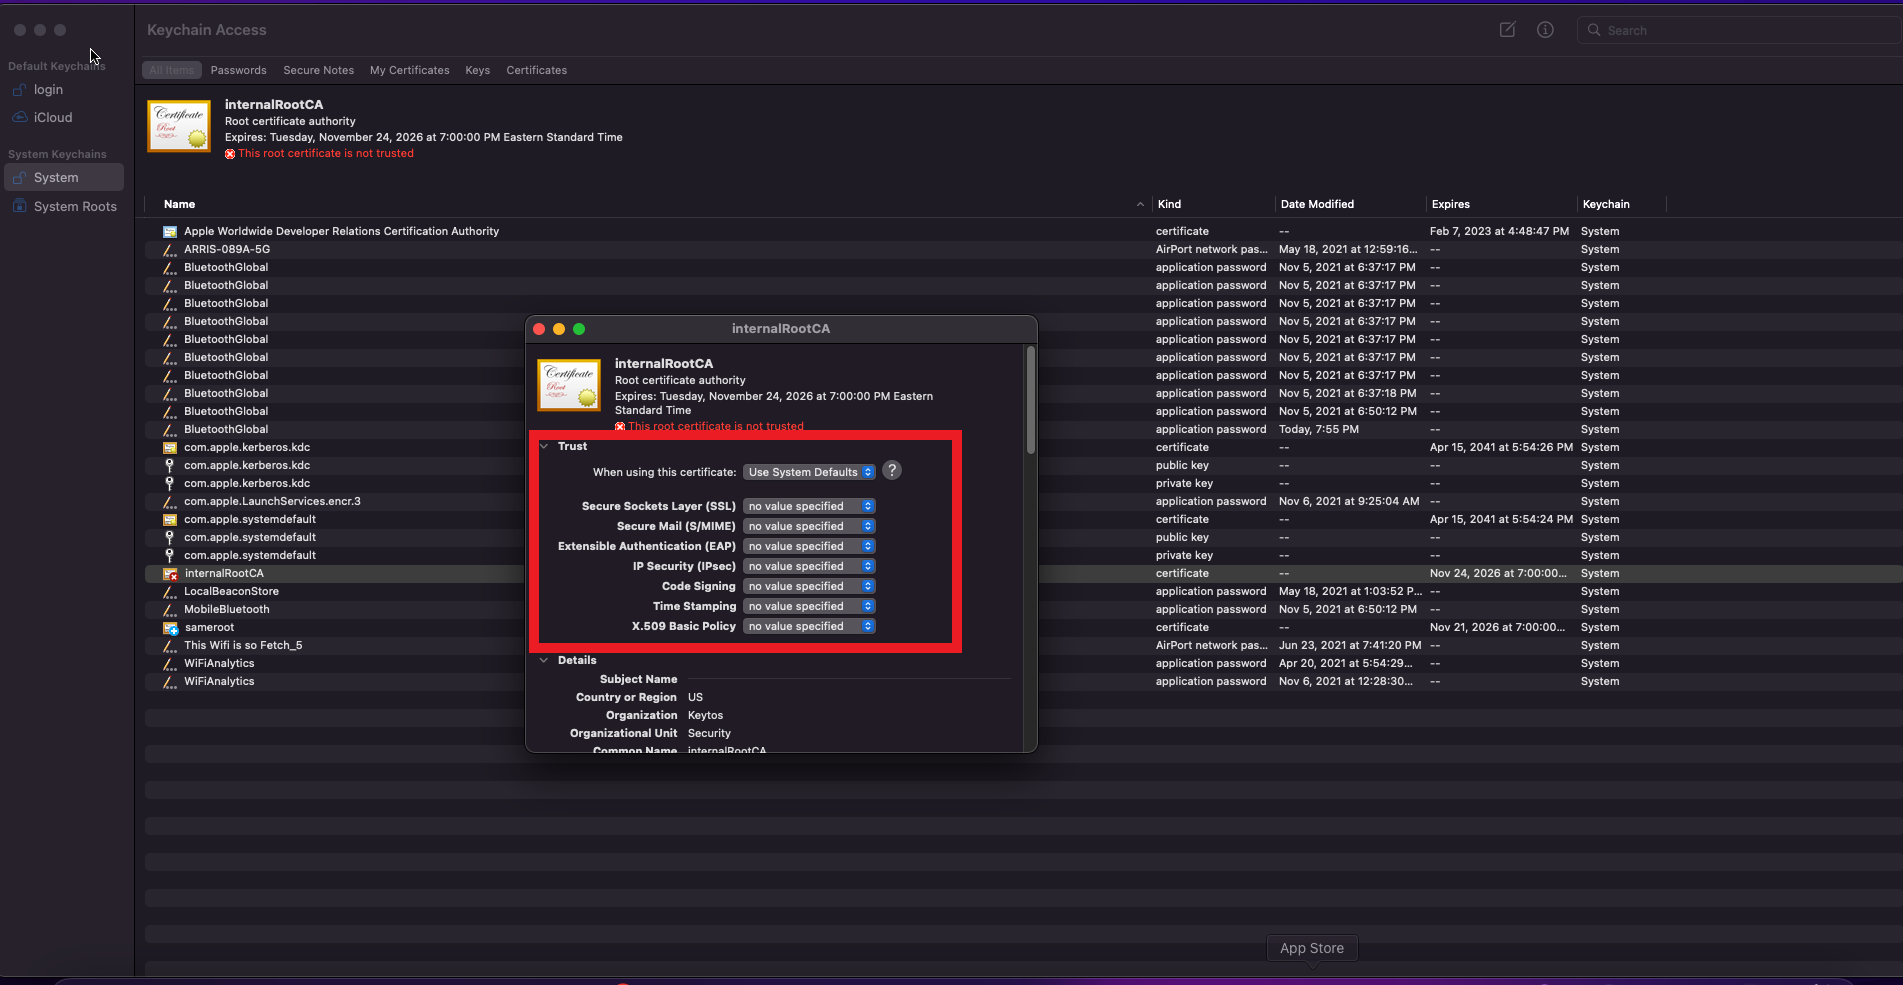
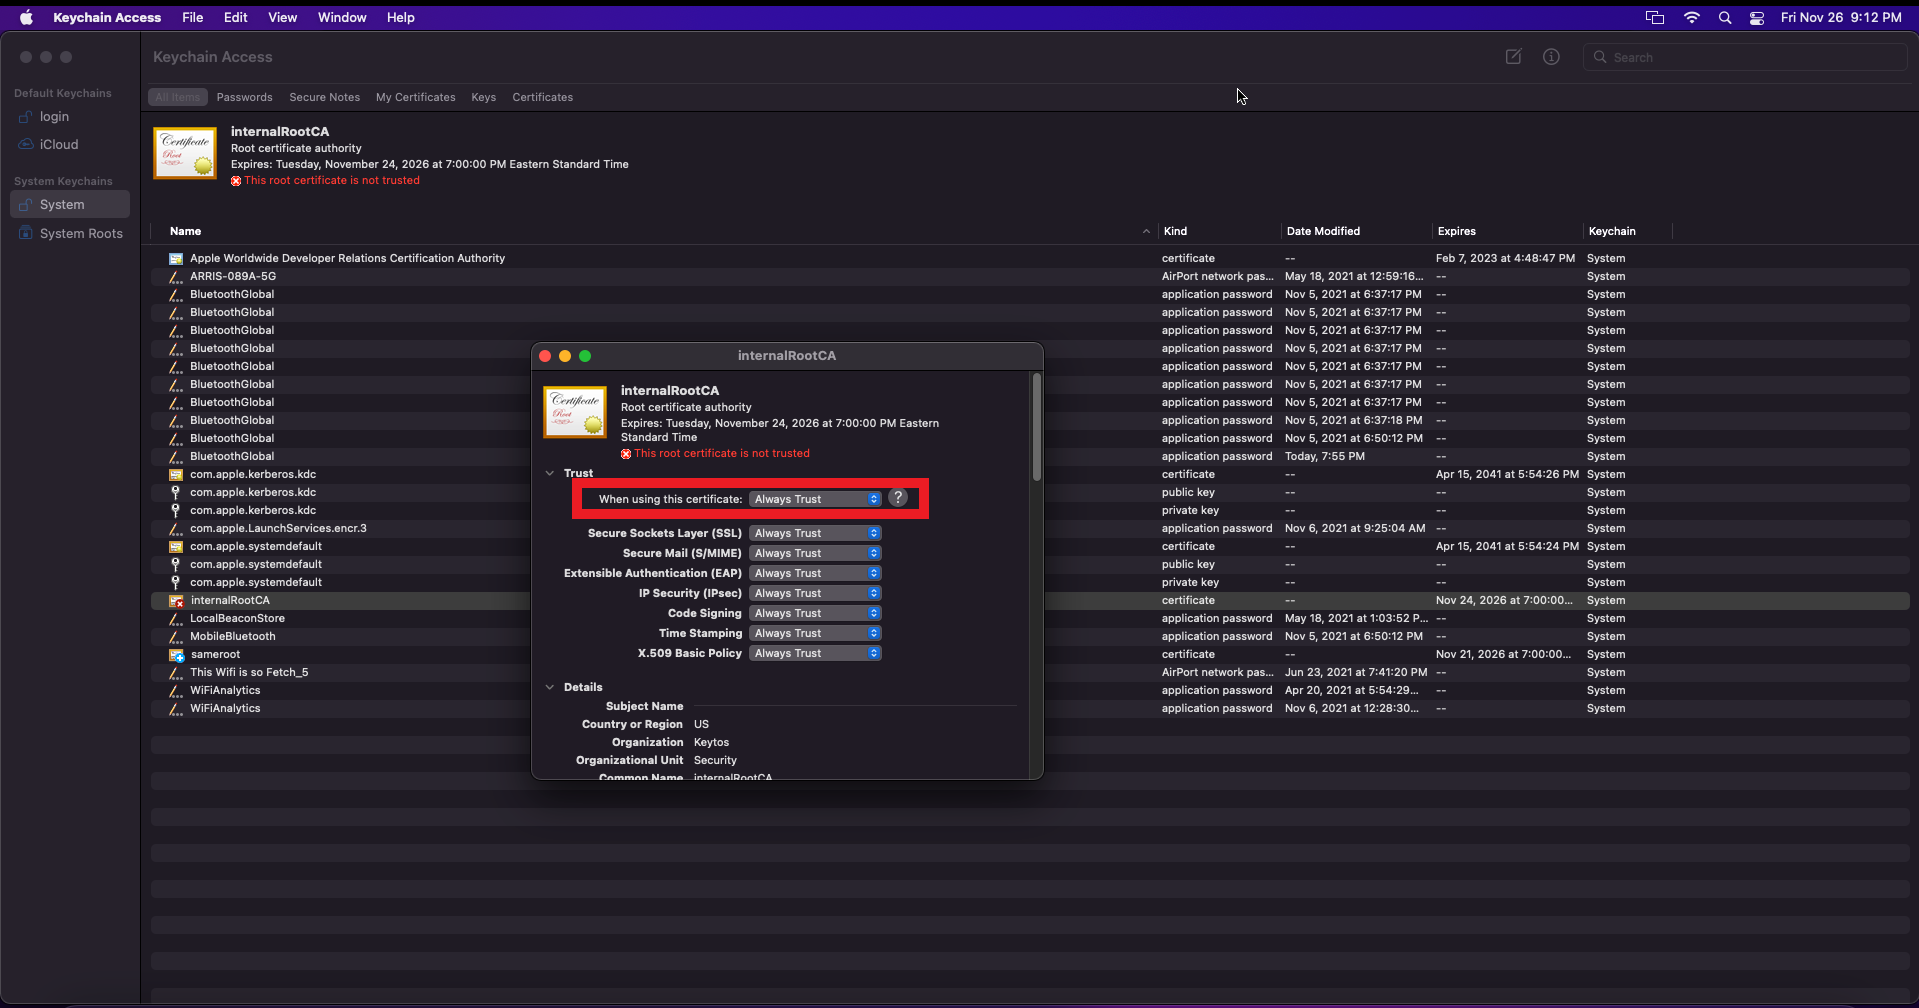
- Change the “When using this certificate:” to “Always trust”
- Close the window with the certificate details.
- Enter your Admin Password
- Your Certificate is now trusted (You might have to reboot for all changes to take effect)