How-To: Issue SCEP Certificates in Jamf Now
Overview - What is Jamf Now?
Jamf Now is a cloud-based mobile device management (MDM) solution designed for small businesses. It allows organizations to easily manage and secure their Apple devices, including iPhones, iPads, and Macs.
Does Jamf Now Support SCEP Certificates?
Yes, via Custom Profiles. While Jamf Now does not directly support SCEP certificate issuance (as of writing), it does allow you to configure Custom Profiles via Apple Configurator which can be used to deploy SCEP certificates to your devices. The guide below will walk you through how to use Custom Profiles in Jamf Now to issue SCEP certificates from your EZCA SCEP CA.
What Limitations Are There with Jamf Now and SCEP?
The main limitation with using Jamf Now for SCEP certificate issuance is that it does not allow you to inject Jamf variables into the certificate Subject or Subject Alternative Name (SAN) fields, including information about the assigned user of the device. This means that you will need to use static values for these fields in your SCEP configuration profile, or use Apple’s built-in variables.
Apple’s Built-In Variables
| Variable | Substitution |
|---|---|
%ComputerName% |
The Mac computer’s name, as set in Sharing (in System Settings > General for macOS 13 or later, or in System Preferences for macOS 12.0.1 or earlier). |
%HardwareUUID% |
The Mac computer’s unique identifier. |
%HostName% |
The Mac computer’s DNS name, such as mac1.betterbag.com. |
%LocalHostName% |
The Mac computer’s local network name, such as Mac1.local. |
%MACAddress% |
The Mac computer’s Ethernet (en0) MAC address. |
%SerialNumber% |
The Mac computer’s serial number. |
A good set of values to use would be:
- Subject:
CN=%HardwareUUID% - DNS SAN:
%HostName%
Can I Use Jamf Now-Issued SCEP Certificates for Wi-Fi or VPN?
Yes! Once you issue SCEP certificates to your devices using Jamf Now, you can use them like any X.509 certificate. This means you can use them for Wi-Fi authentication, VPN authentication, or any other use case that requires a client certificate. However, keep in mind the limitations mentioned above regarding the inability to customize the Subject and SAN fields, which may impact certain use cases.
What Types of Apple Devices Can I Issue SCEP Certificates To with Jamf Now?
Jamf Now supports managing iOS, iPadOS, tvOS, and macOS devices. This means you can issue SCEP certificates to iPhones, iPads, Apple TVs, and Macs using the custom profile method described in this guide.
How to Configure Jamf Now to Issue SCEP Certificates - Step-by-Step Guide
The following steps will guide you through the process of configuring Jamf Now to issue SCEP certificates from your EZCA SCEP CA using Custom Profiles.
Prerequisites for Configuring Jamf Now with SCEP
- You will need a macOS device with Apple Configurator installed to create the custom profile.
- You will need an EZCA SCEP CA set up and ready to issue certificates.
- You will need to be a Jamf Now administrator with permissions to create and upload configuration profiles.
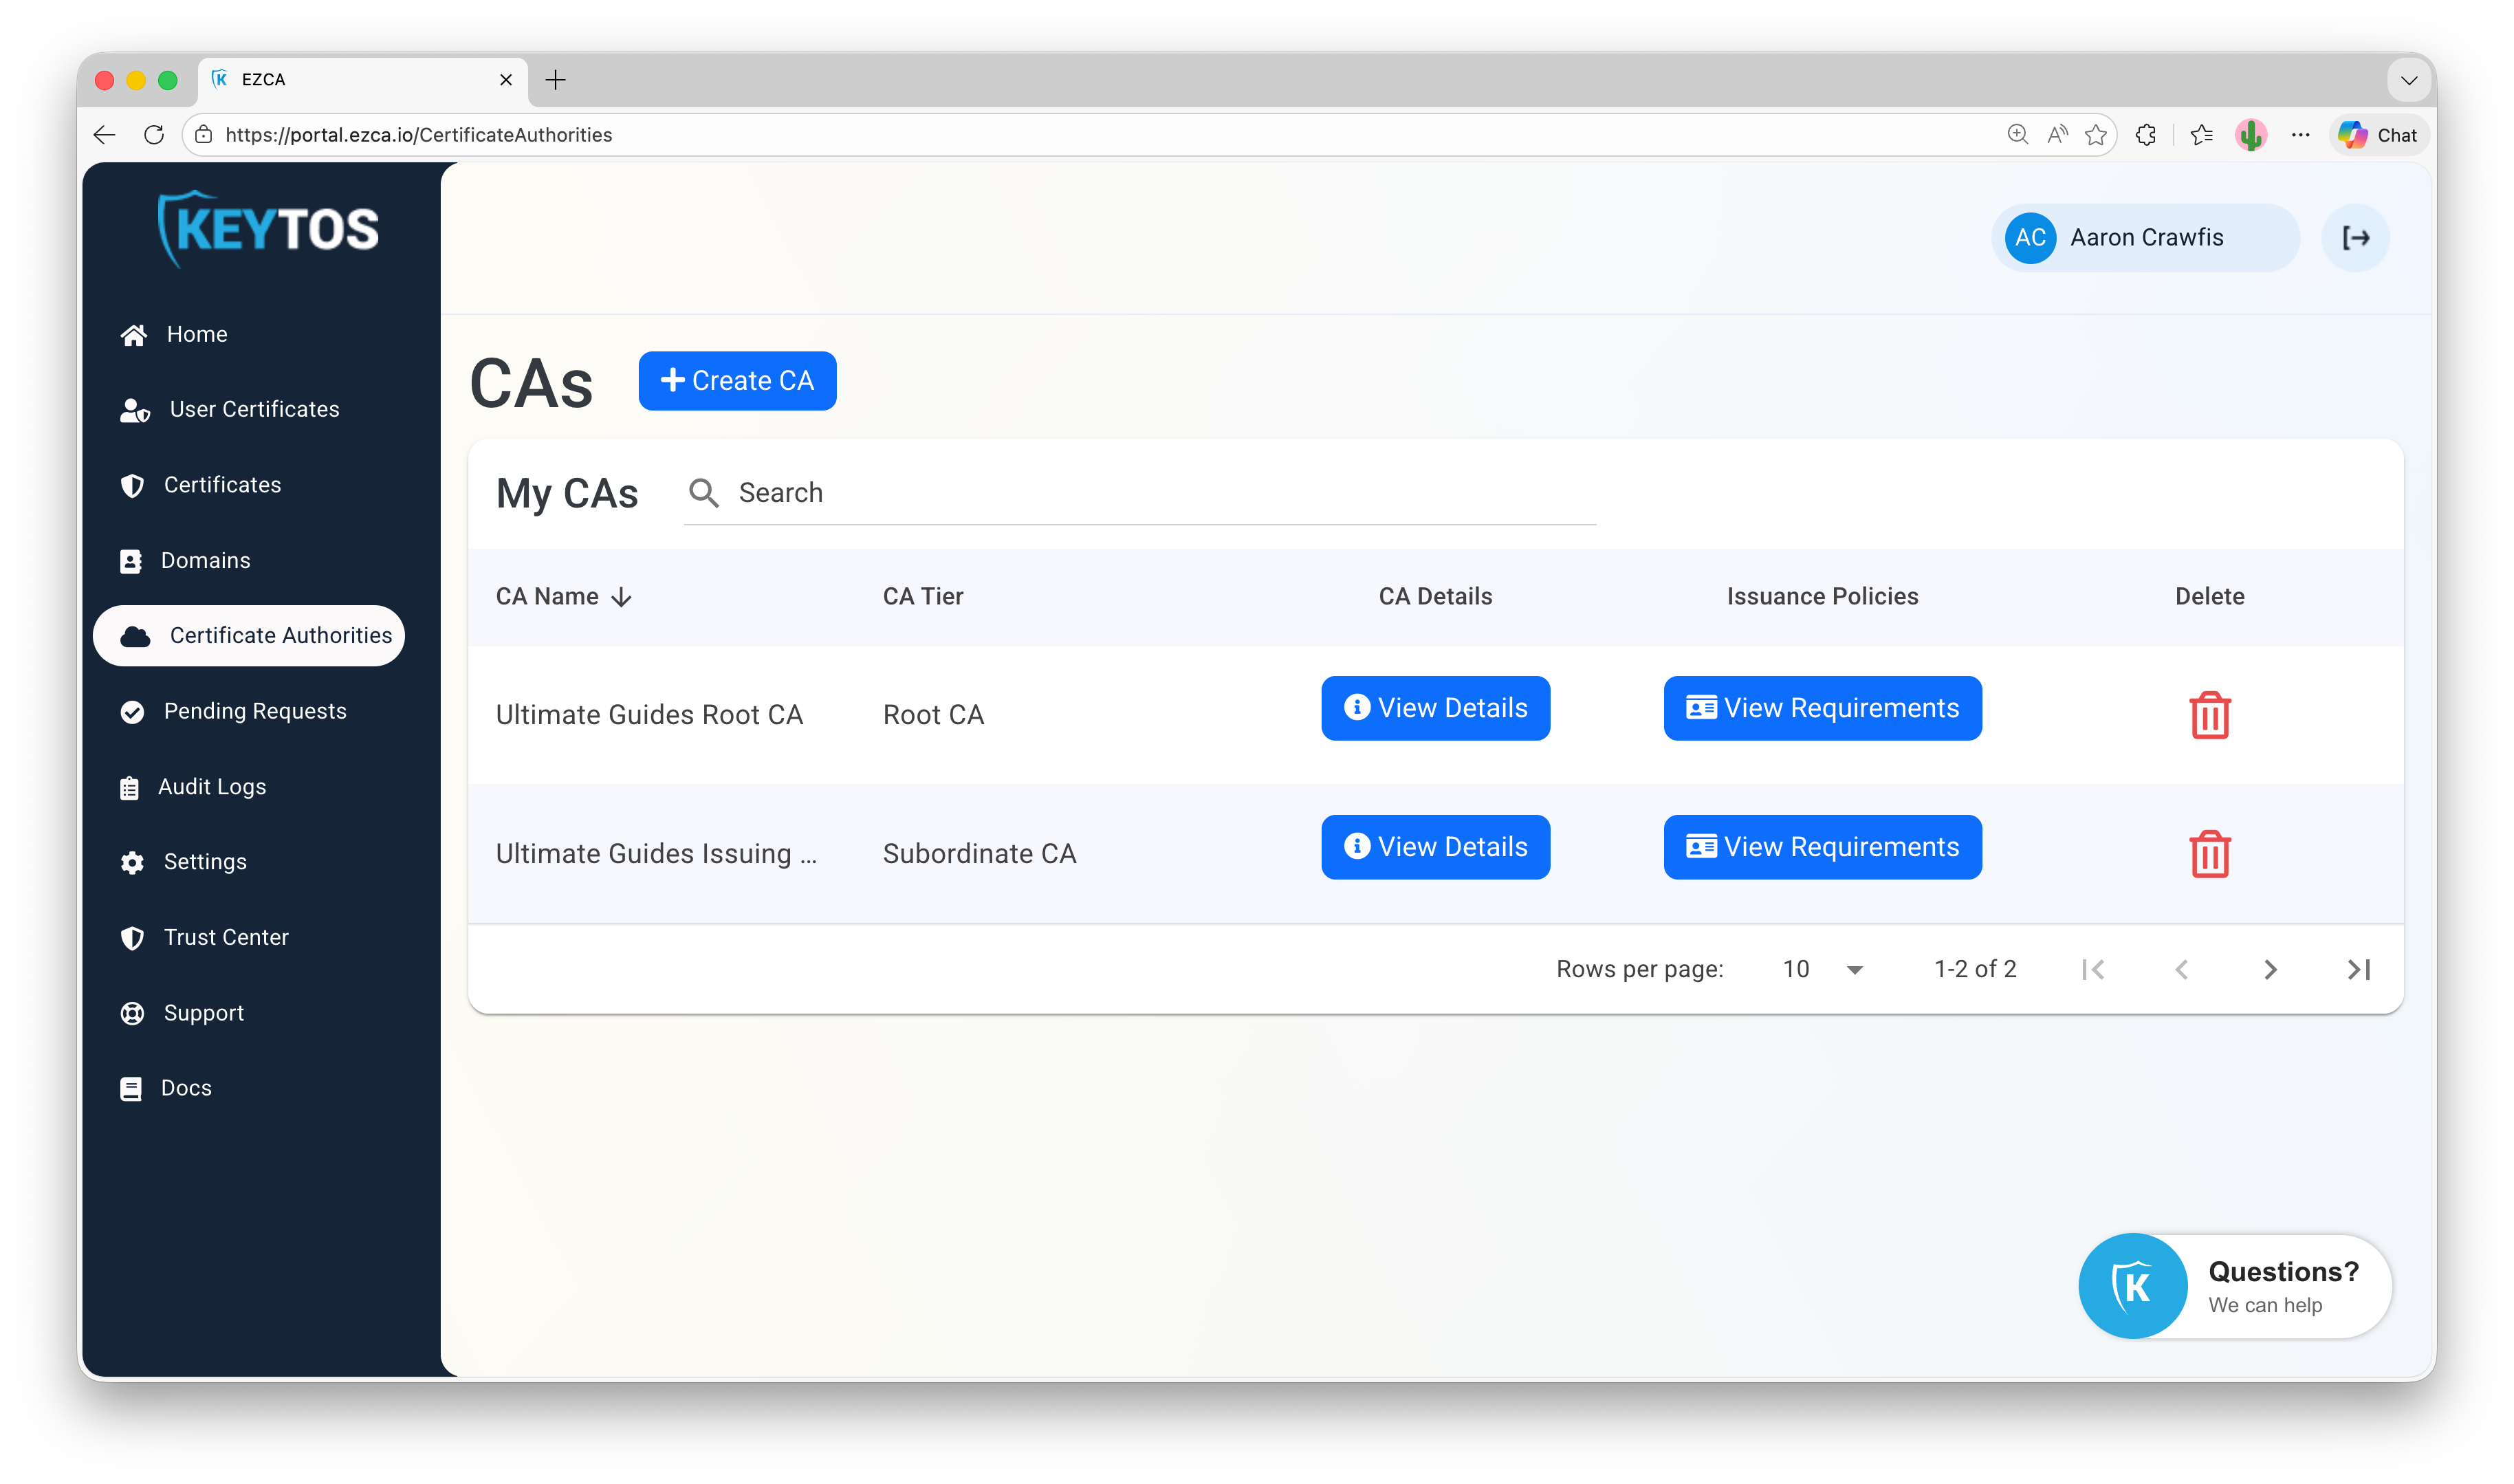
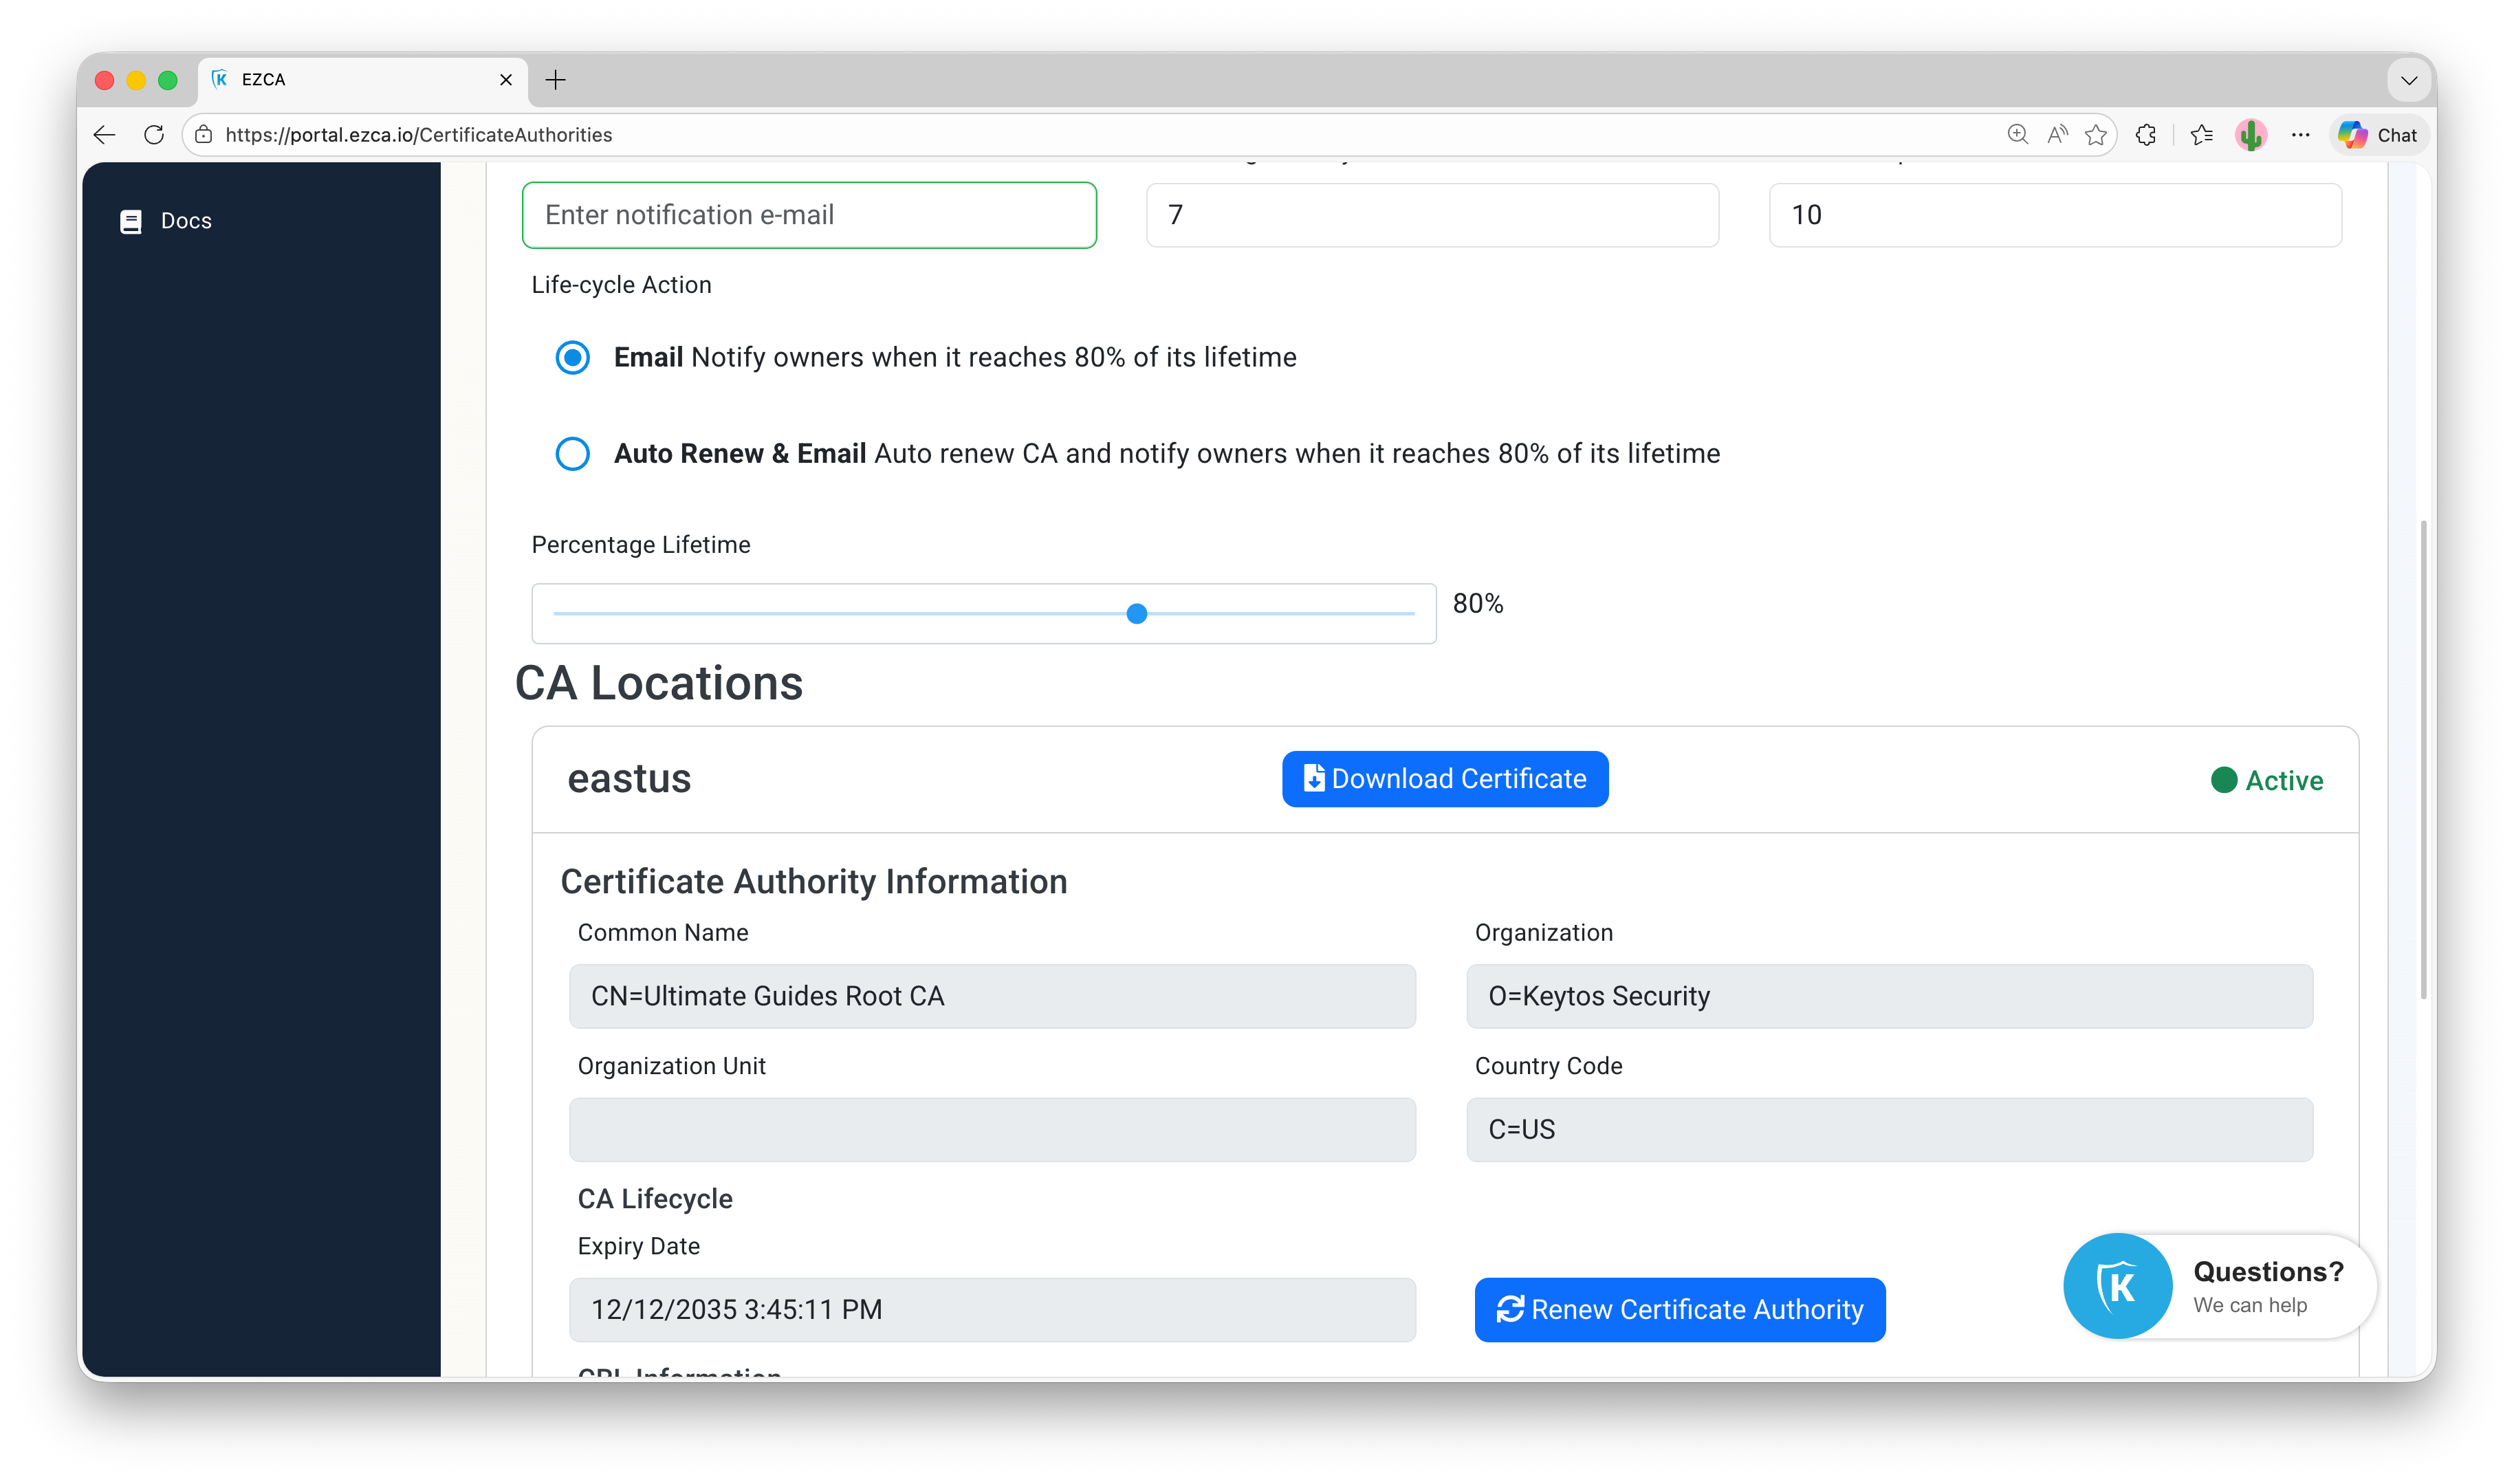
How to Download Your Root and/or SCEP CA Certificates from EZCA
To establish trust for your SCEP certificates, you will need to download and later push the CA certificate(s) for your SCEP CA to your devices. If your SCEP CA is a subordinate CA, you will need to download both the root and SCEP CA certificates. If your SCEP CA is a root CA, you will only need to download the SCEP CA certificate.
-
Navigate to your EZCA portal and sign in as a PKI Administrator.
-
Click on the Certificate Authorities tab and scroll to your SCEP CA.
-
Click on the View Requirements button for your SCEP CA.
-
Scroll down to the CA Locations section and click on the Download Certificate button for your CA.
-
If your SCEP CA is a subordinate CA, repeat the process to download the root CA certificate as well.
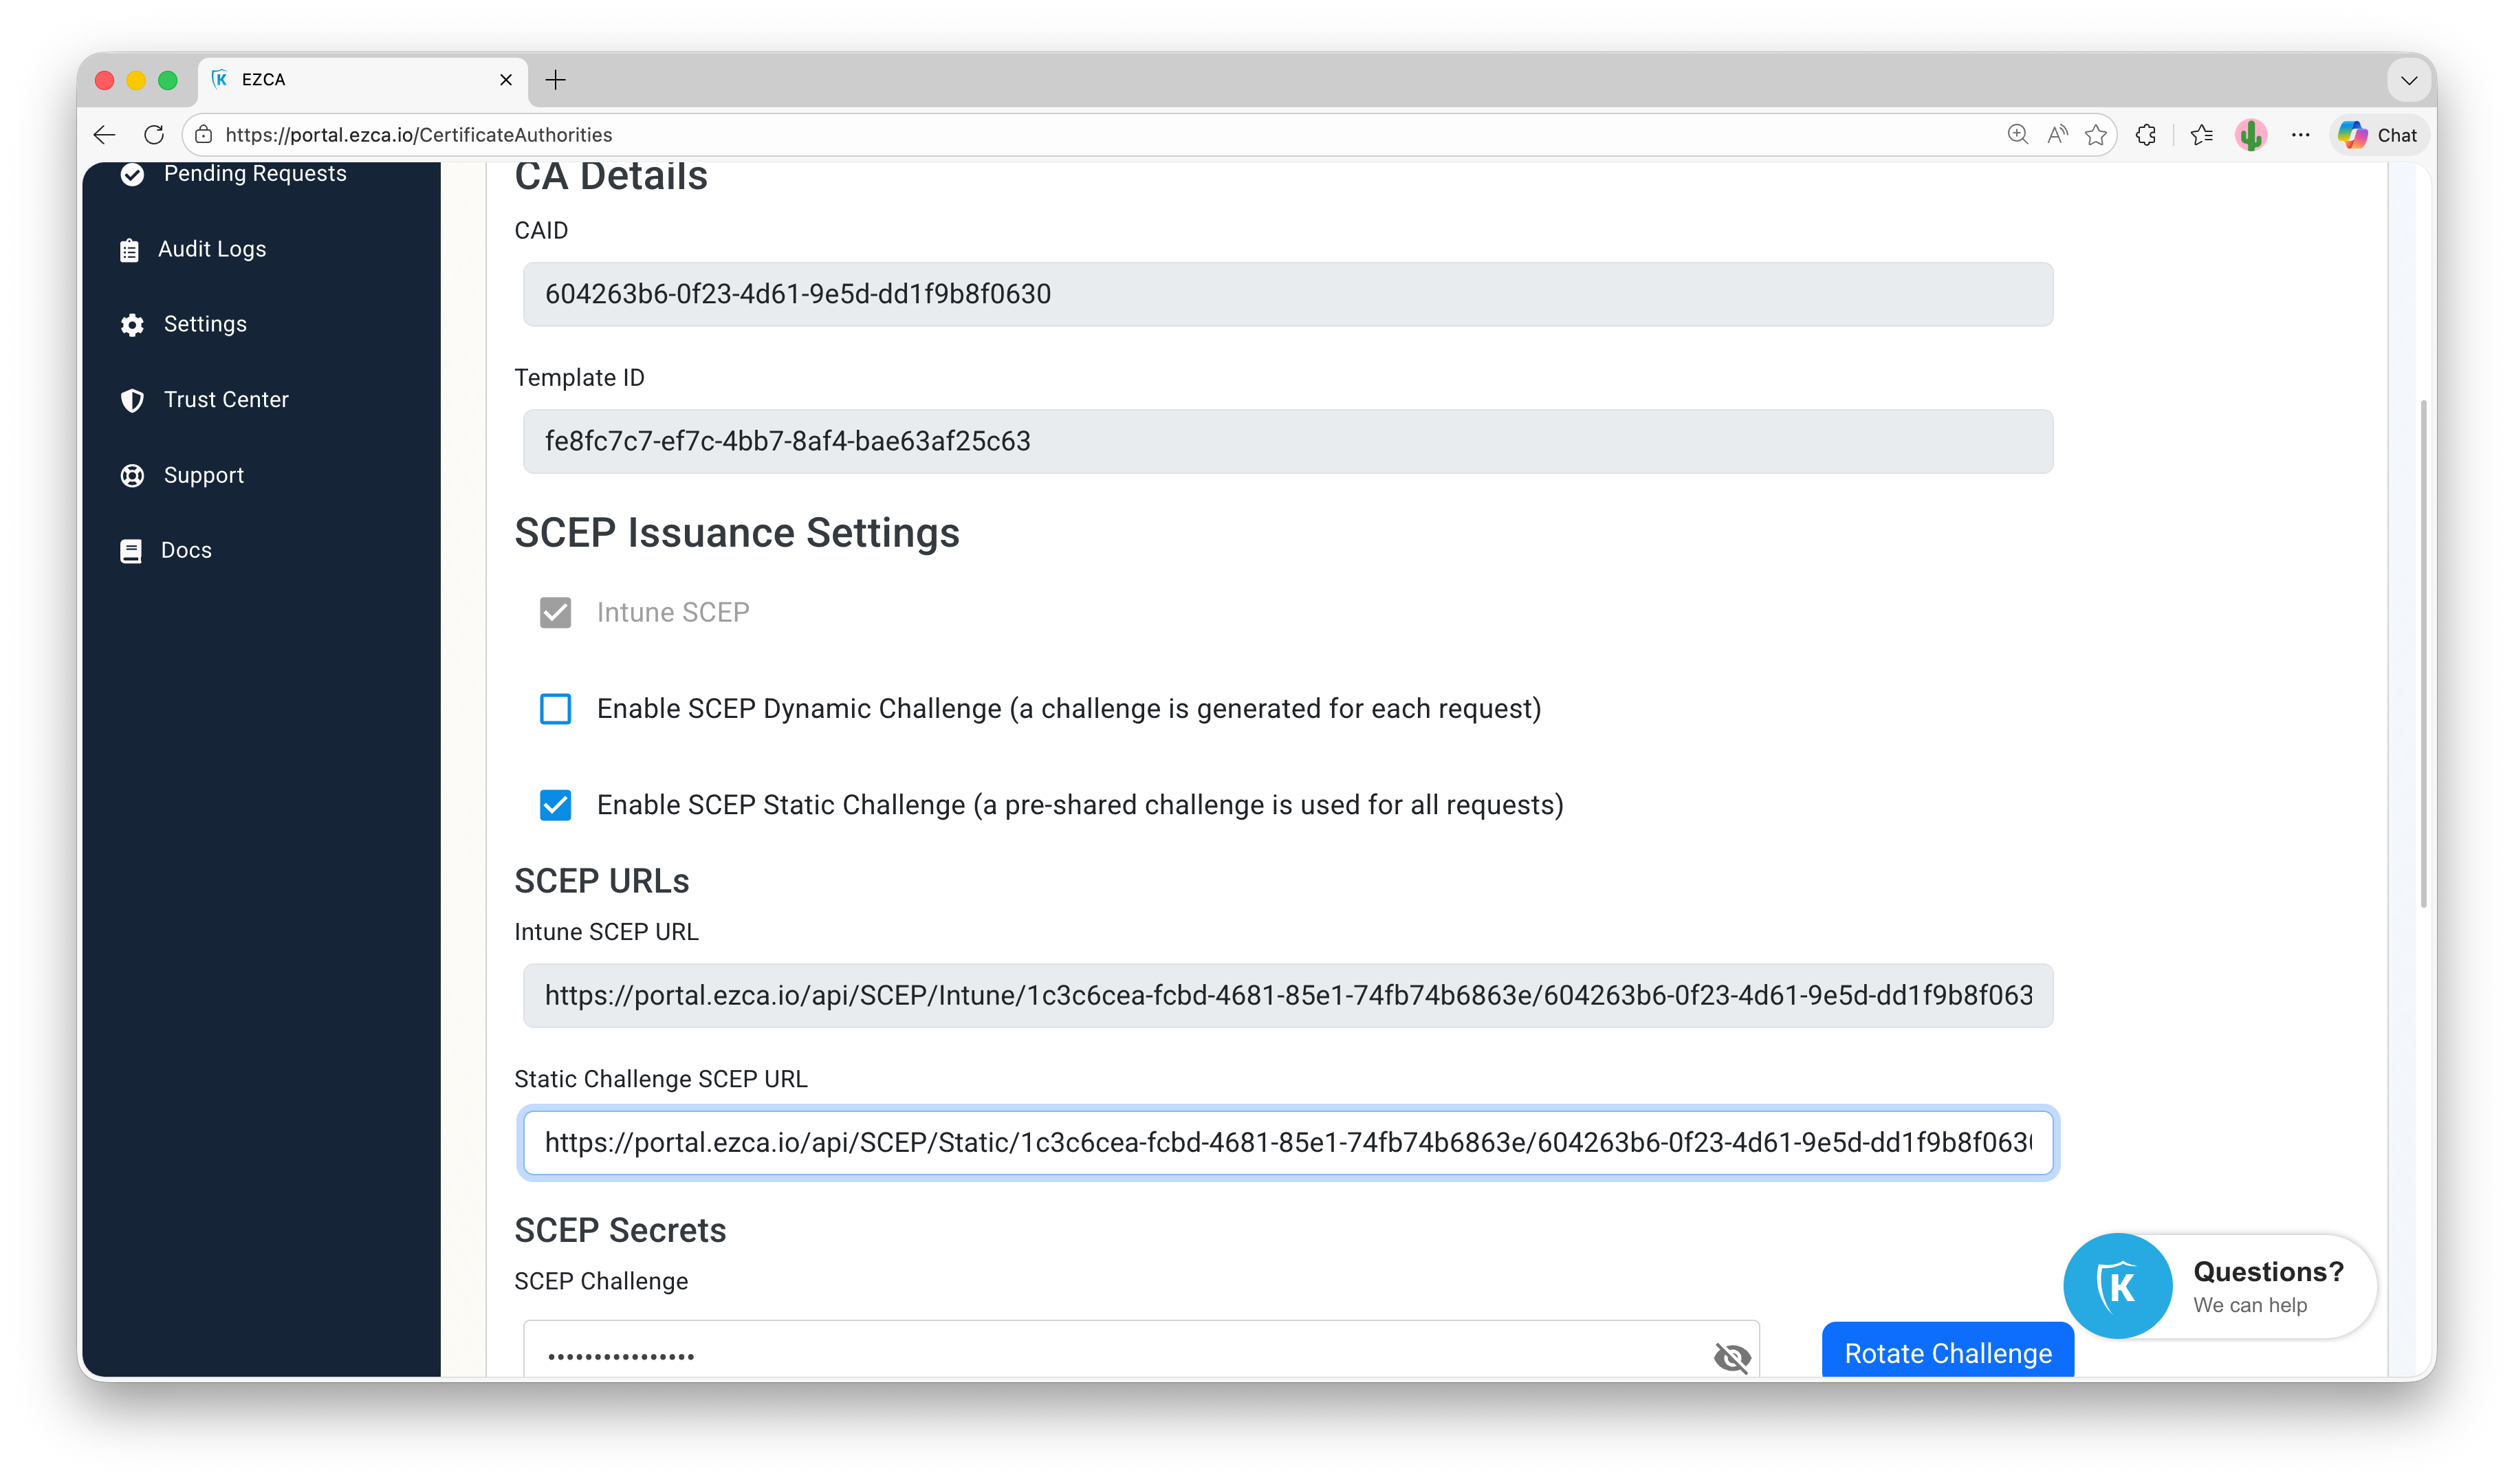
How to Enable Static SCEP Challenge in Your EZCA SCEP CA
Before you can create a custom profile for SCEP in Jamf Now, you need to ensure that your EZCA SCEP CA is configured to use a static challenge.
-
Navigate to your EZCA portal and sign in as a PKI Administrator.
-
Click on the Certificate Authorities tab and scroll to your SCEP CA.
-
Click on View Requirements for your SCEP CA.
-
Check the box for Enable SCEP Static Challenge and click Save Changes. You will now see your Static Challenge SCEP URL and SCEP Challenge:
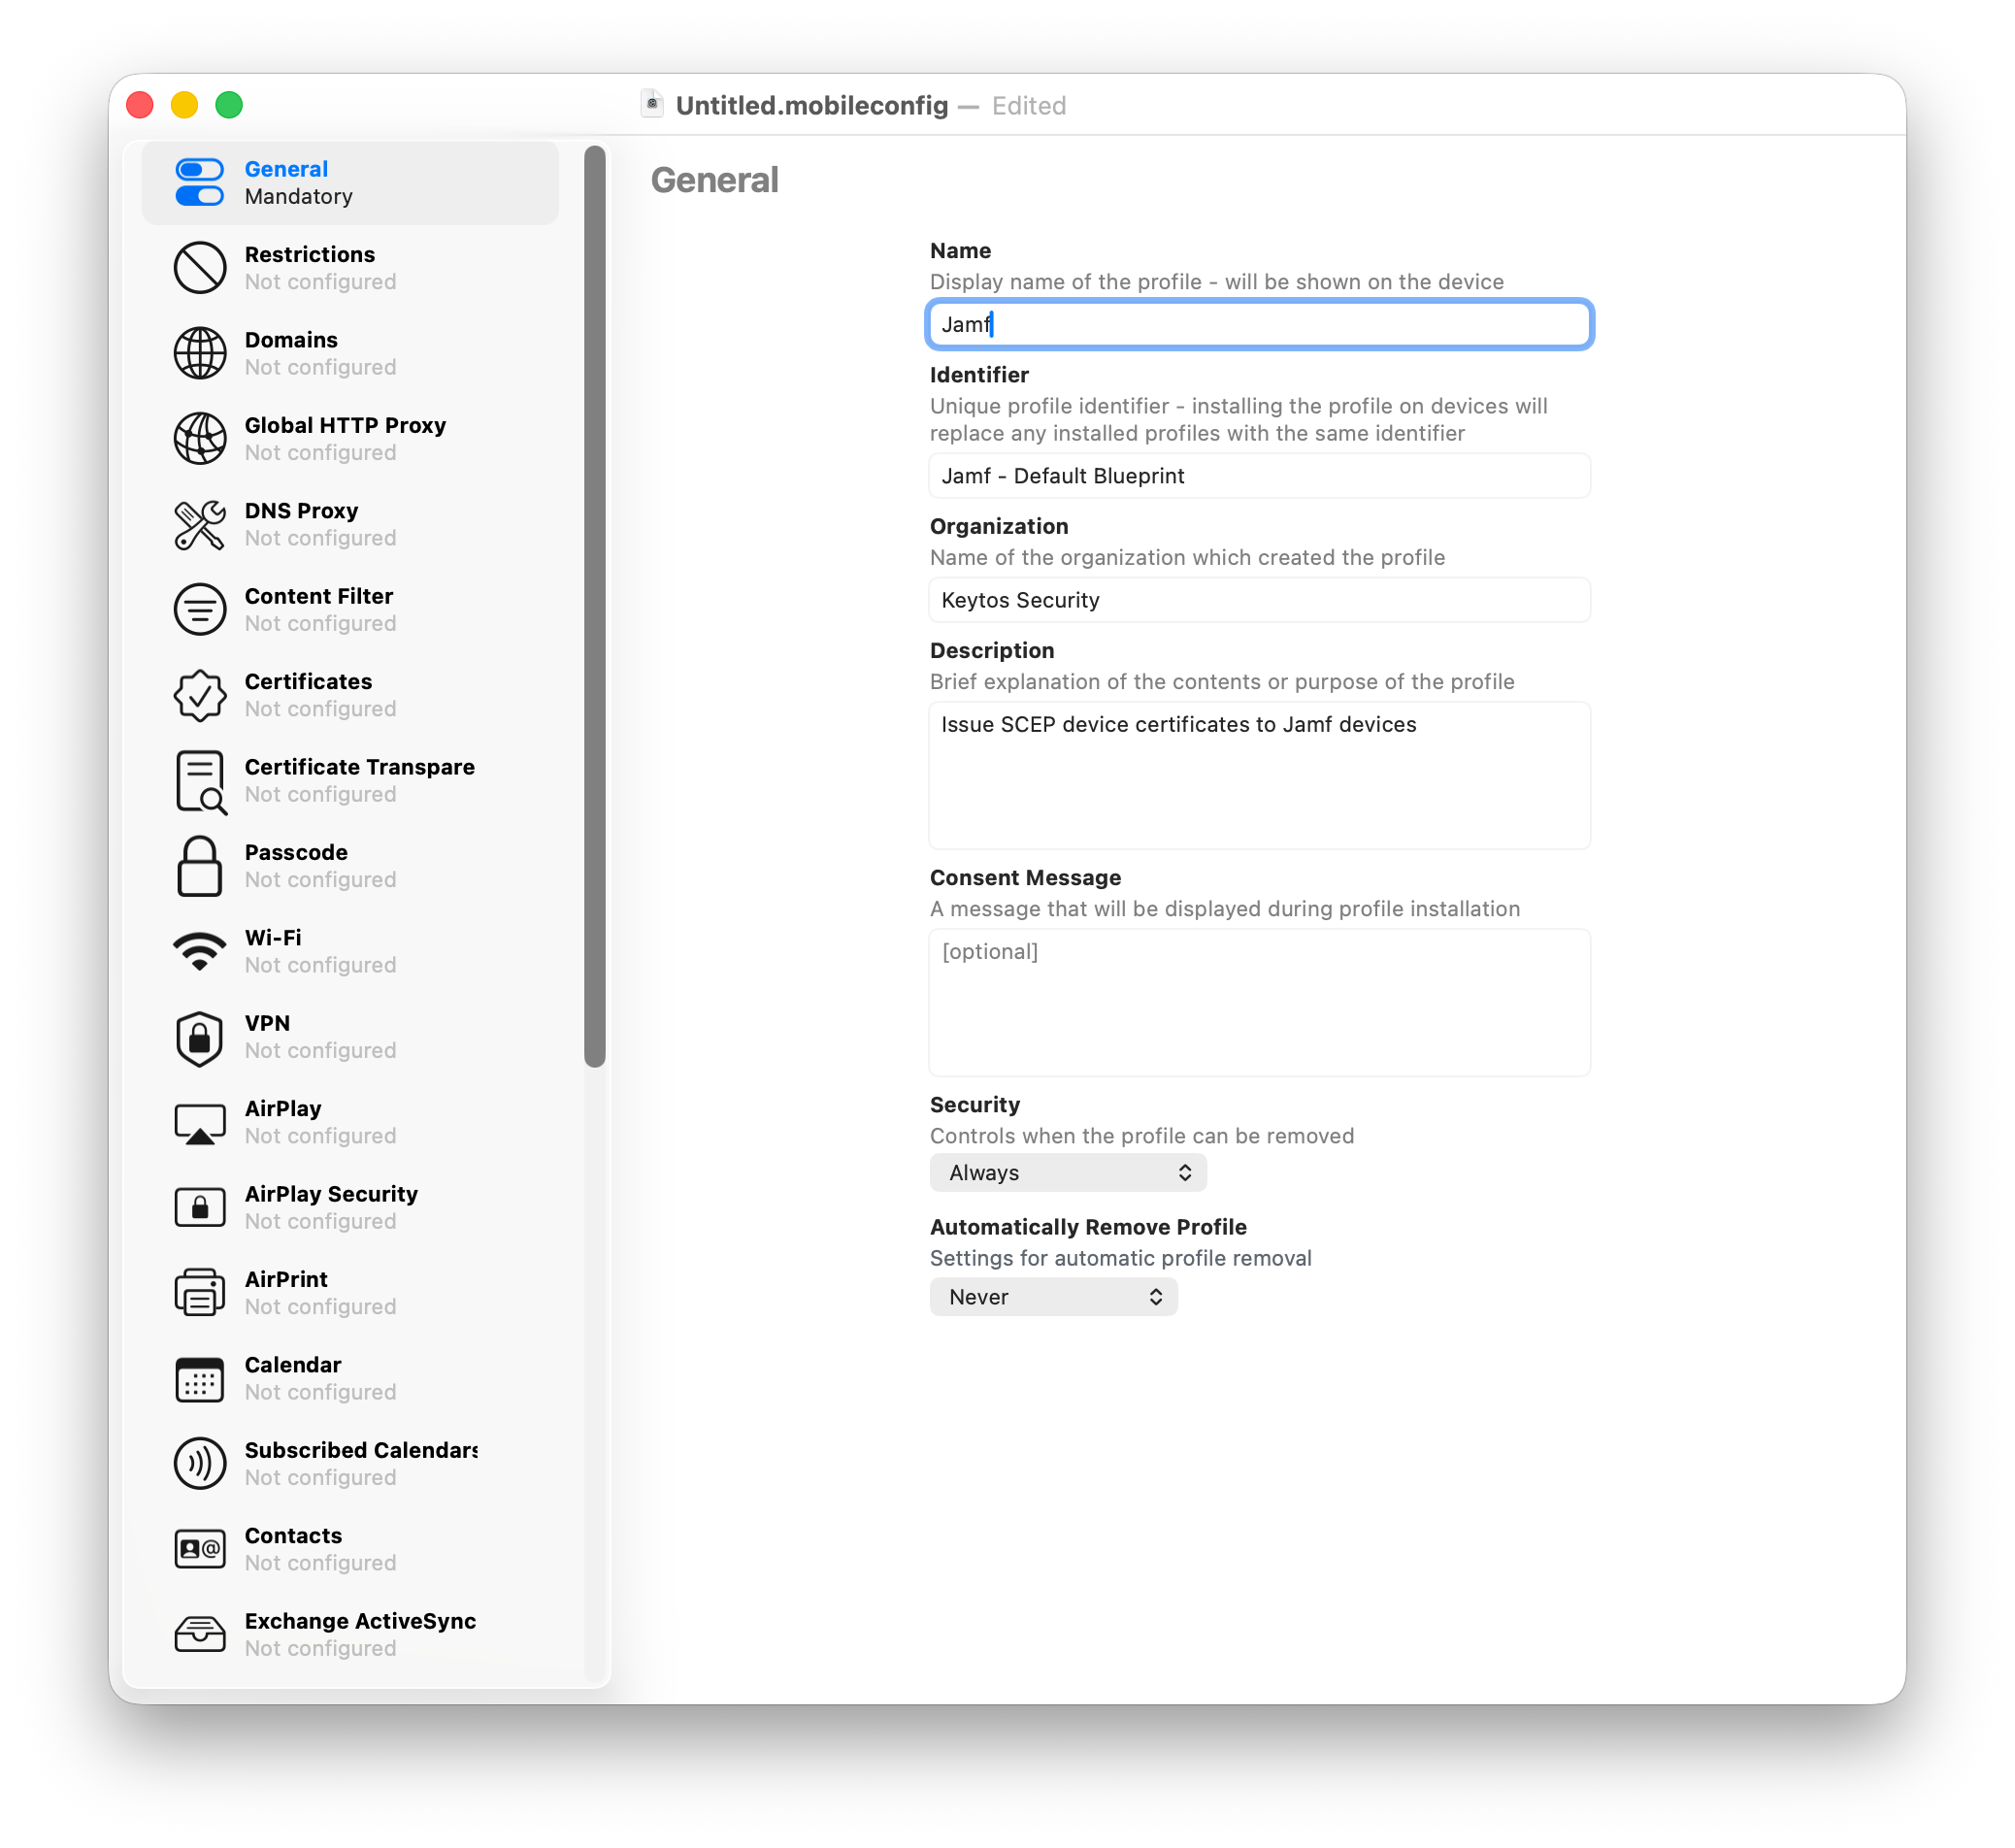
How to Create a Configuration Profile in Apple Configurator for SCEP
-
Start on a macOS device with Apple Configurator installed.
-
Open Apple Configurator, and click on File → New Profile to create a new configuration profile.
-
Fill out the General section with a name, identifier, and description for the profile. This is what will help you identify the profile in Jamf Now when you upload it.
-
Click on the Certificates section and then click on the Configure button to add a new certificate payload.
-
Select the CA certificate you downloaded from EZCA and upload it to the profile. This will ensure that the CA certificates are pushed to the devices and that they trust the SCEP CA.
-
Repeat the process to upload the root CA certificate if your SCEP CA is a subordinate CA.

-
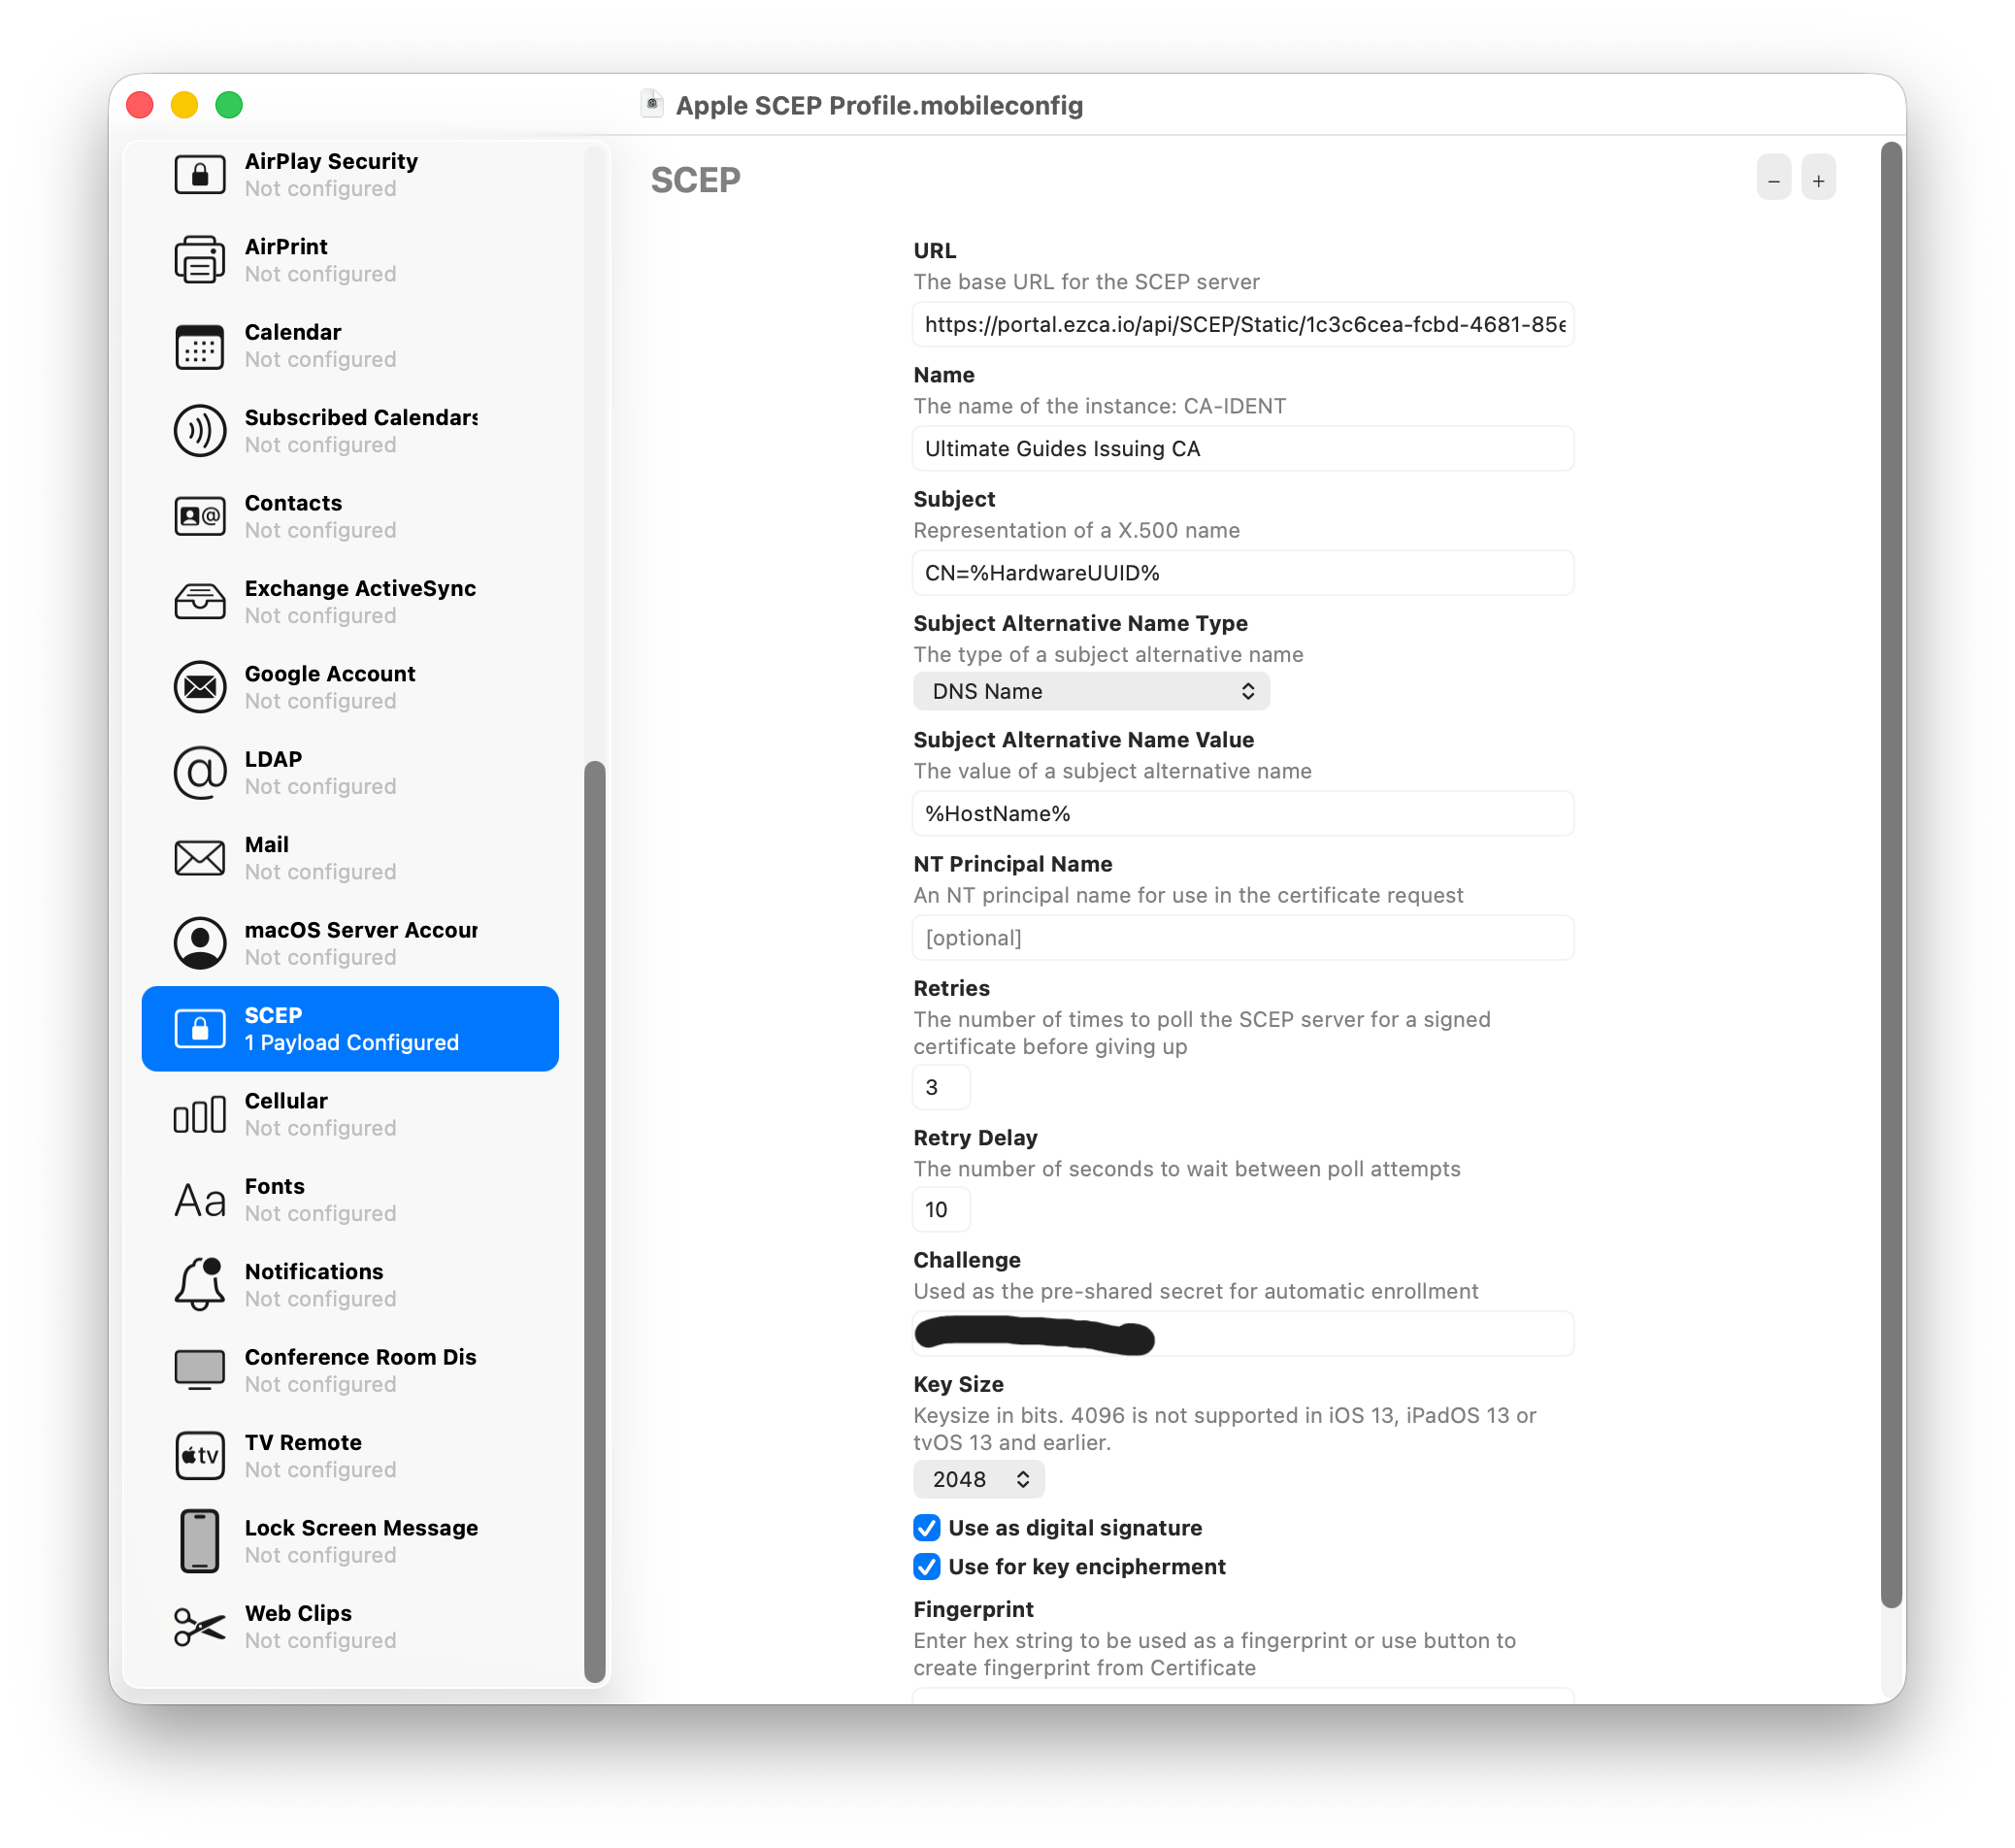
Next, click on the SCEP section and click on the Configure button to add a new SCEP payload.
-
Copy the Static Challenge SCEP URL from your EZCA portal and paste it into the URL field in Apple Configurator. Do the same for the Static Challenge in the Challenge field.
-
Configure the remaining fields:
- Name: Set as the name of your SCEP CA
- Subject: Use a static value or Apple’s built-in variables (e.g.
CN=%HardwareUUID%) - Subject Alternative Name Type: Set as DNS Name
- Subject Alternative Name Value: Use a static value or Apple’s built-in variables (e.g.
%HostName%) - Key Size: Set as 2048 or higher.
- Key Usage: Set as “Sign” and “Key Encipherment”.
-
You should now have a complete SCEP configuration in your custom profile:
-
Save the profile to your device as a .mobileconfig file.
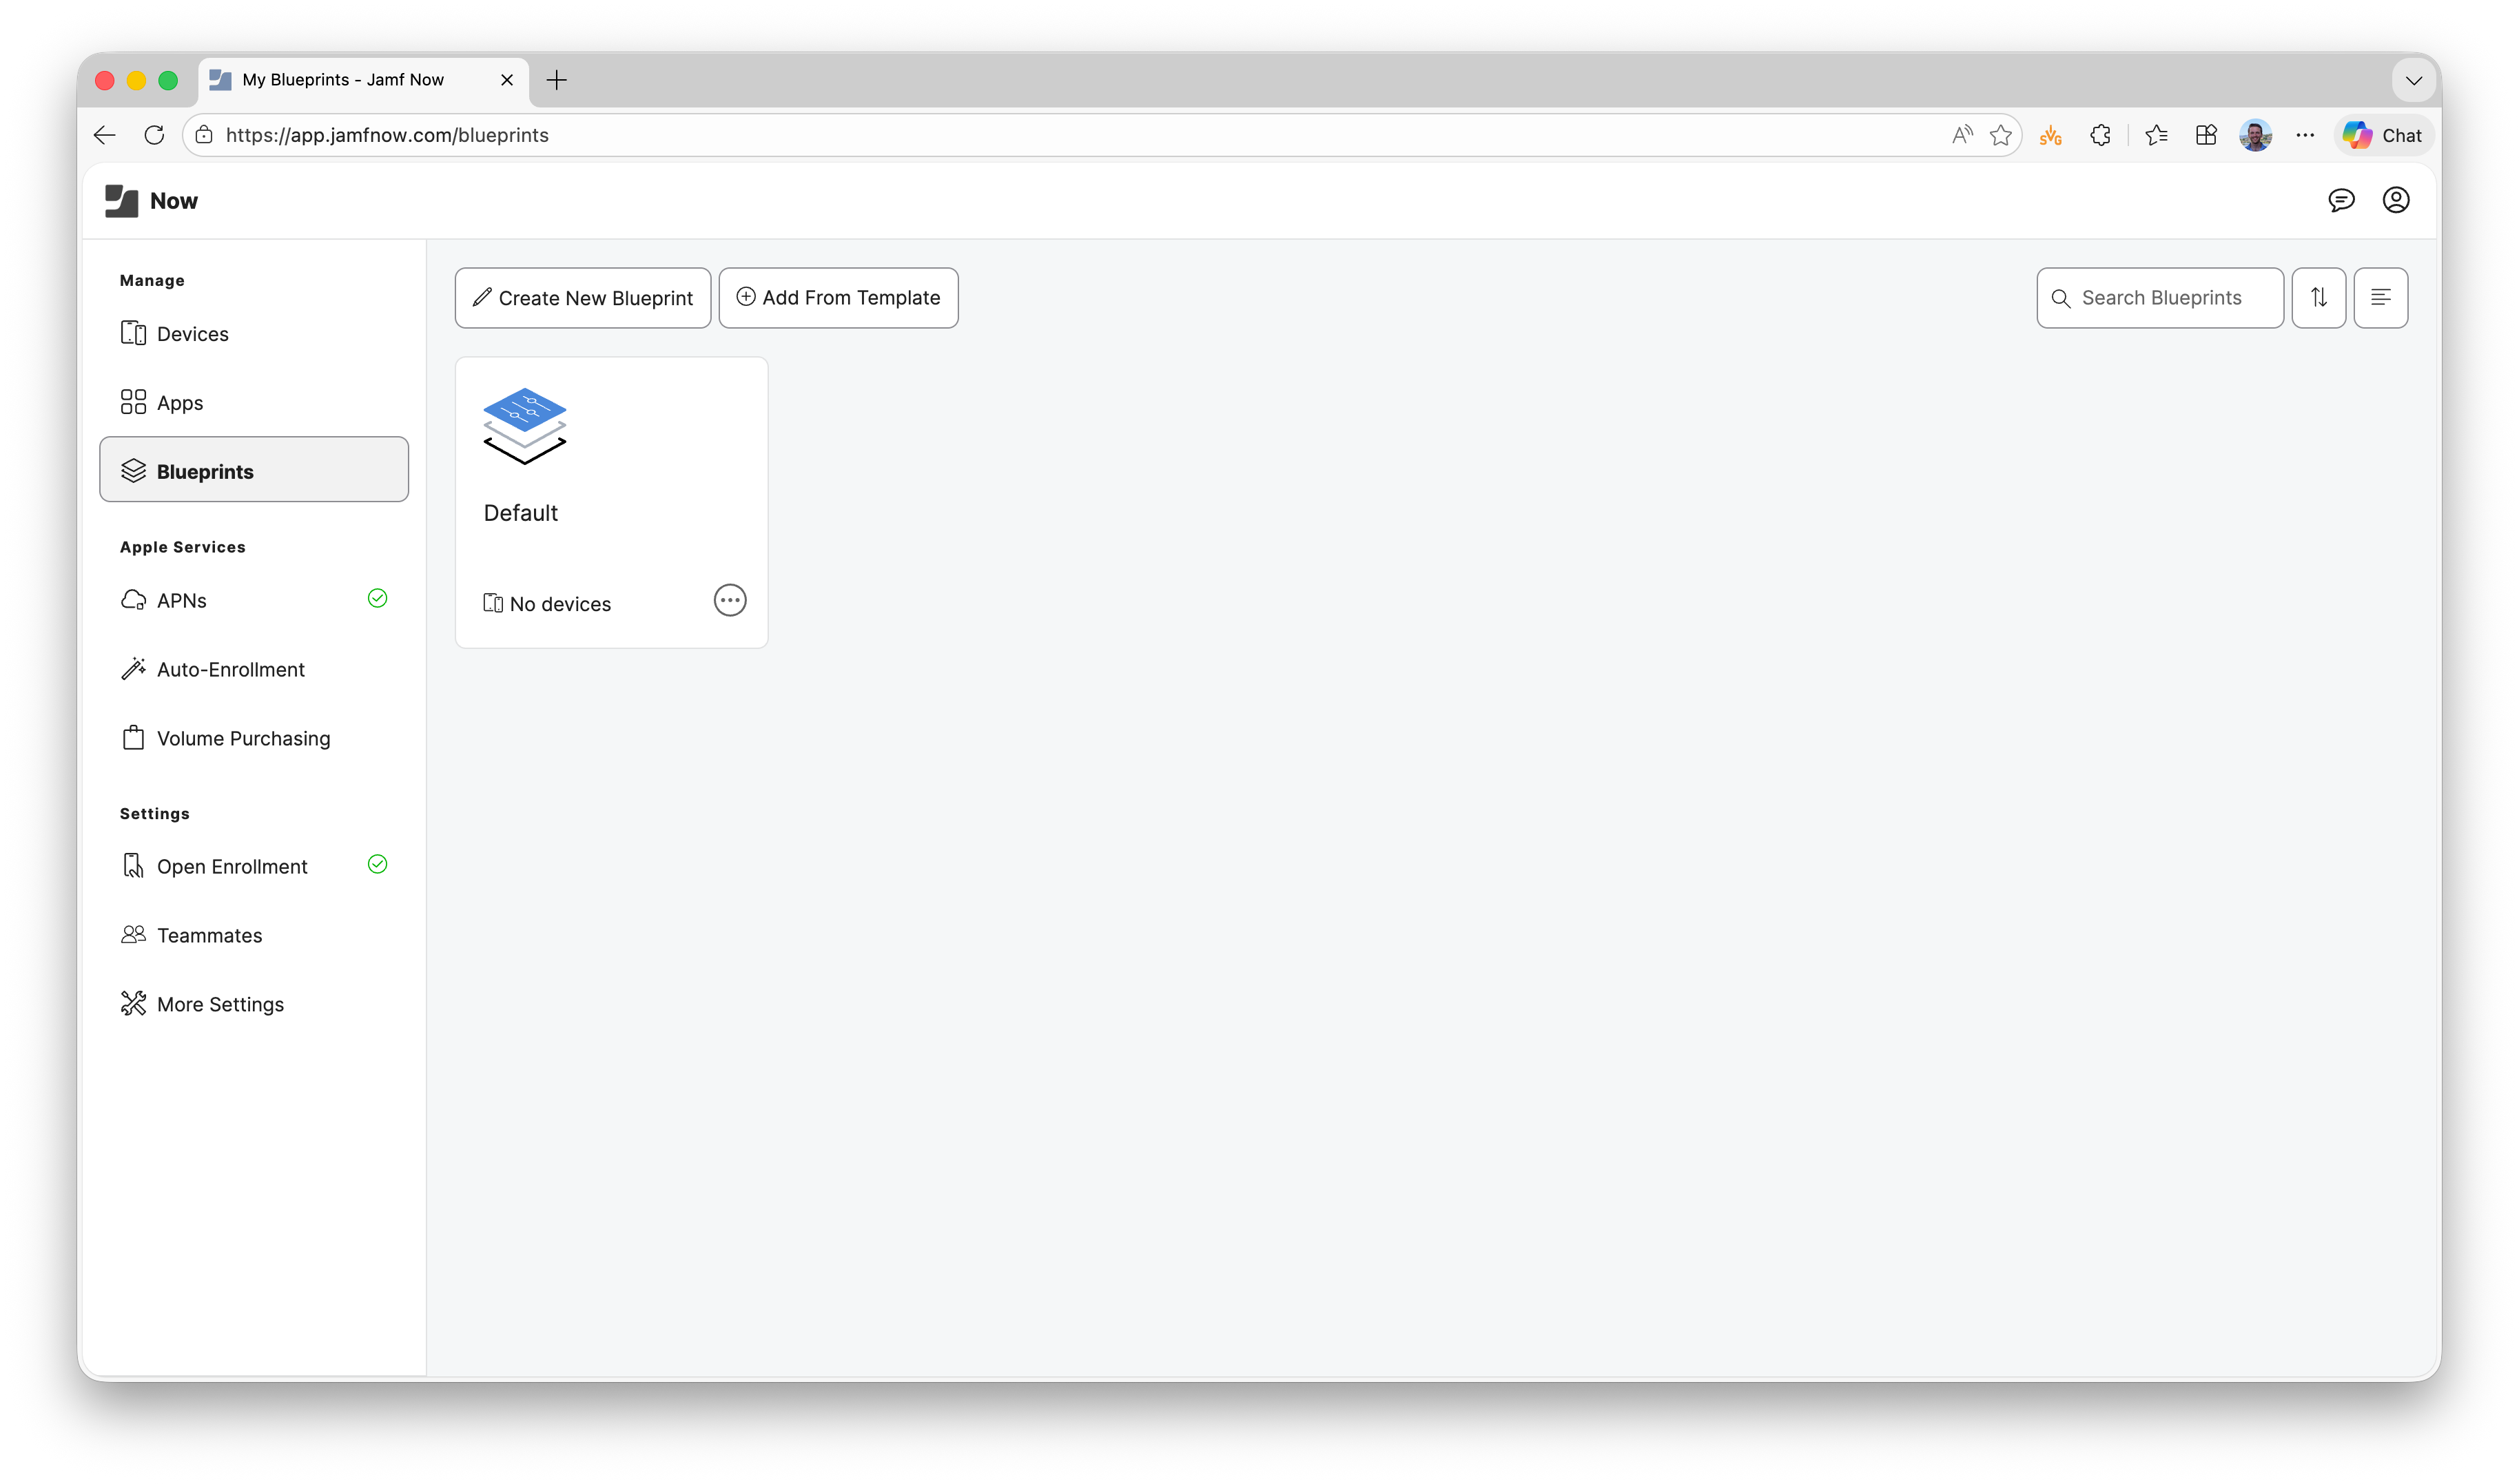
How to Add a Custom Profile to Jamf Now
Now that you have created a configuration profile for SCEP in Apple Configurator, you can upload it to Jamf Now to deploy it to your devices.
-
Navigate to the Jamf Now Portal and sign in with your administrator account.
-
Click on the Blueprints tab and select the blueprint you want to add the SCEP profile to.
-
Click on the Custom Profiles section and then click on the Add a Custom Profile button.
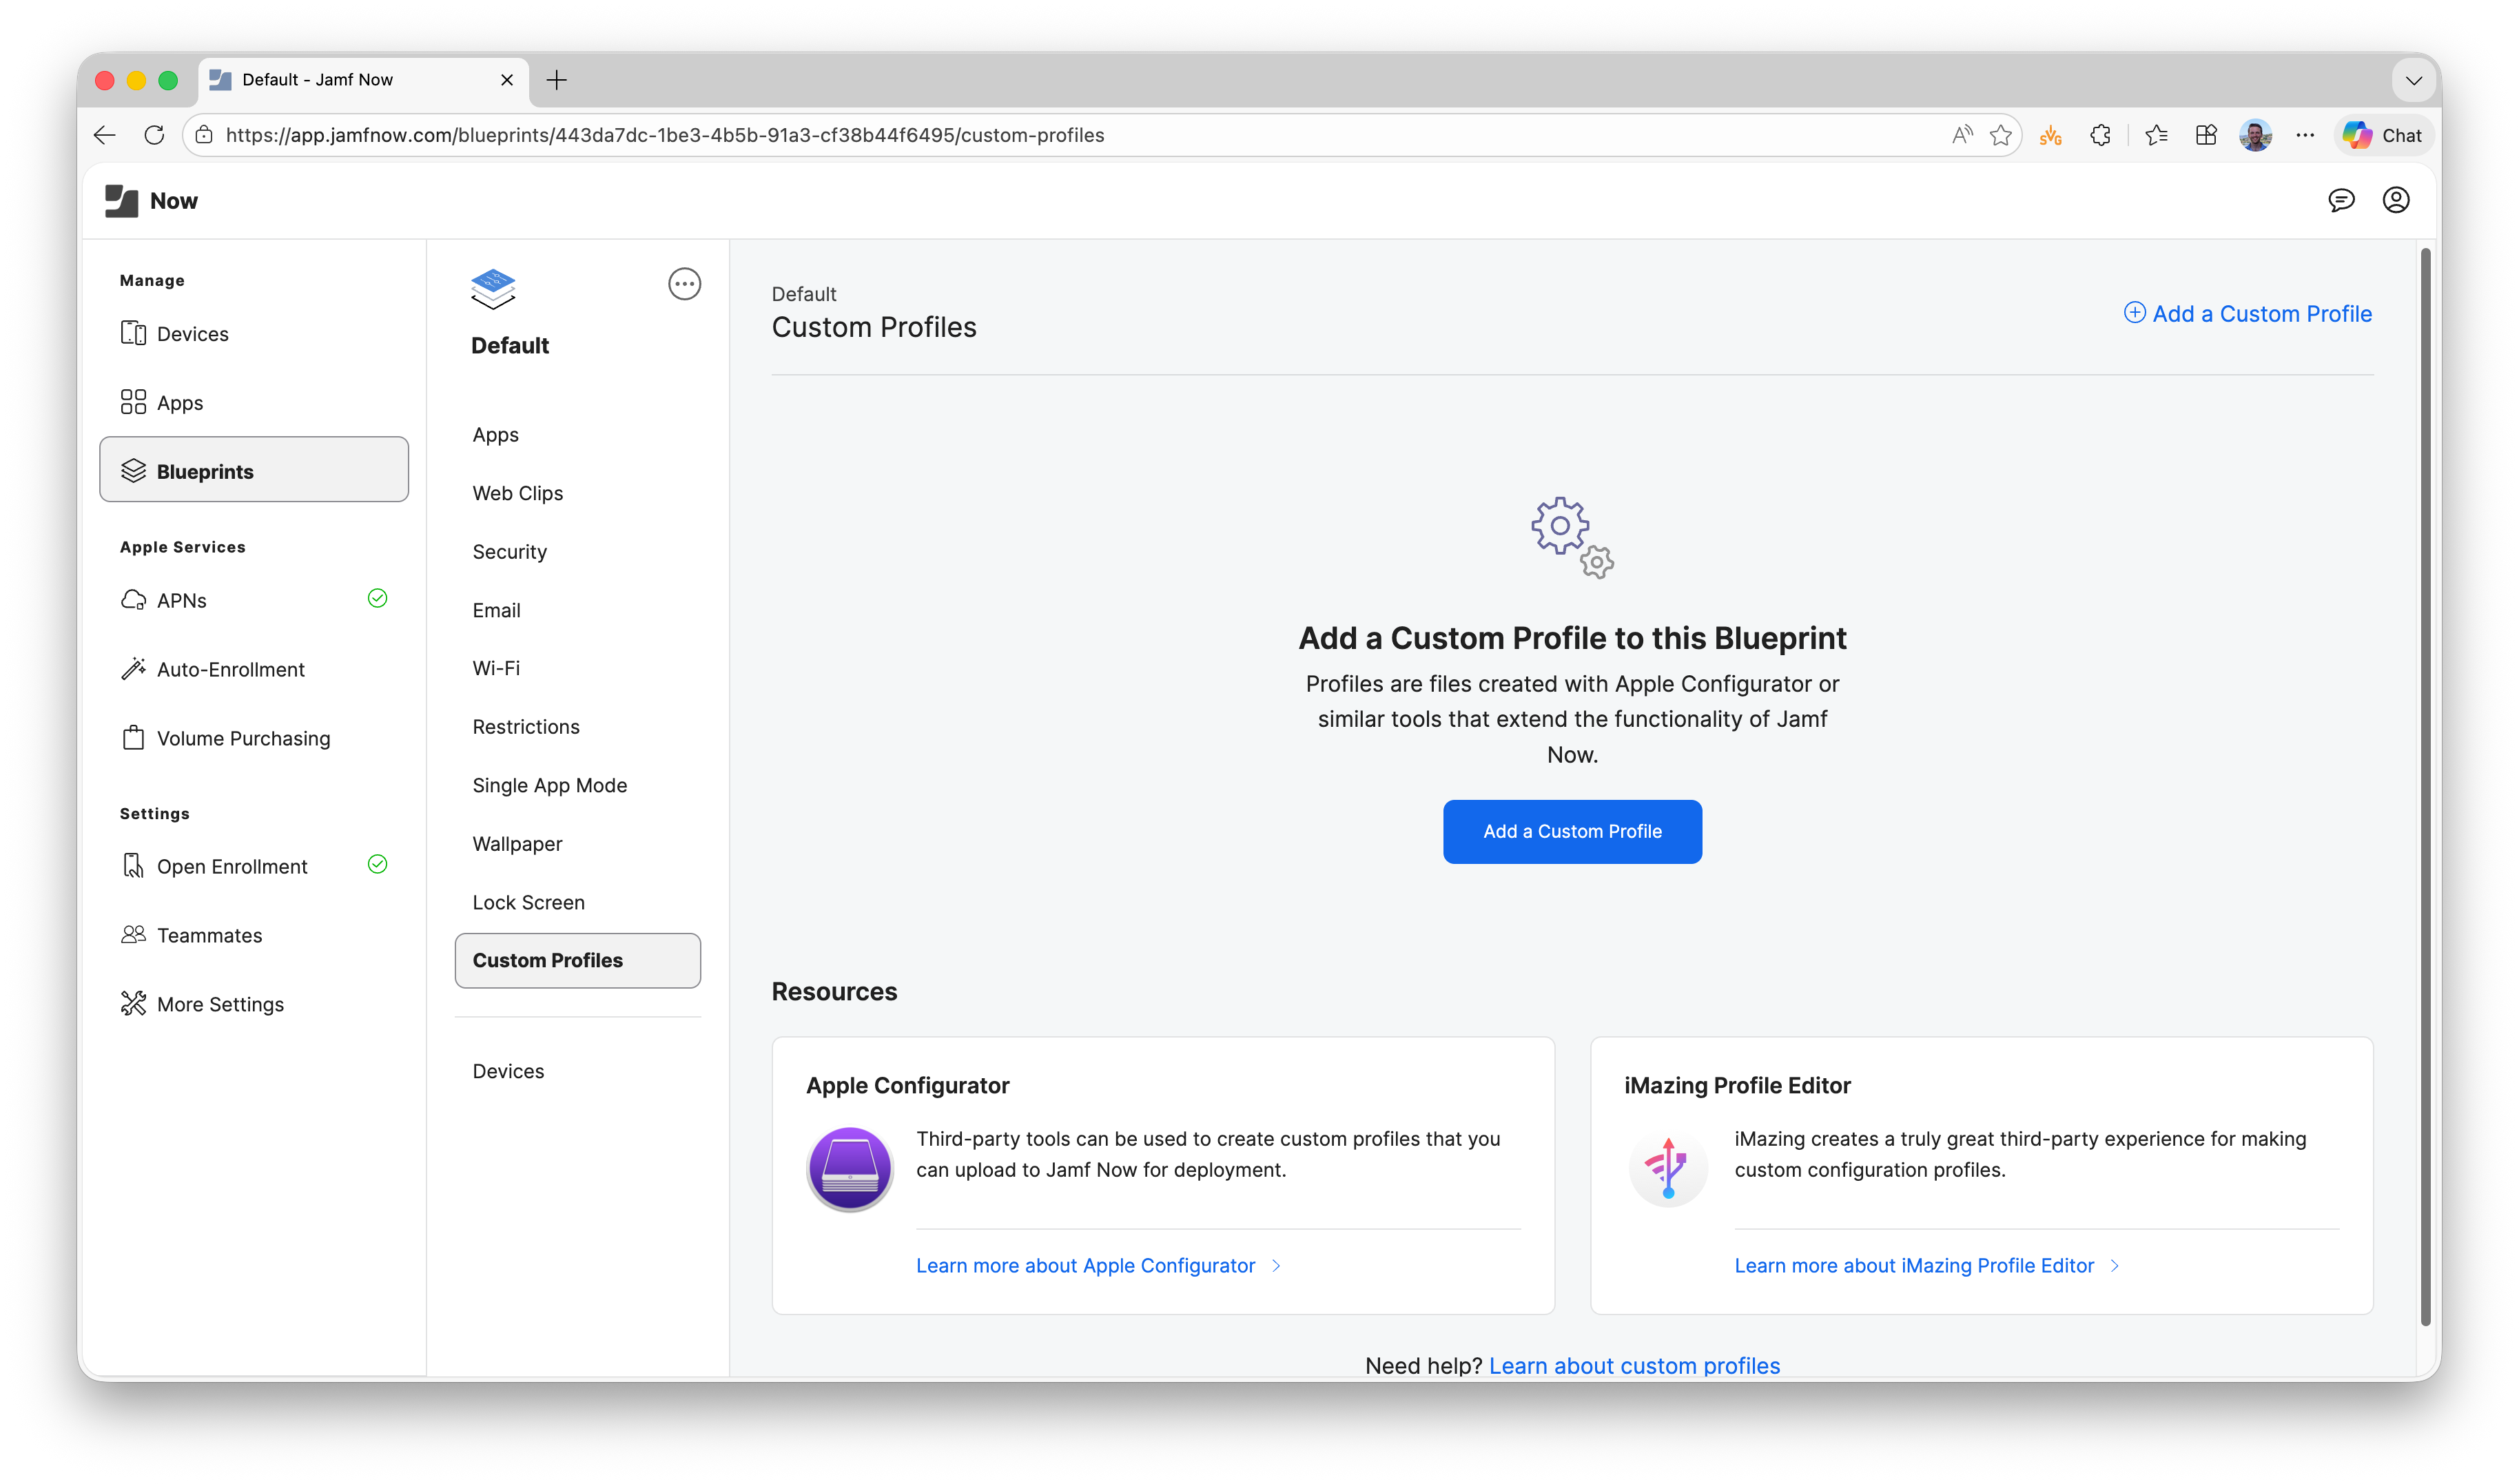
-
Upload the .mobileconfig file you saved from Apple Configurator and click Add Custom Profile.
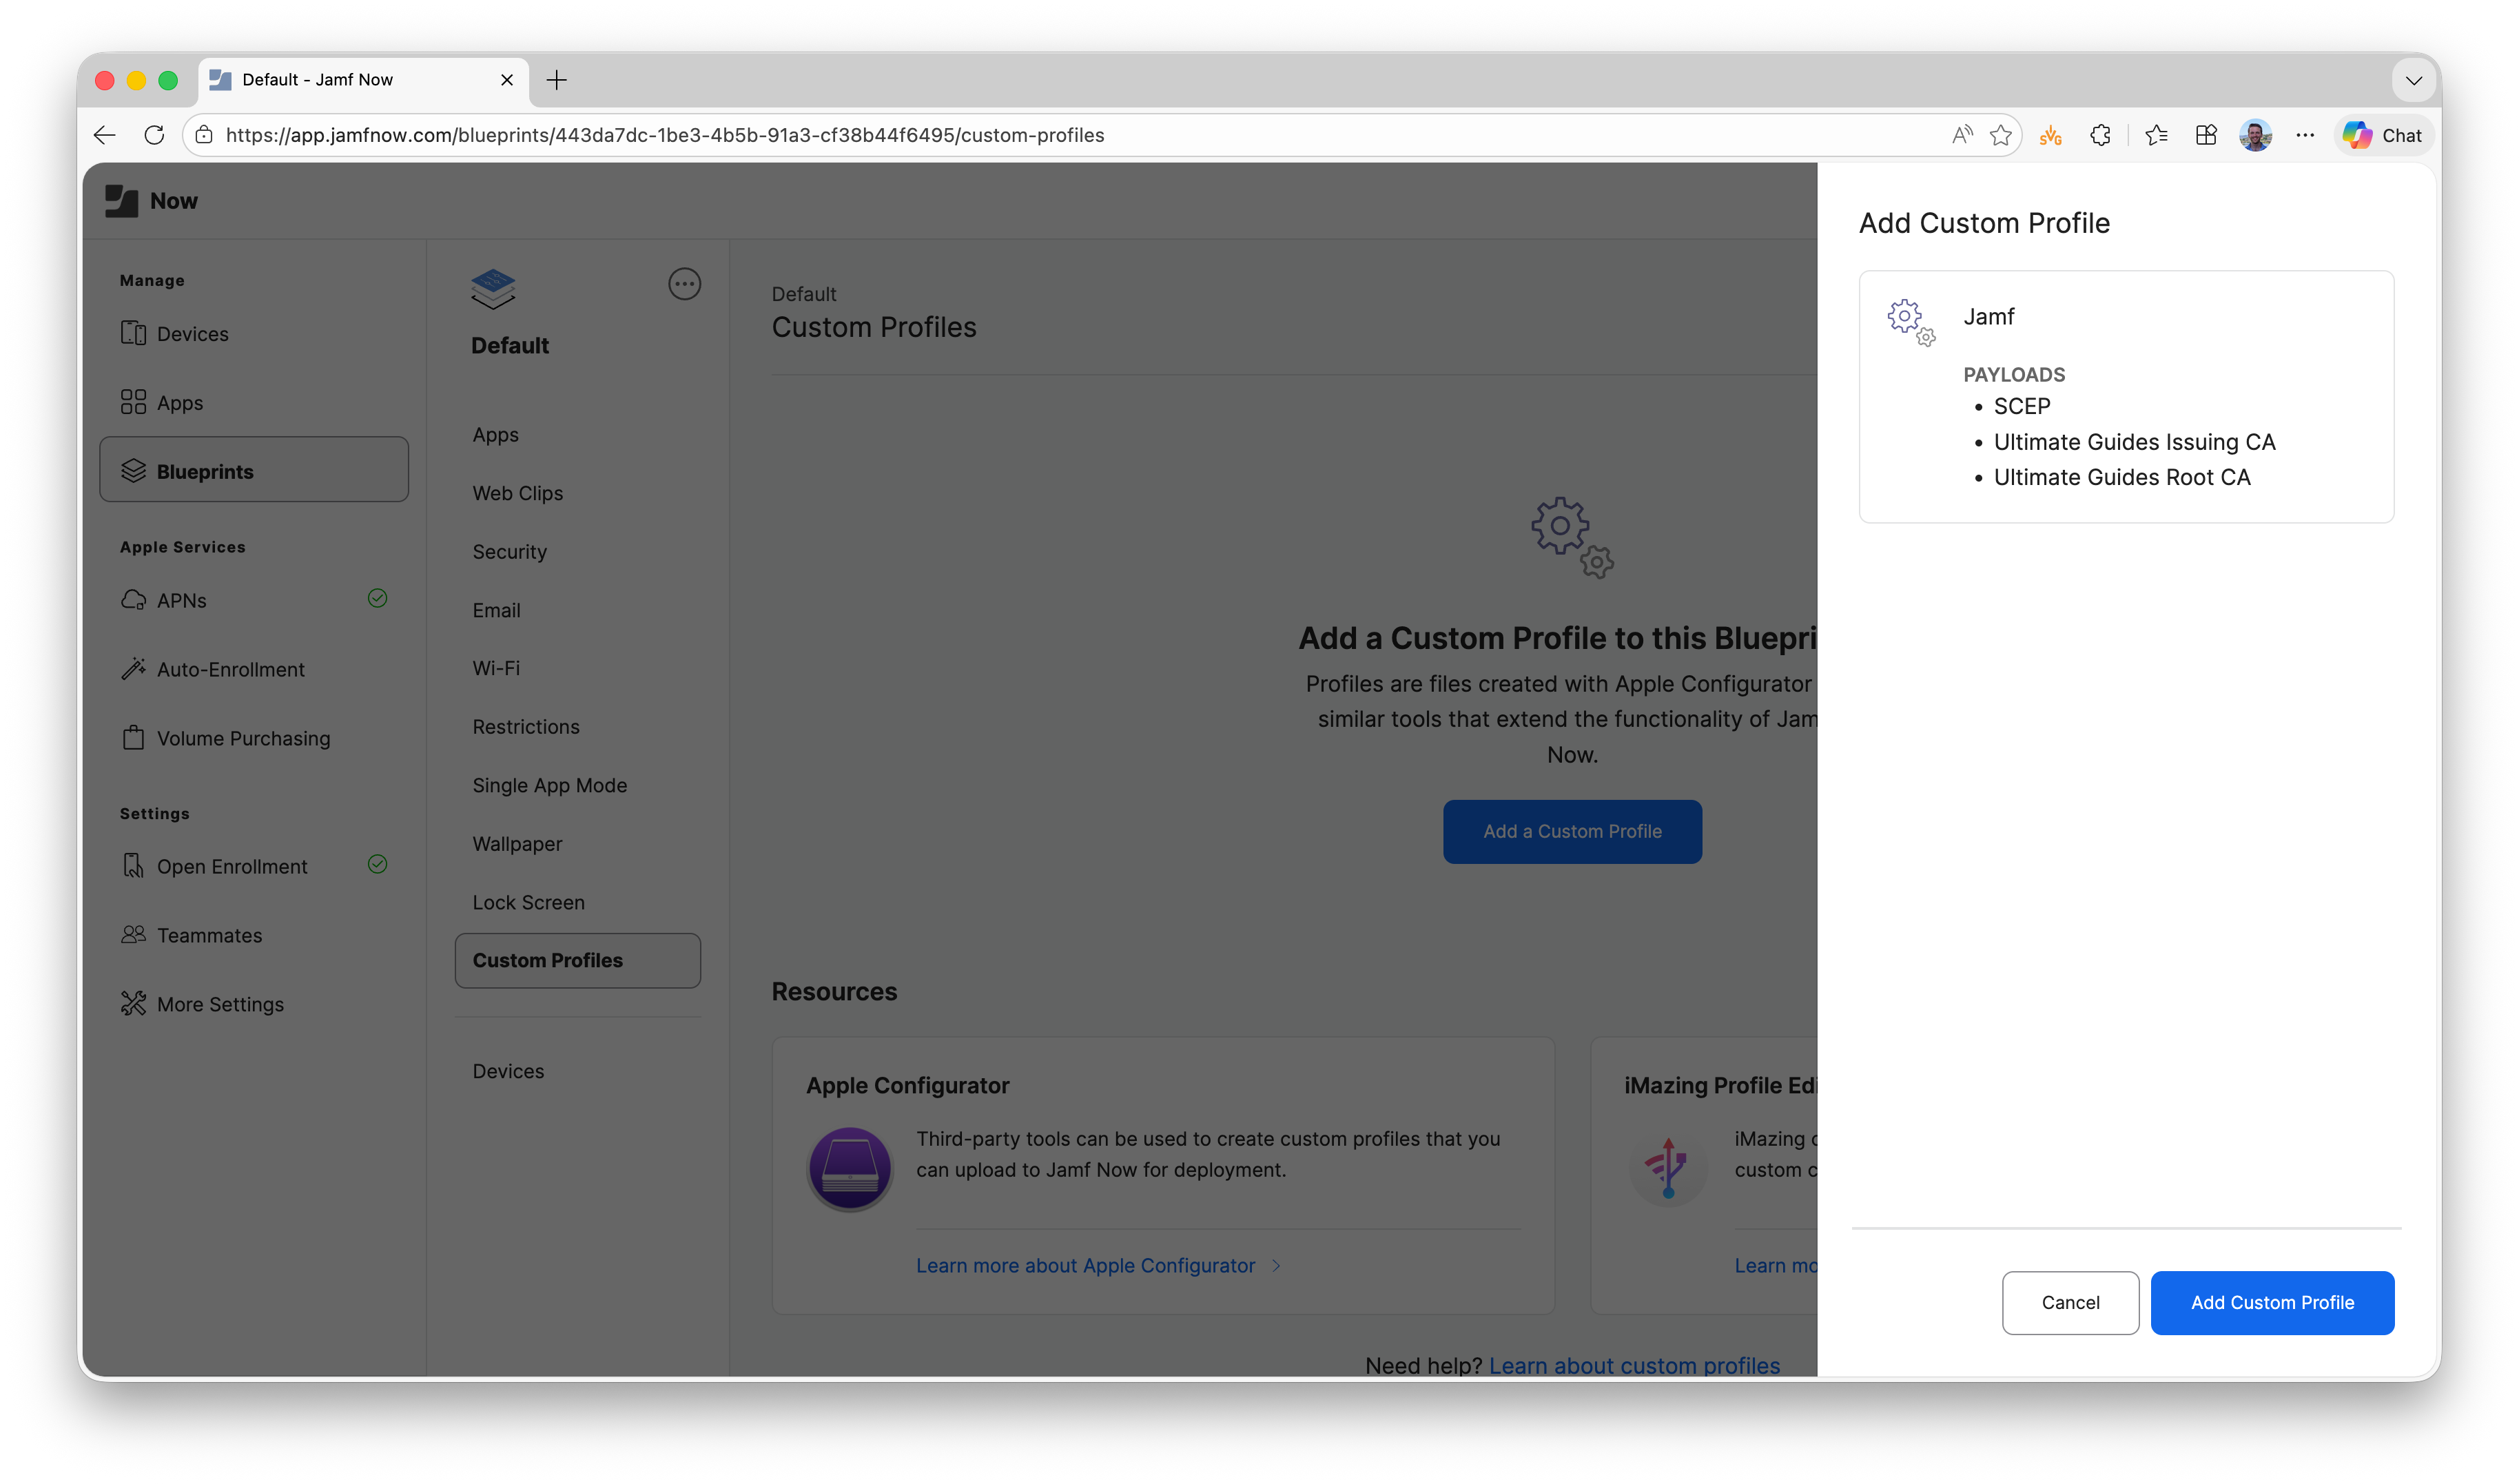
-
Done! Your Jamf Now devices that are assigned to this blueprint will now receive the SCEP configuration and will receive a SCEP certificate from your EZCA SCEP CA.
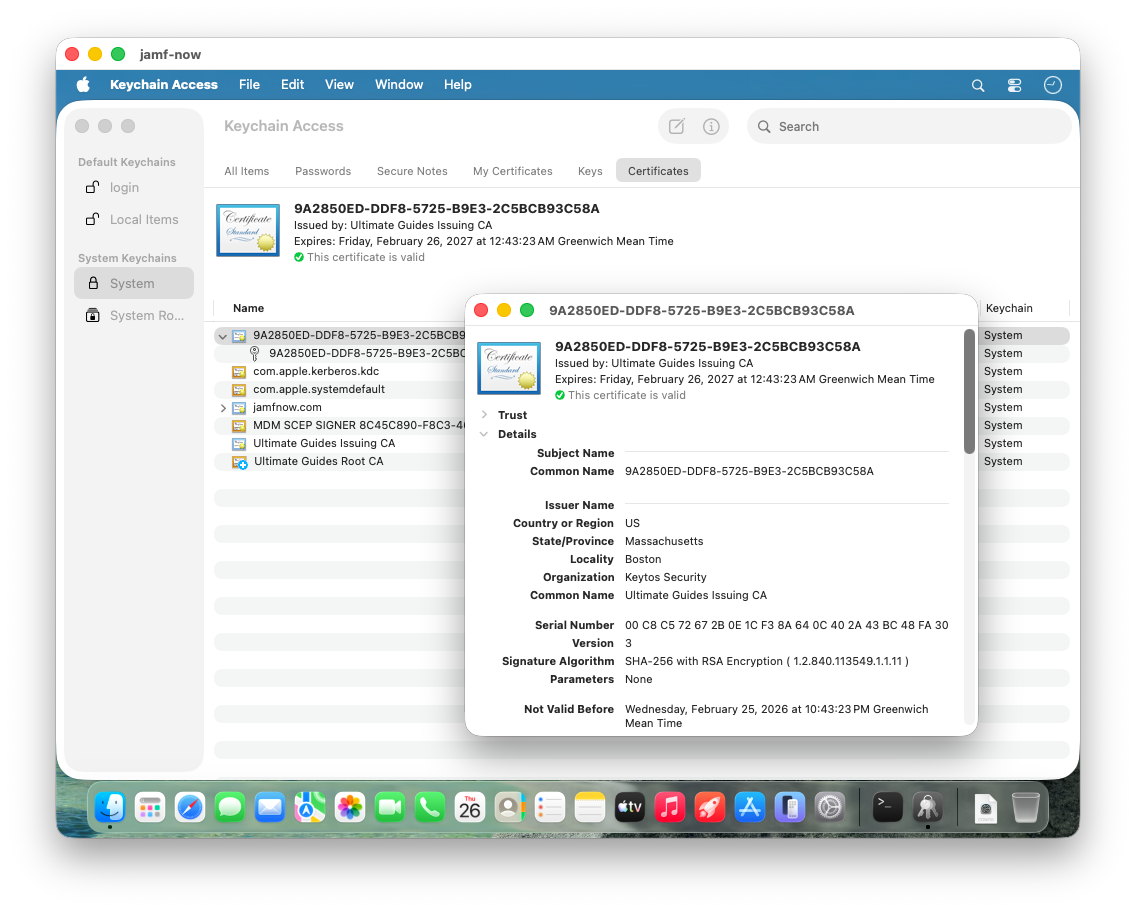
How to Verify Your Apple Devices Received the SCEP Certificate
To verify that your devices have received the SCEP certificate, you can check the device’s certificate store via the Keychain Access app on macOS.
-
Open the Keychain Access app on your macOS device.
-
In the left sidebar, select System.
-
Select the Certificates category.
-
You will now see both the CA certificate(s) you uploaded in the profile and the SCEP certificate issued to the device.