How-To: Export your EZCMS Logs to CrowdStrike Falcon
Prerequisites
How to Export your Passwordless Onboarding Audit Logs to CrowdStrike Falcon
To export your EZCMS logs to CrowdStrike Falcon, you will need to enable Audit Log exports in your EZCMS subscription, set up your CrowdStrike Falcon environment with the proper endpoint, and then establish a connection from EZCMS to CrowdStrike Falcon. The following steps will walk through how to set this up.
How To Enable Log Export in EZCMS Portal
-
Go to your EZCMS portal.
-
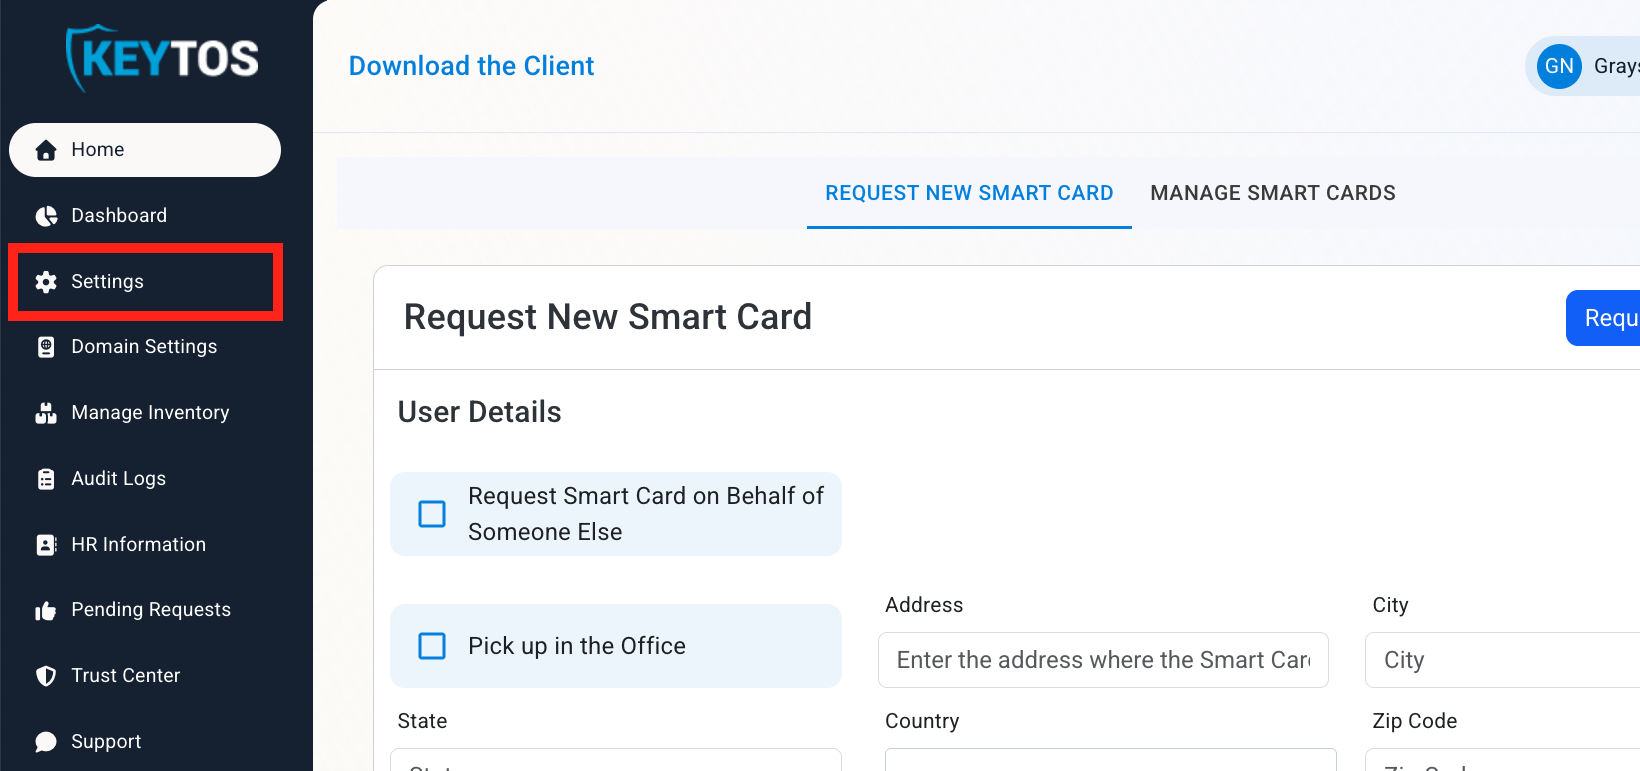
Click on Settings.
-
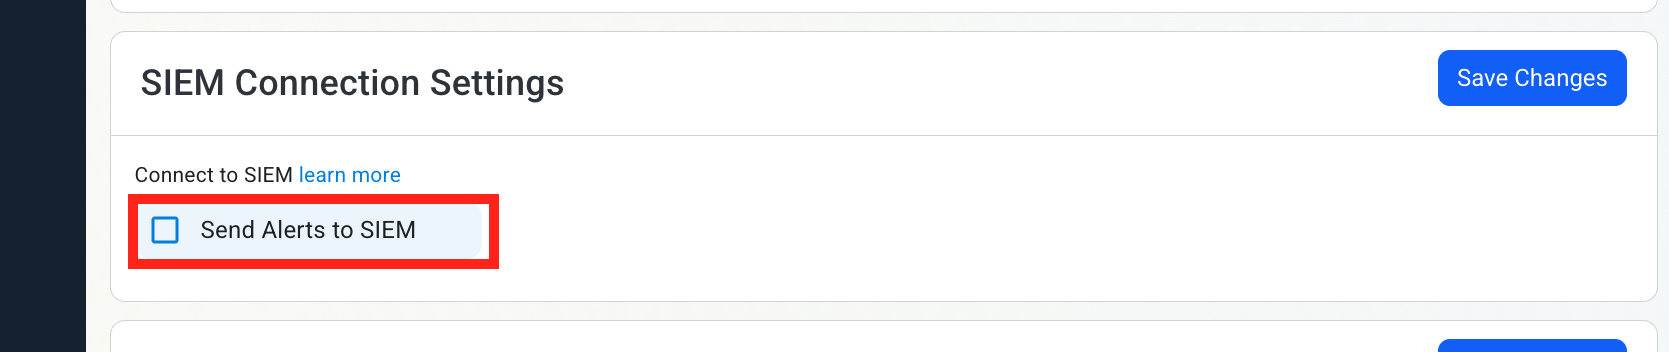
Scroll down to SIEM Connection Settings and enable the Send Alerts to SIEM option.
How to Configure the CrowdStrike Falcon SIEM
To complete the connection in EZCMS you’ll need to configure your SIEM settings in CrowdStrike Falcon first. Follow these steps to set up EZCMS log imports.
How to Create a CrowdStrike Falcon Next-Gen SIEM HEC Data Connector
-
In another tab, log into CrowdStrike Falcon.
-
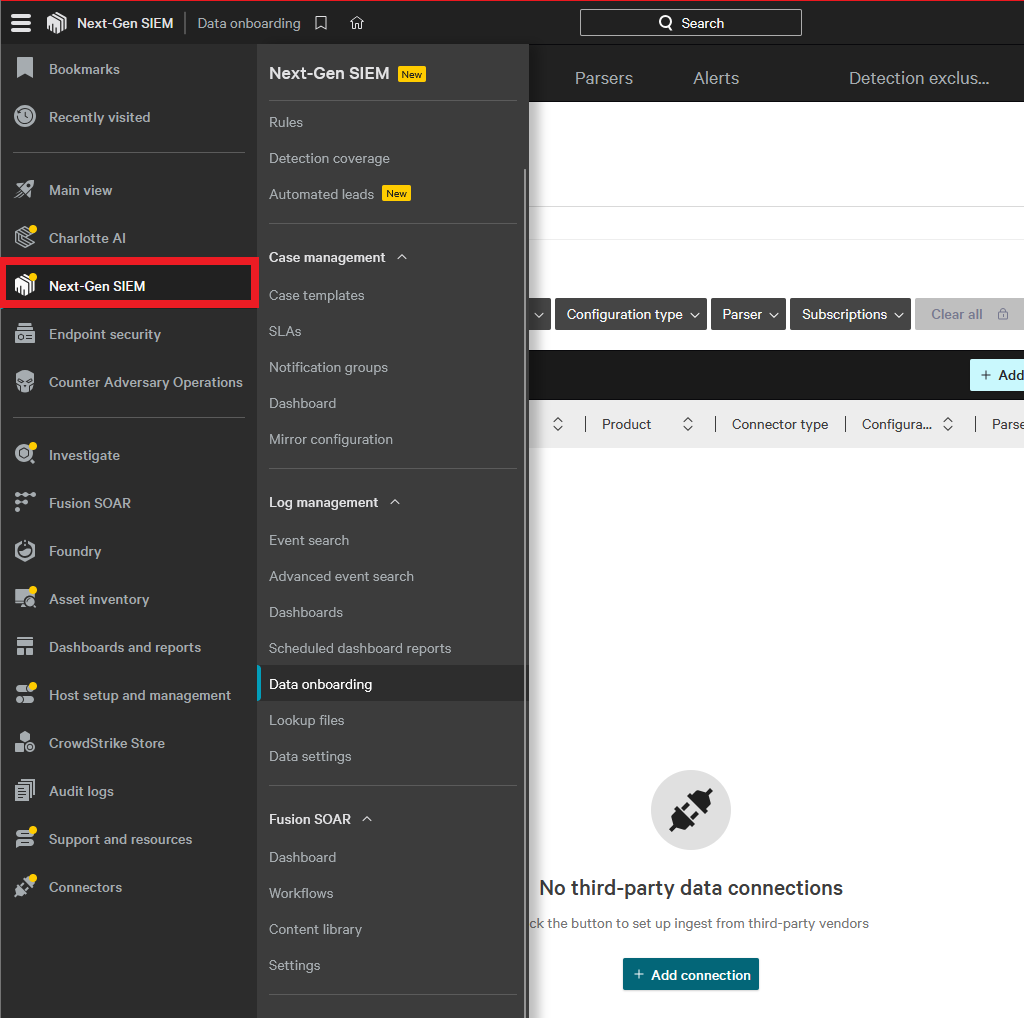
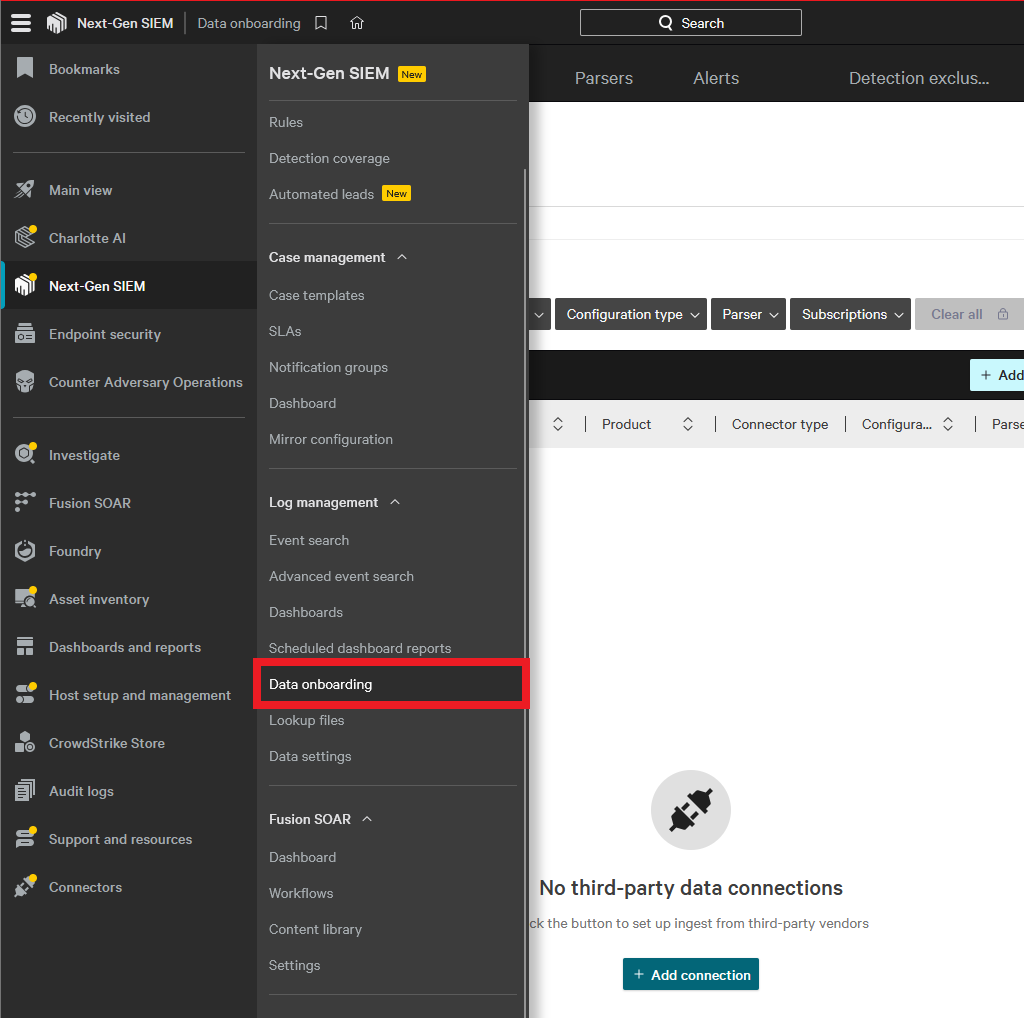
From the left-hand nav menu, click Next-Gen SIEM.
-
Under Log management click Data onboarding.
-
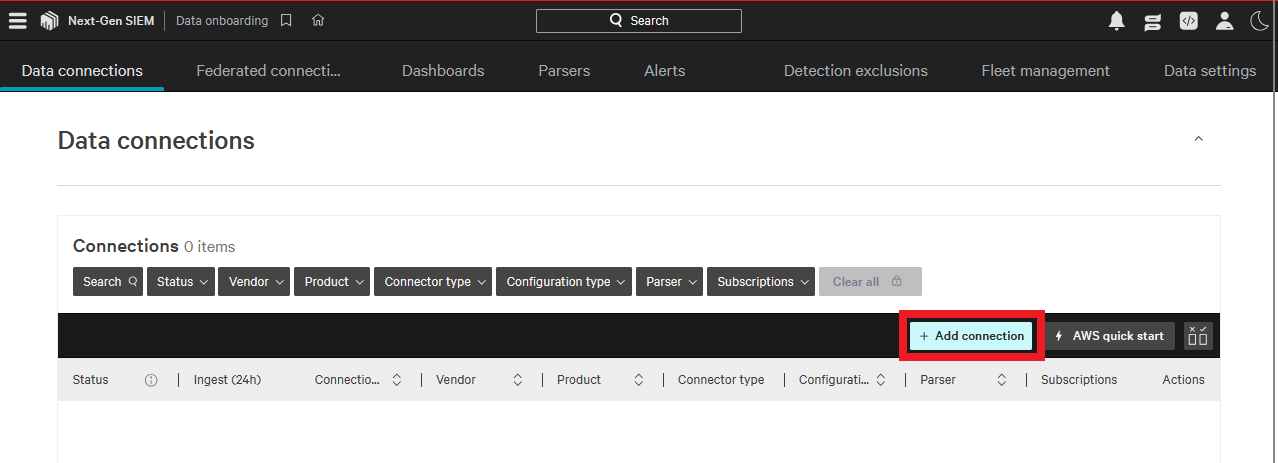
Click Add connection.
-
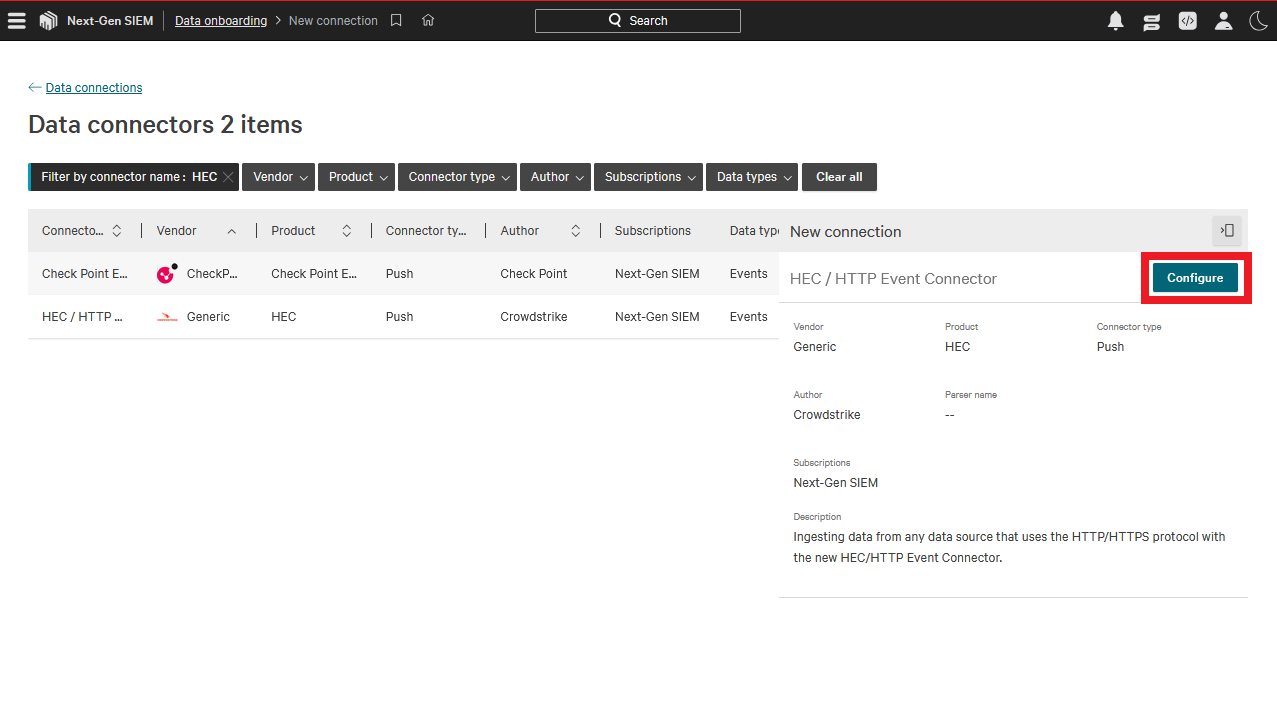
Find and select HEC/HTTP Event Data Connector.
-
Click Configure.
-
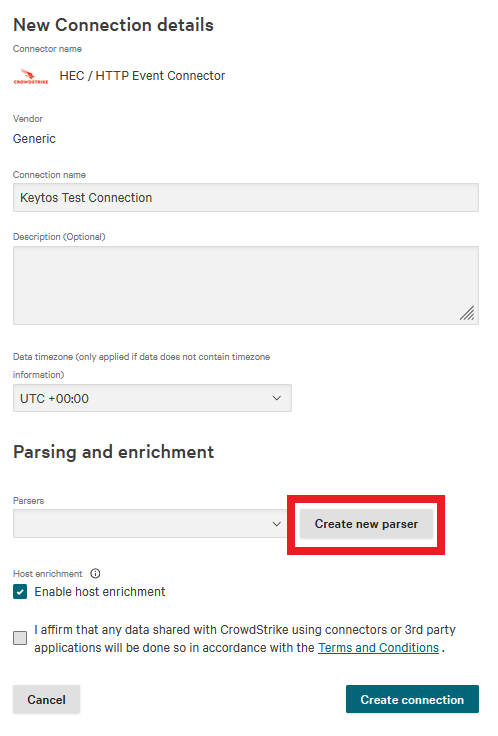
Fill in the Connection name.
-
Under Parsing and enrichment click Create new parser.
-
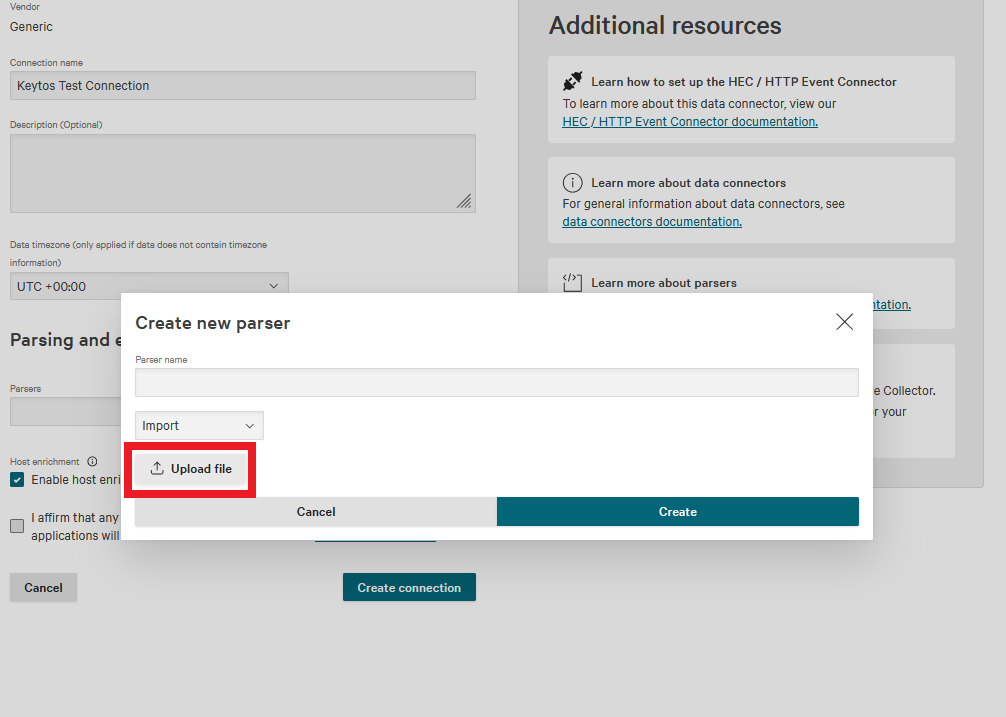
Change the dropdown from Blank template to Import.
-
Download the EZCMS parser template: keytos-ezcms.yaml
Note: This is a template parser for EZCMS that is designed to be used as a starting point for your final parser. It is intentionally bare-bones so it can be customized to your needs.
-
Click Upload file to upload the provided parser.
-
Name the parser and click Create.
-
Check the Terms and Conditions box.
-
Click Create connection.
-
Click Close.
-
It will take a few seconds for the connector to be ready to receive data. Reload the page every few seconds until you see a prompt to Generate API key.

-
Click Generate API key. (This page can only be opened during setup so record you API key.)
-
Copy your API Key and your API URL.
How to Add Your Next-Gen SIEM HEC Connection Details in EZCMS
-
Go back to your EZCMS tab.
-
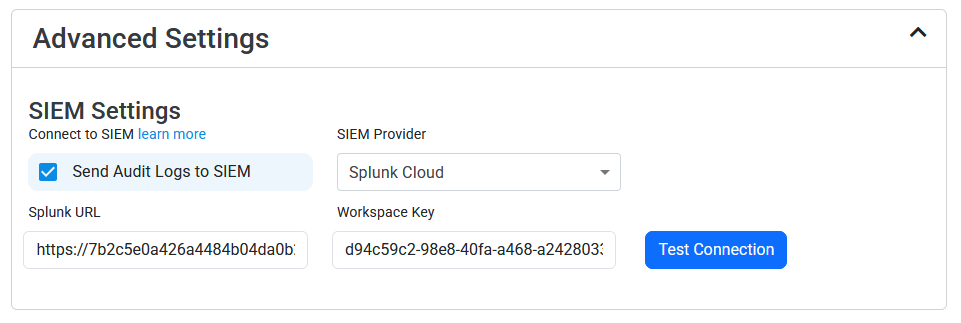
Select Splunk Cloud as the SIEM Provider, as Splunk uses the same HTTP Event Collector (HEC) log format used by Next-Gen SIEM.
-
Paste your API key in Workspace Key.
-
In EZCMS, paste your API URL in Splunk URL. It should look something like this.
-
Click the Test Connection button, this will create a test log in Next-Gen SIEM to make sure EZCMS can write to Next-Gen SIEM.
-
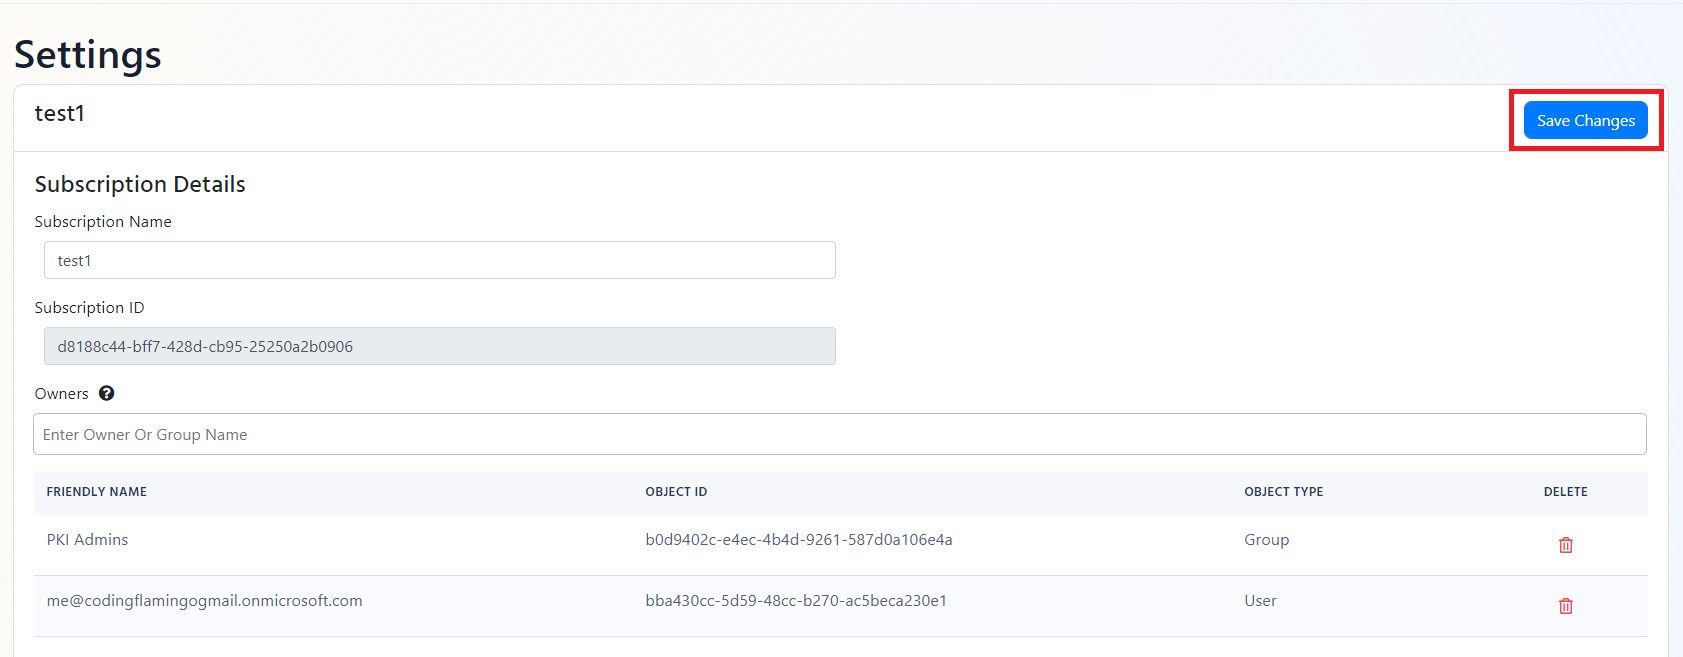
If the connection test was successful, click Save changes at the top of the page.
How To Create a CrowdStrike Falcon LogScale SIEM Data Connector
-
In another tab, go to your CrowdStrike Falcon LogScale instance.
-
Click on the Settings tab.
-
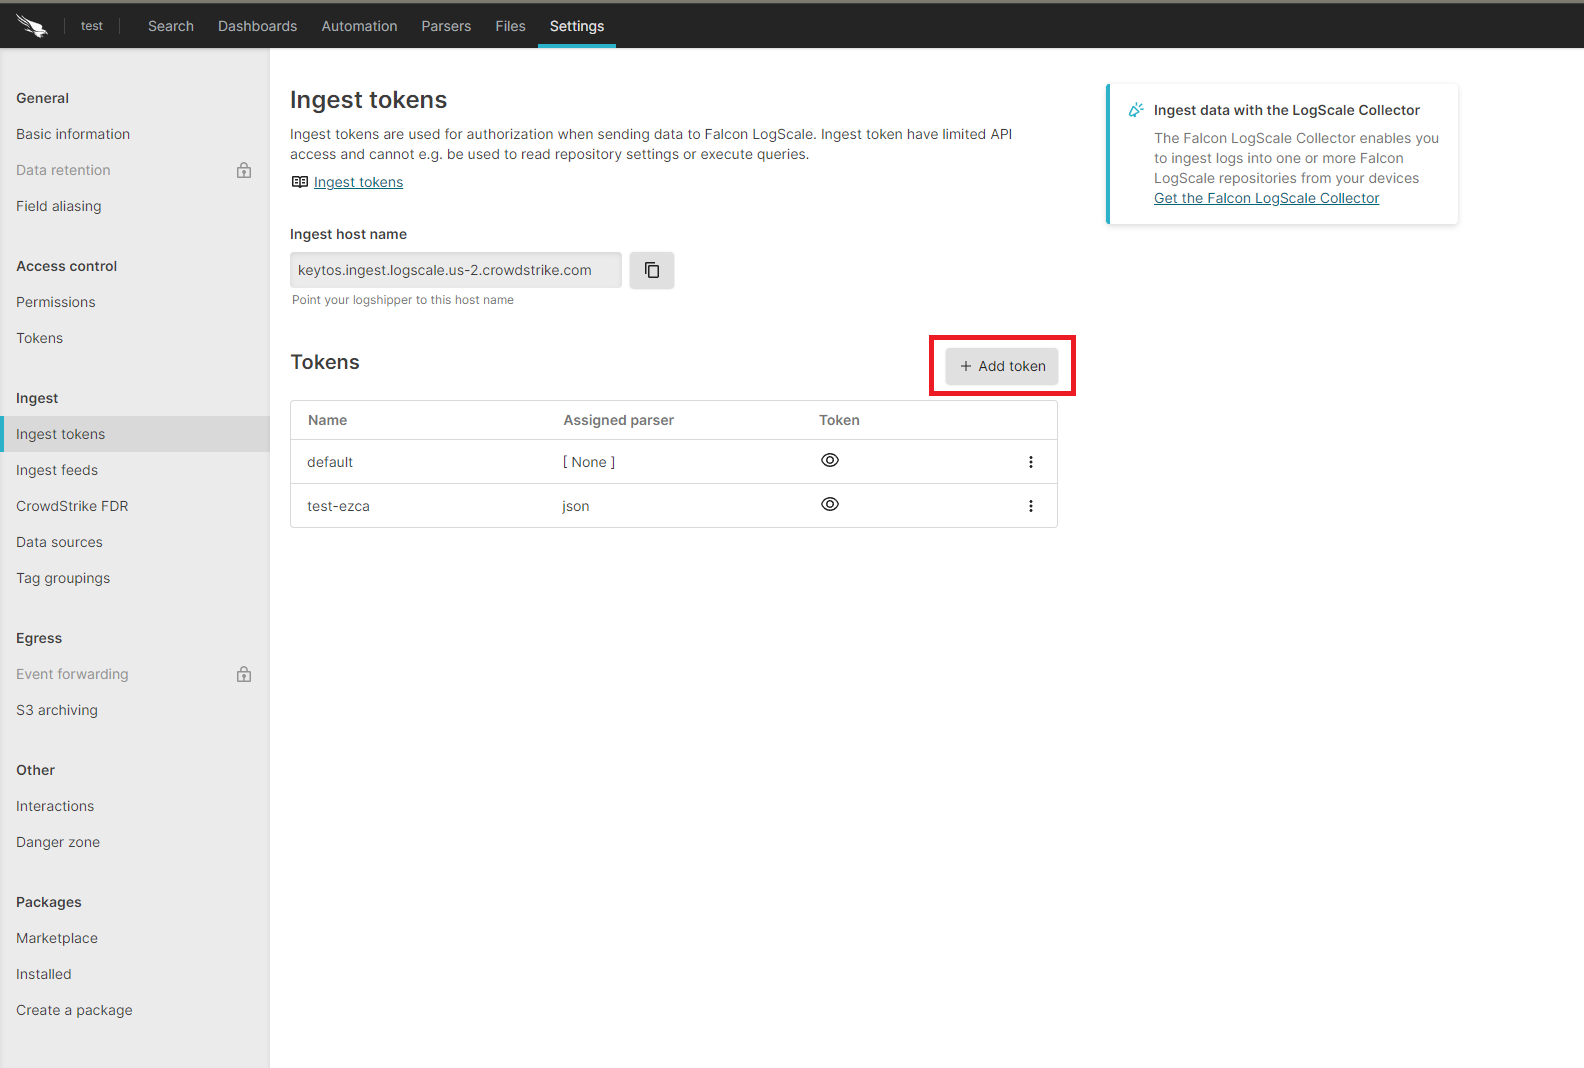
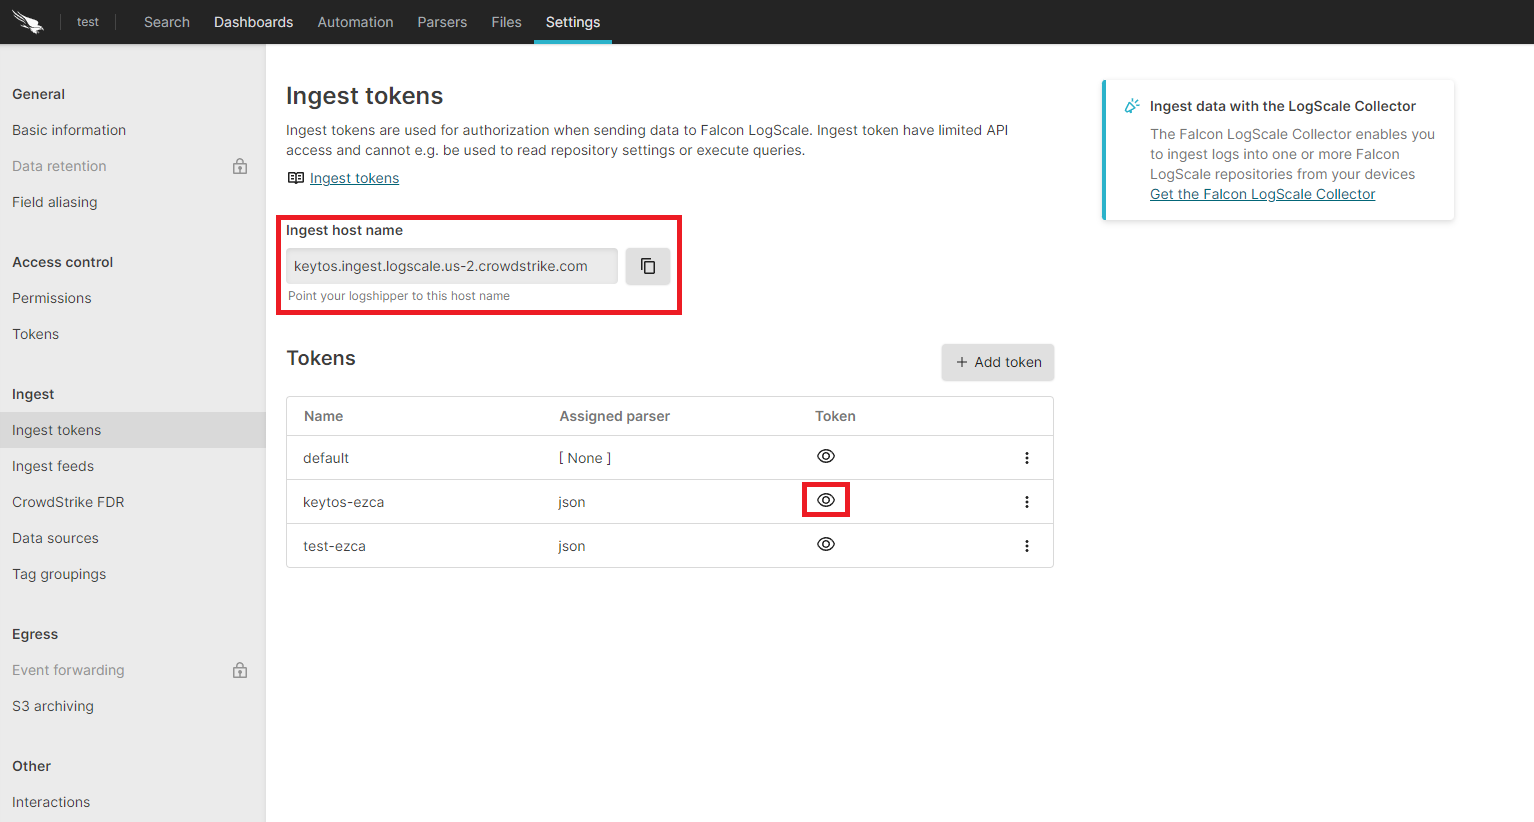
Select the Ingest Tokens menu.
-
Click on the Add Token button.
-
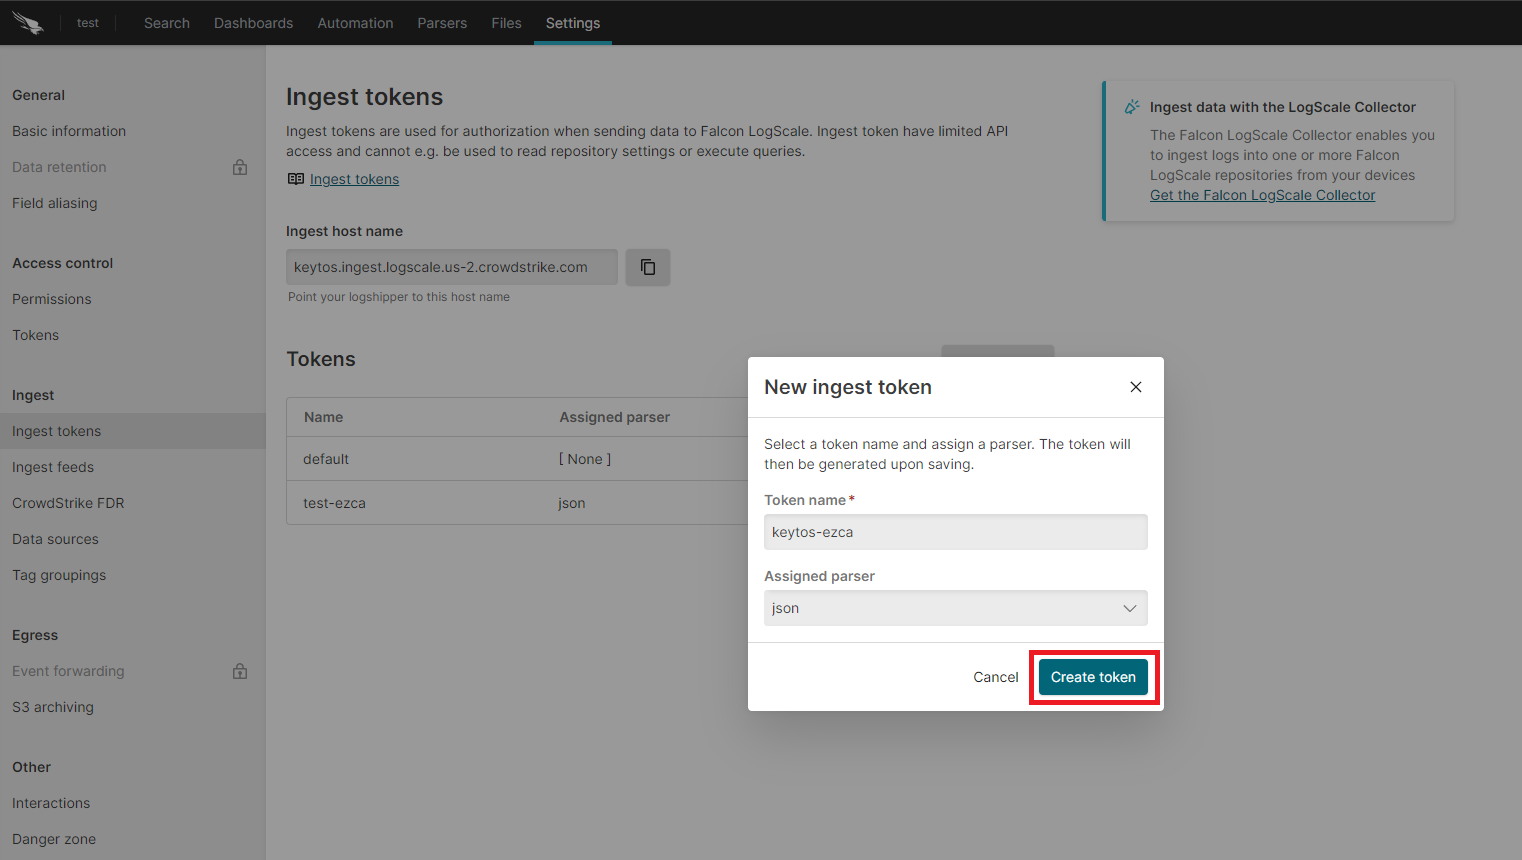
Enter the token name.
-
Assign the json parser and click Create.
-
Copy the token and the ingest host name.
How to Add Your LogScale Connection Details in EZCMS
-
Go back to the EZCMS tab.
-
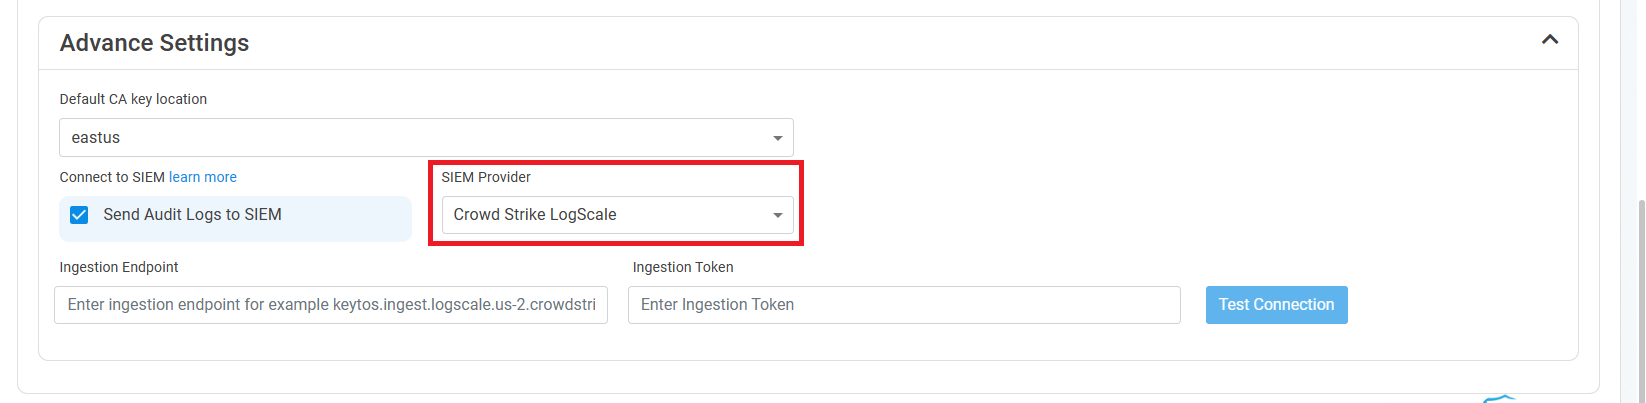
Select CrowdStrike Falcon LogScale as the SIEM Provider.
-
Paste the ingest host name in the Ingestion Endpoint field.
-
Paste the token in the Ingestion Token field.
-
Click the Test Connection button, this will create a test log in LogScale to make sure EZCMS can write to LogScale.

-
If the connection test was successful, click Save changes at the top of the page.