How-To: Enable WiFi Entra ID Authentication in Intune
Prerequisites
- The Keytos Entra ID applications are registered in your tenant
- You have signed up for an EZRADIUS Plan
- You are a Subscription Owner or Network Administrator
- You are an Intune Administrator
How to Enable WiFi Entra ID Authentication in Intune
The following steps will guide you through the process of creating a WiFi profile in Intune that uses Entra ID Password Authentication with EZRADIUS. At a high level, you will need to:
- Distribute your RADIUS server CA certificate(s) to your devices via Intune.
- Create a WiFi profile in Intune that uses EAP-TTLS with Entra ID Password Authentication.
How to Distribute Your RADIUS Server CA Certificates in Intune
For your devices to establish a secure connection to the RADIUS server, you need to distribute the RADIUS server’s CA certificate to your devices.
Download Your RADIUS Server CA Certificates
The first step is to download the CA certificate(s) to your local machine. Depending on how you set up your server certificate in EZRADIUS, the steps may vary slightly.
If you used the EZRADIUS auto-generated certificate for your RADIUS server, you’ll just have a single CA certificate to download. Follow these steps:
-
Log in to your EZRADIUS portal.
-
Navigate to Policies.
-
Select the policy you are using for Entra ID Password Authentication.
-
Scroll down to the Server Certificate section.
-
Click on the Download CA Certificate button to download the certificate to your local machine. It will have a filename similar to
RootCA.cer.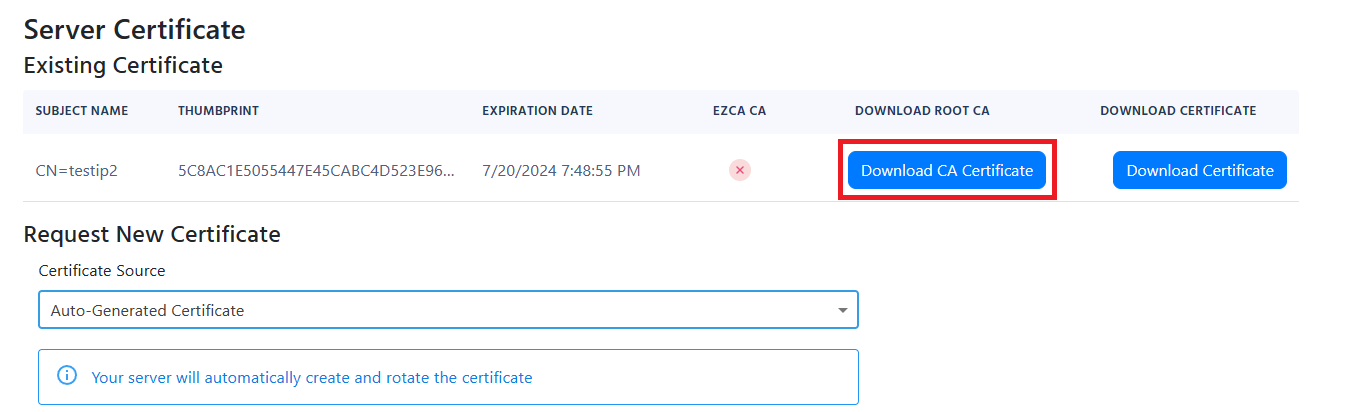
If you used the EZRADIUS EZCA to issue your RADIUS server certificate, you’ll need to download the the CA certificate for your EZCA CA, plus the Root CA certificate, if applicable. Follow these steps:
-
Log in to your EZCA portal.
-
Navigate to Certificate Authorities.
-
Select the CA that issued your RADIUS server certificate.
-
Click on the View Details button.
-
Click on the Download Certificate button to download the CA certificate to your local machine. It will have a filename similar to
<CA-NAME>.cer. -
If your EZCA CA is an intermediate CA, make sure to also download the Root CA certificate by repeating the above steps for the Root CA.
Refer to your PKI documentation to download the CA certificate(s) that issued your RADIUS server certificate. Ensure you have the root CA and any intermediate CA certificates if applicable.
Push the CA Certificates to Your Devices via Intune
Now that you have the CA certificate(s) downloaded, the next step is to push them to your devices’ Trusted Store using Intune.
-
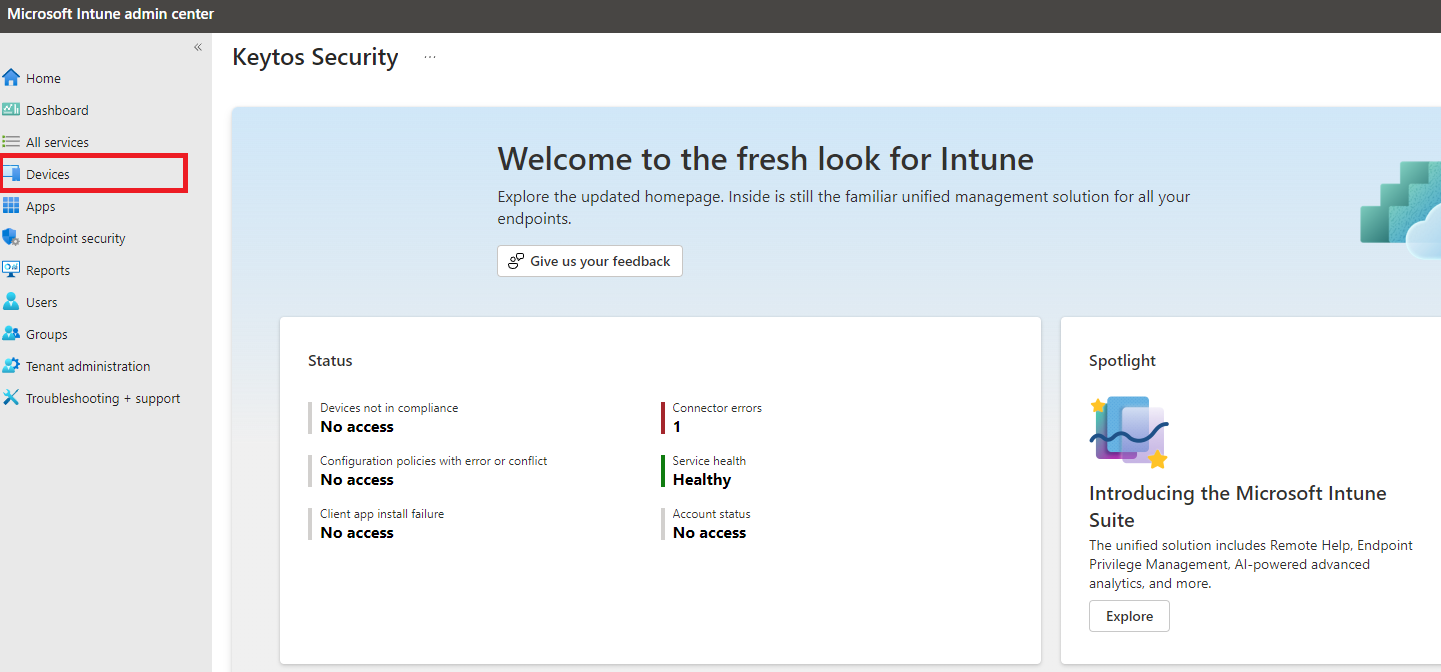
Now, go to your Intune portal: https://aka.ms/Intune
-
Click on Devices.
-
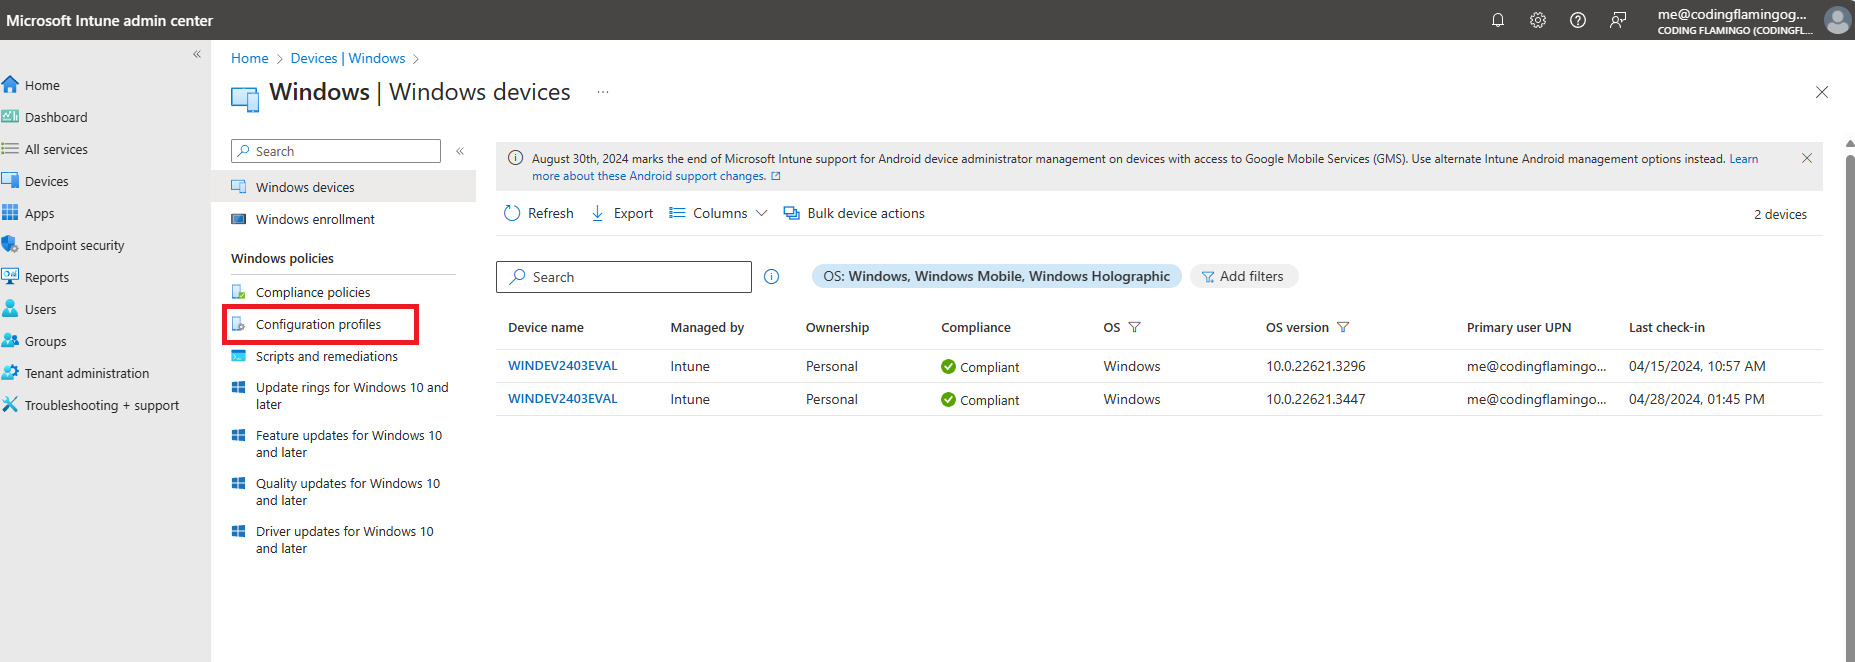
Select the OS/platform you want to configure. In this case we will select Windows, but the setup is similar for other OS platforms.
-
Click on Configuration Profiles.
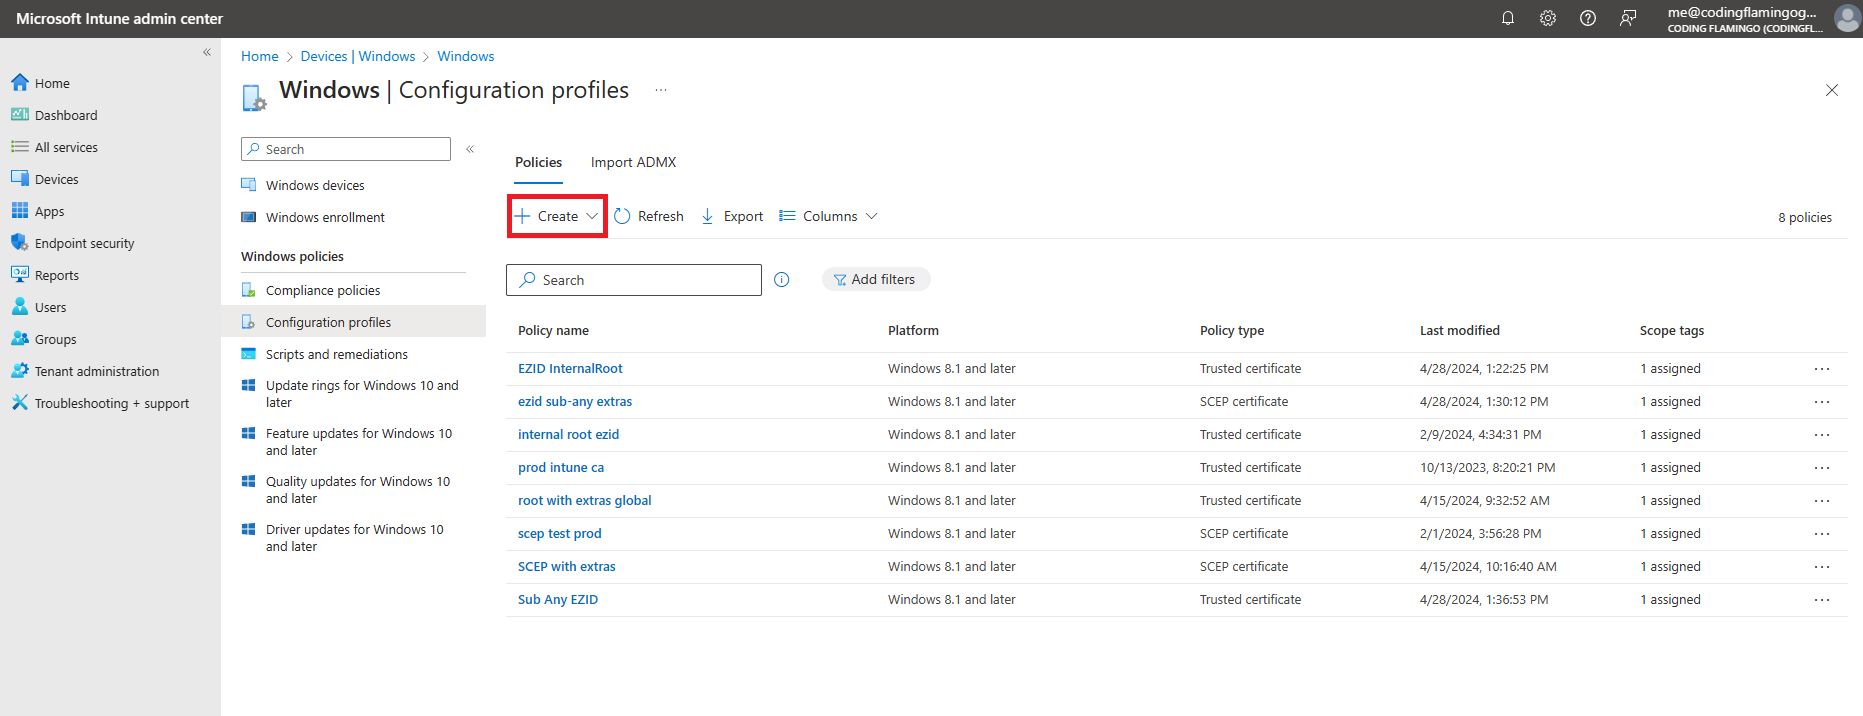
-
Click on the + Create button at the top of the list, then + New Policy.
-
Under “Create a profile”, select:
- Platform: Windows 10 and later
- Profile type: Templates
- Template name: Trusted certificate
-
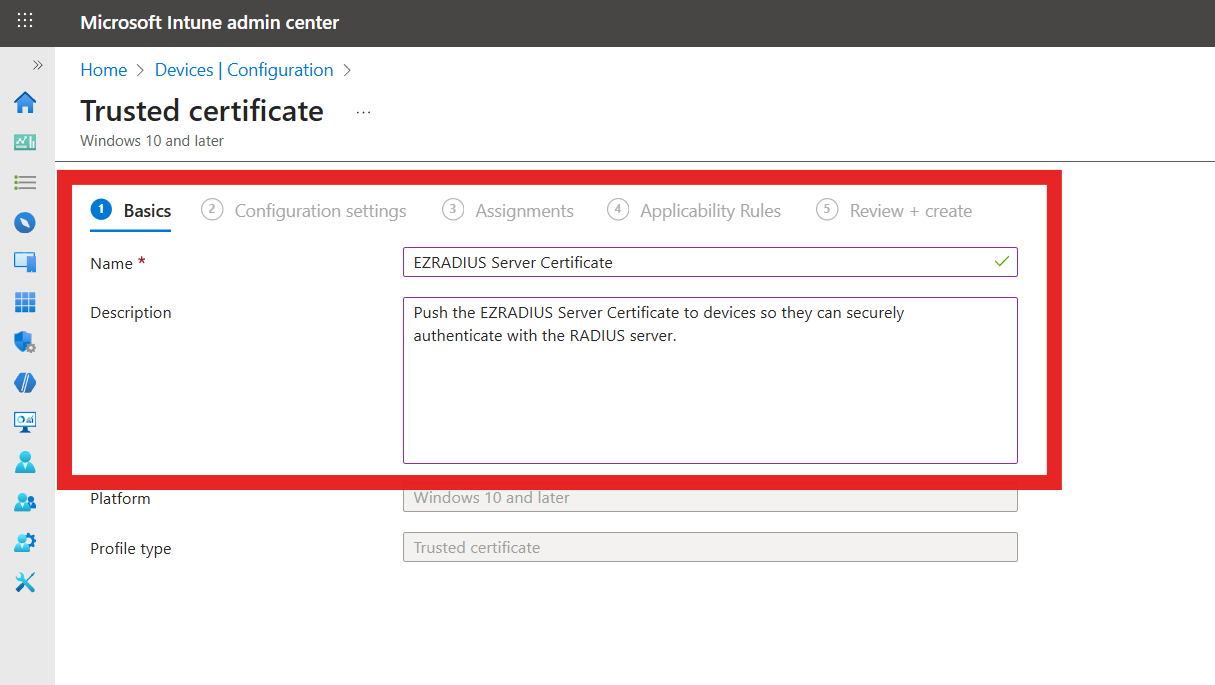
Fill out the profile Basics:
- Name: Friendly name for your organization
- Description: Description for your organization
-
Click on Next.
-
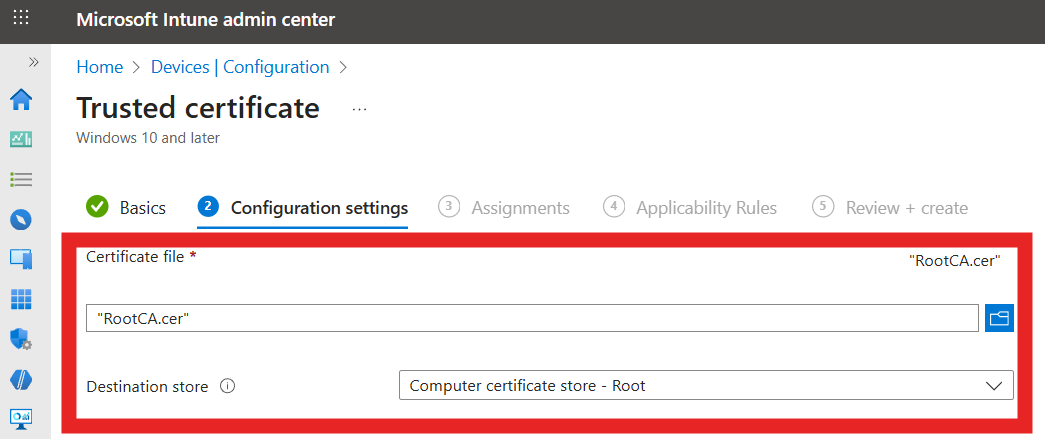
Fill in the Configuration settings:
- Certificate file: Select the CA certificate you downloaded earlier from EZRADIUS (
RootCA.cer). - Destination store: Select the appropriate store based on the type of CA certificate:
- Computer certificate store - Root (if a root CA certificate)
- Computer certificate store - Intermediate (if an intermediate CA certificate).
- Certificate file: Select the CA certificate you downloaded earlier from EZRADIUS (
-
Click on Next.
-
Select the users, groups or devices you want to deploy this profile to.
-
Click on Next.
-
Add any Applicability Rules if needed, then click on Next.
-
Click on Create to finish creating the profile.
-
Repeat the above steps if you have both a root CA and an intermediate CA certificate to deploy.
How to Create a WiFi Profile in Intune for Entra ID Password Authentication
Download Your Radius Server Certificate
When setting up an Intune WiFi profile for Entra ID Password Authentication, you will need details from your RADIUS server certificate. You can find these details in your EZRADIUS portal.
-
Log in to your EZRADIUS portal.
-
Navigate to Policies.
-
Select the policy you are using for Entra ID Password Authentication.
-
Scroll down to the Server Certificate section.
-
Click Download Certificate to download the RADIUS server certificate to your local machine. It will have a filename similar to
Server.cer. -
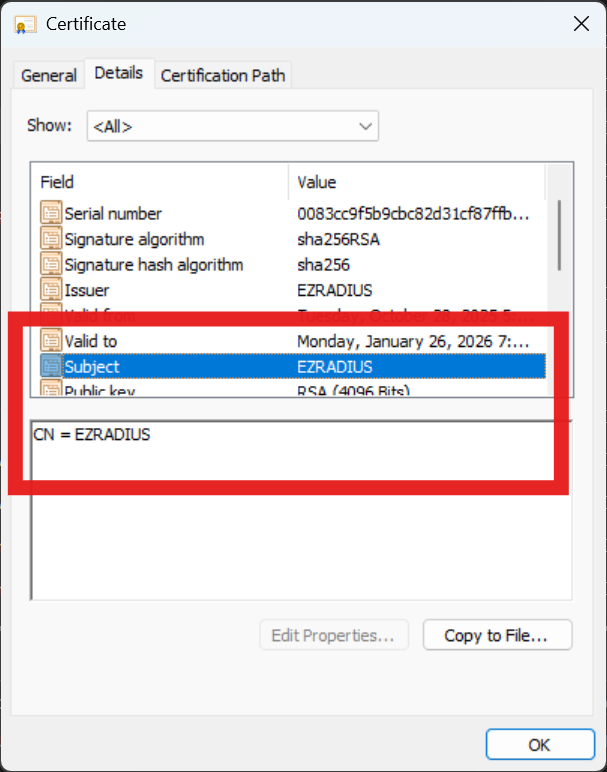
Open the downloaded certificate on your local machine. Note the following details which you will need later.
- The Subject Common Name (CN)
- The Subject Alternative Name (SAN)

Create a WiFi Profile in Intune
-
Go to your Intune portal: https://aka.ms/Intune
-
Click on Devices
-
Select the OS/platform you want to configure. In this case we will select Windows, but the setup is similar for other OS platforms.
-
Click on Configuration Profiles.
-
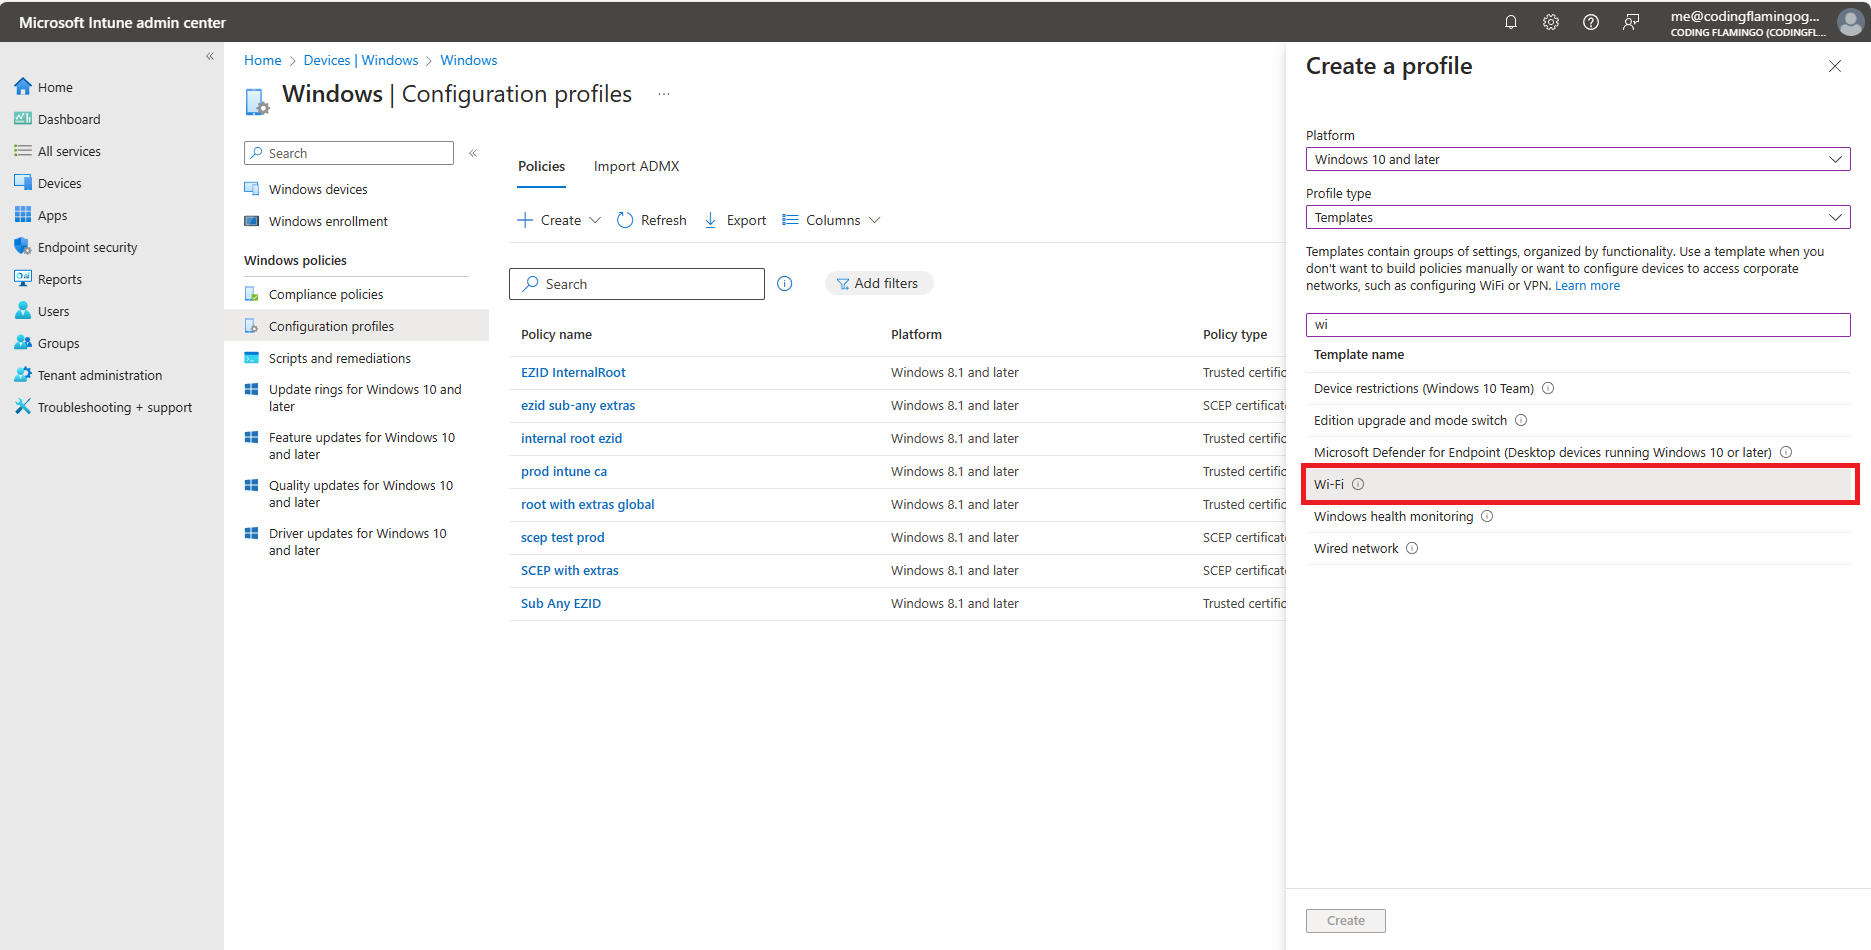
Click on the + Create button at the top of the list.
-
Select Windows 10 and later as the platform.
-
Select Templates as the profile type.
-
Select Wi-Fi as the template.
-
Click on Create at the bottom of the page.
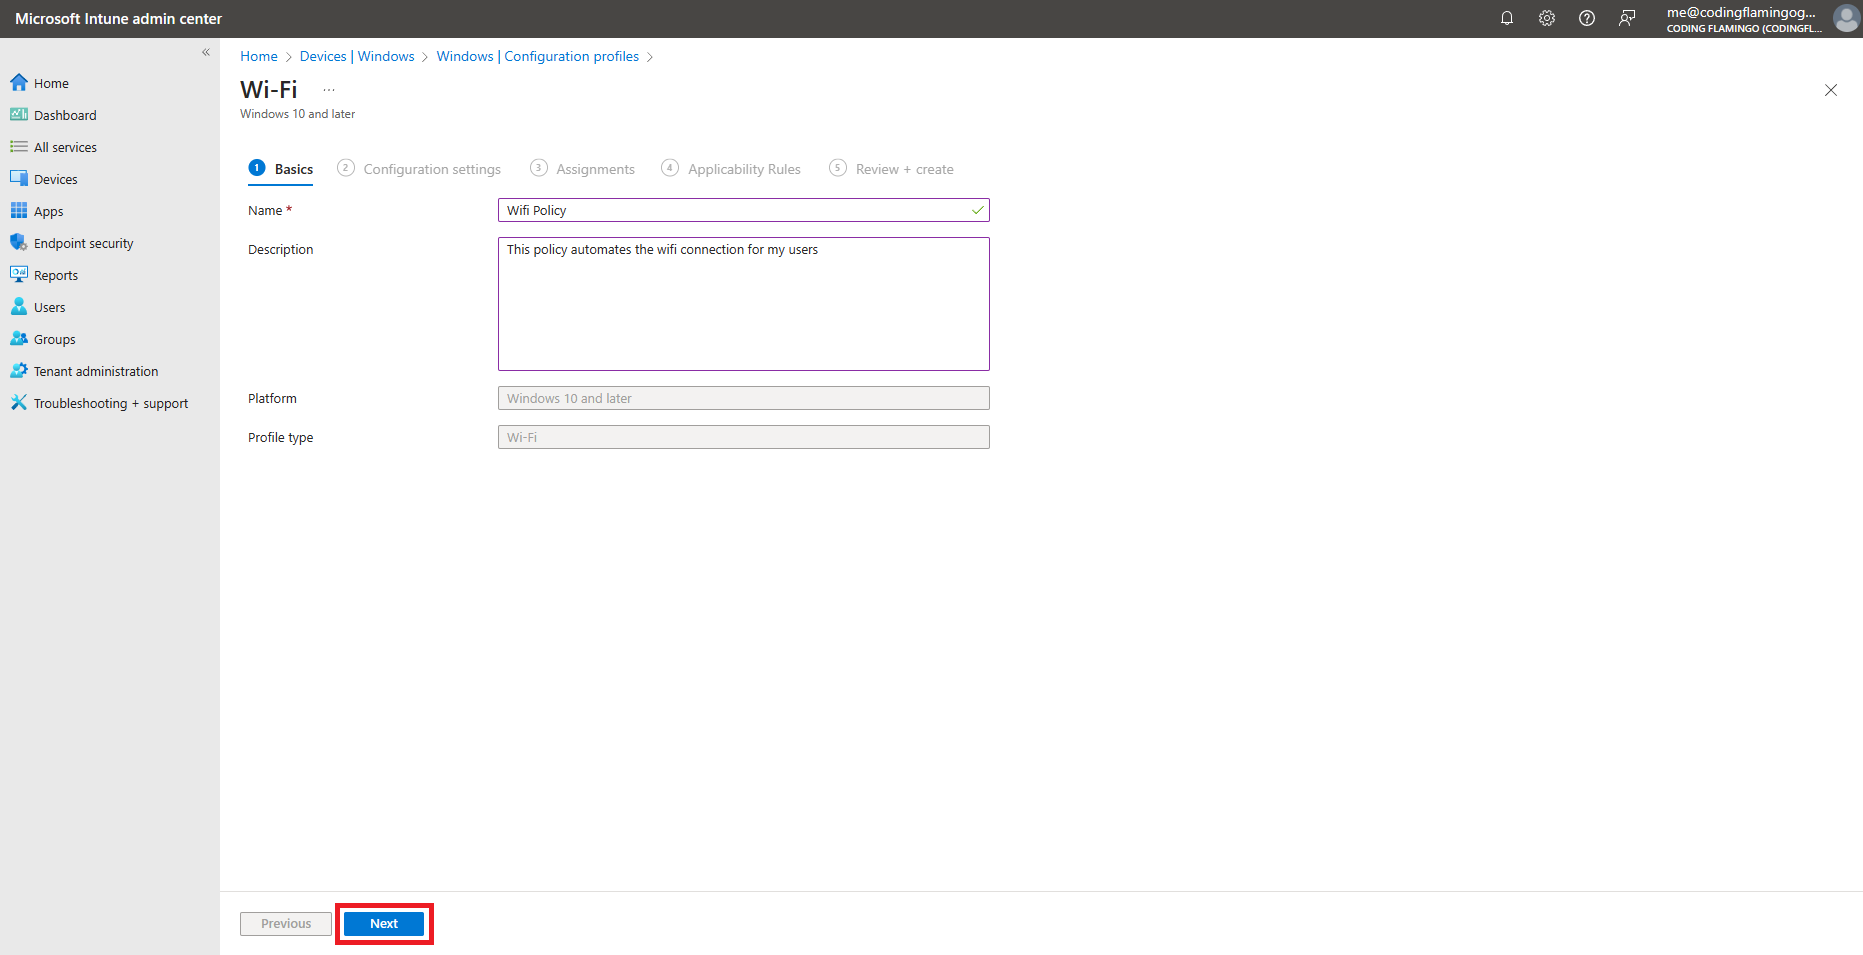
-
Fill in the Name and Description fields with something meaningful for your organization.
-
Click on Next.
-
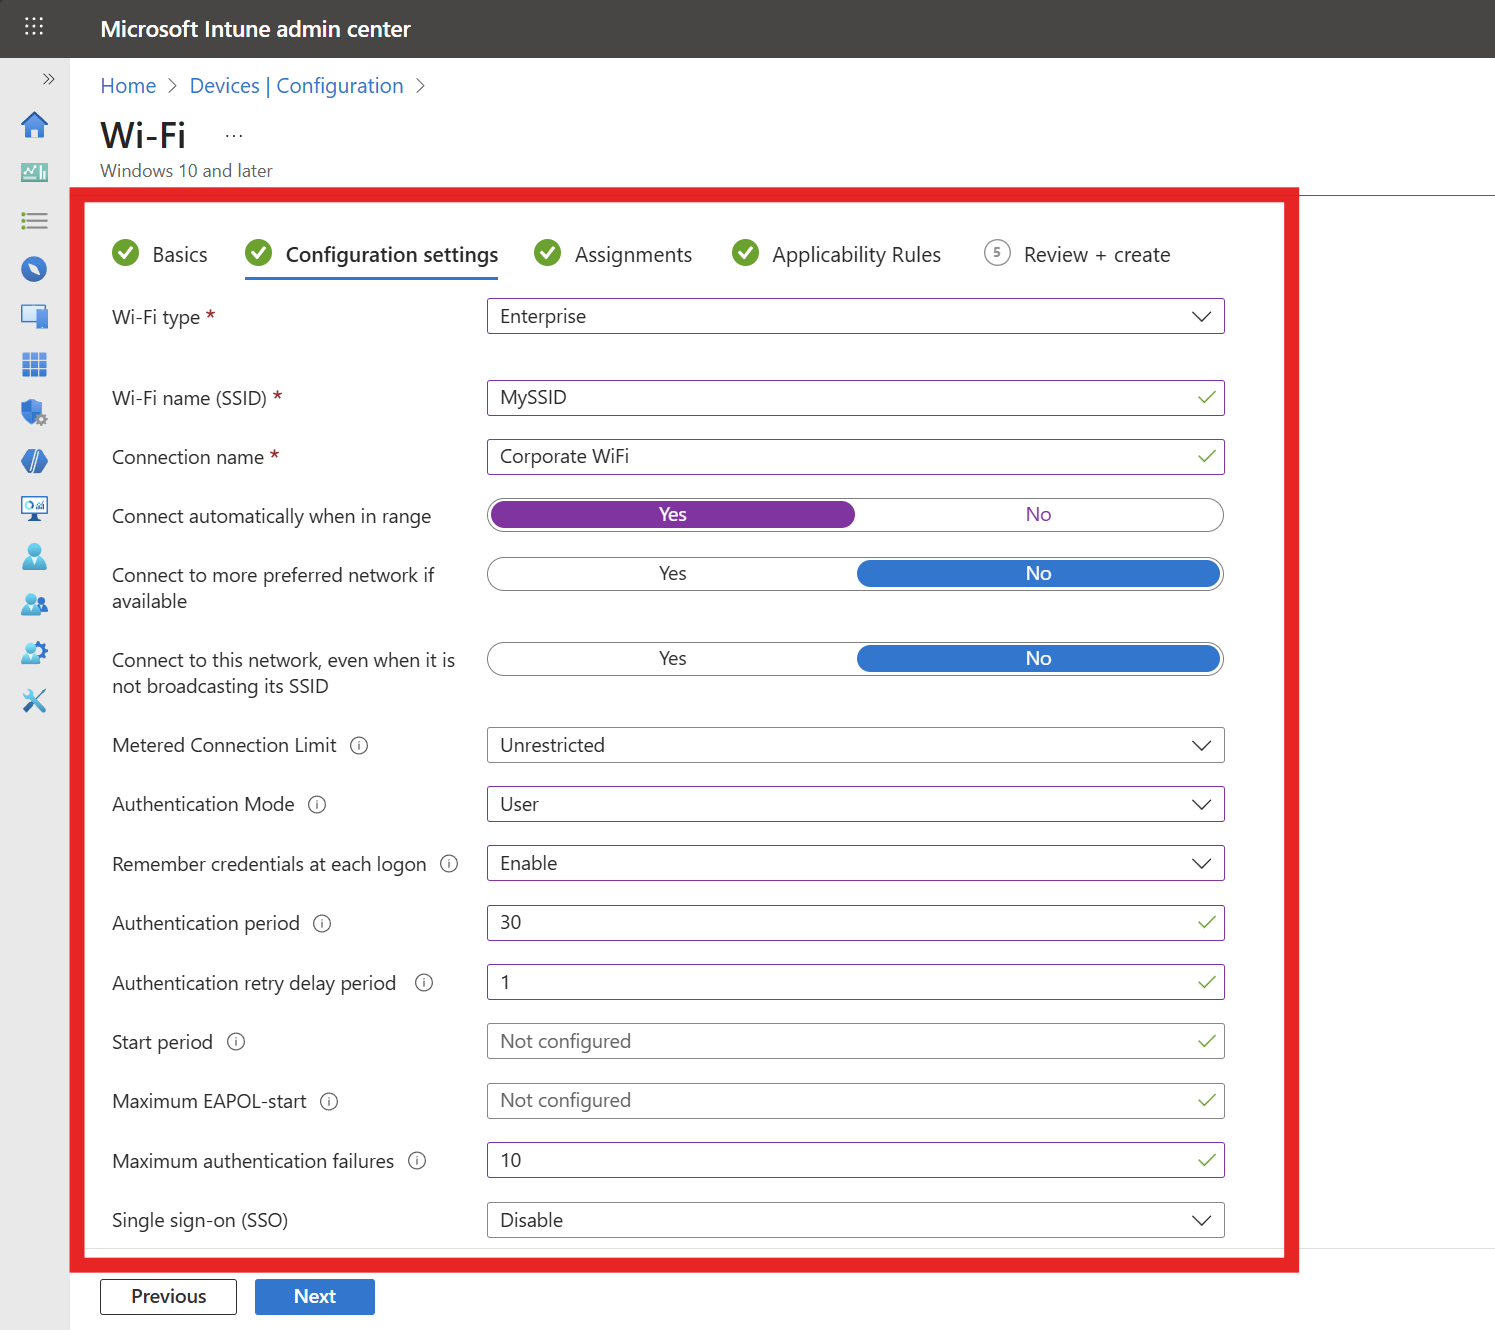
Enter the following required Configuration settings. Any field not mentioned below can be left as default or set to your organization’s preference:
- Wi-Fi type: Enterprise
- Wi-Fi name (SSID): Your Wi-Fi Network SSID (Case Sensitive)
- Connection name: Friendly name for your users
- Authentication mode: User (Device is not supported for Entra ID Password authentication)
- Remember credentials: Yes/No (Based on your preference)
- Authentication period: 30 seconds is a recommended value we’ve seen work well for most environments.
- Authentication retry delay: 1 seconds is a recommended value we’ve seen work well for most environments.
- Maximum authentication failures: 10 is a recommended value we’ve seen work well for most environments.
- Single sign-on (SSO): Disable
-
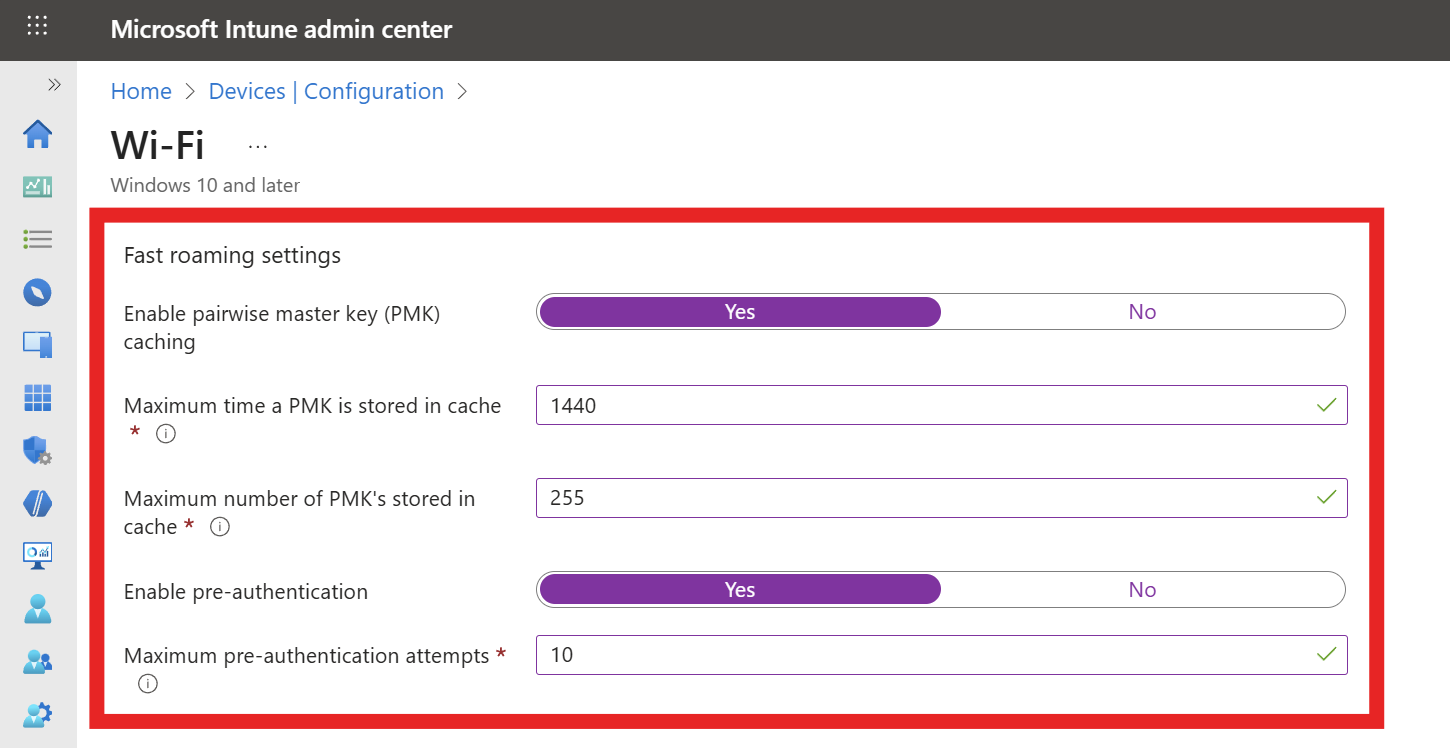
If your network controller supports Fast Roaming, fill out the Fast Roaming settings section with the following settings:
- Enable pairwise master key (PMK) caching: Yes
- Max PMK time stored in cache: We recommend setting this to the maximum (1440 minutes) to improve user experience.
- Max number of PMKs in cache: We recommend setting this to the maximum (255) to improve user experience.
- Enable pre-authentication: Yes
- Max pre-authentication attempts: 10 is a recommended value we’ve seen work well for most environments.
-
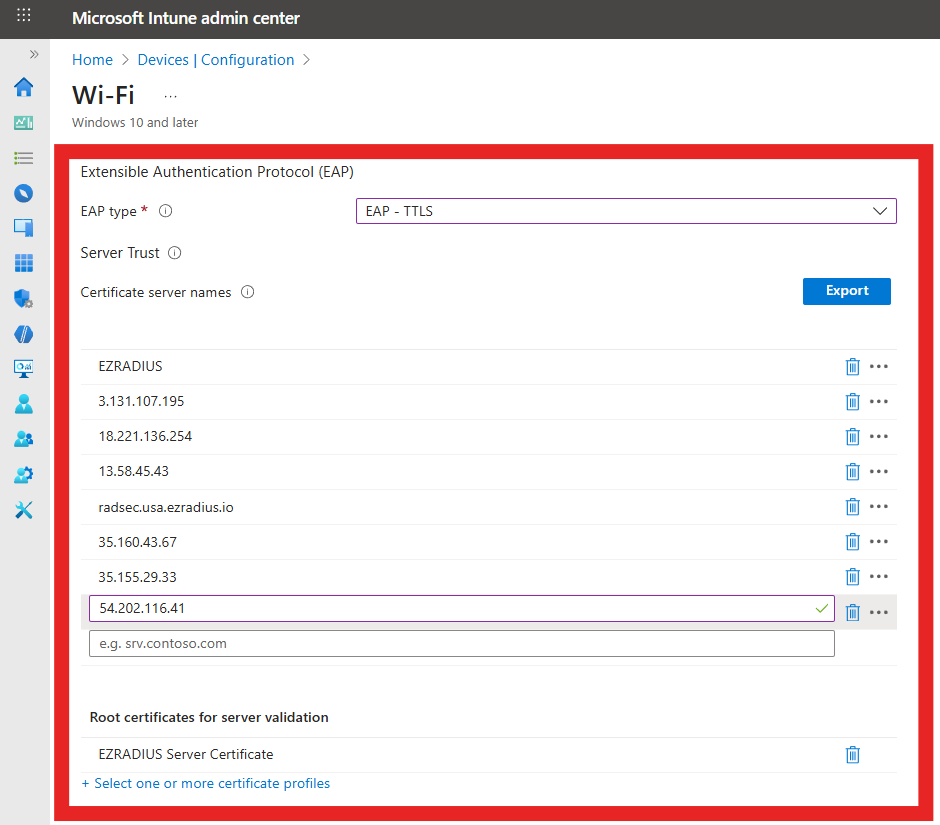
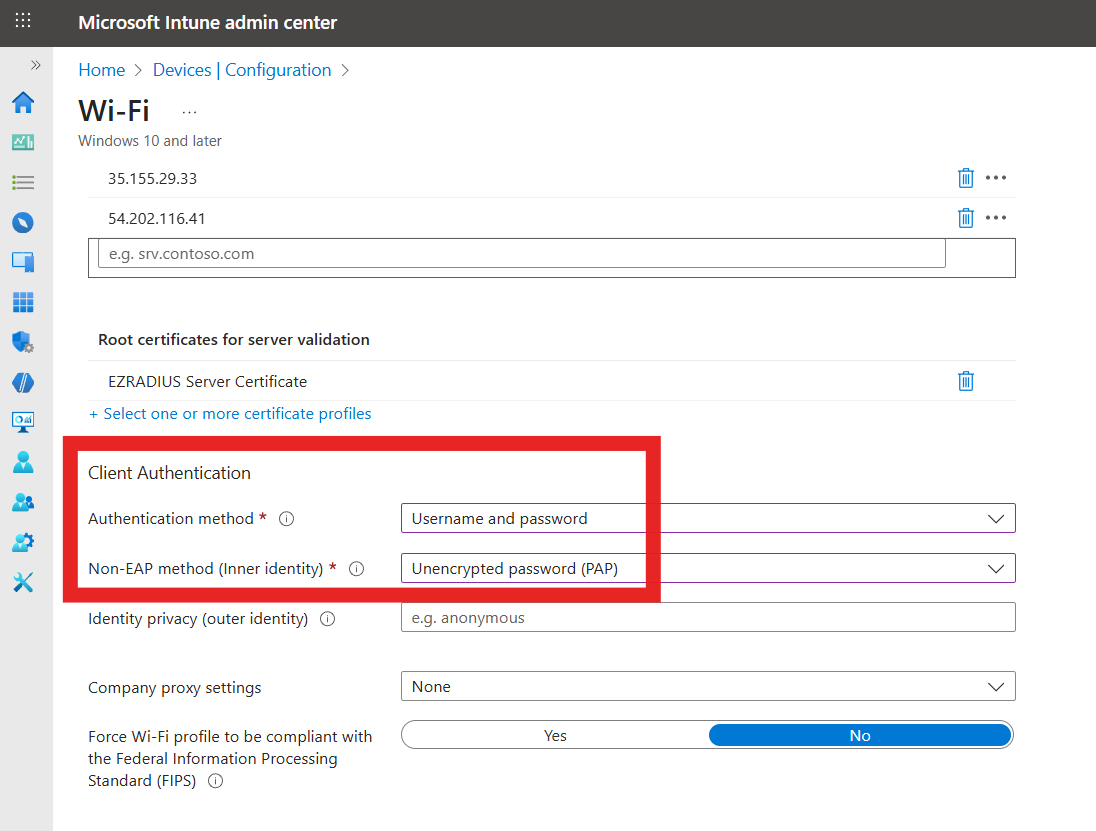
Fill out the Server Trust section with the following settings:
- EAP type: EAP-TTLS
- Certificate server names: Enter the CN and SAN values from your RADIUS server certificate that you noted earlier. Remove
CN=,DNS Name=, andIP Address=prefixes when entering the values. - Root Certificates for server validation: Click on “+ Select one or more certificate profiles” and select the CA certificate profile(s) you created earlier to distribute your RADIUS server CA certificate(s).
-
Fill out the Client Authentication section with the following settings:
- Authentication Method: Username and Password
- Non-EAP method (Inner method): Unencrypted Password (PAP) (Don’t worry the password is encrypted by the EAP-TTLS tunnel, it is not sent unencrypted over the air)
-
Click on Next.
-
Select the users, groups or devices you want to deploy this profile to and click Next.
-
Add any applicability rules if needed, then click on Next.
-
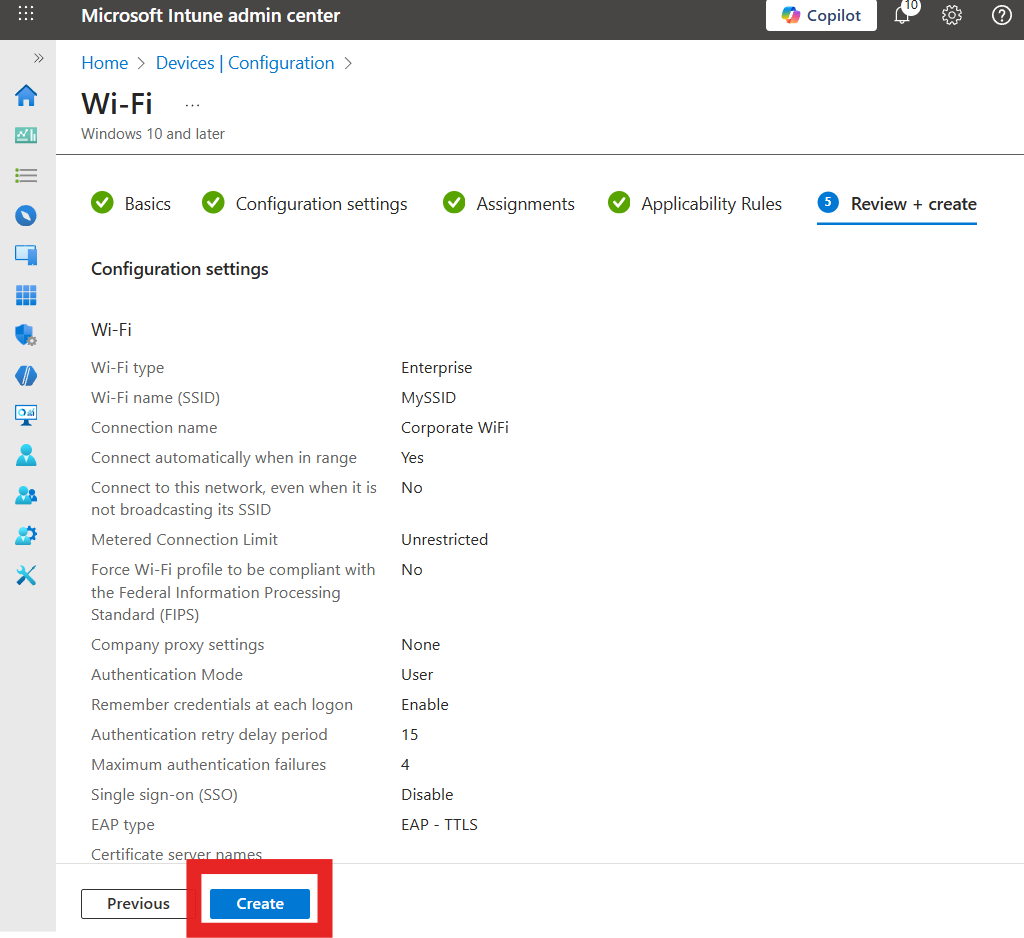
Review your settings and click on Create.
-
Done! Your WiFi profile is now created and will be pushed to your devices. Once the profile is applied, users will be able to connect to the WiFi network using their Entra ID credentials.
How to Test the WiFi Entra ID Password Authentication Setup
Now that you have created and deployed the WiFi profile, it’s important to test the setup to ensure everything is functioning correctly. Follow these steps to test your WiFi profile with Entra ID Password Authentication:
-
Begin on a device that is targeted by the Intune WiFi profile you created.
-
Force a sync with Intune to ensure the latest profiles are applied. You can do this by going to Settings > Accounts > Access work or school, selecting your work account, and clicking on Sync.
-
Once the sync is complete, check that the WiFi profile has been applied by going to Settings > Network & Internet > Wi-Fi > Manage known networks. You should see the SSID you configured in the list.
-
Attempt to connect to the WiFi network using your Entra ID credentials (username and password).
-
If you are unable to connect, refer to our troubleshooting guide.
🔎 Entra ID Troubleshooting Guide
If you get a “Microsoft did not respond in time” error message, try to connect again. EZRADIUS still completes the authentication in the background, so a subsequent attempt should succeed after being cached.