How-To: Request EZCA Certificates with simple-acme
What is simple-acme and What Does it Do?
simple-acme is a fork of win-acme that provides a streamlined experience for automatically managing SSL Certificates for Windows IIS. It is actively maintained by the original developer of win-acme and is actively being worked on.

This guide will walk you through the process of setting up simple-acme to request certificates from your EZCA ACME Agent, ensuring that your IIS-hosted applications always have valid SSL certificates without manual intervention.
Prerequisites for Using simple-acme with EZCA
Before you can use simple-acme to request certificates from your EZCA ACME Agent, make sure you have the following prerequisites in place:
- You have an active EZCA subscription
- You have created an SSL Template Certificate Authority in EZCA (either root or subordinate)
- You have successfully deployed an ACME agent in EZCA.
- You have a Windows Server with IIS hosting your internal application that you want to secure with an SSL certificate from EZCA. (This can be a VM in Azure or on-premises)
How to Automate SSL Certificate Issuance with simple-acme - Step by Step Guide
The following steps will guide you through the process of configuring simple-acme to request SSL certificates from your EZCA ACME Agent for your IIS-hosted applications:
How to Configure simple-acme to Point to Your EZCA ACME Agent
-
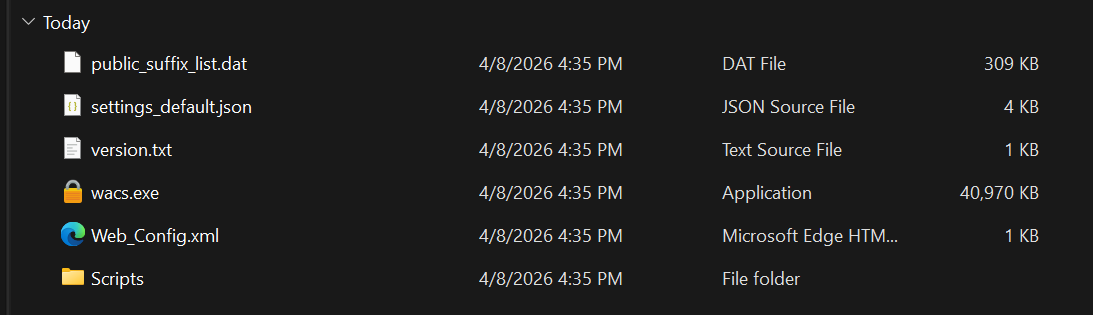
Download the latest version of simple-acme from the simple-acme website.
-
Extract the files to your desired installation folder.
-
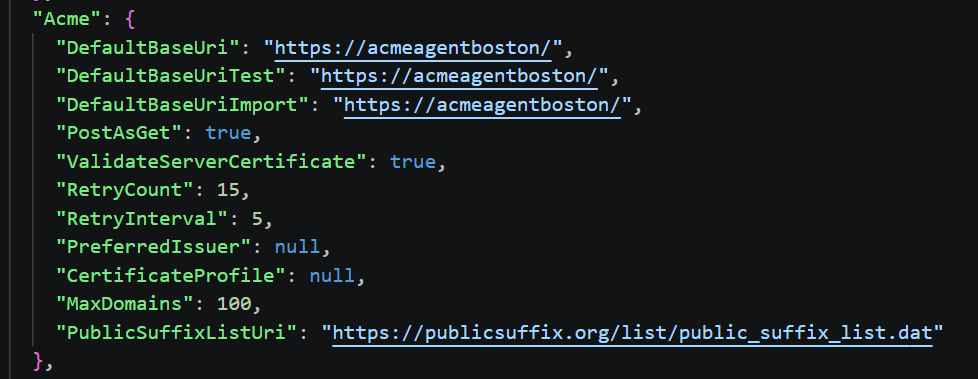
Open settings_default.json to update the endpoint configuration to point to your EZCA ACME Agent.
-
In the
Acmesection, change the following fields to your EZCA ACME Agent information:DefaultBaseUri: Set this to the URL of your EZCA ACME Agent (e.g.,https://acmeagentboston/).DefaultBaseUriTest: Set this to the same URL as DefaultBaseUri (e.g.,https://acmeagentboston/).DefaultBaseUriImport: Set this to the same URL as DefaultBaseUri (e.g.,https://acmeagentboston/).
-
Save your changes to settings_default.json.
-
We are now ready to use simple-acme to request certificates from your EZCA ACME Agent!
How to Request Certificates with simple-acme
-
Navigate to the folder where simple-acme was installed.
-
Open the
wacs.exeprogram.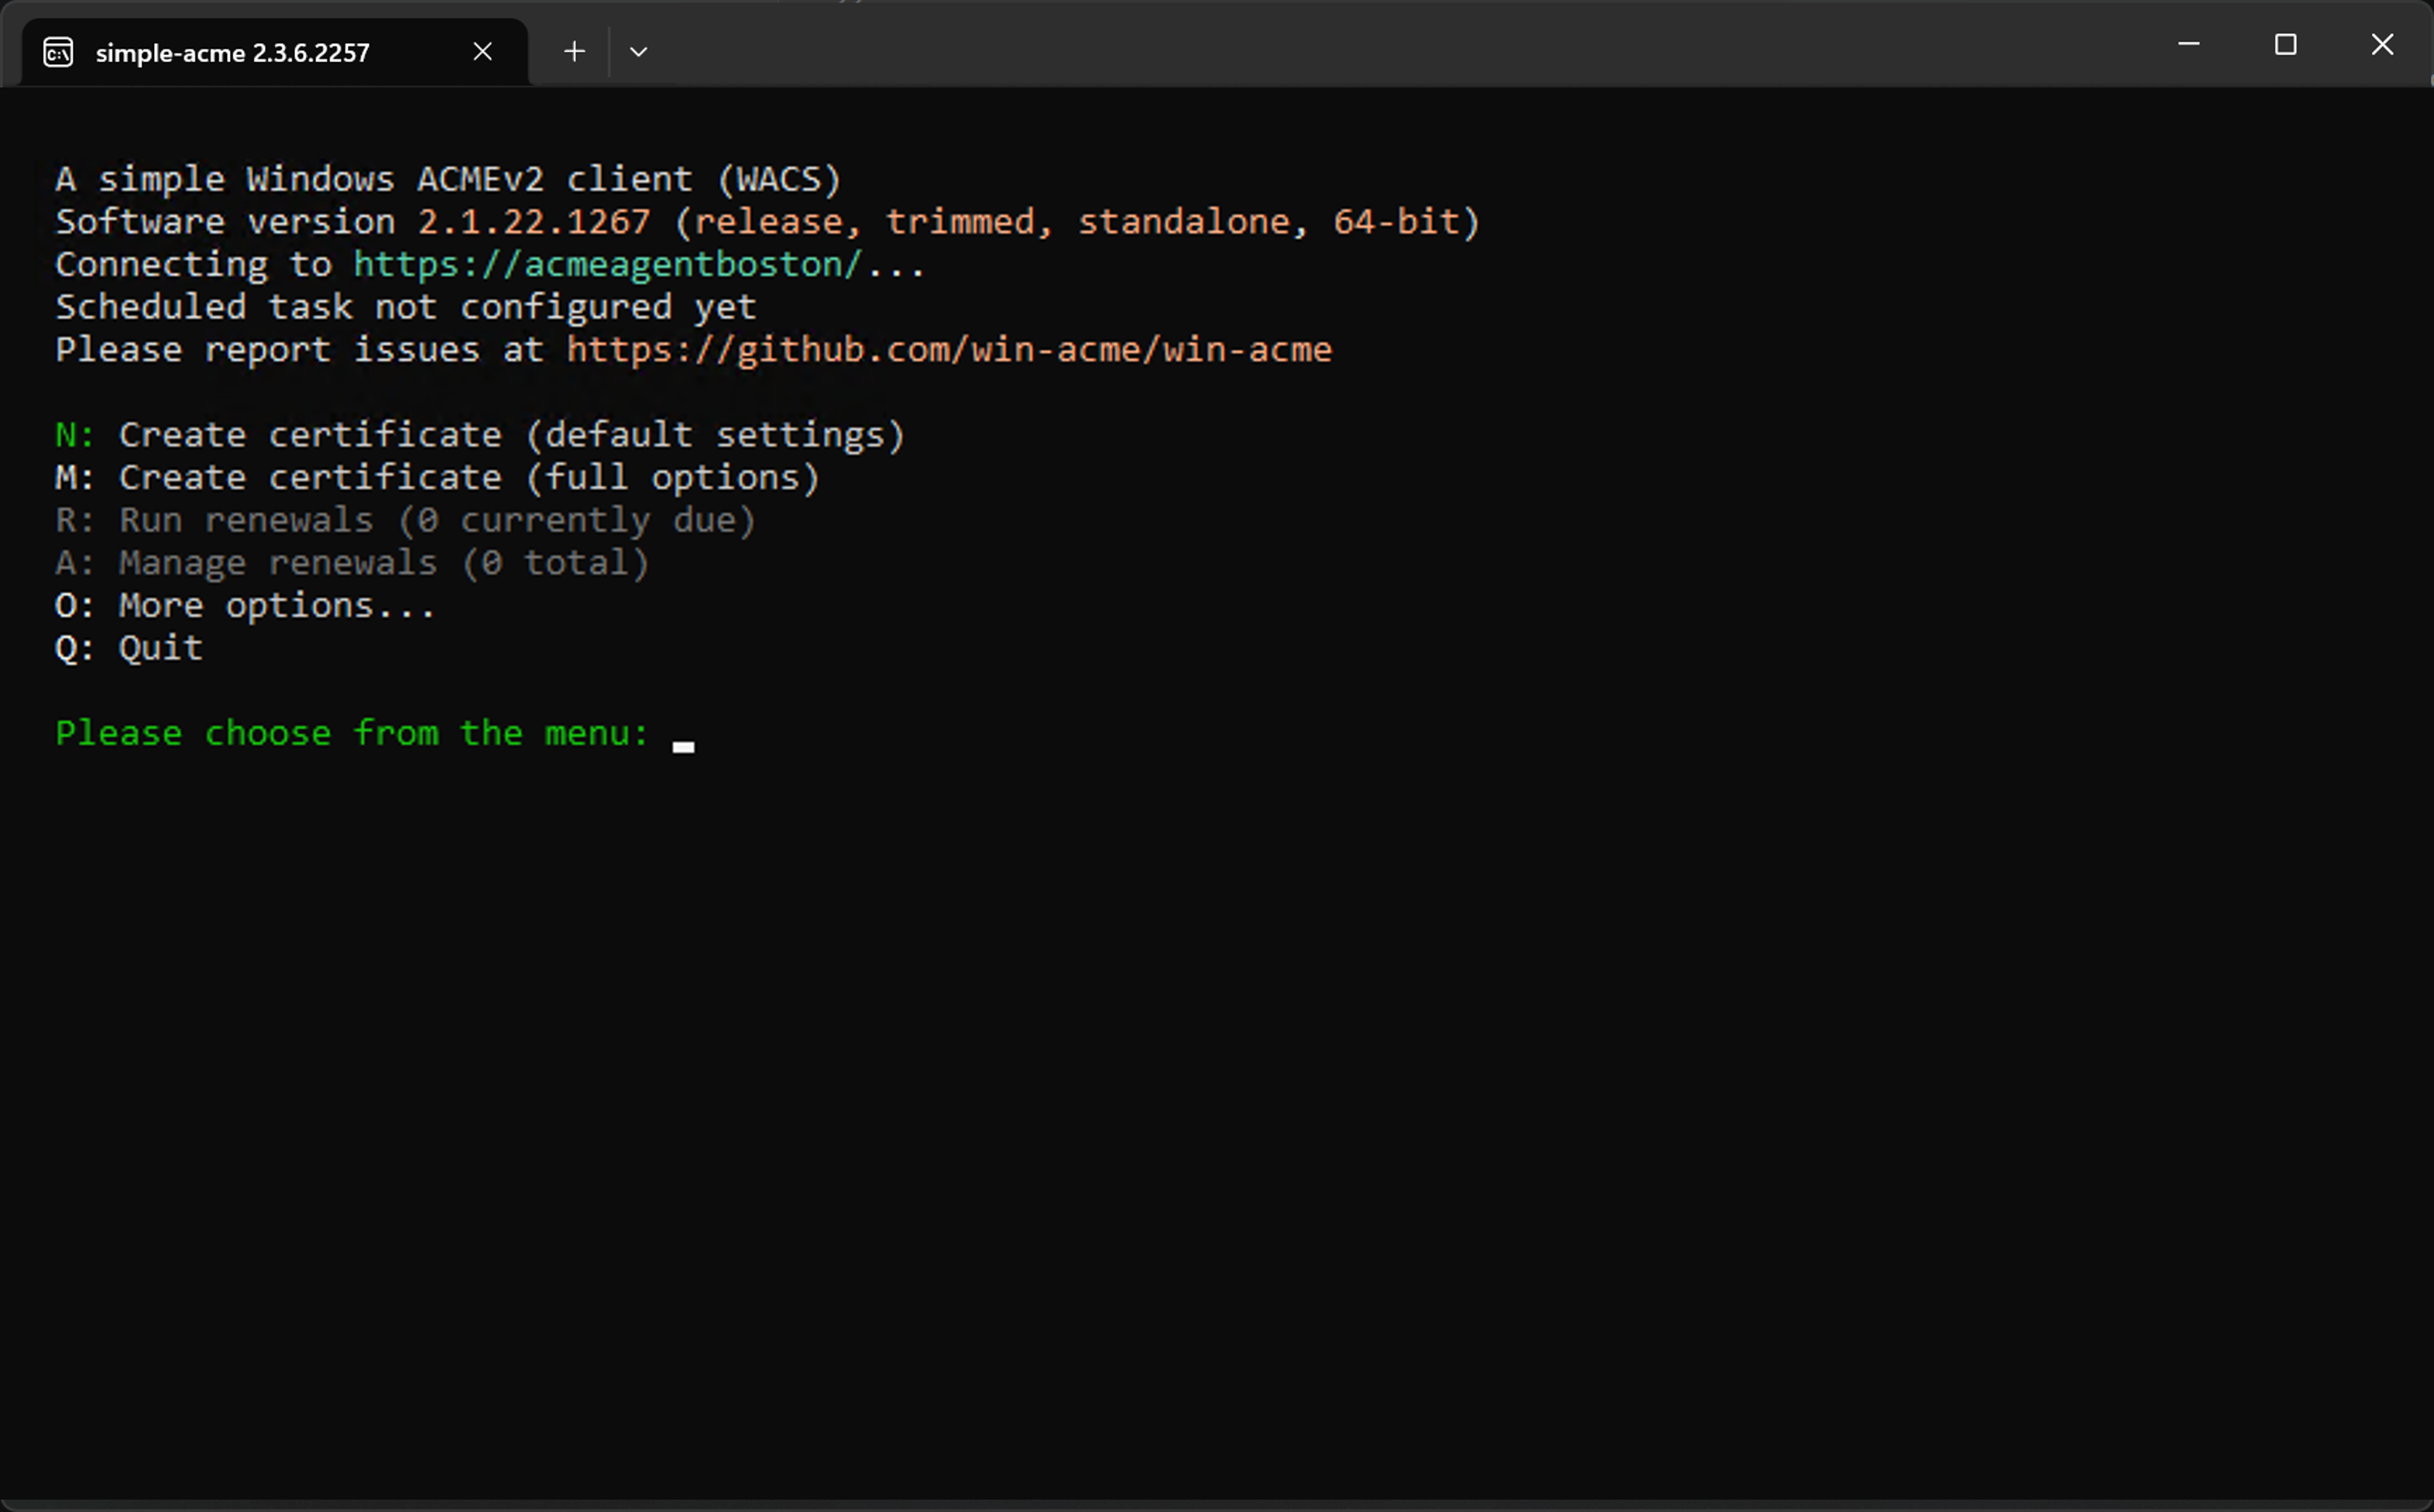
-
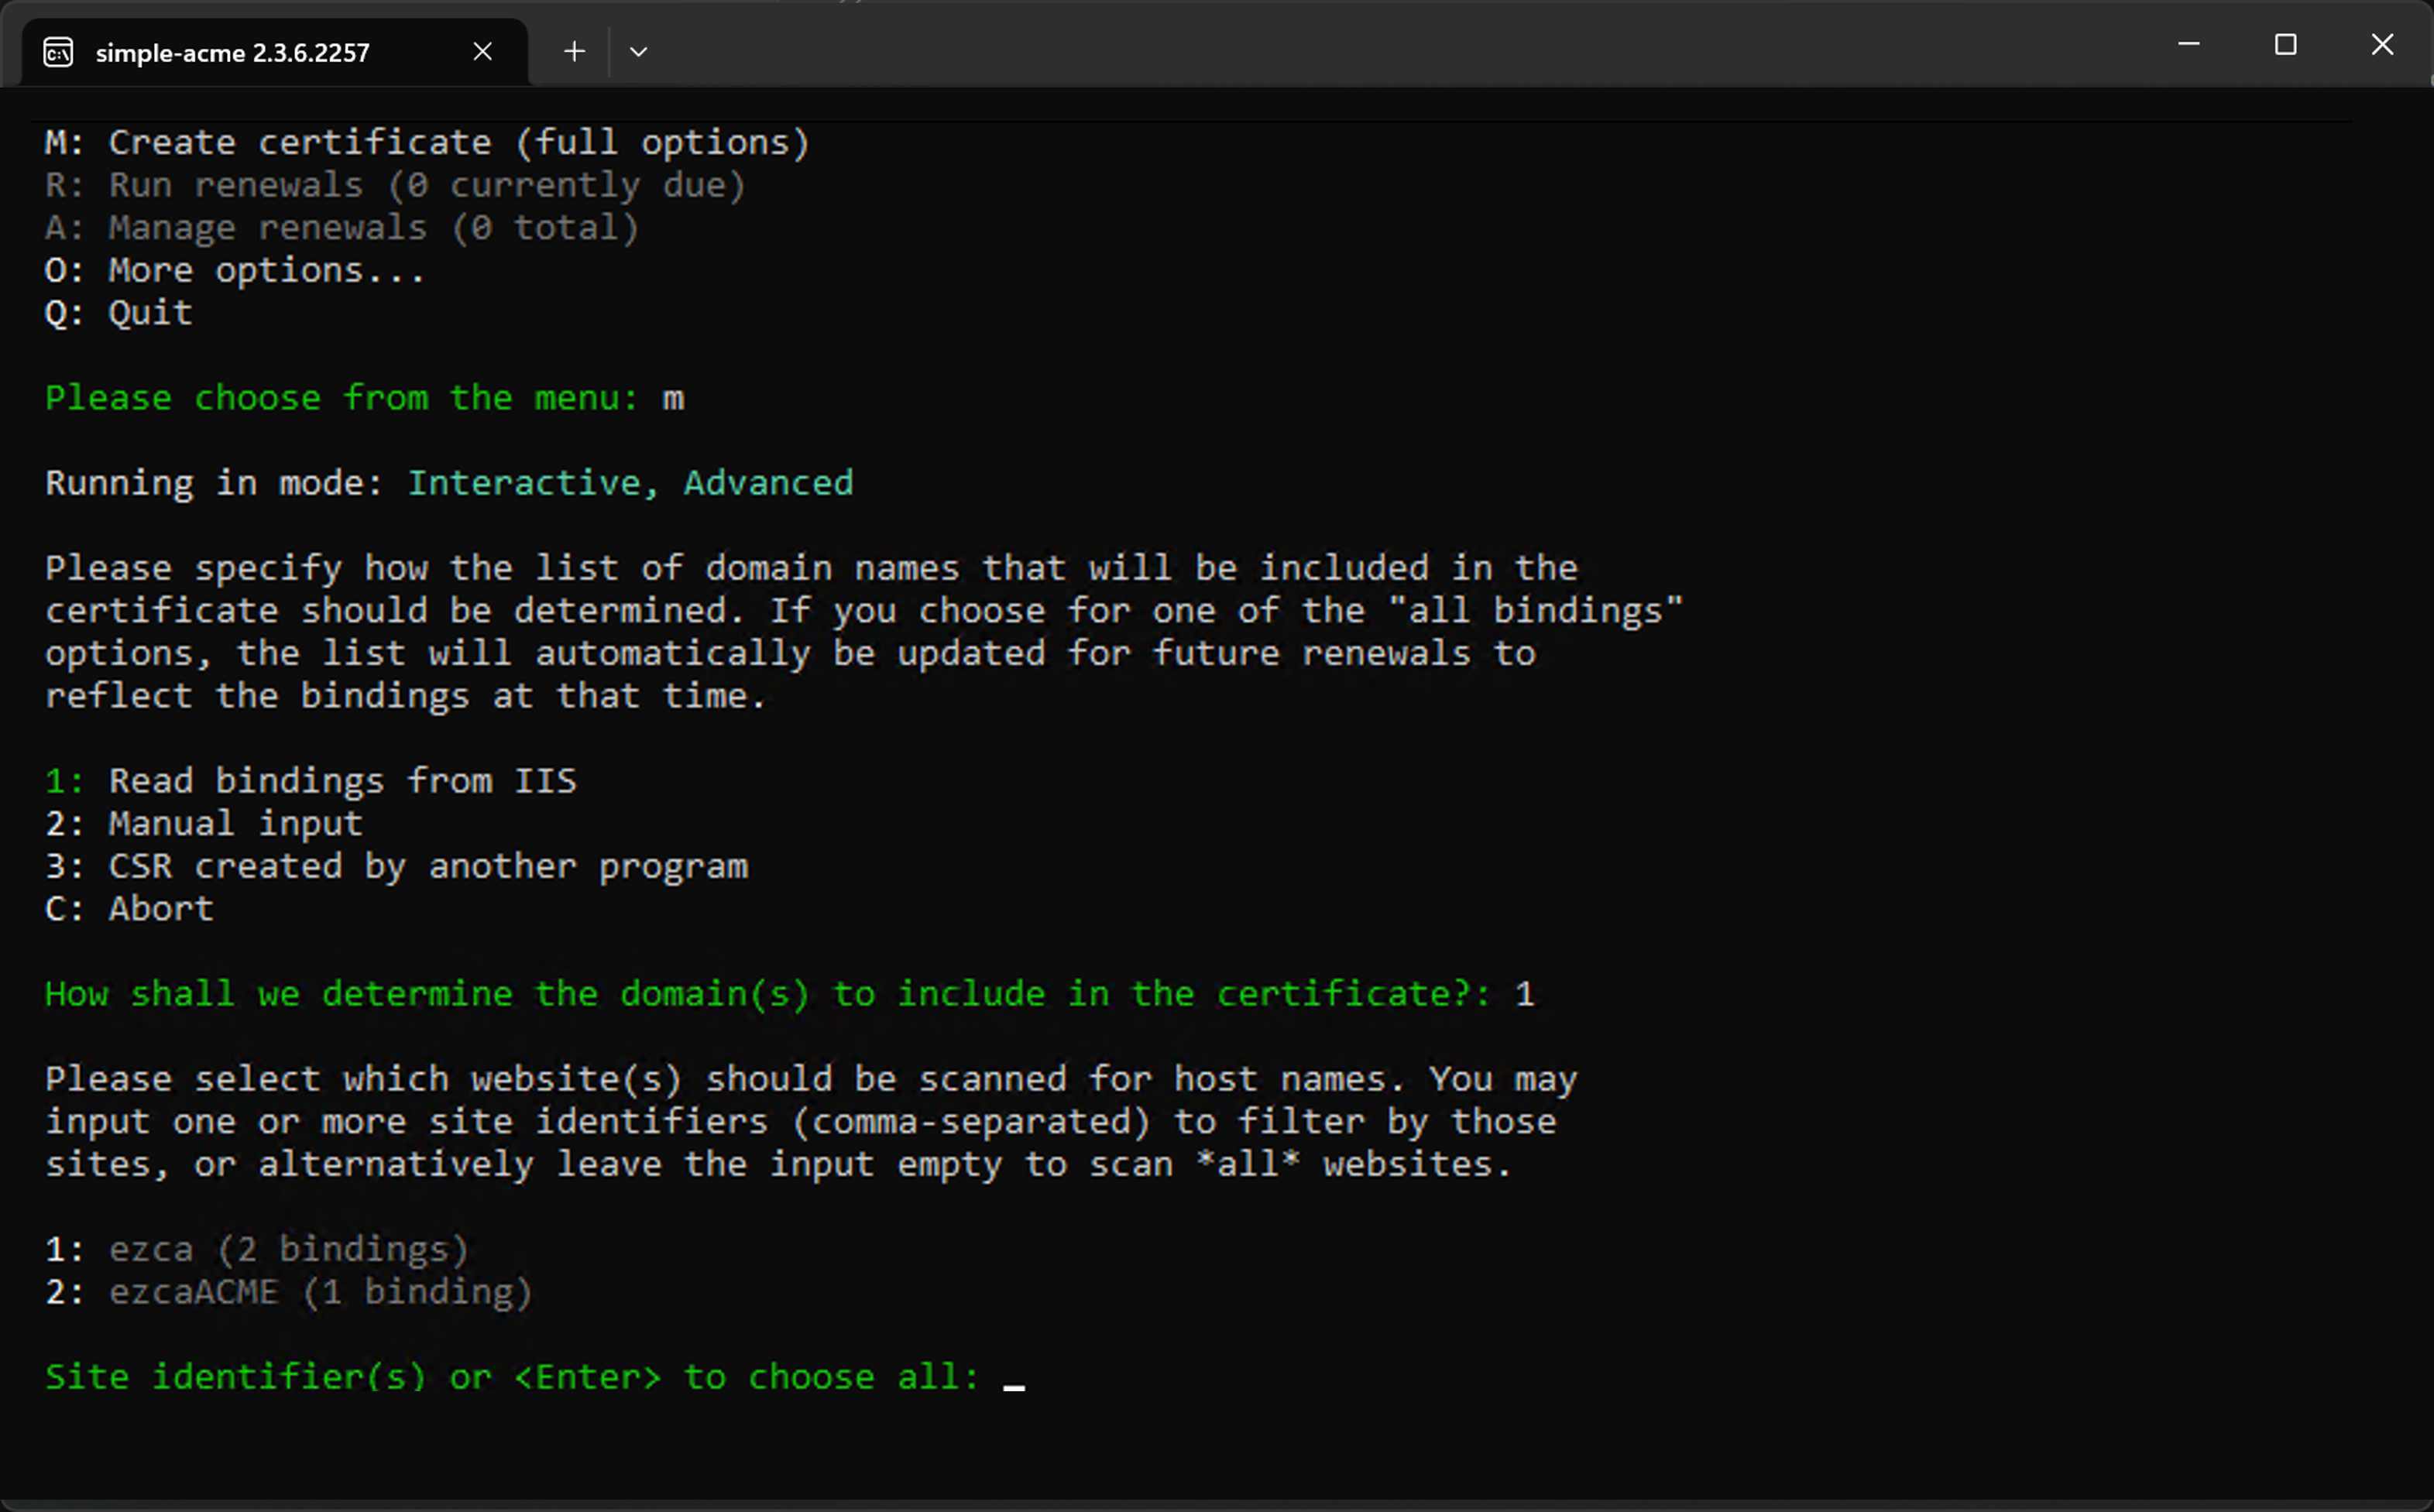
Enter M for manual issuance with full options.
-
Select 1 to read the binding from IIS. This will look at your IIS site bindings and will request a certificate containing the domains in your binding.
-
Select the website you want to create the certificate for.
-
Select which bindings you want to issue the certificate for.
-
Enter a Friendly name for the certificate.
-
Enter 2 for simple-acme to serve the correct challenge on the site.

-
Select the Key type you would like to use.
-
Select where to store the certificate. (We recommend the Windows Certificate Store)
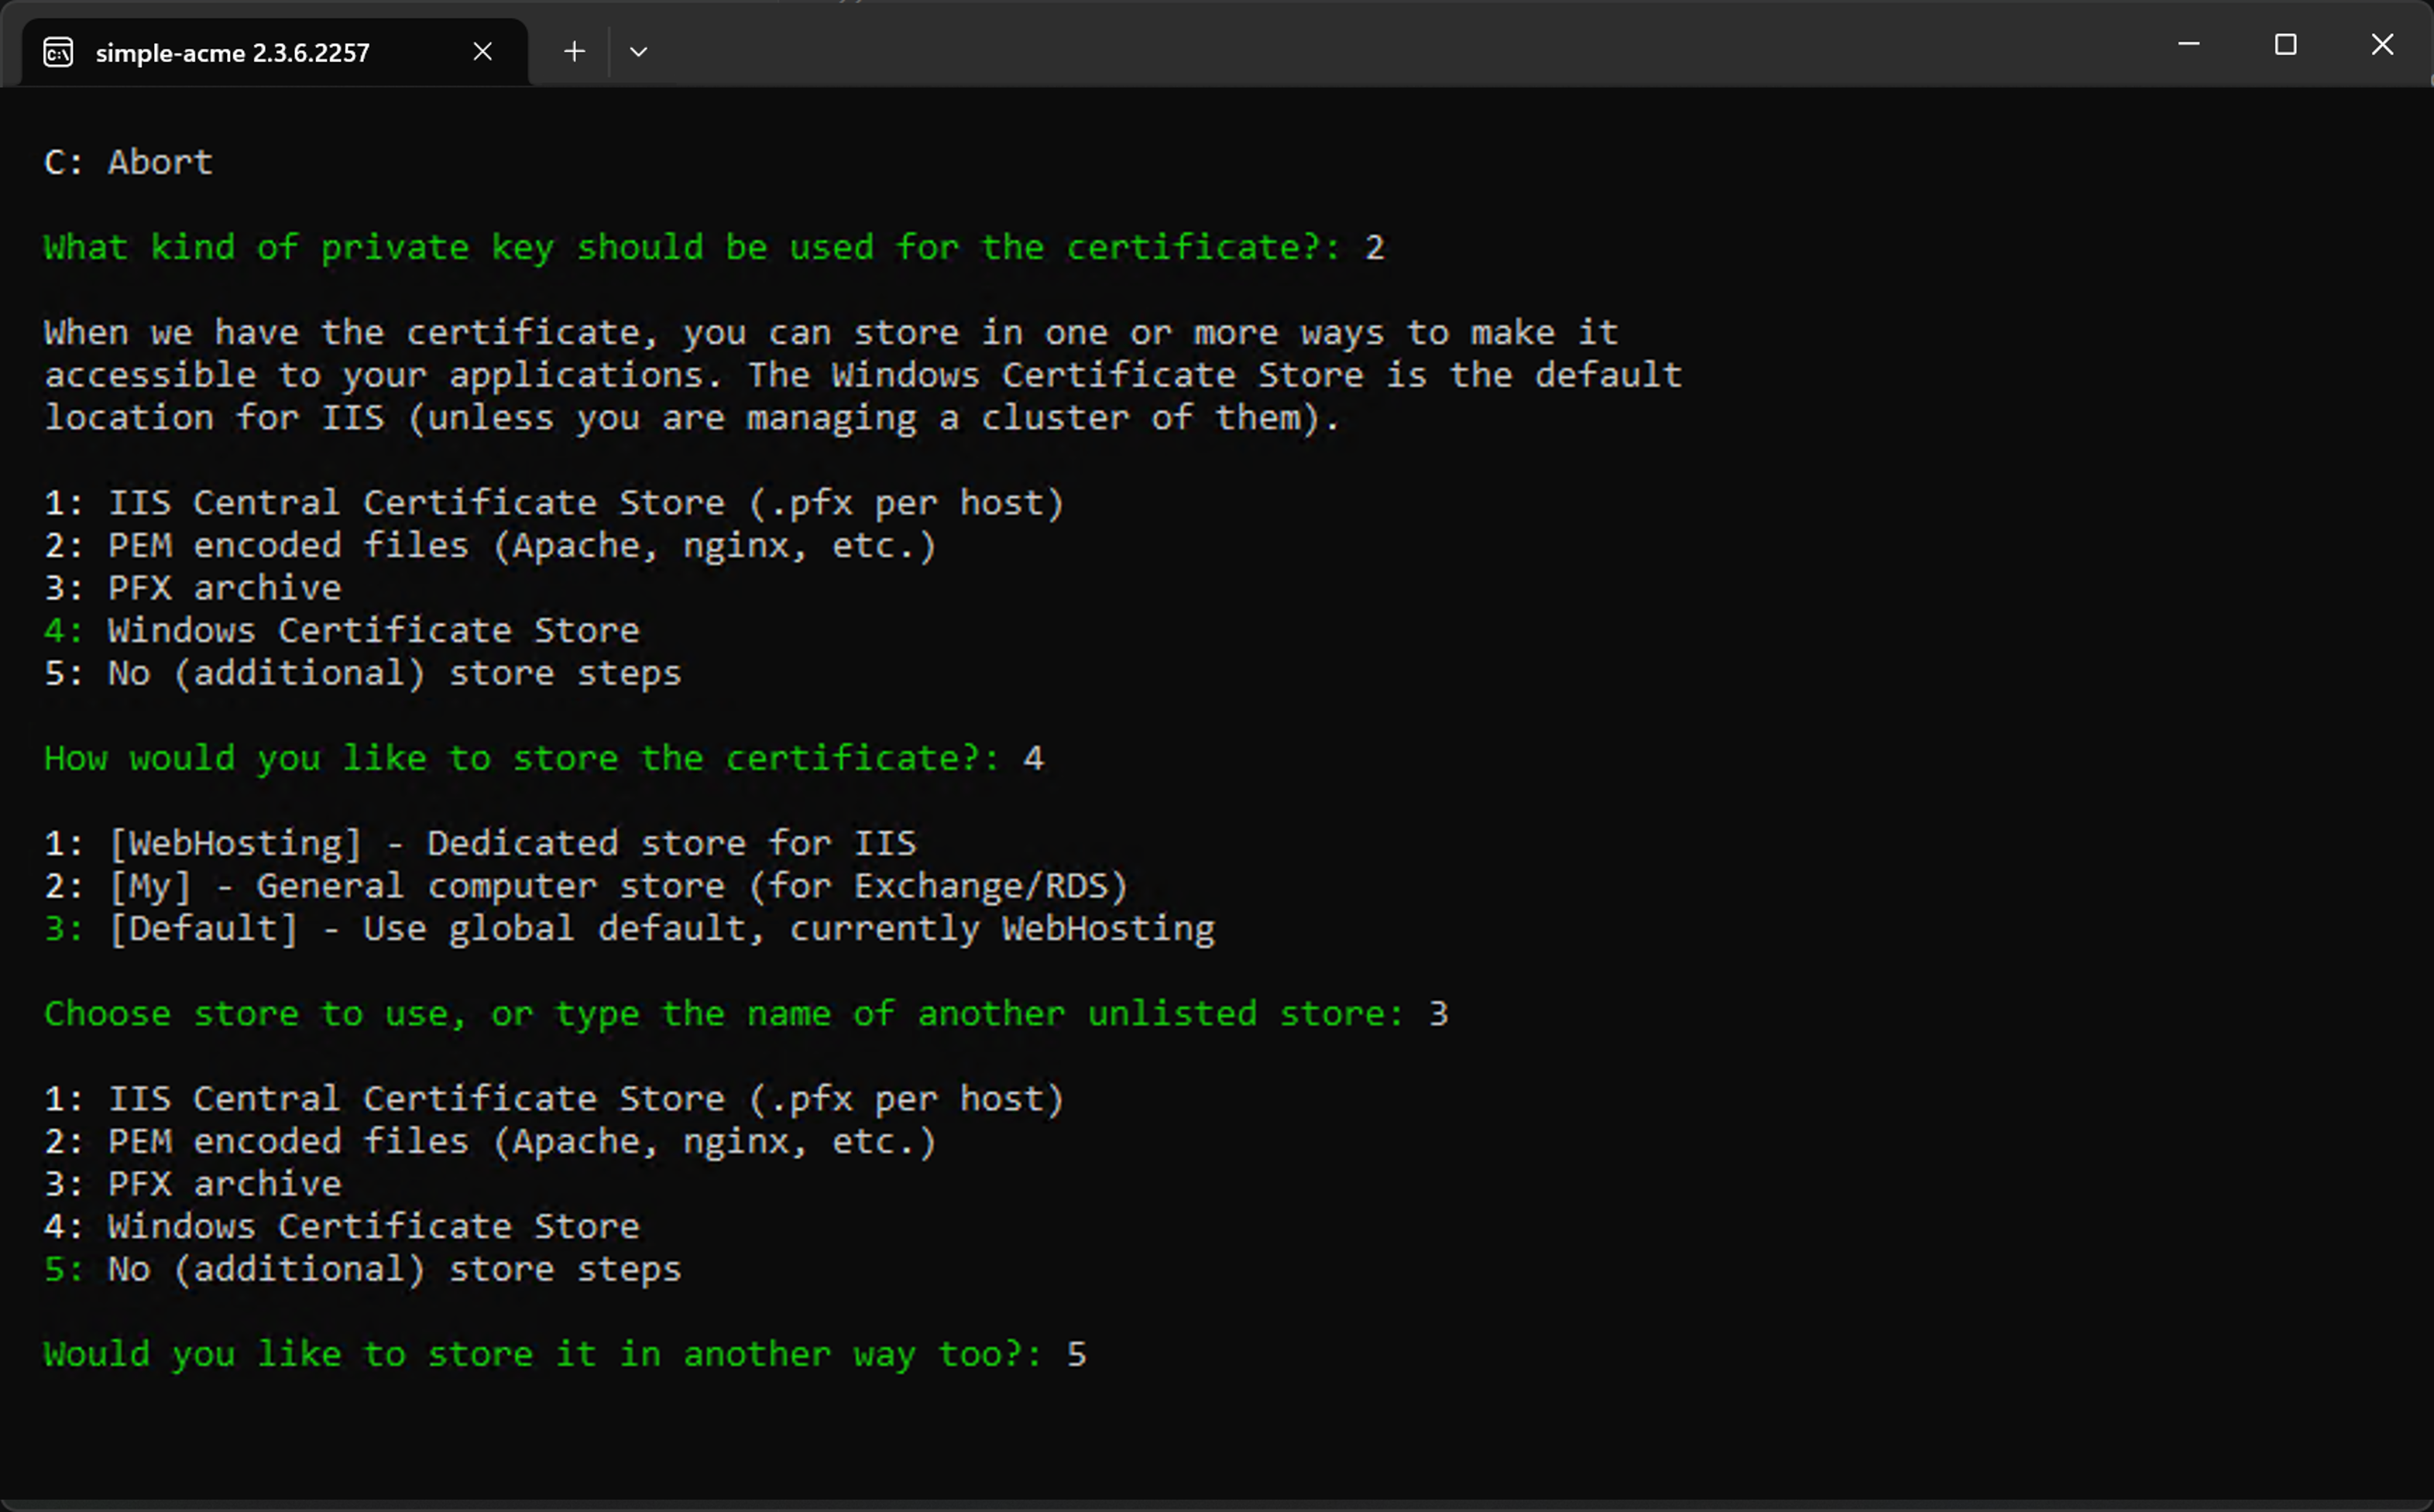
-
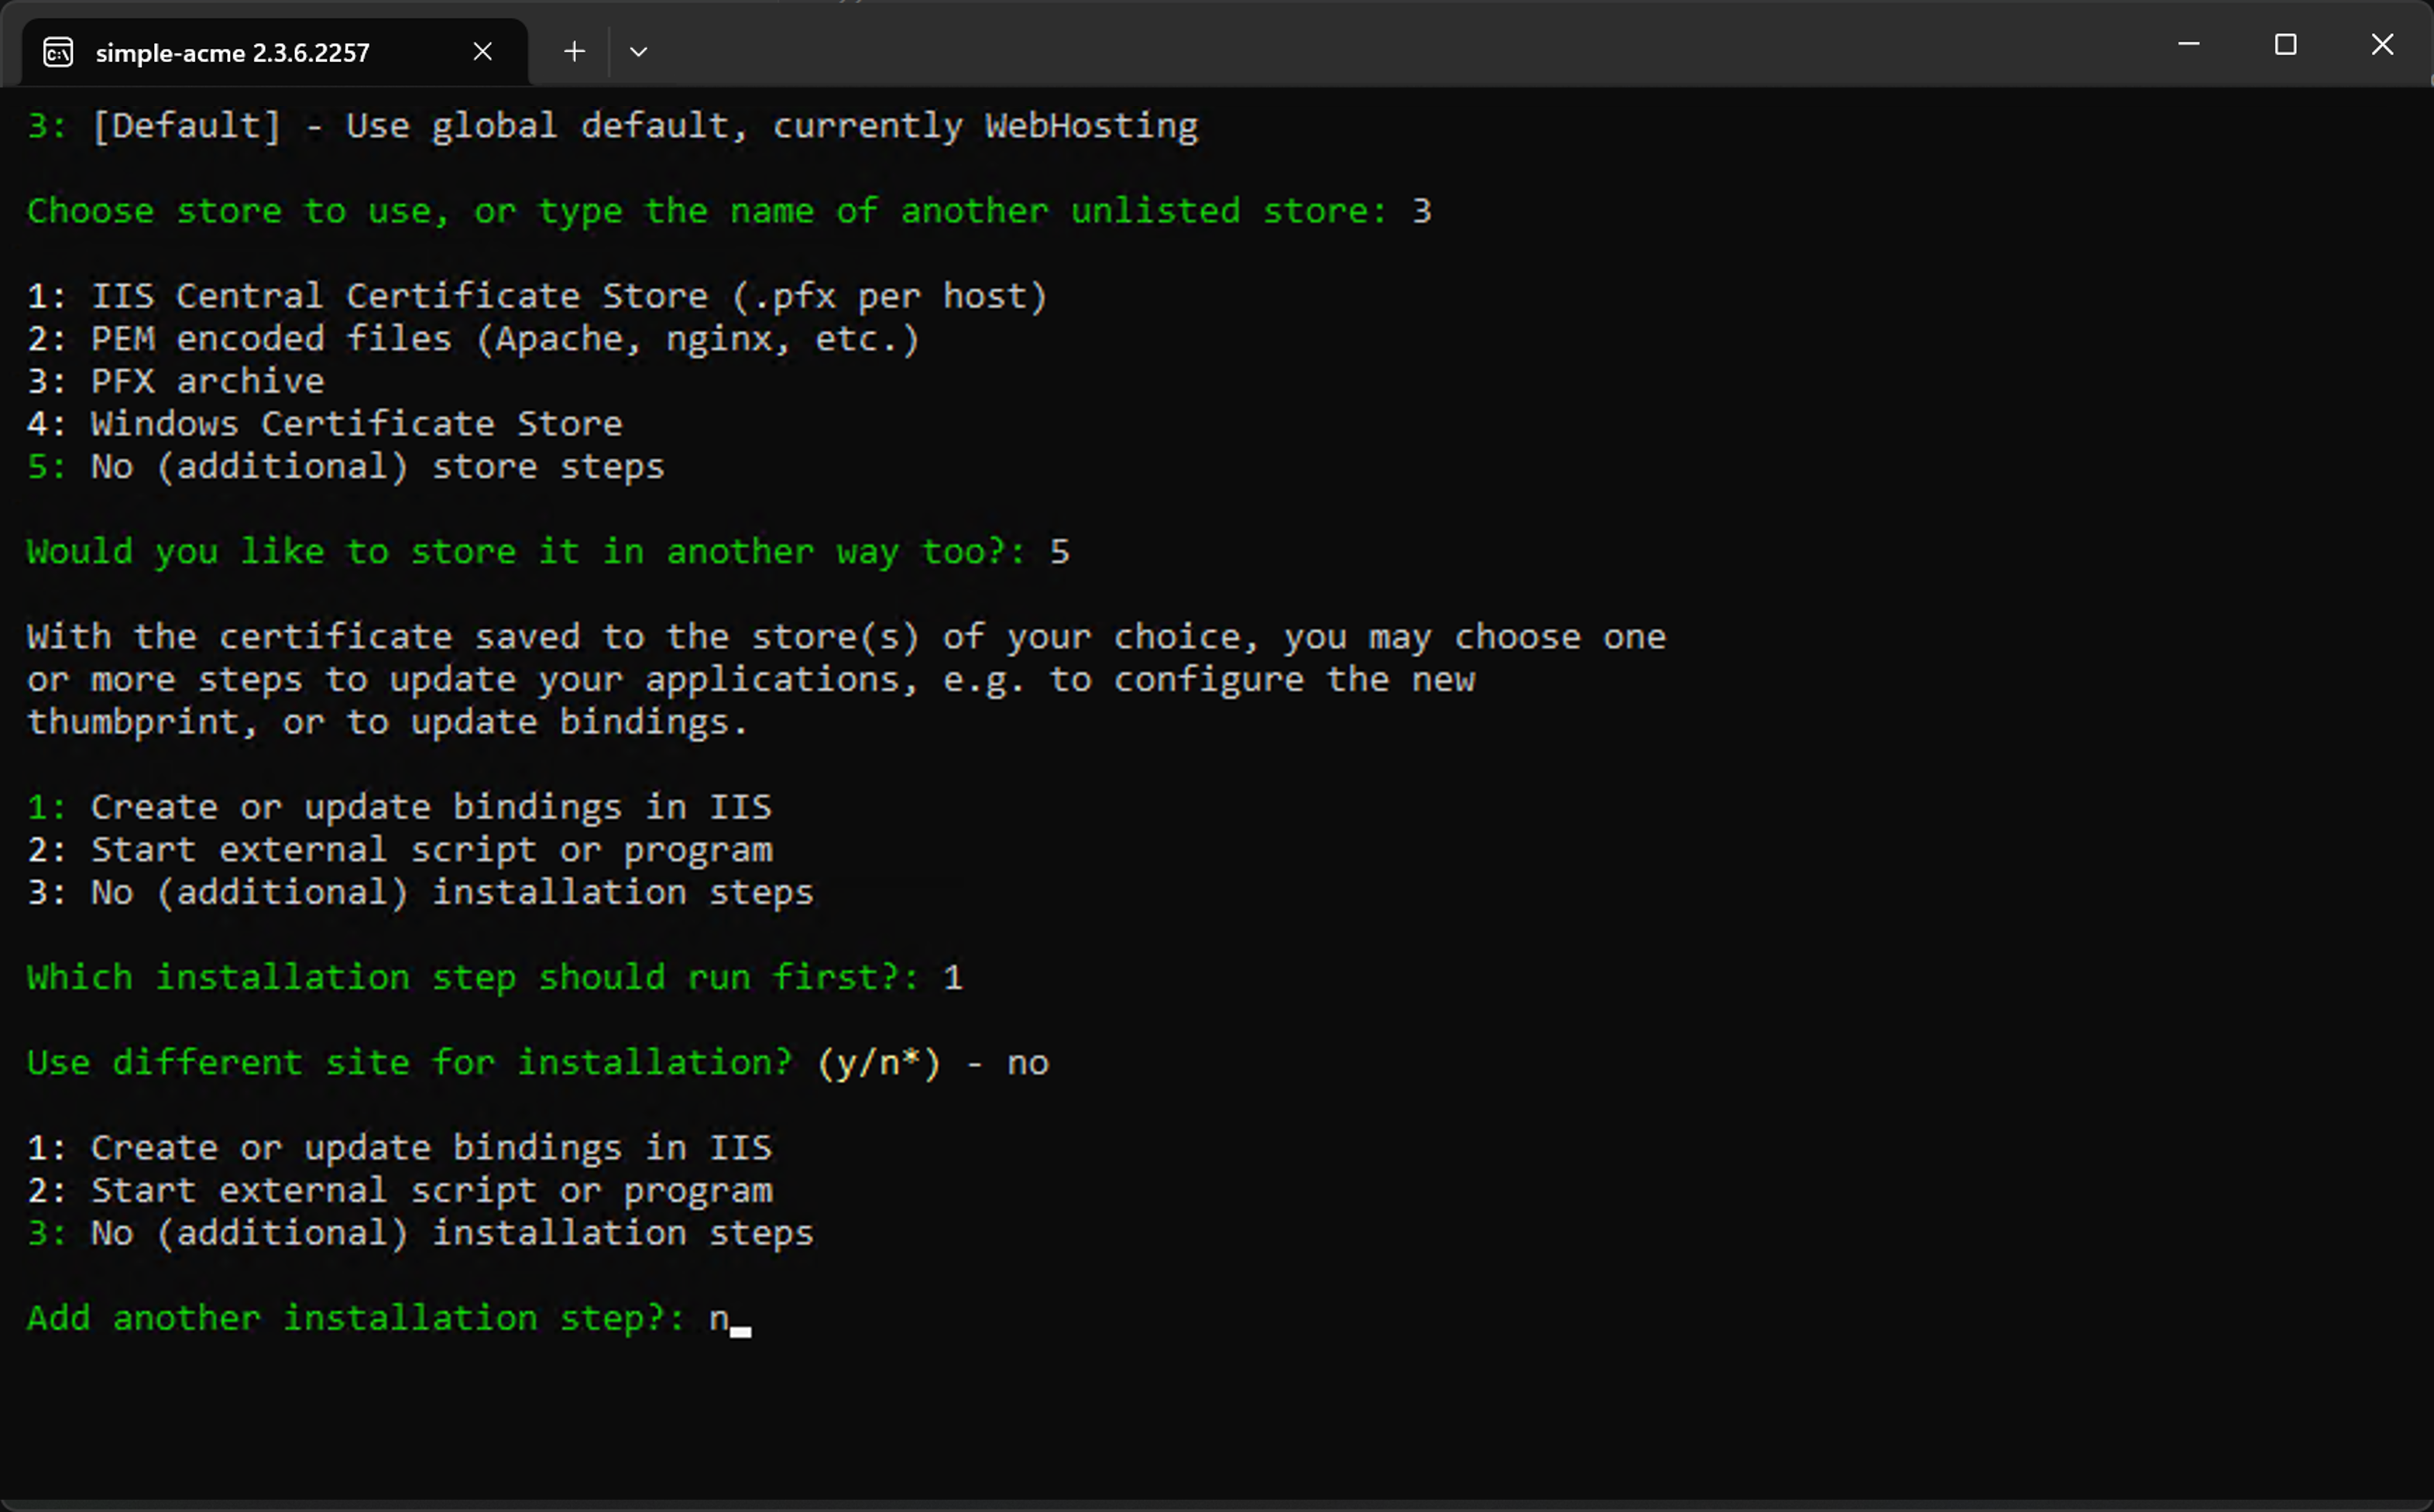
Select Update bindings to automatically change your binding to use the new certificate when the certificate is renewed.
-
Select the same site for installation.
-
Enter n for Add another installation step.
-
Read the terms and conditions and accept them to continue with the certificate request.
-
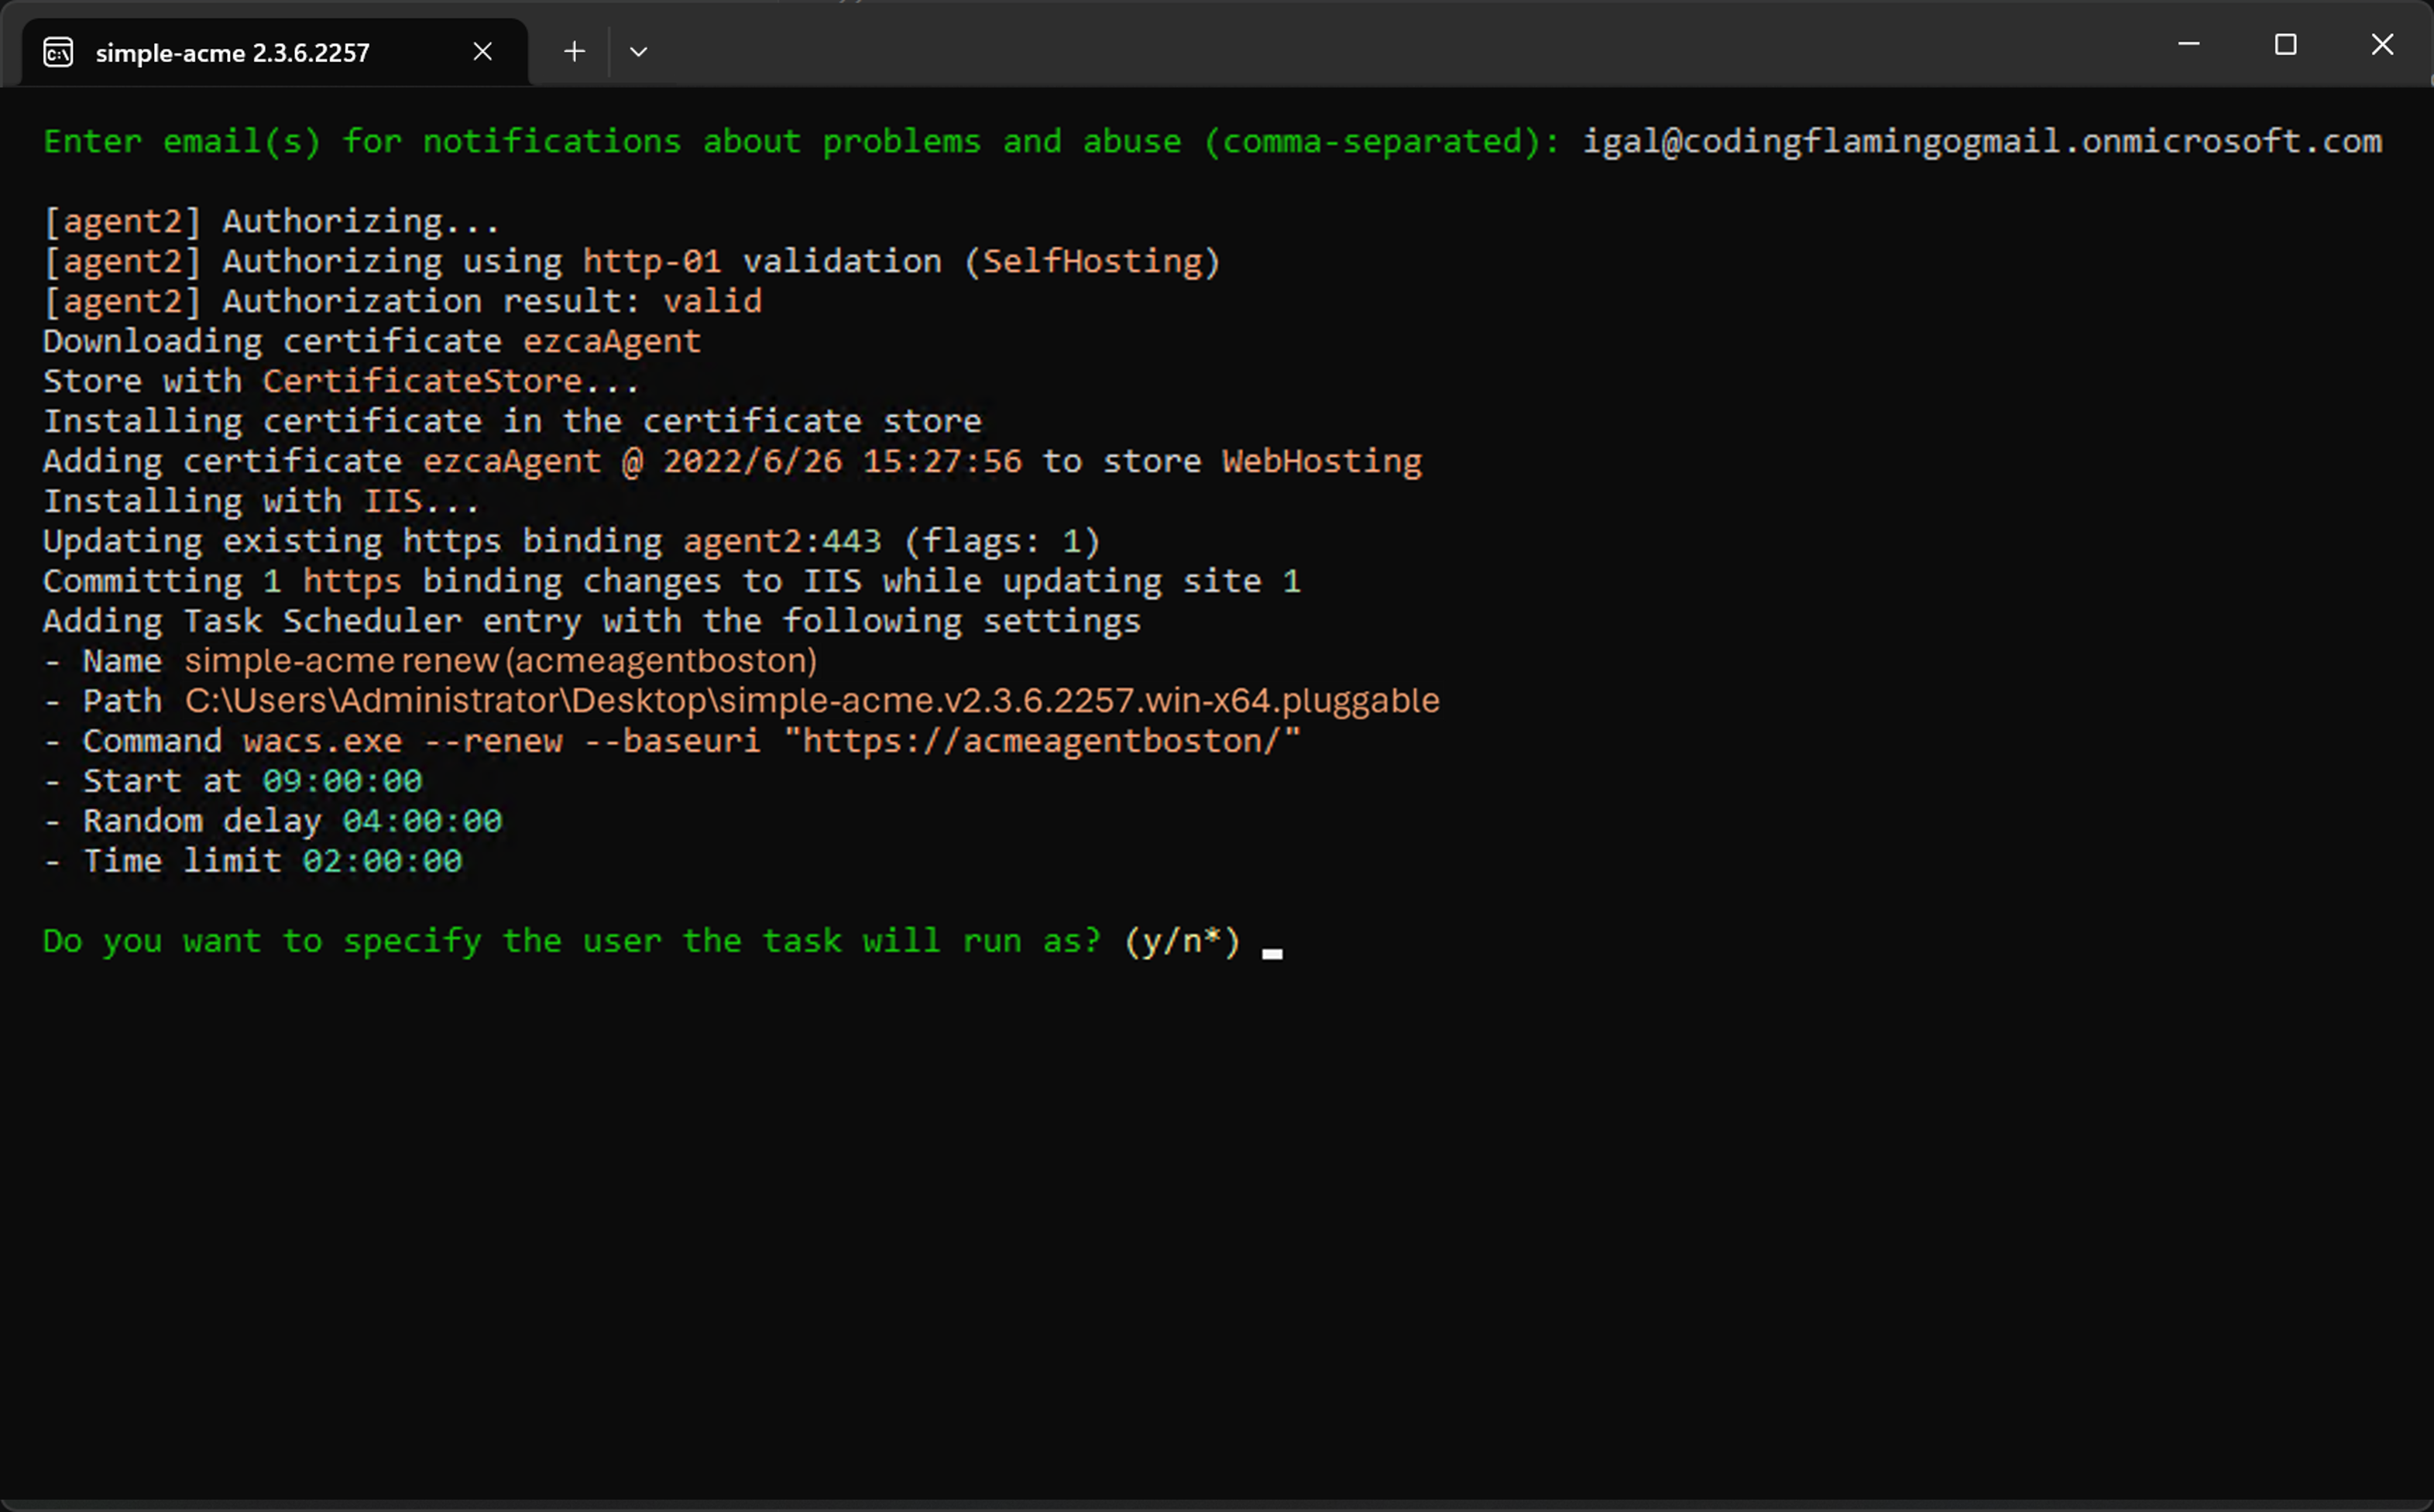
Enter the email(s) of the owners of this certificate/website.
Emails Must Exist in Entra IDThe provided emails must be part of your Entra ID tenant. If they cannot be verified with Entra ID, the request will fail.
-
Your certificate will now be issued, and a task to automatically update your certificate will be added to Task Scheduler.
-
Done! Your certificate will now be automatically renewed by simple-acme before it expires, ensuring your IIS site always has a valid SSL certificate from your EZCA ACME Agent. You can manage your scheduled tasks in Task Scheduler under the simple-acme folder to see when your certificates will be renewed.