How-To: Create EZRADIUS Cloud Radius as an Azure Resource
EZRADIUS is a cloud-based RADIUS service that provides secure access to your network. This page will walk you through how to create a cloud RADIUS service in Azure.
Free Trials
Due to Azure Marketplace limitations, we are unable to offer a free trial plan when creating EZRADIUS through the Azure Portal. To take advantage of our free trial, please create your EZRADIUS instance directly through our EZRADIUS Portal. After your trial period, you can migrate your policies to an Azure-based subscription.
Prerequisites
How to Create Cloud RADIUS - Video Tutorial
How To Create EZRADIUS as an Azure Resource
- Go to https://portal.azure.com/
- Click on “Create a resource”.
- Type “EZ RADIUS” in the search bar.
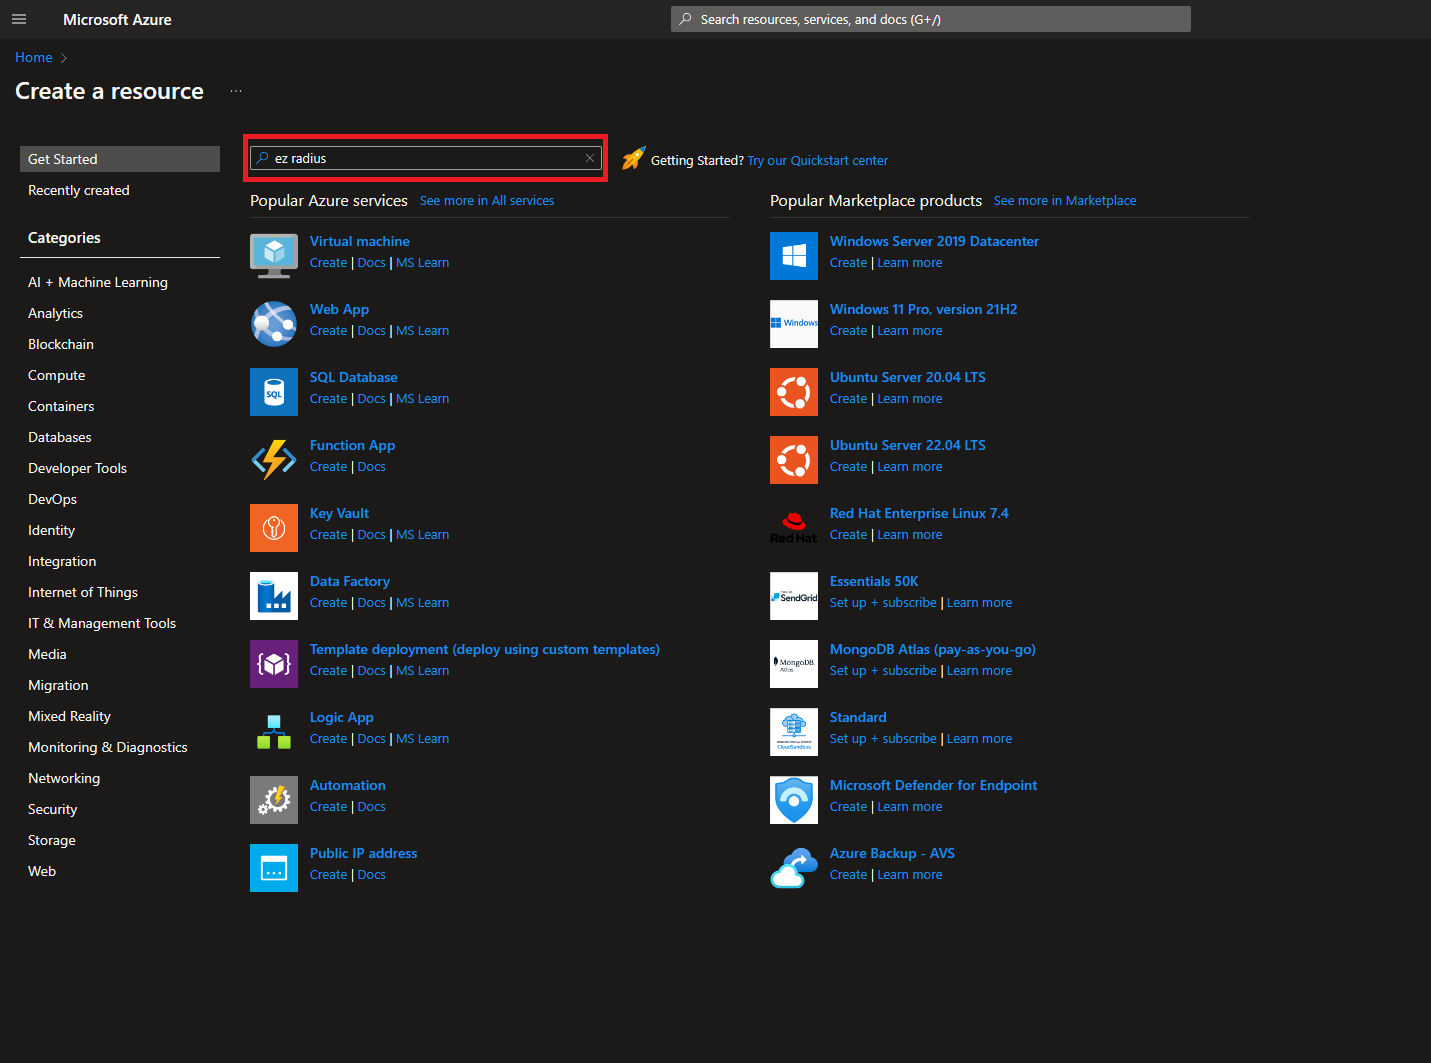
- Press enter.
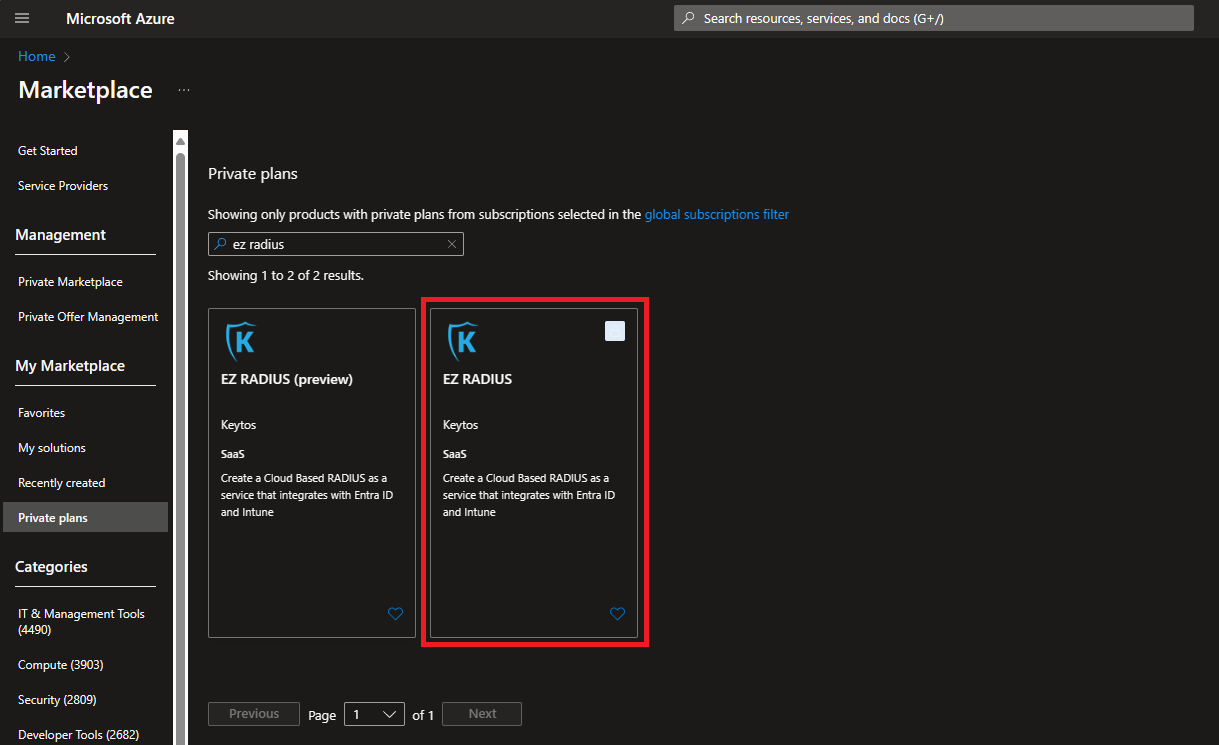
- Select the EZRADIUS offering
- Select the plan.
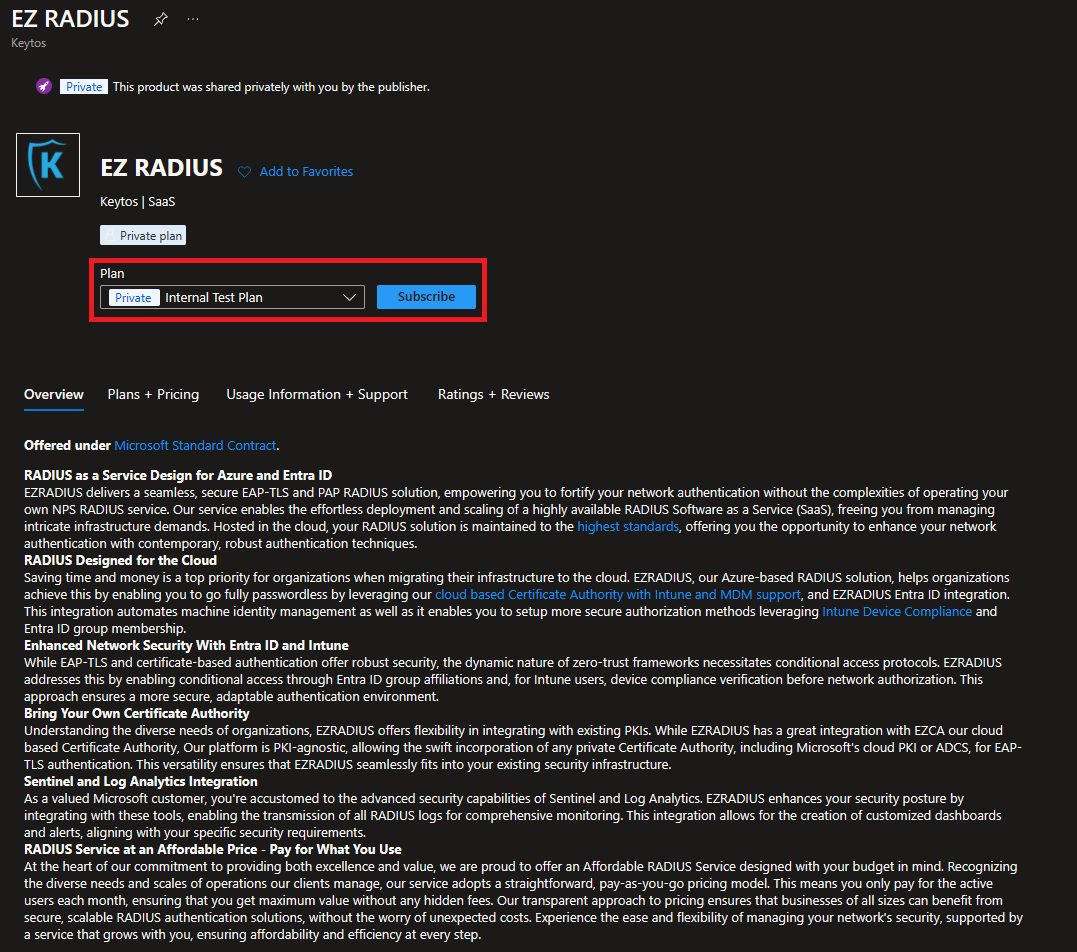
- Click the “Subscribe” button
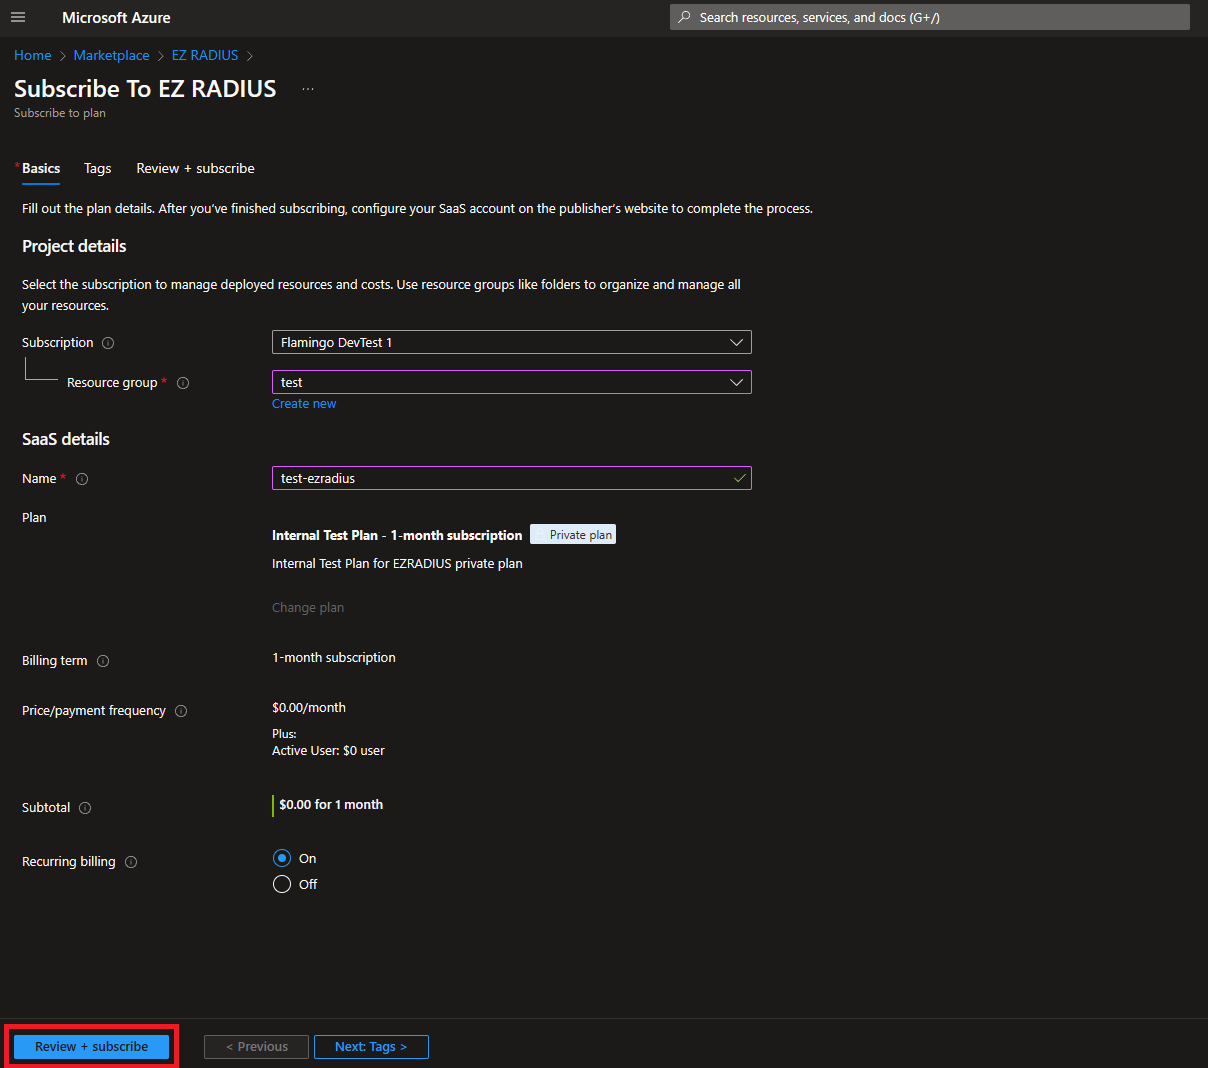
- Enter your subscription and resource group information.
- Enter the name of the subscription you want to use.
- Click the “Review + Subscribe” button
- Click the “Subscribe” button
- Once the subscription is complete, click the “Configure account now” button.
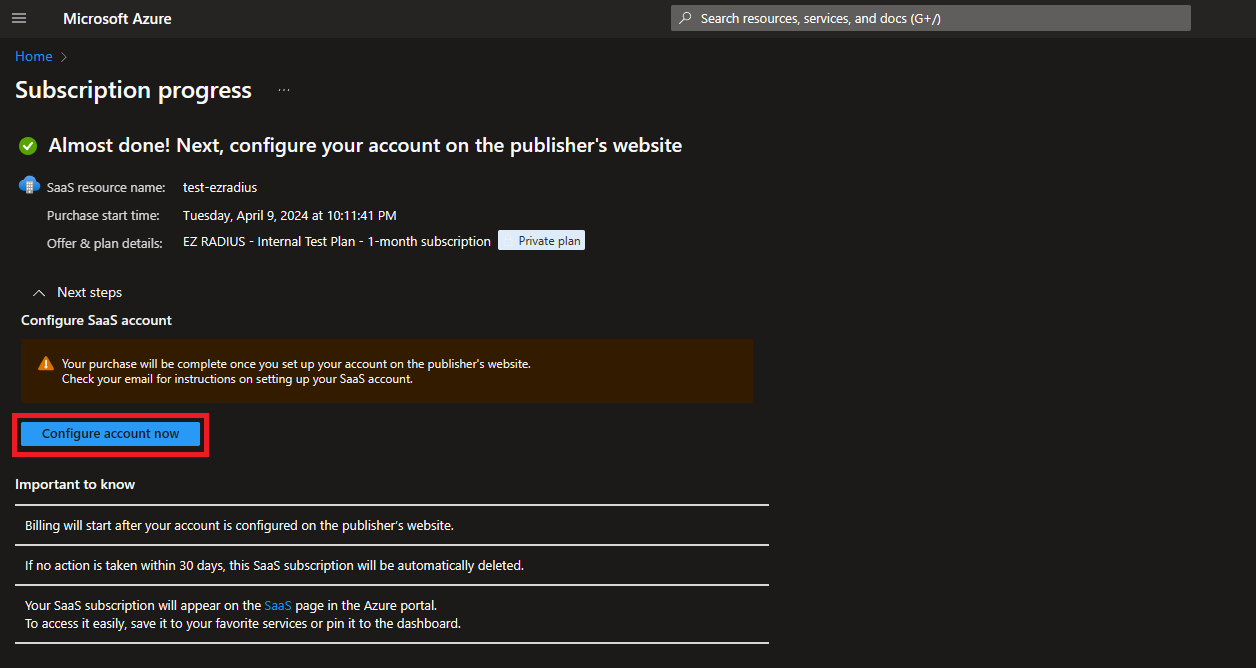
- This will redirect you to our portal (https://portal.ezradius.io/). Sign in with your same Microsoft account.
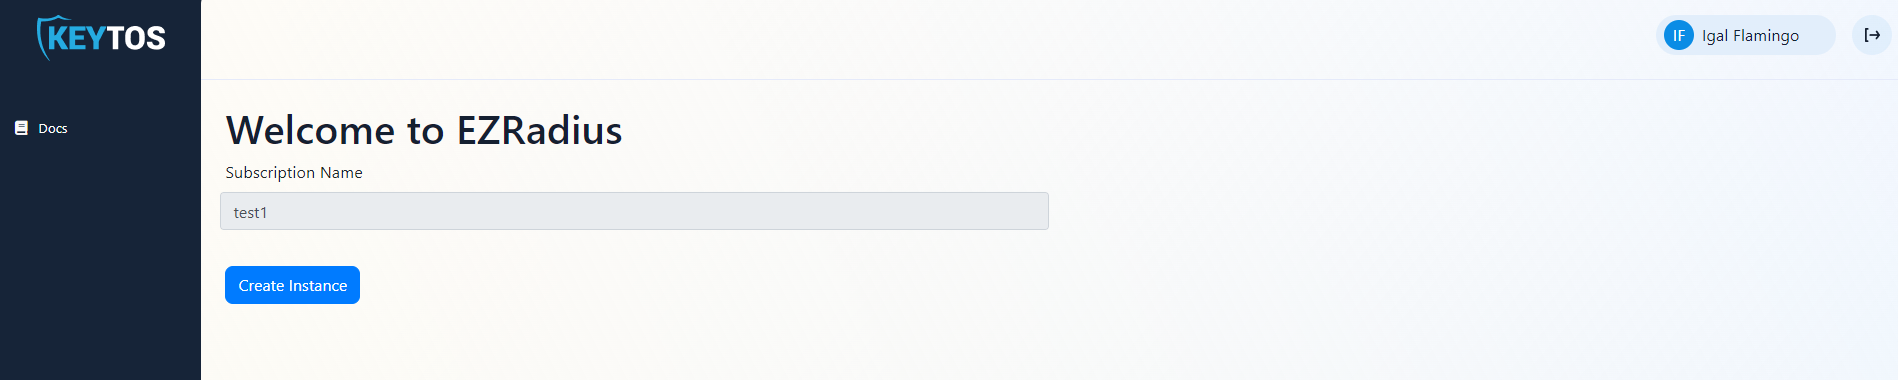
- If you created an dedicated plan, select the deployment region and subdomain.
- Click the “Create Instance” button. This will activate your Azure subscription and assign your account to an EZRADIUS instance.
- Once your instance is ready, the instance URL will be displayed, it is recommended you bookmark this instance so you can enter it directly.

- You can now access your EZRADIUS instance by clicking on the instance URL.
- Once you have created your instance, you can now connect to your SIEM. Learn how to connect to your SIEM