How-To: Issue Entra CBA Smart Cards with Azure PKI
Get started with passwordless authentication and start creating smart cards in minutes by connecting EZCMS to EZCA the first Azure Certificate Authority
Once your organization wide settings are set, we have to register your Entra ID domain(s). This might be a bit confusing if you are using this in the commercial space, but since EZCMS was designed to meet the highest government and security standards, you have to register each domain individually. This allows you to manage multiple domains within your organization all within the same tool. In this document we will go over how to register a new domain, set the domain requirements and connect a CA.
Navigate to your EZCMS instance and select “Domain Settings”
You must be an administrator for this option to appear.
</div>

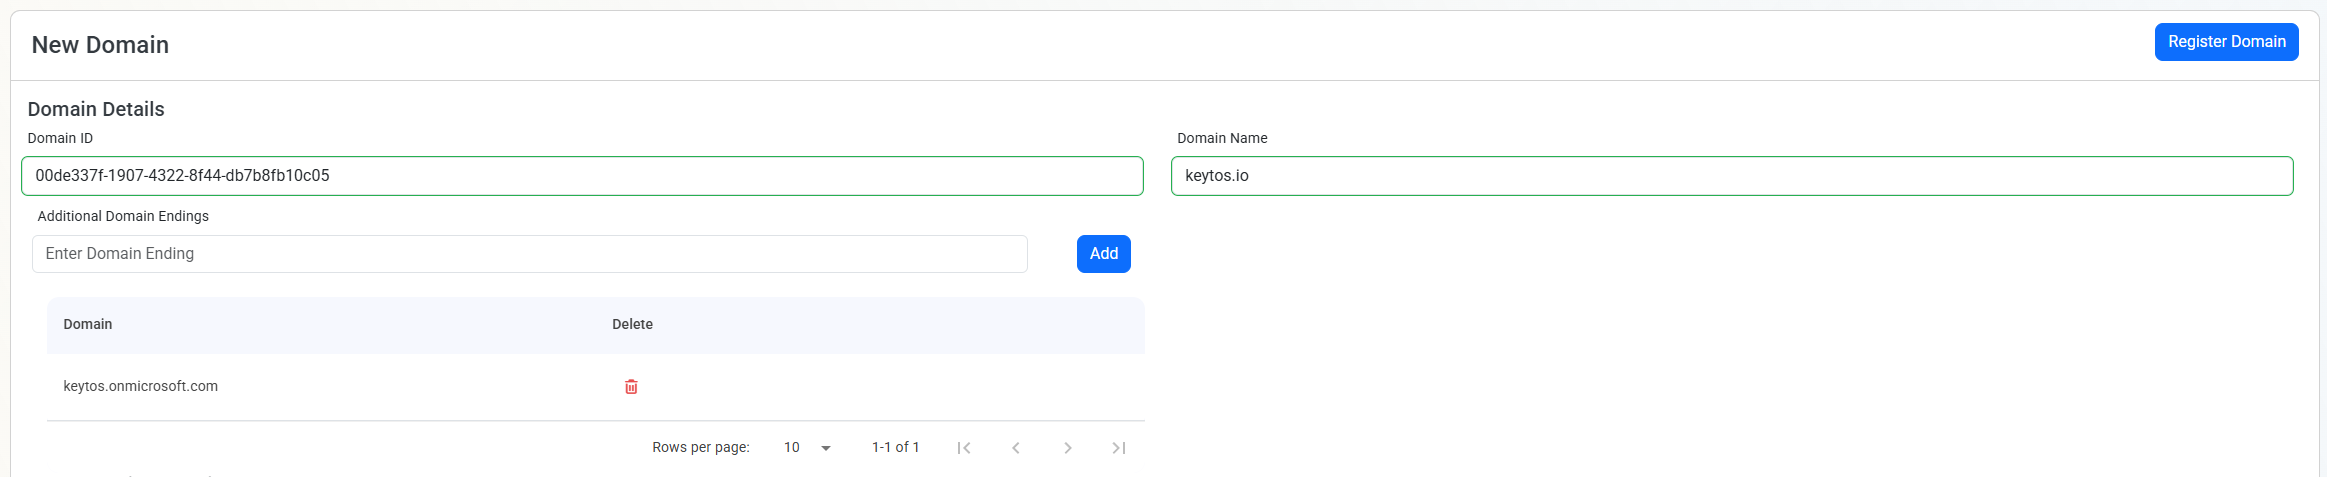
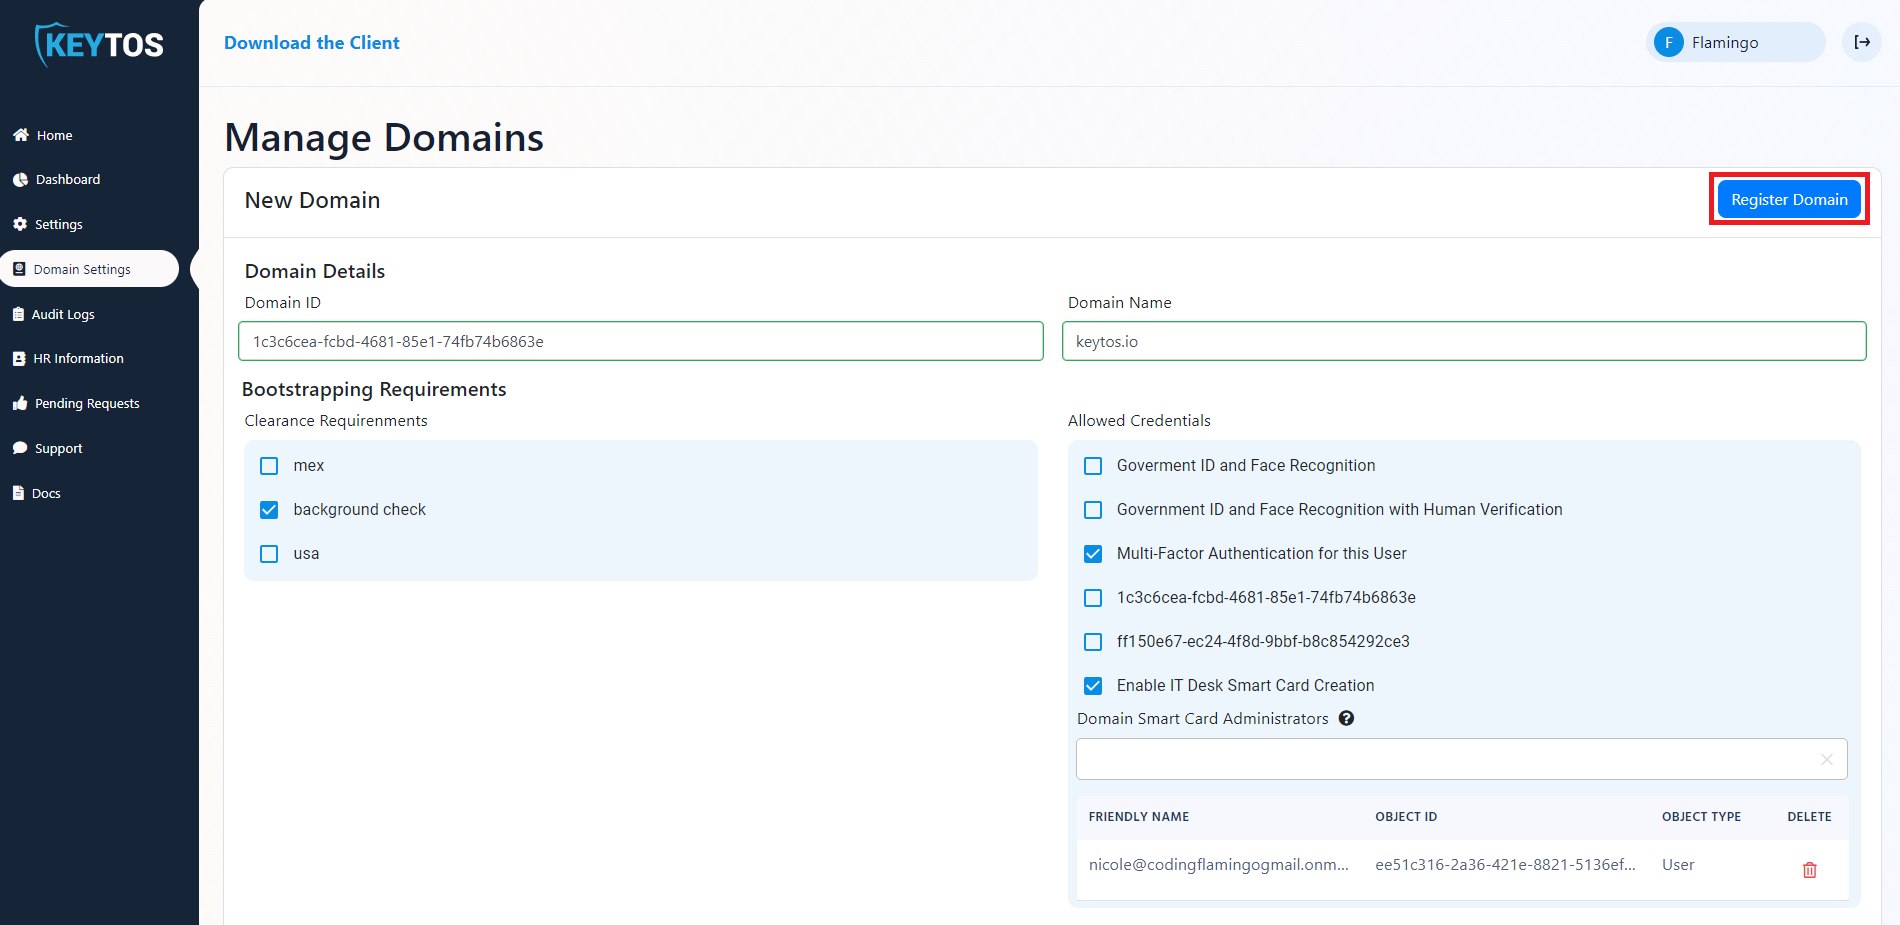
Enter your domain ID (Azure Tenant ID)
Enter domain name.
Domain name is all the text after the @, for example for jake@keytos.io the domain name is keytos.io
If you have alternate domains you can add them in the “Additional domain settings” section, this is useful for organizations that have multiple verified domains in their tenant or have different UPN suffixes.
Now your domain settings should look something like this (if you don’t have alternate domains you can ignore the additional domain settings section):
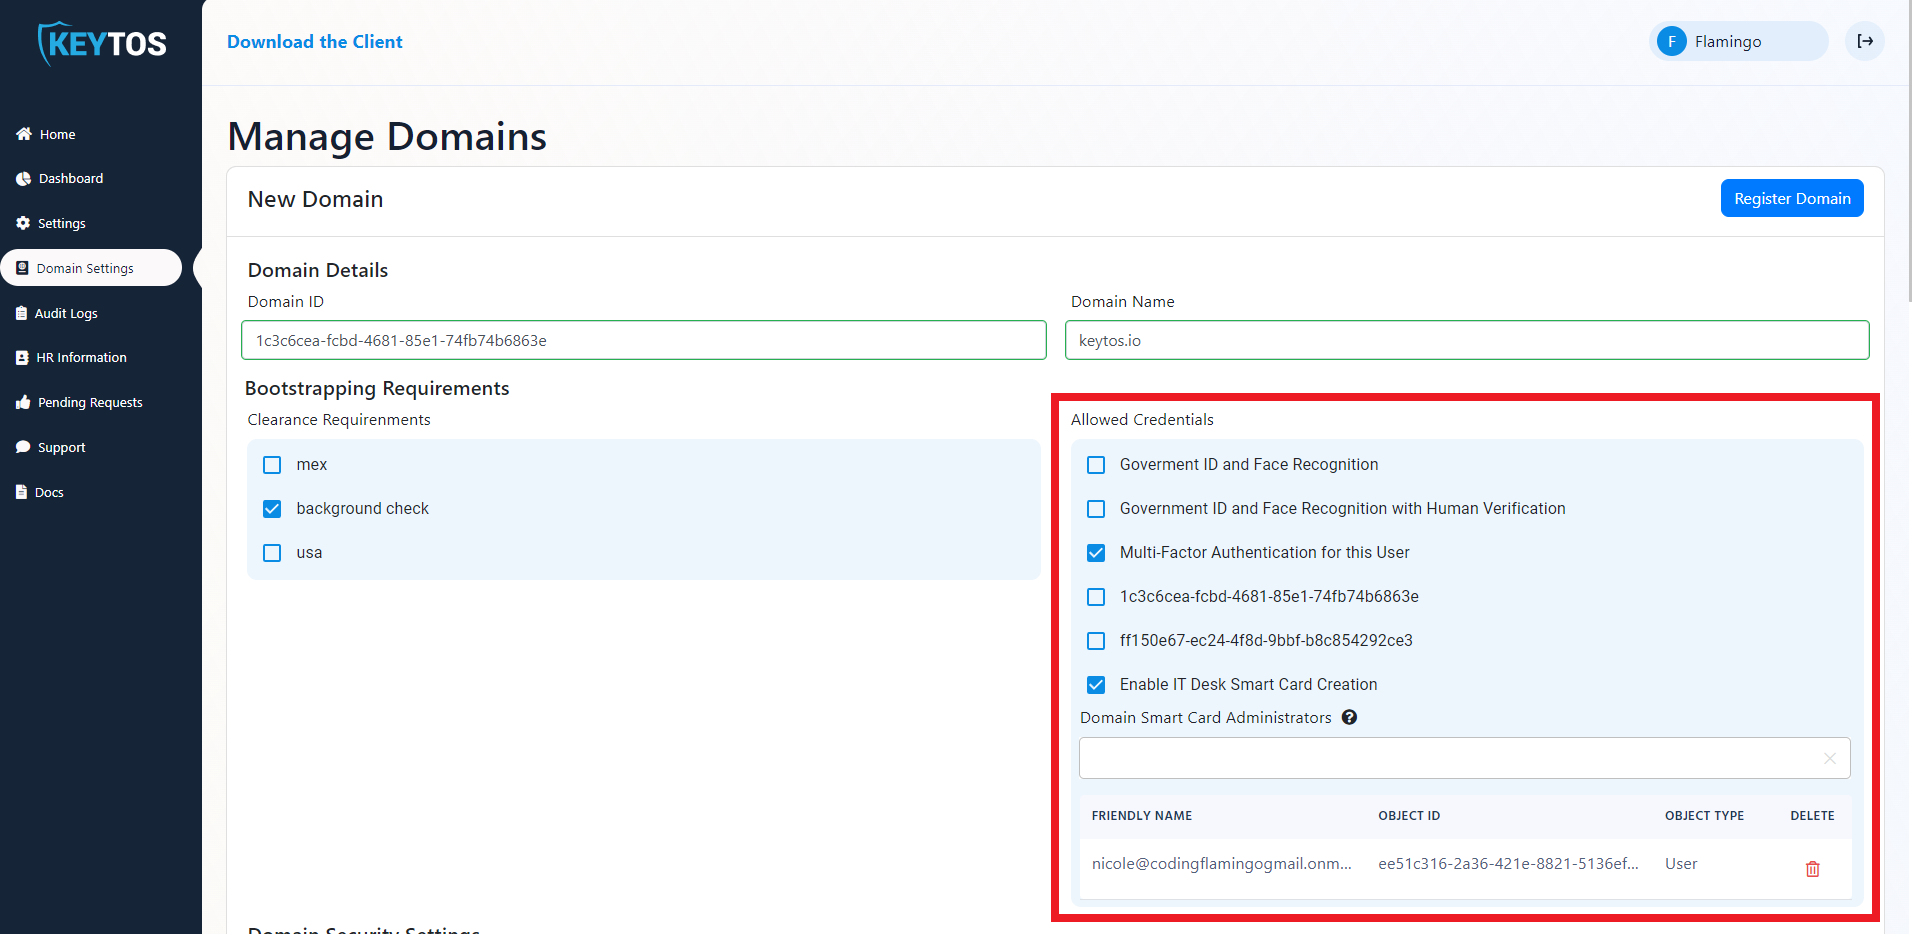
If you have clearances set up in your HR database, you can also select the clearance requirements for this domain in the “Clearance Requirements” Section. This will make sure that only users that meet the clearance requirements will be able to see this domain when they go to onboard.
Clearances are set by you in the HR database, this can be from certain background checks, to actual government clearances. Anyone that doesn’t meet the clearance requirements will not be able to see the domain.
The “Allowed Bootstrapping Credentials” section enables you to select which credential types are allowed to create a smart card for this domain. Depending on your plan you will have some of the following options:
For multi-tenant organizations the aliases of a secondary domain might not match the aliases of the main domain, to solve this issue EZCMS supports user mapping. To enable this select the “Use custom UPNs for this domain option.

Select if you are doing both FIDO2 and SmartCard authentication or just one of them in the “Allowed Domain Credentials to Create” section. Watch this video to learn about different authentication methods and help decide which one is best for you.
We recommend enabling both FIDO2 and SmartCard authentication, giving your users the ability to use the most convenient authentication method when using their hardware token, since in some cases it might not be possible to use a FIDO2 key or a SmartCard and this way they always have a hardware protected credential to use.
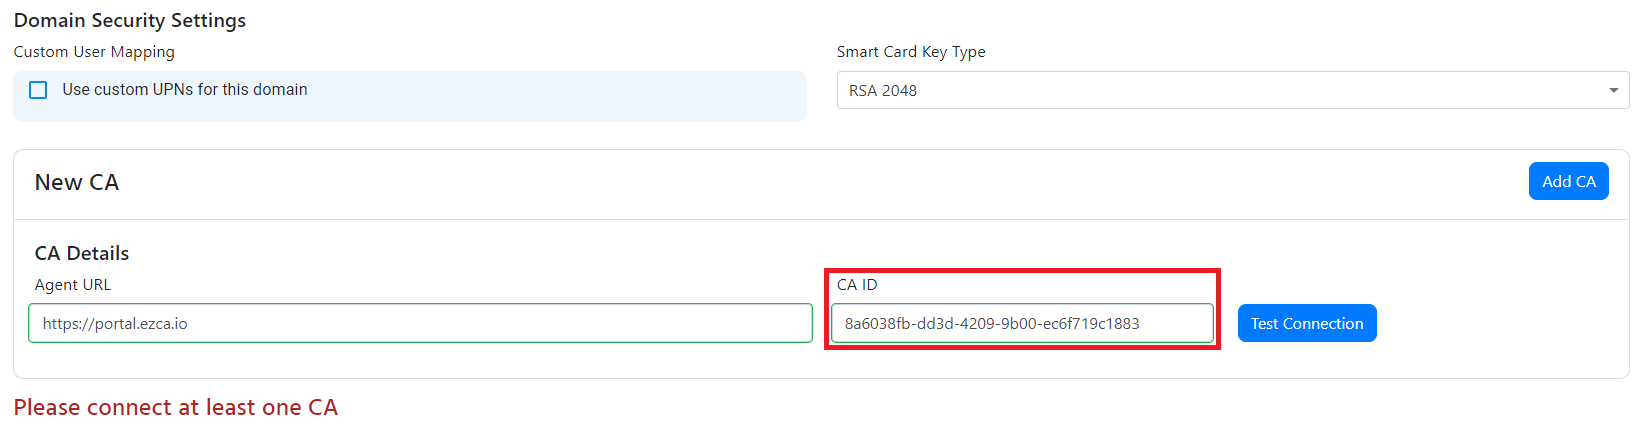
If you have enabled Smartcard Authentication, a “Smartcard Settings” section will appear. In this section, you can select the cryptographic key type for the smart cards created for this domain as well as the smart card slot. If you don’t have a preference, leave the default settings for this section, since these are the most common settings that work with most hardware tokens.
After the cryptographic settings of the card, you will see a checkbox to enable high affinity in Entra ID. We have a blog post that explains if you should enable high affinity for your smart cards if you are using high affinity in Entra CBA, this checkbox will save the certificate in the users object saving you from having to manually save each user’s smart card certificate in their user object in Entra ID.

If you are using smart cards for authentication, you can also use them for encryption. This is especially useful for MacOS users since if they are using their smart card for authentication MacOS cannot use the password to encrypt the keychain, instead Apple Requires to have a certificate in 9d in addition to the 9a certificate used for authentication. To achieve this, you will have to select the option to have an additional certificate in a different slot.
This feature is currently only available for YubiKey 5 Series and FIPS Versions and planned for Authentrend Keys, if you are using a different hardware token and want to have multiple certificates for authentication and encryption, this is not supported at the moment.

Many organizations have users with multiple identities, for example a user might have their regular account and an administrator account that is used for privileged access, or a breakglass account. In this case, we can add what we call “Alternative” Accounts to the same tenant, these are accounts usually have a prefix such as “alt-” or “admin-” to differentiate them from the regular accounts. Instead of having to create another user in EZCMS and have to have the users manually manage both of their credentials, you can create an alternative account in EZCMS. This will even allow the user to have both accounts on the same YubiKey. To enable this feature you just have to fill out the “Domain Alternative Accounts” Section of the domain (You can have as many of these as you need).

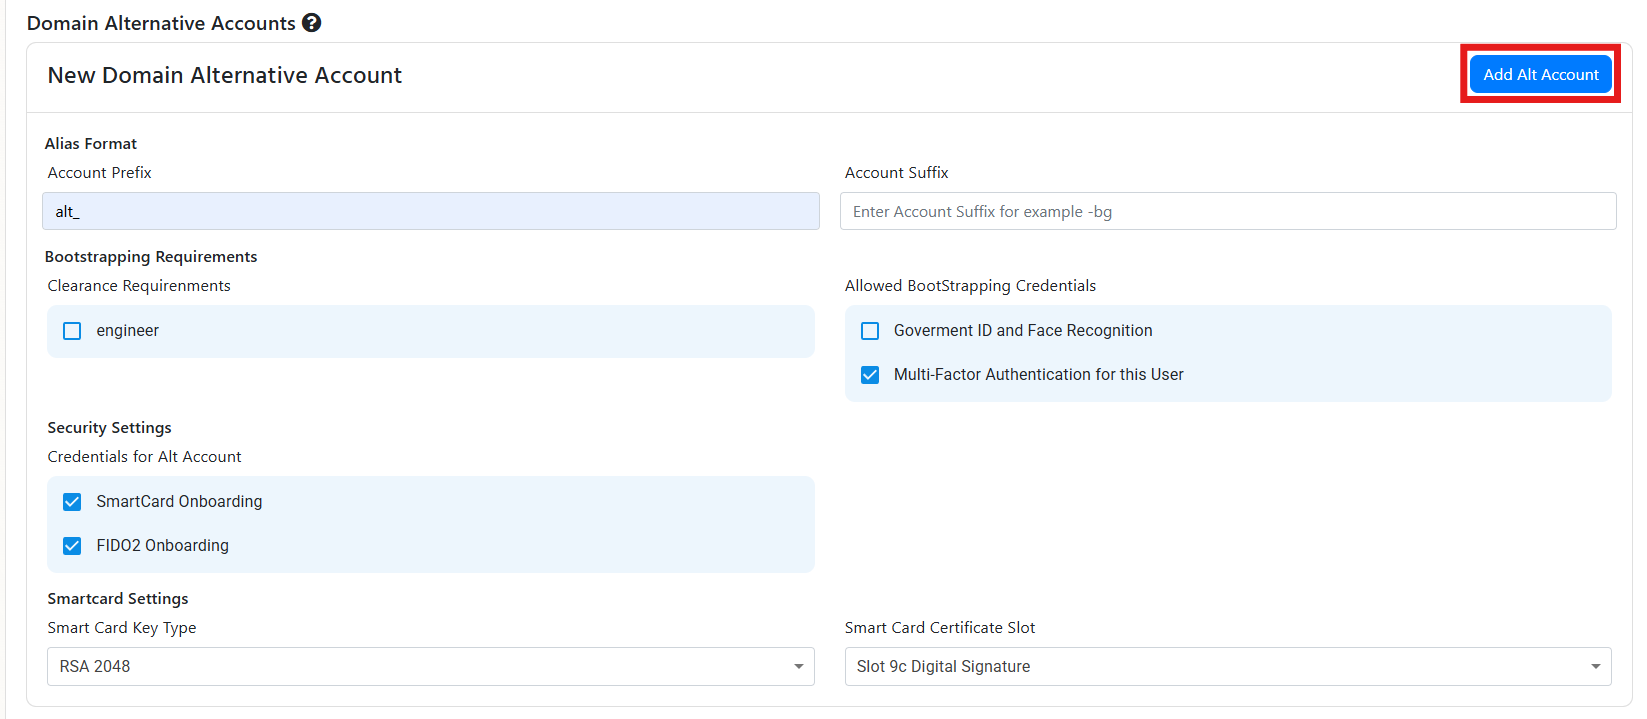 Now when a user has an account that matches the prefix or suffix you entered, they will be able to use the same hardware token to authenticate to both accounts.

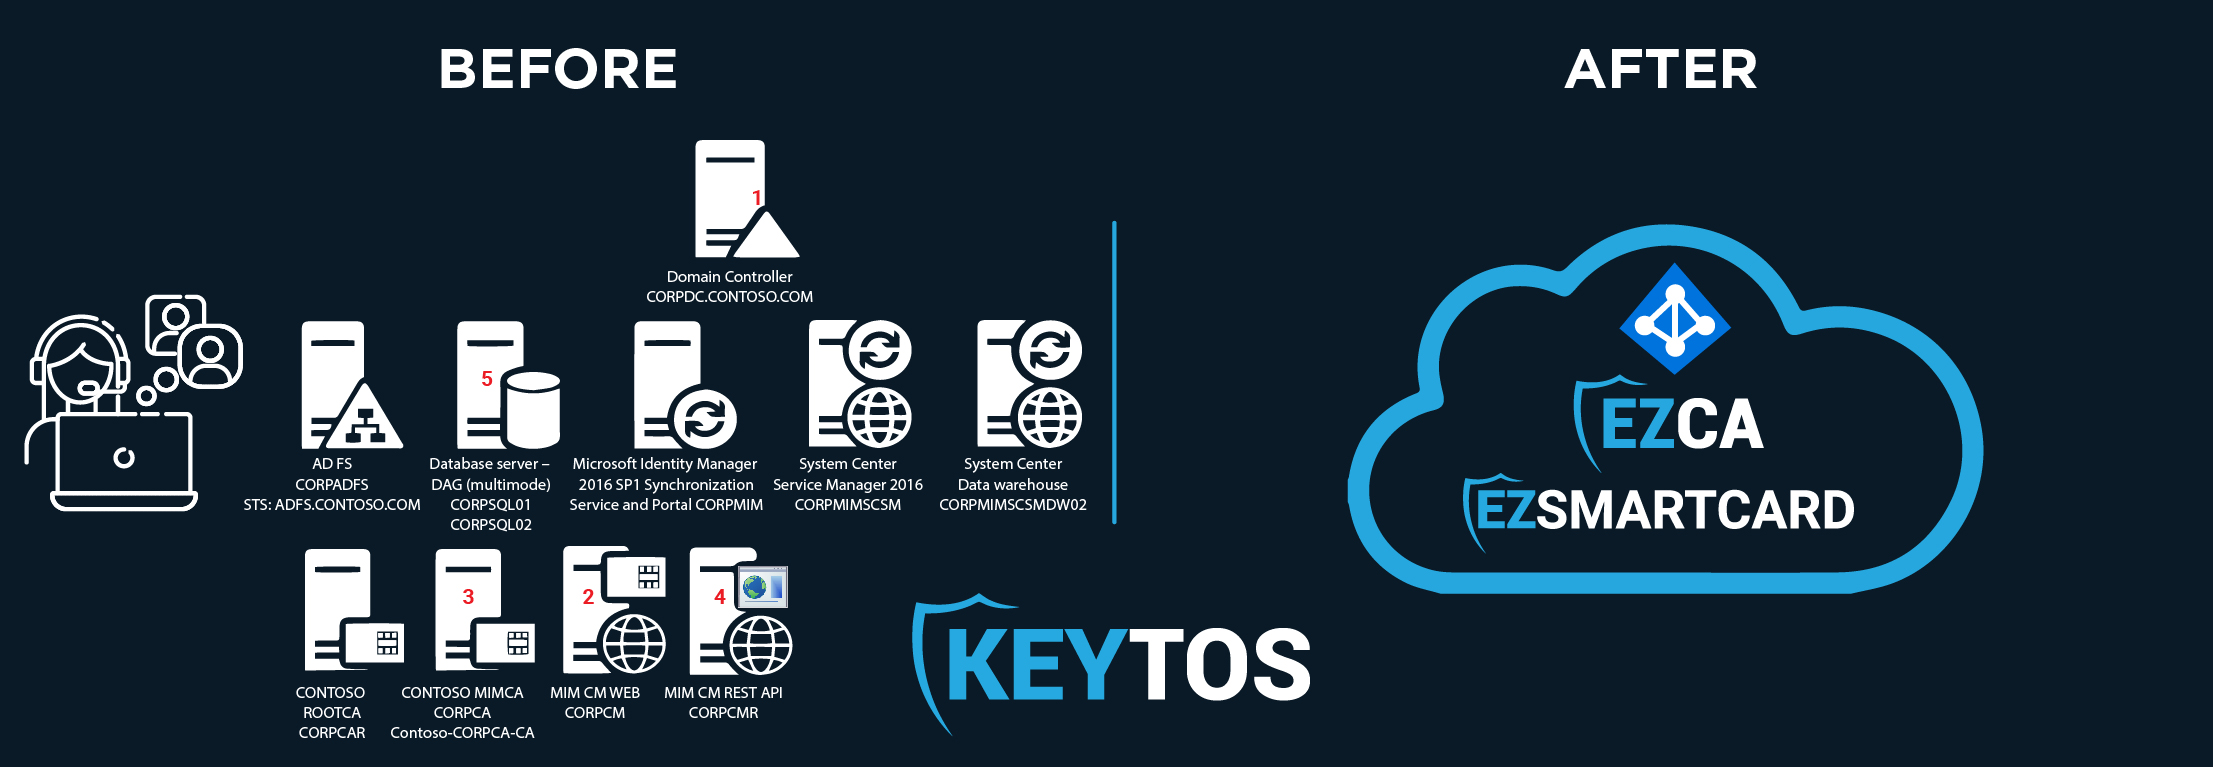
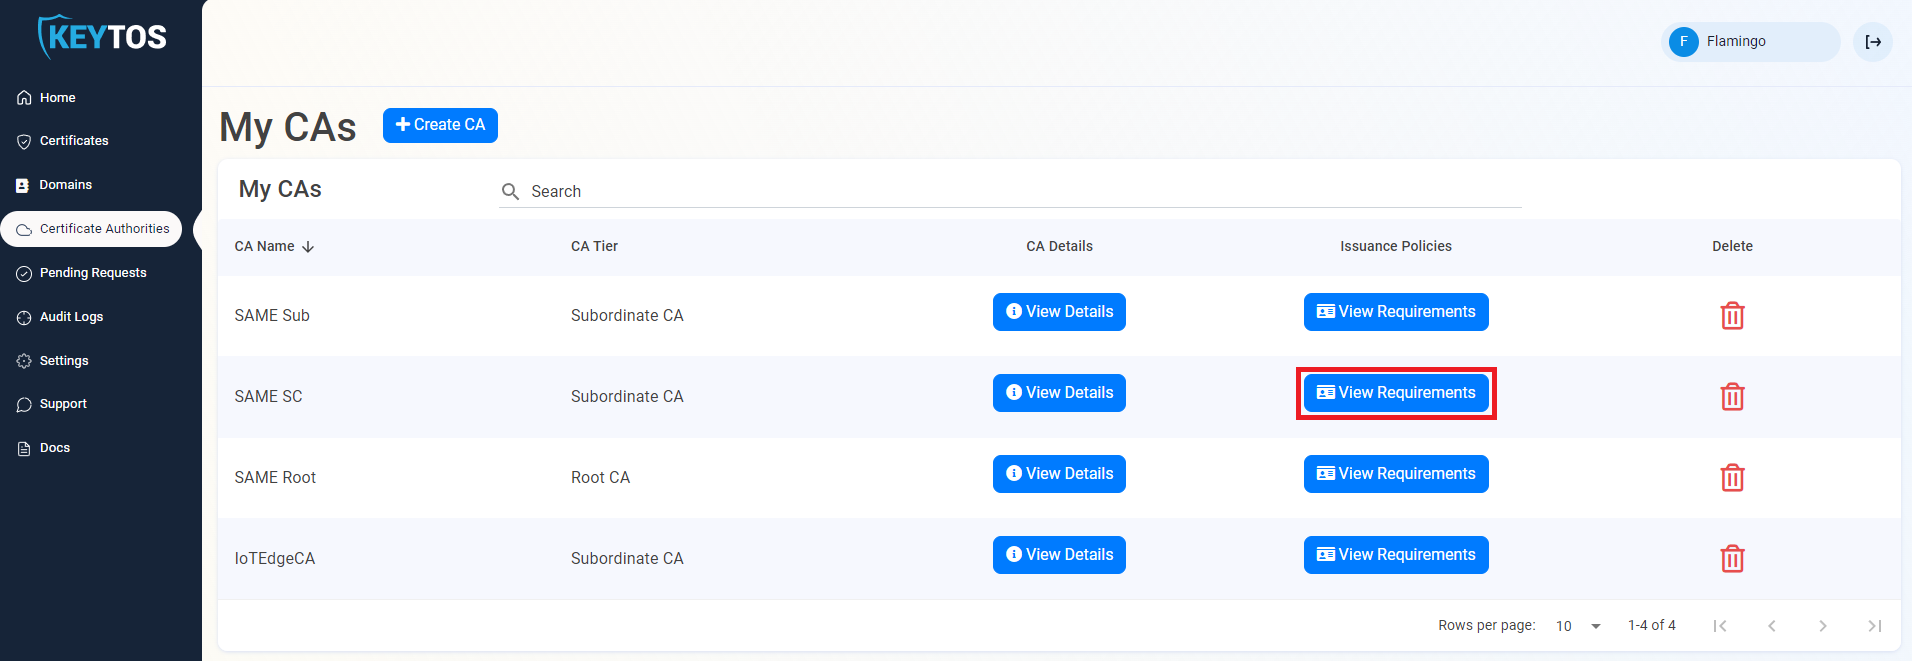
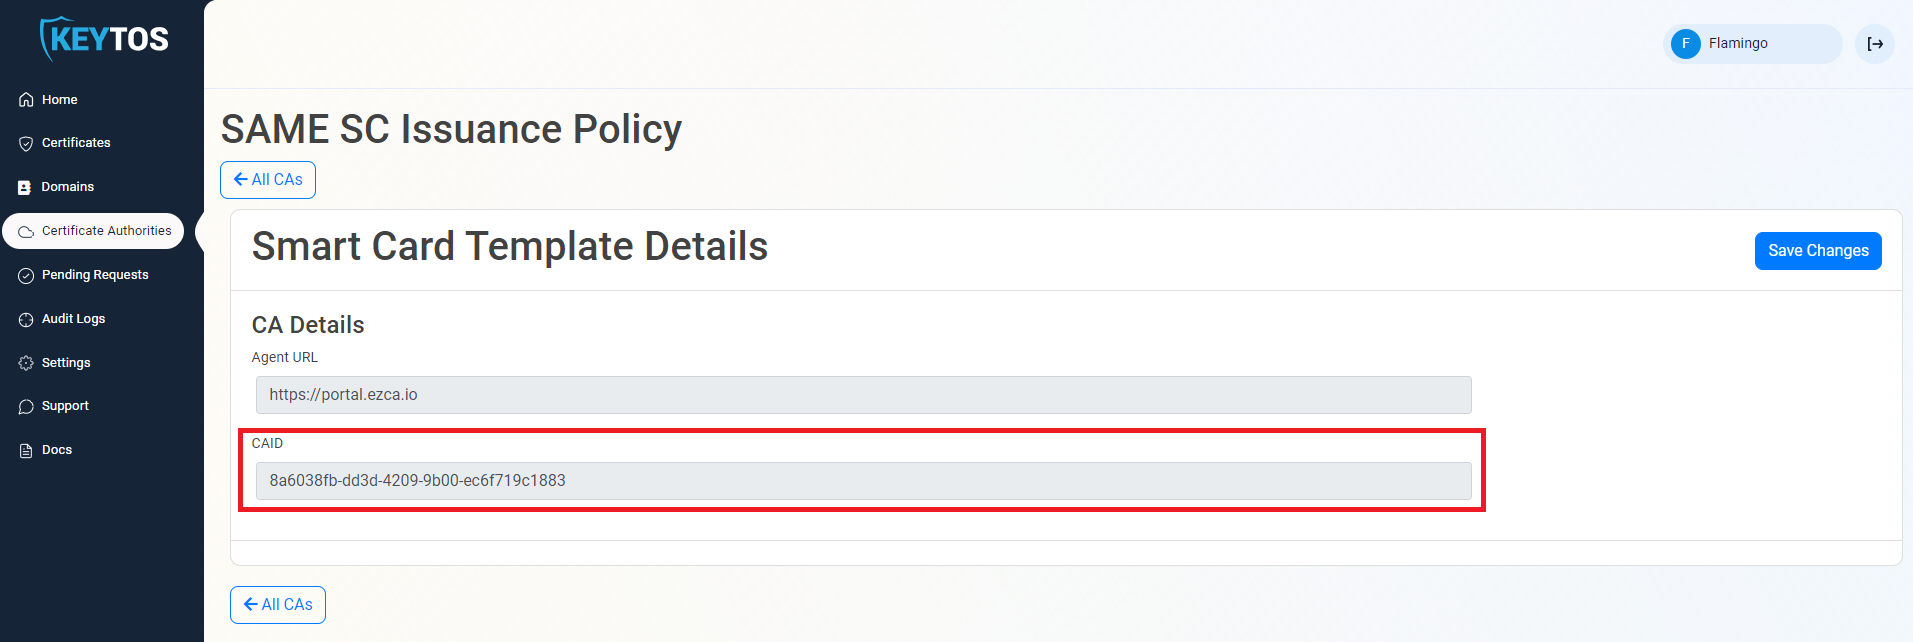
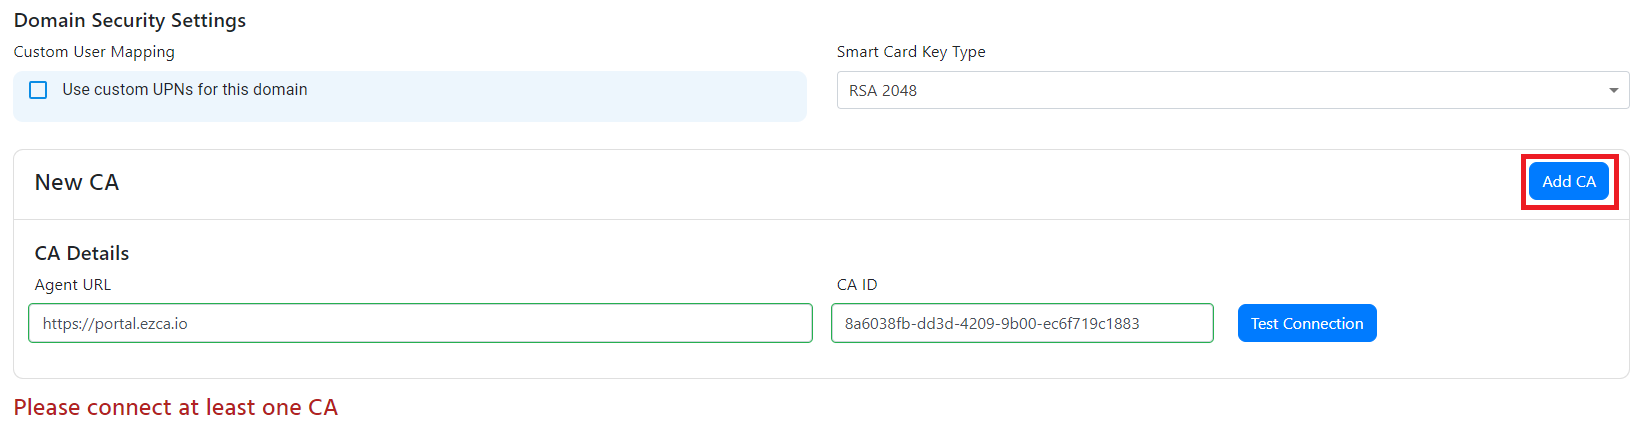
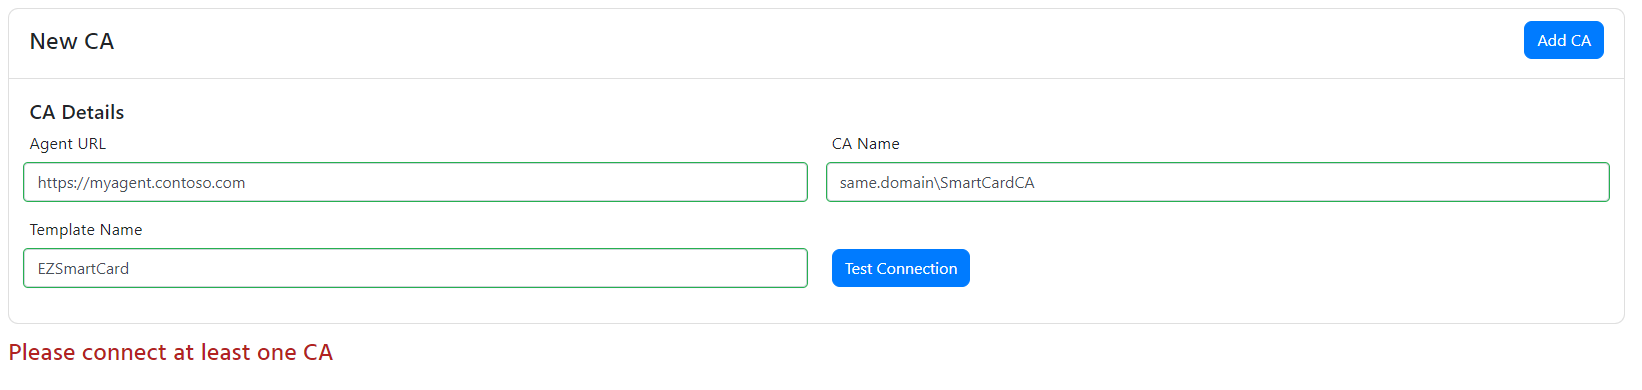
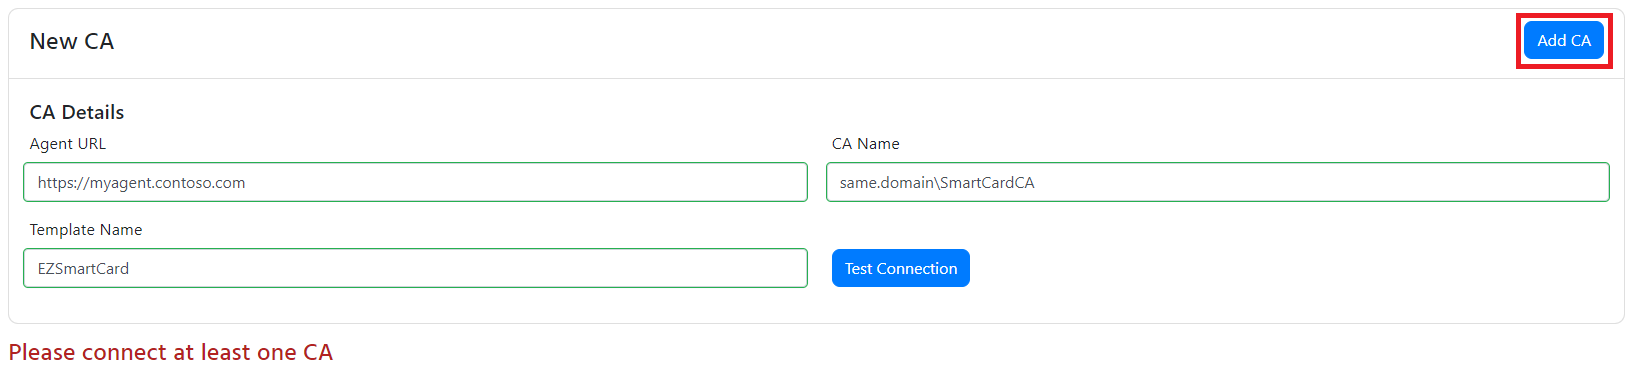
If you selected SmartCard as one of the authentication methods, you will have to connect a CA. EZCMS Supports connecting EZCA an Azure Based PKI and Windows ADCS CAs for certificate creation.
Get started with passwordless authentication and start creating smart cards in minutes by connecting EZCMS to EZCA the first Azure Certificate Authority
Create SmartCards by connecting EZCMS to your existing Windows ADCS (Active Directory Certificate Services) and start get started with passwordless authentication