How-To: Enable Windows Hello for Business in Hybrid Intune Devices
Introduction - How to Enable Windows Hello for Business in Hybrid Intune Devices
If you want to enable Windows Hello for Business in hybrid mode while migrating your PKI to the cloud, you need to complete several PKI steps before your users can use passwordless authentication. This guide walks through the full setup using EZCA, with no ADCS (Active Directory Certificate Services) required.
The setup involves three major stages:
- Trust your EZCA CA in Active Directory — publish your root and issuing CA certificates to the correct AD certificate stores.
- Issue domain controller certificates — each domain controller needs a certificate from your EZCA CA so that hybrid-joined devices can authenticate against them.
- Deploy Windows Hello for Business user certificates for RDP — to allow users to sign in to Remote Desktop sessions using their Windows Hello gesture, deploy an authentication certificate to the Windows Hello for Business container on each device.
Prerequisites
Before starting, ensure the following are in place:
- You have created a SCEP CA.
- For Windows Hello for Business and LDAP scenarios, make sure you have the KDC Authentication, Smart Card Logon, Client Authentication, and Server Authentication EKUs enabled in your CA configuration.
- You are a PKI Admin in EZCA with permissions to manage certificate authorities.
- You have pushed your CA certificates to your Intune-managed devices via a Trusted Certificate profile.
Step 1: Trust Your EZCA CA in Active Directory
Active Directory must trust your EZCA certificate chain before it will accept certificates issued by EZCA for authentication. This requires publishing the root CA certificate to the domain Root CA store, the issuing (sub) CA certificate to the SubCA store, and the issuing CA certificate to the NTAuth store.
Download Your CA Certificates from EZCA
-
Navigate to the EZCA portal (If you have your private instance, go to that specific portal).
-
Log in with an account registered as a PKI Admin in EZCA.
-
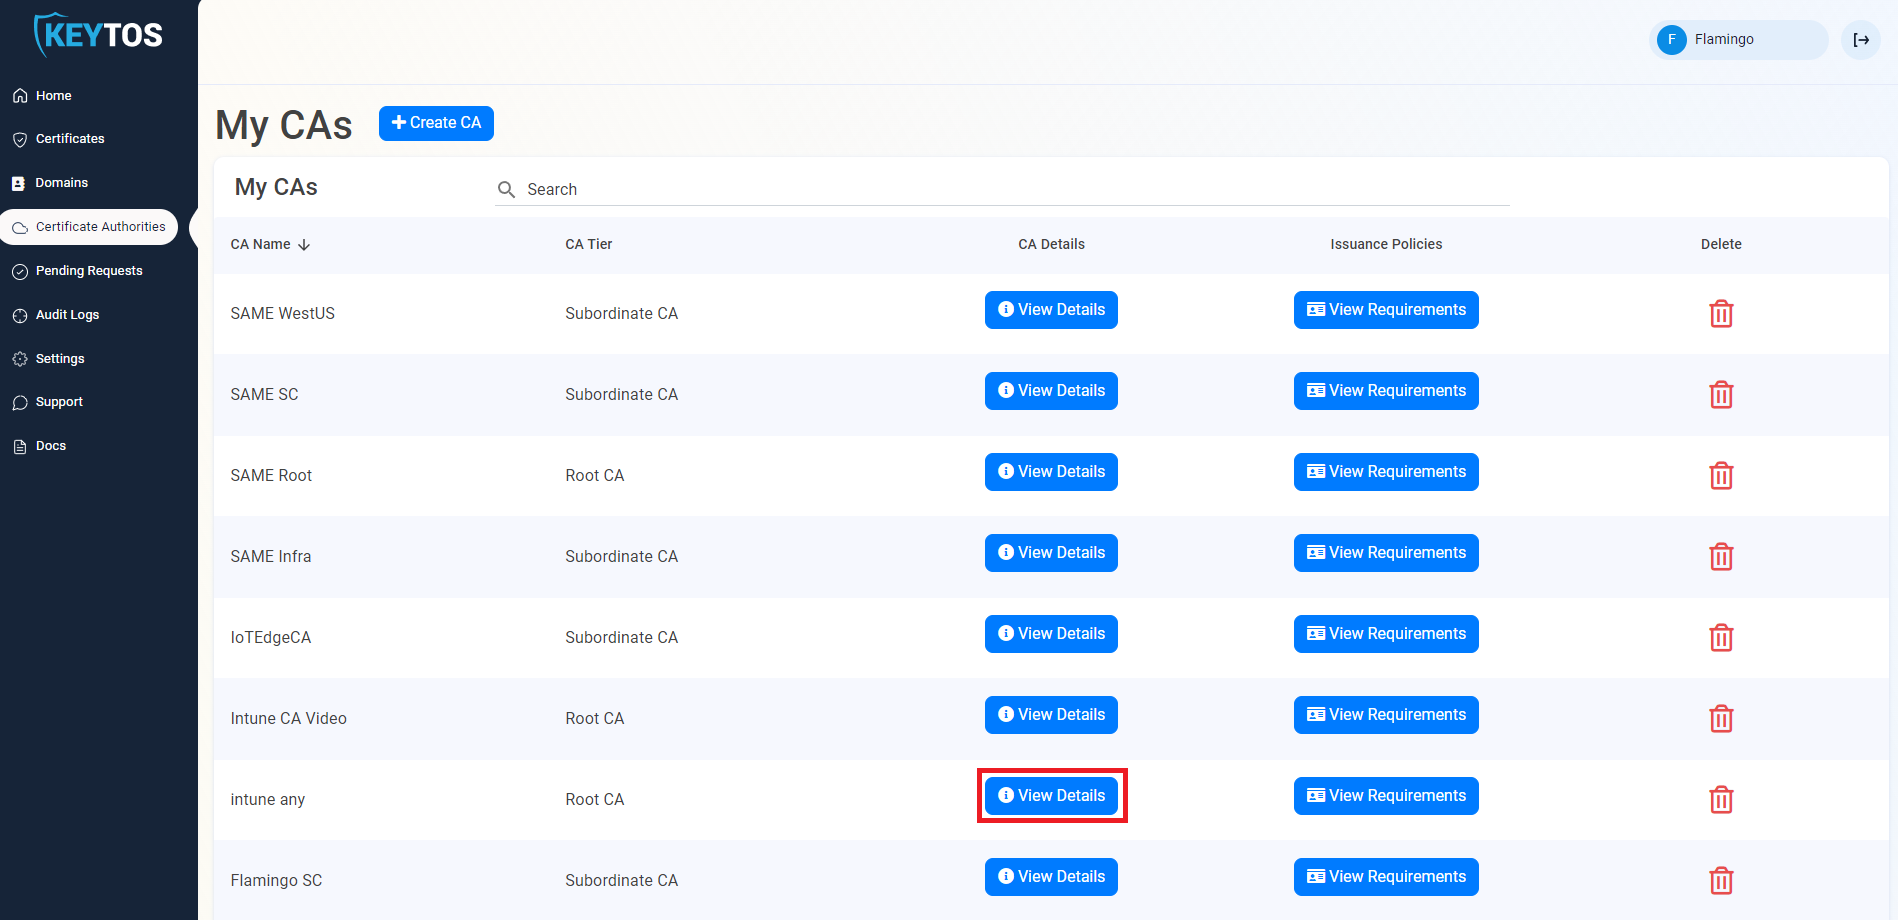
From the left-hand menu, select Certificate Authorities.

-
Scroll down to the issuing CA you want to use and click View Details.
-
Click Download Certificate to download the issuing CA certificate (
ca-cert.cer).
-
If you are using a 2 Tier PKI, repeat the above steps for the Root CA that signed your issuing CA, downloading that certificate as
root-ca-cert.cer.
Publish the Certificates to Active Directory
Run the following commands from an elevated command prompt on a domain controller or any machine with the AD DS tools installed, using an account with Enterprise Administrator rights.
-
Publish the root CA certificate to the domain Root CA store. This makes the root trusted by all machines in the domain.
certutil.exe -dspublish -f root-ca-cert.cer RootCA -
Publish the issuing (sub) CA certificate to the SubCA store. This establishes the issuing CA as a known subordinate in Active Directory.
certutil.exe -dspublish -f ca-cert.cer SubCA -
Publish the issuing CA certificate to the NTAuth store. This allows certificates issued by your EZCA CA to be used for authentication in Active Directory (including smart card and Windows Hello logon).
certutil.exe -dspublish -f ca-cert.cer NTAuthCA
-
Publish the CA certificate to the domain Root CA store. This makes the CA trusted by all machines in the domain.
certutil.exe -dspublish -f ca-cert.cer RootCA -
Publish the CA certificate to the NTAuth store. This allows certificates issued by your EZCA CA to be used for authentication in Active Directory (including smart card and Windows Hello logon).
certutil.exe -dspublish -f ca-cert.cer NTAuthCA
Wait for Replication
These changes replicate to all domain controllers via Active Directory replication. Allow one to two days for full replication across your environment. To force an immediate update on a specific machine, run:
gpupdate /force
You can also manually trigger replication from a domain controller using:
repadmin /syncall /AdeP
Step 2: Issue Domain Controller Certificates
Each domain controller needs a certificate from your EZCA CA to support Windows Hello for Business hybrid key trust. Hybrid-joined devices use the domain controller certificate to verify they are communicating with a legitimate domain controller.
Follow the full domain controller certificate guide here:
How to Create Domain Controller Certificates for Windows Hello Hybrid
That guide covers downloading the CA certificate from EZCA, requesting a domain controller certificate using either the EZCA portal or the EZCA Certificate Renewal Client, setting up automatic renewal, and validating the certificate is in use.
Step 3: Deploy Windows Hello for Business User Certificates for RDP
Once your domain controllers are configured, users can enroll Windows Hello for Business. However, to allow users to sign in to Remote Desktop sessions using their Windows Hello gesture (PIN or biometric), you must deploy a user authentication certificate to the Windows Hello for Business container on each device.
Windows Hello for Business emulates a smart card using the Microsoft Passport Key Storage Provider (KSP). When a user initiates an RDP connection, Windows presents this certificate as the authentication credential and prompts the user for their Windows Hello gesture to unlock the private key.
How it Works
Windows stores keys using Key Storage Providers (KSPs). Keys created by Windows Hello for Business use the Microsoft Passport Key Storage Provider. When you enroll a certificate targeting this KSP, the private key is protected by the device TPM and unlocked by the user’s PIN or biometric — the certificate APIs handle the rest transparently during RDP authentication.
Configure the EZCA SCEP CA
Your EZCA SCEP CA must have the correct EKUs configured to issue these certificates. Ensure your CA template includes at minimum:
- Smart Card Logon (
1.3.6.1.4.1.311.20.2.2) - Client Authentication (
1.3.6.1.5.5.7.3.2)
If you created your SCEP CA with these EKUs for domain controller certificates in Step 2, the same CA can be used for user certificates. Otherwise, recreate your SCEP CA with the correct EKUs or create a new SCEP CA specifically for user certificates. Note: EKUs cannot be added to an existing CA after issuance due to it being embedded and signed in the certificate, so a new CA is required if your current one does not have the necessary EKUs.
Deploy Certificates via Intune SCEP Profile
-
Go to the Microsoft Intune admin center.
-
Select Devices > Configuration profiles > Create profile.
-
Select Platform > Windows 10 and later and Profile type > Templates > SCEP Certificate.
-
Select Create.
-
In the Basics panel, provide a Name such as
WHfB RDP Authentication Certificate, then select Next. -
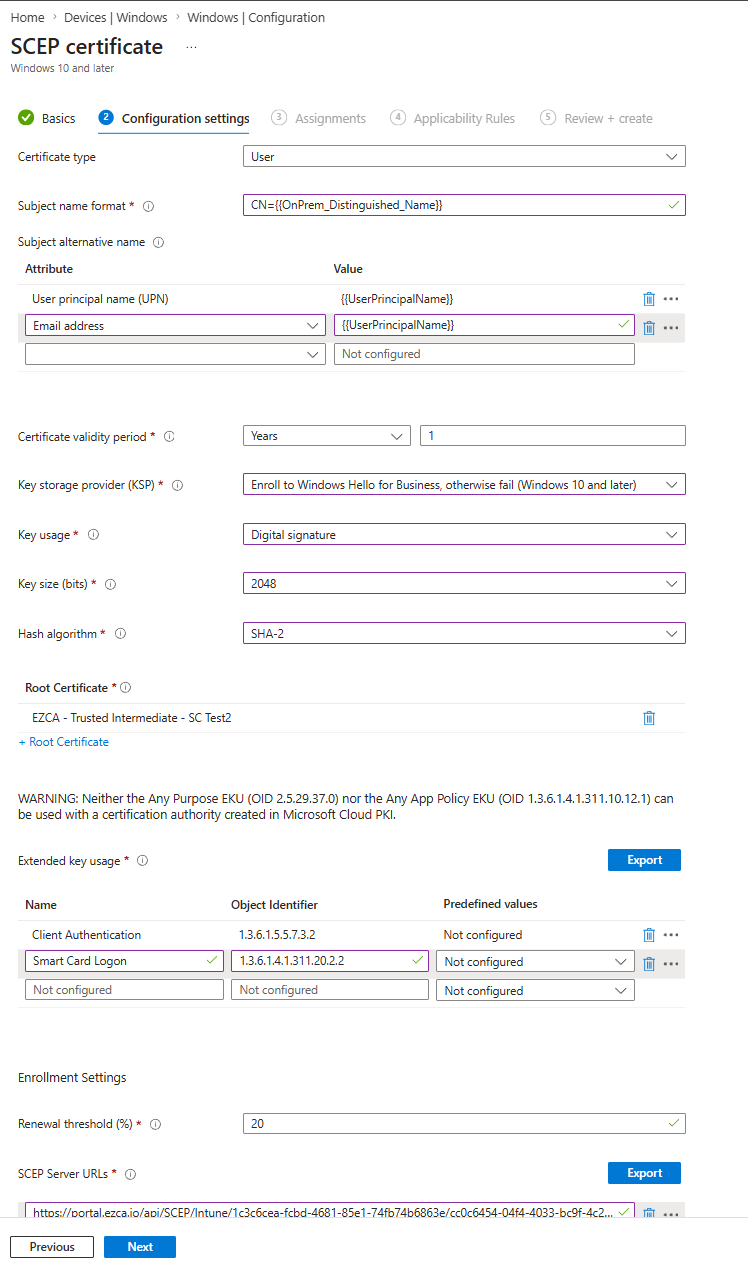
In the Configuration settings panel, configure the following:
Setting Value Certificate Type User Subject name format CN={{OnPrem_Distinguished_Name}}Subject alternative name User principal name (UPN) = {{UserPrincipalName}}Certificate validity period Your preferred validity period Key storage provider (KSP) Enroll to Windows Hello for Business, otherwise fail Key usage Digital Signature Key size (bits) 2048 Hash algorithm SHA-2 Root Certificate Select the Trusted Certificate profile for your EZCA SCEP CA (If two tier select the issuing CA) Extended key usage Add: Smart Card Logon ( 1.3.6.1.4.1.311.20.2.2) (Smart Card is not one of the predefined EKUs in Intune so you will have to add it manually) and Client Authentication (1.3.6.1.5.5.7.3.2)SCEP Server URLs Your EZCA SCEP endpoint URL from the EZCA portal Learn how to get SCEP URL for Intune -
Your Profile should look similar to the following:
-
Select Next.
-
In the Assignments panel, assign the profile to the security group containing the users or devices you want to configure and select Next.
-
In the Review + create panel, review the configuration and select Create.
Note: If you configure Windows Hello for Business via Group Policy and also deploy certificates via Intune, devices may fail to enroll with error
0x82ab0011. Configure Windows Hello for Business via Intune instead of Group Policy to avoid this conflict.
Verify Certificate Deployment
To confirm the certificate was deployed to the Windows Hello for Business container, run the following command on the client device:
certutil -store -user my
A correctly deployed certificate will show Provider = Microsoft Passport Key Storage Provider in the output. For example:
my "Personal"
================ Certificate 0 ================
Serial Number: 110000001f4c4eccc46fc8f93a00000000001f
Issuer: CN=Contoso - Issuing CA, DC=CONTOSO, DC=COM
 NotBefore: 12/8/2025 6:16 AM
 NotAfter: 12/7/2026 6:16 AM
Subject: CN=amanda.brady@contoso.com
Provider = Microsoft Passport Key Storage Provider
Private key is NOT exportable
Encryption test passed
If the provider is listed as Microsoft Software Key Storage Provider instead, the certificate was not enrolled into the Windows Hello for Business container. Check that Windows Hello for Business is enrolled on the device and that the Intune profile KSP setting is set to Enroll to Windows Hello for Business, otherwise fail.
User Experience
Once the certificate is deployed, users can open Remote Desktop Connection (mstsc.exe) and connect to any Windows device in the same Active Directory forest. When prompted for credentials:
- Microsoft Entra joined devices: the user can authenticate using any Windows Hello gesture, including biometrics.
- Microsoft Entra hybrid joined devices: the credential prompt will show Security device credential and the user must use their PIN to unlock.
Note: The user must be a member of the Remote Desktop Users local group on the remote host, or otherwise authorized to connect via RDP.
Known Issue: TLS 1.3
There is a known issue where TLS 1.3 client authentication with a Windows Hello for Business certificate over RDP fails with ERR_SSL_CLIENT_AUTH_SIGNATURE_FAILED. Microsoft is investigating a fix. As a workaround, disable TLS 1.3 for the affected RDP connections if needed.