Connect to Work or School Wi-Fi on Windows with Keytos Connect
Overview - Connect to Work or School Wi-Fi on Windows with Keytos Connect
If your workplace or school allows personal and bring-your-own-devices (BYOD) to connect to their Wi-Fi network, Keytos Connect simplifies the process and makes it as easy as just a few clicks to get connected.
Simply download Keytos Connect for Windows, sign in, and you’ll be up and running in no time. Keytos Connect will automatically detect the Wi-Fi network and configure your device to connect securely without the need for any manual configuration.
How to Download the Keytos Connect App for Windows
The Keytos Connect application can be downloaded directly from our site via the following links:
- Keytos Connect x64 (USA)
- Keytos Connect x64 (Europe)
- Keytos Connect x64 (Australia)
- Keytos Connect x64 (Asia)
- Keytos Connect x64 (Latin America)
- Keytos Connect x64 (Africa)
For private instances, and all other instances, you can access direct download via https://<subdomain>.ezradius.io/download
What Can My Workplace or School See or Do On My PC?
Keytos Connect is designed to be a lightweight application with the minimum amount of permissions required to install network profiles and connect to Wi-Fi.
Things Keytos Connect CAN Do On Your Mac
Keytos Connect and your workplace or school can do the following on your device on it is installed and you are signed in:
- Install trusted certificates on your device which allow it to securely communicate with your workplace or school Wi-Fi.
- Install and renew a user certificate for your work or school account into your personal certificate store which is used to sign you into your work or school Wi-Fi.
- Install a Wi-Fi profile on your device for your workplace or school Wi-Fi networks, which tells your device which certificates to use when establishing a secure connection.
- Send notifications if you need to sign-in again or take any other manual actions.
Things Keytos Connect CANNOT Do On Your Mac
Keytos Connect and your workplace or school cannot do the following on your device once Keytos Connect is installed:
- View your files and folders.
- Install other applications.
- View your screen.
- Track your on-device network activity or browsing history (although they may implement network tracking outside of Keytos Connect. Consult with your IT team for any questions).
- Make any changes to your browsers or other applications on your device.
How to Connect to Work or School Wi-Fi on Windows with Keytos Connect - Step-by-Step Guide
The following steps will walk you through how to install the Keytos Connect application for Windows and connect to your workplace or school Wi-Fi network:
Step 1: How to Install the Keytos Connect Application for Windows
The first step to connect to your workplace or school Wi-Fi is to install the Keytos Connect application for Windows. The section above details each installation method.
Step 2: How to Launch Keytos Connect and Install Your Wi-Fi Profiles on Windows
Once you get Keytos Connect installed, you can launch it and install your available Wi-Fi profiles.
-
Launch Keytos Connect on your PC by opening the Start Menu, typing “Keytos Connect” and selecting the Keytos Connect app.
-
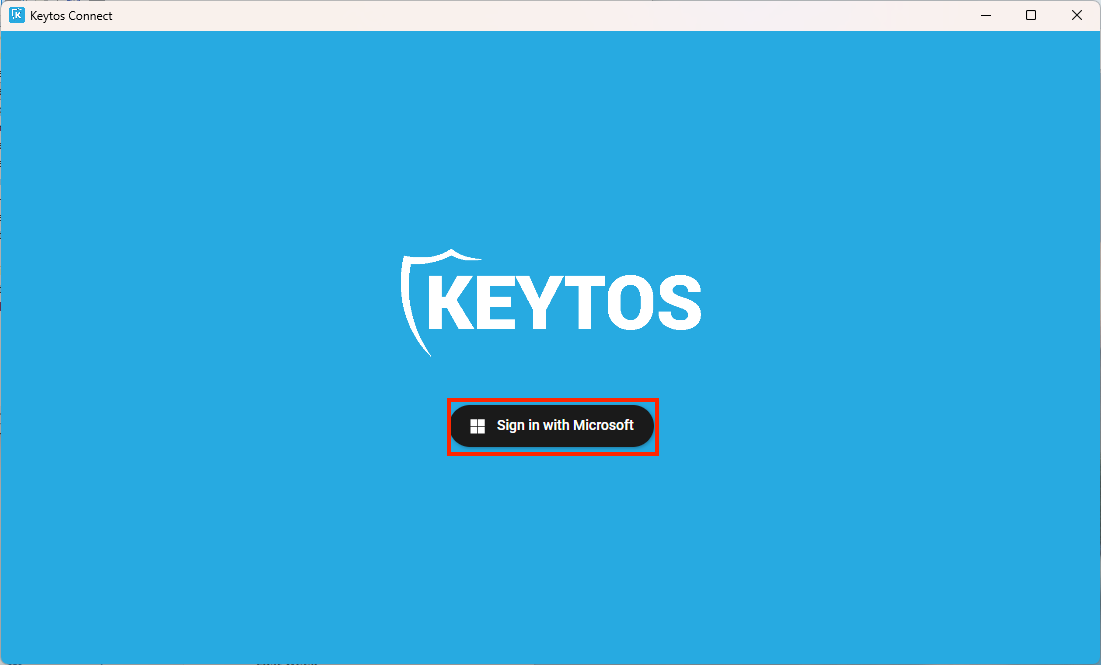
On first launch you will be prompted to login with your Microsoft workplace or school (Entra ID) account. Click the Sign in with Microsoft button to launch your web browser and complete the sign-in process. Make sure to use your email address given to you by your workplace or school.
-
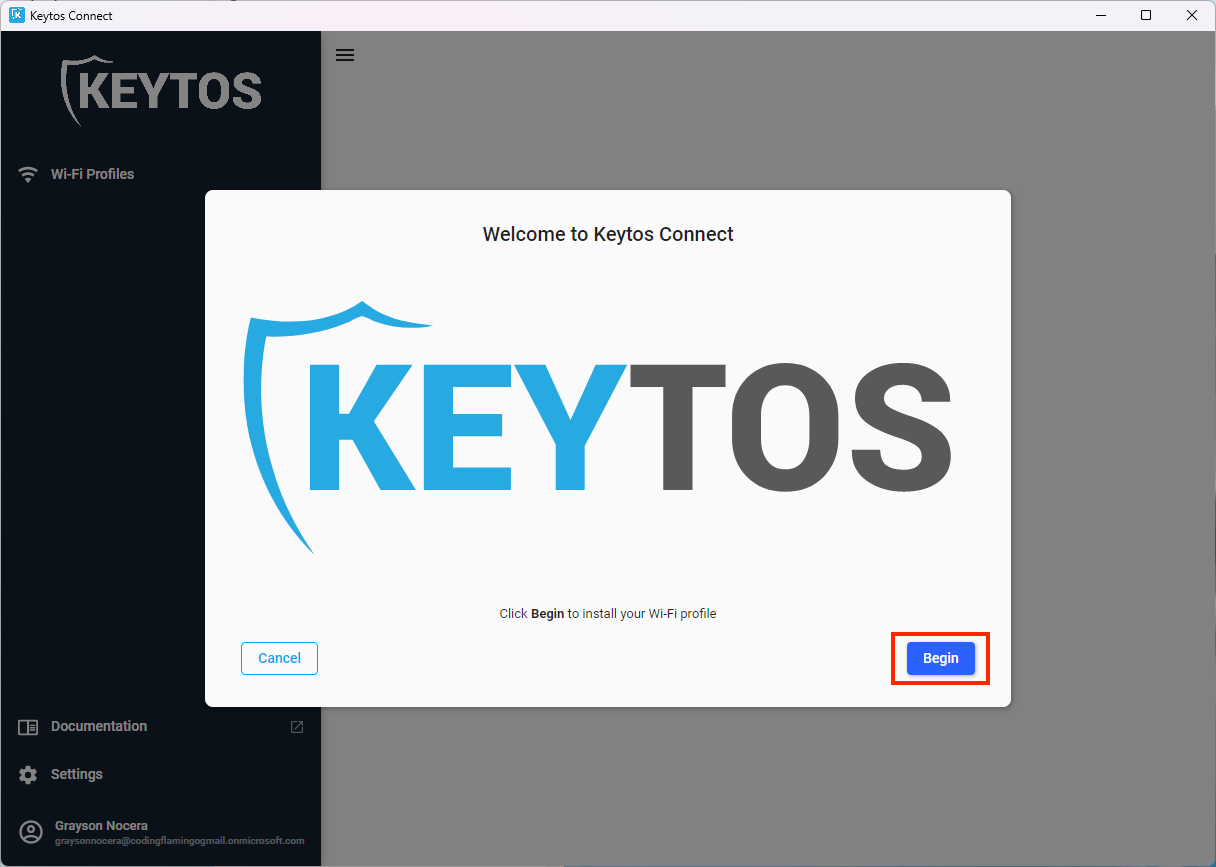
Upon a successful login, Keytos Connect will automatically begin the installation process. Click Begin to start the installation process.
-
When prompted to install a new Root Certificate on your PC, select Confirm to confirm the installation. This certificate is used to set up your Wi-Fi profile and establish trust between your workplace and school.

-
If your workplace or school has multiple Root Certificates, Keytos Connect will guide you through the installation process again. If all your networks use the same one, you will be returned to the Keytos Connect home screen.
Step 3: How to Connect to Your Workplace or School Wi-Fi on Windows
Now that you have installed your Wi-Fi profile(s), you can connect to your workplace or school Wi-Fi. If your Wi-Fi network is configured to auto-connect, you should automatically connect to the network. If the network is not configured to connect automatically, you can:
- In your Windows taskbar, select the network icon (if disconnected from a network it will be a globe. If connected to a different network, it will show as a Wi-Fi icon or computer icon).
- Next to the Wi-Fi icon, select the > icon to display all available networks.
- Select your workplace or school Wi-Fi network to begin connecting.
- You should connect to the Wi-Fi network within 5-10 seconds.
- Done! You are now connected to your workplace or school Wi-Fi.
How to Troubleshoot a Failed Wi-Fi Connection on Windows After Configuring Keytos Connect
Failed to Sign In to Keytos Connect on Windows
If you’re unable to sign-in to Keytos Connect on your device start by verifying the following:
- Make sure you’re currently connected to an internet connection such as a Guest Wi-Fi network or personal cellular hotspot.
- Clicking the login button in Keytos Connect will launch a web browser. Make sure it’s not pushed to the background or on another screen.
- Make sure you used your workplace or school email address & account. Personal accounts will not work.
- If required by your IT team, make sure you successfully completed multi-factor authentication.
If you’ve verified the above steps and still cannot sign-in, consult your workplace or school’s IT team to make sure they have configured the Keytos Connect application on their end, and your account is enabled to use Keytos Connect.
Failed to Install Wi-Fi Profiles Using Keytos Connect on Windows
If Keytos Connect failed to install the Wi-Fi profile during initial onboarding start by verifying the following:
- Make sure you are a local administrator on your device. Standard, non-administrator accounts won’t be able to install the trusted certificate required to communicate with your workplace or school Wi-Fi.
- Make sure your device isn’t managed by another Mobile Device Management (MDM) platform such as Microsoft Intune. If both try to apply the same certificates or Wi-Fi profile they can conflict and cause unexpected results.
- Make sure you accept the certificate installation prompt. It might be launched in the background or on another screen.
If you’ve verified the above steps and still cannot complete the Wi-Fi profile installation, consult your workplace or school’s IT team.
Failed to Connect to Wi-Fi Network on Windows
If you’ve successfully installed your workplace or school’s Wi-Fi profiles and cannot connect to the Wi-Fi network, verify the following:
- Make sure Wi-Fi is enabled on your device. Check your Wi-Fi settings within the Settings app and check if your device has any hardware switches or keyboard keys which might disable Wi-Fi.
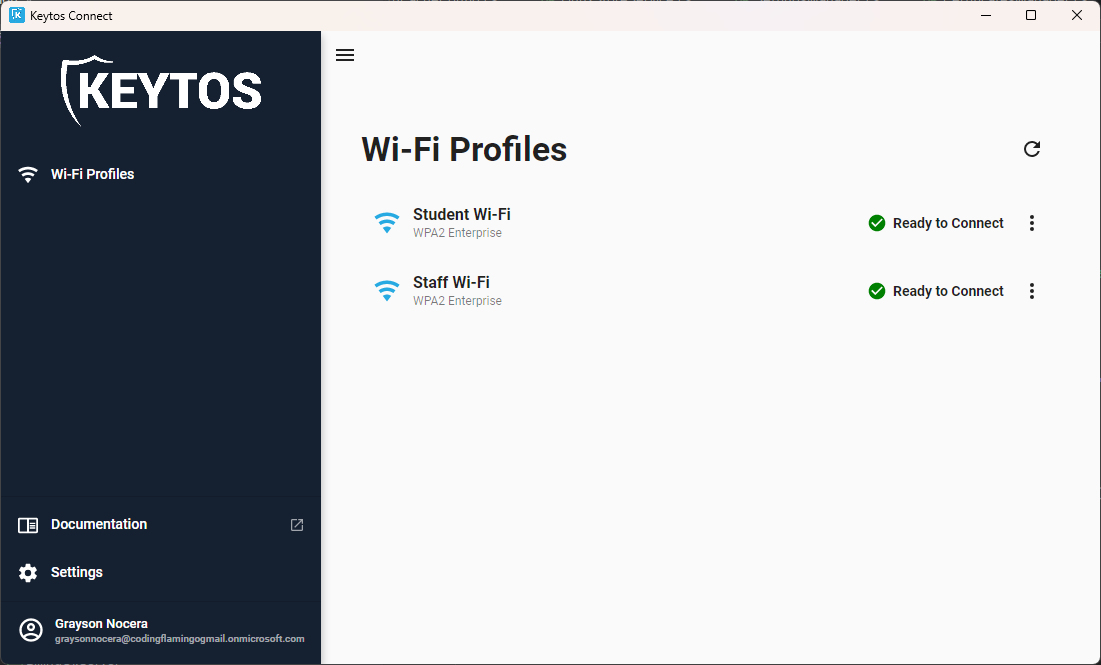
- Make sure you’re connecting to the correct Wi-Fi profile and SSID. The Keytos Connect homepage will show you which networks are configured on your device.
- Confirm with your IT team that the certificate used to connect you to Wi-Fi does not have the Smart Card Logon EKU. If the certificate has this EKU, Windows will not be able to select it for Wi-Fi authentication.
- Some older devices (2017 or older) may not support WPA3 networks if your workplace or school uses WPA3. Consult your device manufacturer’s website for which network types are supported.
- Try removing and reinstalling the Wi-Fi profile.
If you’ve verified the above steps and still cannot connect to Wi-Fi, consult your workplace or school’s IT team.
How To Uninstall a Wi-Fi Profile in Keytos Connect on Windows
If you no longer need to connect to your workplace or school Wi-Fi or need to attempt a reinstallation, follow these steps:
How To Remove a Wi-Fi Profile in the Keytos Connect Application
To uninstall a Wi-Fi profile in the Keytos Connect application:
- Open the Keytos Connect application.
- Click the three-dots icon (⁝) next to the Wi-Fi profile name that you want to remove.
- Select Remove Profile to delete your Wi-Fi profile.
- Keytos Connect will automatically delete all the previously installed certificates and network profile.
How to Manually Remove a Keytos Connect Wi-Fi Profile in Windows
If you’re unable to access the Keytos Connect application and you want to remove and clean up a previous network connection on Windows, follow these steps:
How to Delete Your Leaf User Certificate
The first step to manually cleanup a Wi-Fi profile on Windows is to delete your leaf user certificate.
- Open the Start Menu and type User Certificates.
- Open the Manage User Certificates application.
- Open the Personal > Certificates folder.
- Identify the certificate issued by your workplace or school. Check with your workplace or school IT team if you’re unsure.
- Double-click the certificate and select the Certification Path tab to view the entire trust chain.
- The bottom-most certificate will be the leaf certificate you just opened.
- The top-most certificate will be the Root Certificate Authority certificate. Note this for an upcoming section.
- Any certificates in the middle will be Intermediate Certificate Authority certificates. Note these for the next section.
- Back in the certificate list, right-click the certificate and select Delete. Confirm the deletion.
How to Delete Your Intermediate Trusted Certificates in Windows (if configured)
If your workplace or school leverages Intermediate Certificate Authorities, follow these steps to delete them from your Windows device.
- Still within Manage User Certificates, open the Intermediate Certification Authorities > Certificates.
- Right-click and delete the CAs you previously identified in the previous section.
How to Delete Your Root Trusted Certificate in Windows
To delete your workplace or school’s Root Certificate Authority certificate on Windows, follow these steps:
- Still within Manage User Certificates, open the Trusted Root Certification Authorities > Certificates.
- Right-click and delete the CA you previously identified in the previous section.
How to Delete Your Wi-Fi Network Profile in Windows
The last step is to delete your previously installed Wi-Fi profile.
- Open the Settings app.
- From the left-hand navigation menu, select Network & internet.
- Select Wi-Fi.
- Select Manage known networks.
- Identify your workplace or school’s Wi-Fi network.
- Click Forget to remove the Wi-Fi profile from your device.