

















How-To: Issue SCEP Certificates in SimpleMDM
How to Configure SimpleMDM SCEP Certificate Authority - Step by Step Guide
The following steps will walk you through the process of creating an Apple Configuration Profile with SCEP certificates and configuring SimpleMDM to issue the .mobileconfig file.
How to Create An Apple Configuration Profile With SCEP Certificates For SimpleMDM
Prerequisites for Configuring Apple Configurator with SCEP
- You will need an EZCA SCEP CA set up and ready to issue certificates.
How to Download An Apple Configuration Profile from your EZCA SCEP CA
-
Navigate to your EZCA portal and sign in as a PKI administrator.
-
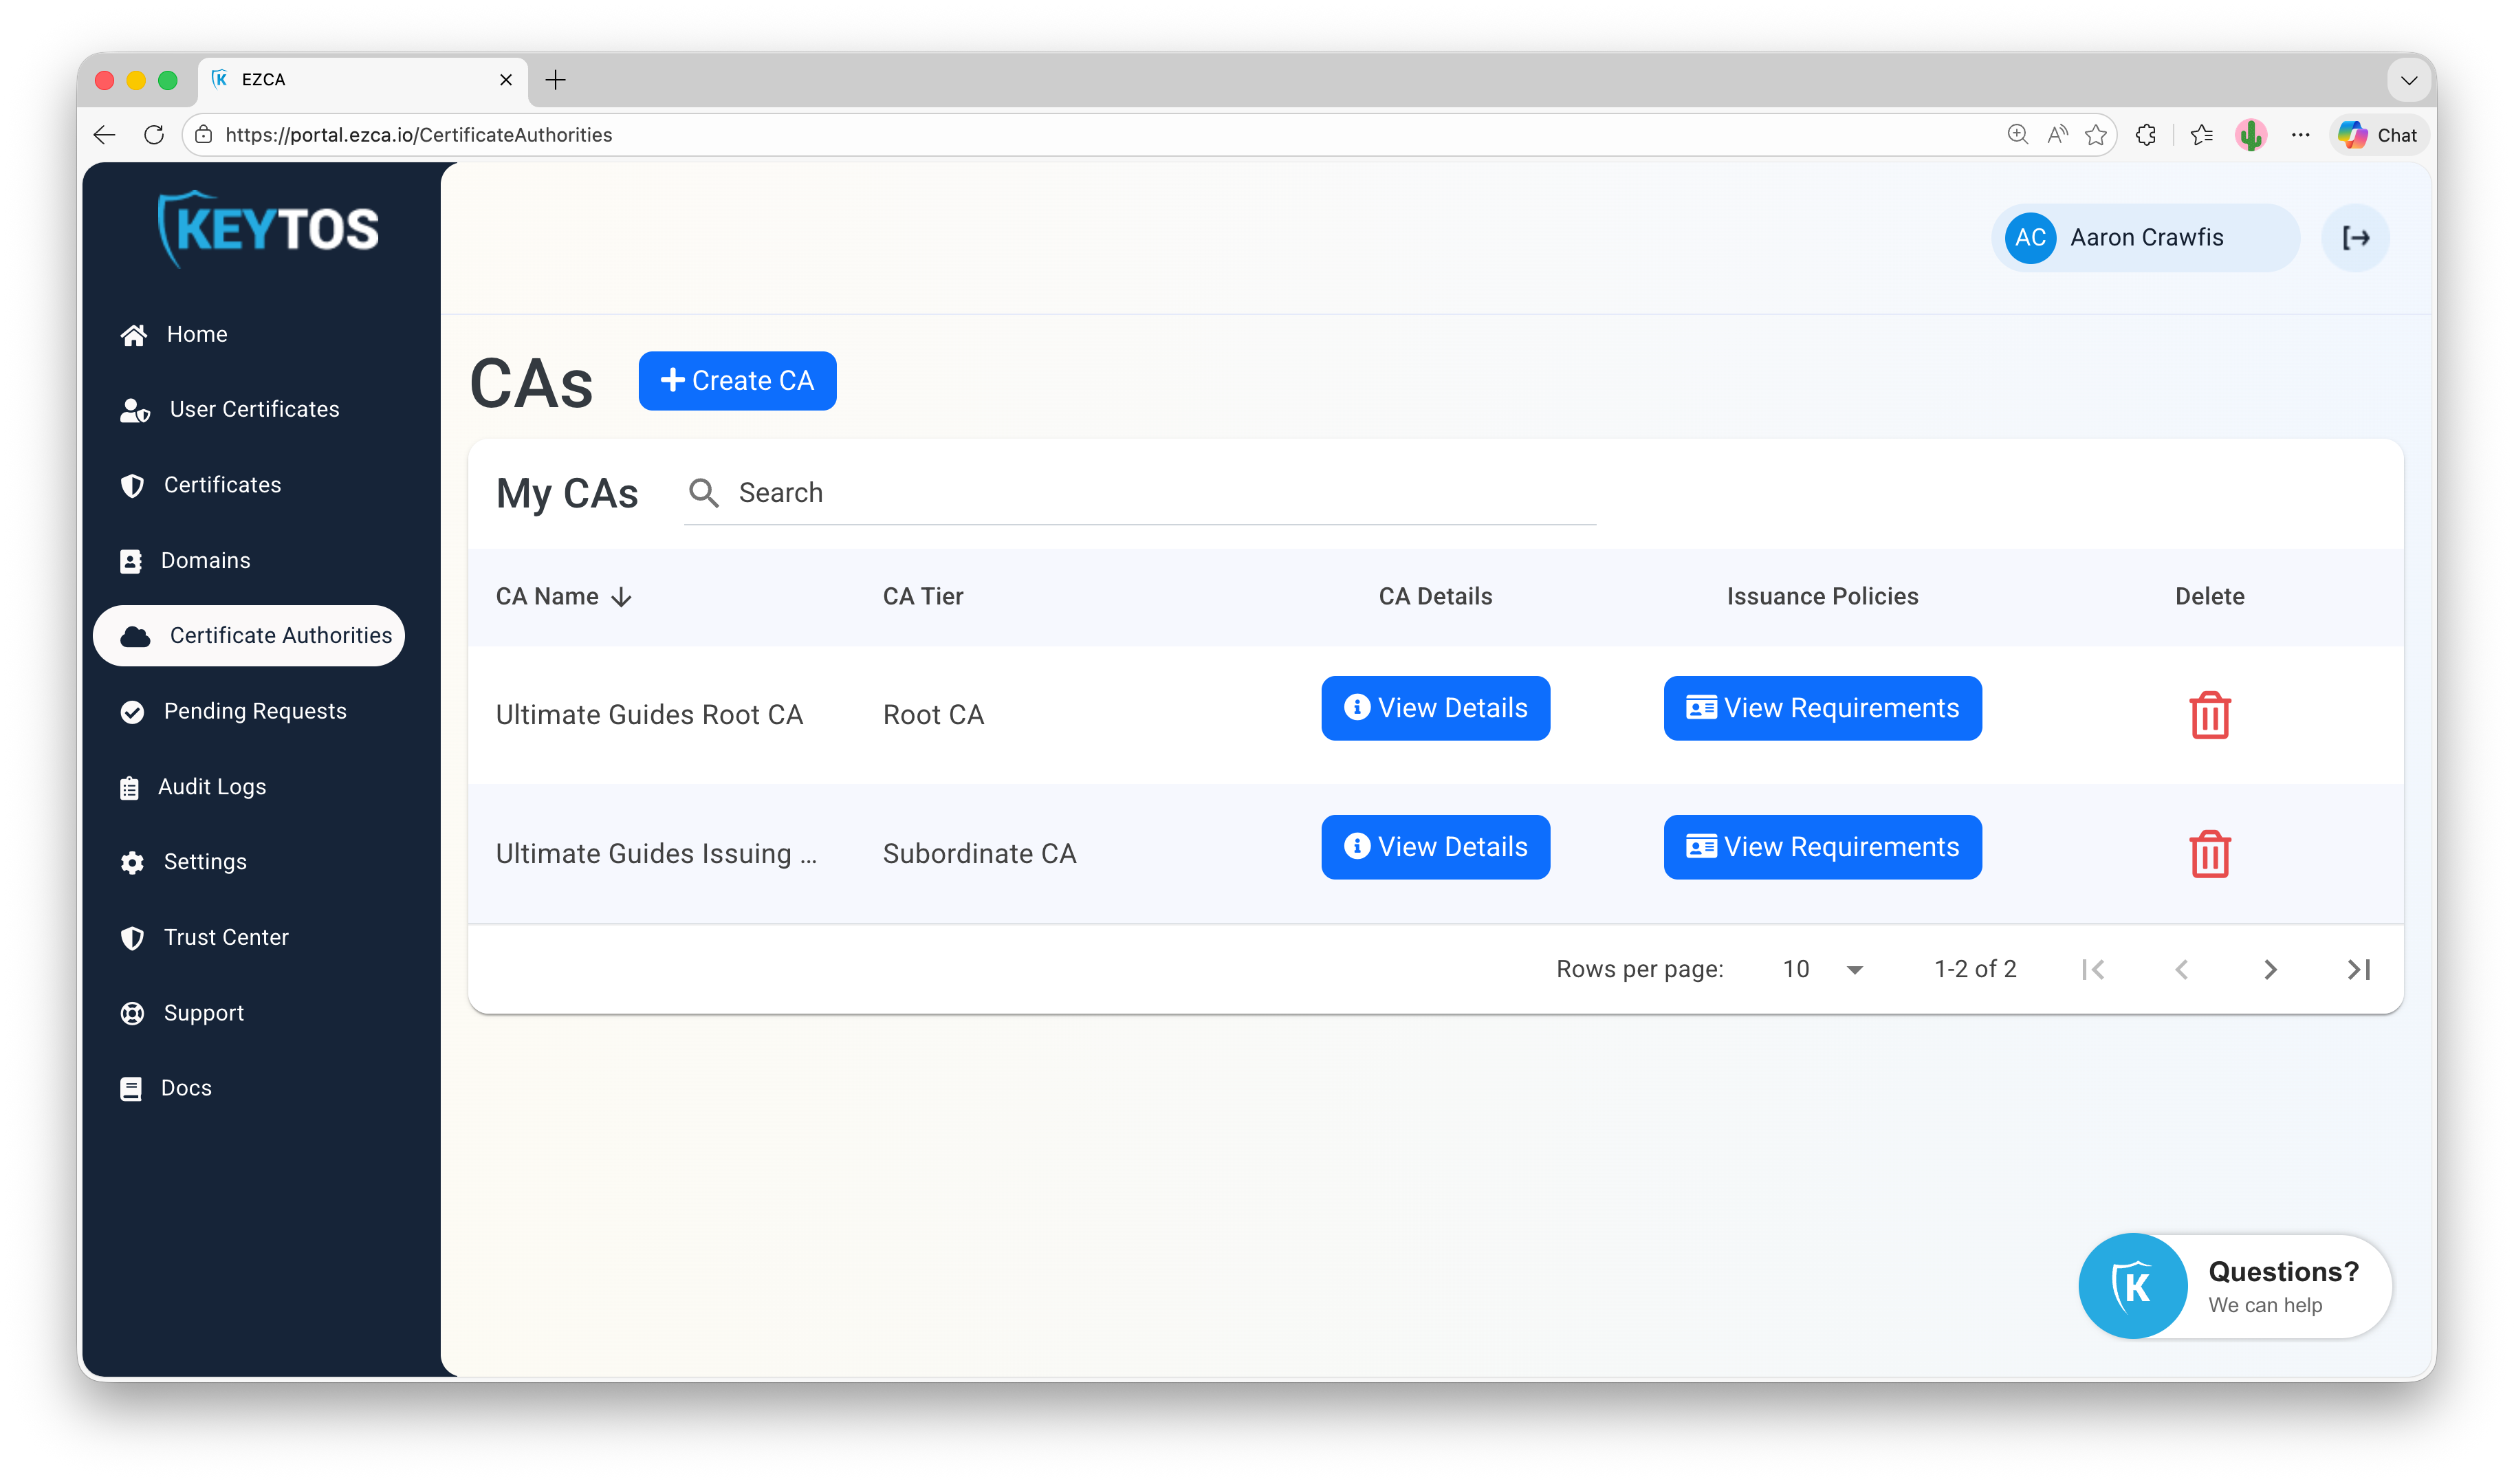
Click on the Certificate Authorities tab and scroll to your SCEP CA.
-
Click on the View Requirements button for your SCEP CA.
-
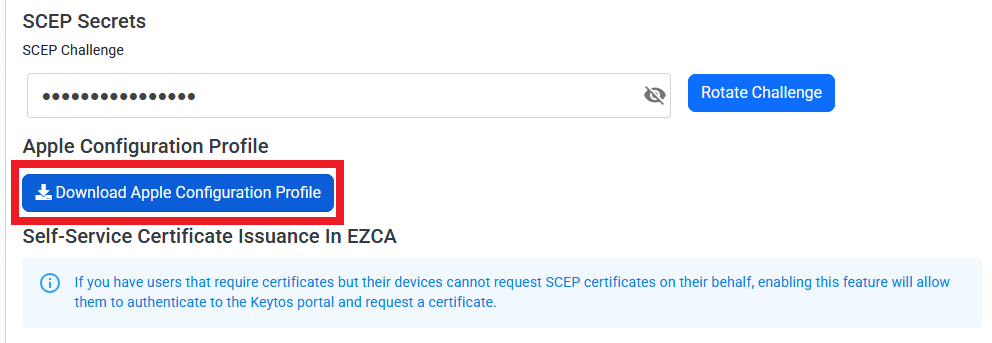
Scroll down to the Apple Configuration Profile section and click Download Apple Configuration Profile.
-
Done!
Prerequisites for Configuring iMazing Profile Editor with SCEP
- You will need a macOS device with Apple Configurator installed to create the custom profile.
- You will need an EZCA SCEP CA set up and ready to issue certificates.
How to Download Your Root and/or SCEP CA Certificates from EZCA
To establish trust for your SCEP certificates, you will need to download and later push the CA certificate(s) for your SCEP CA to your devices. If your SCEP CA is a subordinate CA, you will need to download both the root and SCEP CA certificates. If your SCEP CA is a root CA, you will only need to download the SCEP CA certificate.
-
Navigate to your EZCA portal and sign in as a PKI Administrator.
-
Click on the Certificate Authorities tab and scroll to your SCEP CA.
-
Click on the View Requirements button for your SCEP CA.
-
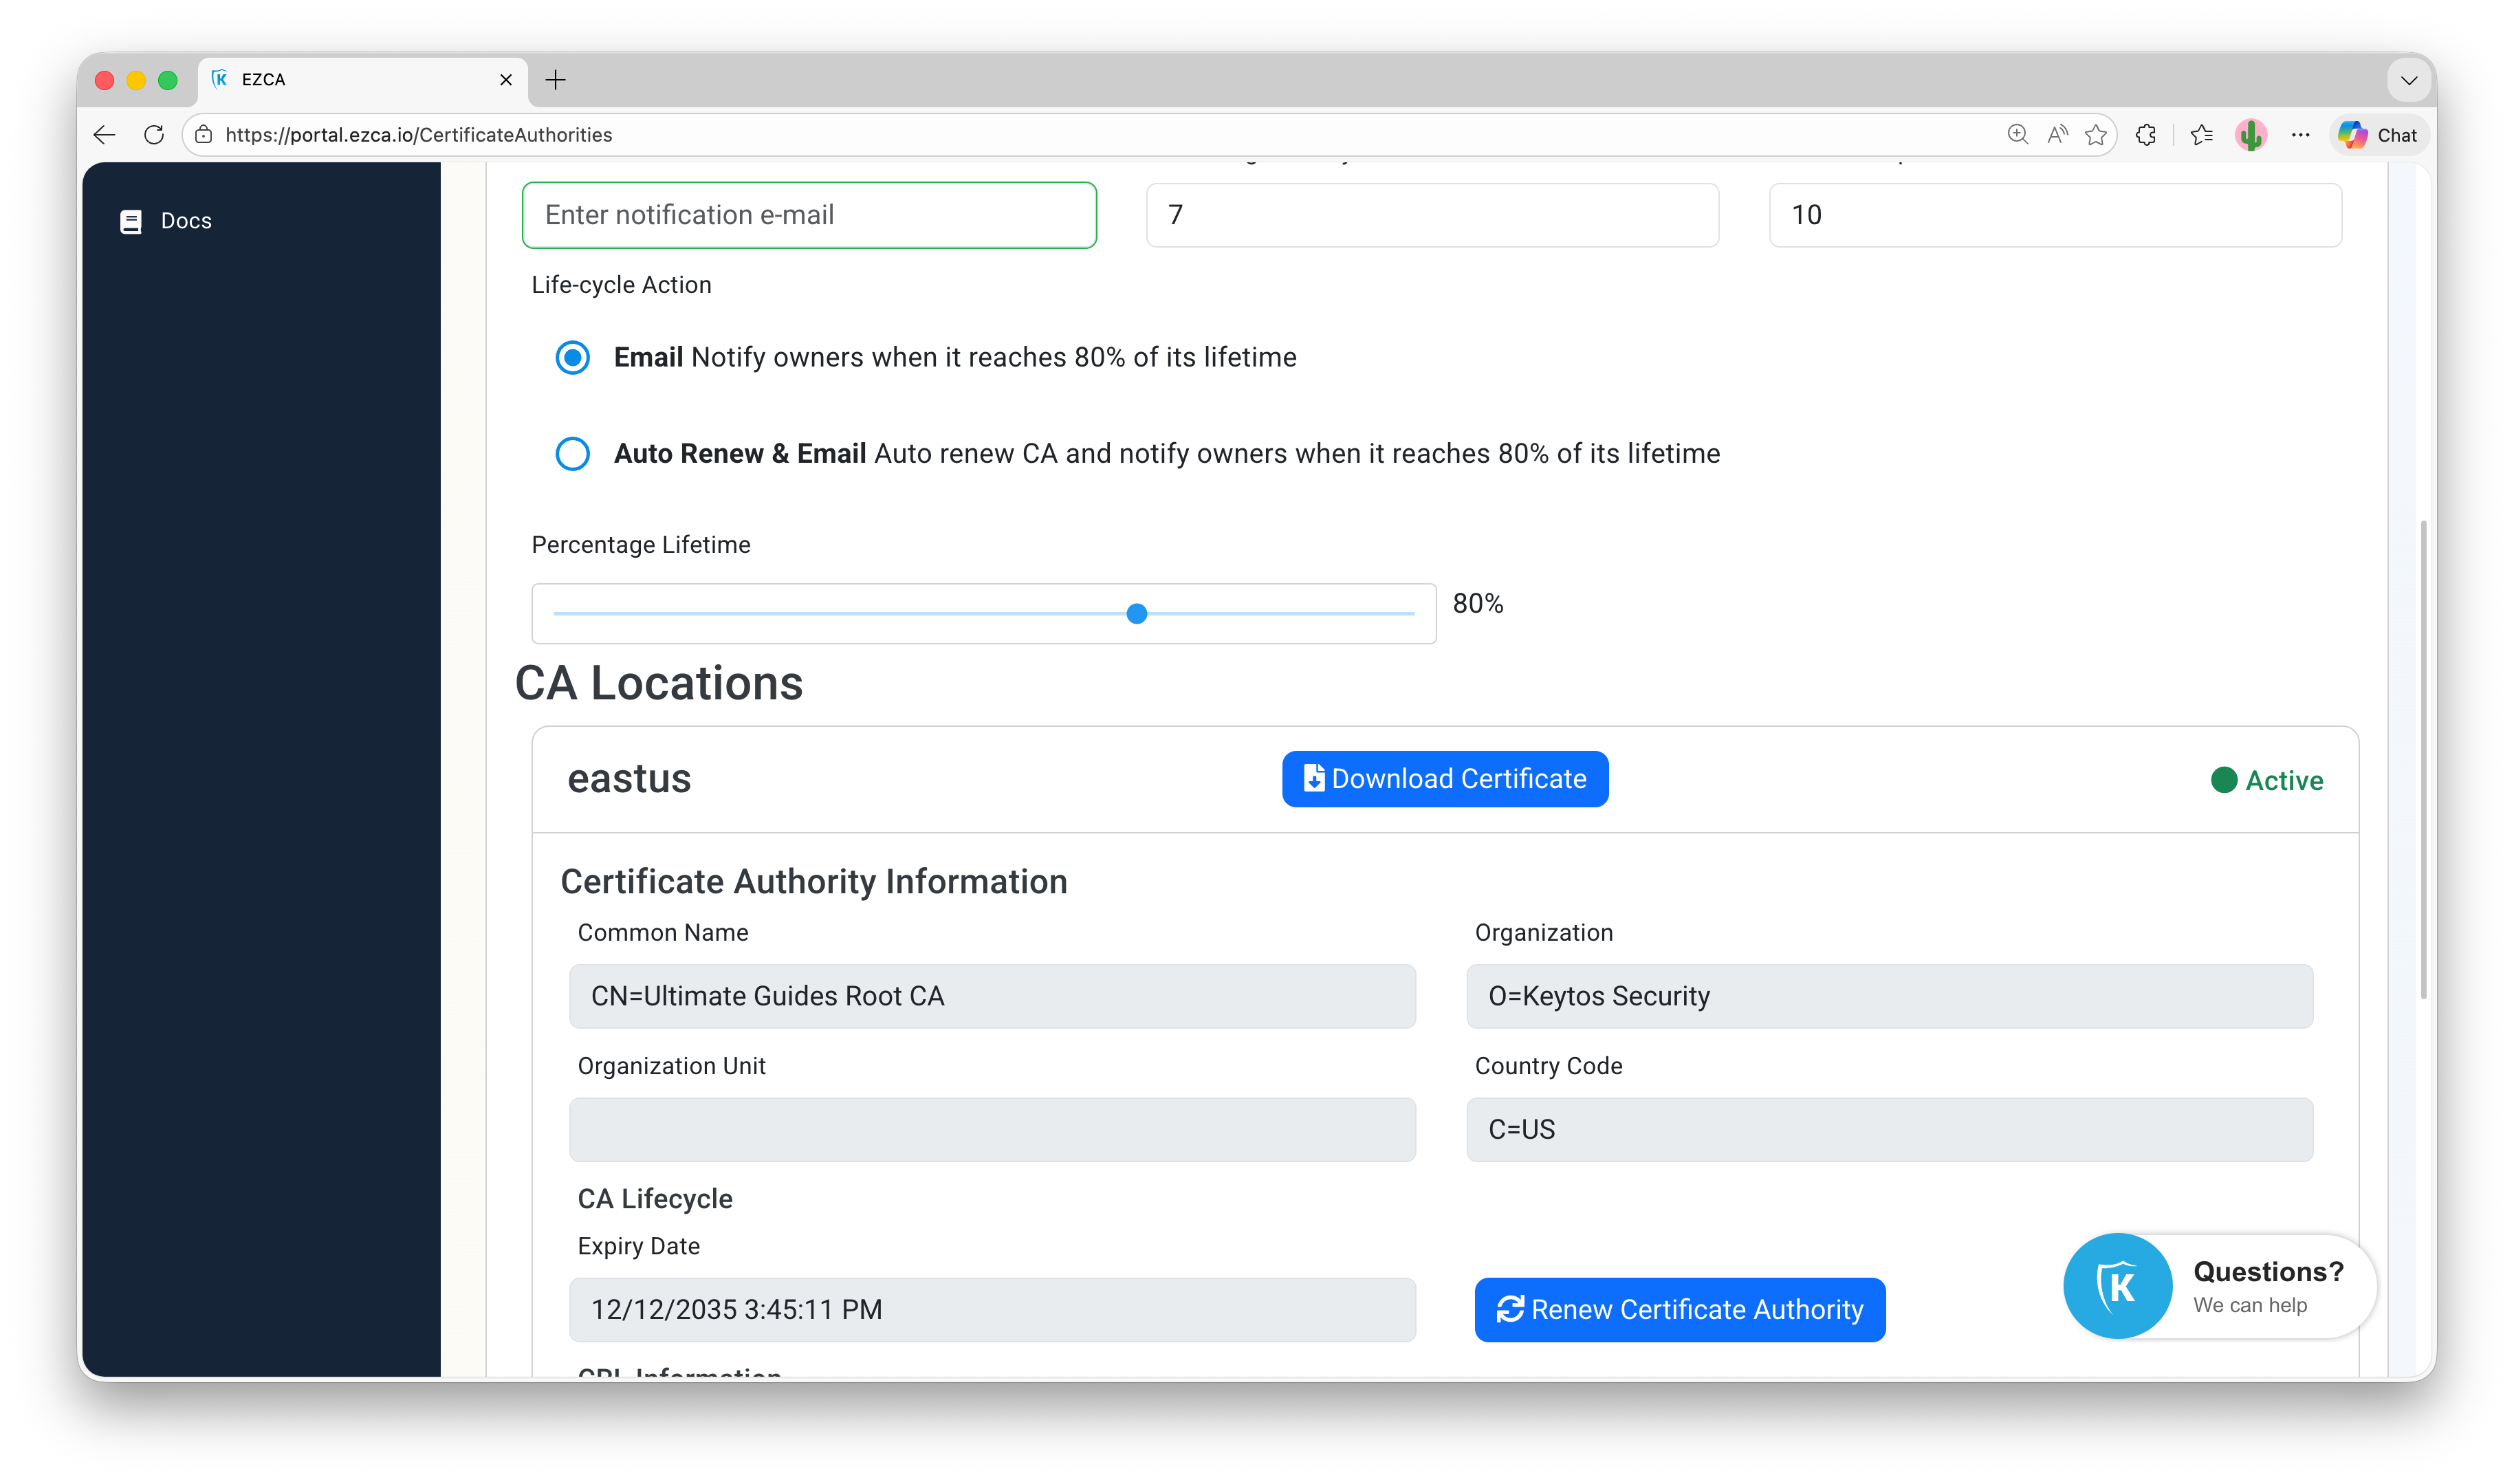
Scroll down to the CA Locations section and click on the Download Certificate button for your CA.
How to Enable Static SCEP Challenge in Your EZCA SCEP CA
Before you can create a custom profile for SCEP in Apple Configurator, you need to ensure that your EZCA SCEP CA is configured to use a static challenge.
-
Navigate to your EZCA portal and sign in as a PKI Administrator.
-
Click on the Certificate Authorities tab and scroll to your SCEP CA.
-
Click on View Requirements for your SCEP CA.
-
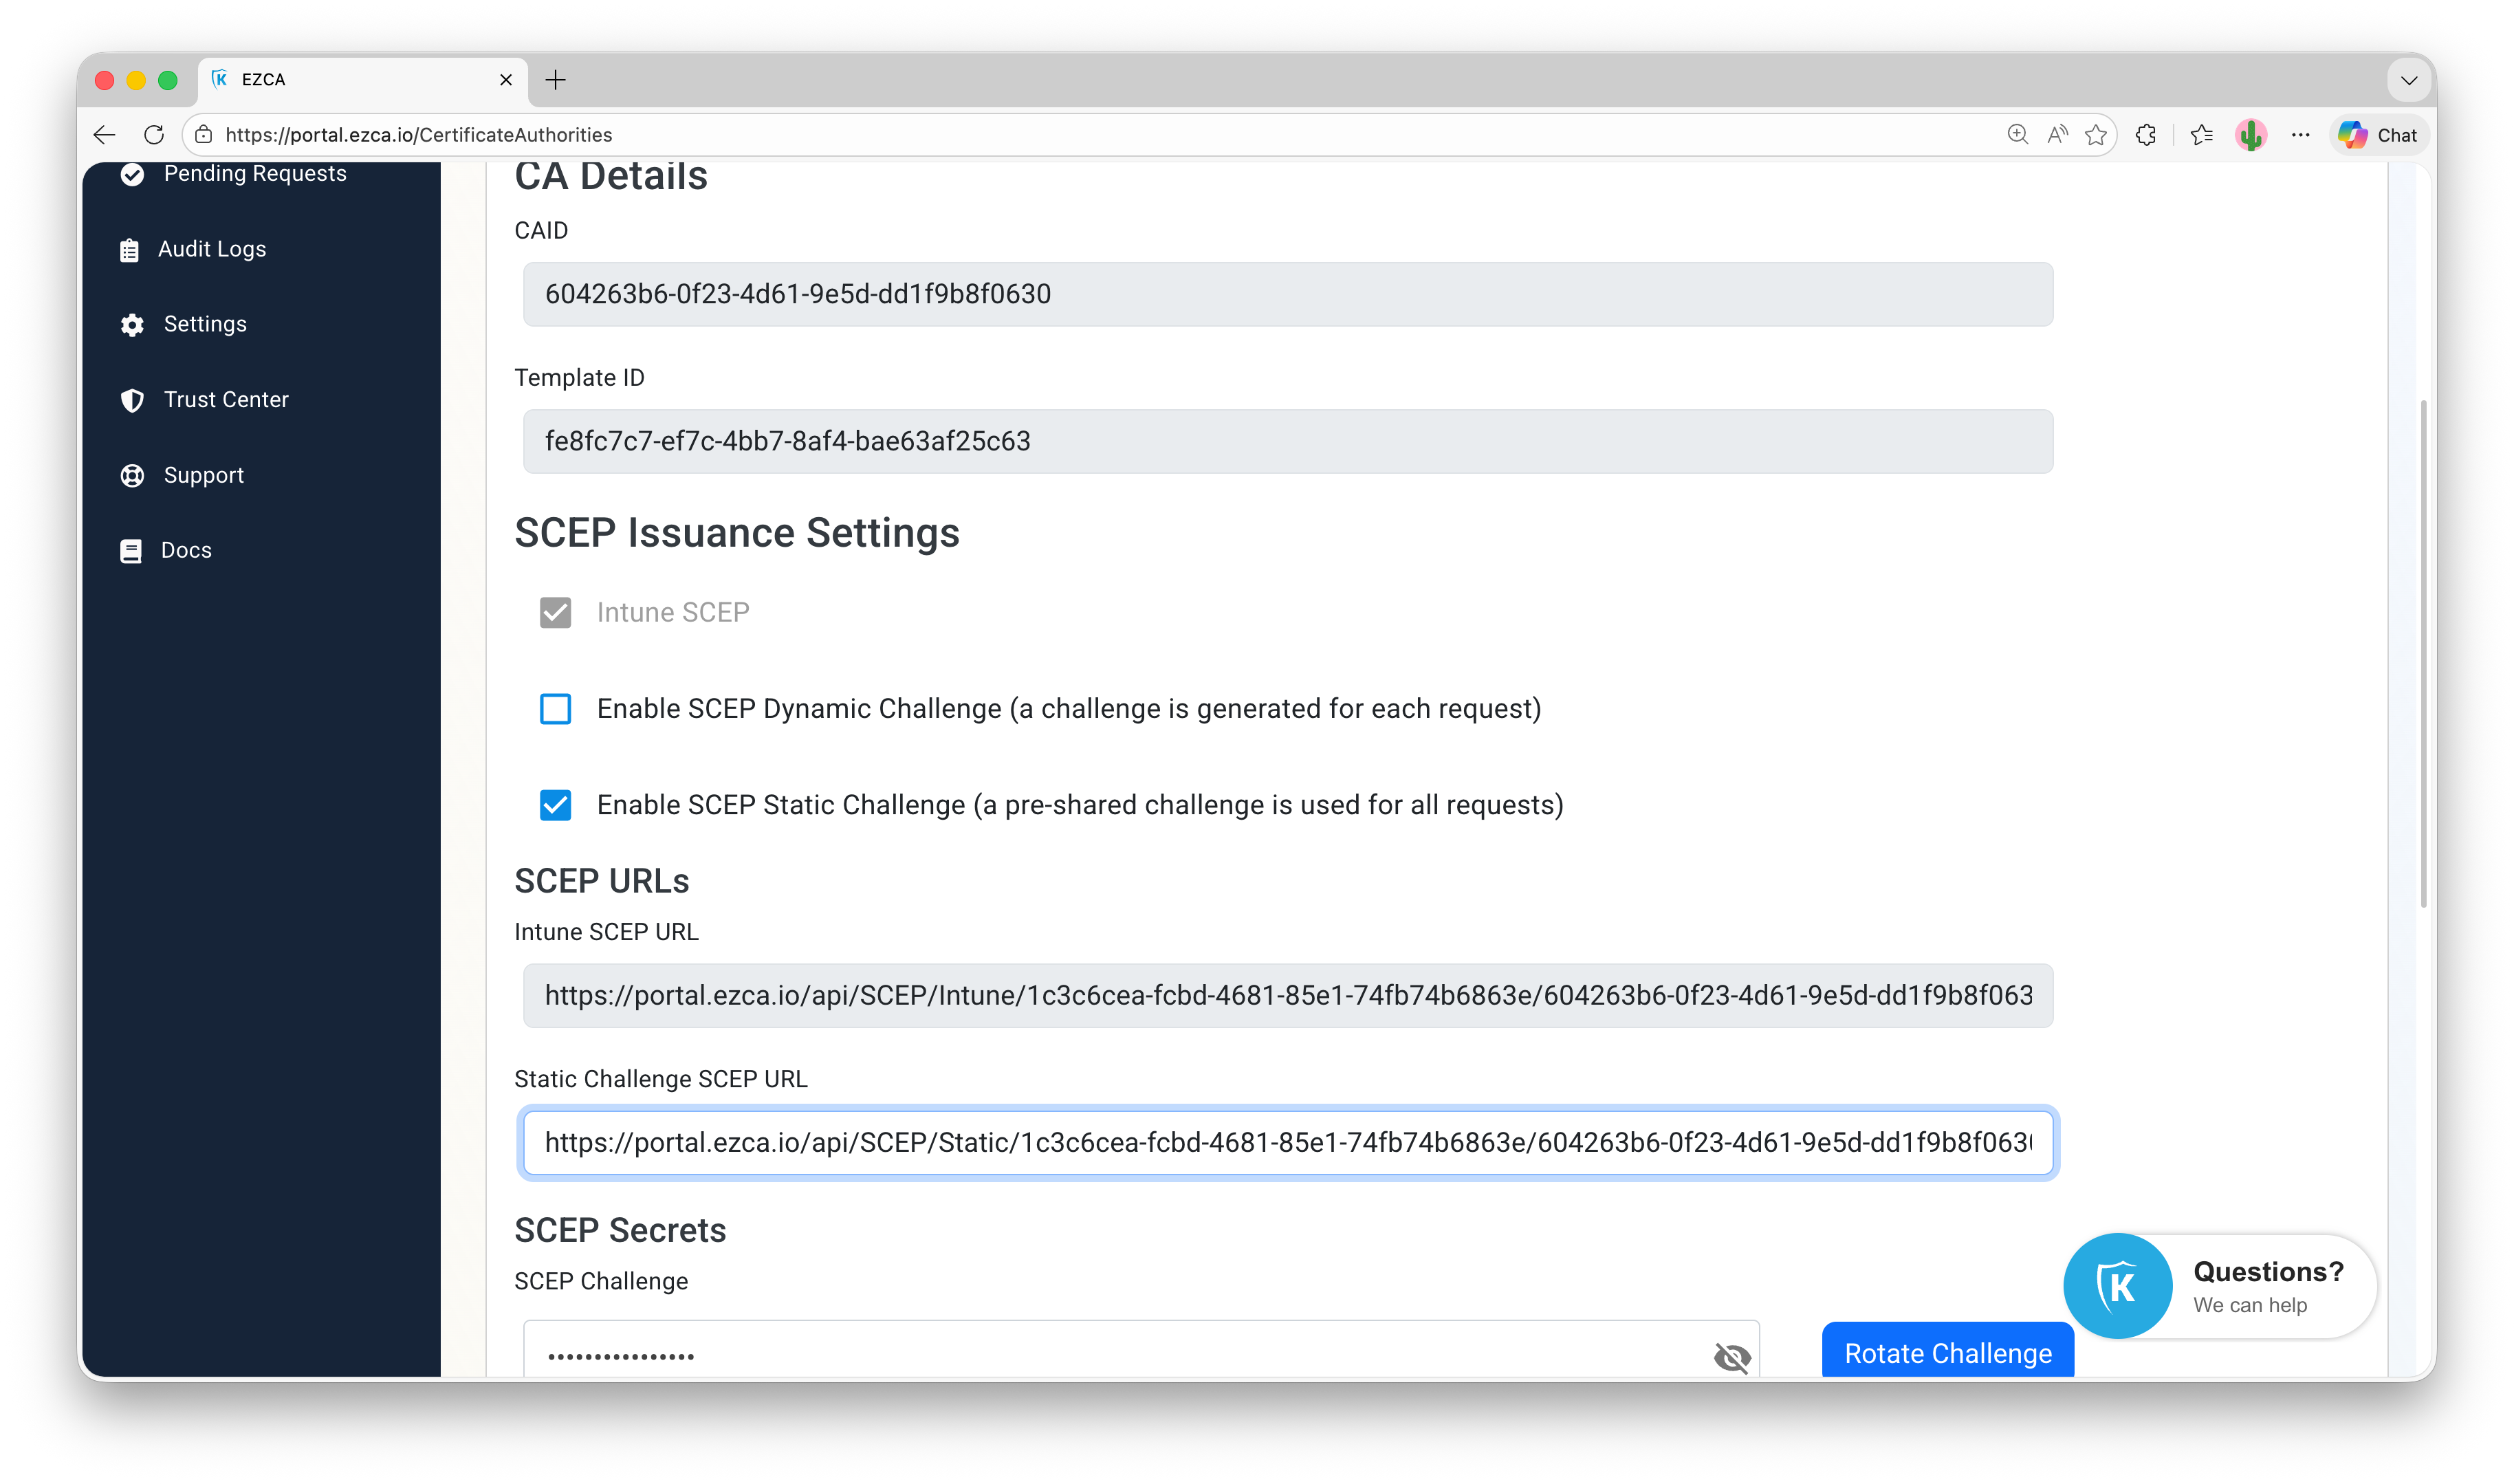
Check the box for Enable SCEP Static Challenge and click Save Changes. You will now see your Static Challenge SCEP URL and SCEP Challenge:
How to Create a Configuration Profile in Apple Configurator for SCEP
-
Start on a macOS device with Apple Configurator installed.
-
Open Apple Configurator, and click on File → New Profile to create a new configuration profile.
-
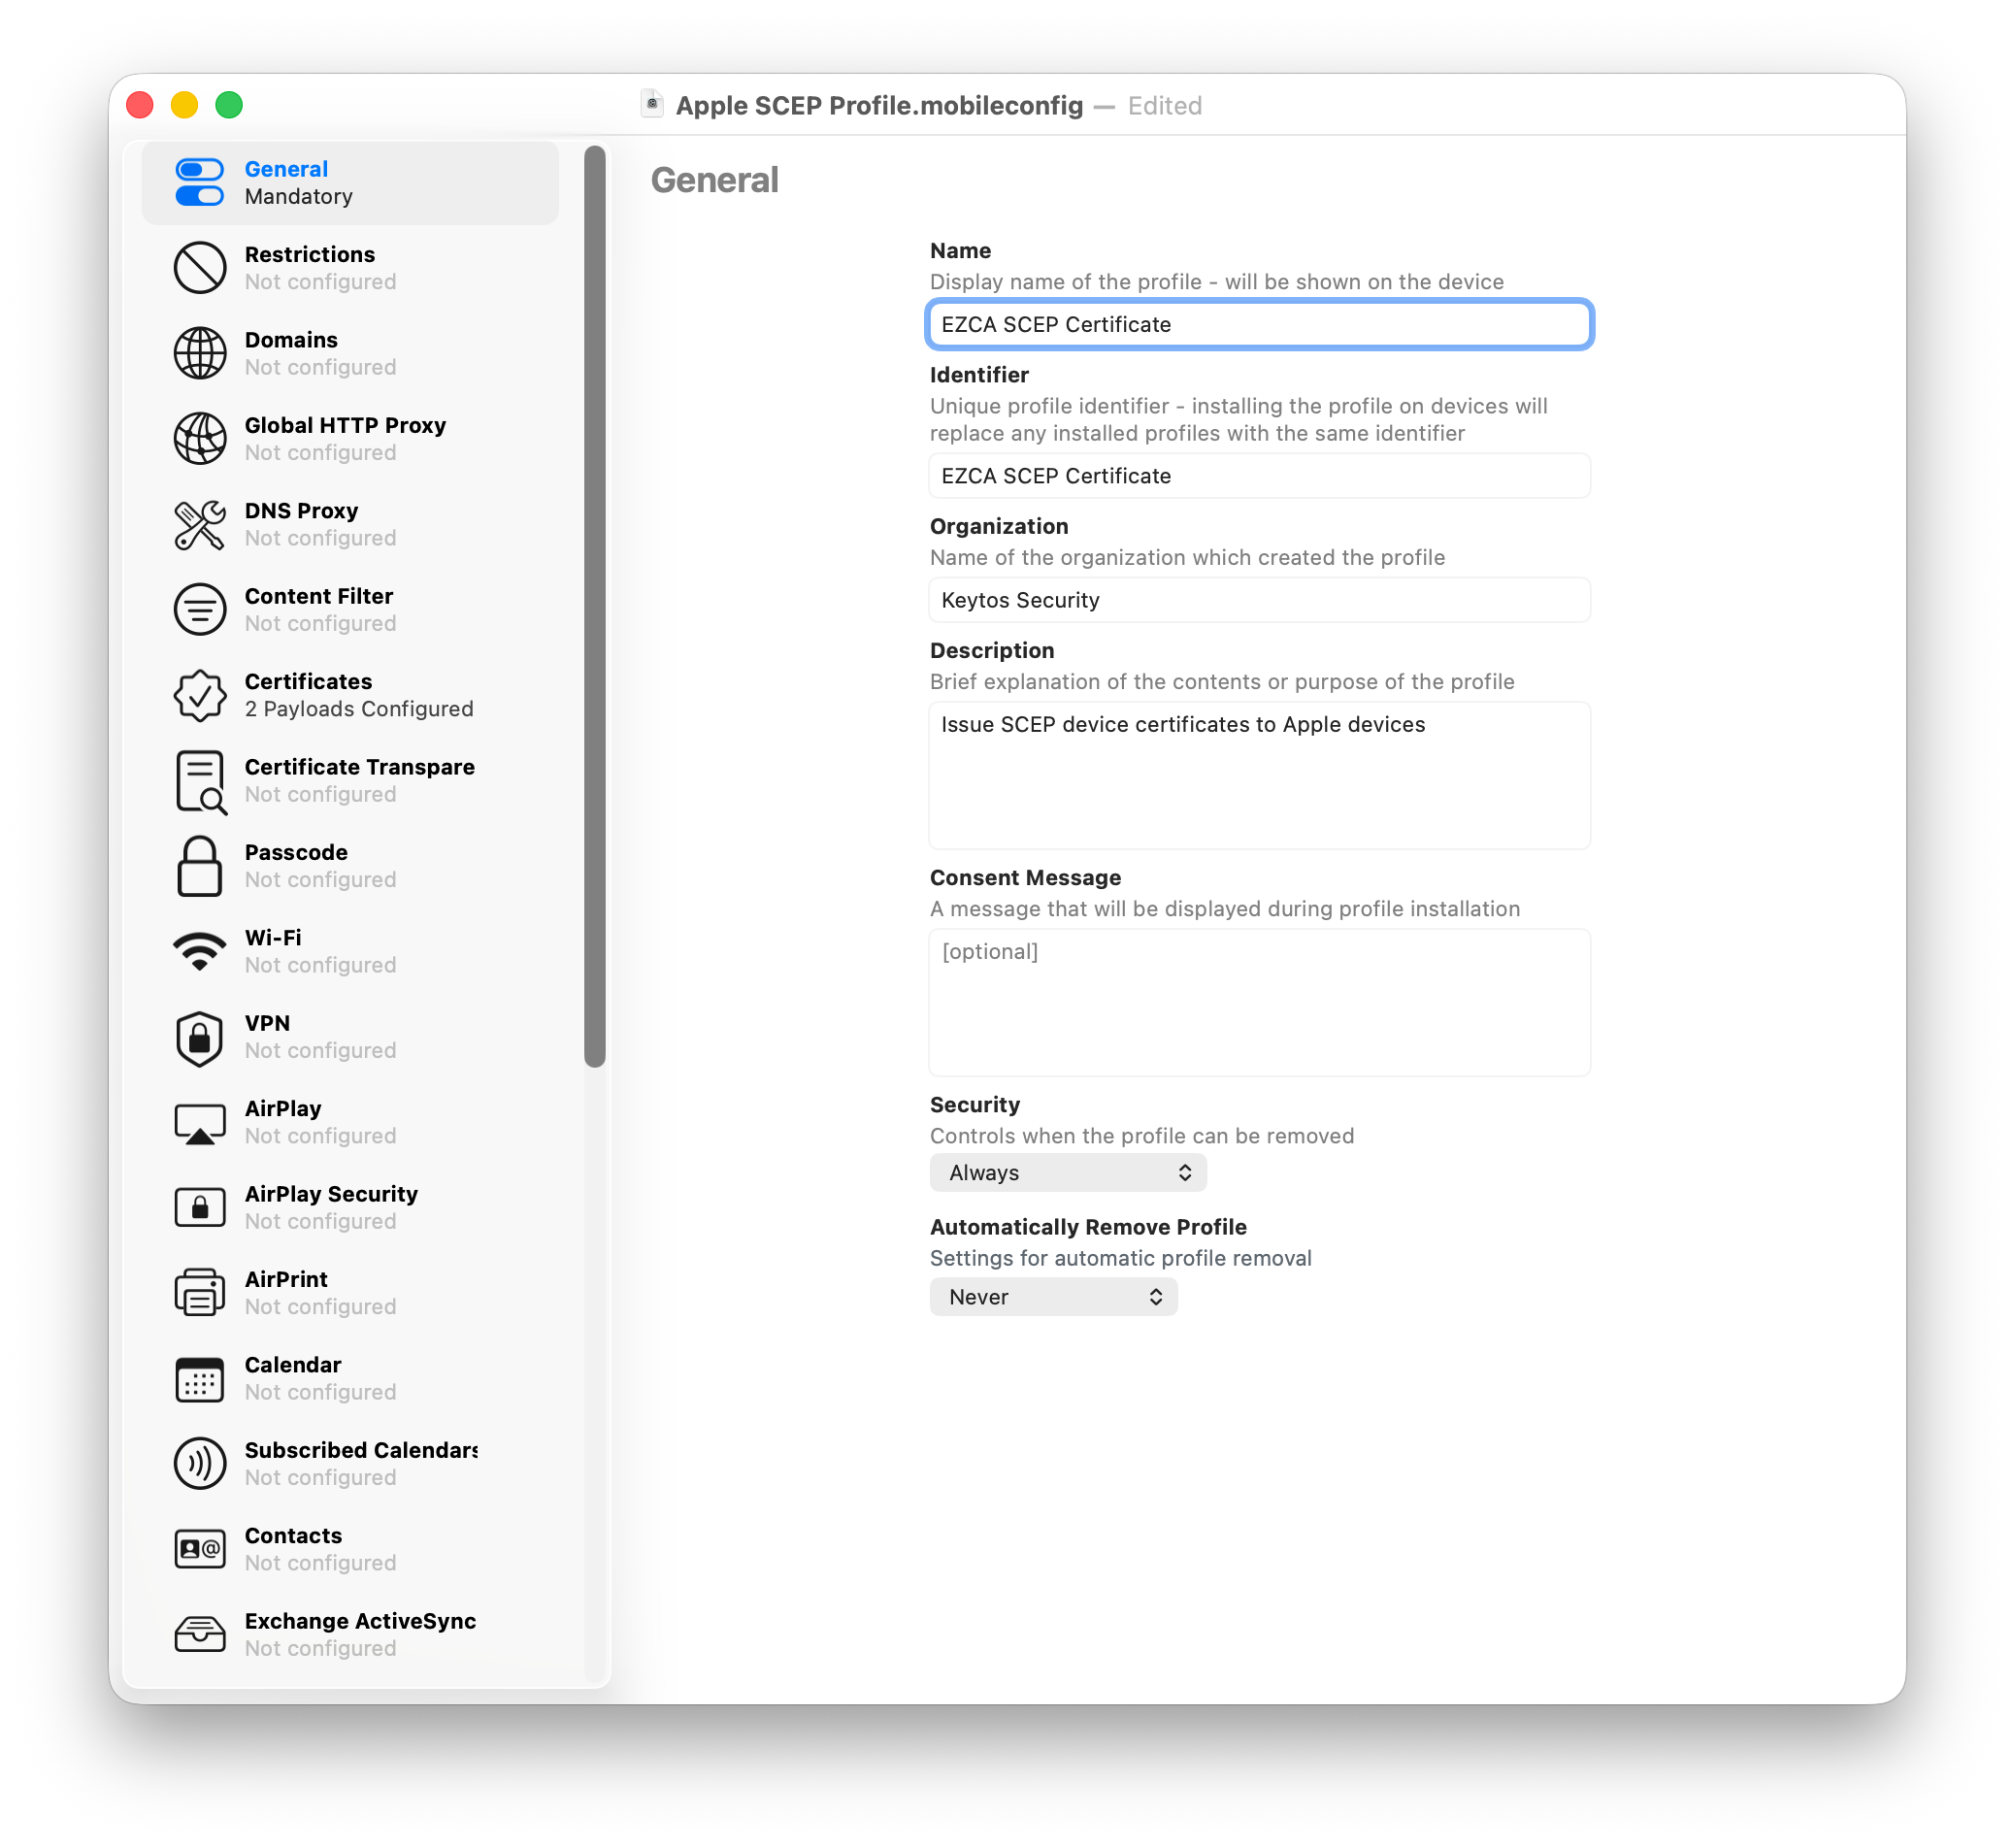
Fill out the General section with a name, identifier, and description for the profile.
-
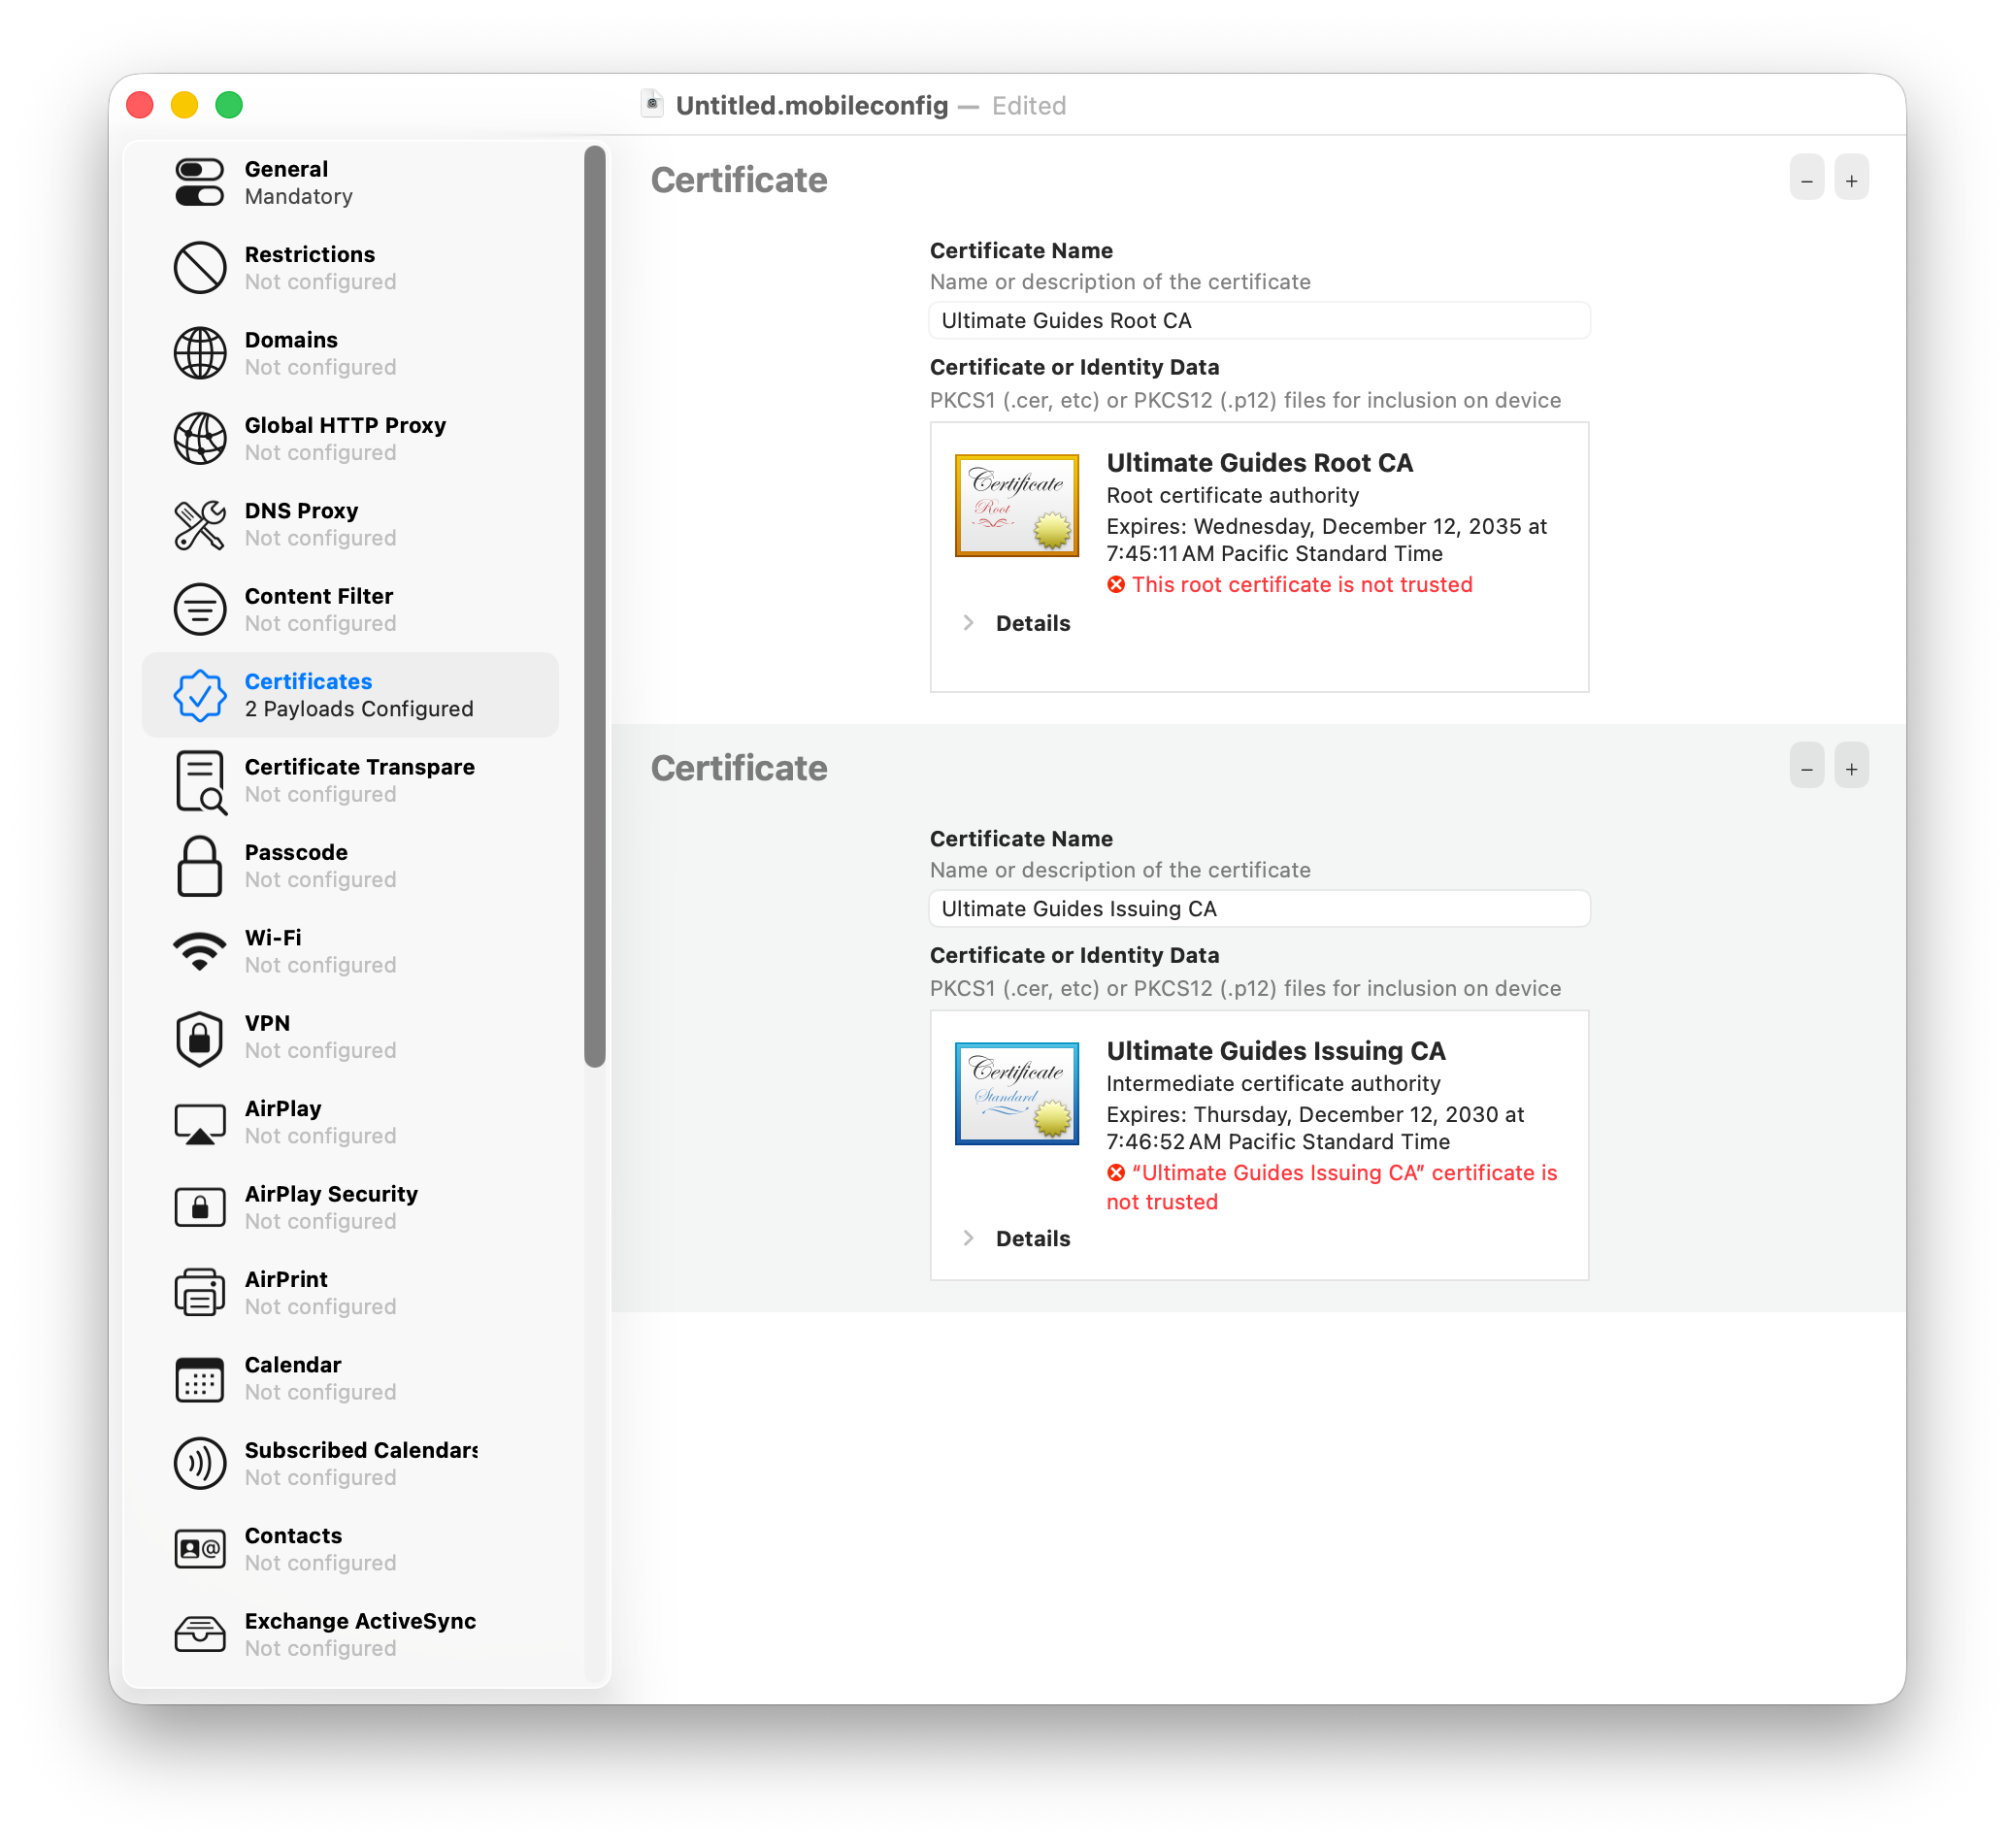
Click on the Certificates section and then click on the Configure button to add a new certificate payload.
-
Select the CA certificate you downloaded from EZCA and upload it to the profile. This will ensure that the CA certificates are pushed to the devices and that they trust the SCEP CA.
-
Repeat the process to upload the root CA certificate if your SCEP CA is a subordinate CA.
-
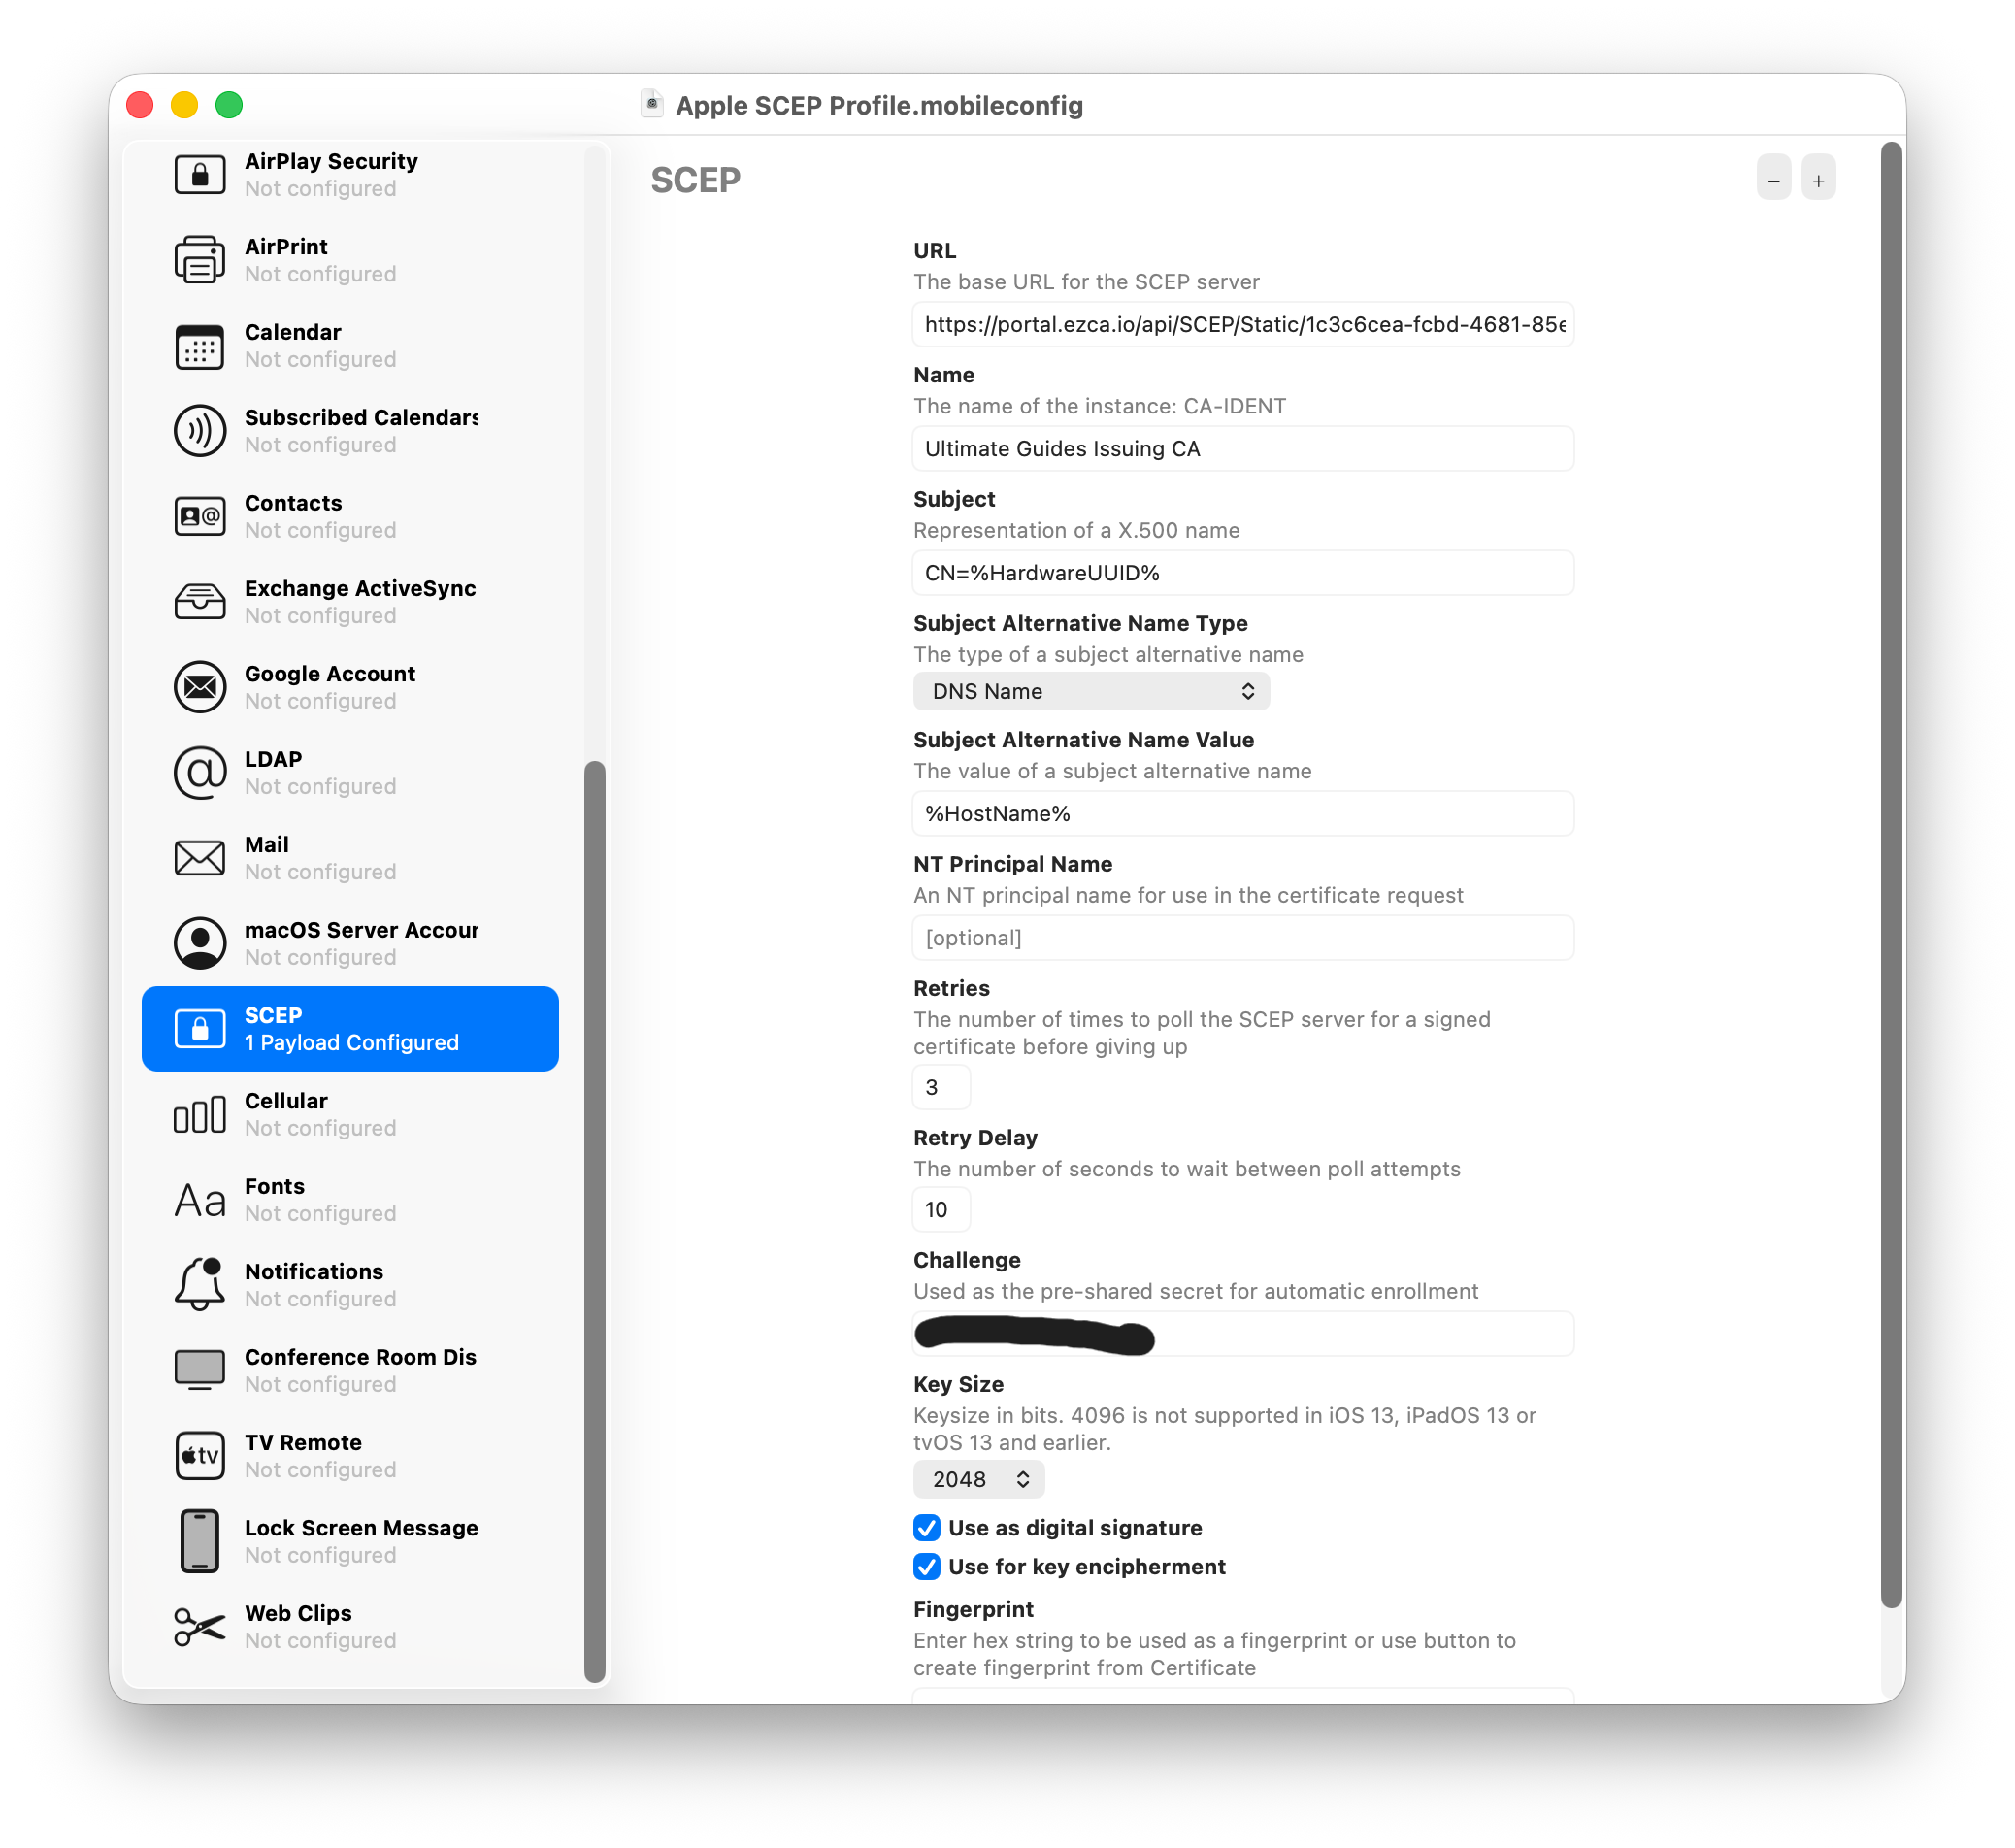
Next, click on the SCEP section and click on the Configure button to add a new SCEP payload.
-
Copy the Static Challenge SCEP URL from your EZCA portal and paste it into the URL field in Apple Configurator. Do the same for the Static Challenge in the Challenge field.
-
Configure the remaining fields:
- Name: Set as the name of your SCEP CA
- Subject: Use a static value or Apple’s built-in variables (e.g.
CN=%ComputerName%). - Subject Alternative Name Type: Set as DNS Name
- Subject Alternative Name Value: Use a static value or Apple’s built-in variables (e.g.
%HostName%). - Key Size: Set as 2048 or higher.
- Key Usage: Set as “Sign” and “Key Encipherment”.
-
You should now have a complete SCEP configuration in your custom profile:
-
Save the profile to your device as a .mobileconfig file.
Prerequisites for Configuring iMazing Profile Editor with SCEP
- You will need a macOS or Windows device with iMazing Profile Editor installed to create the custom profile.
- You will need an EZCA SCEP CA set up and ready to issue certificates.
How to Download Your Root and/or SCEP CA Certificates from EZCA
To establish trust for your SCEP certificates, you will need to download and later push the CA certificate(s) for your SCEP CA to your devices. If your SCEP CA is a subordinate CA, you will need to download both the root and SCEP CA certificates. If your SCEP CA is a root CA, you will only need to download the SCEP CA certificate.
-
Navigate to your EZCA portal and sign in as a PKI Administrator.
-
Click on the Certificate Authorities tab and scroll to your SCEP CA.
-
Click on the View Requirements button for your SCEP CA.
-
Scroll down to the CA Locations section and click on the Download Certificate button for your CA.
How to Enable Static SCEP Challenge in Your EZCA SCEP CA
Before you can create a custom profile for SCEP in iMazing Profile Editor, you need to ensure that your EZCA SCEP CA is configured to use a static challenge.
-
Navigate to your EZCA portal and sign in as a PKI Administrator.
-
Click on the Certificate Authorities tab and scroll to your SCEP CA.
-
Click on View Requirements for your SCEP CA.
-
Check the box for Enable SCEP Static Challenge and click Save Changes. You will now see your Static Challenge SCEP URL and SCEP Challenge:
How to Create a Configuration Profile in iMazing Profile Editor for SCEP
-
Download and install iMazing Profile Editor.
-
Open iMazing Profile Editor, and click on File → New Profile to create a new configuration profile.
-
Fill out the General section with a name and description for the profile.
-
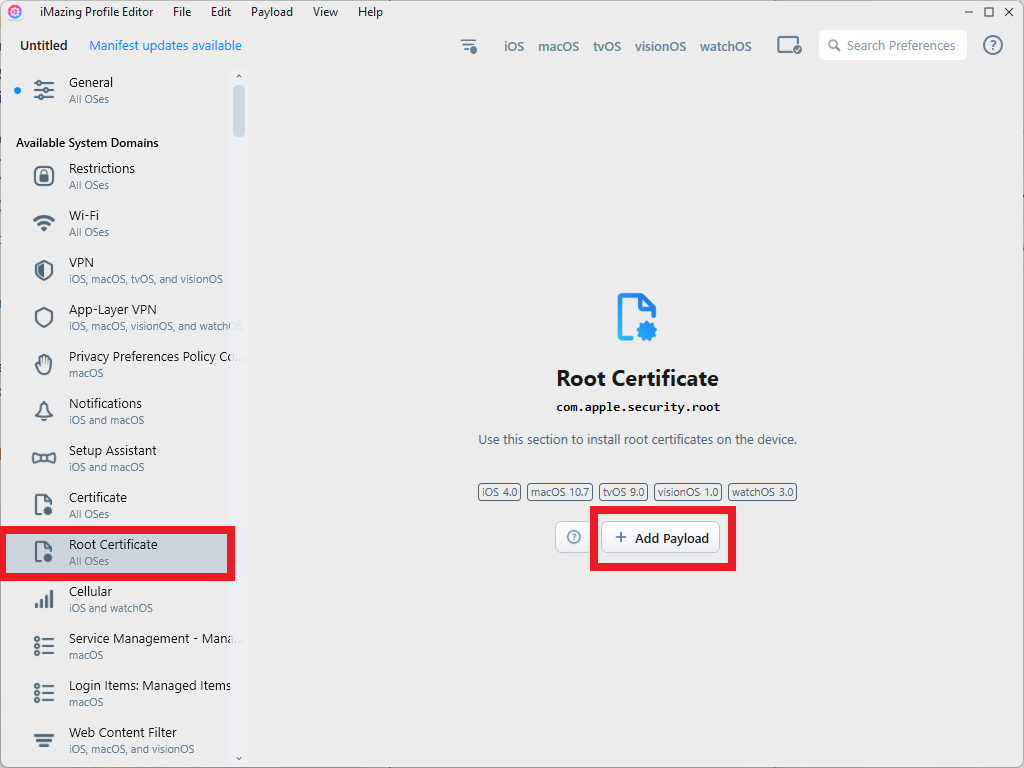
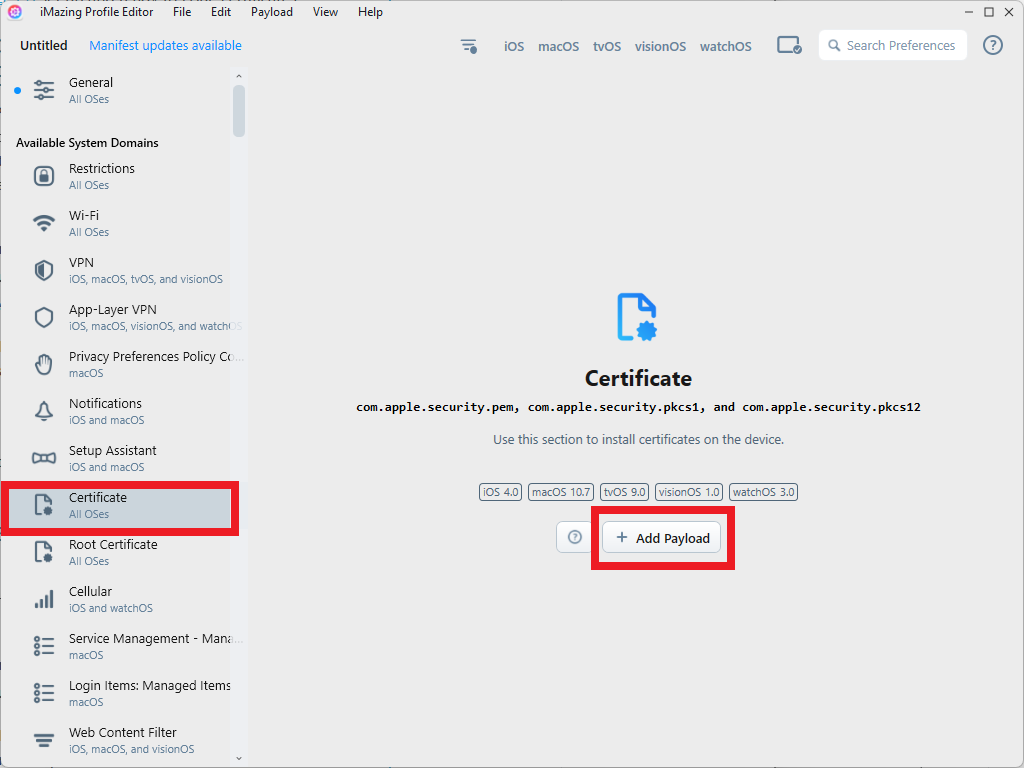
Click on the Root Certificate section and then click on the Add Payload button to add a new certificate payload.
-
Select the Root CA certificate you downloaded from EZCA and upload it to the profile. This will ensure that the Root CA certificates are pushed to the devices and that they trust the SCEP Root CA.
-
Repeat the process to upload the CA certificate if your SCEP CA is a subordinate CA.
-
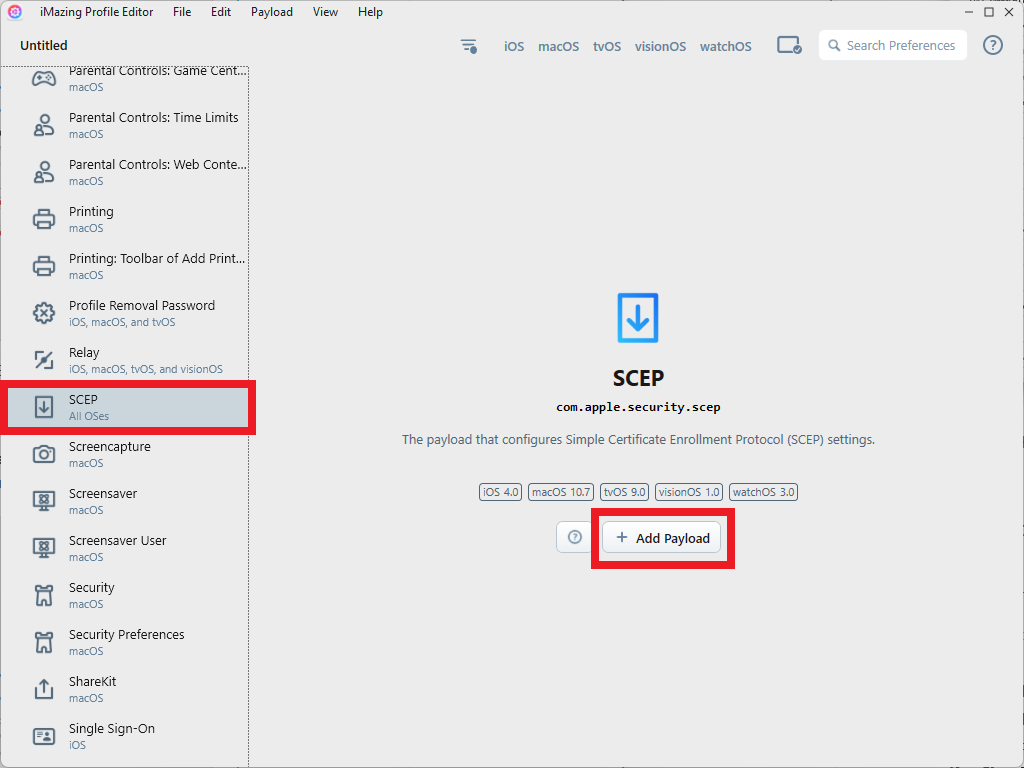
Next, click on the SCEP section and click on the Add Payload button to add a new SCEP payload.
-
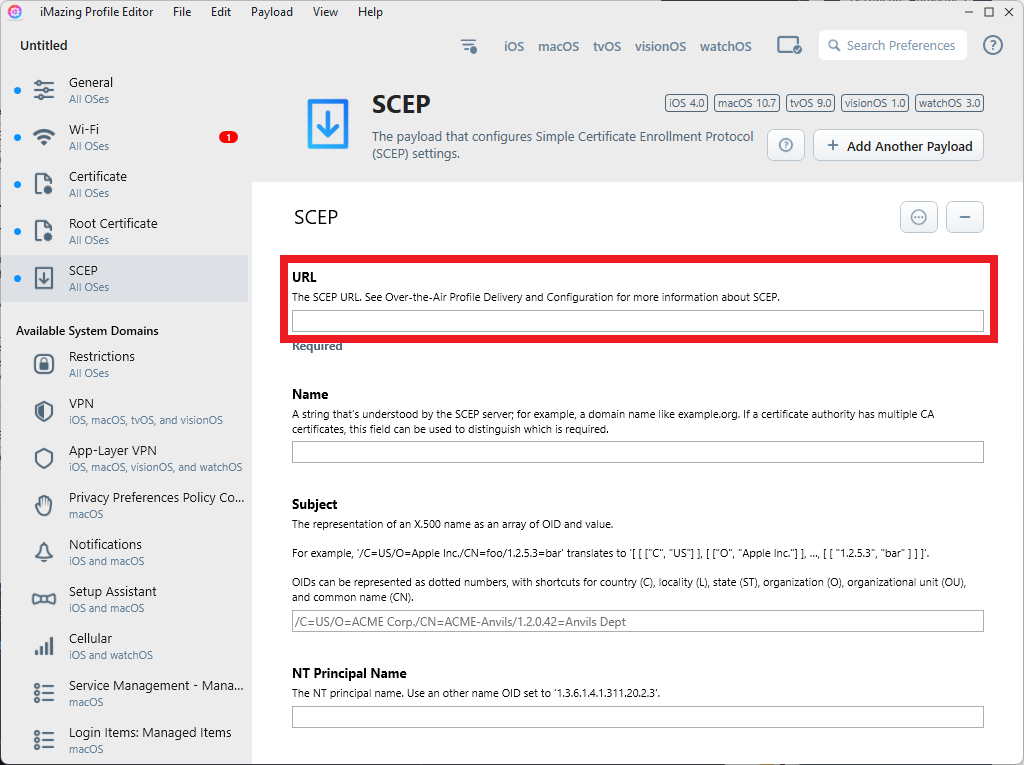
Copy the Static Challenge SCEP URL from your EZCA portal and paste it into the URL field in iMazing Profile Editor.
-
Copy the Challenge from EZCA and paste it into the Challenge field.
-
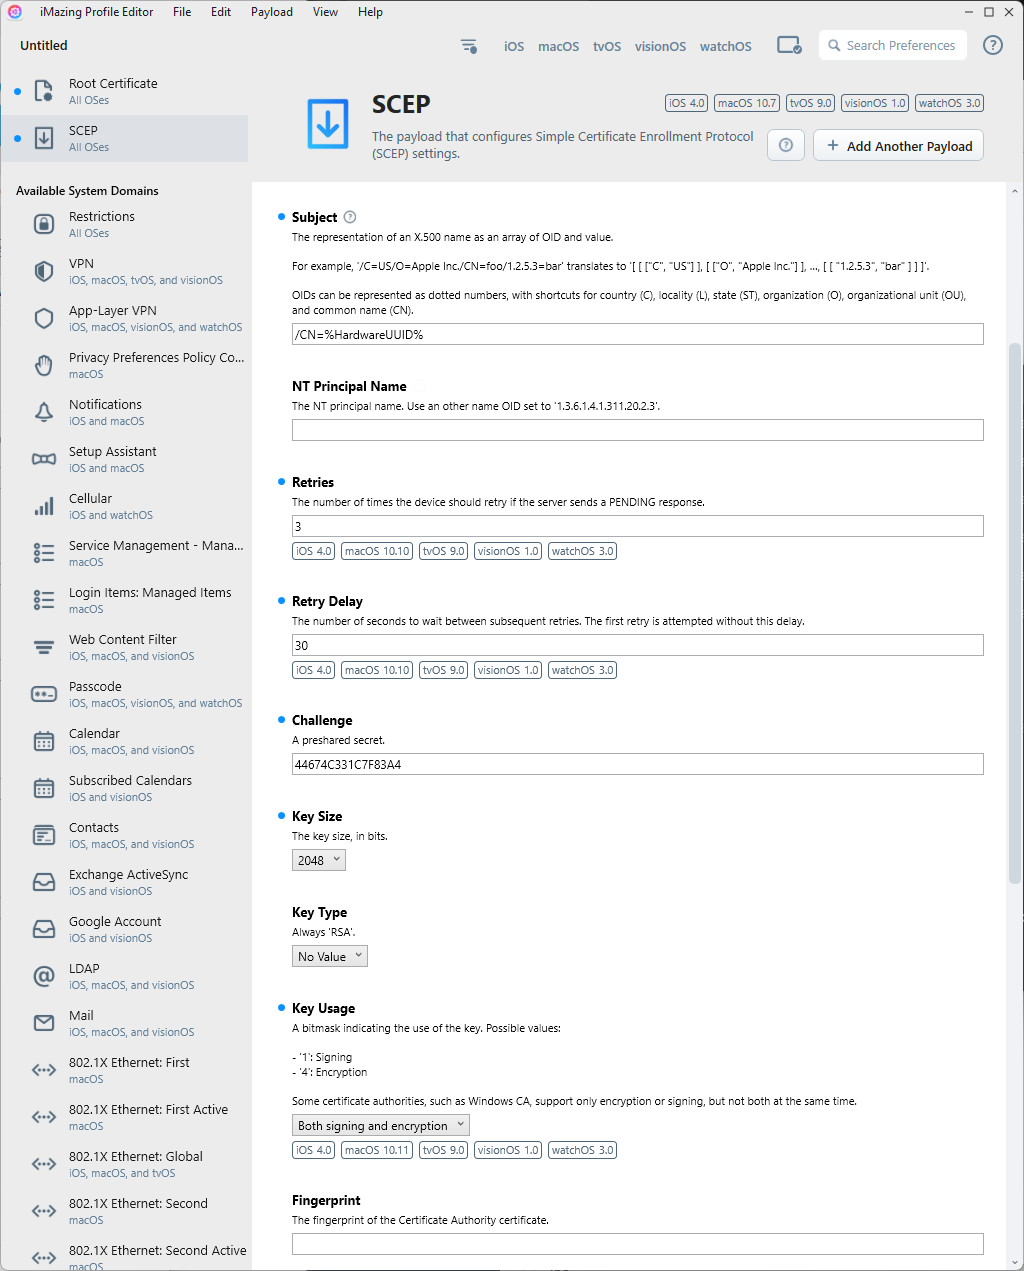
Configure the remaining fields:
-
Subject: Use a static value or Apple’s built-in variables (e.g.
CN=%ComputerName%). -
Subject Alternative Name Type: Set as DNS Name
-
Subject Alternative Name Value: Use a static value or Apple’s built-in variables (e.g.
%HostName%) -
Retries: 3.
-
Retry Delay: 30.
-
Key Size: Set as 2048 or higher.
-
Key Usage: Set as Both signing and encryption.
-
-
You should now have a complete SCEP configuration in your custom profile:
-
Click File → Save to save the profile to your device as a .mobileconfig file.
How To Issue SCEP Certificates to SimpleMDM Devices for RADIUS Authentication
Once you have created your .mobileconfig file, you will need to issue it to all your devices.
-
Open SimpleMDM in your browser.
-
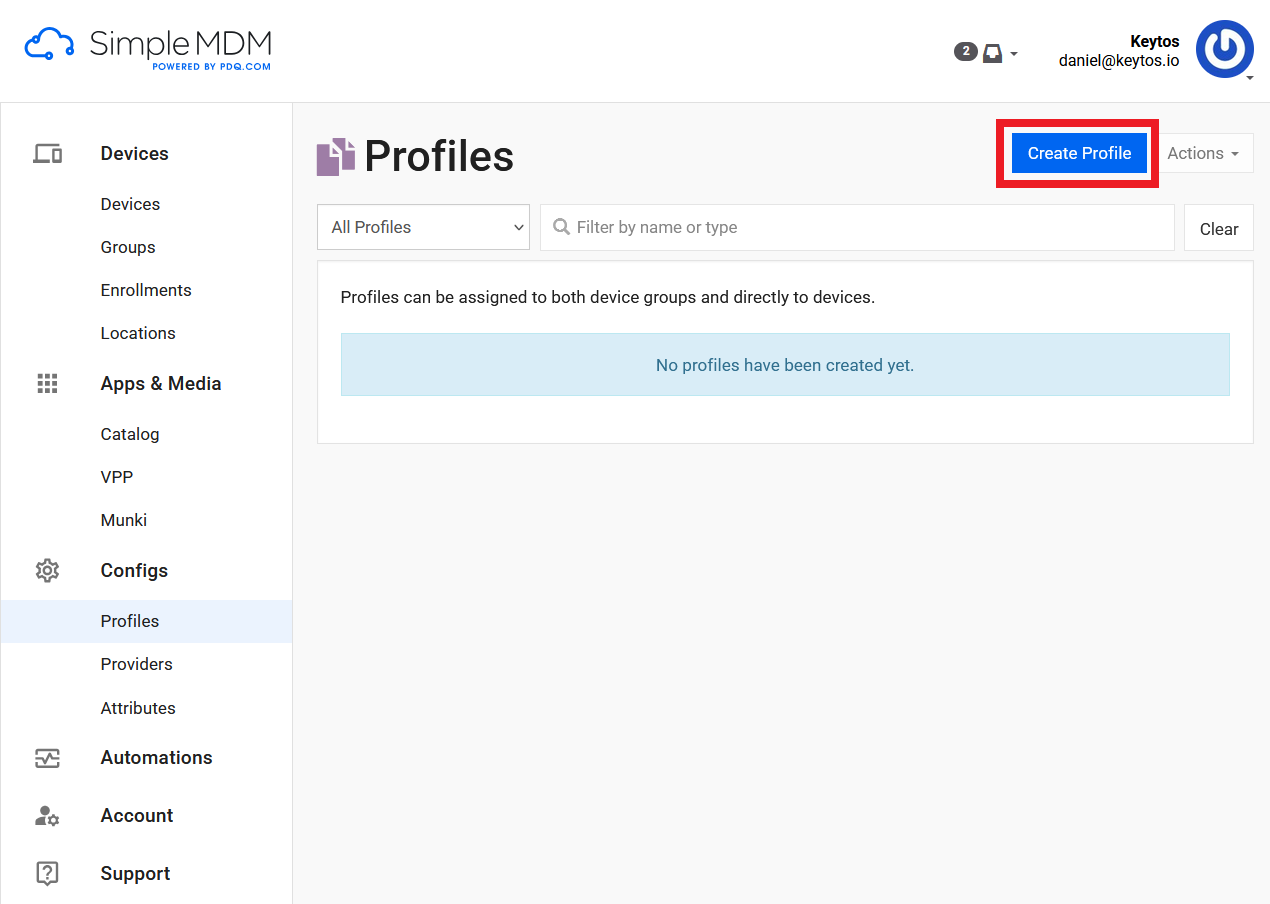
Navigate to Config → Profiles.
-
Click Create Profile.
-
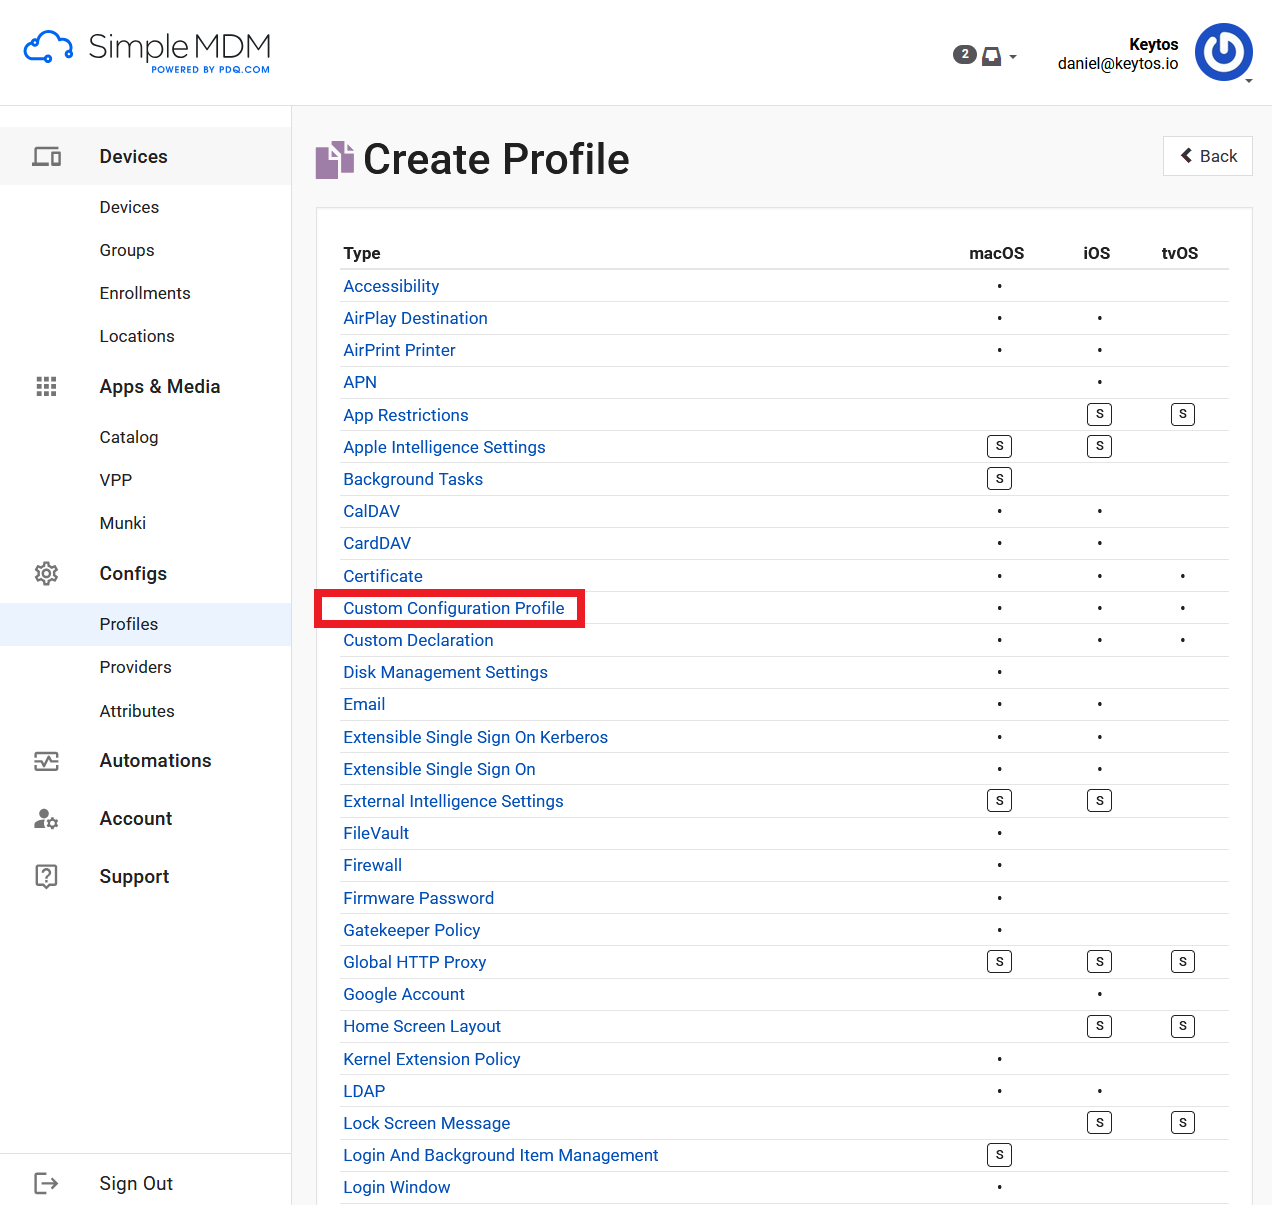
Select Custom Configuration Profile.
-
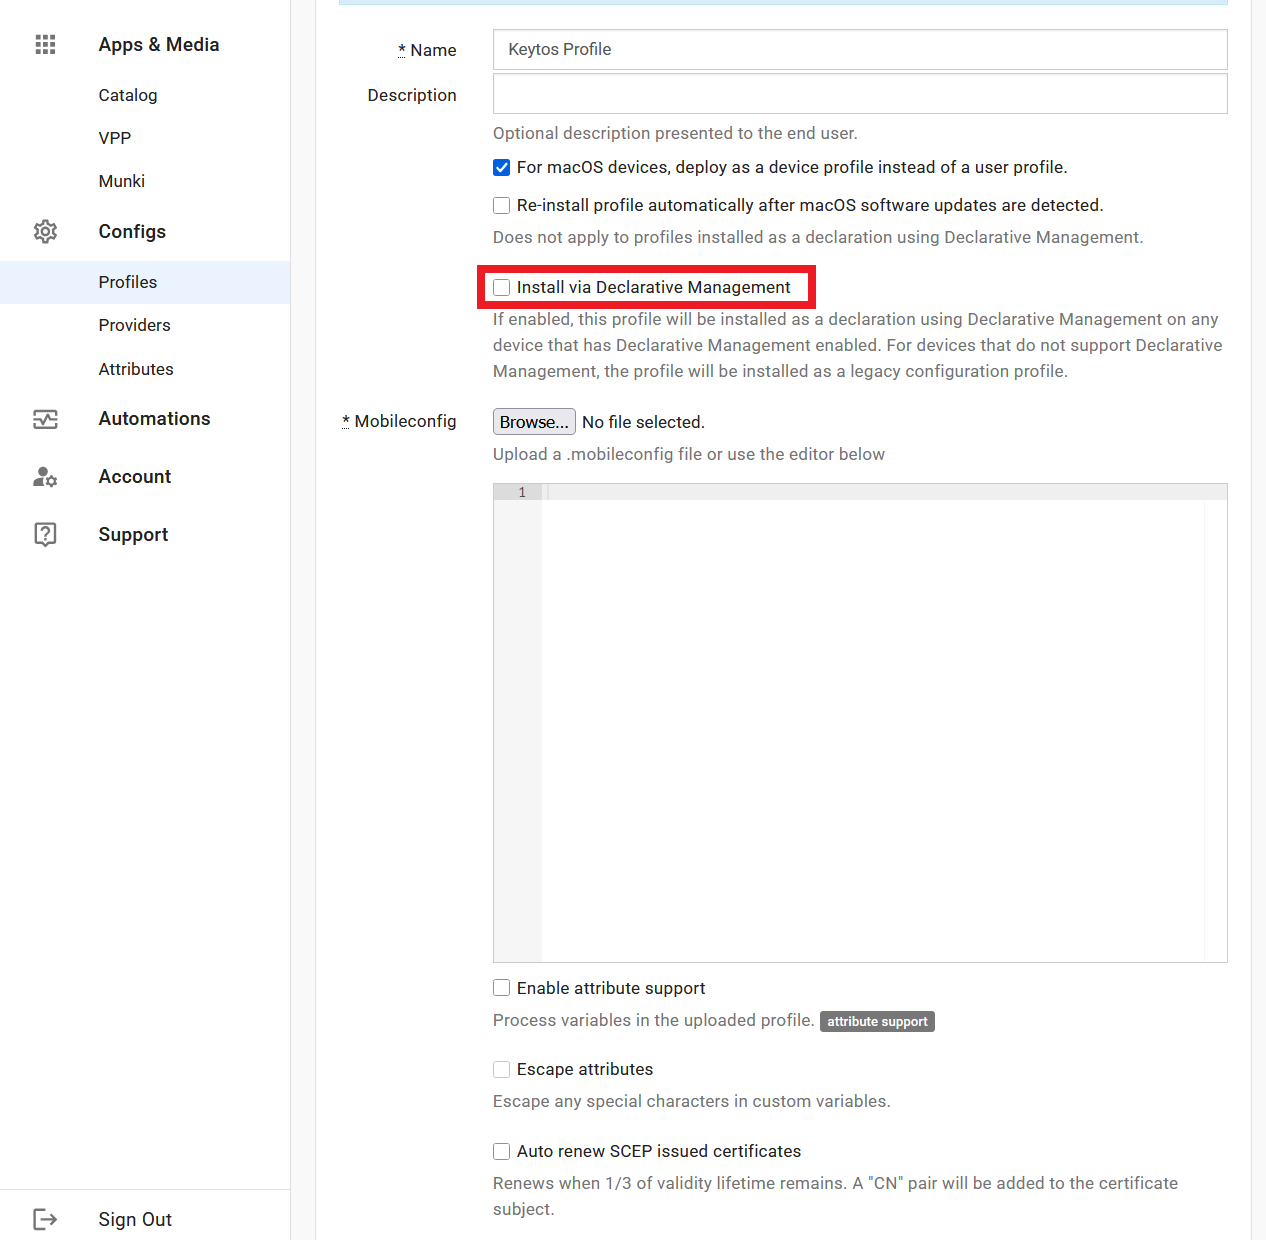
Name your profile.
-
Disable Install via Declarative Management.
-
Upload the
.mobileconfigyou just created. -
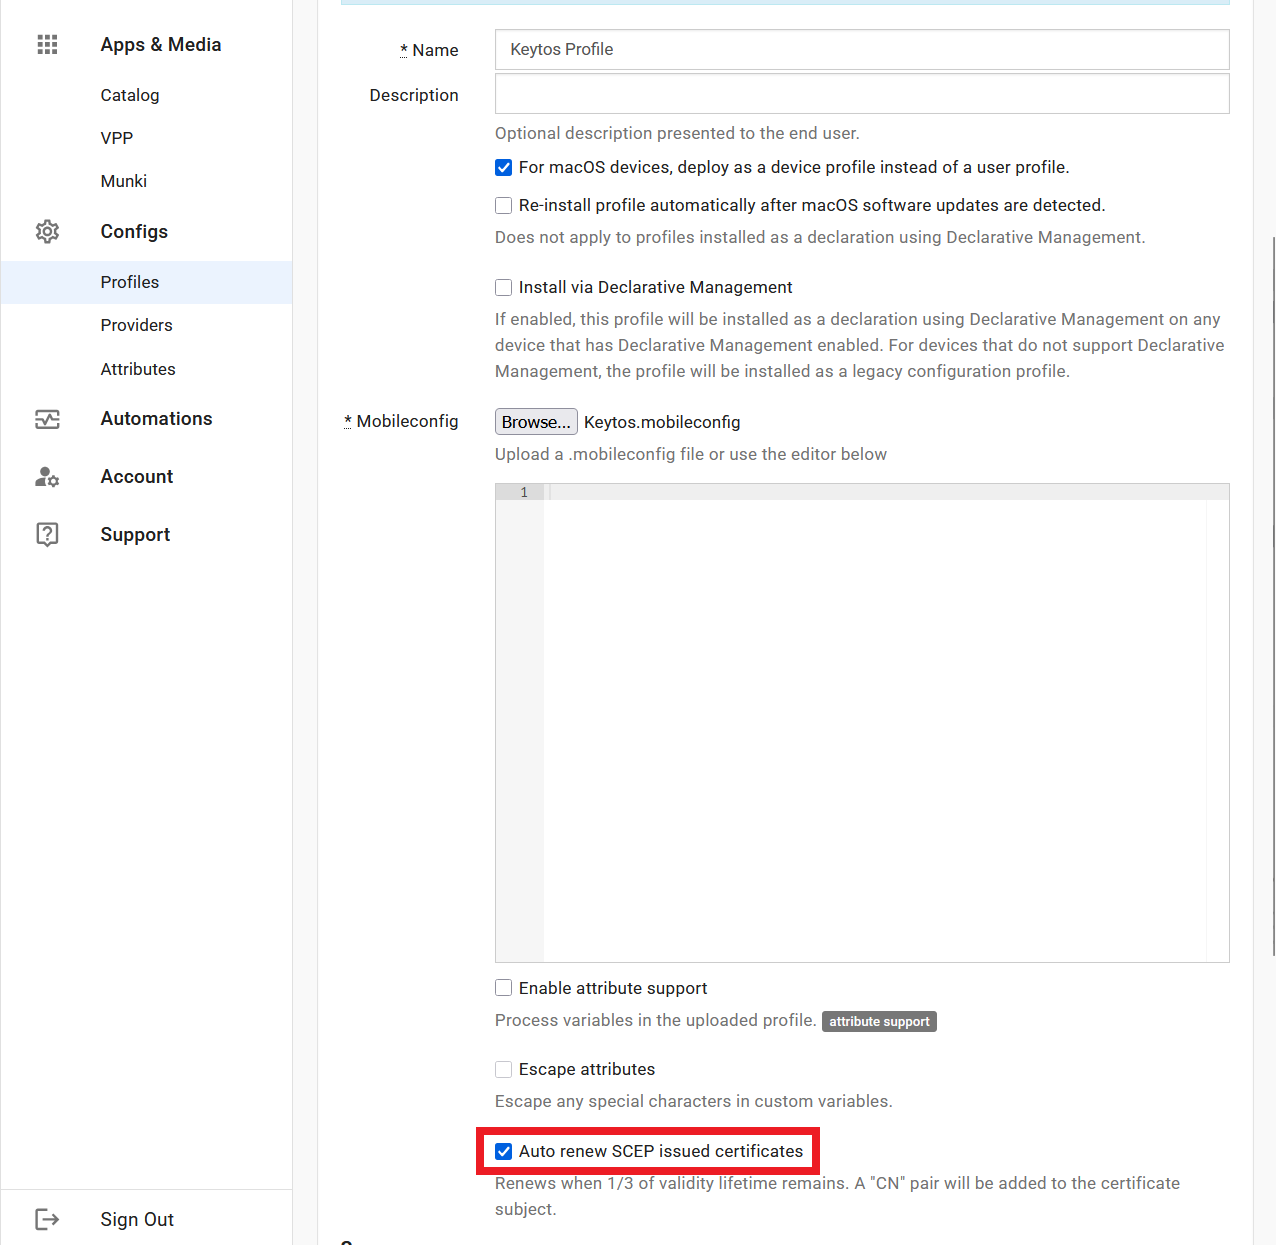
Enable Auto renew SCEP issued certificates.
-
Scroll to the bottom and click Save.
-
Click on the profile you just created.
-
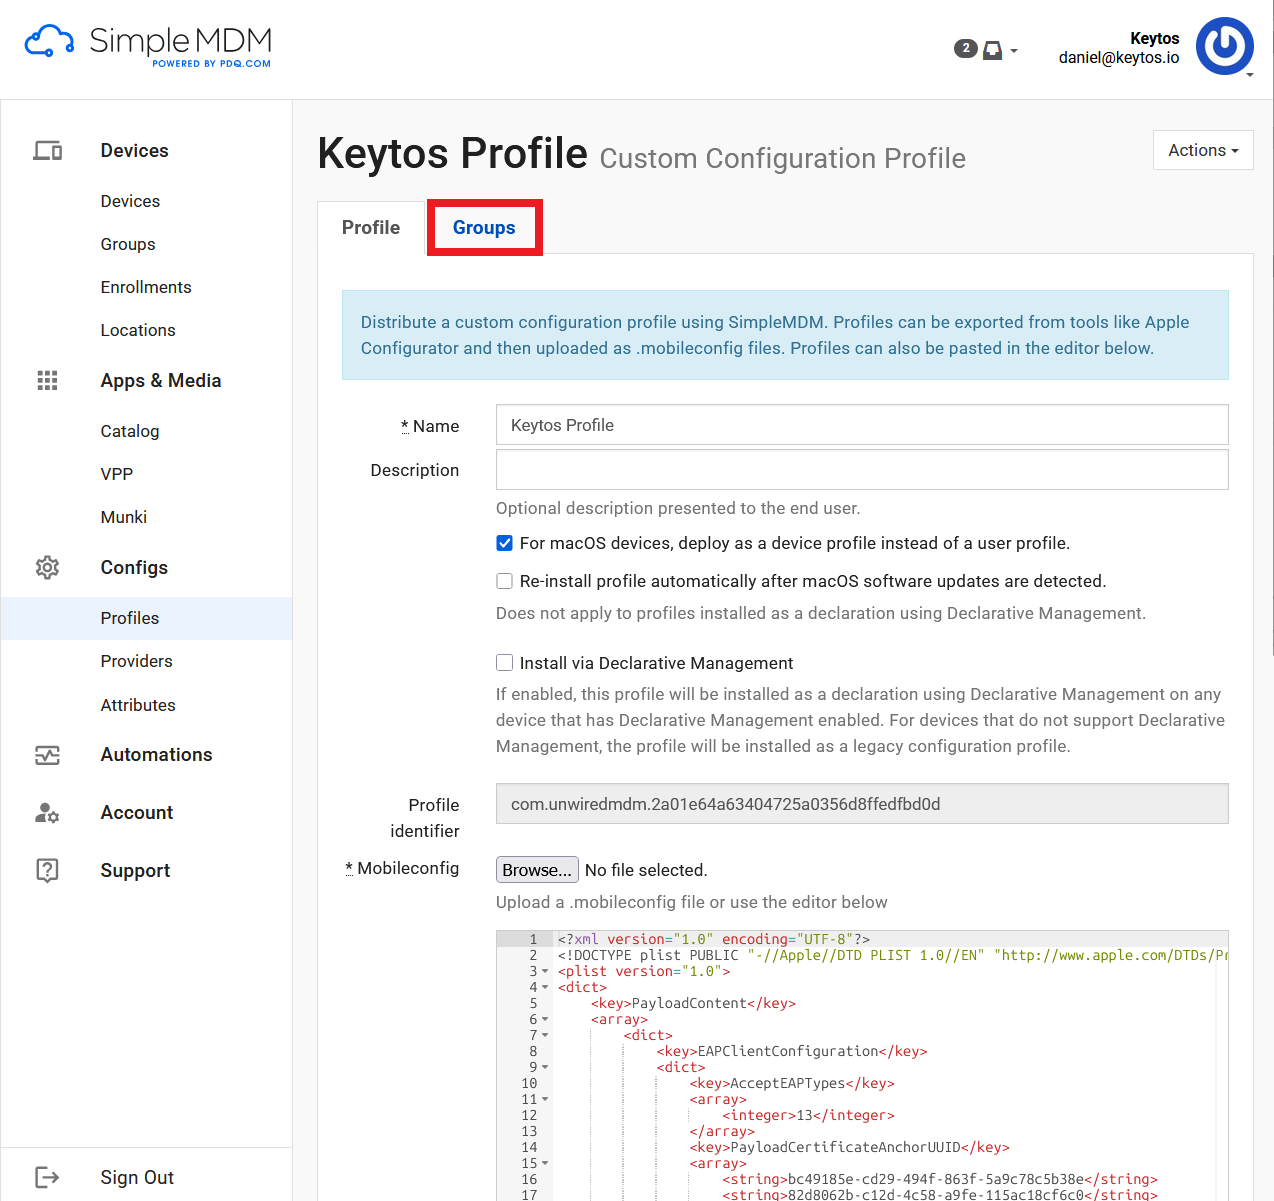
Click on the Groups tab.
-
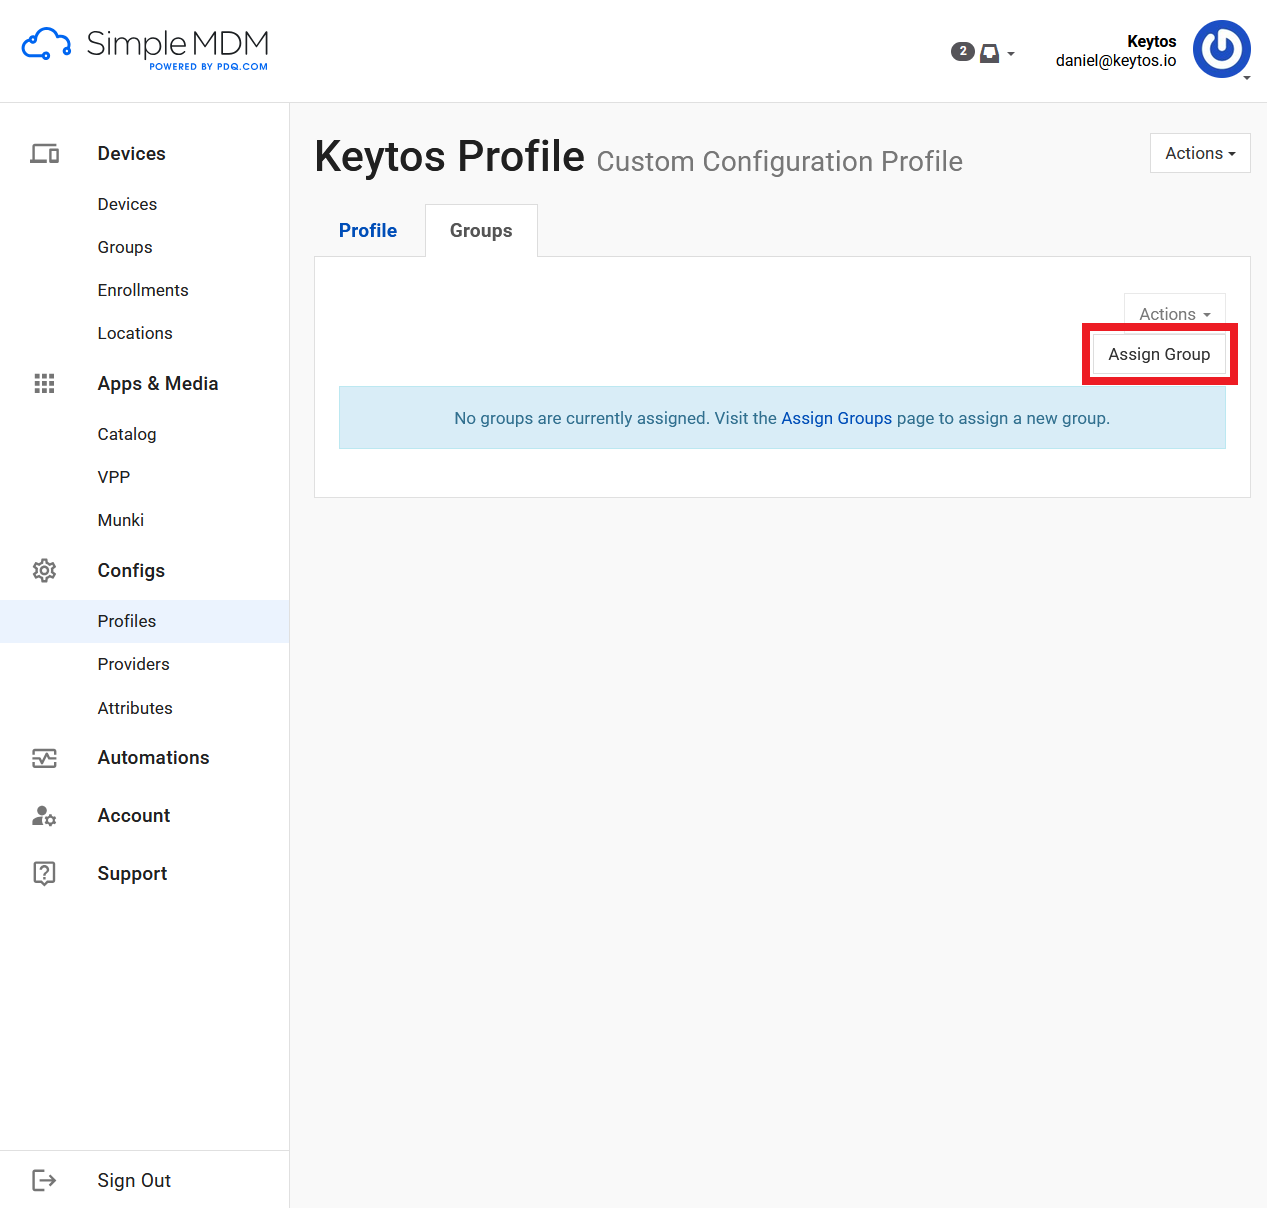
Click Assign Group.
-
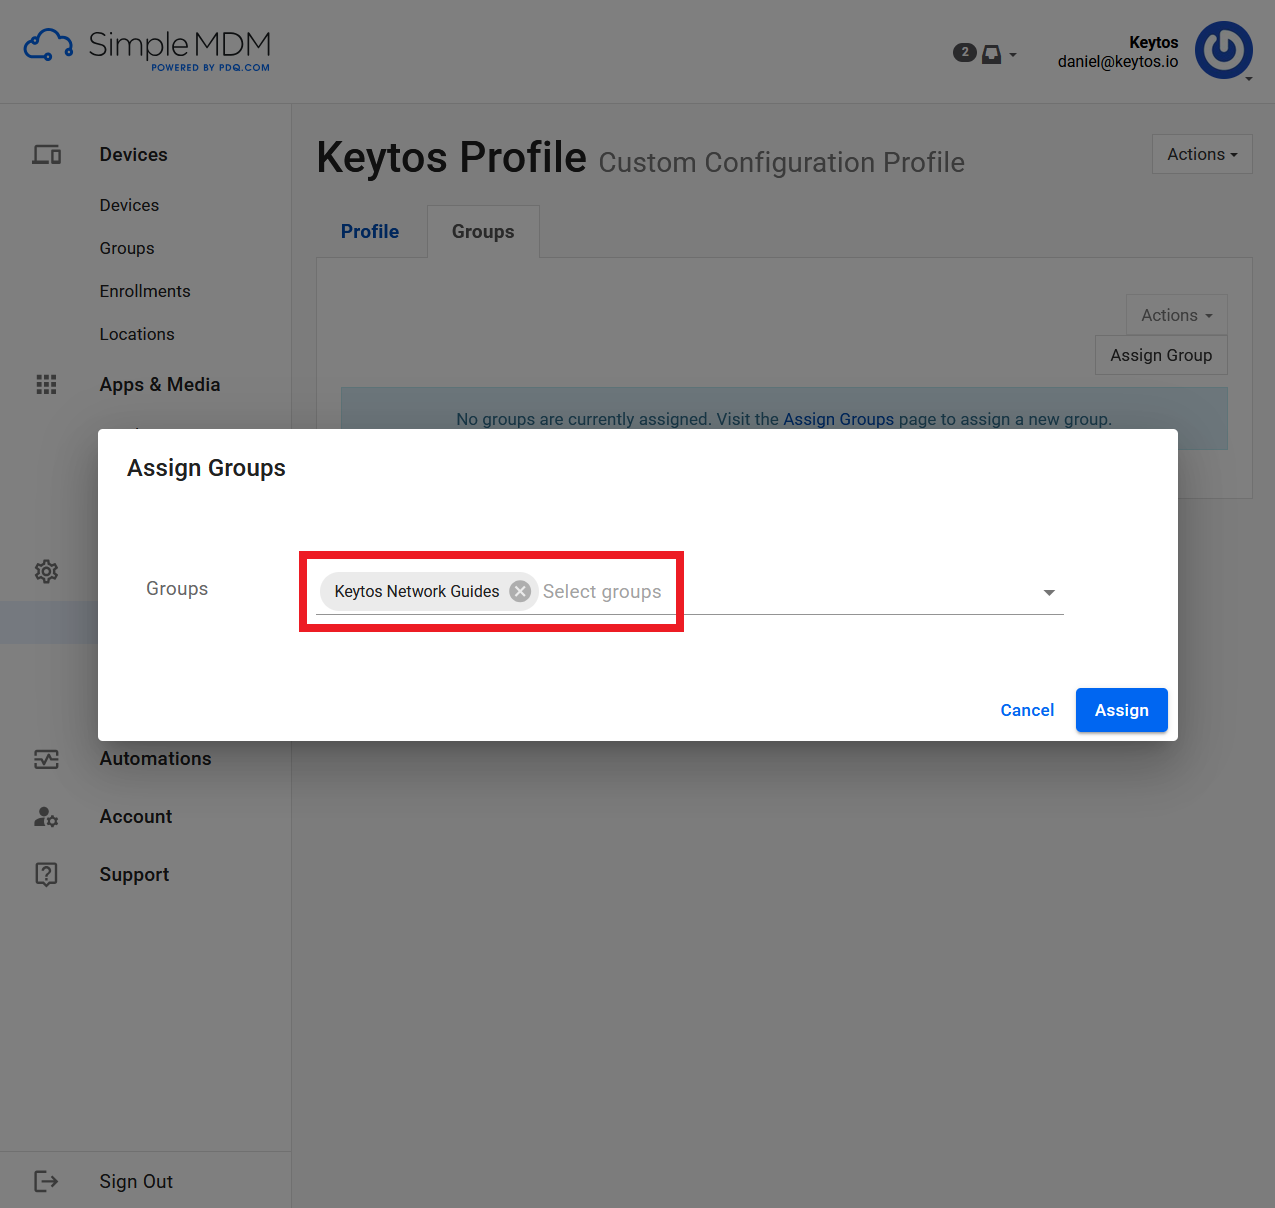
Select all the groups you want to assign this profile to.
-
Click Assign.
-
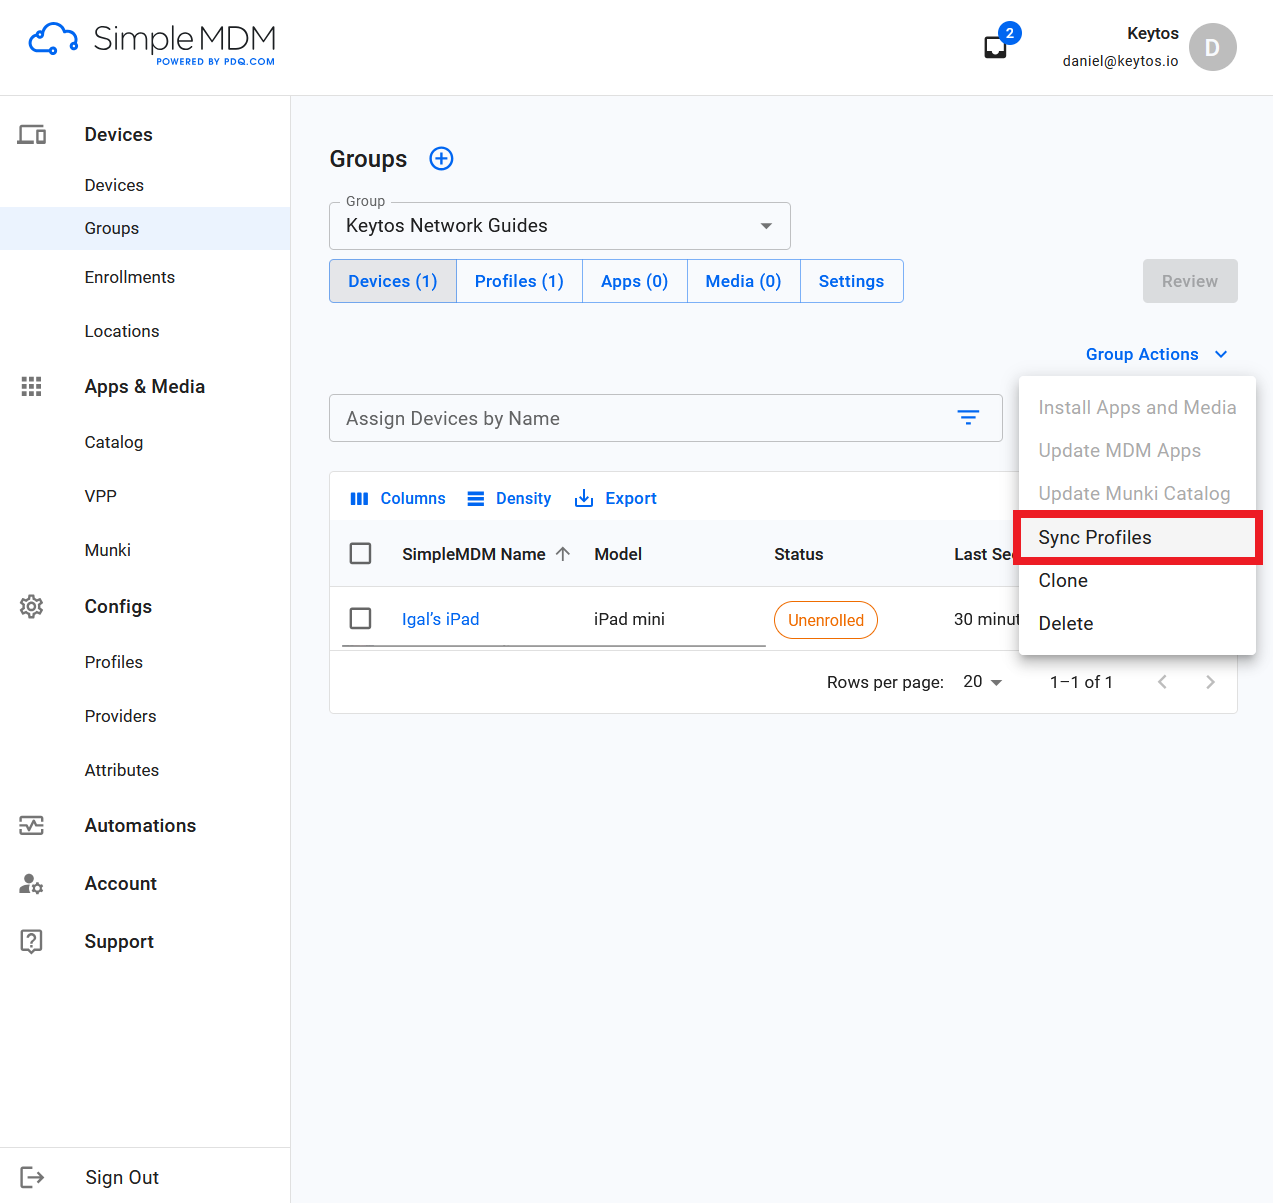
Navigate to Devices → Groups.
-
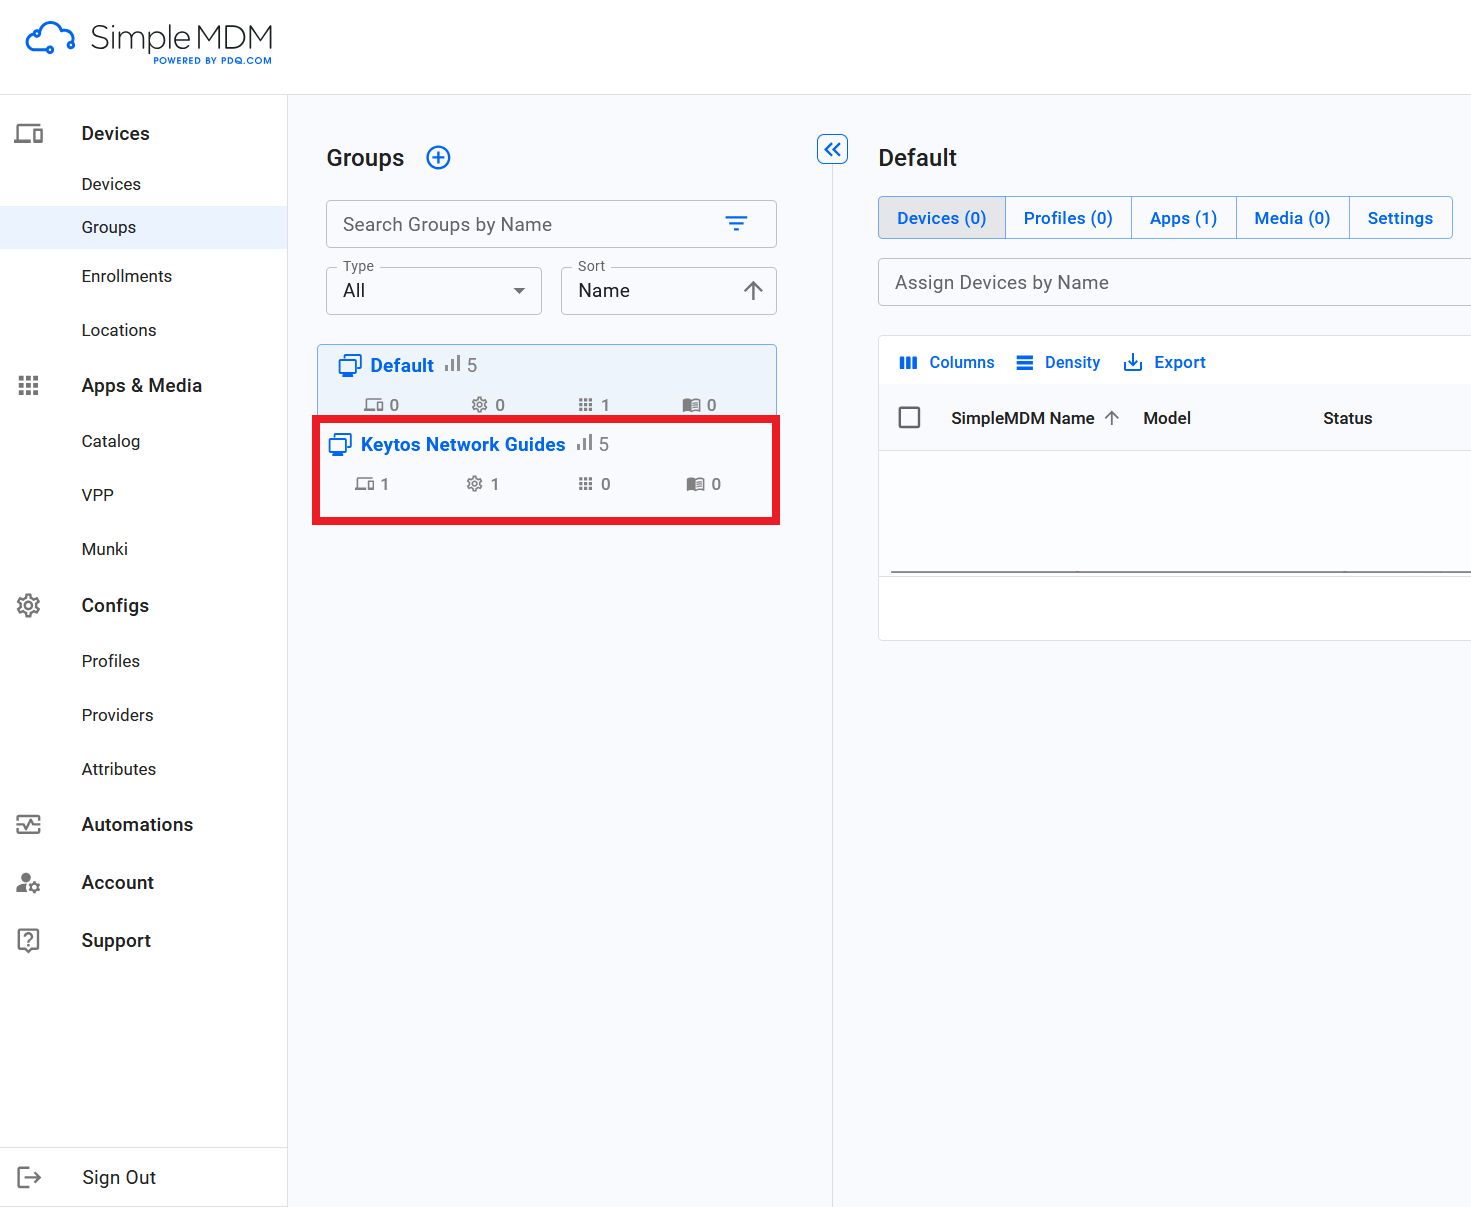
Select the group you assigned the profile to.
-
Click on Group Actions and select Sync Profiles.
-
Repeat for any additional groups.
-
Done!
Enjoying EZCA? Leave Us a Review!
We hope you’re enjoying using EZCA to issue your SCEP certificates! If you have a moment, we would greatly appreciate it if you could leave us a review on G2. Your feedback helps other IT professionals discover EZCA and helps us continue to improve our service. Thank you for your support!