

















How to Export Shield Audit Logs to Your SIEM Platform
Overview - How to Export Shield Audit Logs to Your SIEM Platform
Shield audit logs provide a detailed record of all activities and changes within your Keytos Shield environment, including network authentication events, certificate issuance and revocation, and administrative actions. Exporting these logs to your SIEM platform allows for centralized monitoring, analysis, and alerting, helping you maintain security and compliance across your organization.
How to Grant Permissions for Azure Sentinel (Log Analytics)
If you are exporting to Azure Sentinel or Log Analytics, you must first grant the Keytos Shield application access to your workspace. Keytos Shield sends logs as the Keytos Shield application (Application ID 04ba5b42-89b9-441e-b6d6-4d04a4638418), not as the EZCA (Keytos) or EZRADIUS applications. Skip this section for other SIEM providers.
To allow Keytos Shield to send logs to your Log Analytics and Azure Sentinel workspace, you need to grant the Keytos Shield application the following roles on the Resource Group containing your Log Analytics workspace:
This can be done manually in the Azure Portal or using the Azure CLI.
How to Grant Permissions using the Azure Portal
It’s easy to enable the required permissions using the Azure Portal:
-
Navigate to the Azure Portal.
-
Open the Log Analytics Workspace you want to connect to Keytos Shield. If you are using Azure Sentinel, open the Log Analytics workspace connected to your Sentinel instance.
-
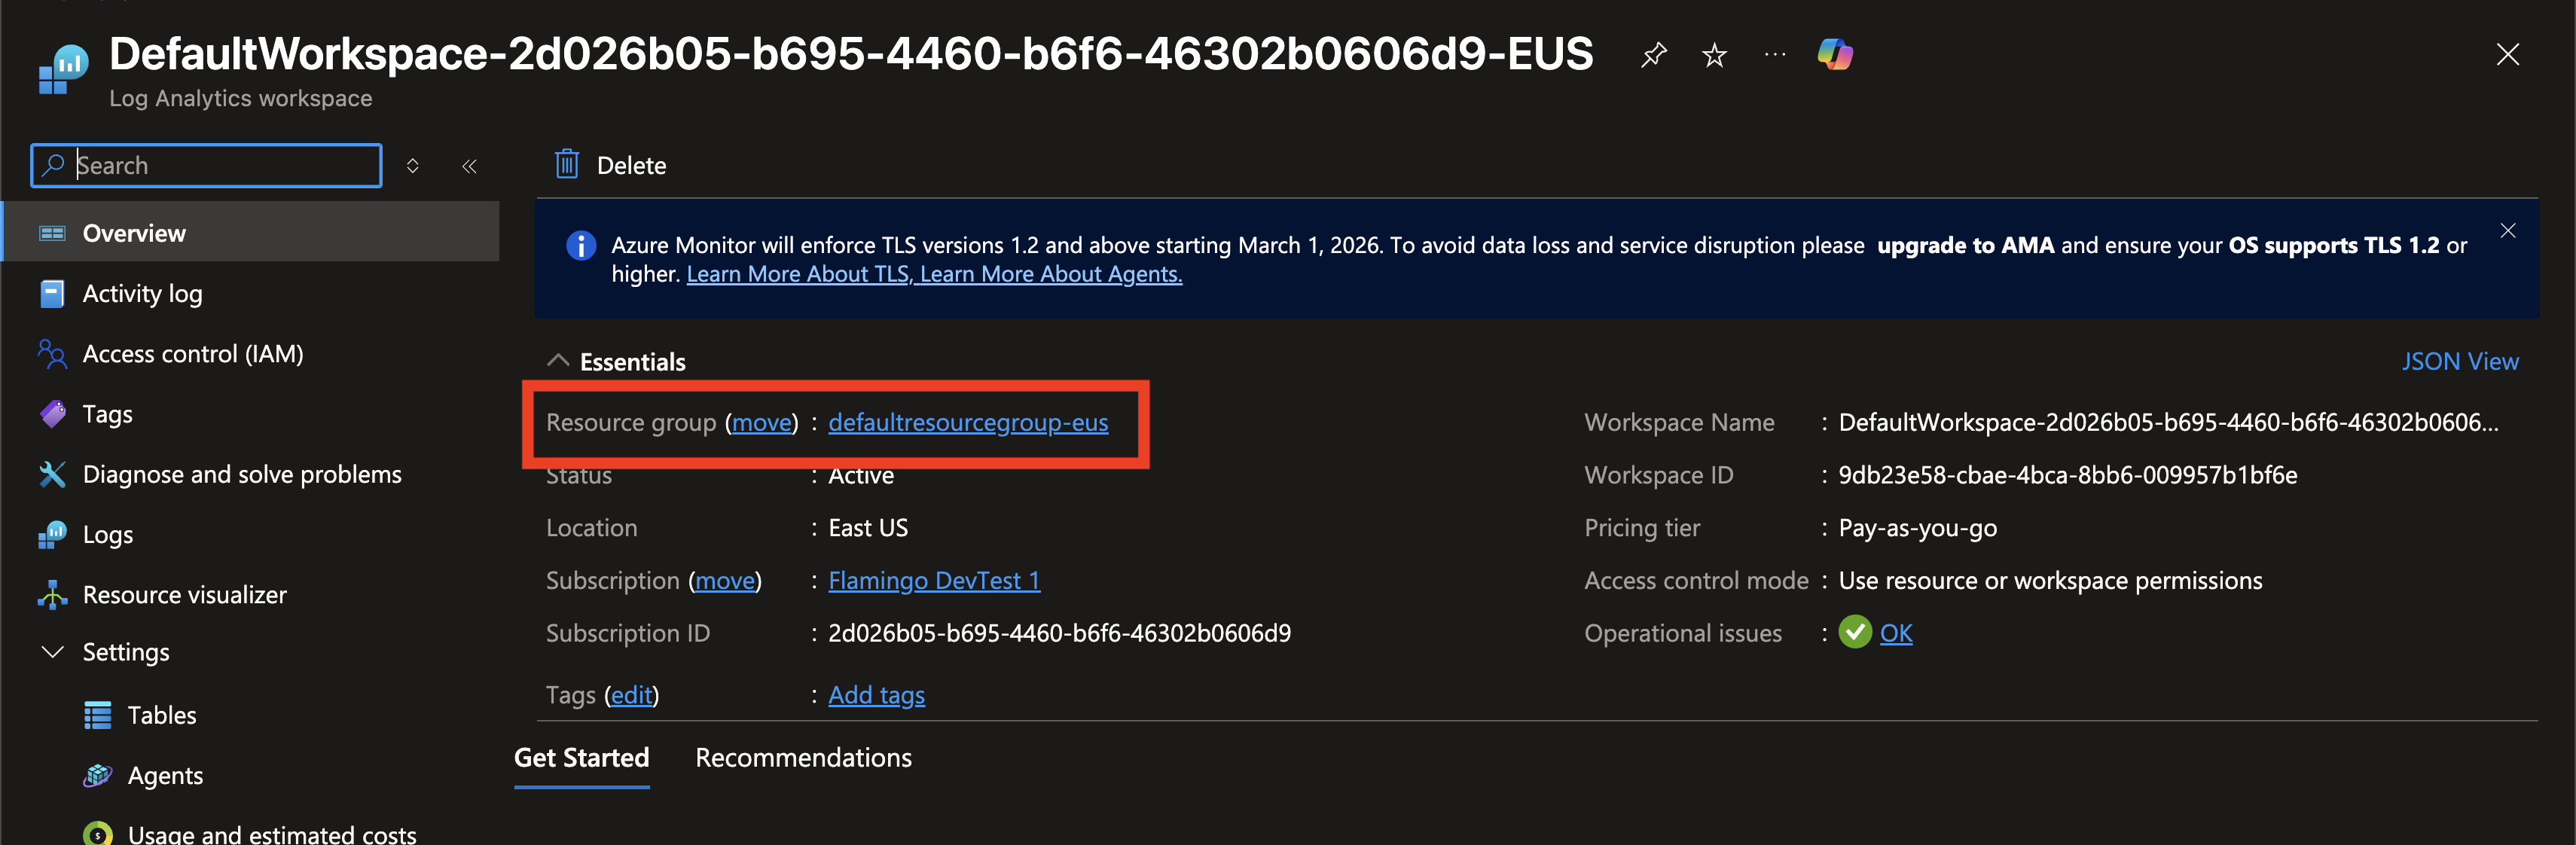
Click on Resource group to open the Resource Group containing your Log Analytics workspace.
-
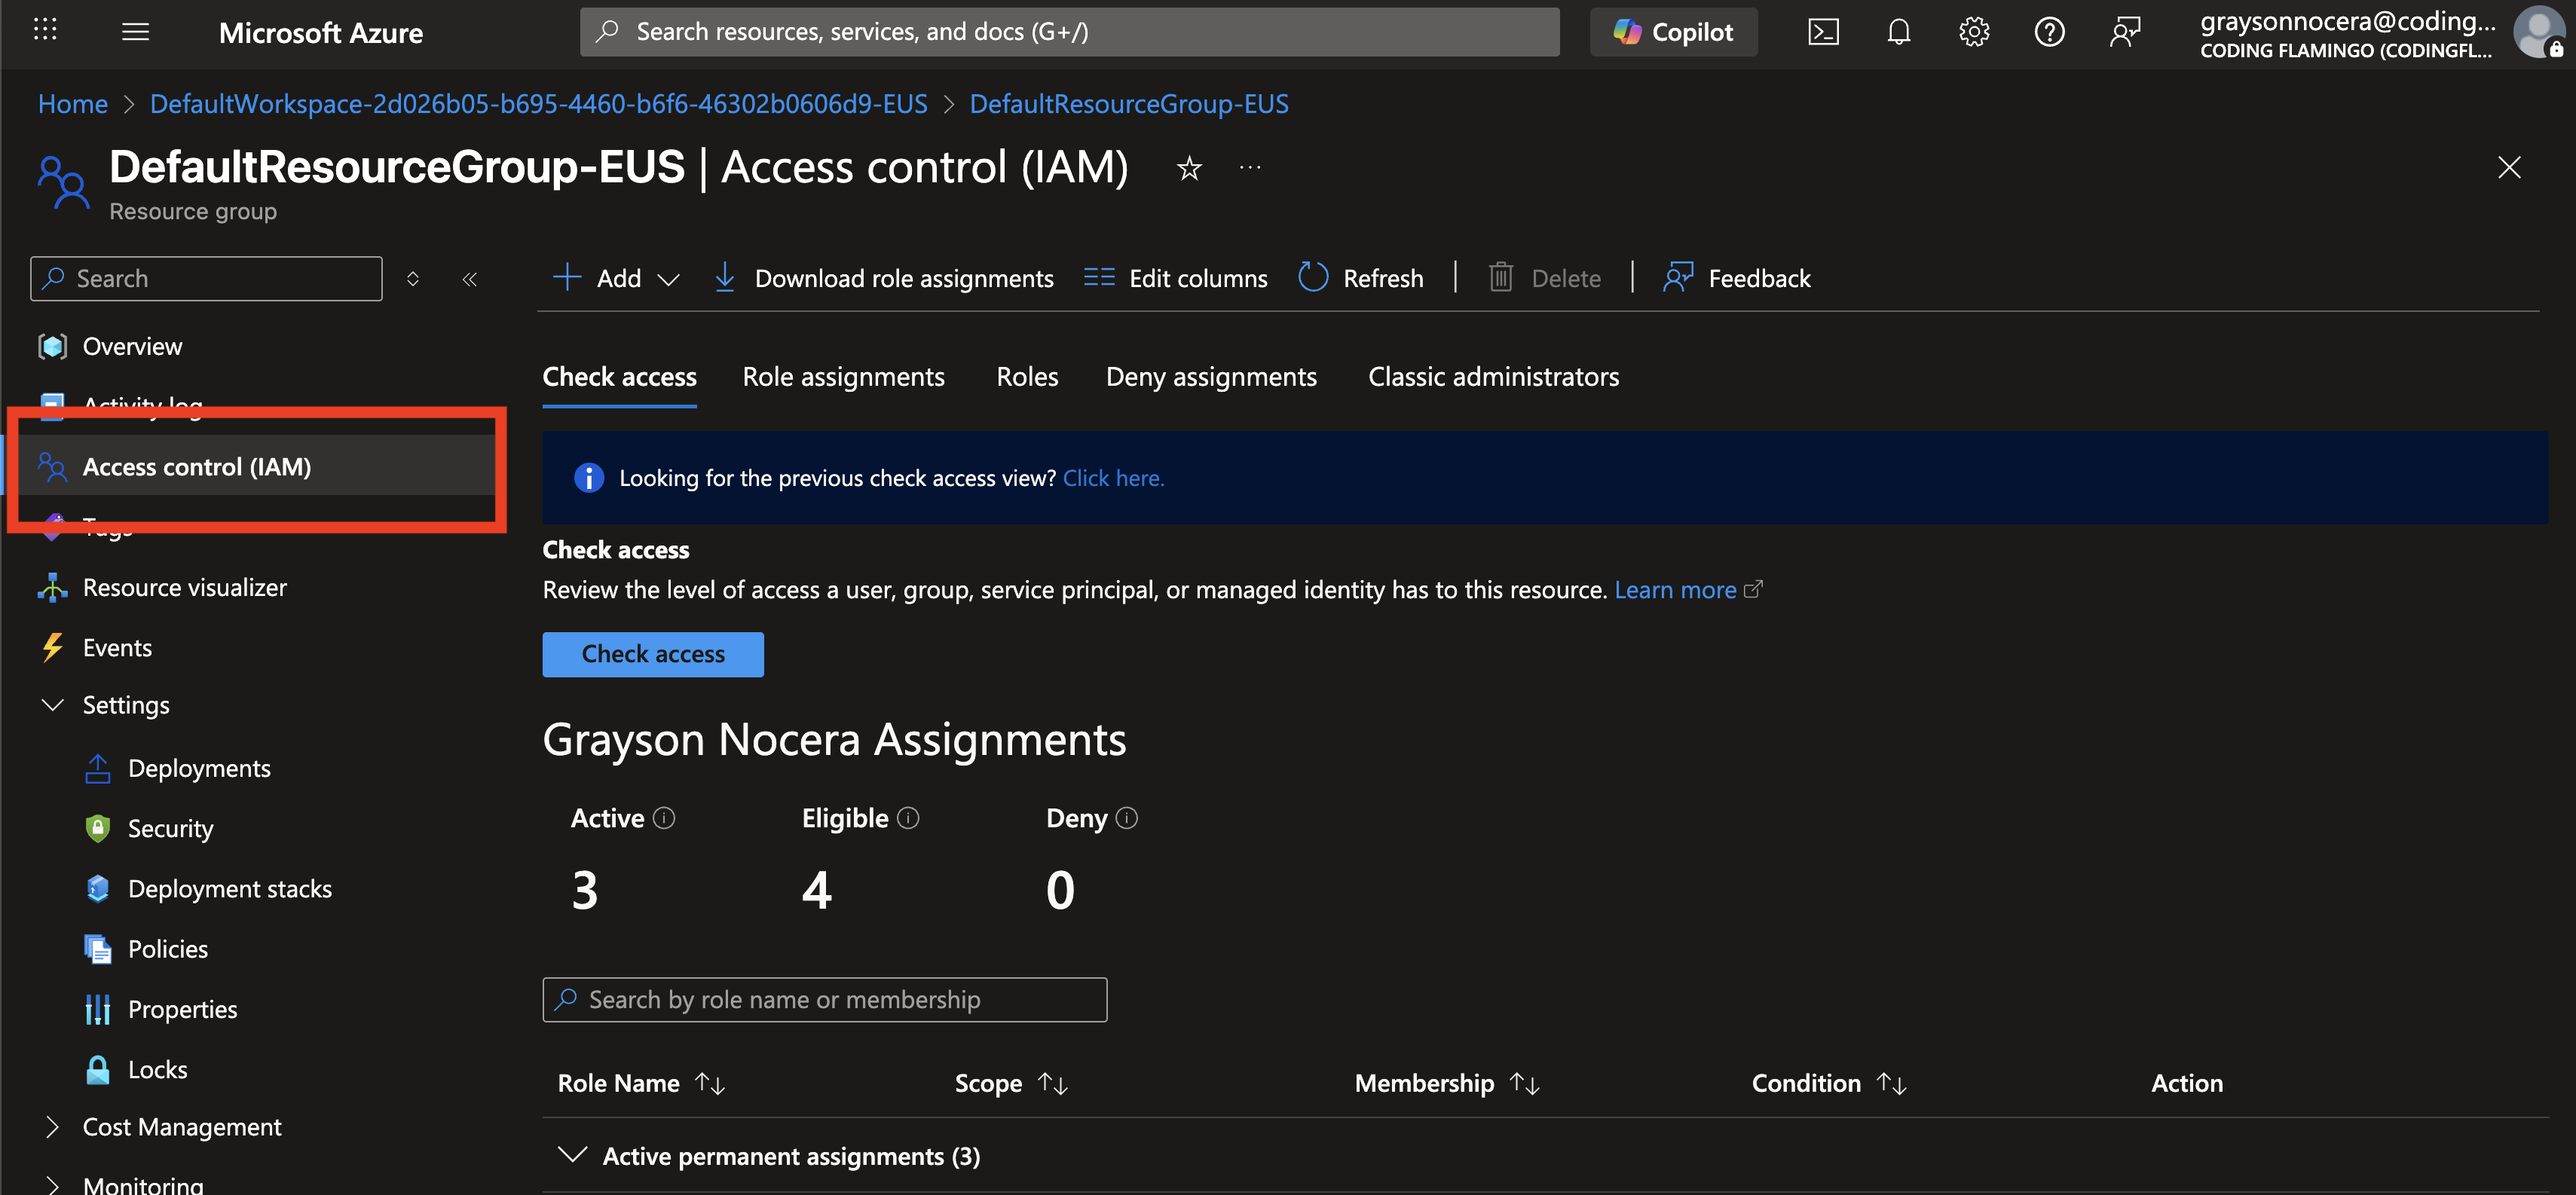
Click Access control (IAM) in the left menu.
-
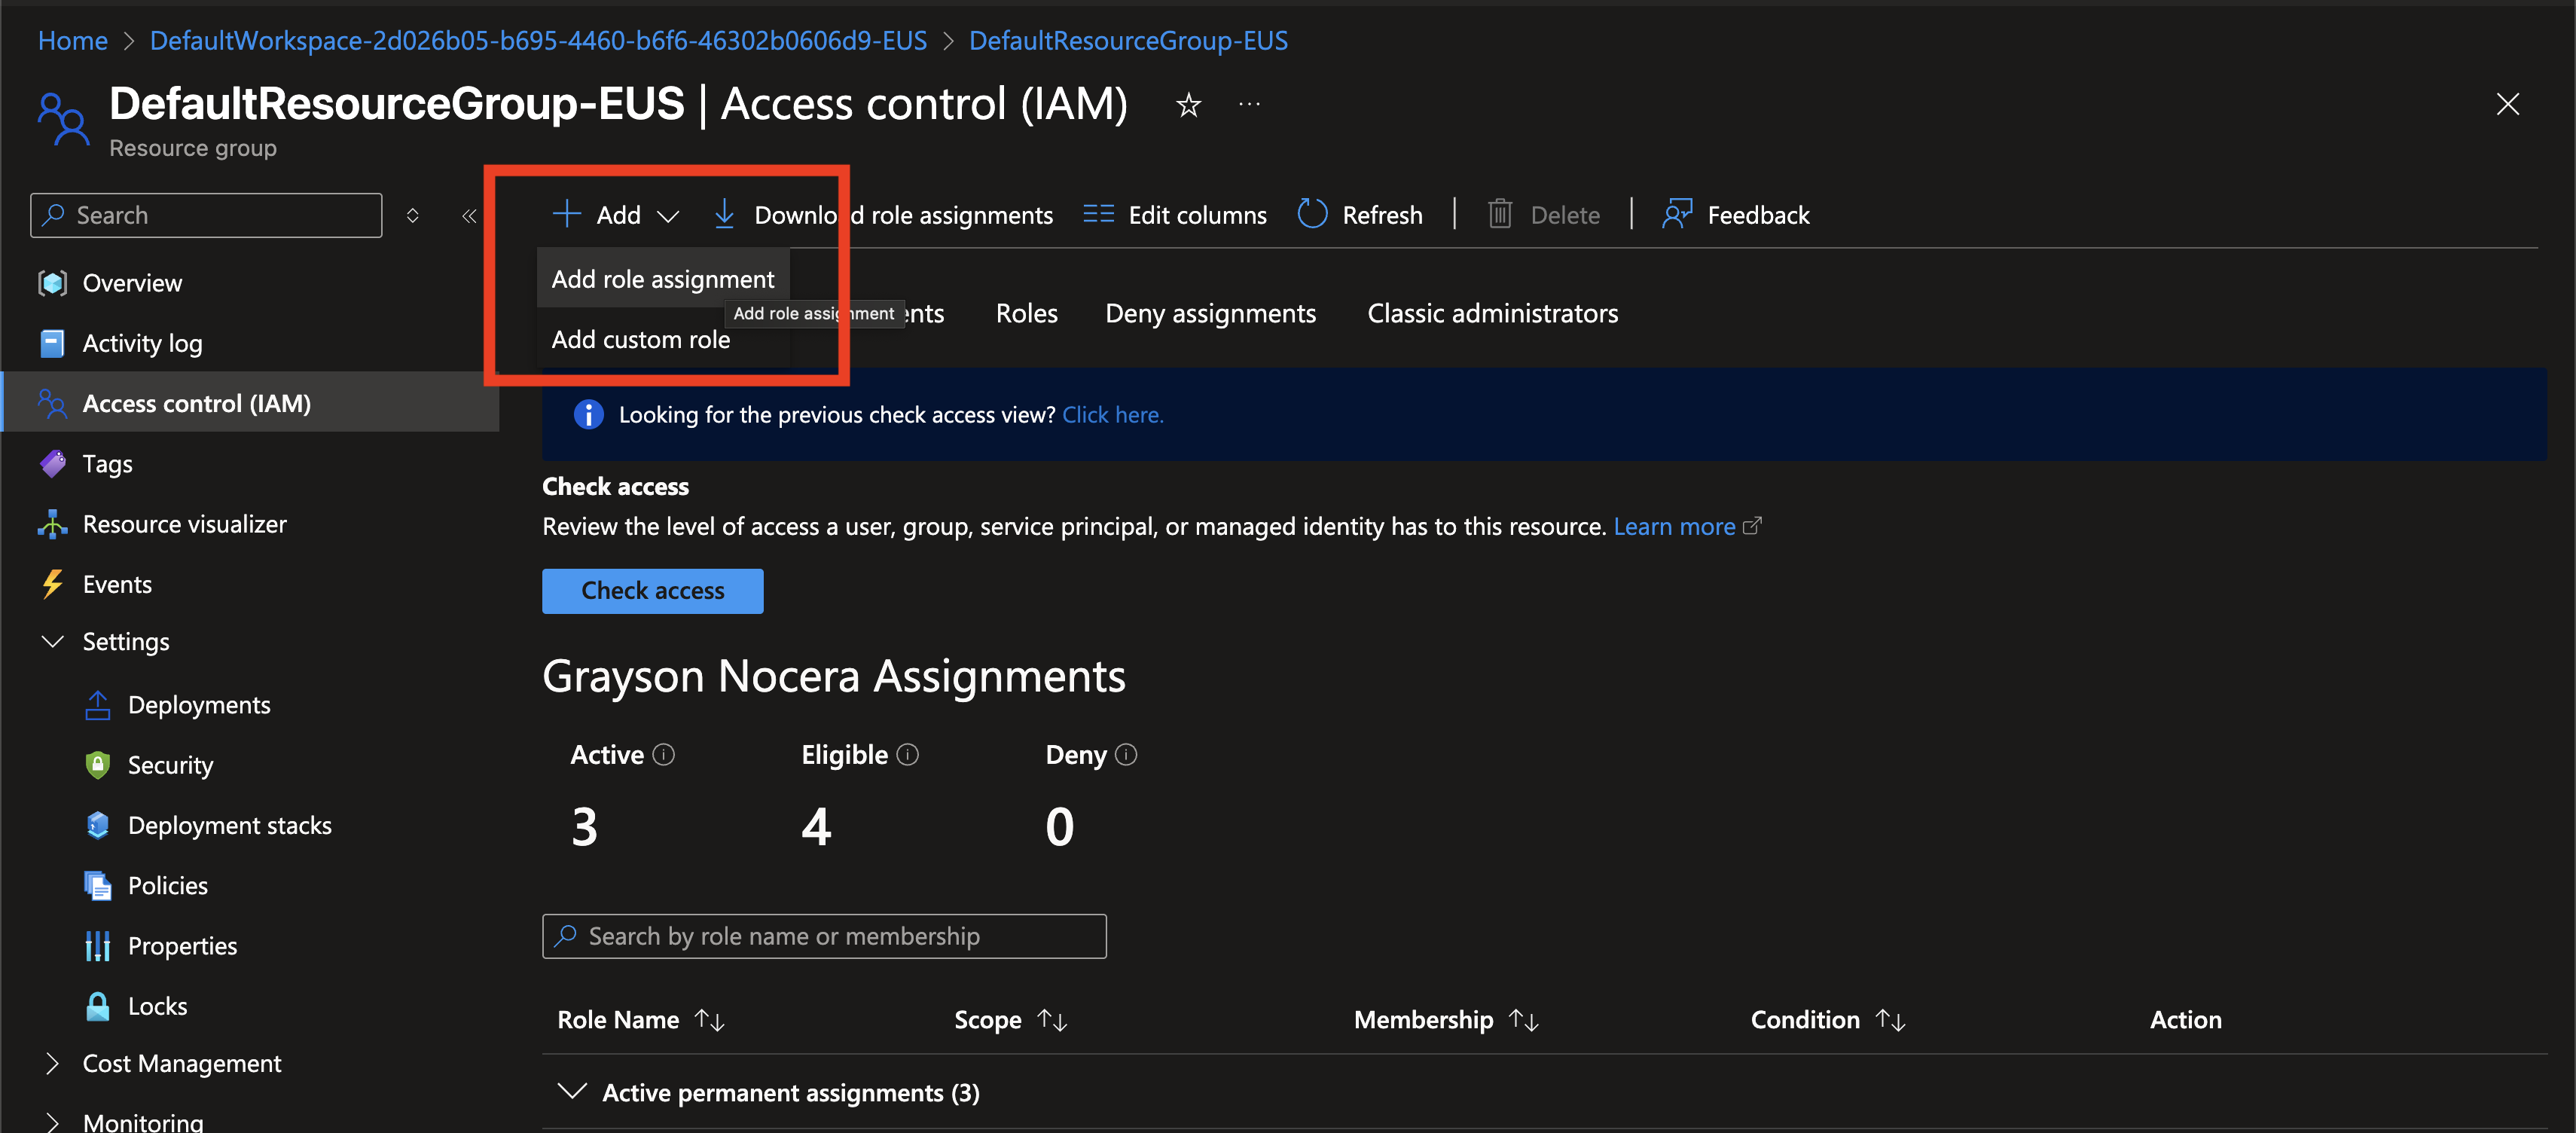
Click + Add and Add role assignment.
-
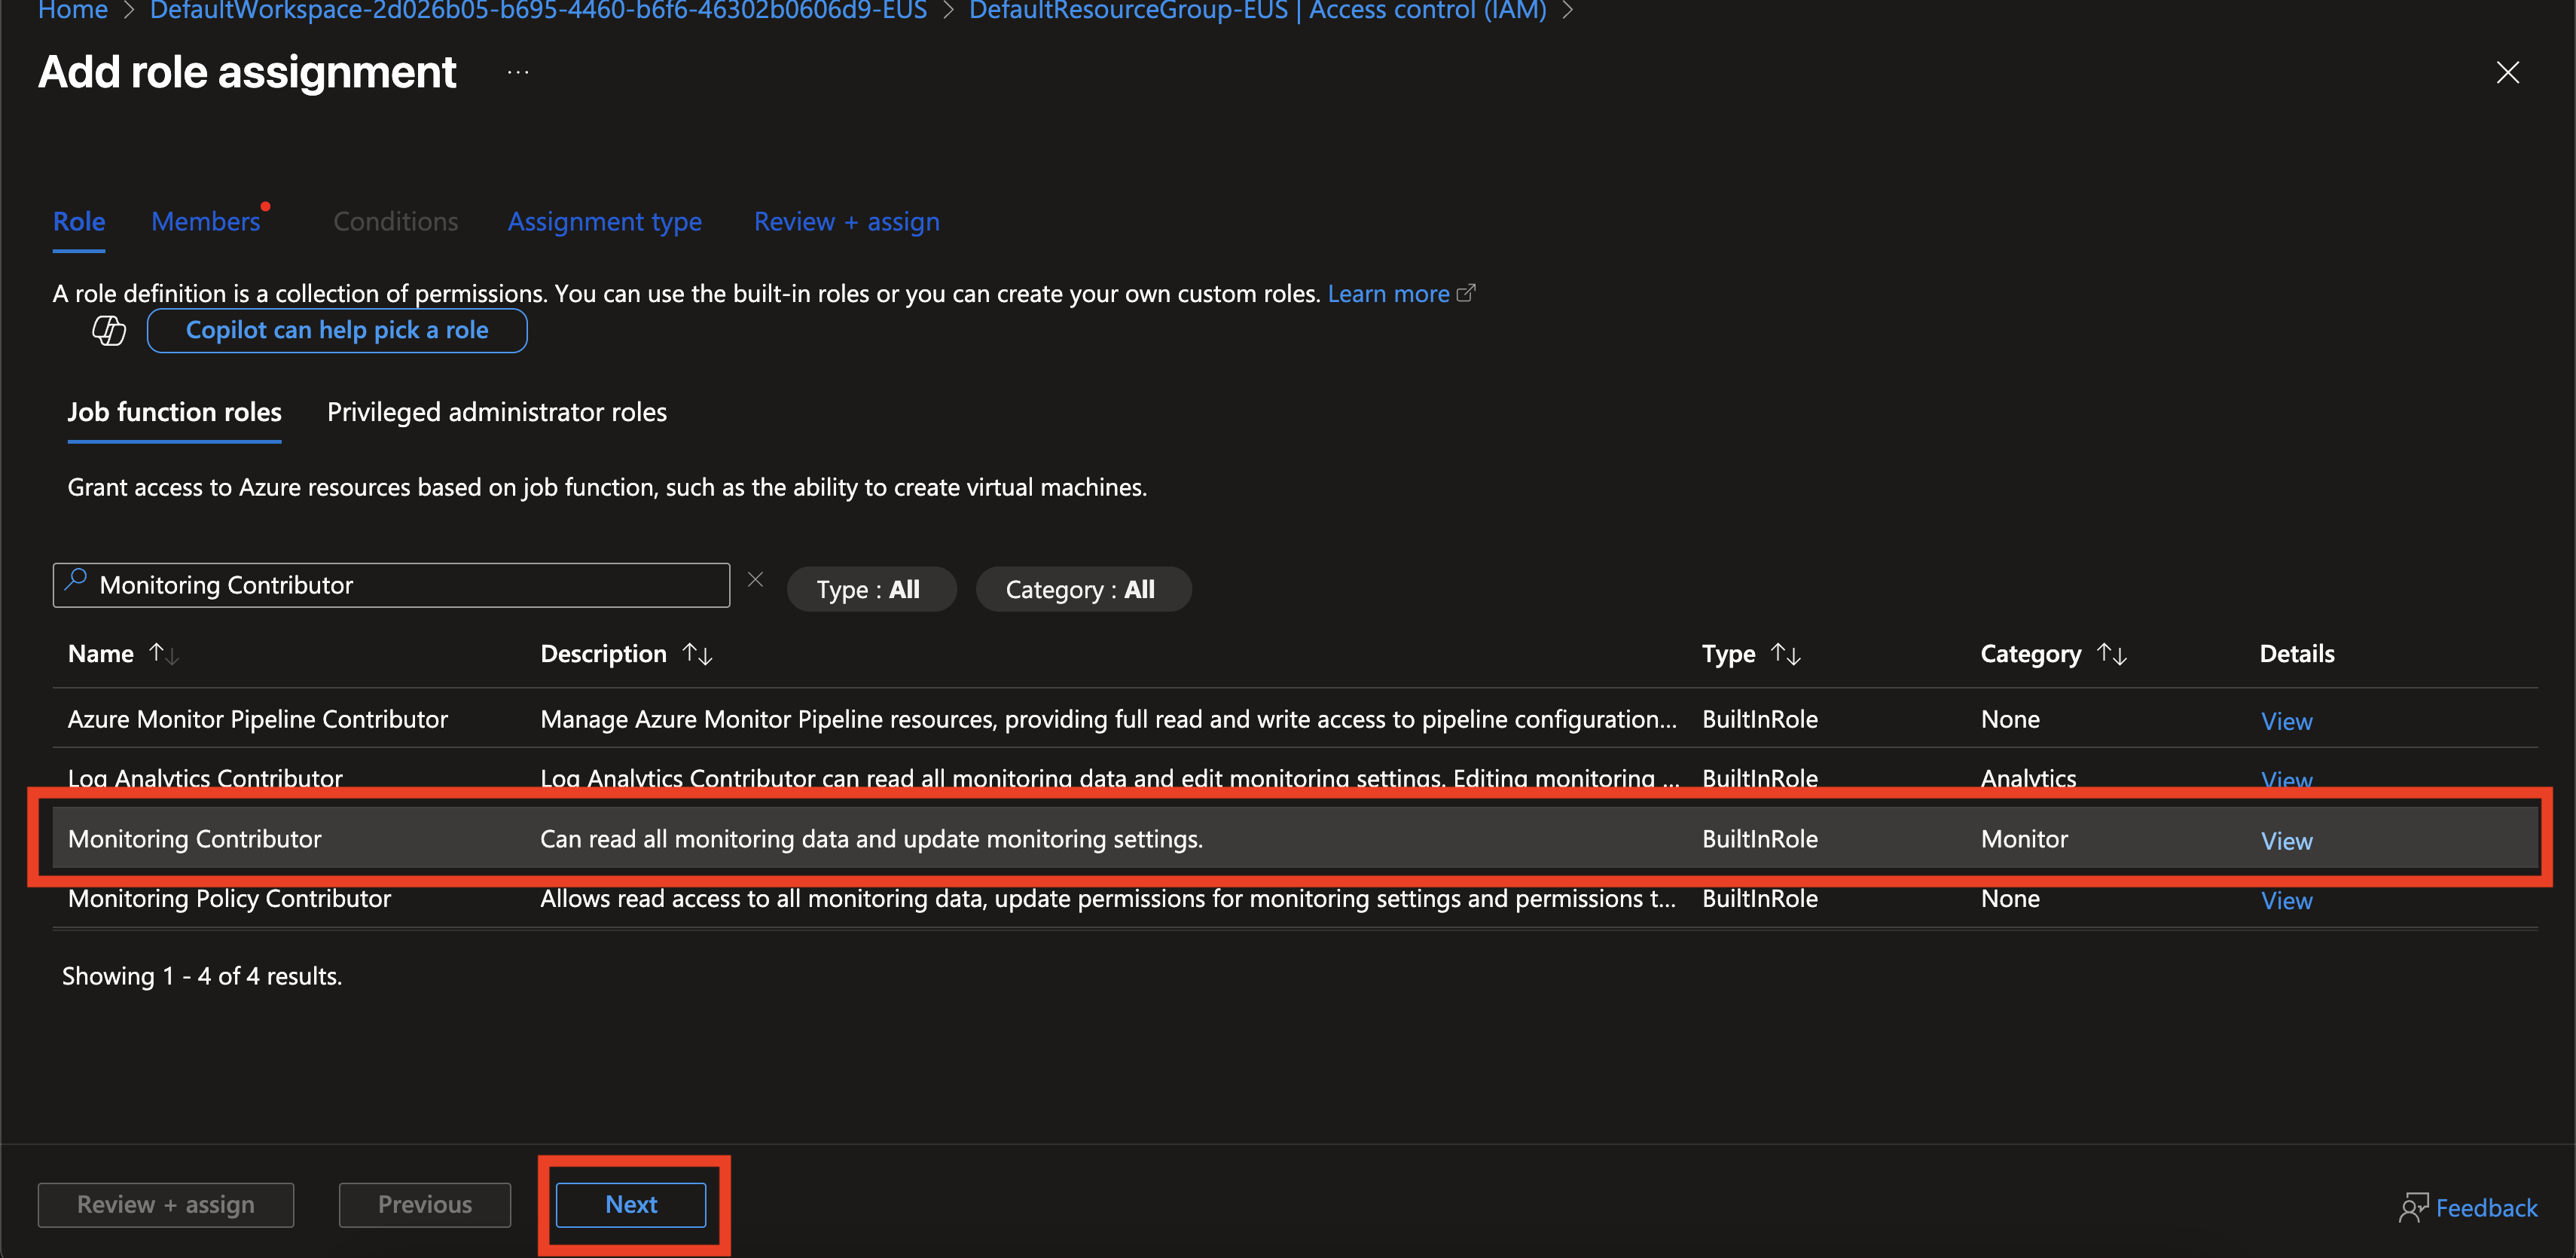
Search for Monitoring Contributor in the list of Azure roles. Select the role and click Next.
-
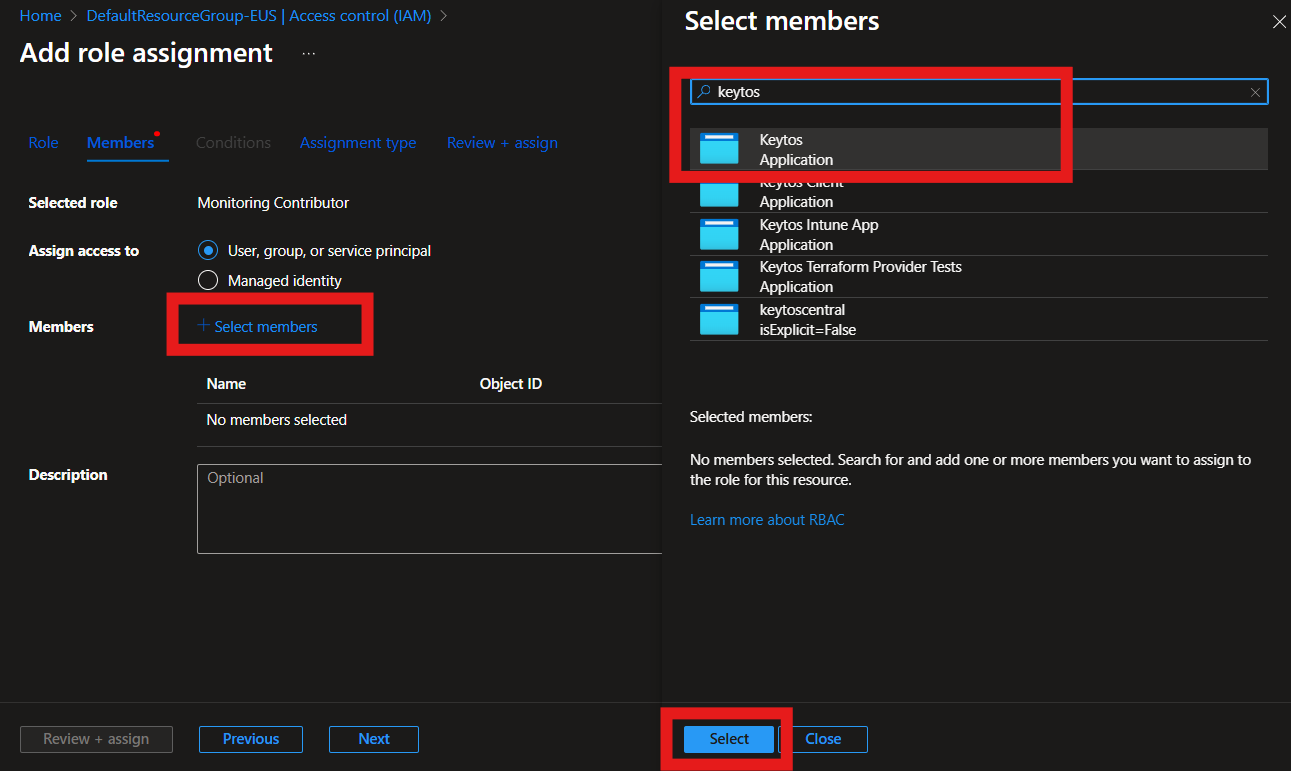
Click + Select members and search for Keytos Shield. Select the Keytos Shield application.
-
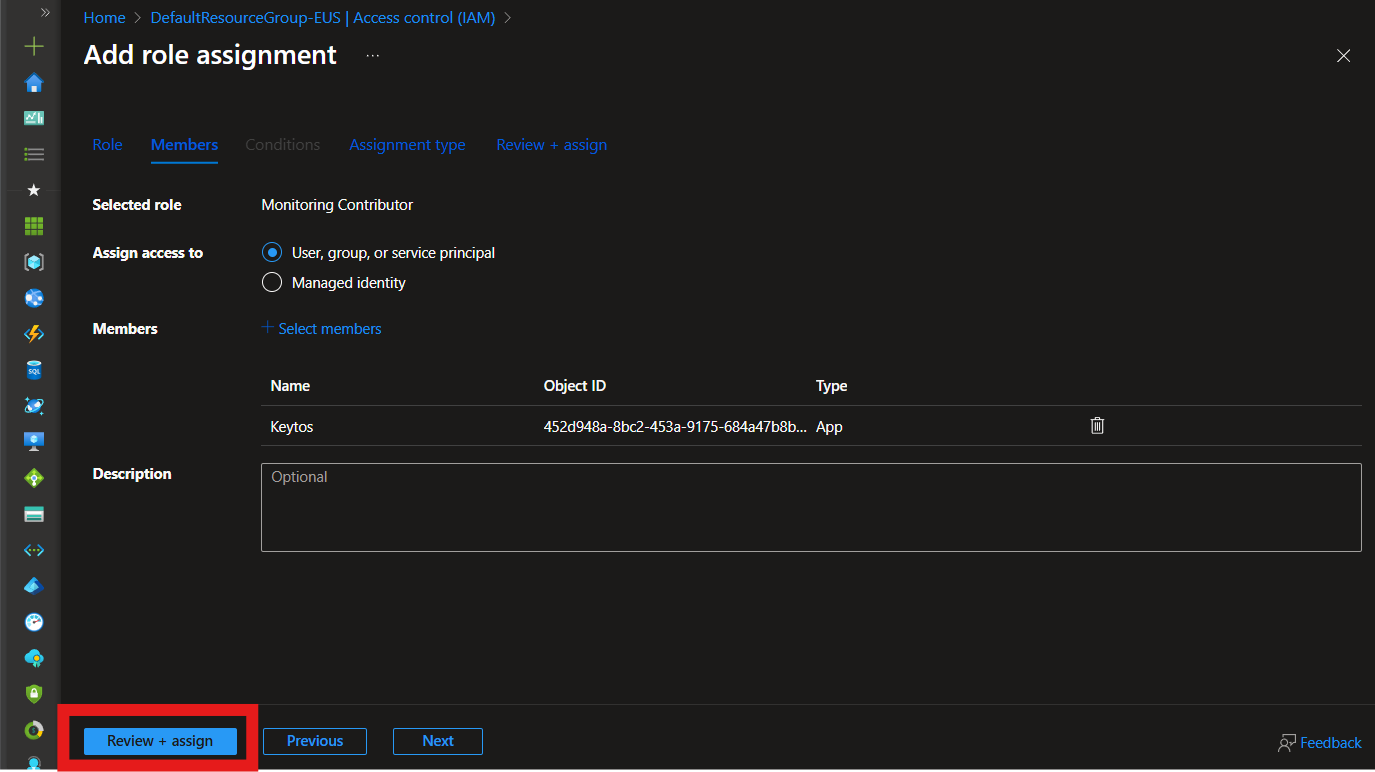
Click Review + assign twice to grant the role to the Keytos Shield application.
-
Repeat steps 1-8 for the Monitoring Metrics Publisher and Log Analytics Contributor roles.
How to Grant Permissions using the Azure CLI
The Azure CLI can also be used to enable the required permissions. Follow these steps:
-
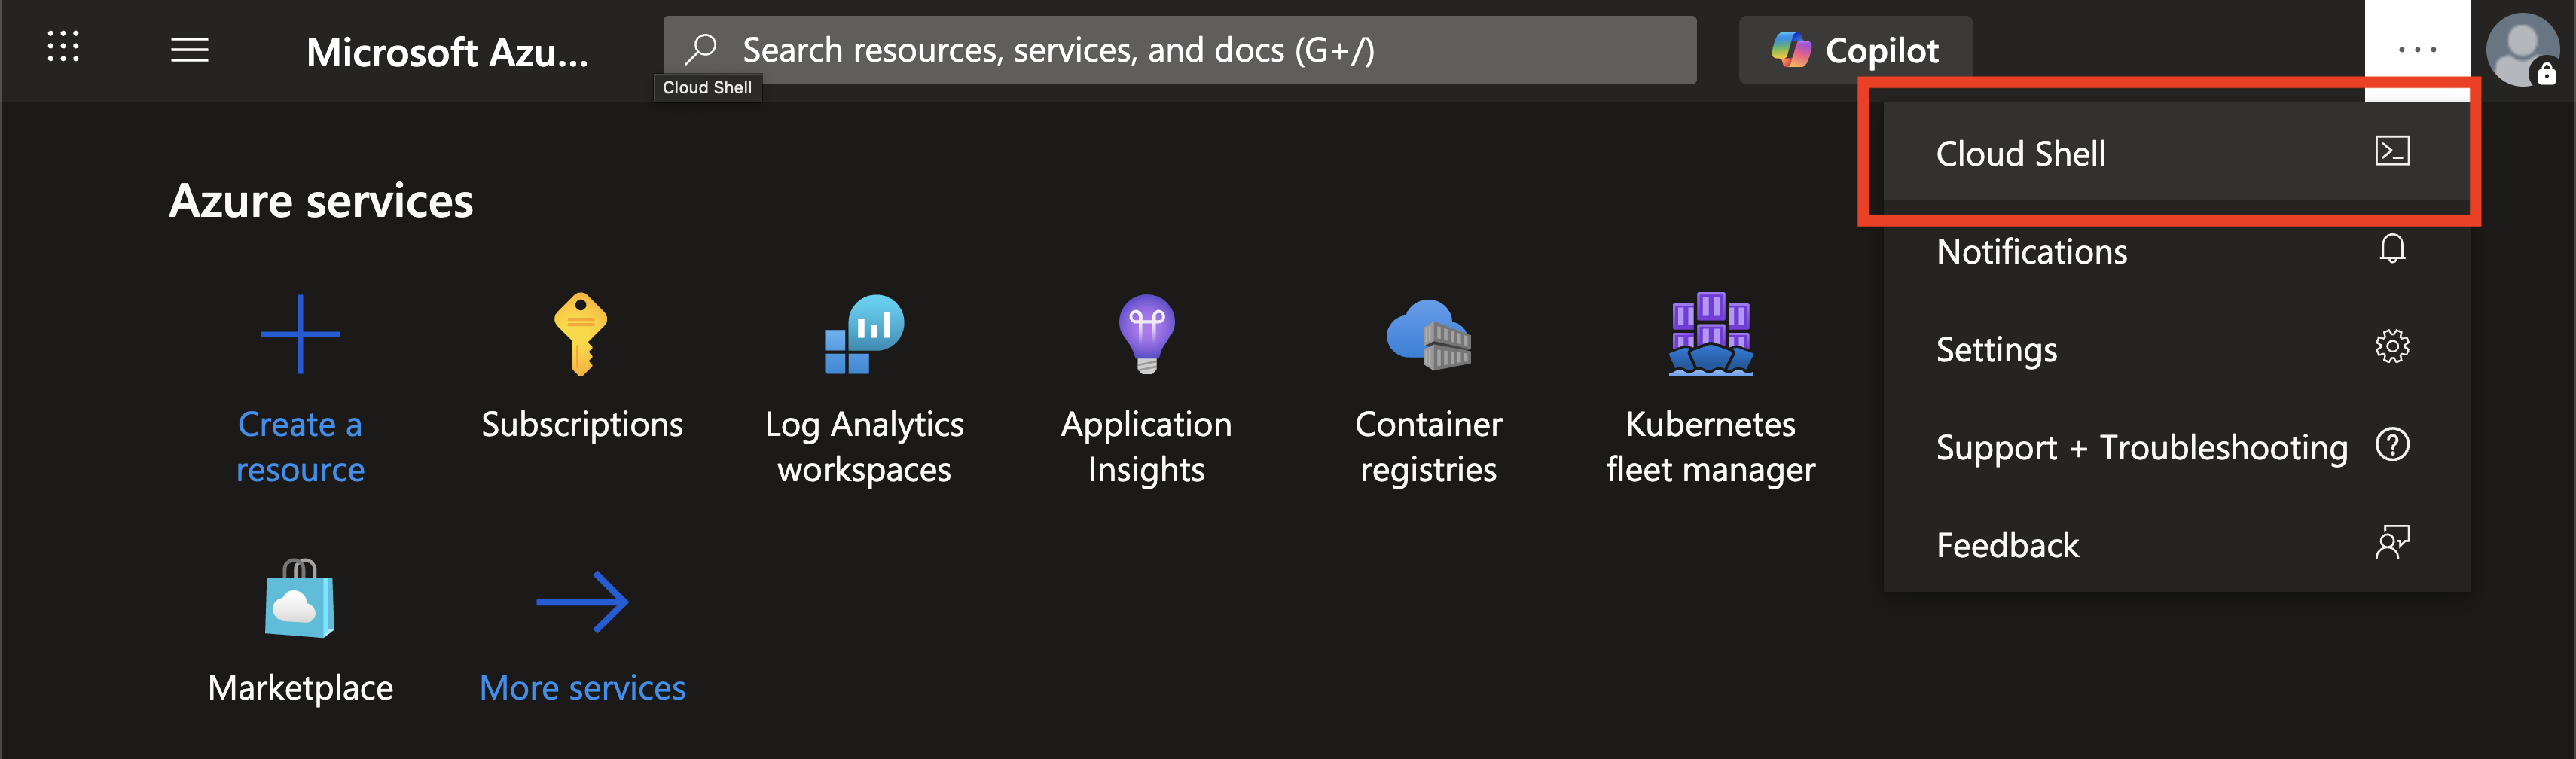
Open a terminal window on your device or navigate to the Azure Portal and open Azure Cloud Shell.
-
Begin by getting the object ID of the service principal for the Keytos Shield application in your tenant:
$objectId = az ad sp list --filter "appId eq '04ba5b42-89b9-441e-b6d6-4d04a4638418'" --query "[].{id:id}" --output tsv -
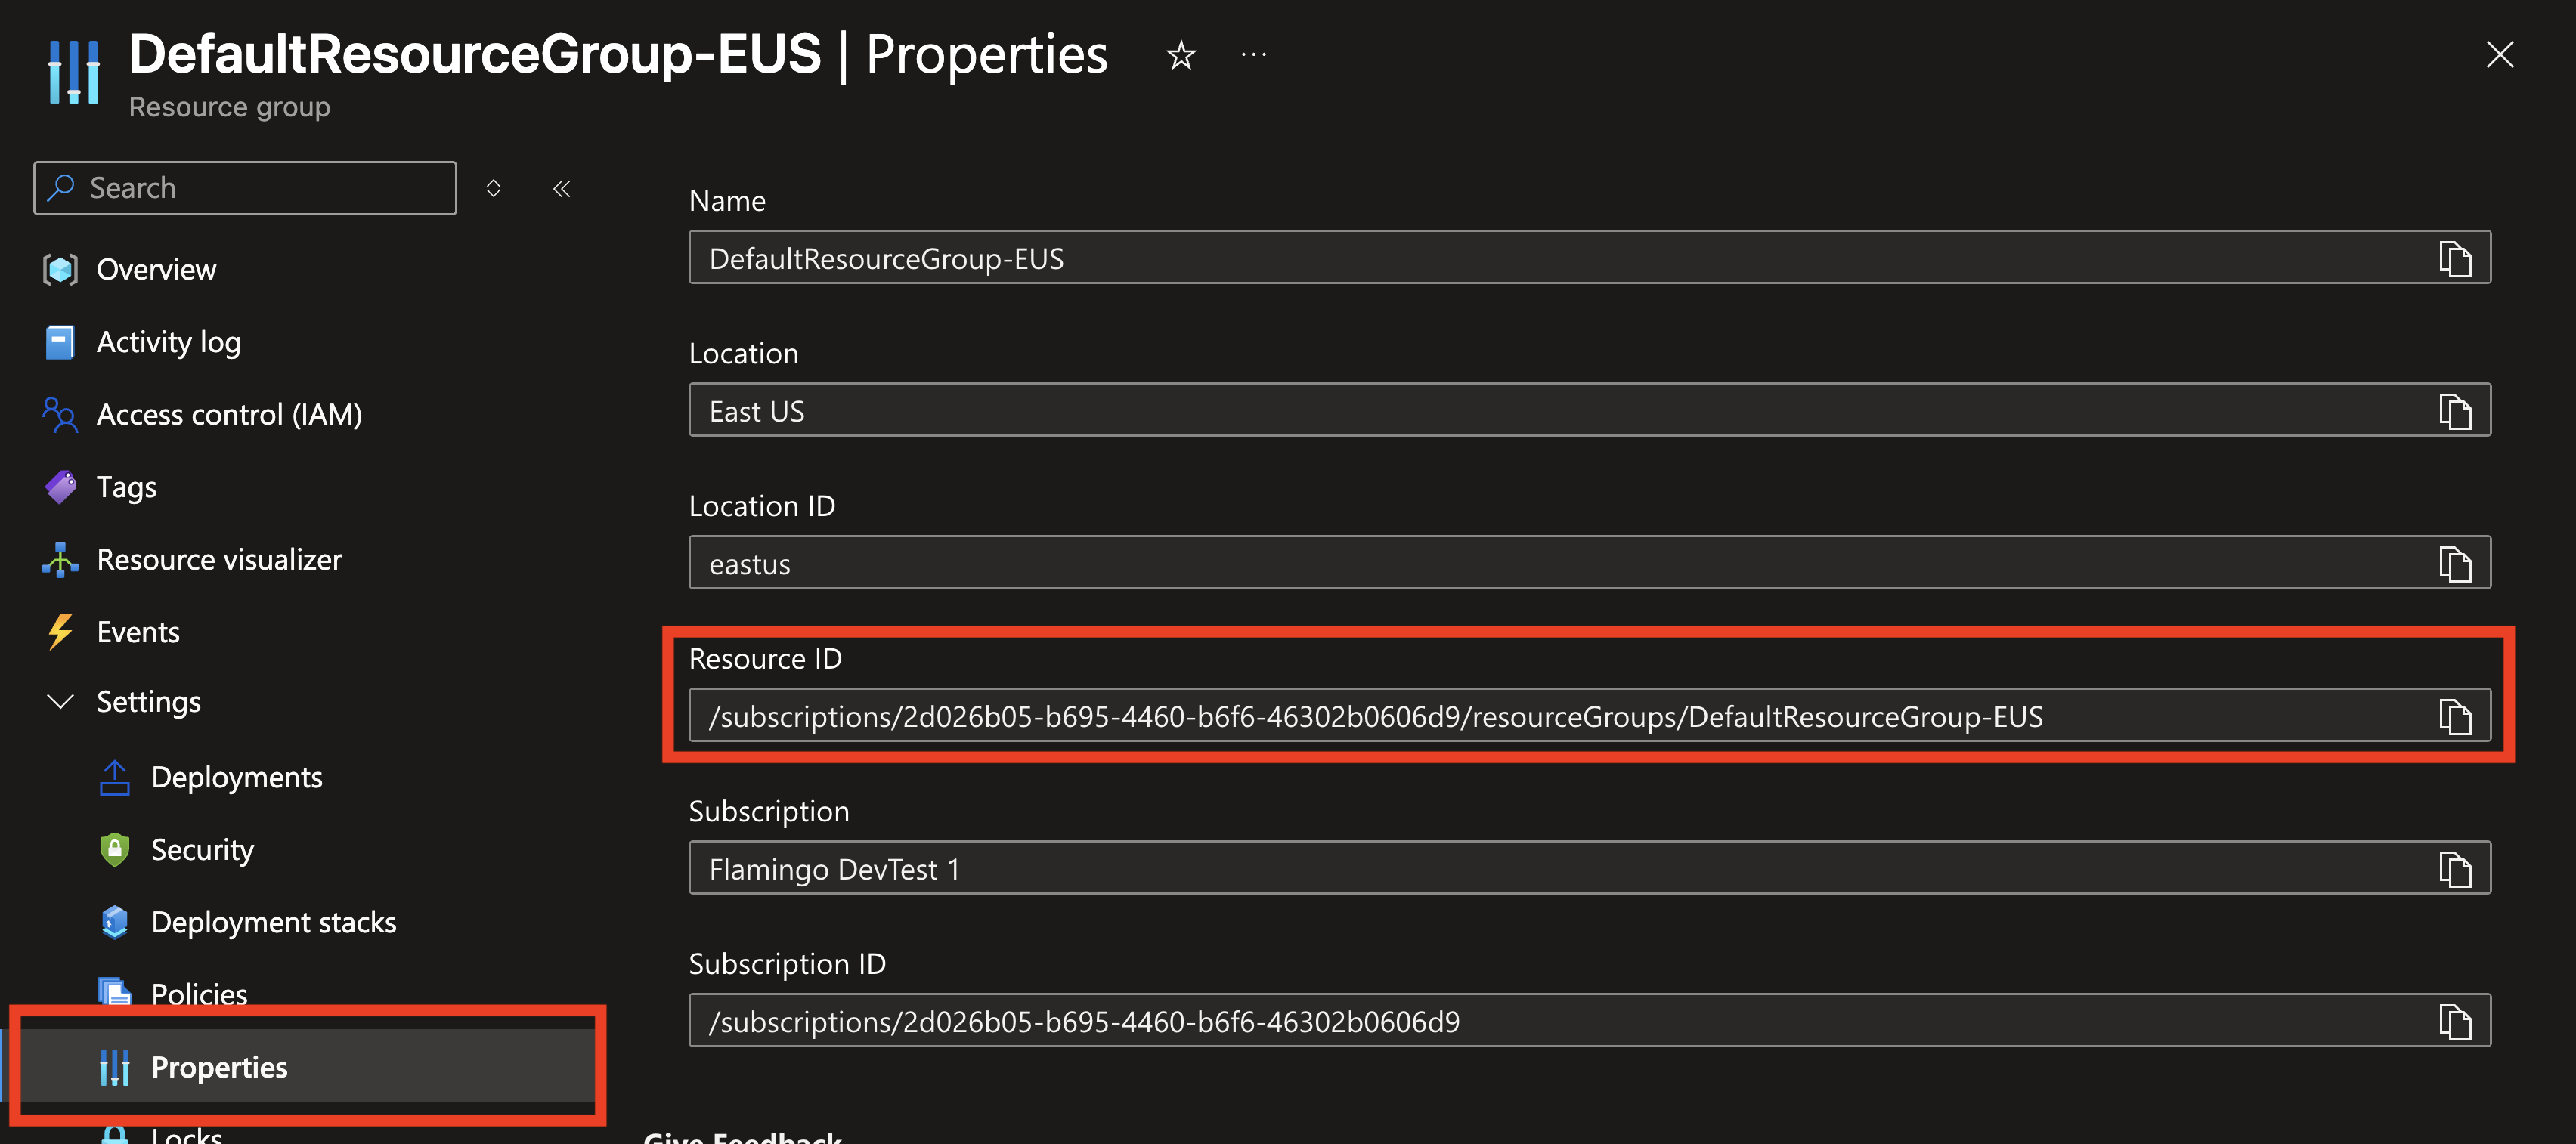
Copy the Resource ID of the Resource Group containing your Log Analytics workspace. This can be found by going to the Resource Group in Azure, selecting Properties, and copying the Resource ID.
-
Save the Resource ID as a variable for easier use:
$resourceGroupId = "/subscriptions/<YOUR-SUBSCRIPTION-ID>/resourceGroups/<YOUR-RESOURCE-GROUP-NAME>" -
Grant the Monitoring Contributor role to the Keytos Shield application:
az role assignment create --scope "$resourceGroupId" --role "Monitoring Contributor" --assignee $objectId -
Grant the Monitoring Metrics Publisher role to the Keytos Shield application:
az role assignment create --scope "$resourceGroupId" --role "Monitoring Metrics Publisher" --assignee $objectId -
Grant the Log Analytics Contributor role to the Keytos Shield application:
az role assignment create --scope "$resourceGroupId" --role "Log Analytics Contributor" --assignee $objectId
How to Export Shield Audit Logs to Your SIEM Platform
Follow these steps to export your Shield audit logs to your SIEM platform:
- Sign in to your Keytos Shield account.
- Navigate to the Settings page.
- Scroll down to SIEM Settings.
- Enable Send Audit Logs to SIEM.
- From the SIEM Provider dropdown, select your SIEM provider.
- Enter in the required connection details for your SIEM platform.
- Make sure to click Test connection or Create connection, if applicable to your SIEM platform.
- Scroll up and click Save Changes to apply your SIEM configuration.