

















How-To: Issue and Manage Certificates via Let's Encrypt and EZCA
Overview - How to Centrally Manage Your Let’s Encrypt Certificates in EZCA
While Let’s Encrypt offers free publicly trusted certificates via ACME, you may run into a situation where every team, engineer, or server has their own process and governance for managing certificates. Especially with the upcoming 47-day restriction on public certificates, your organization might be heading straight into waves of outages that you may not be prepared for.
What Are Some of the Most Common Issues Caused by Let’s Encrypt Certificates?
When every server talks to Let’s Encrypt directly for every public certificate, some common issues regularly pop up:
- Certificate Validity Length: The CA/Browser forum voted in 2025 to require all public certificates to move to 47-day issuance by 2029, with a staged rollout. If you request certificates for longer durations or forget to renew before they expire, you will have an outage.
- Shadow IT & PKI: Since Let’s Encrypt is a public and free service, anyone can use it, including anyone in your organization. Many organizations don’t even know they’re using Let’s Encrypt to issue server certificates if they have a different preferred certificate authority.
- Combined Client/Server EKUs: Let’s Encrypt ended support for client EKUs in 2026. If you’re requesting or using this EKU, your certificate will be denied.
- DNS Permissions: Completing an ACME DNS challenge requires you to set your DNS records, usually through automation. If you don’t scope your access correctly, you could hand over full control of your DNS records to an attacker if they gain access to a single server.
- Broken Automation: If your ACME client crashes or fails to run on your server, your certificate won’t be renewed and will expire. You usually don’t find out until after you have an outage.
How Can EZCA Help Prevent the Most Common Let’s Encrypt Issues?
EZCA provides public certificate authorities (CAs) to sit in between Let’s Encrypt and your organization’s servers to help centrally manage, monitor, and protect your public certificates. Every EZCA public CA allows you to:
- Centrally Monitor Your Certificates: In a single view you can see how many certificates you’ve issued and how many are nearing expiry.
- Proactive Alerts for Expiring Certificates: If a certificate is nearing expiration, we proactively alert you via email or SIEM integration so you don’t miss any expiring certificates.
- Enforce Role-Based Access Control (RBAC) to Your Domains: For large organizations you may have multiple teams each managing separate domains, servers, and certificates. EZCA allows you to control access via Entra ID apps and groups for who can request/issue/manage certificates and domains.
- Add Dual Key Approval for New Certificates: Add additional protections to your domains via dual key approvals, where no one person can issue new certificates.
- Perform ACME Challenges with No Access to Your DNS: After you set up a one-time DNS delegation (CNAME record) for only ACME challenges (
_acme-challenge), EZCA doesn’t need any access to your DNS for ongoing issuance and renewal.
Step-by-Step Guide - How to Issue Let’s Encrypt Certificates Through EZCA
This guide will walk you through how to set up a new EZCA certificate authority which can connect to Let’s Encrypt and help centrally manage your Let’s Encrypt certificates.
Before you begin, make sure you have these pre-requisites in place:
Prerequisites for Setting Up a Let's Encrypt Public CA
Make sure you've completed these steps
For EZCA to talk to your Entra ID tenant, you need to register the EZCA Entra ID application in your tenant.
Collapses this section and completes the checkmark.
Now that you have the pre-requisites in place, you can create your public certificate authority:
How to Set Up an EZCA Public CA with Let's Encrypt
Follow these steps to create an EZCA public certificate authority
The first step to automating your Let’s Encrypt public certificate issuance is to connect EZCA to Let’s Encrypt via a Public CA. Follow these steps to create one:
-
Navigate to https://portal.ezca.io (or your private/regional EZCA instance).
-
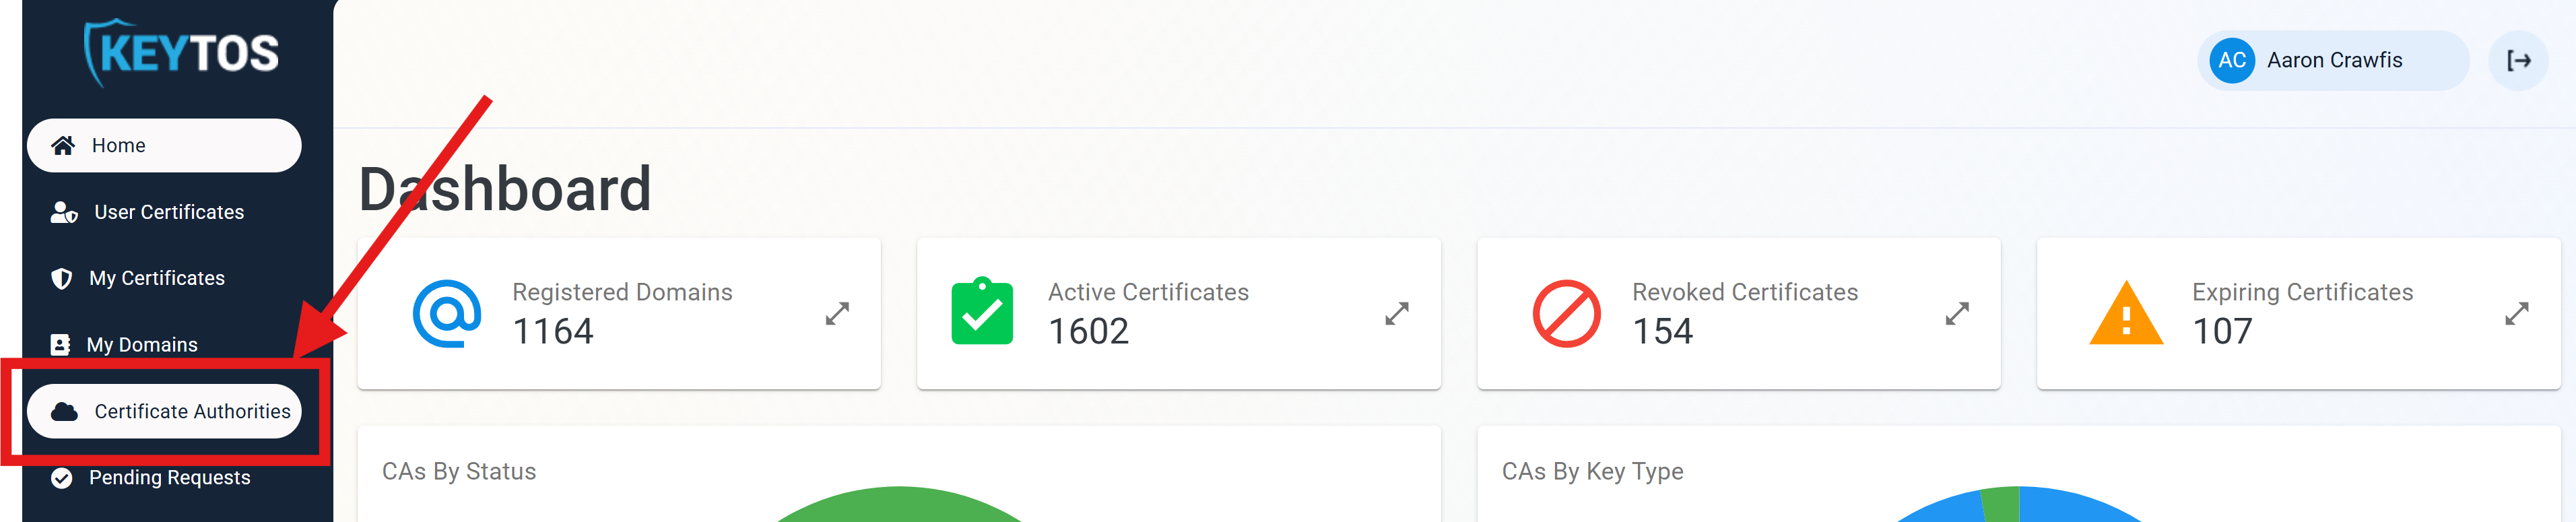
From the left sidebar, select Certificate Authorities.
-
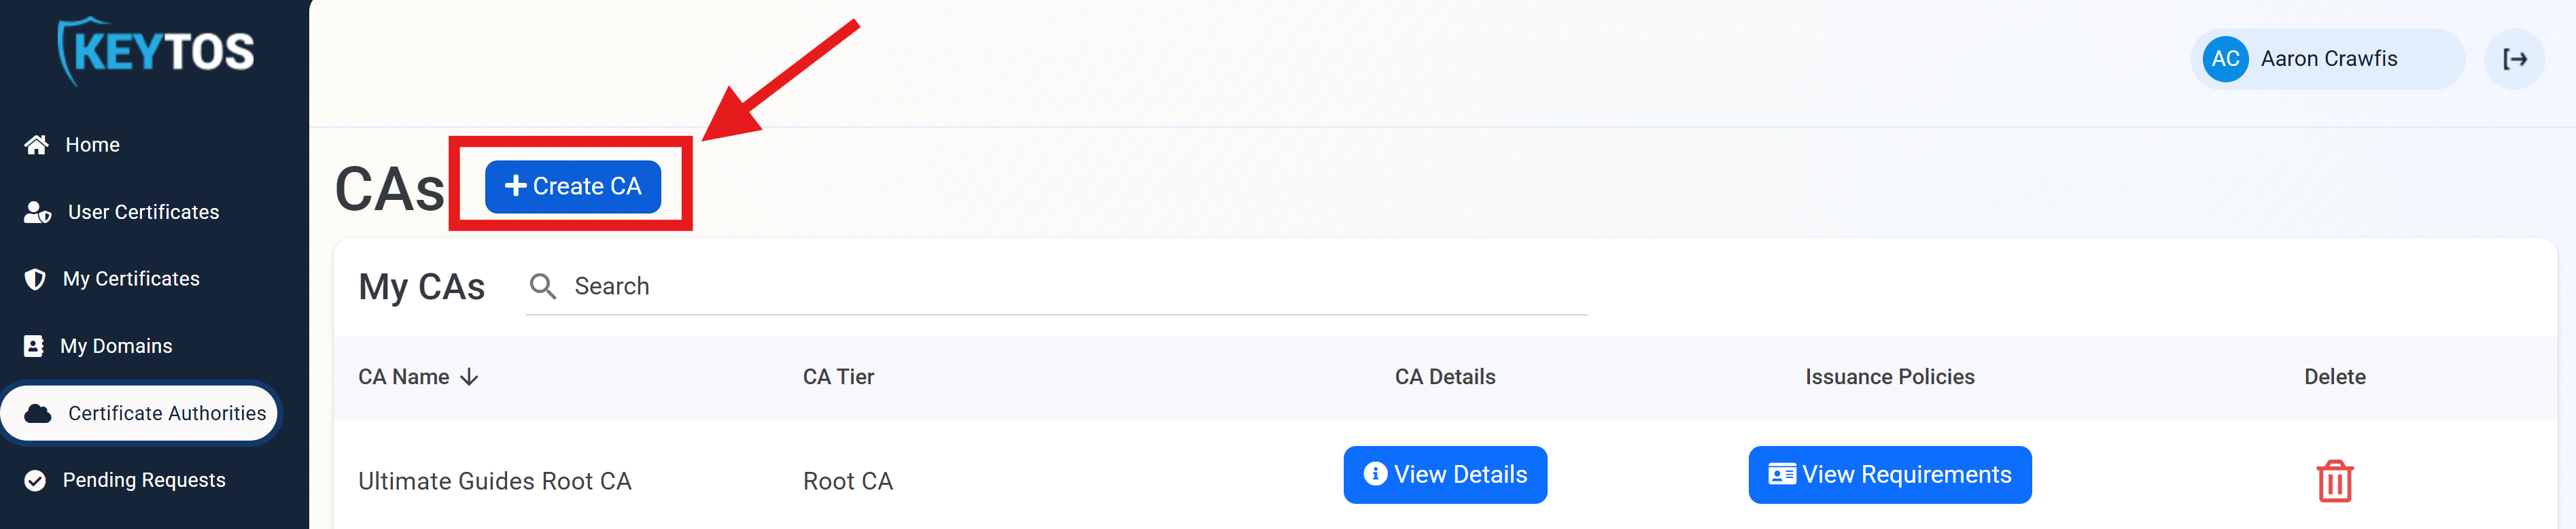
At the top of the menu, click + Create CA.
-
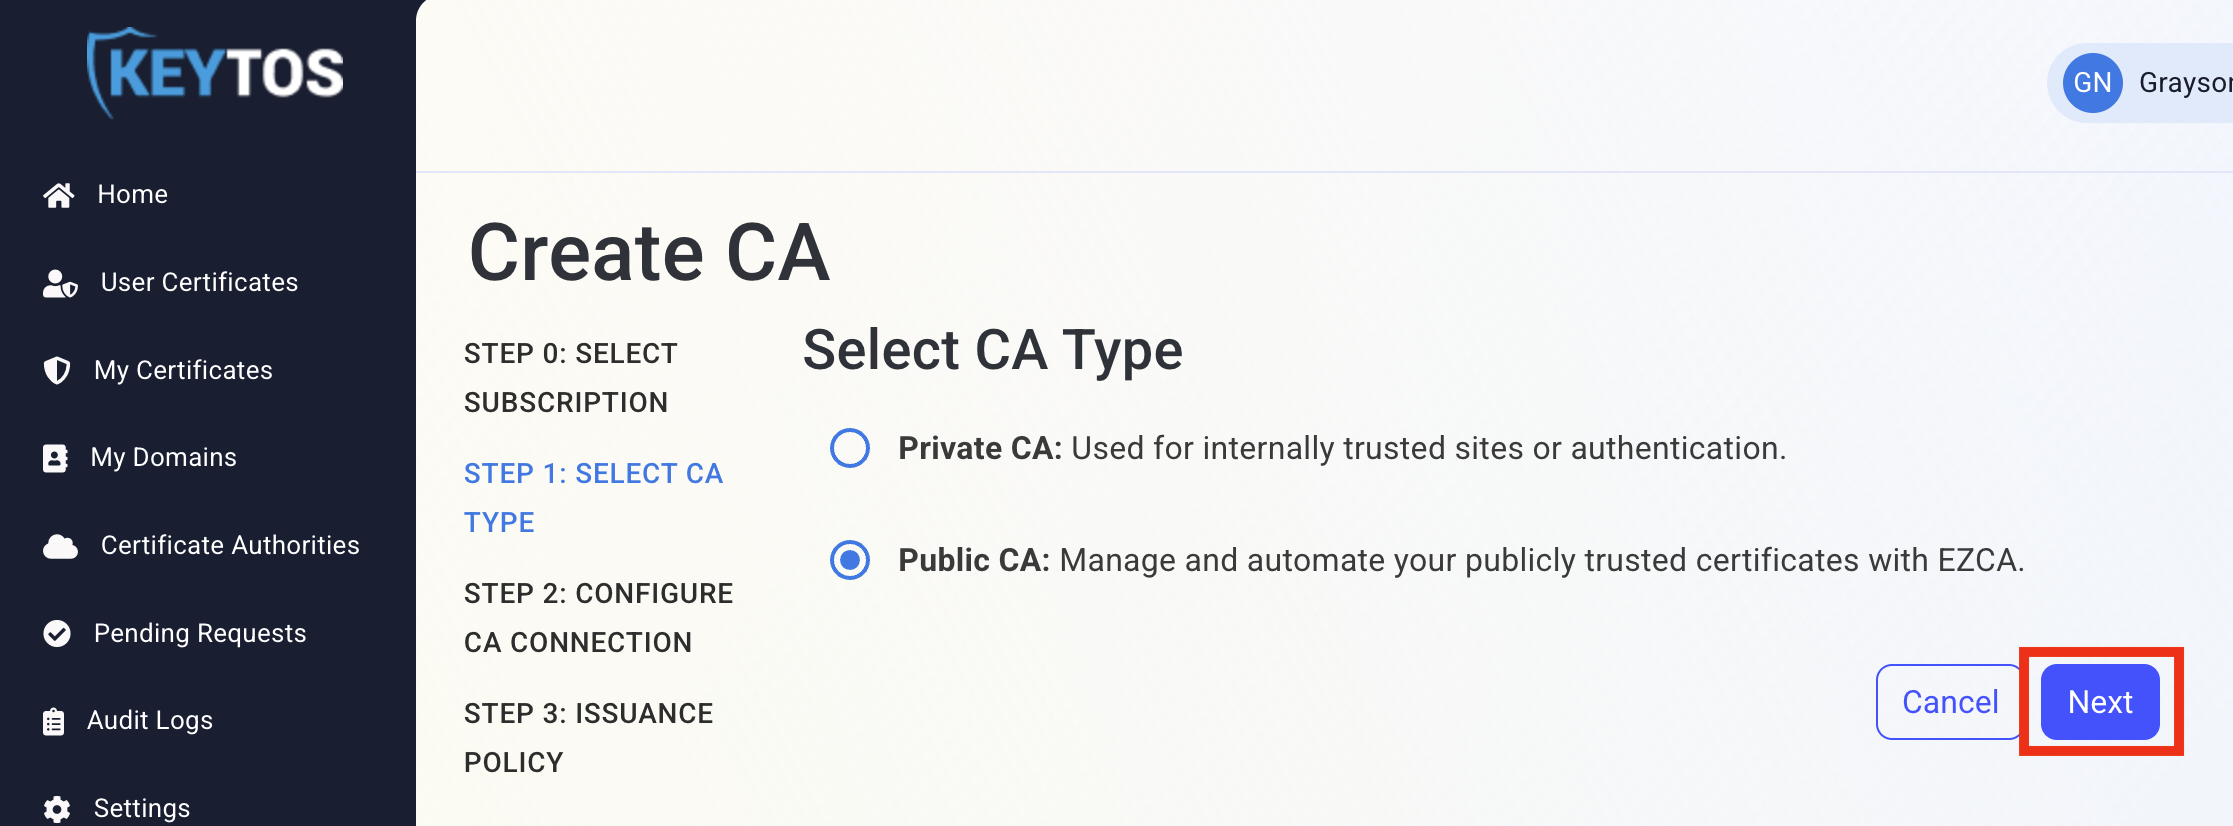
Under Select CA Type select Public CA and click Next.
 Not seeing the option for CA type?
If you’re not seeing an option to select Public CA, make sure you have a Premium EZCA subscription. Basic subscriptions do not support Public CAs.
-
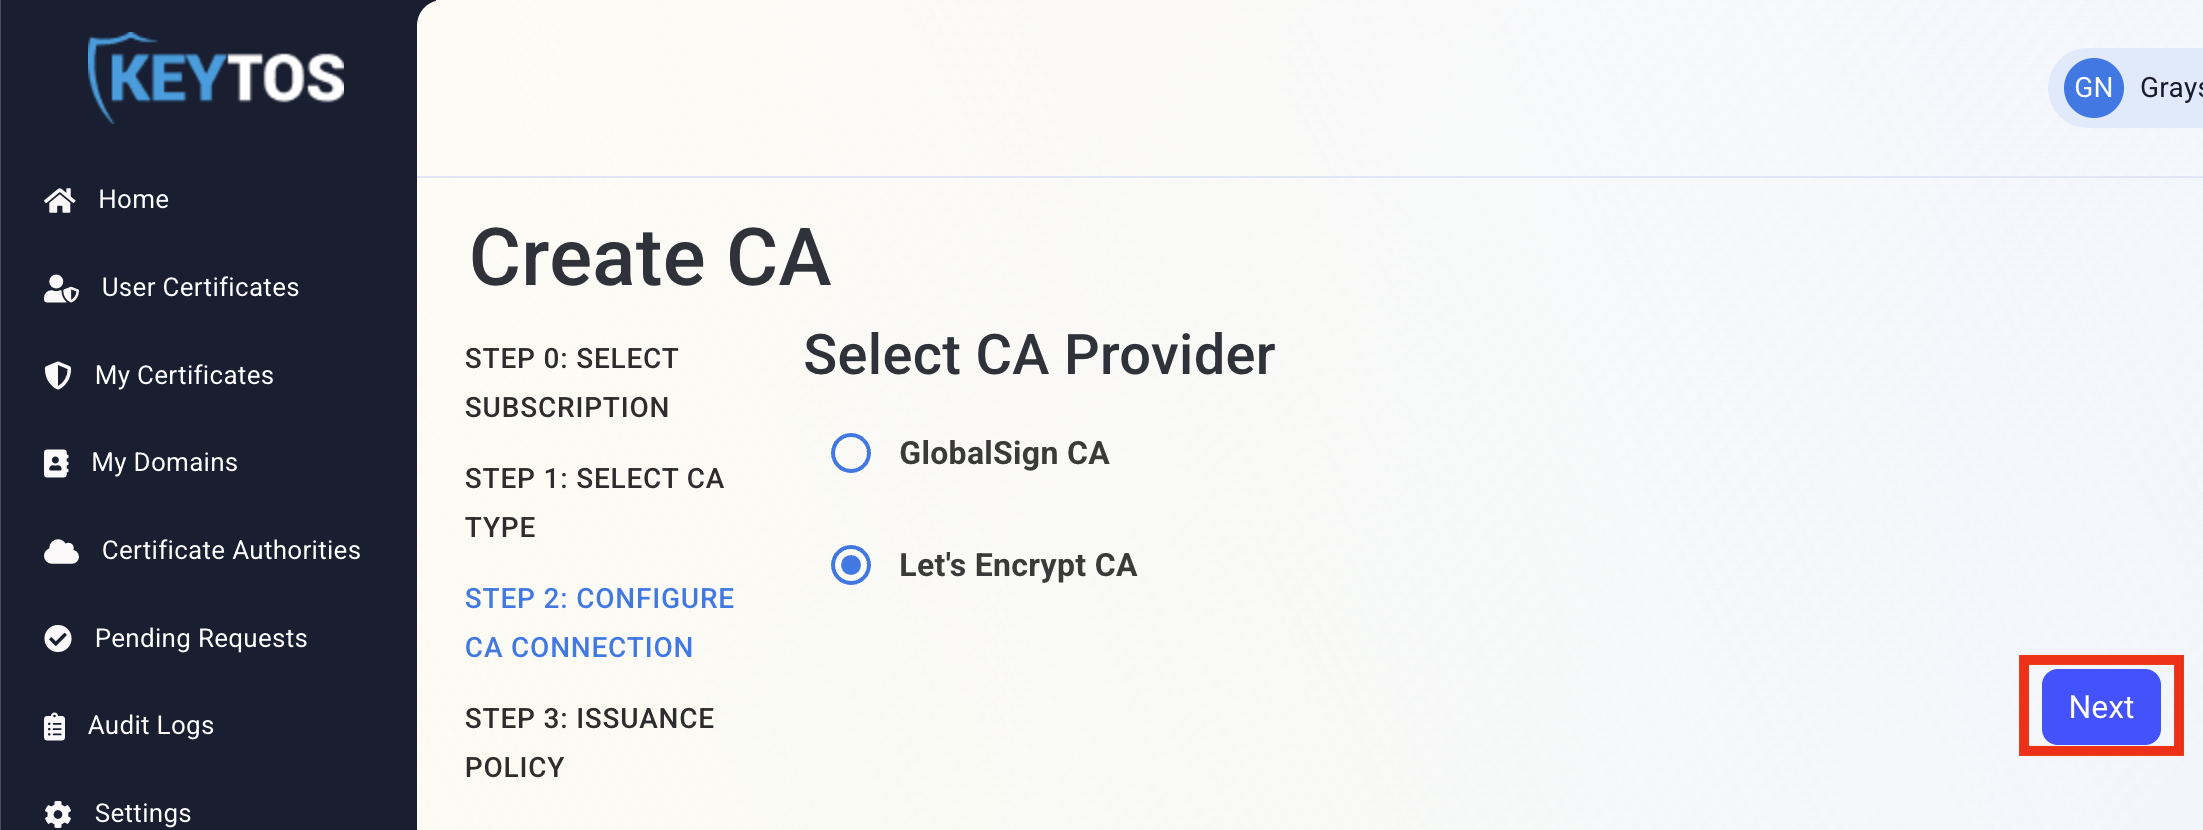
Under Select CA Provider select Let’s Encrypt CA and click Next.
-
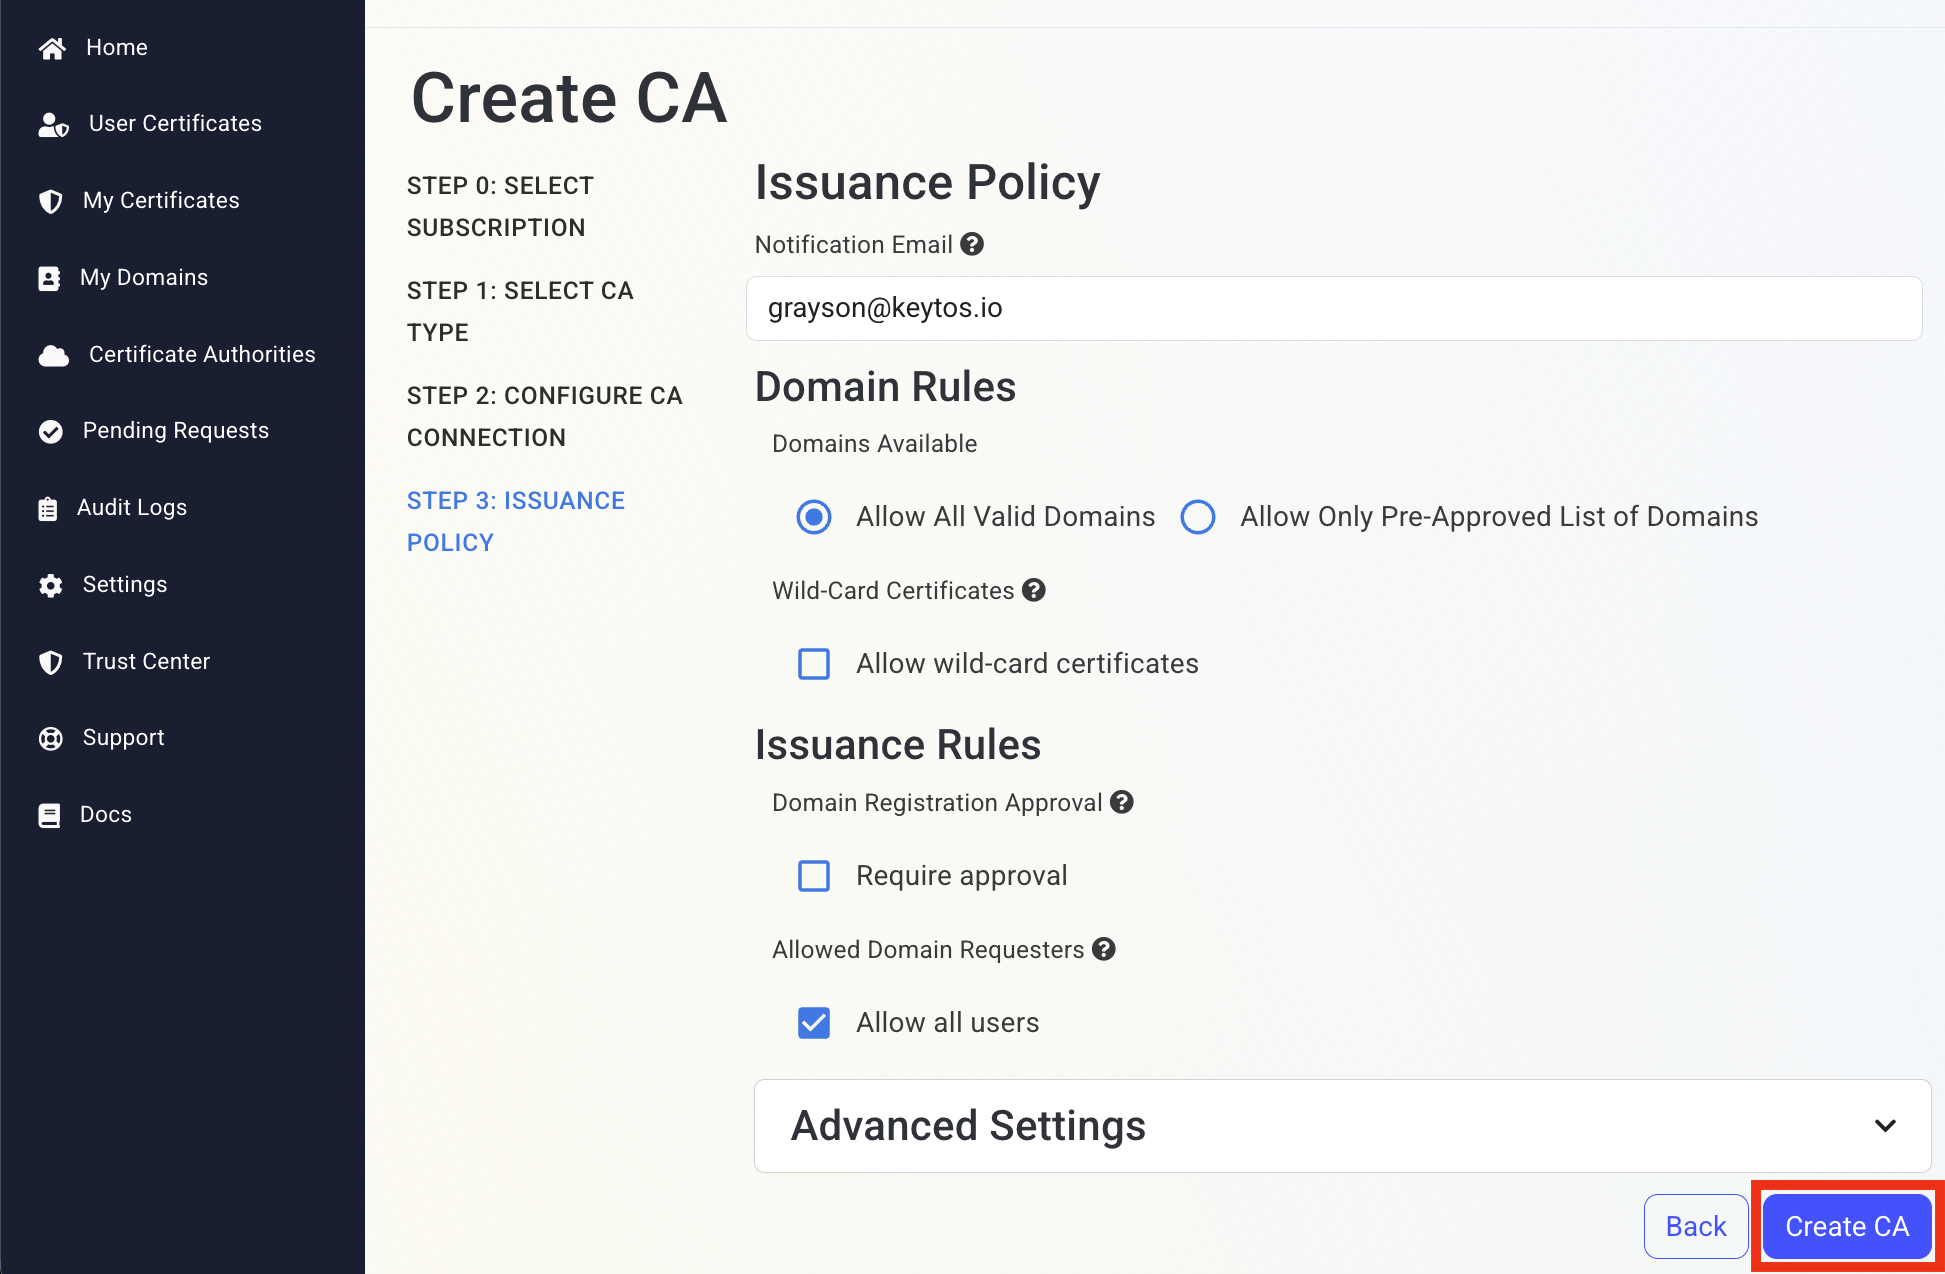
Enter a Notification Email and optionally configure any Domain Rules or Issuance Rules:
- Notification Email: Enter the email address where you want to receive notifications related to your Let’s Encrypt CA. A group email address is recommended instead of a specific person.
- Domains Available: Control if you want all domains to be available for issuance or if you want to restrict issuance to specific domains. Note that this cannot be changed later without recreating your CA.
- Wild-Card Certificates: Enable this option if you want to allow the issuance of wild-card certificates for your domains. Note that this cannot be changed later without recreating your CA.
- Domain Registration Approval: Enable this if you want new Domains to have to be approved first before they can be used for certificate issuance. If checked you can add any Entra ID users/groups that can act as approvers. Can be updated later.
- Allowed Domain Requesters > Allow all users: Uncheck this box if you only want specific Entra ID users/groups to be able to request/create new Domains for this CA. Can be updated later.
-
Click Create CA to complete the creation of your Let’s Encrypt CA.
Collapses this section and completes the checkmark.
Now that your CA has been created, you can create a Domain, which controls who can issue certificates for specific subject and SAN values in a certificate.
-
Navigate to https://portal.ezca.io (or your private/regional EZCA instance).
-
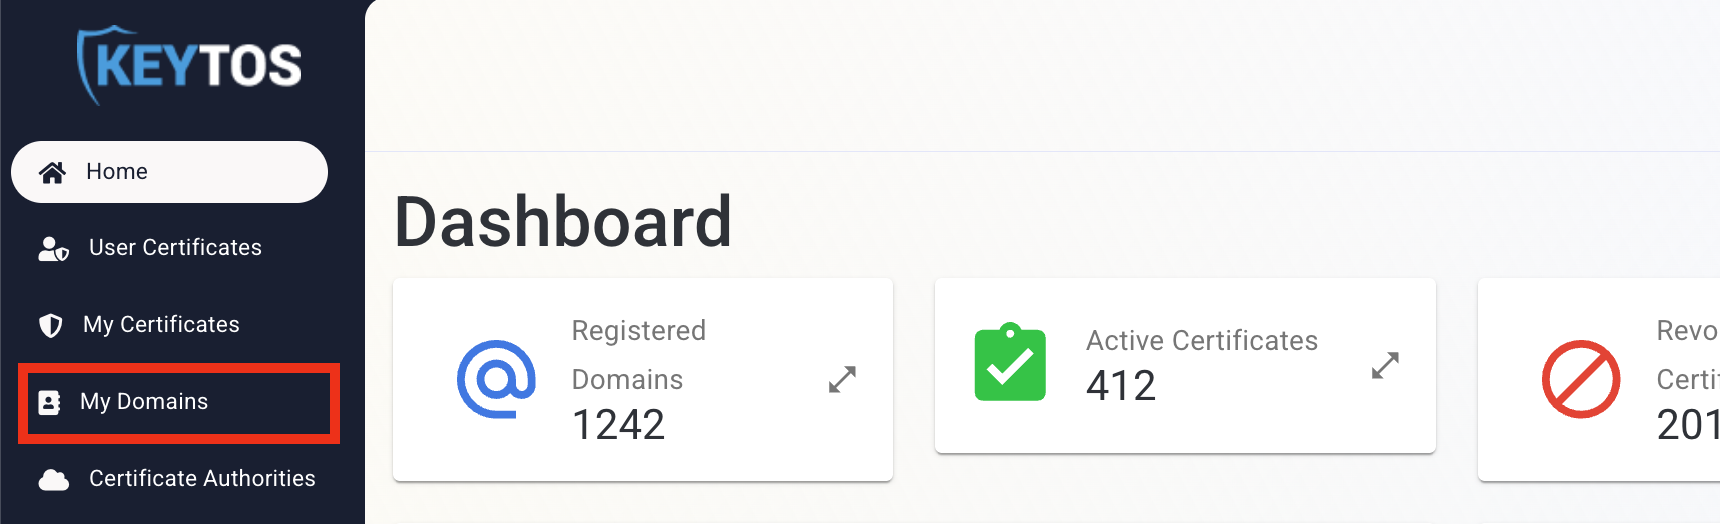
From the left-hand menu, navigate to My Domains.
-
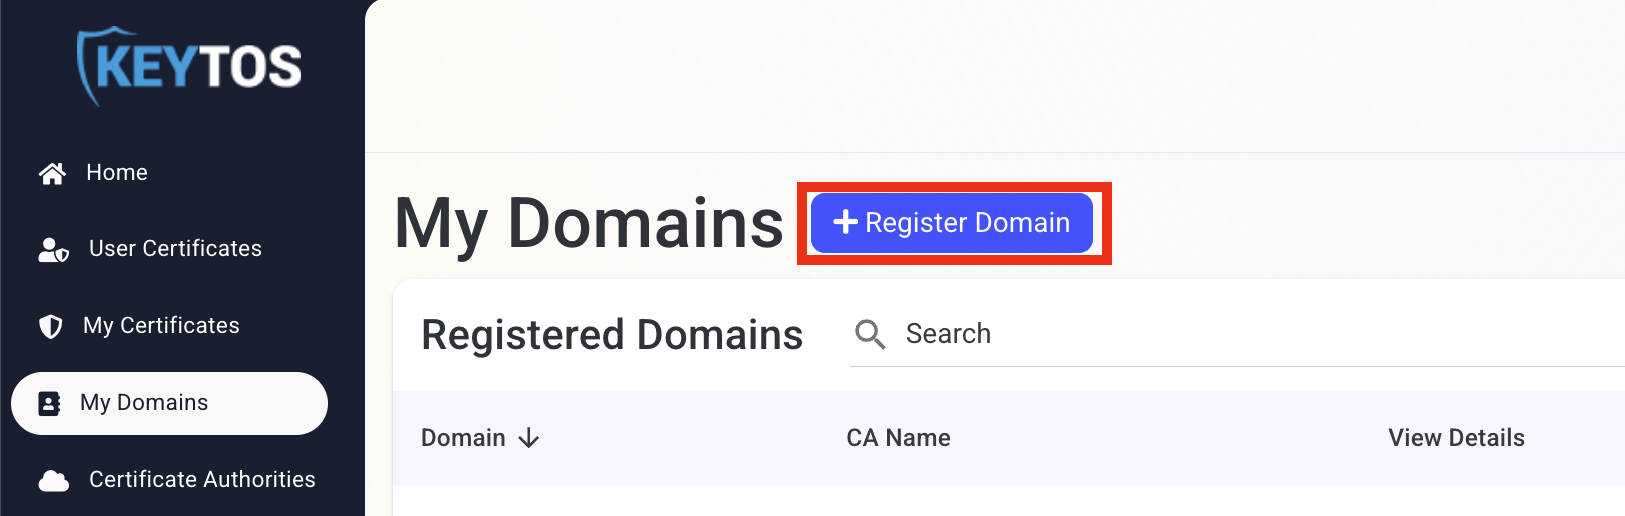
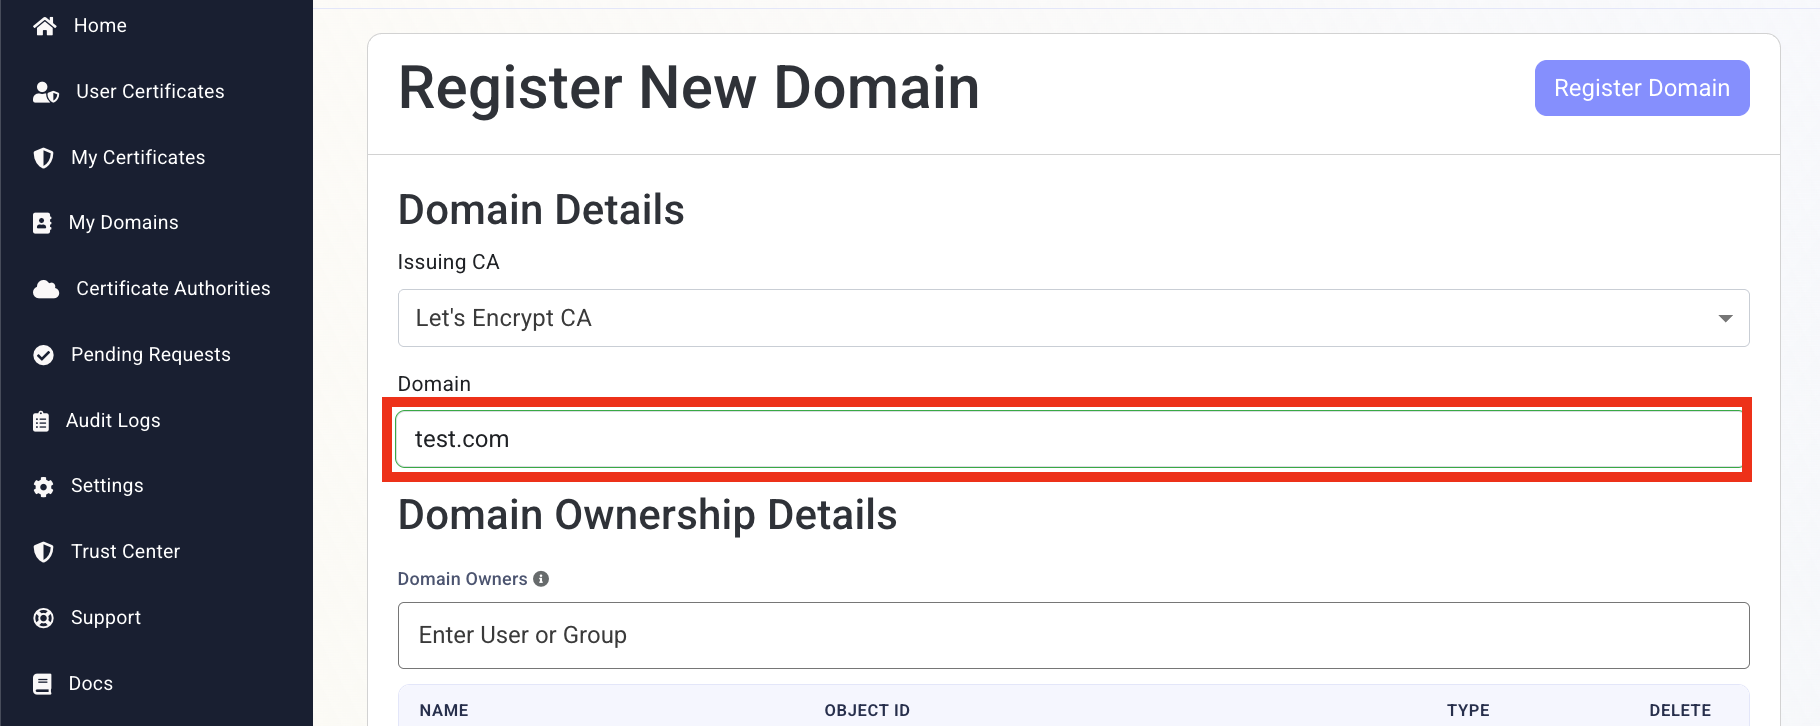
Click + Register Domain.
-
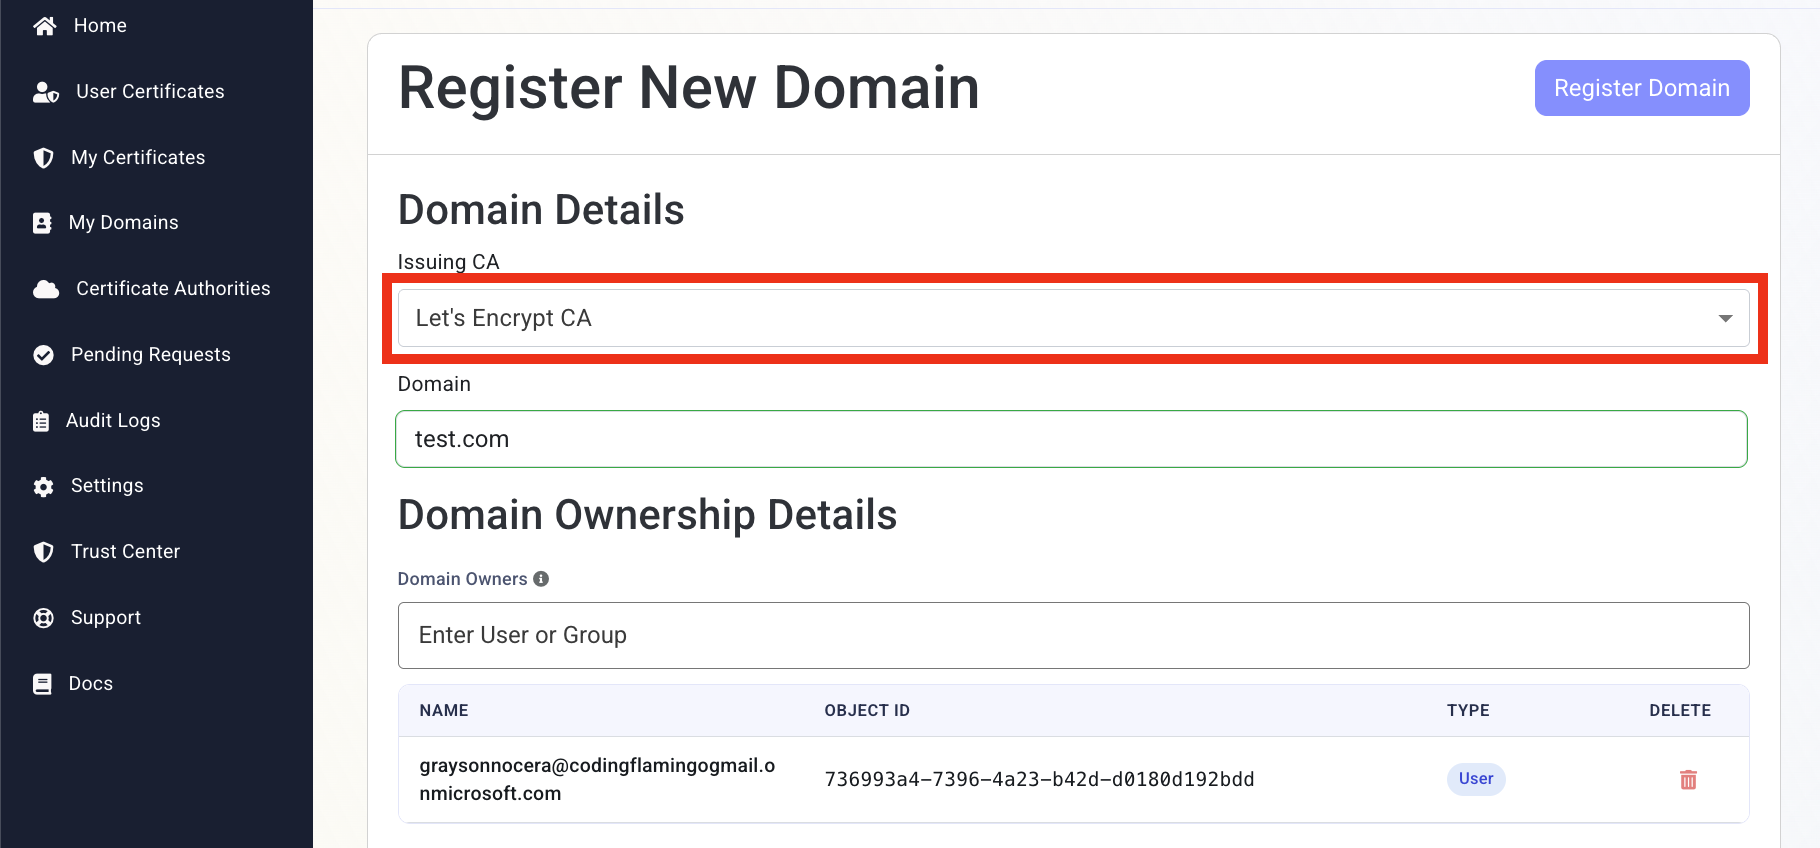
From the Issuing CA dropdown, select your Let’s Encrypt CA.
-
In the Domain field, enter the domain name or IP address you want to register.
-
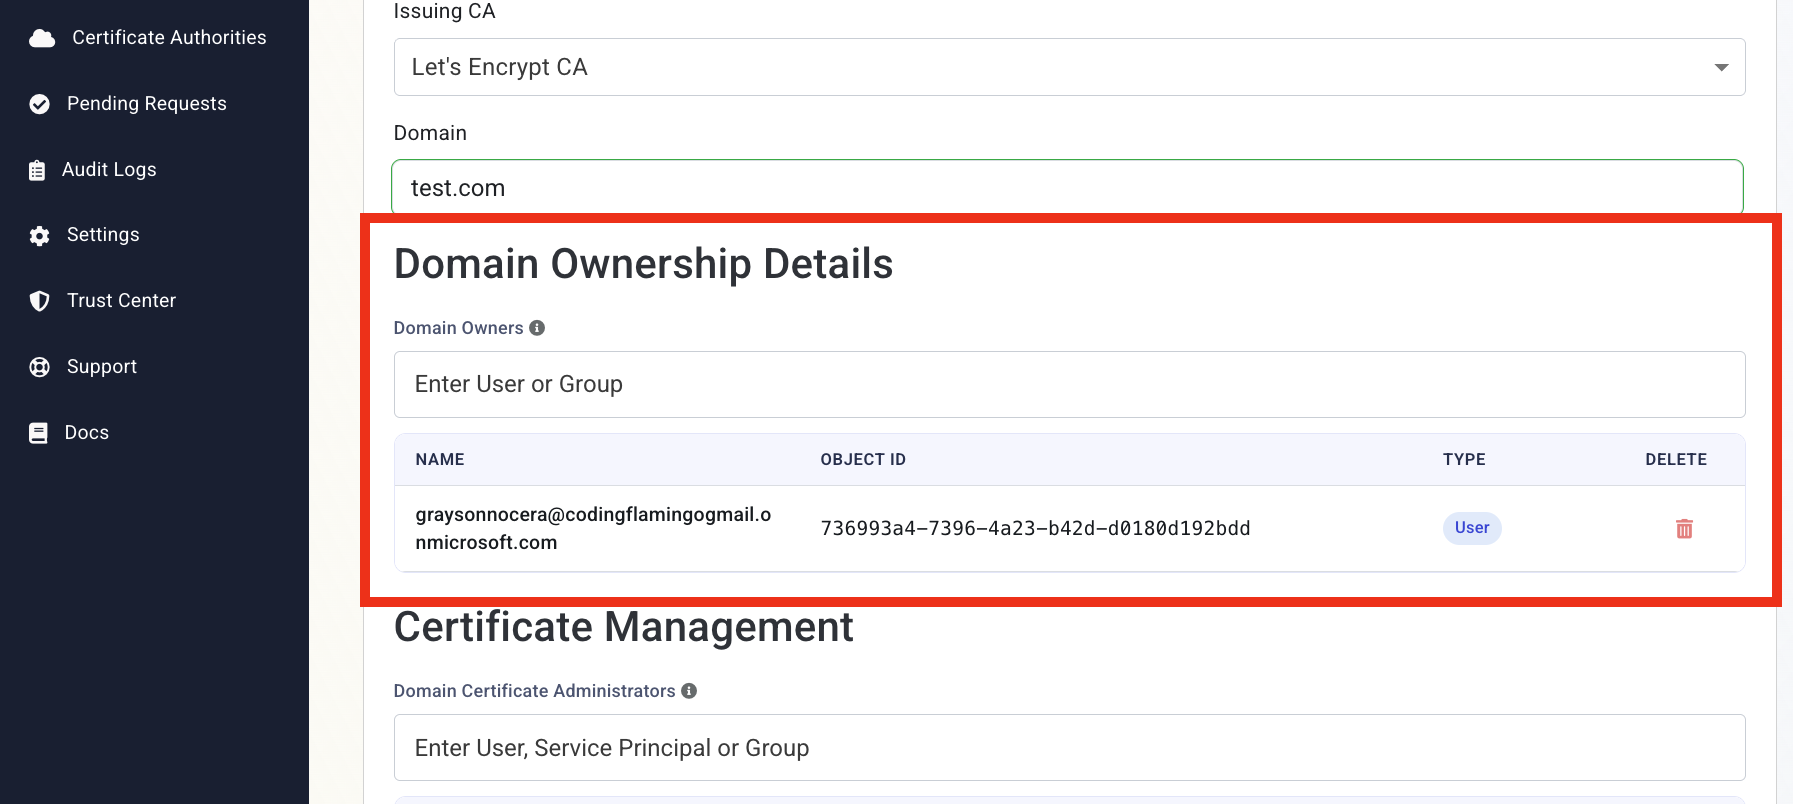
In the Domain Ownership Details, enter the user(s) and/or group(s) that will act as the Domain Owner. Domain owners can make changes to this Domain including access control and other settings.
-
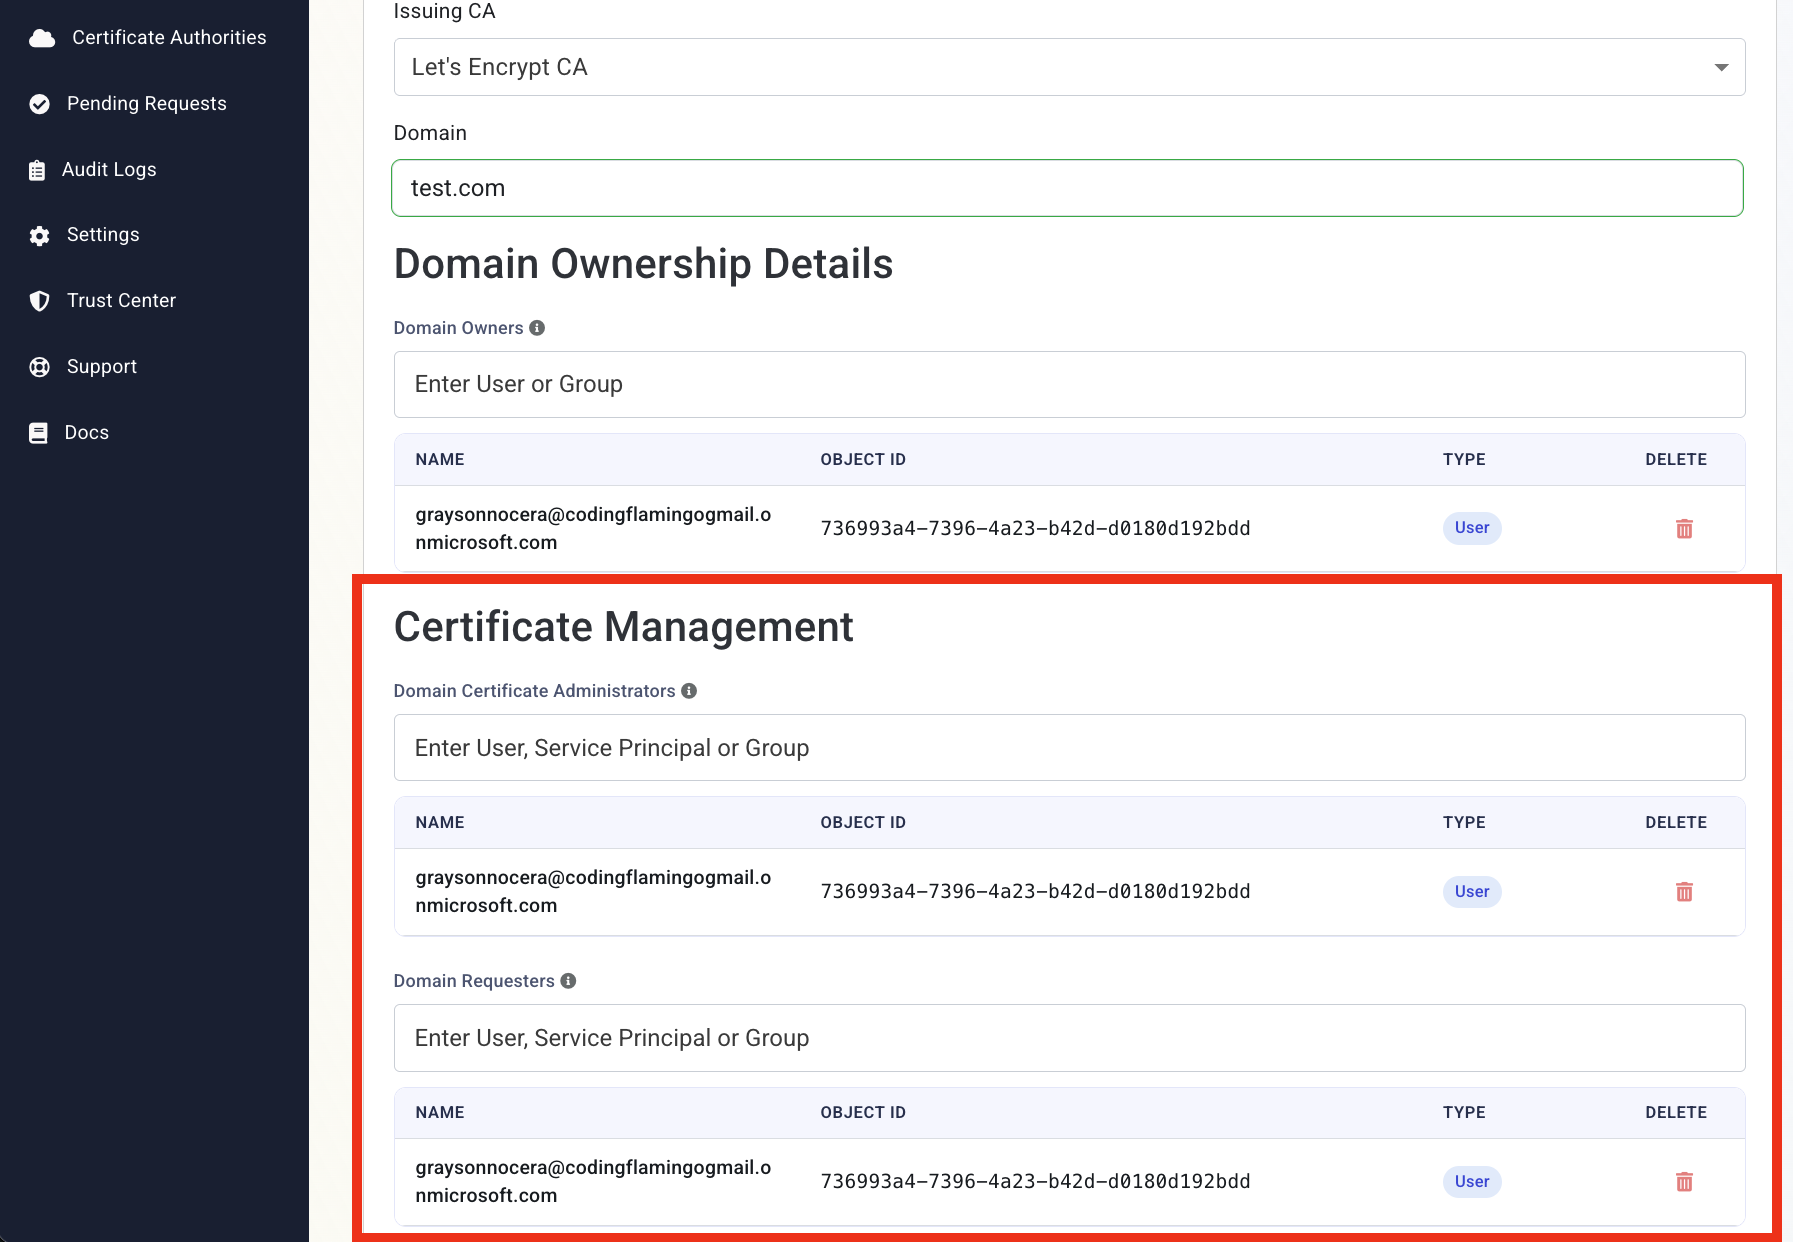
In the Certificate Management field, enter the user(s), group(s), and Entra ID application(s) that will be allowed to request certificates for this domain.
-
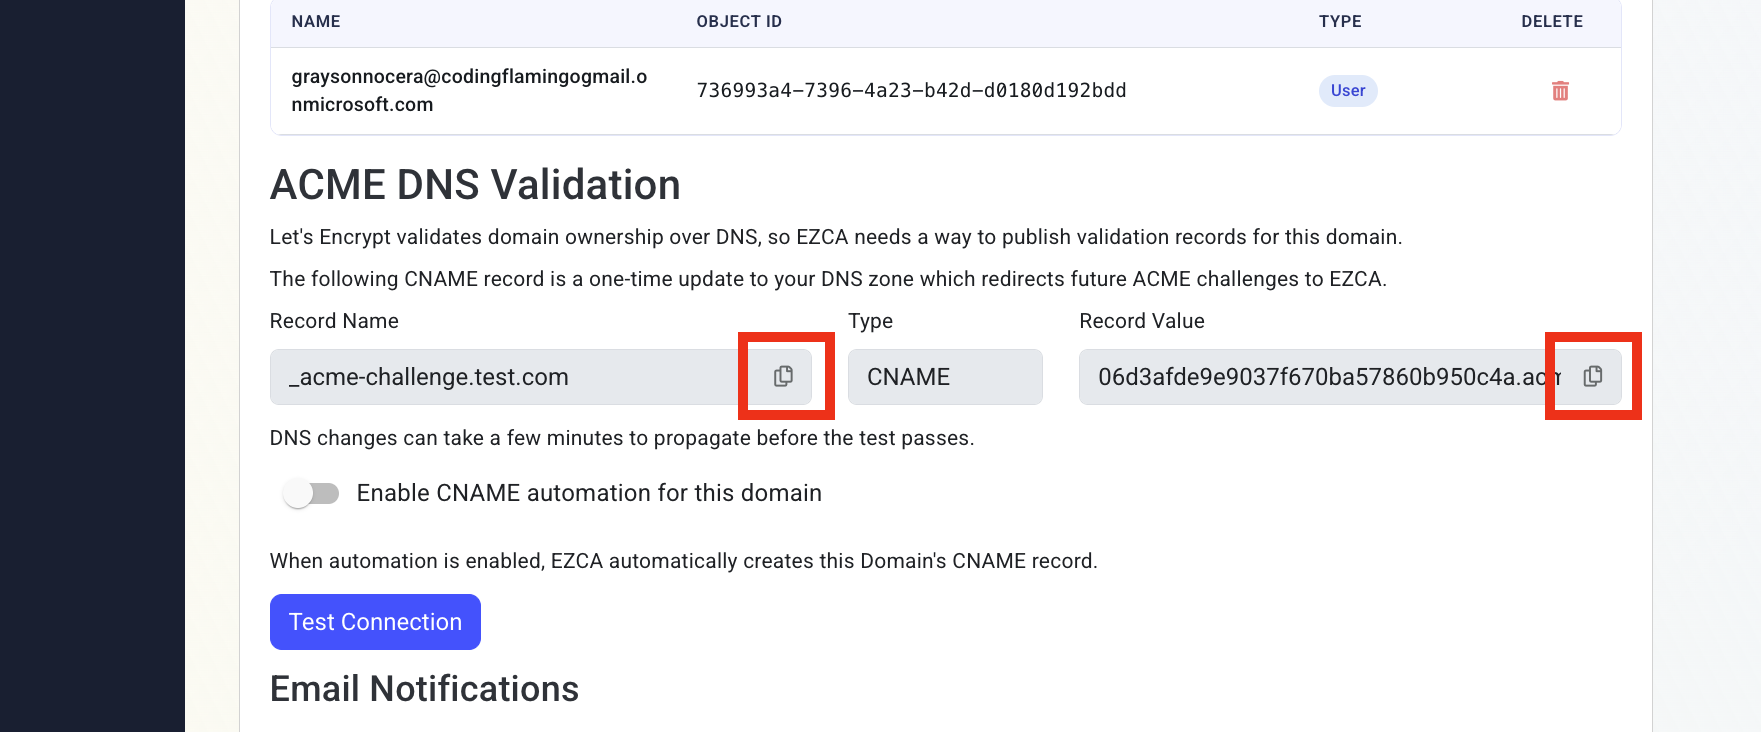
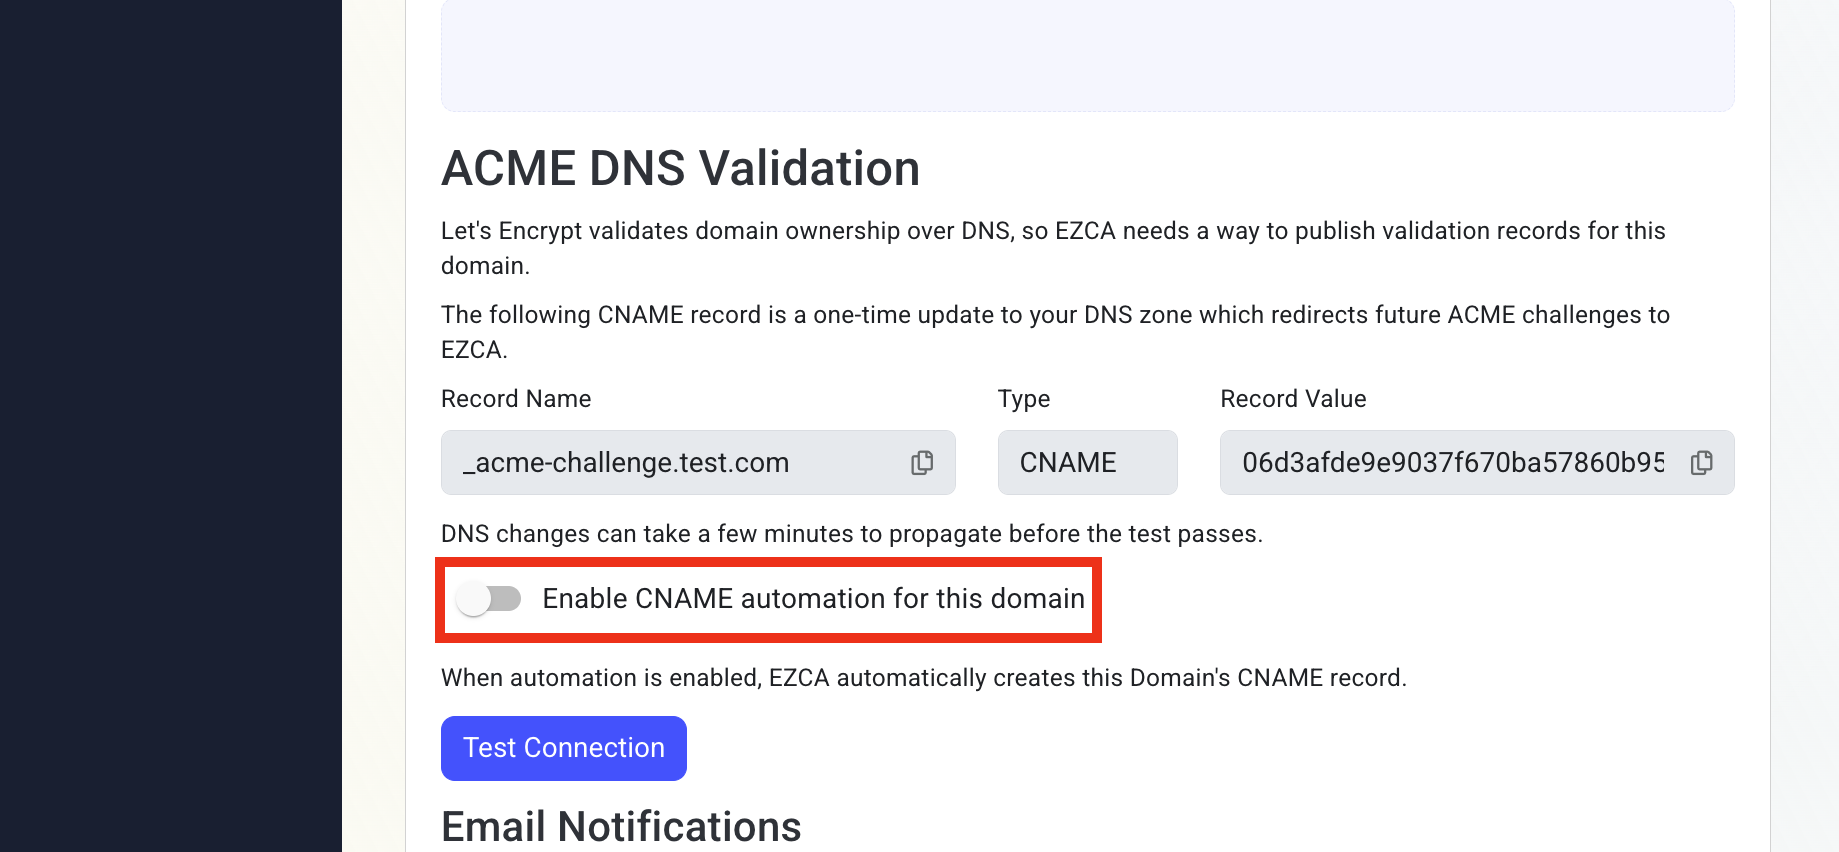
In the ACME DNS Validation section, copy the DNS Record Name and Record Value. You will need to create a CNAME record in your DNS provider for the domain. This CNAME allows EZCA to complete the ACME DNS challenge on your behalf for just this domain and just for the ACME record. EZCA does not have access to any other part of your DNS record (unless you elect to add optional automation for future subdomains in the next section).
-
If you want to automate DNS onboarding for future subdomains, move onto the next step. Otherwise click Register Domain to complete the domain registration.
Collapses this section and completes the checkmark.
If you plan to add additional subdomain records (e.g., sub.example.com), you can optionally automate the creation of the necessary CNAME records by giving EZCA access to your DNS zone for your root domains (e.g., example.com).
Out of the box, EZCA uses DNS CNAME records to handle ACME DNS challenges. If you don’t want to give EZCA access to your DNS zone, you can manually add these CNAME records as a one-time action anytime you add a domain. However, you can also optionally enable CNAME automation for future subdomains, where EZCA will automatically create the necessary CNAME records on your behalf.
Follow these steps to give EZCA access to your Azure DNS zone so it can automatically create the necessary CNAME records for new subdomains.
-
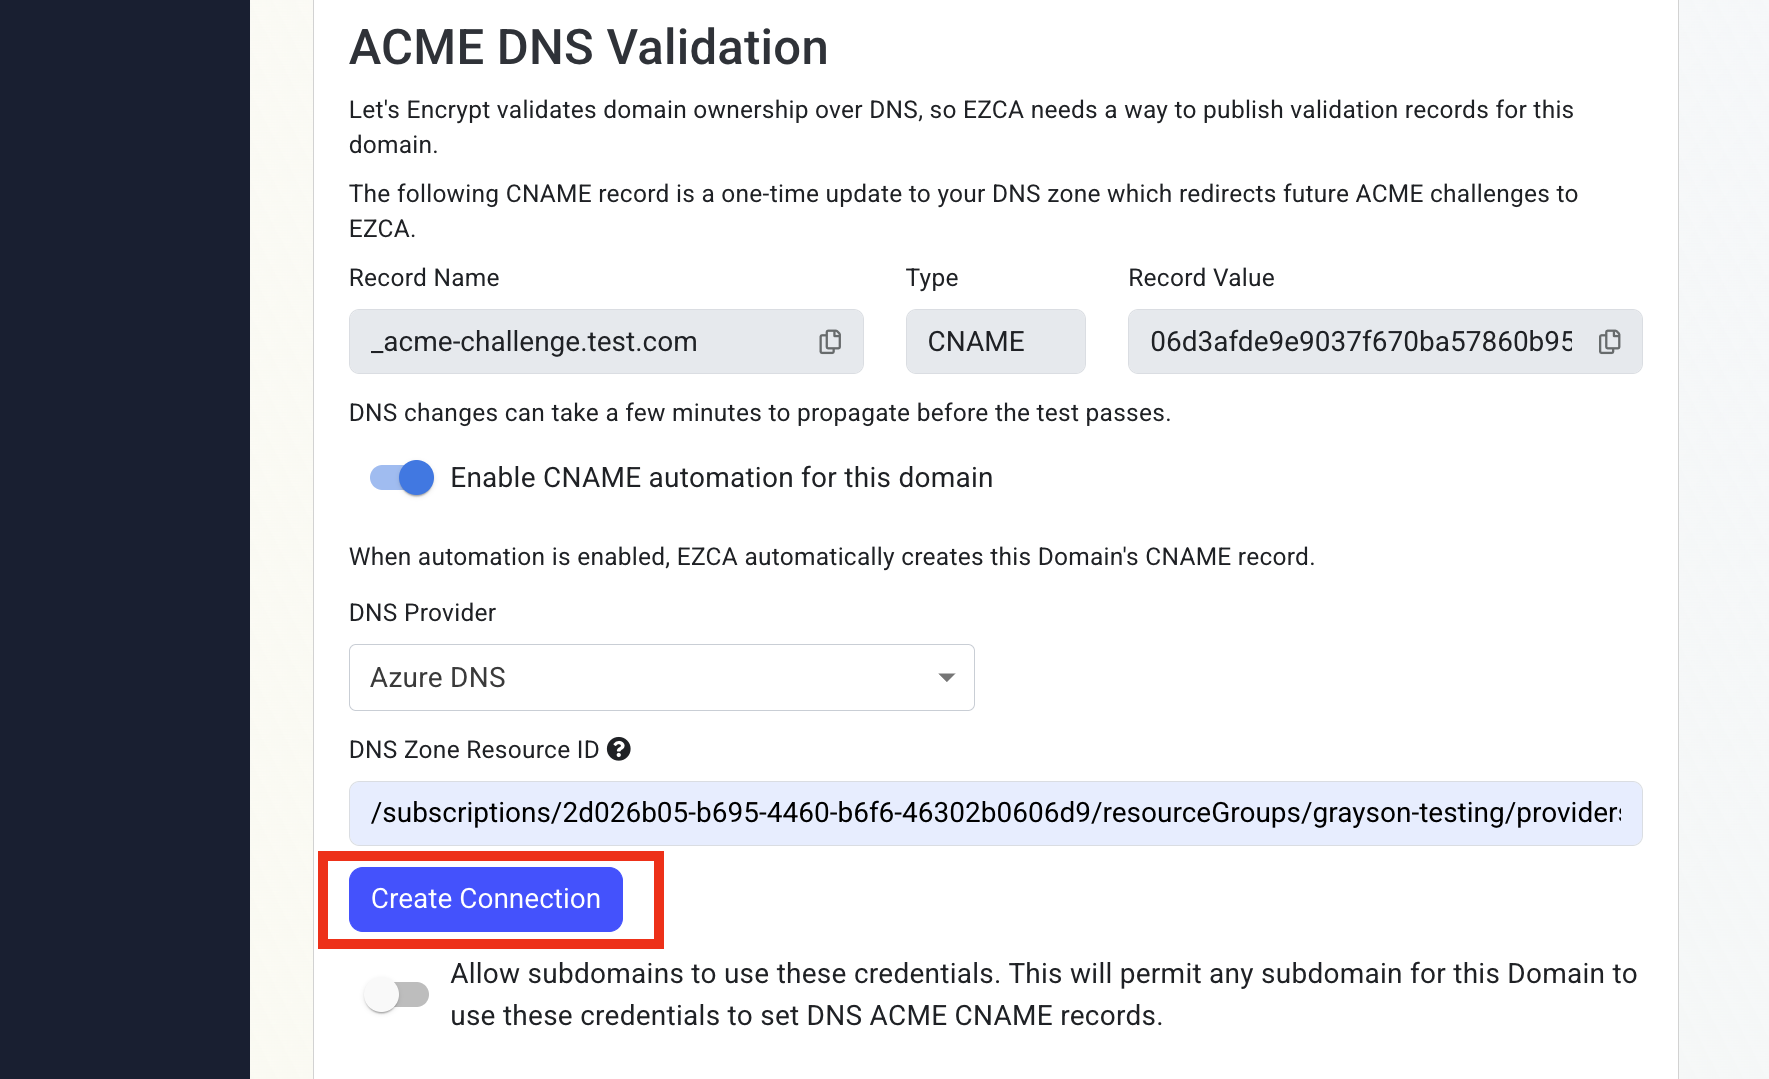
Begin by toggling Enable CNAME automation for this domain:
-
Under DNS Provider, select Azure DNS.
-
In another tab, go to https://portal.azure.com.
-
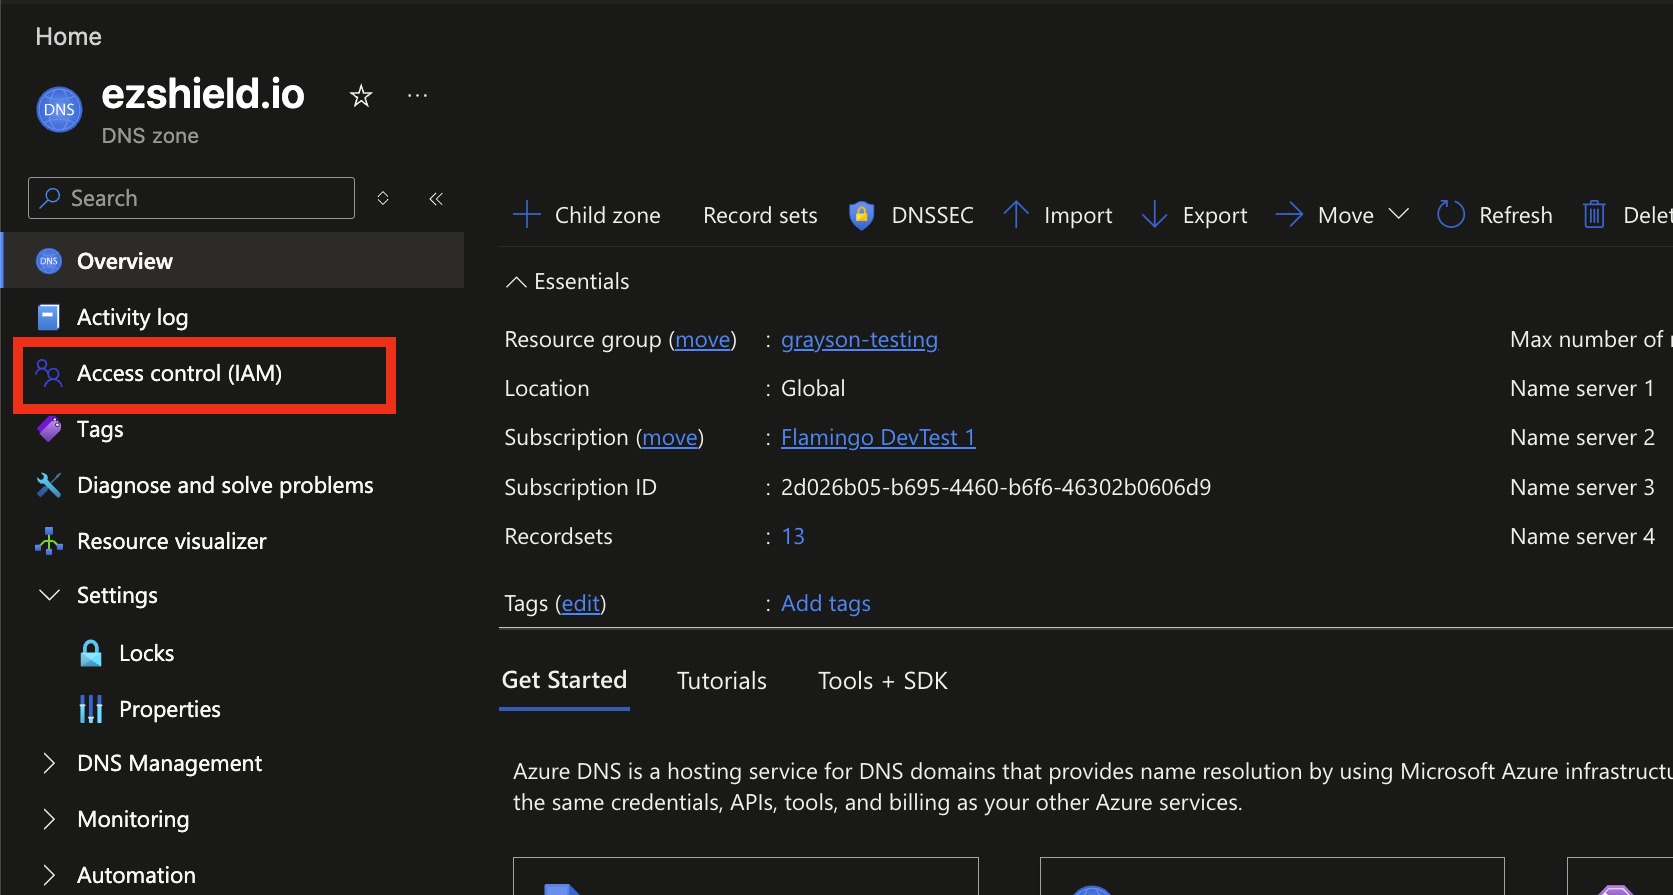
In your DNS Zones, select your public DNS zone corresponding to your domain.
-
On the sidebar, select Access control (IAM).
-
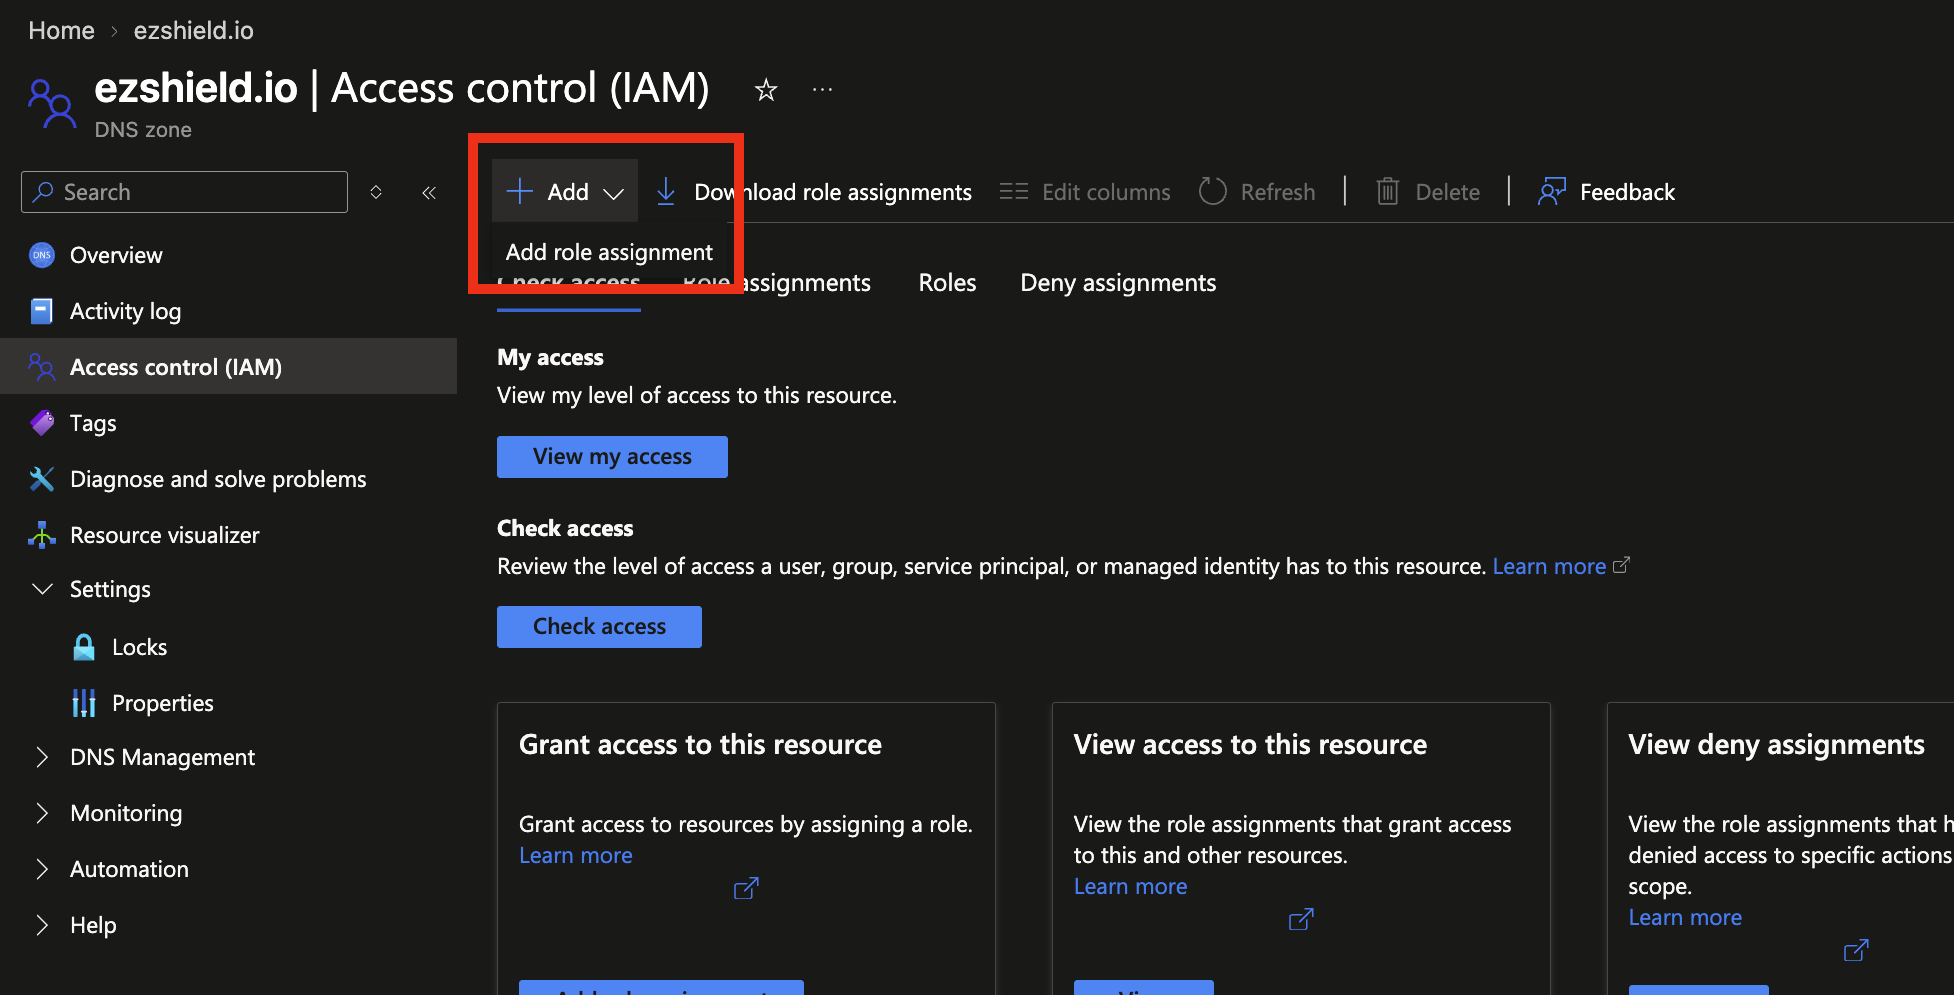
On the top bar, select Add role assignment.
-
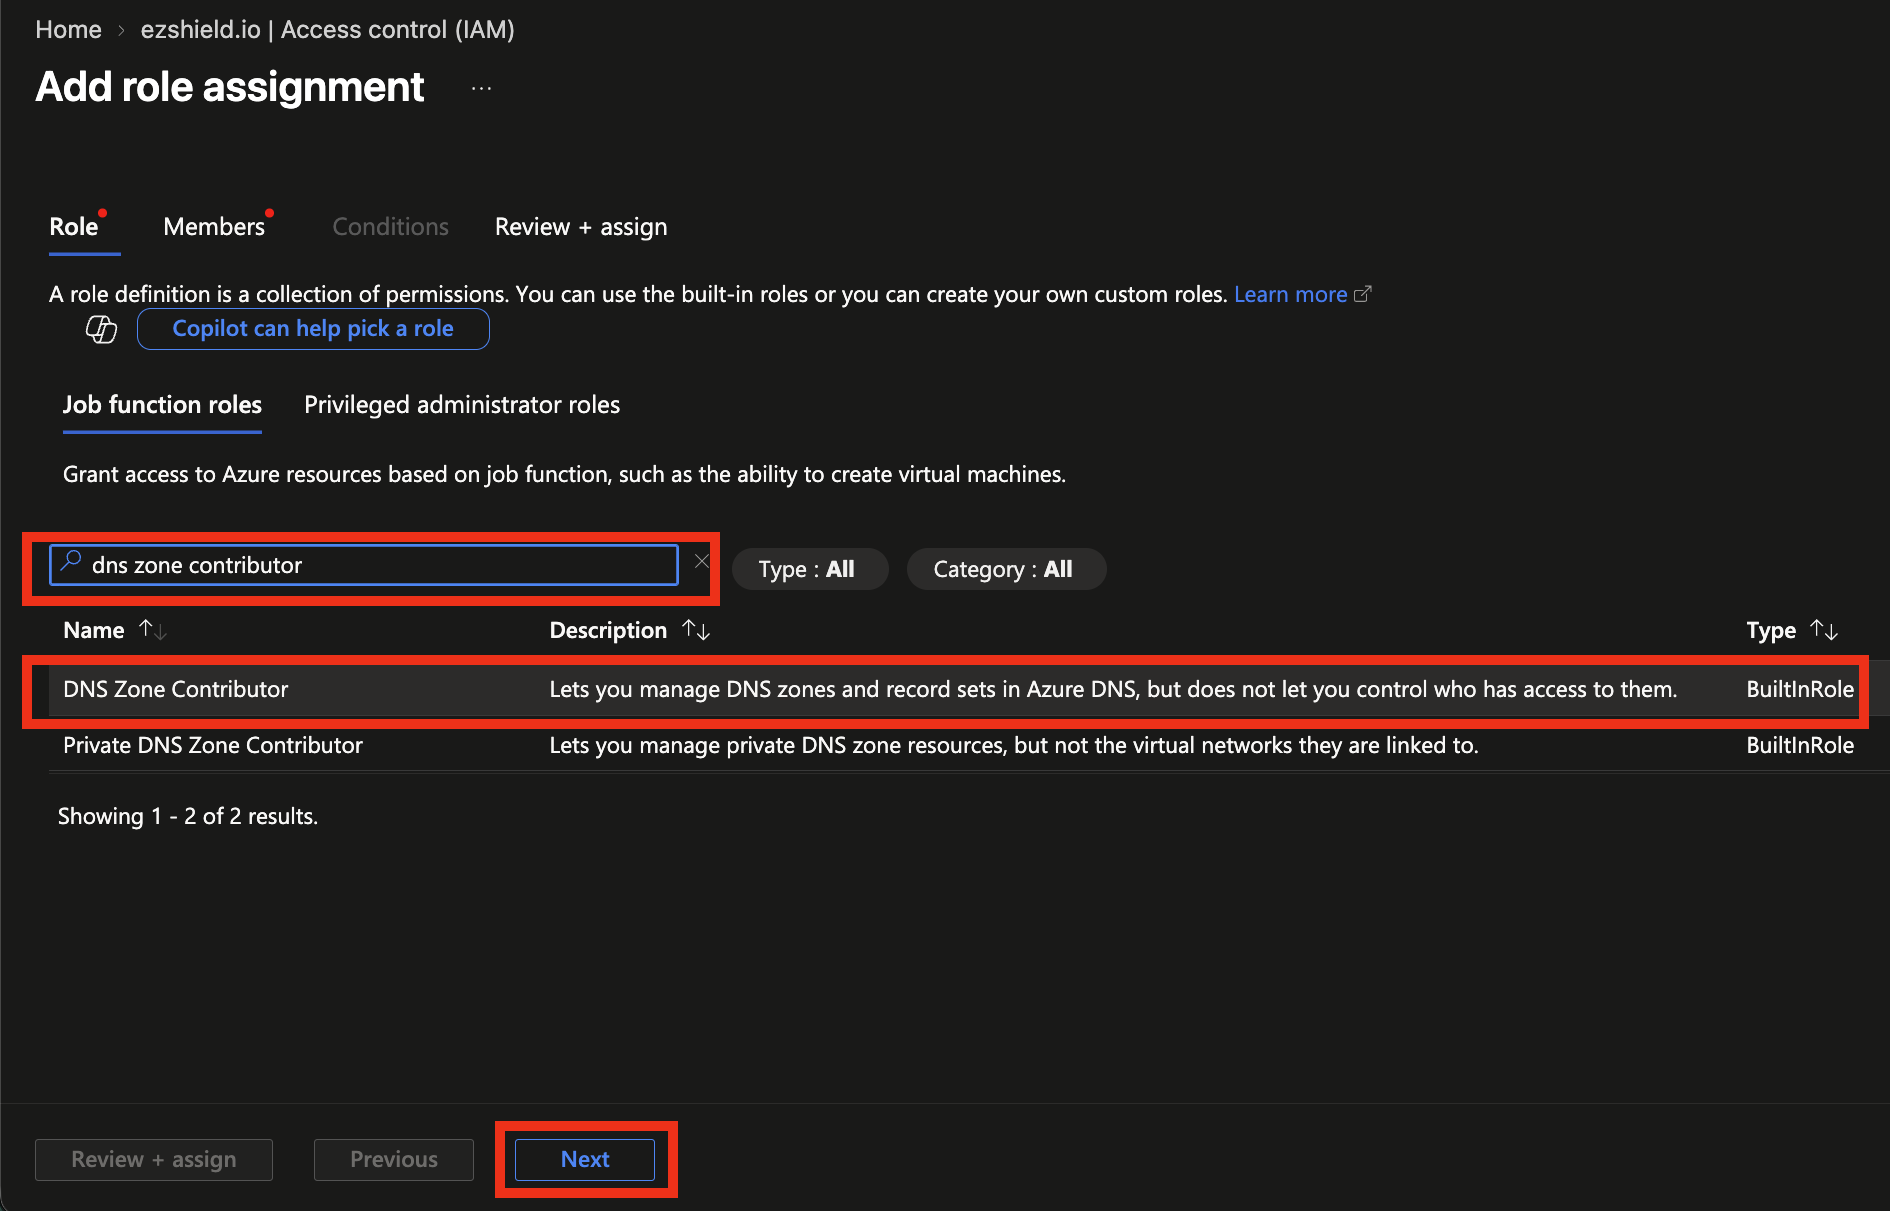
In the search bar, search for the DNS Zone Contributor role and select it. Then, click Next.
-
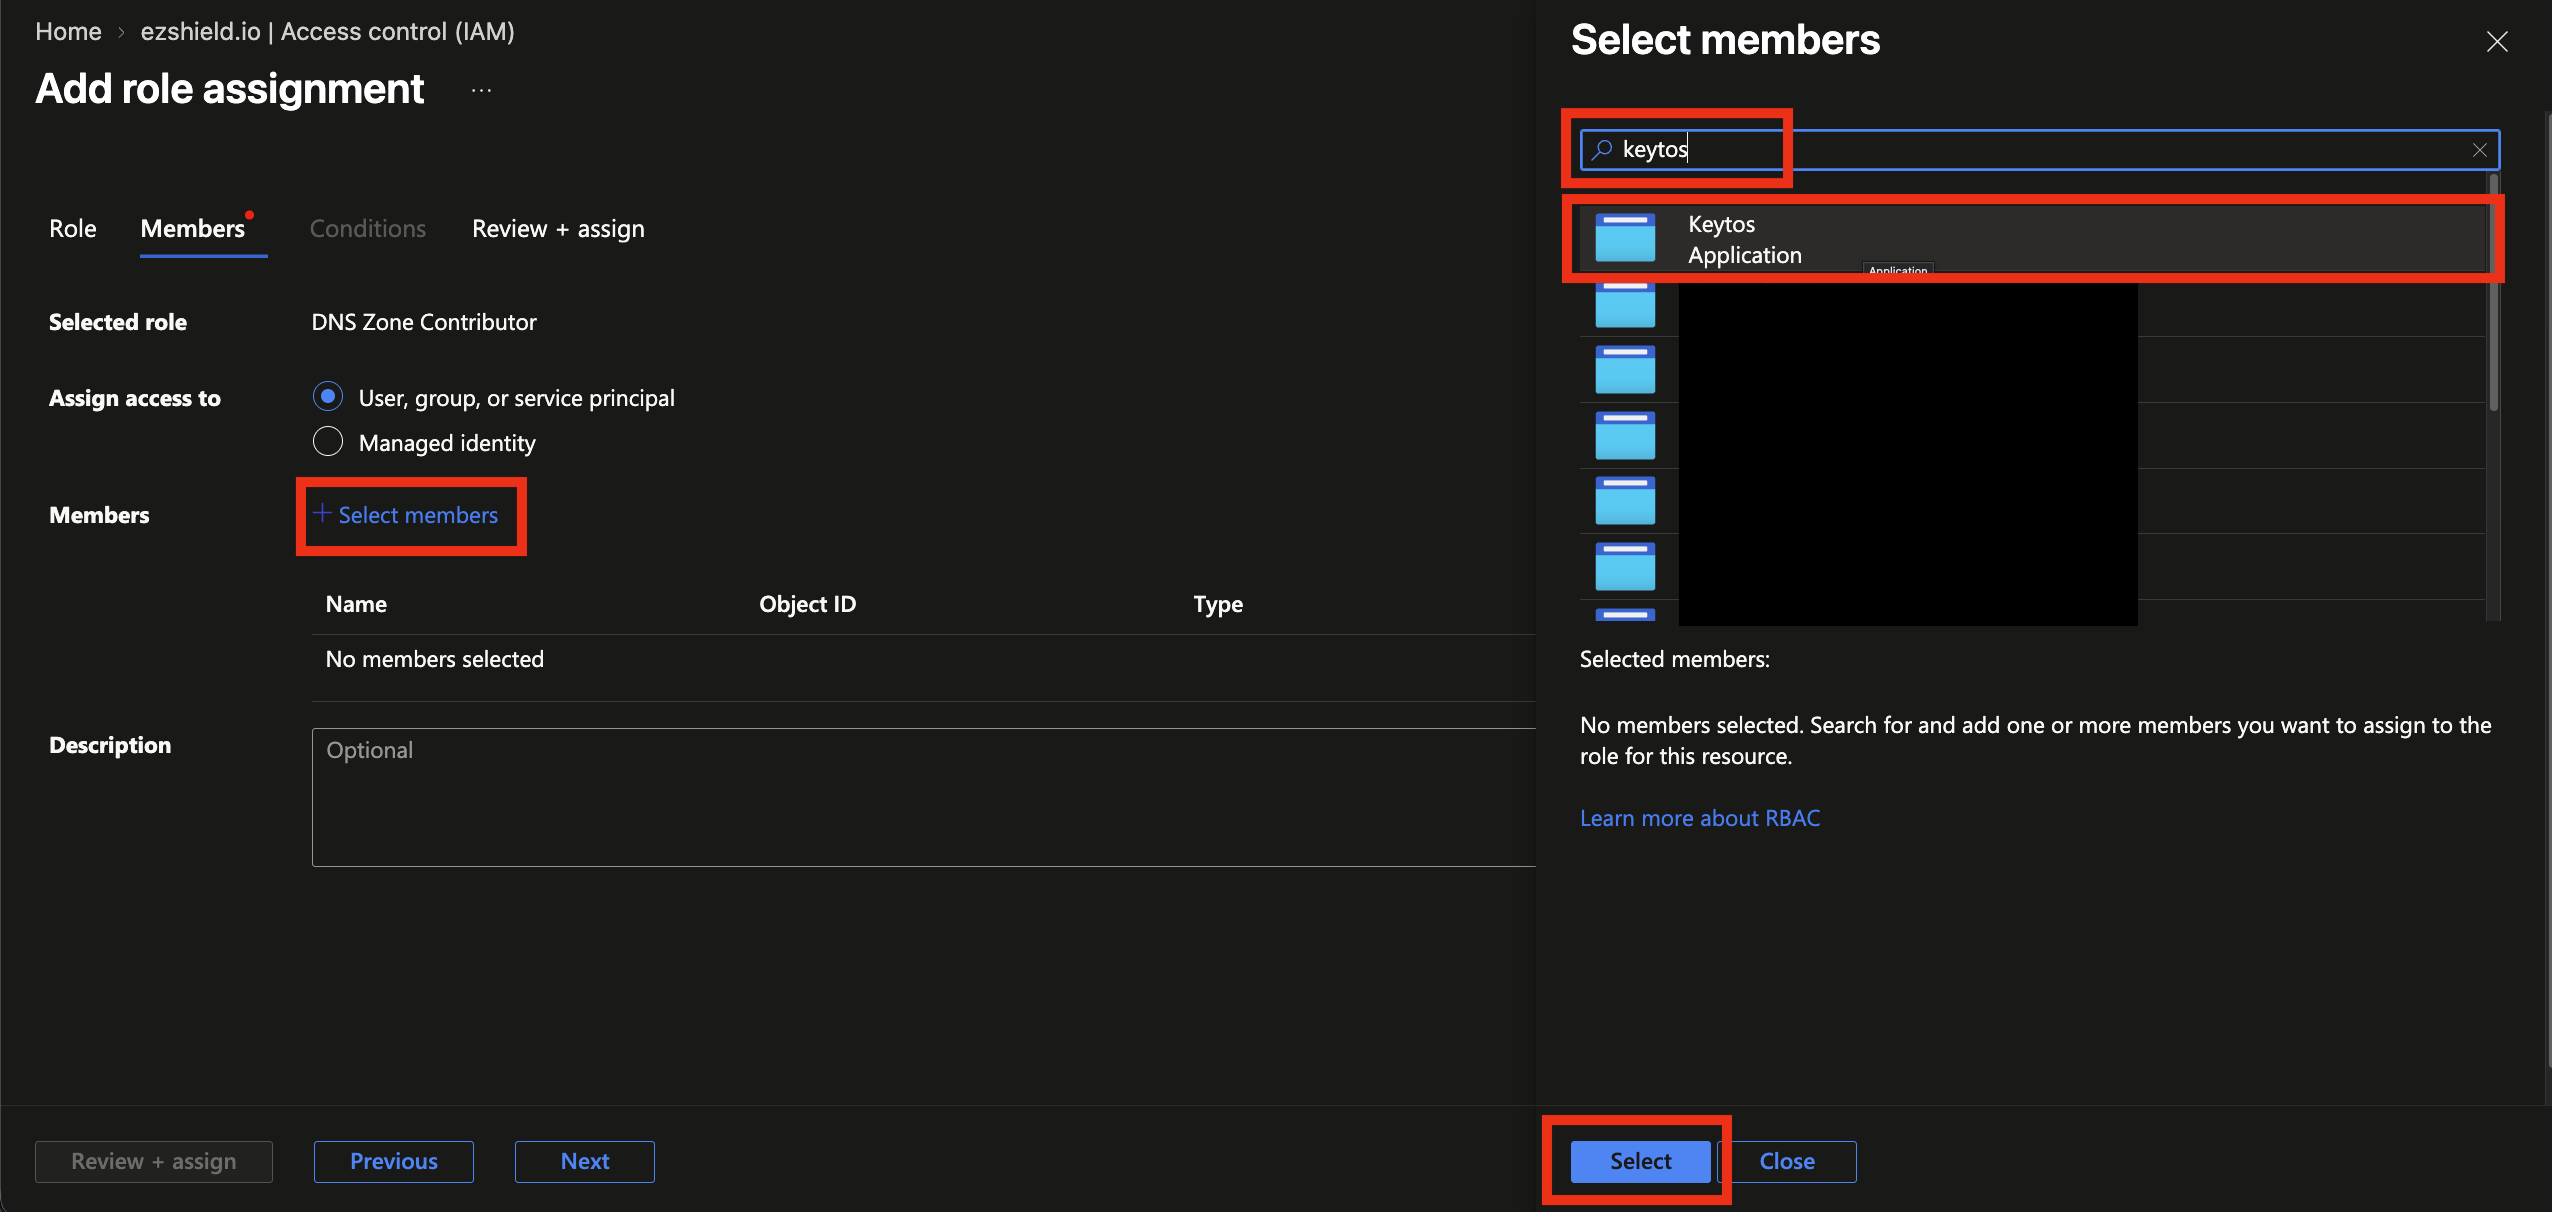
In the search bar, search for the Keytos application and select it.
-
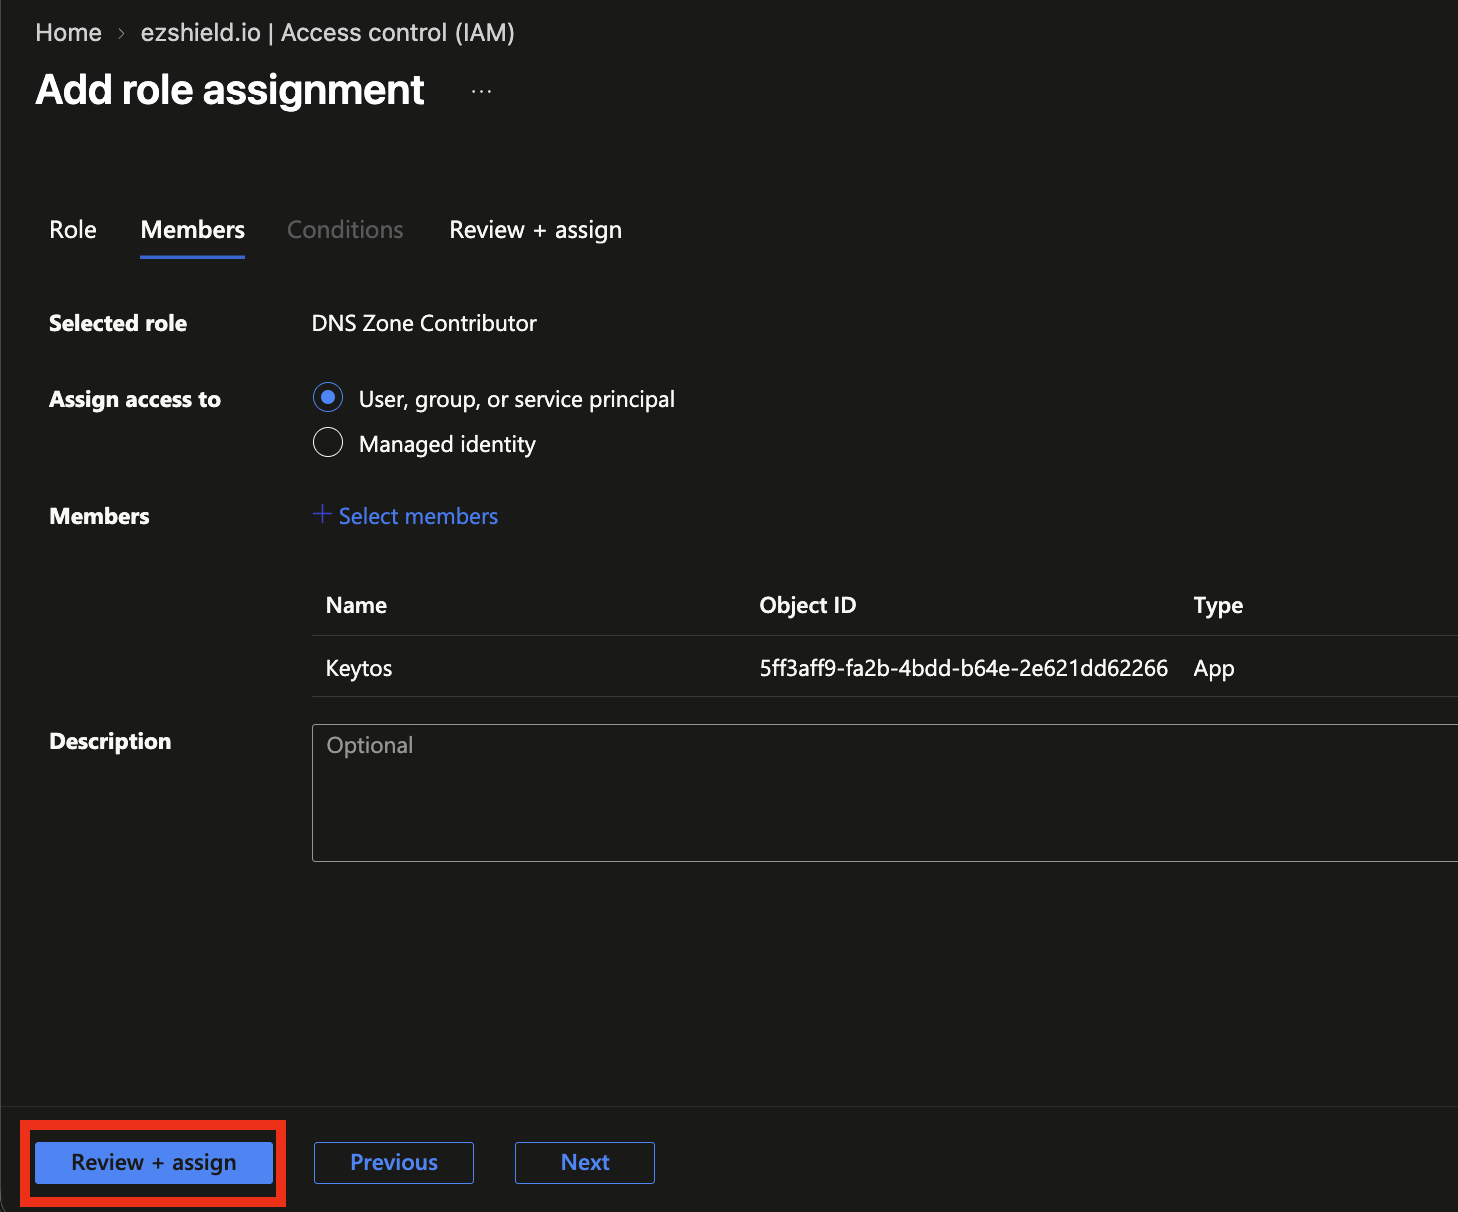
At the bottom of the page, click Review + assign.
-
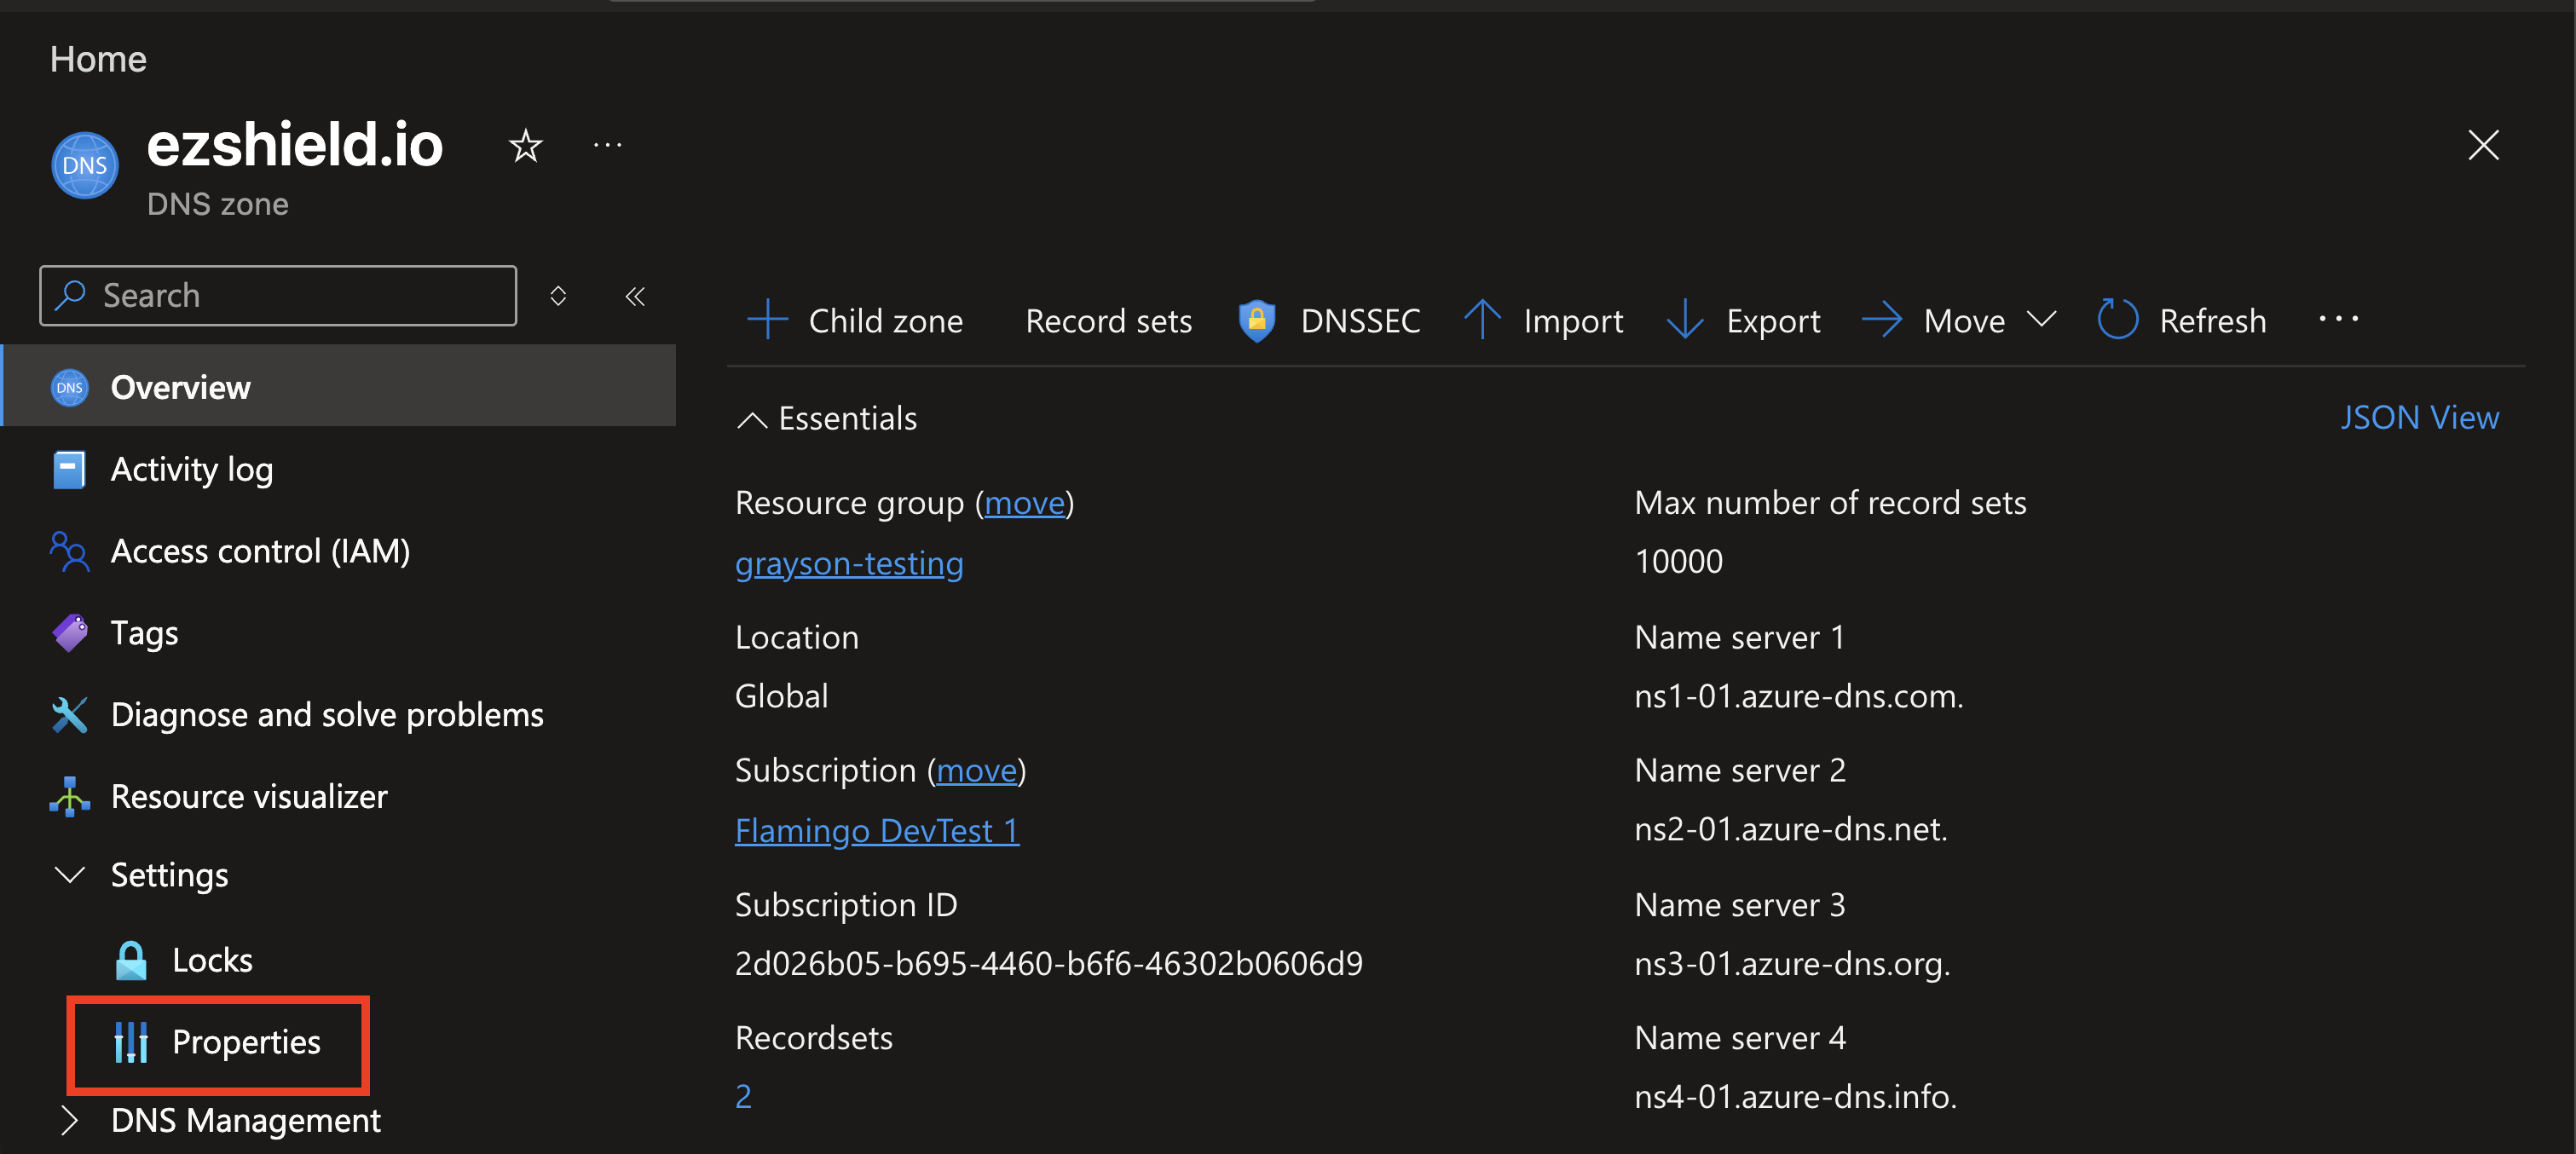
Back in your DNS zone, on the sidebar, click Settings and Properties.
-
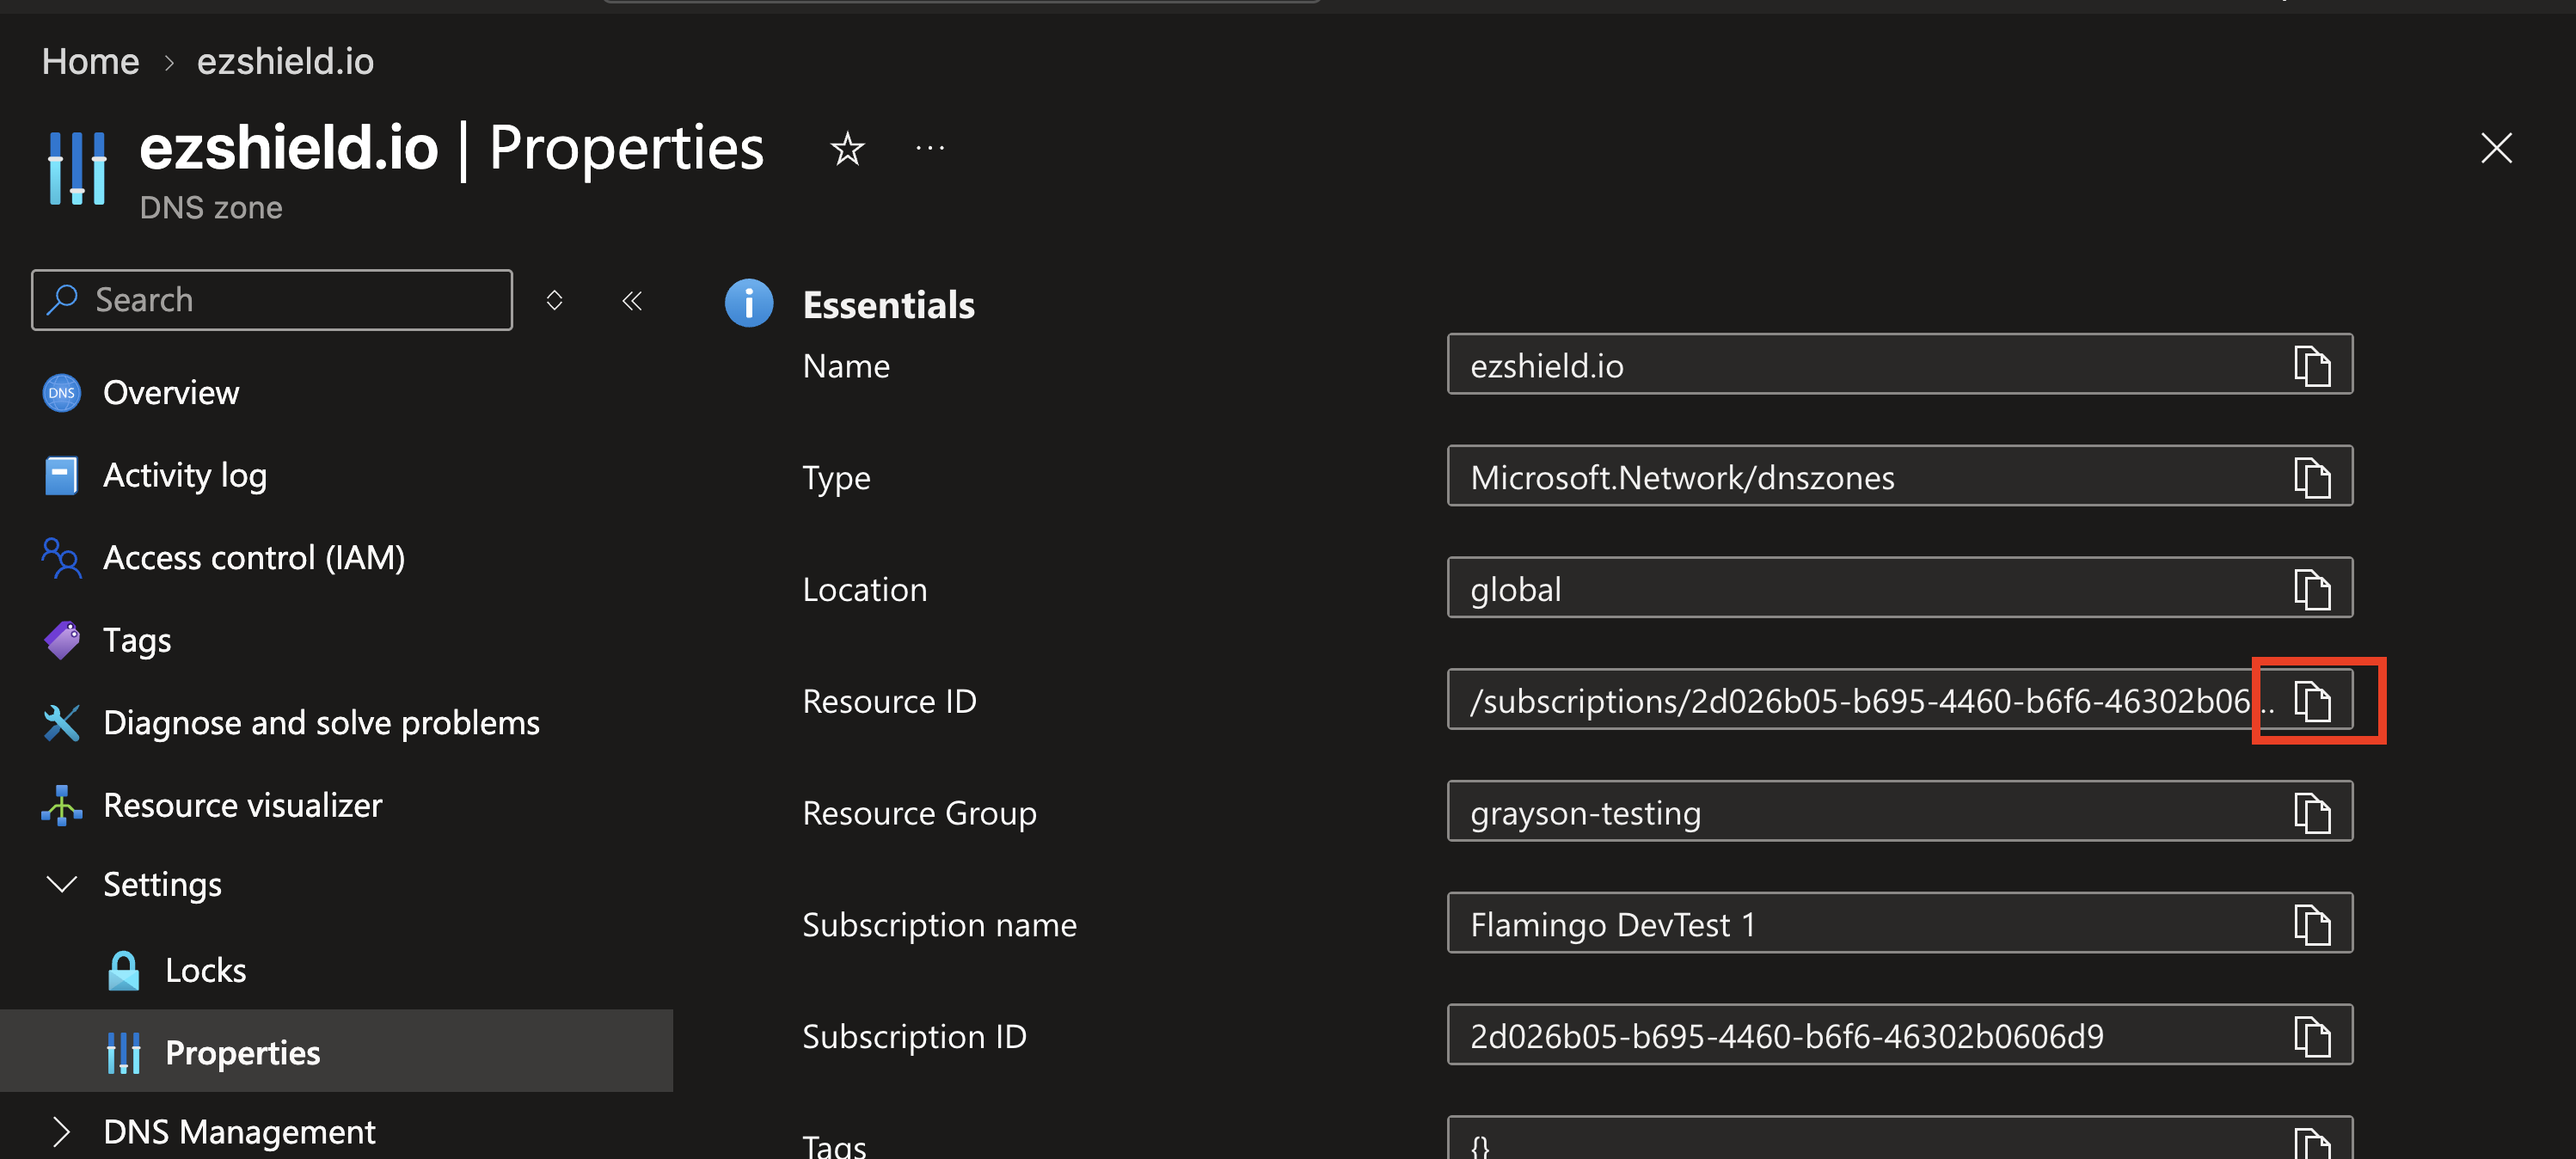
Under Essentials, copy the Resource ID.
-
Go back to your EZCA tab.
-
Paste the Resource ID into the DNS Zone Resource ID field and click Create Connection.
-
Click the Register Domain button.
-
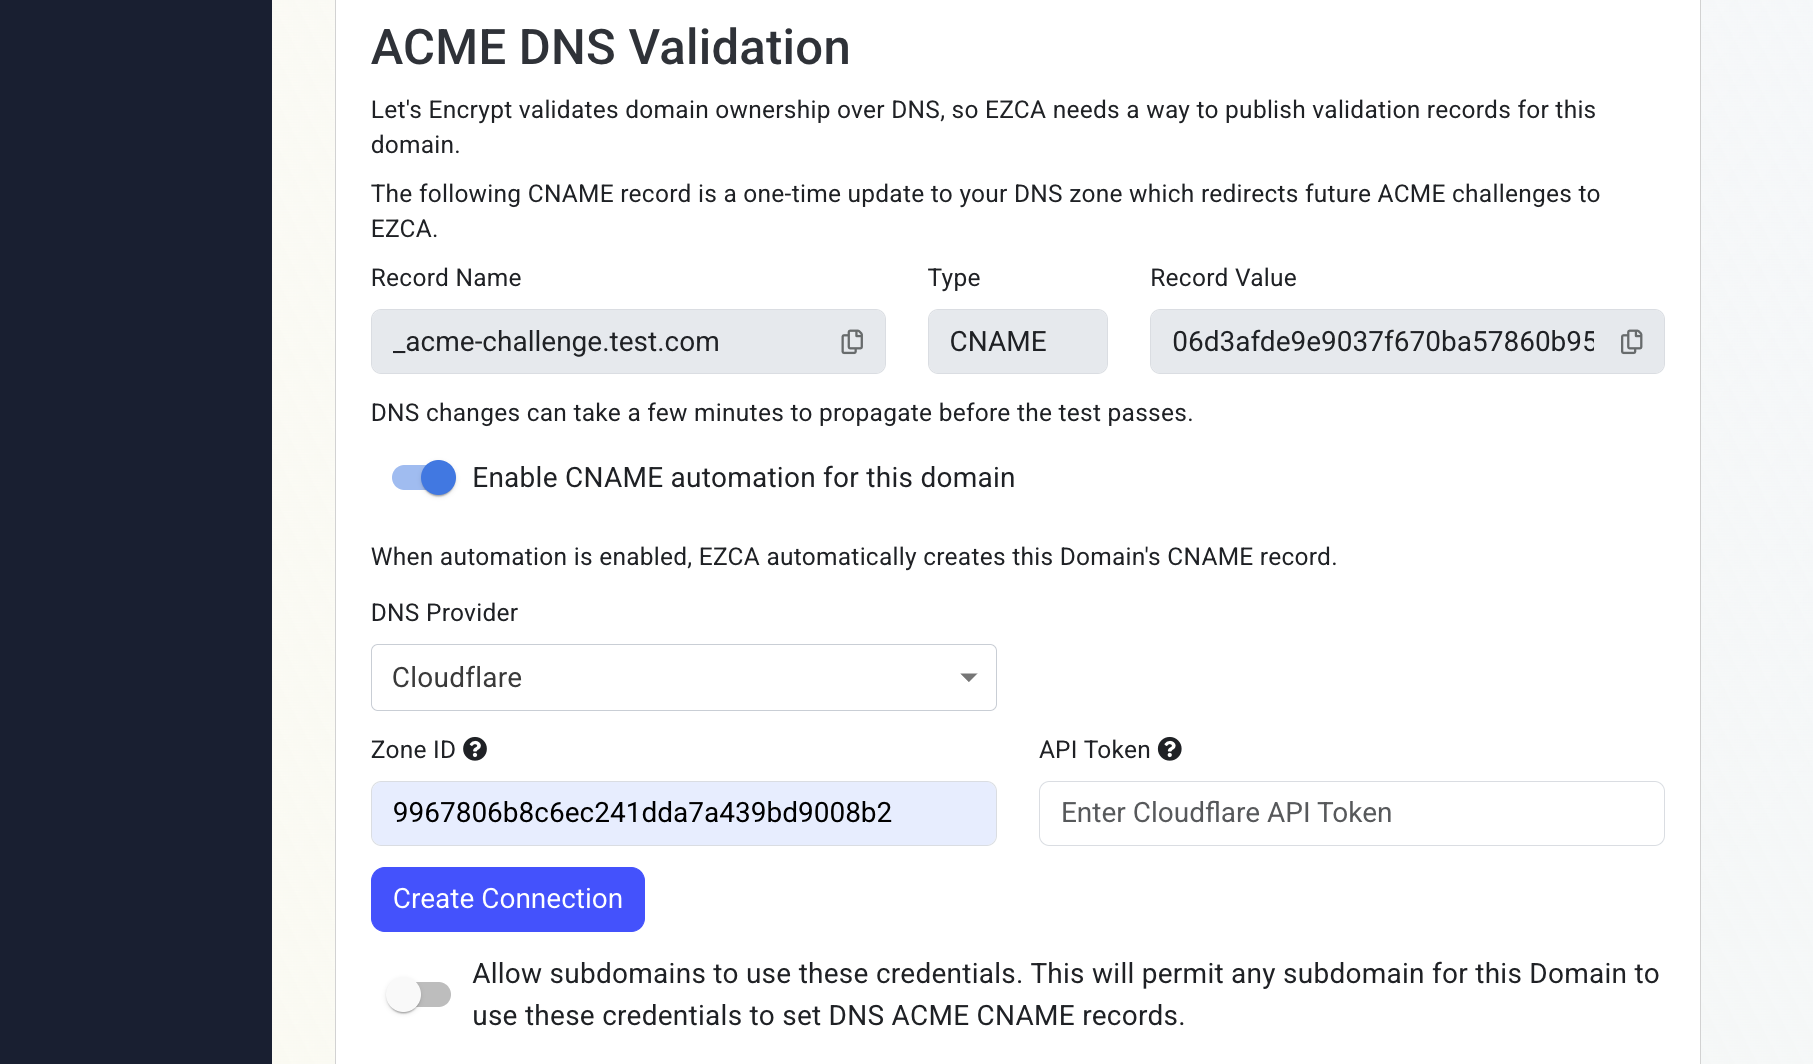
Begin by toggling Enable CNAME automation for this domain:
-
Under DNS Provider, select your DNS provider from the list and follow the steps in the tabs below.
-
In another tab, go to https://dash.cloudflare.com.
-
Among the options, select your domain.
-
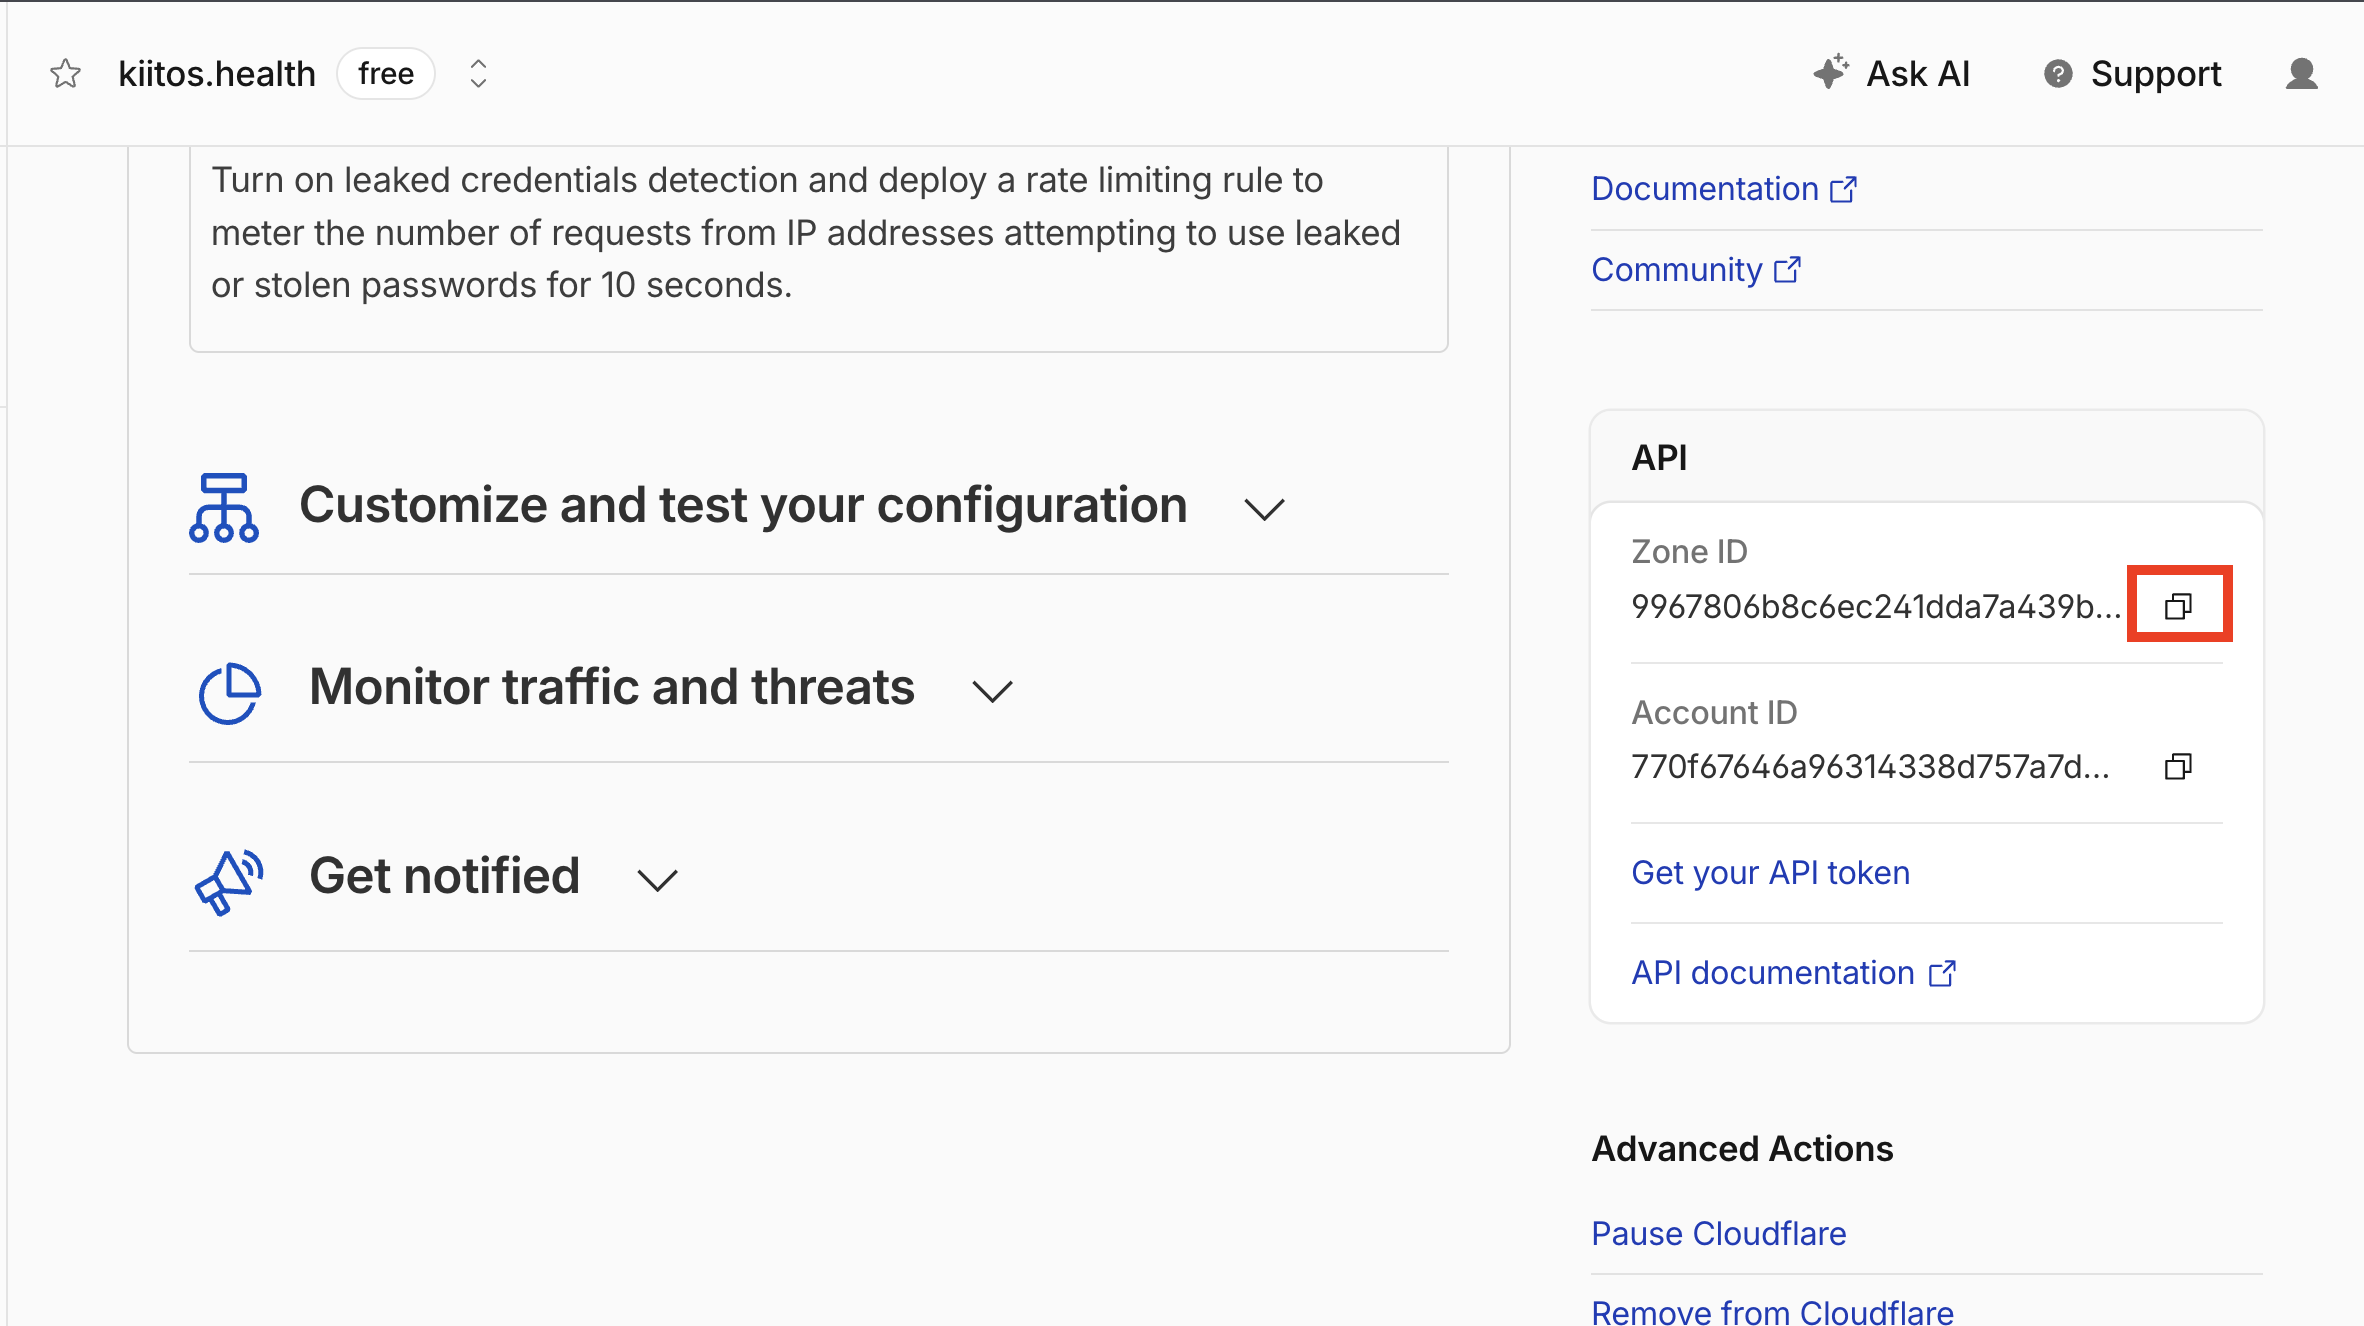
On the right-hand sidebar, scroll down to the API section and copy the Zone ID.
-
Go back to your EZCA tab.
-
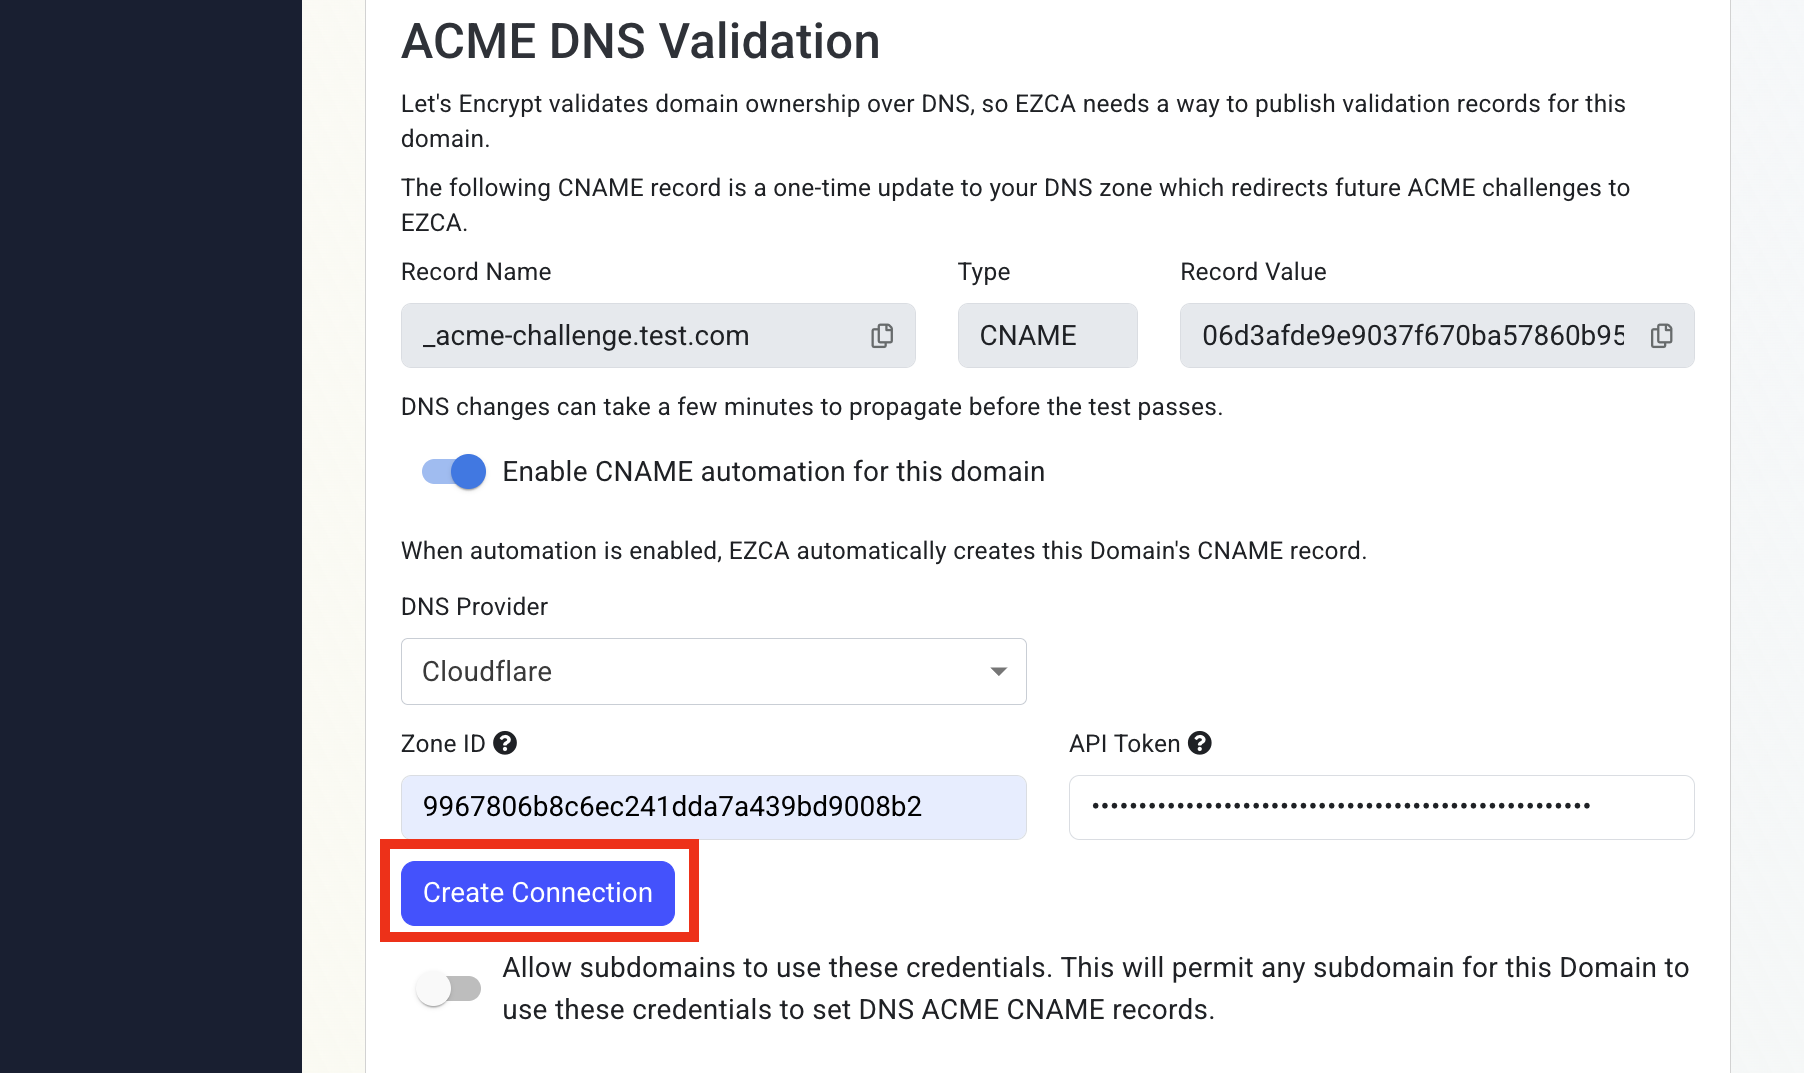
Paste the Zone ID in the Zone ID field.
-
Go back to your Cloudflare tab.
-
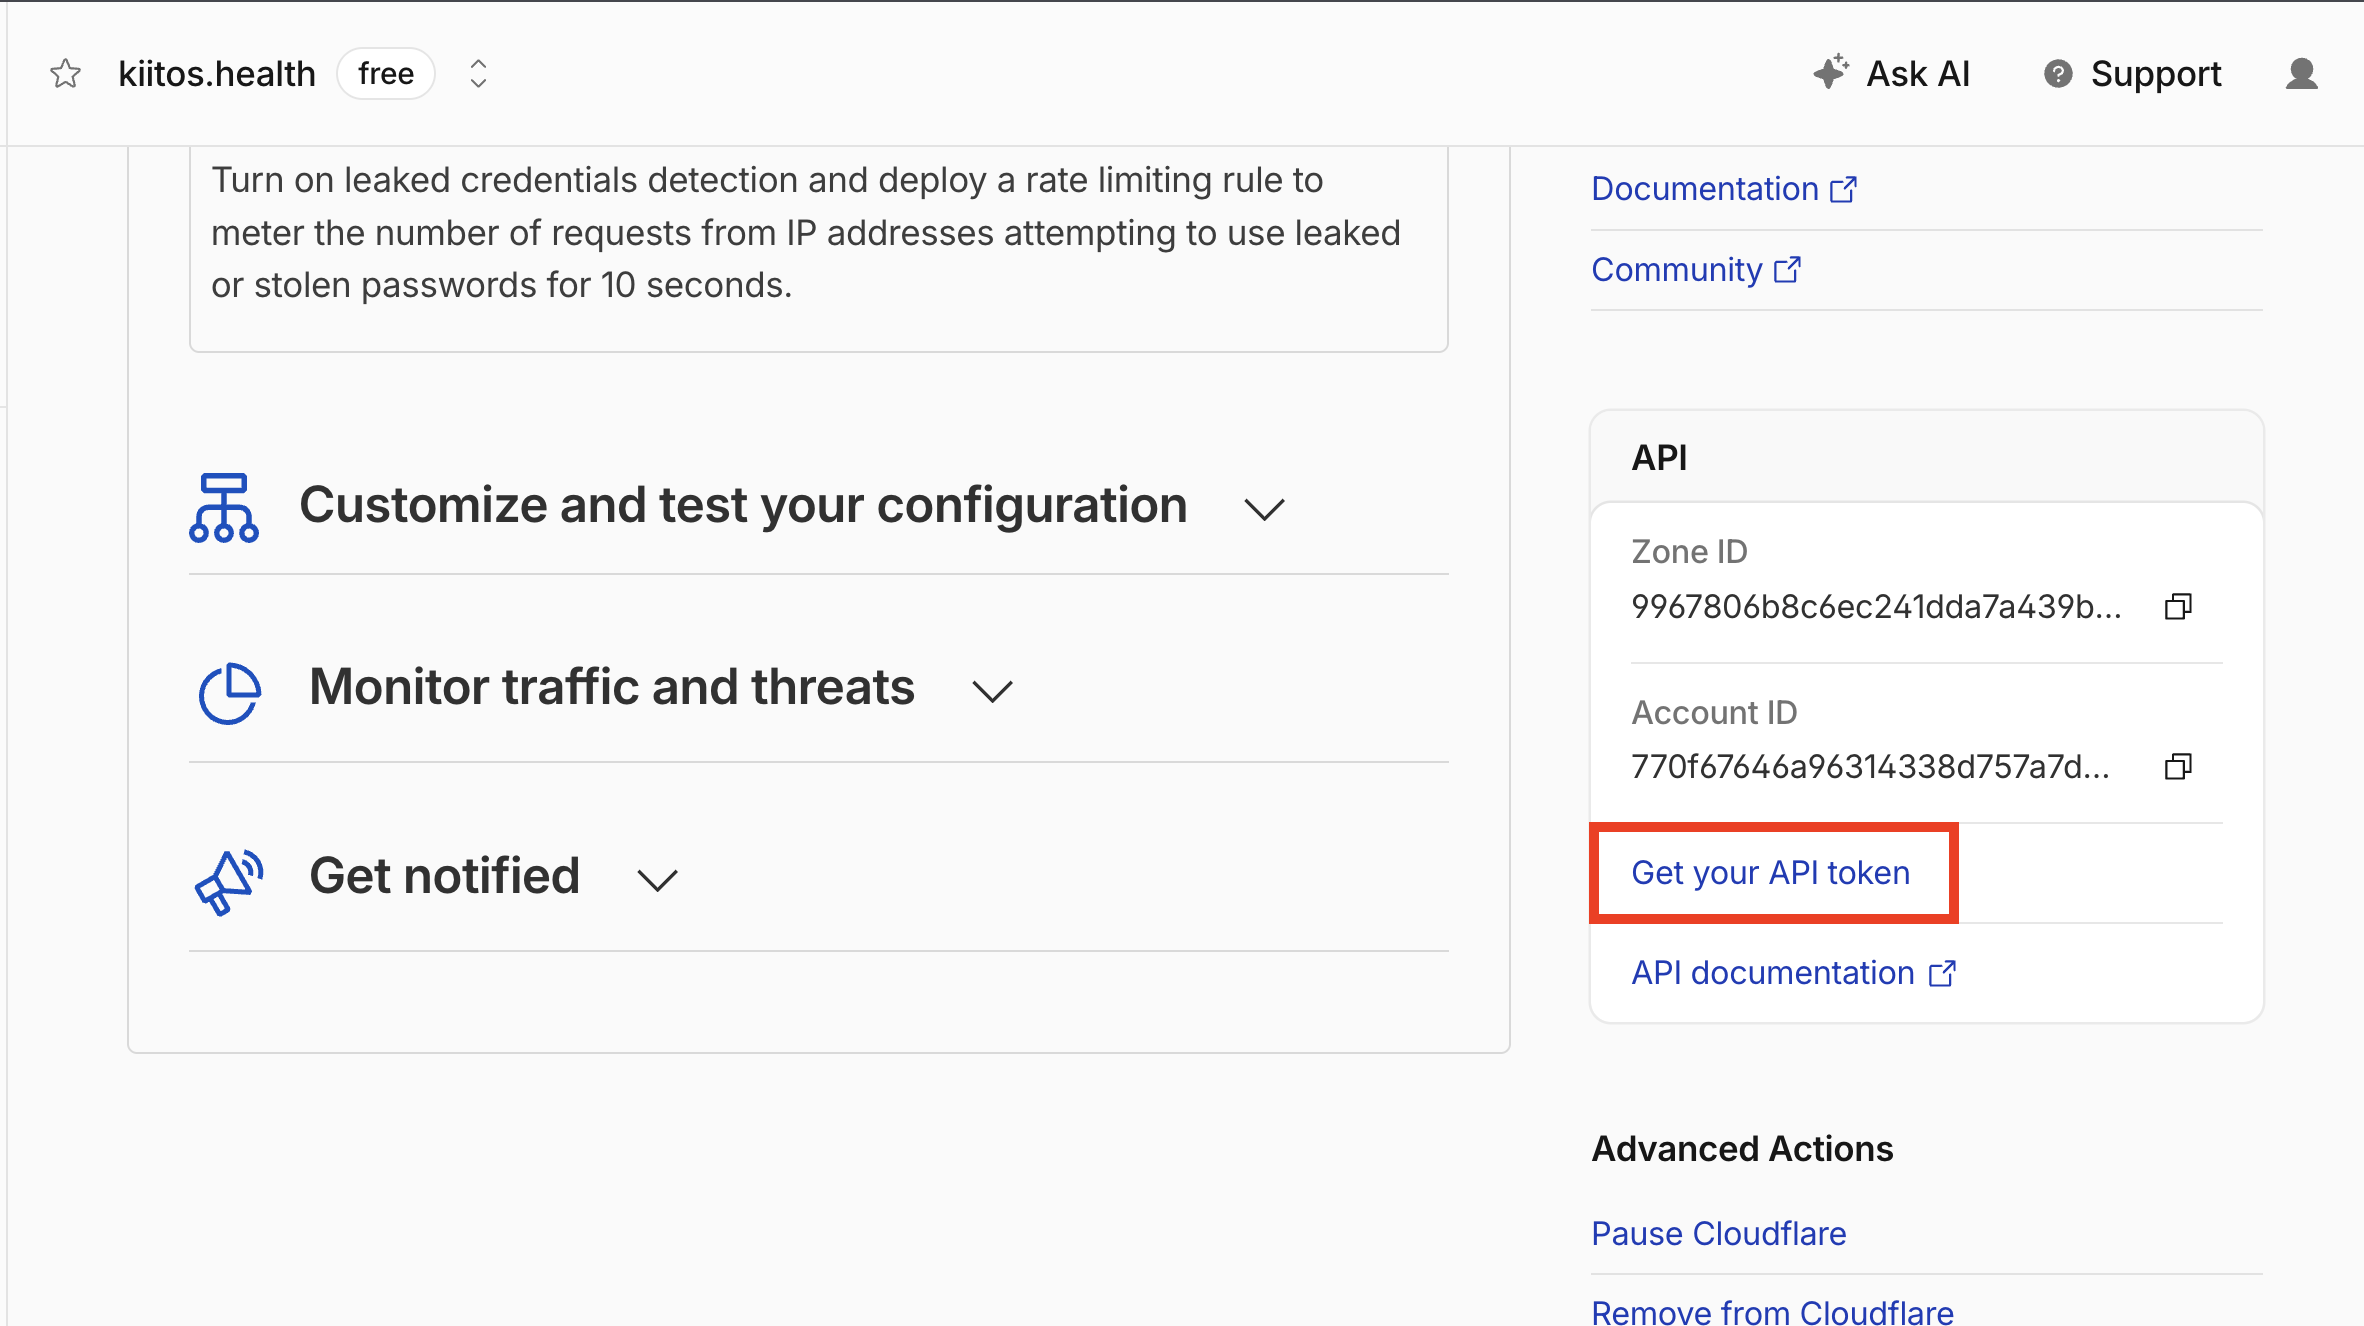
On the right-hand sidebar, in the API section, select Get your API token.
-
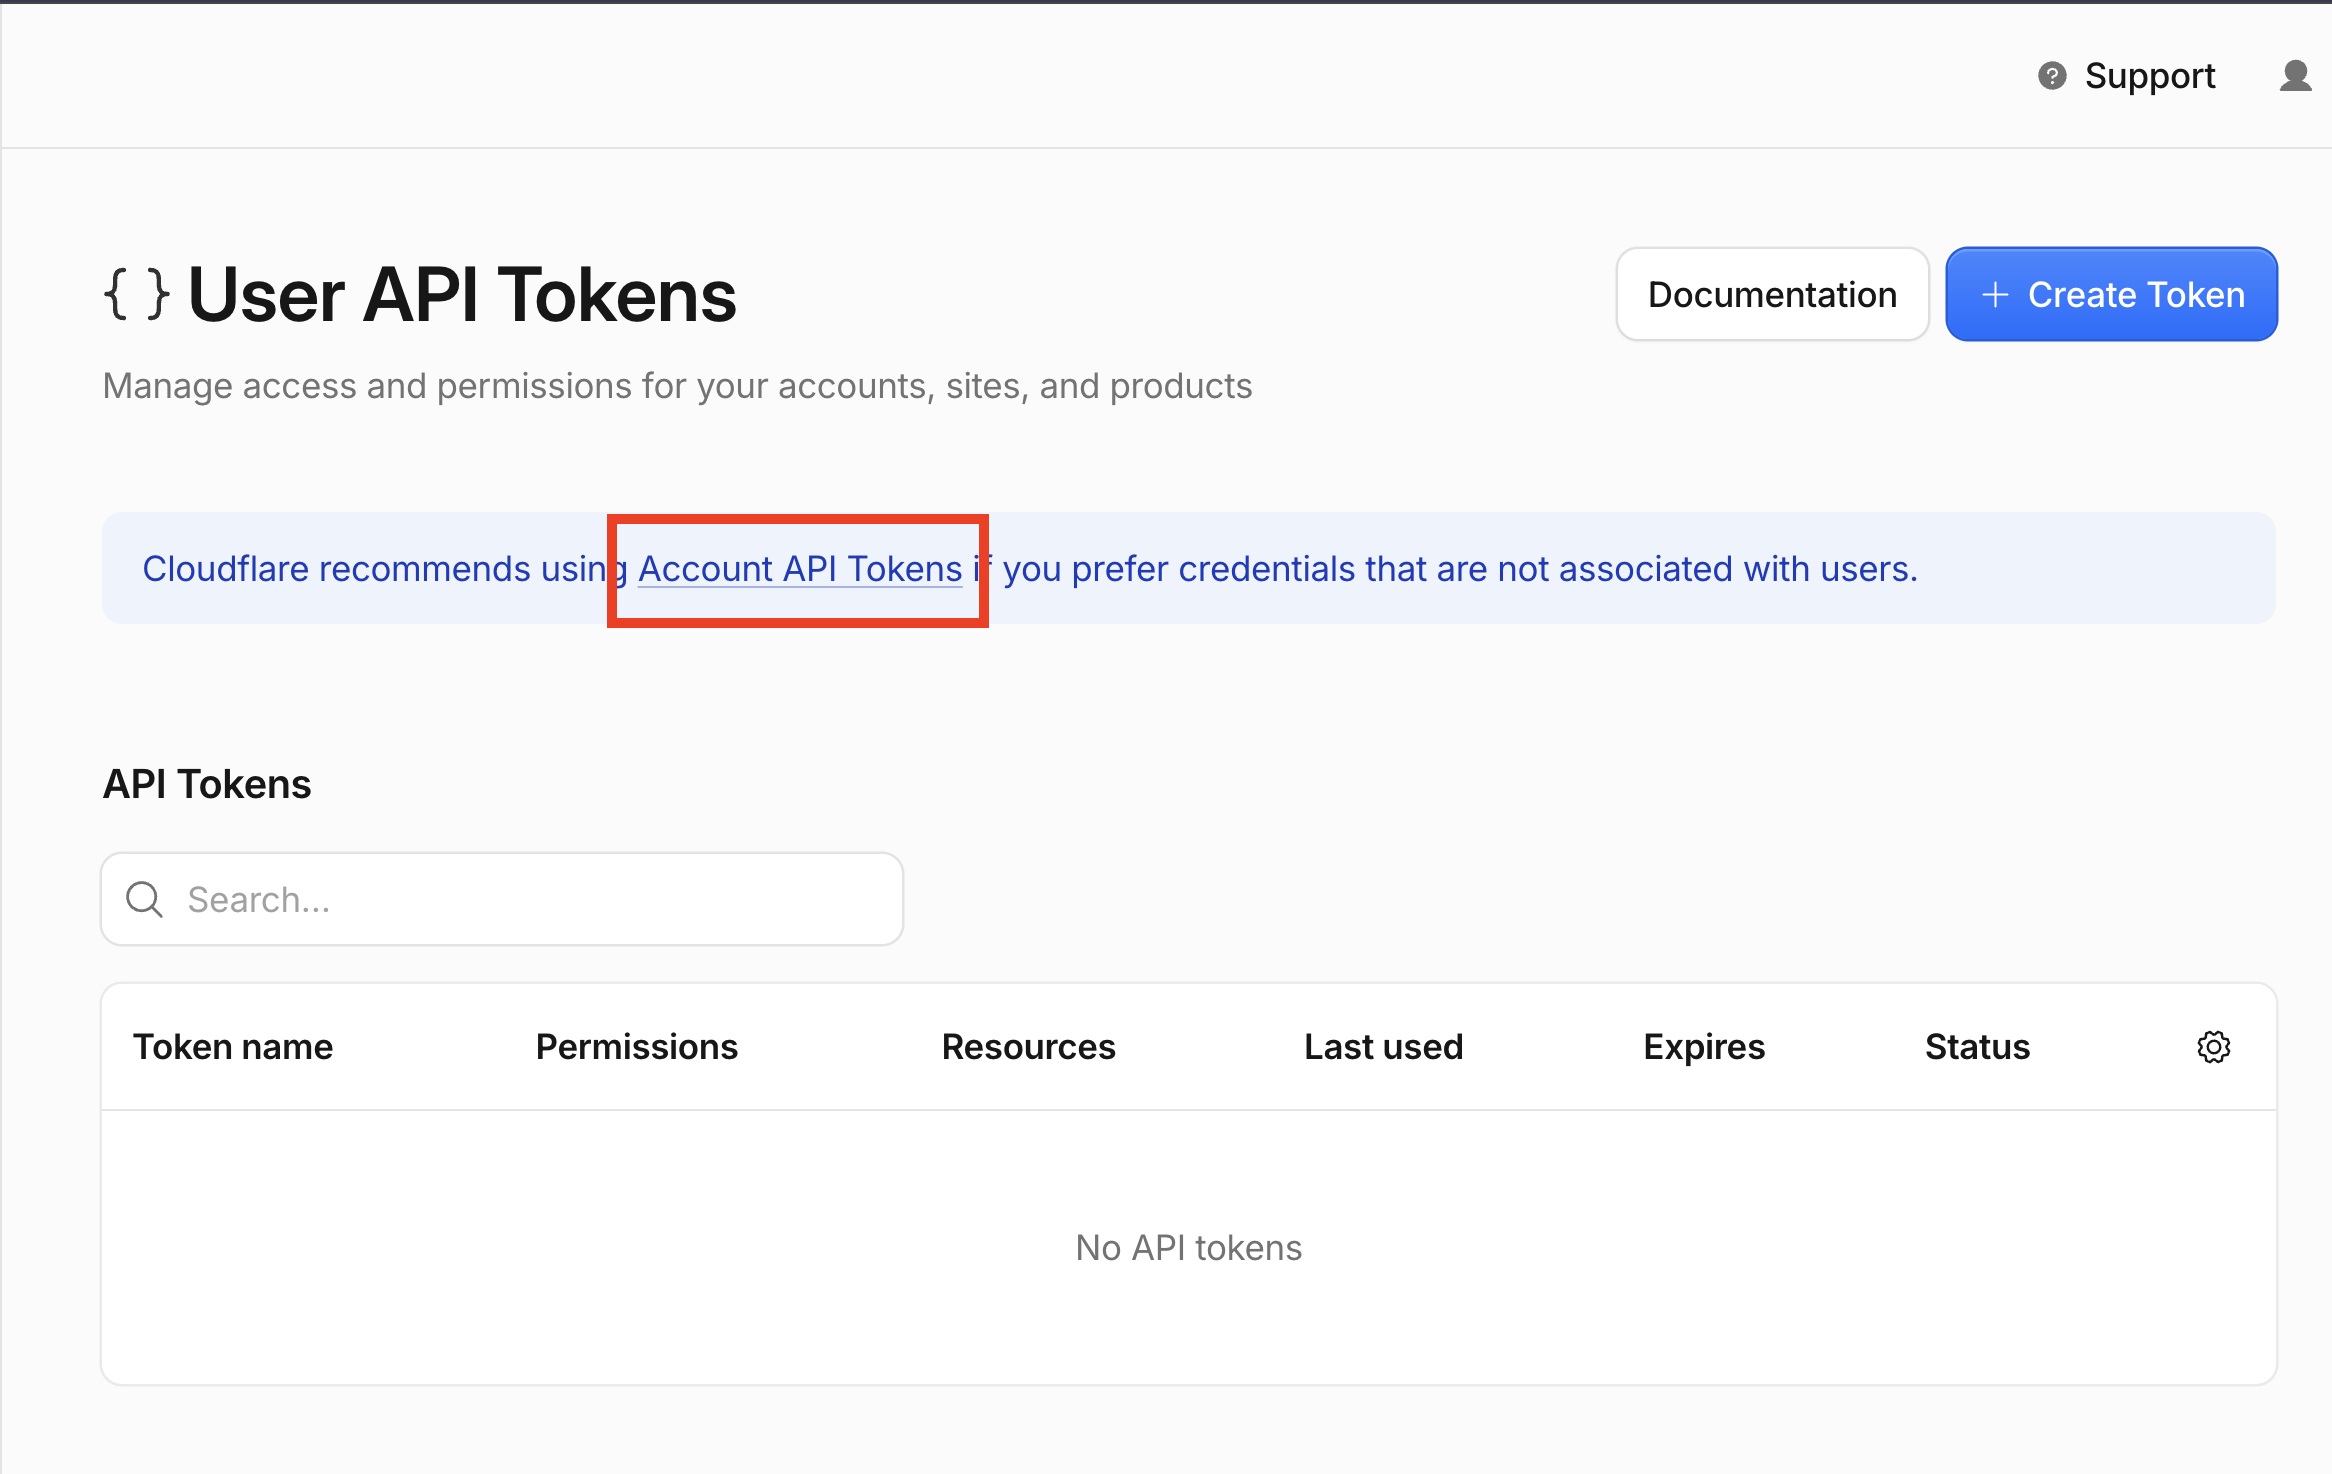
Select Account API Tokens.
-
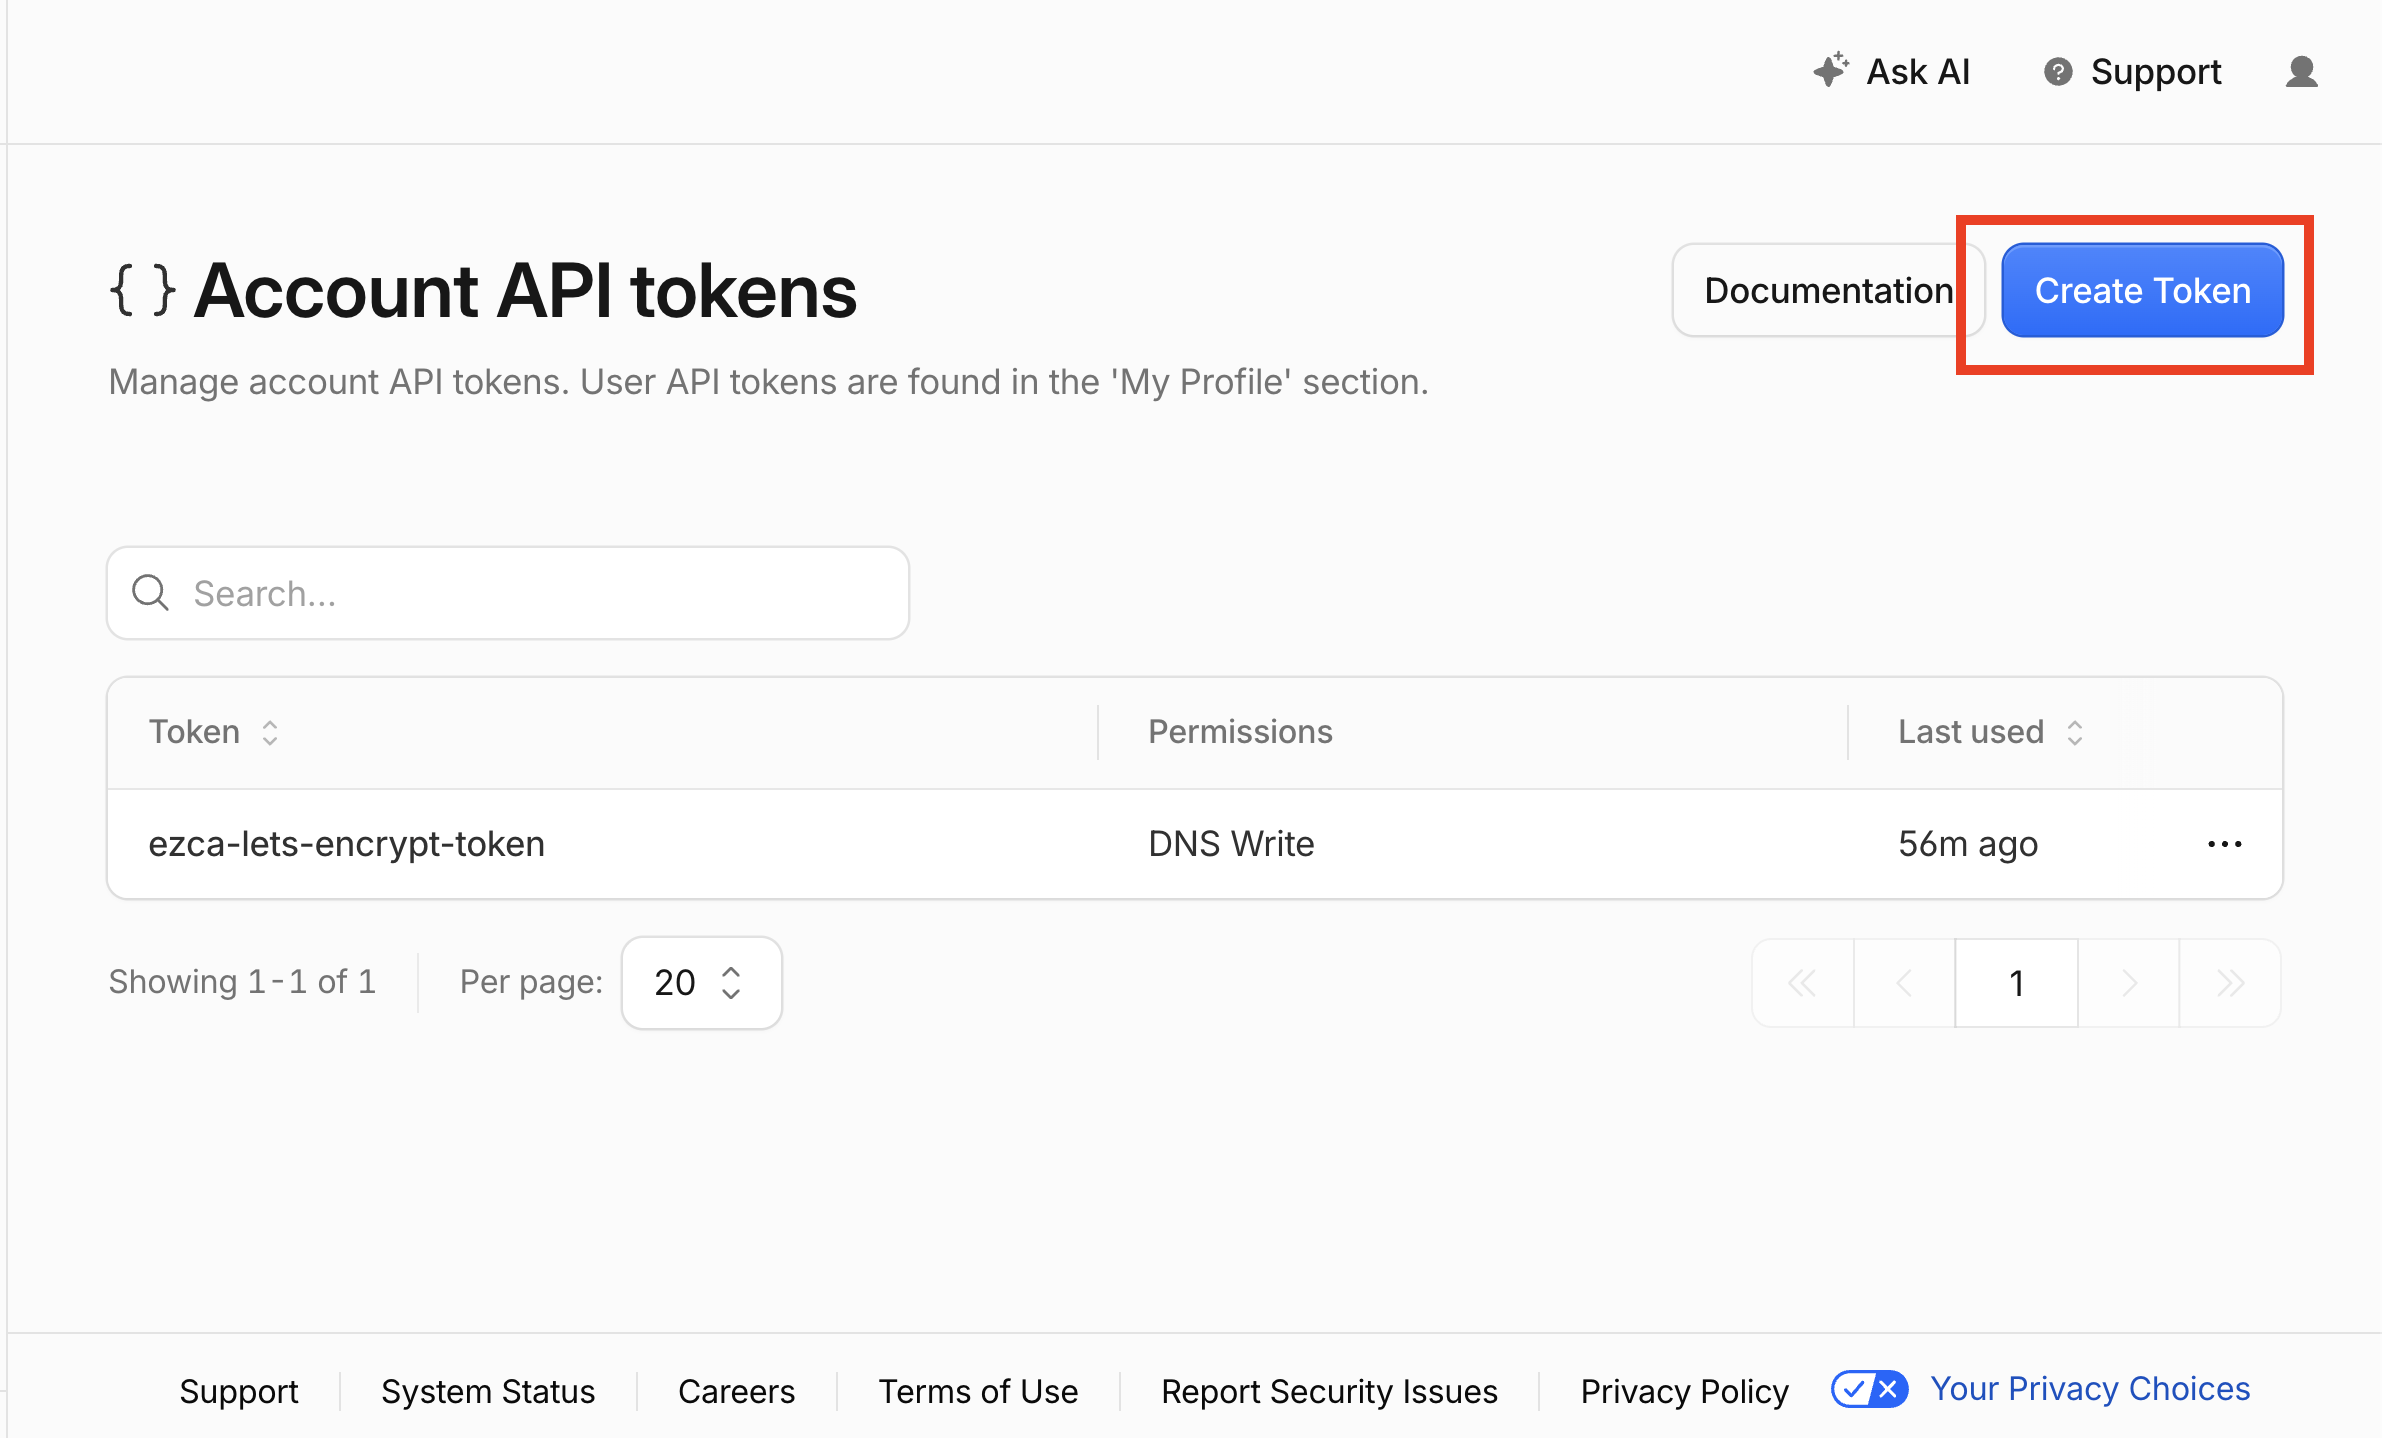
Click Create Token.
-
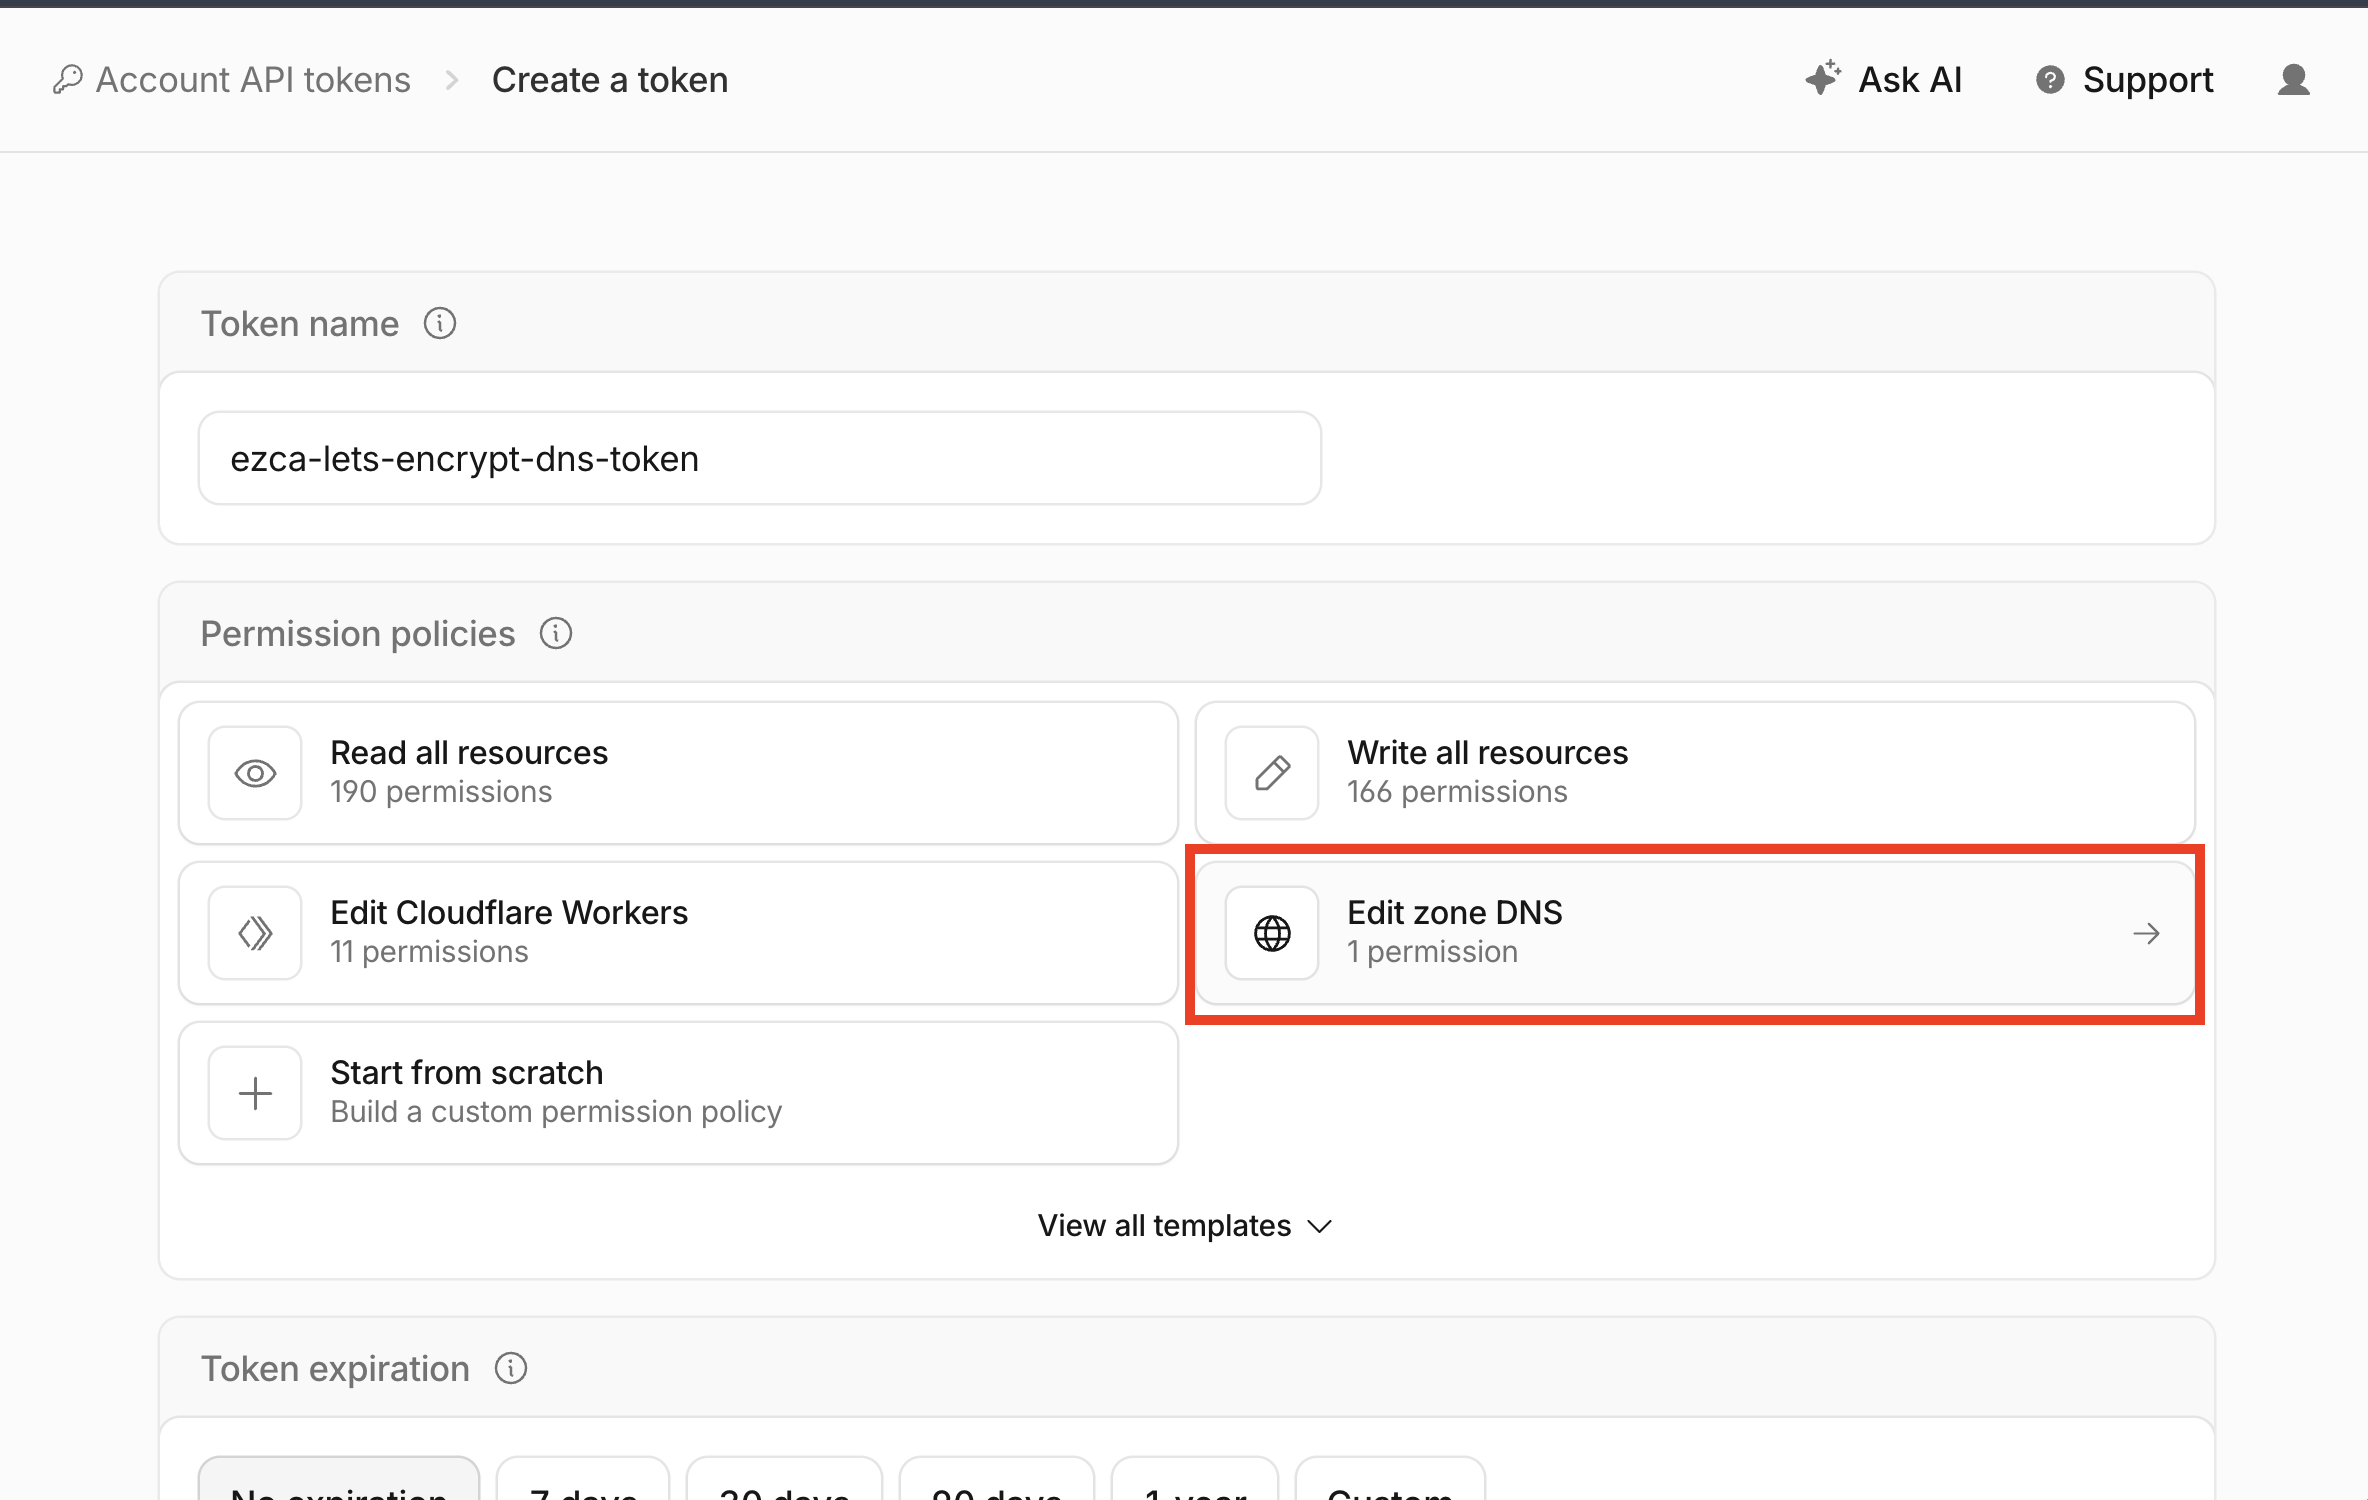
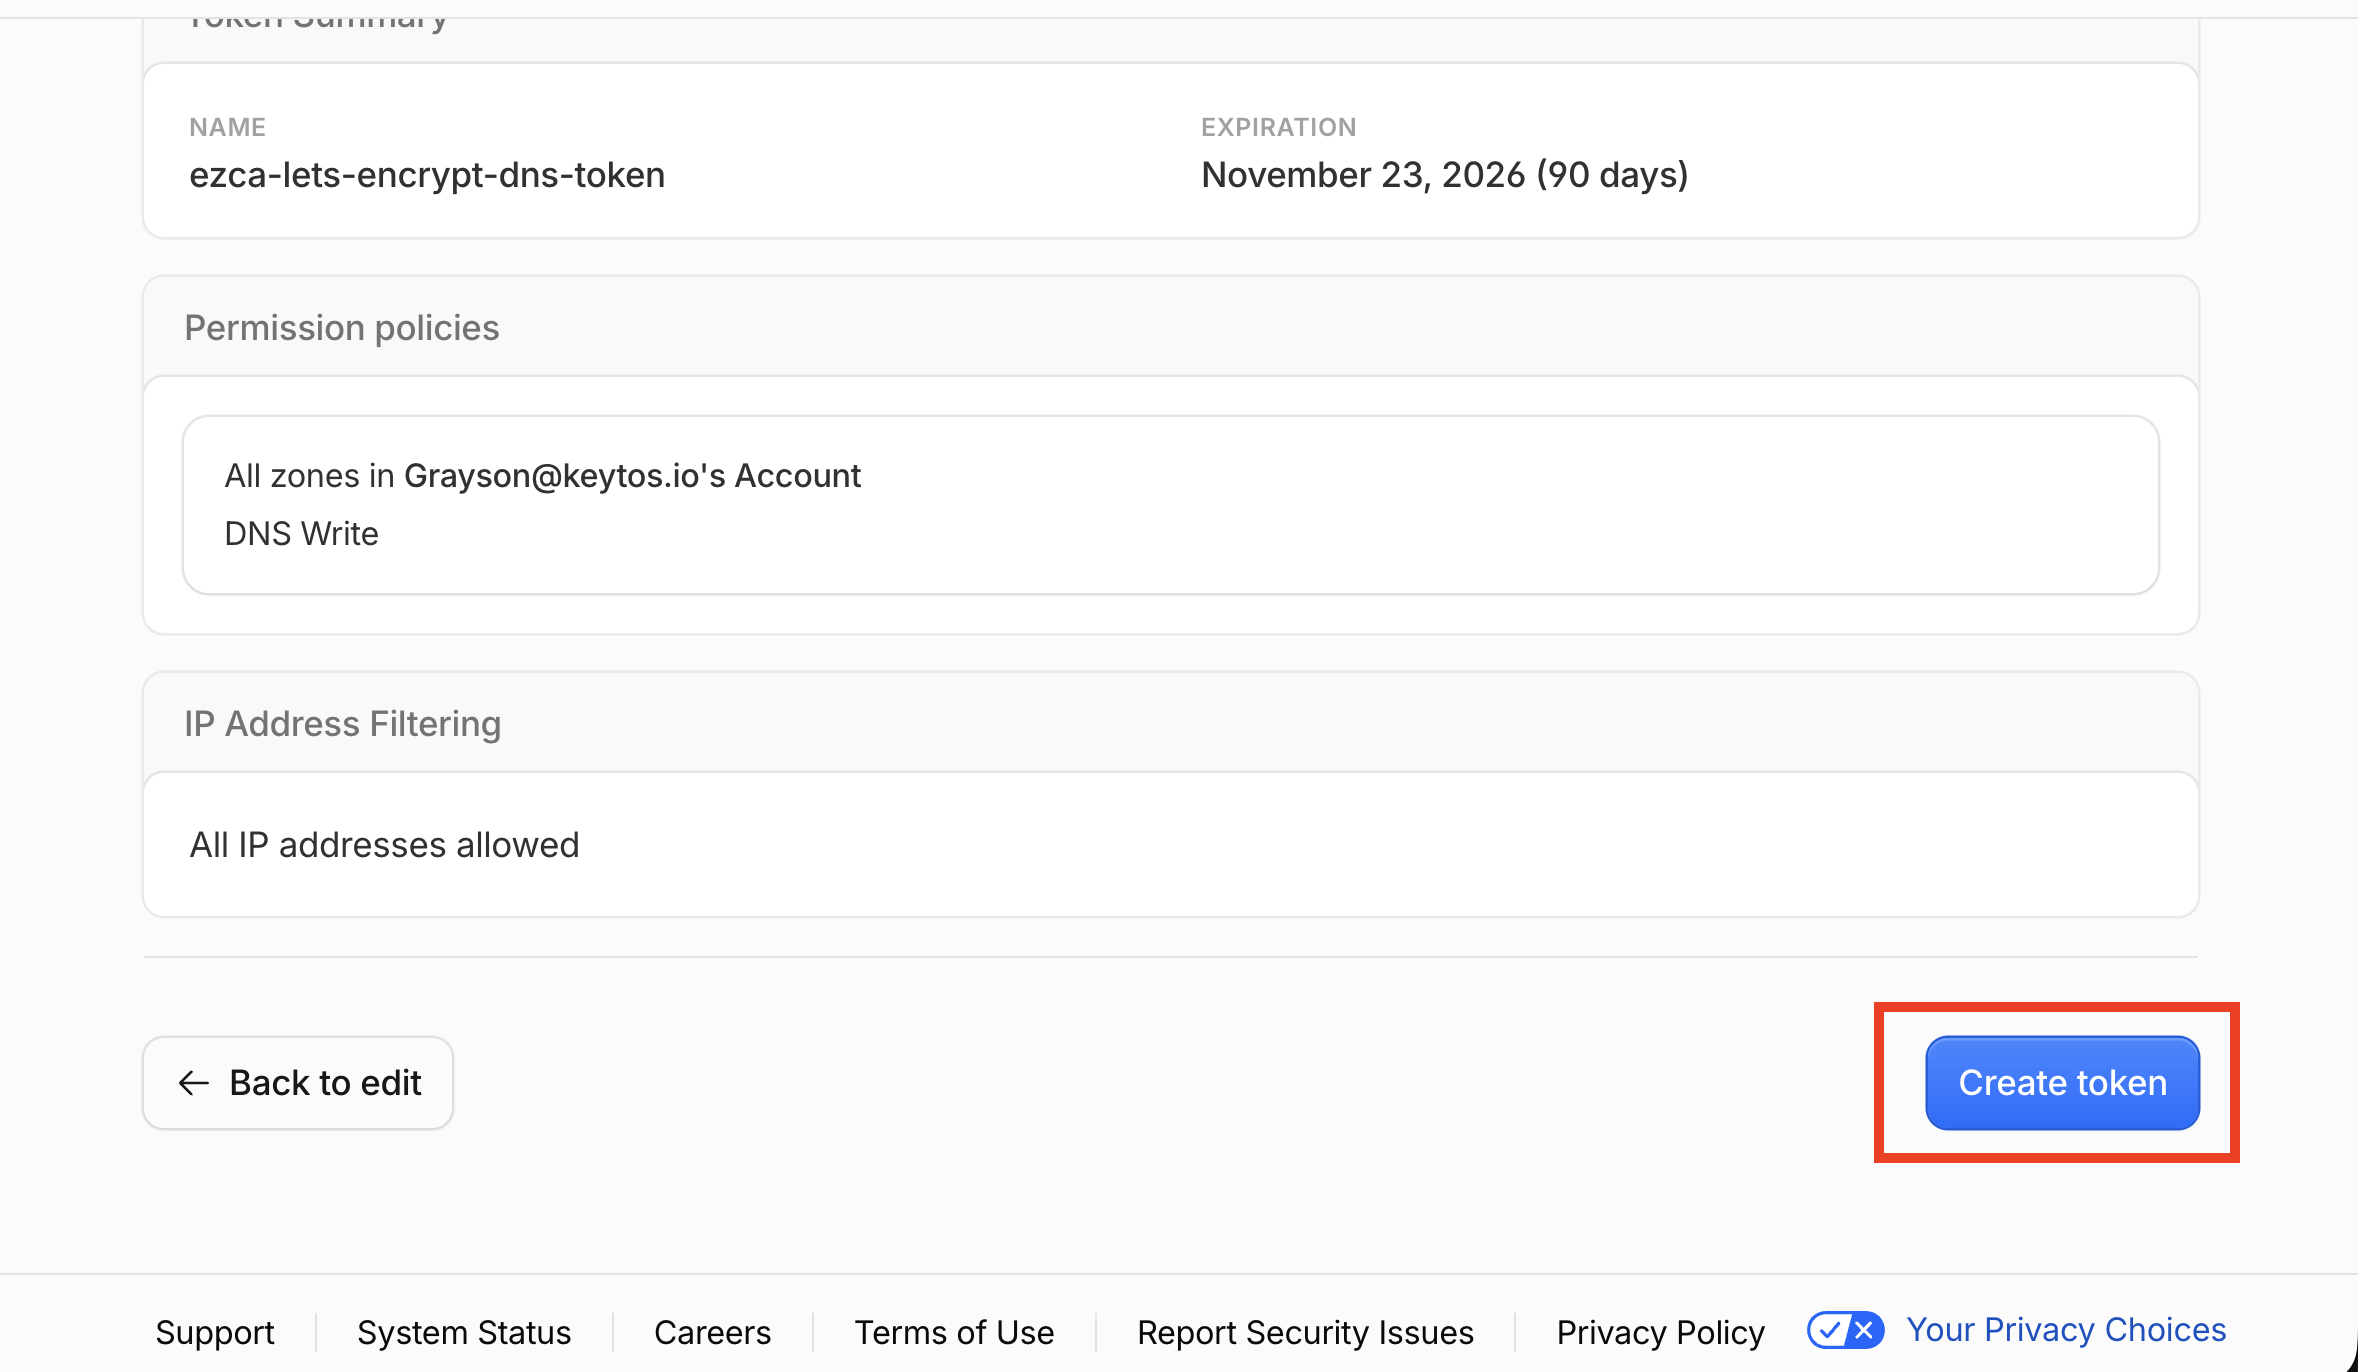
Give your token a name in the Token name section.
-
In the Permission policies, select Edit zone DNS. By default, this will give EZCA access to all domains in the account. To change this, edit the policy to only give EZCA access to the domains you need.
-
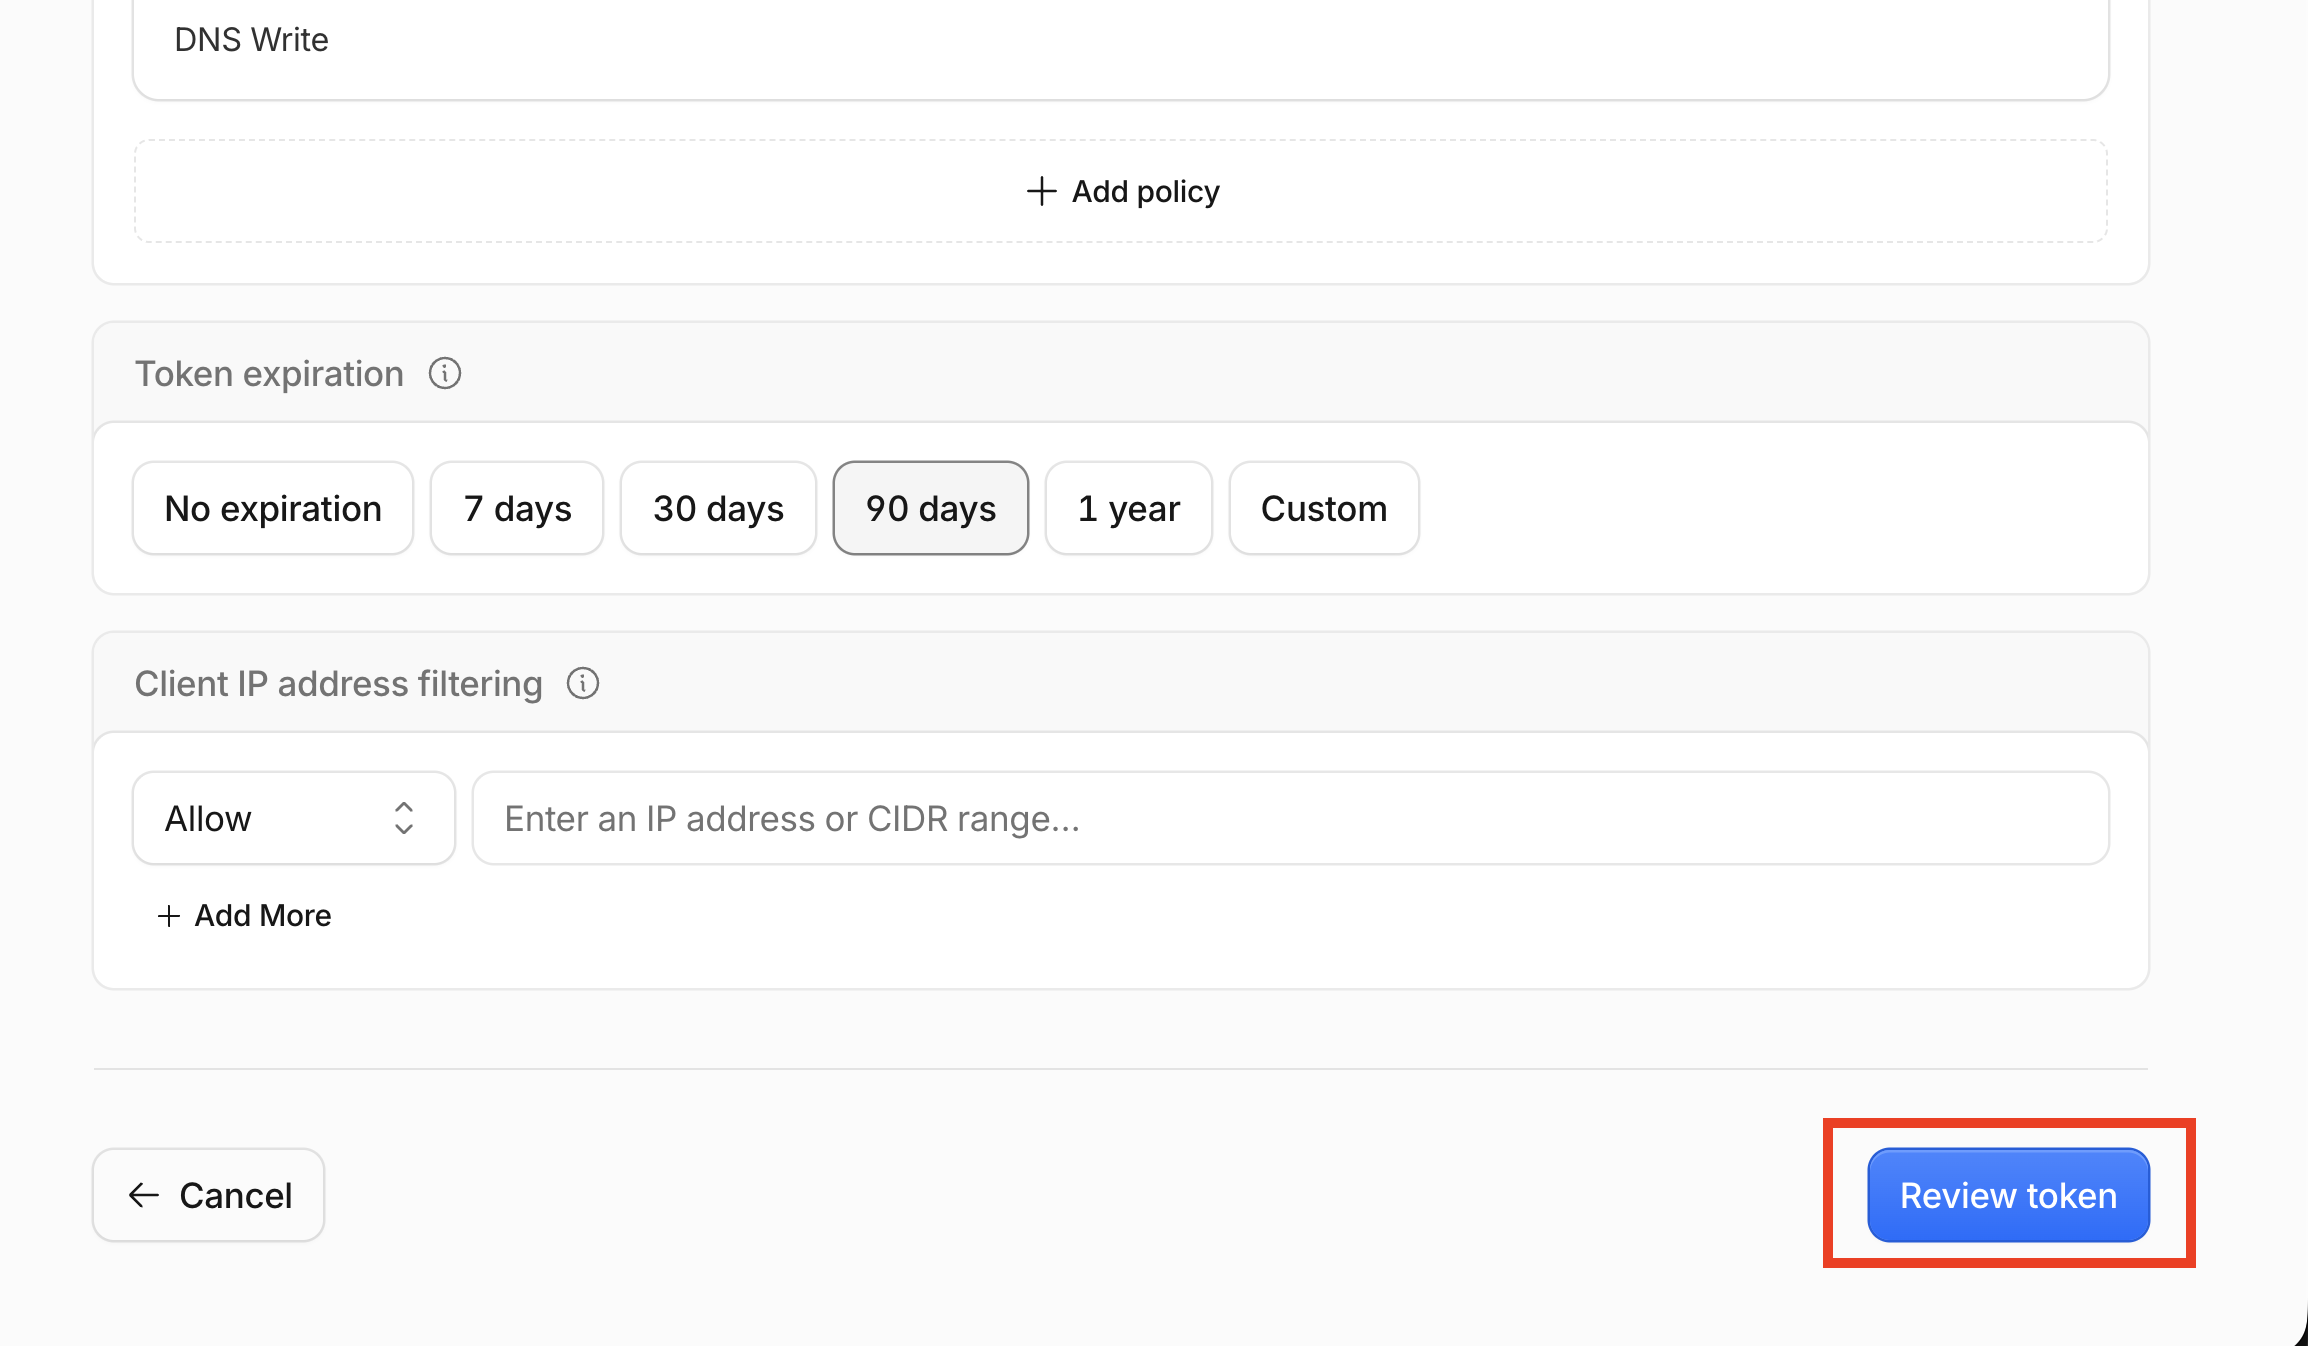
In the Token expiration section, set an expiration data for EZCA’s access to your DNS.
-
Select Review Token.
-
Select Create Token.
-
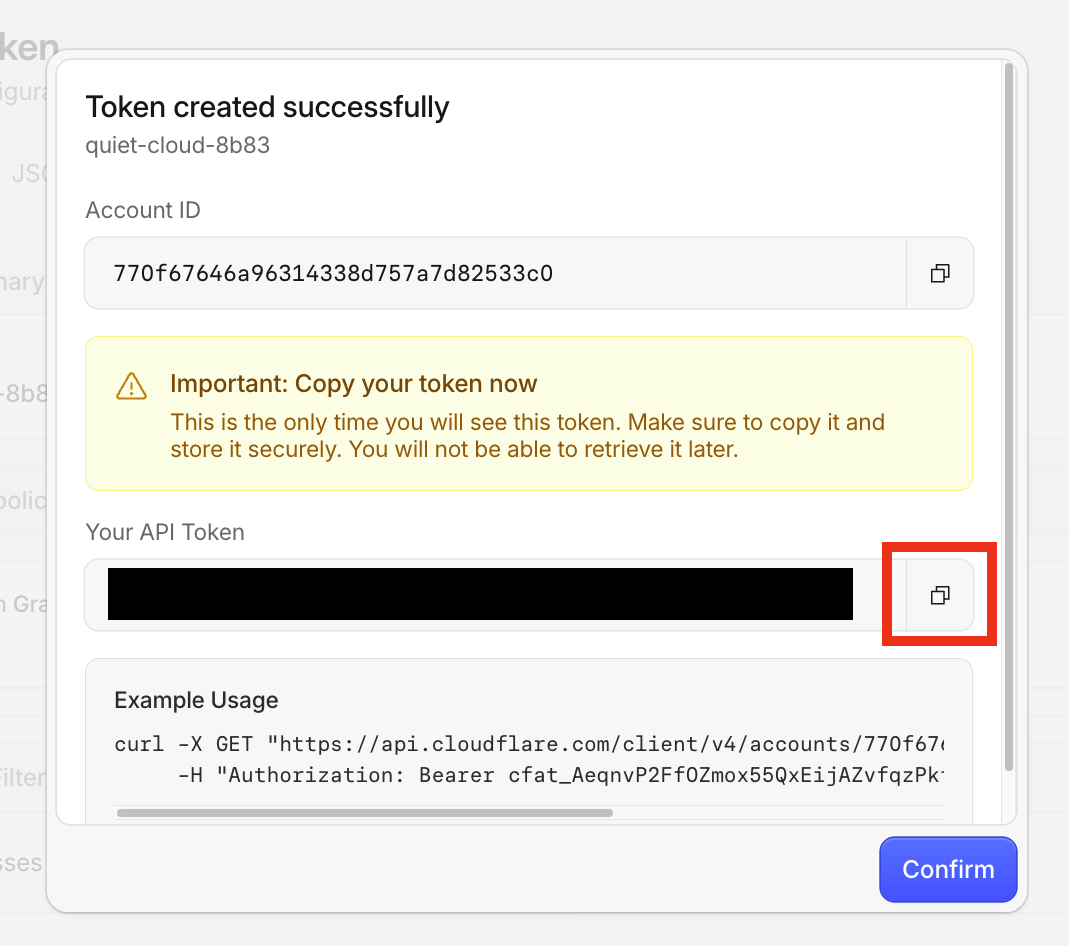
Copy the API Token.
-
Go back to your EZCA tab.
-
Paste the API token in the API Token field and click Create Connection.
-
Click the Register Domain button.
Collapses this section and completes the checkmark.
Next Steps - How to Issue a Let’s Encrypt Certificate in EZCA
Now that you’ve onboarded Let’s Encrypt to EZCA, the next step is to create a certificate. Behind the scenes, EZCA will handle the ACME challenge on you behalf.
How to Issue a Certificate