How-To: Issue a Server Certificate in Keytos Shield
Check out our guides for distributing client certificates via your Mobile Device Management (MDM) platform.
What Is a Server Certificate in Keytos Shield?
A server certificate is issued by Shield’s certificate authority (CA), with custom subject, names, lifetime and usages that you determine. This is most useful for anything that needs to trust Shield in your network: servers, appliances, domain controllers, or devices that don’t fit the built-in RadSec flow.
What Fields Can Be Configured for Server Certificates in Keytos Shield?
In Keytos Shield you can create a server certificate tailored to your environment’s specific needs. To make this possible, you can customize the following:
| Field | Description | Example |
|---|---|---|
| Subject name | The primary name for the certificate. Used to identify the certificate. | CN=mysite.internal |
| Subject Alternative Names | The secondary names for the certificate. Can be used to identify the certificate See SANs | DNS: radius.contoso.com |
| Validity Period | How many days the certificate is valid. Defaults to the longest lifetime your CA allows, which is also the maximum. | 365 days |
| Extended Key Usages (EKUs) | What the certificate can be used for. Client Authentication and Server Authentication are selected by default, and only EKUs your CA can issue are shown. At least one is required with Generate locally. With Import CSR, they’re added to the EKUs the CSR already has. See EKUs. | Server Authentication |
What Extended Key Usages Can Be Configured for Server Certificates in Keytos Shield?
Keytos Shield supports the following EKUs for server certificates:
| EKU | OID | Description |
|---|---|---|
| Client Authentication (default) | 1.3.6.1.5.5.7.3.2 | Allows the server to prove its identity when authenticating as a client (e.g. mutual TLS or RadSec). |
| Server Authentication (default) | 1.3.6.1.5.5.7.3.1 | Allows the server to prove its identity to clients that connect to it. Required for all TLS and RADIUS server certificates. |
| Code Signing Authentication | 1.3.6.1.5.5.7.3.3 | Allows the certificate to sign code. |
| Email Protection Authentication | 1.3.6.1.5.5.7.3.4 | Allows the certificate to sign and encrypt email (S/MIME). Use with an RFC822 Name Subject Alternative Name. |
| IP Sec End System Authentication | 1.3.6.1.5.5.7.3.5 | This EKU is for hosts that use IPsec directly. Only select this if your device’s documentation requires it. |
| IP Sec Tunnel Authentication | 1.3.6.1.5.5.7.3.6 | This EKU is for gateways that terminate IPsec tunnels. Only select this if your device’s documentation requires it. |
| IP Sec User Authentication | 1.3.6.1.5.5.7.3.7 | This EKU identifies a user in IPsec. |
| Smart Card Logon | 1.3.6.1.4.1.311.20.2.2 | Allows Windows sign-in to Active Directory with the certificate. Use with a UPN Subject Alternative Name. |
| KDC Authentication | 1.3.6.1.5.2.3.5 | Allows a domain controller to prove its identity to clients. Only select this for domain controller certificates. |
| Document Signing | 1.3.6.1.4.1.311.10.3.12 | Allows the certificate to sign documents. |
| Document Encryption | 1.3.6.1.4.1.311.80.1 | Allows the certificate to encrypt documents. |
With Generate locally, the certificate gets only the EKUs you pick. With Import CSR, your picks are added to the EKUs the CSR already asks for.

What Subject Alternative Names Can Be Configured for Server Certificates in Keytos Shield?
Keytos Shield supports the following types of Subject Alternative Names (SANs) for server certificates:
| SAN | Description | Example |
|---|---|---|
| DNS (recommended) | Use this SAN for the hostname(s) clients use to reach the server. | radius.contoso.com |
| User Principal Name (UPN) | Use this SAN when the certificate will be used to authenticate as an Entra ID account (requires the Client Authentication EKU). | radius-admin@contoso.com |
| URI | Use this SAN if the software checking the cert expects a URI identity. | urn:contoso:org:service |
| RFC822 Name (email) | Use this SAN when the cert will also be used to sign or encrypt email for a mailbox, such as with S/MIME. | alerts@contoso.com |
| IP Address | Use this SAN when clients connect to the server by IP address instead of by hostname. This is similar to a DNS name, however if the server’s IP address changes the certificate must be reissued. | 10.0.0.1 |
Step-by-Step Guide - How to Create and Issue Keytos Shield Server Certificates
Prerequisites for Creating Server Certificates in Keytos Shield
Before you begin creating server certificates in Keytos Shield, ensure that you have completed all the necessary prerequisites:
- The Keytos Entra ID applications are registered in your tenant.
- You have signed up for a Keytos Shield Plan.
- You are a Subscription Owner or Network Administrator.
- You have completed the Keytos Shield Network Security onboarding
How to Create a Server Certificate in Keytos Shield
-
Navigate back to your Keytos Shield portal
-
Using the left-hand menu expand Network Security and click Network profiles
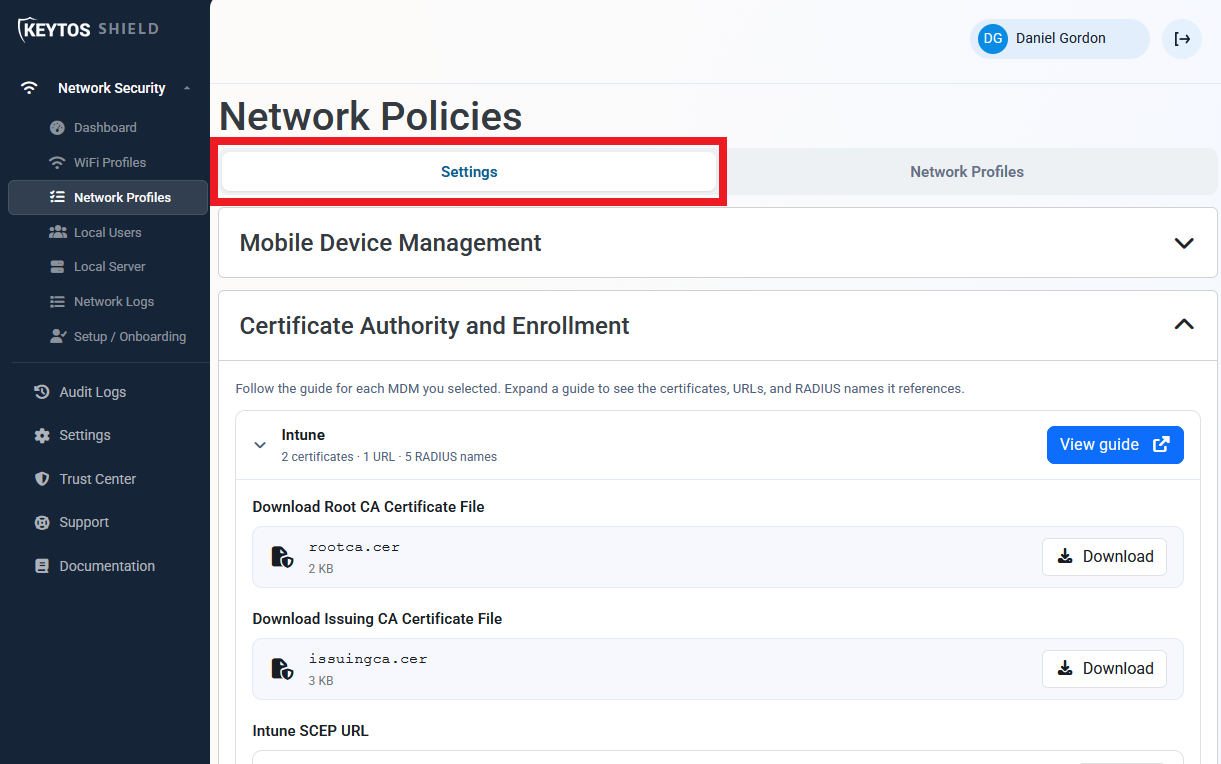
-
Scroll to the Create Certificate section and expand it.
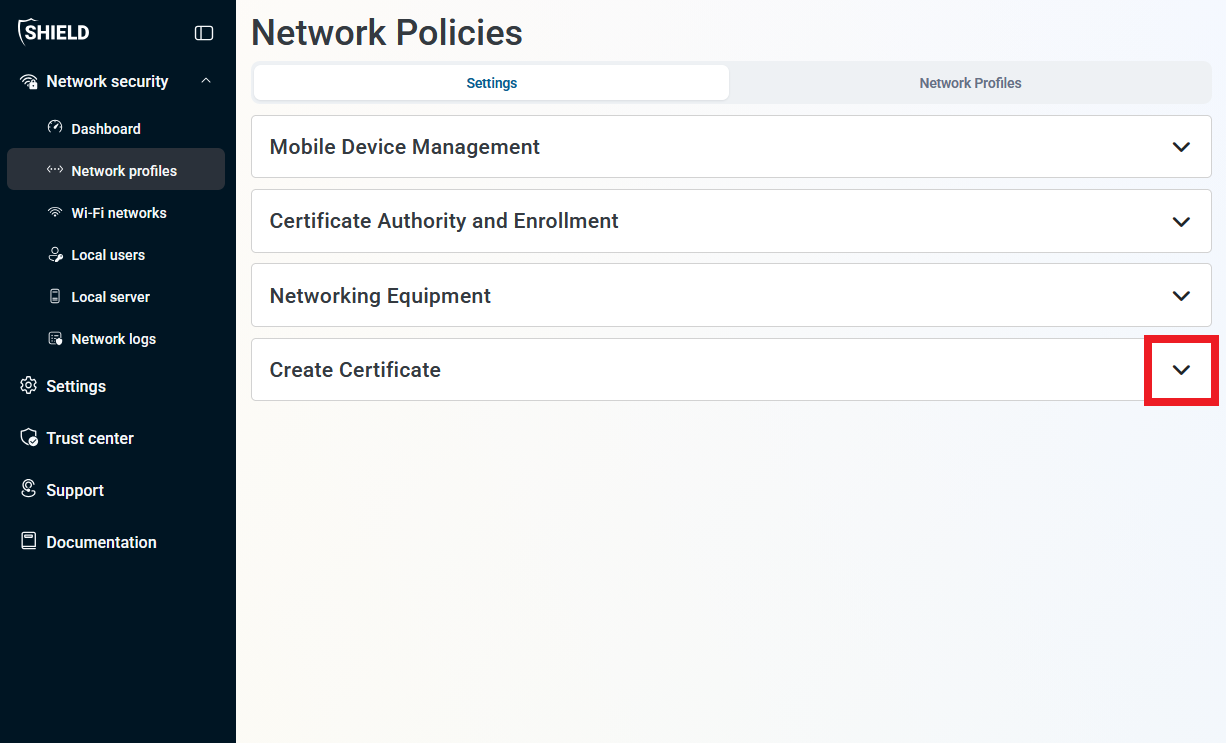
-
For What type of certificate do you want to create select Custom.
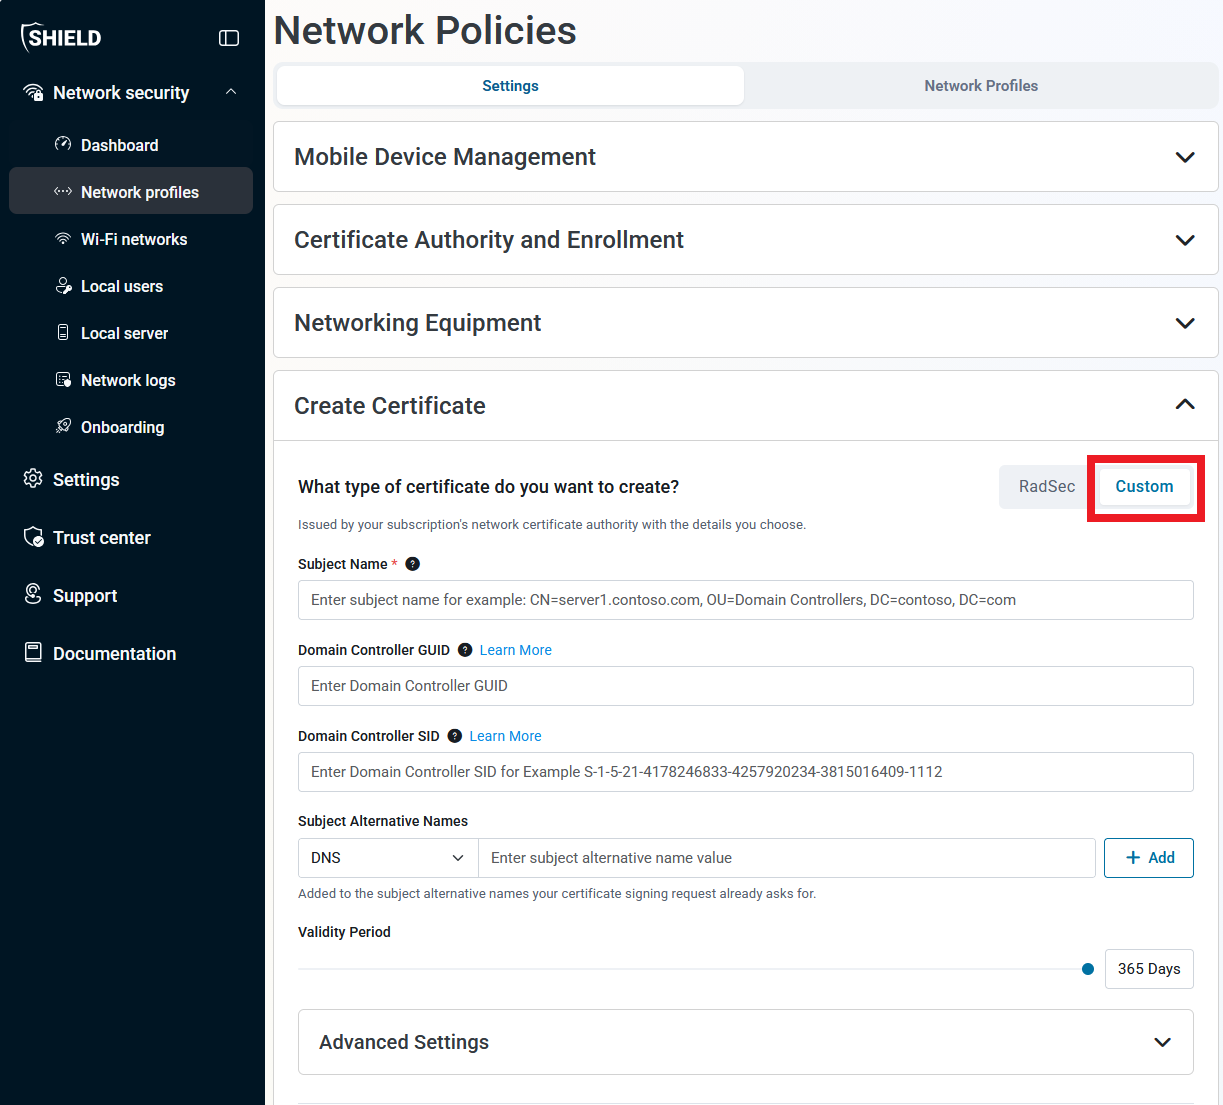
-
Add the subject name in format
CN=server1.contoso.com, OU=Custom Contoso Certificate, DC=contoso.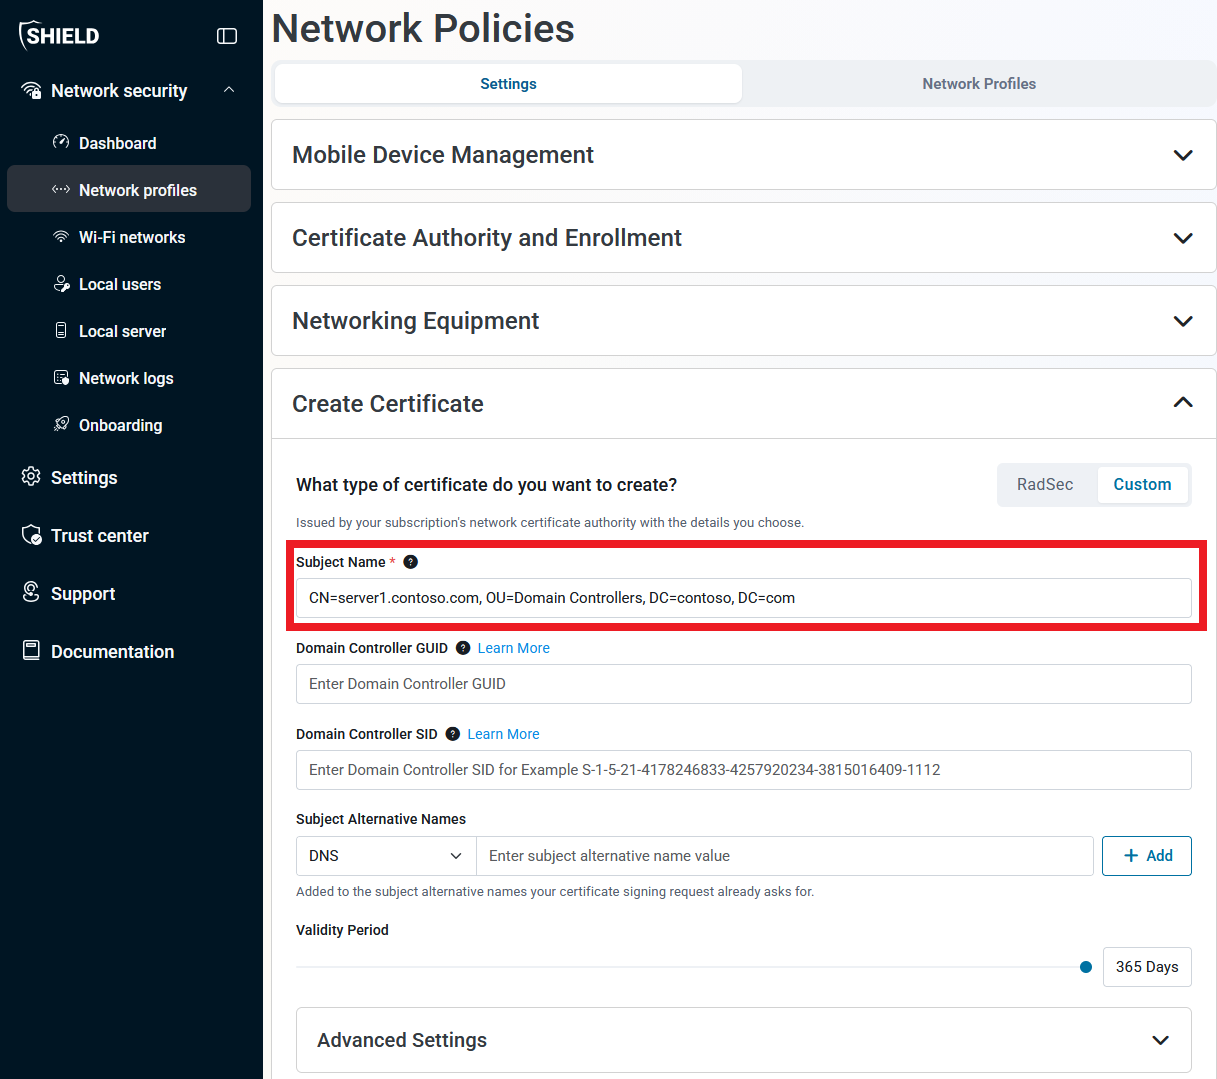
-
The Domain Controller GUID and Domain Controller SID are only necessary for domain controller certificates. If you are trying to create a domain controller certificate, please follow our dedicated guide here.
-
Enter any Subject Alternative Names (SANs) that you would like to include in the certificate. This can include DNS names, IP addresses, or other identifiers depending on your needs.
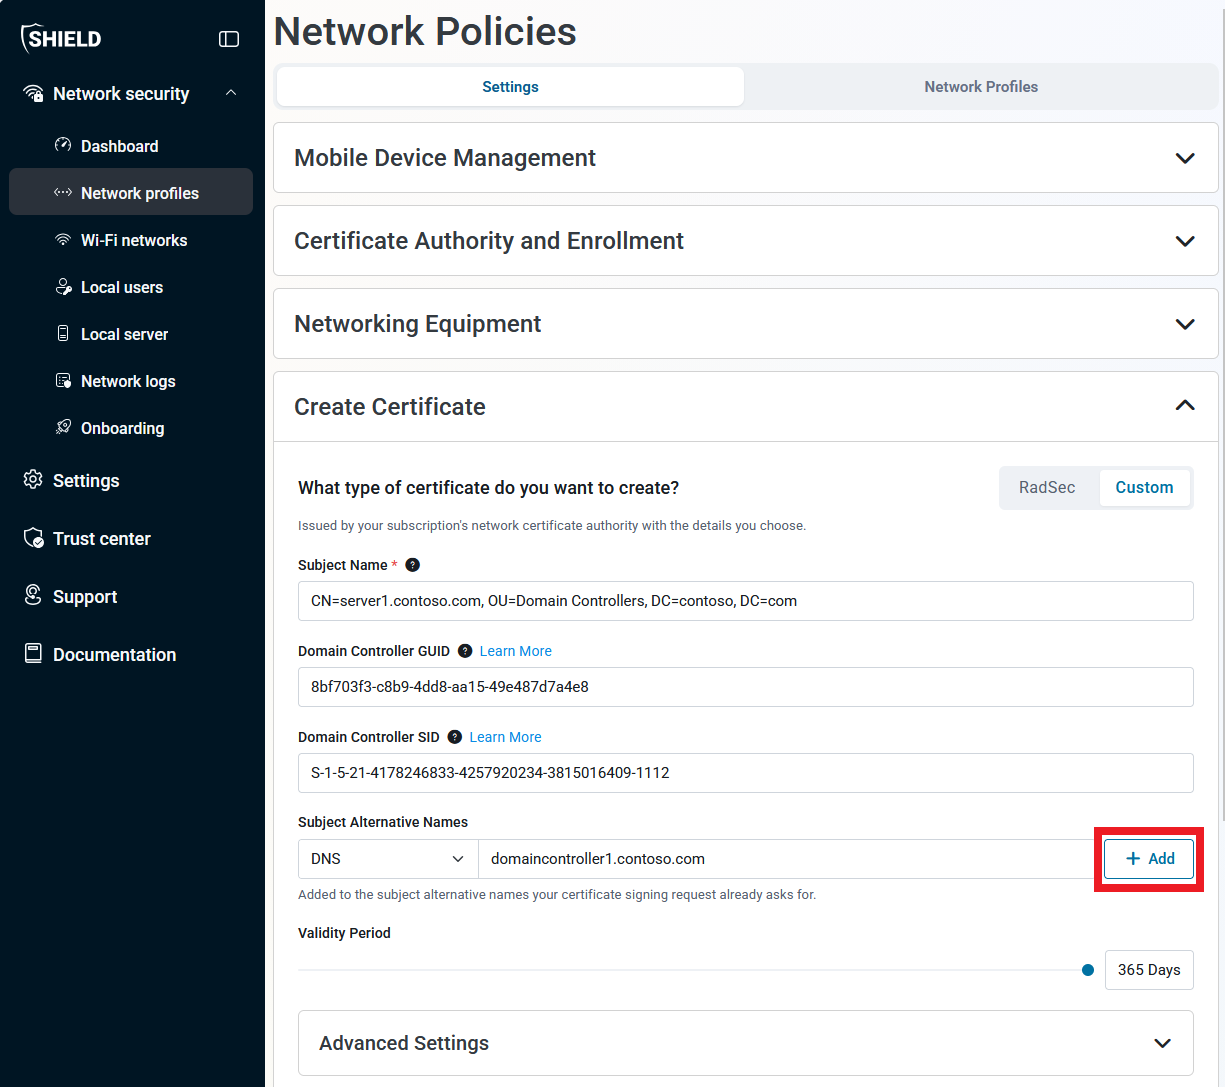
-
Set the Validity Period of your certificate to determine how long you would like the certificate to be valid for.
-
Expand the Advanced Settings section and ensure that you have the necessary EKUs enabled for your needs. The defaults are Client Authentication and Server Authentication, which are necessary for a client to prove its identity to a server, and for a server to prove its identity to a client.
-
For Private key, select either Generate Locally or Import CSR, depending on your scenario.
- If you select Generate Locally, Keytos Shield will generate the private key for the certificate in your browser and then issue the RadSec client certificate. The private key never leaves the browser and you can download both the certificate and the private key.
- If you select Import CSR, you will need to provide a Certificate Signing Request (CSR) from your network device for Keytos Shield to issue the RadSec client certificate. Click How to Create a CSR for guidance on generating a CSR from your device.
-
Click Create certificate.
-
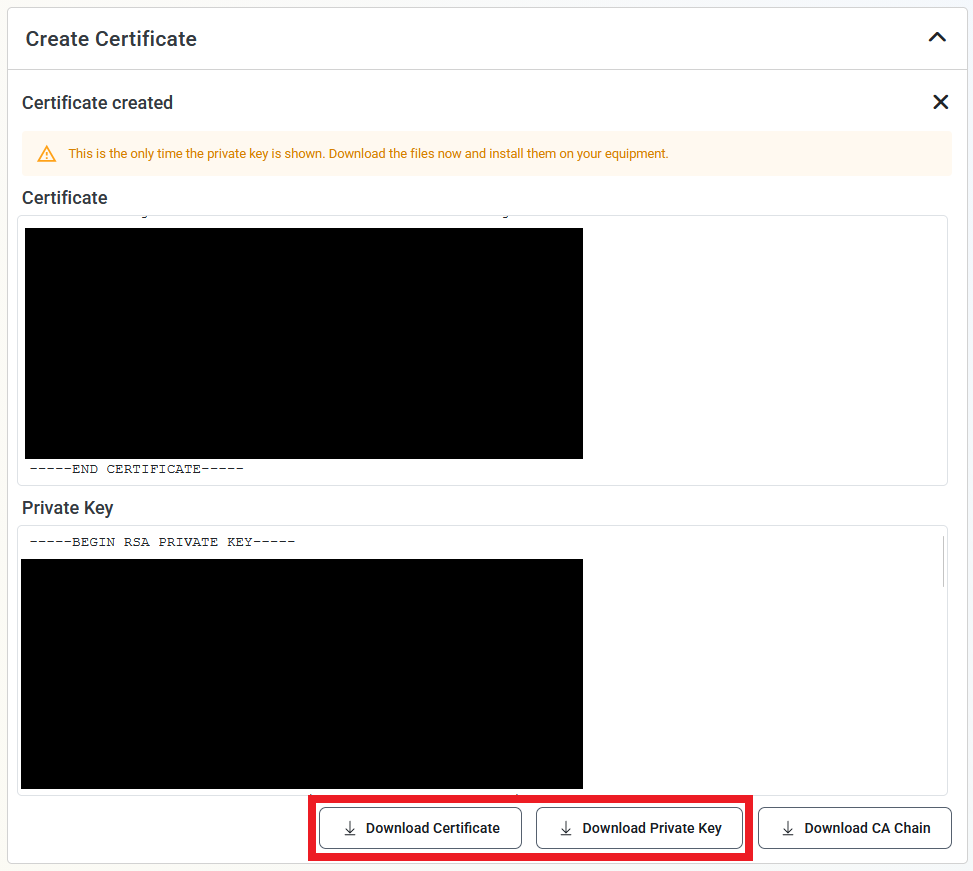
Once the certificate has been created, click Download Certificate and Download Private Key (if applicable). These should download as
certificate.cerandcertificate.key, respectively.