

















How-To: Create a Domain Controller Certificate in Keytos Shield
Step-by-Step Guide - How to Issue Domain Controller Certificates in Keytos Shield
Follow these steps to create and issue domain controller certificates in Keytos Shield.
Prerequisites for Creating Domain Controller Certificates in Keytos Shield
Before you begin creating domain controller certificates in Keytos Shield, ensure that you have completed all the necessary prerequisites:
- The Keytos Entra ID applications are registered in your tenant.
- You have signed up for a Keytos Shield Plan.
- You are a Subscription Owner or Network Administrator.
- You have completed the Keytos Shield Network Security onboarding
- Make sure you selected Hybrid infrastructure for What type of environment do you have? during onboarding.
- You have pushed your CA certificates to your Intune devices
Step 1 - How to Trust Your Keytos Shield CA Certificates in Active Directory
The first step is to add the Keytos Shield CA certificates to the NTAuth Store. This will enable the certificate to be used for authentication in Active Directory.
How to Download your Shield Root and Issuing CA Certificates
-
Log in to your Keytos Shield portal.
-
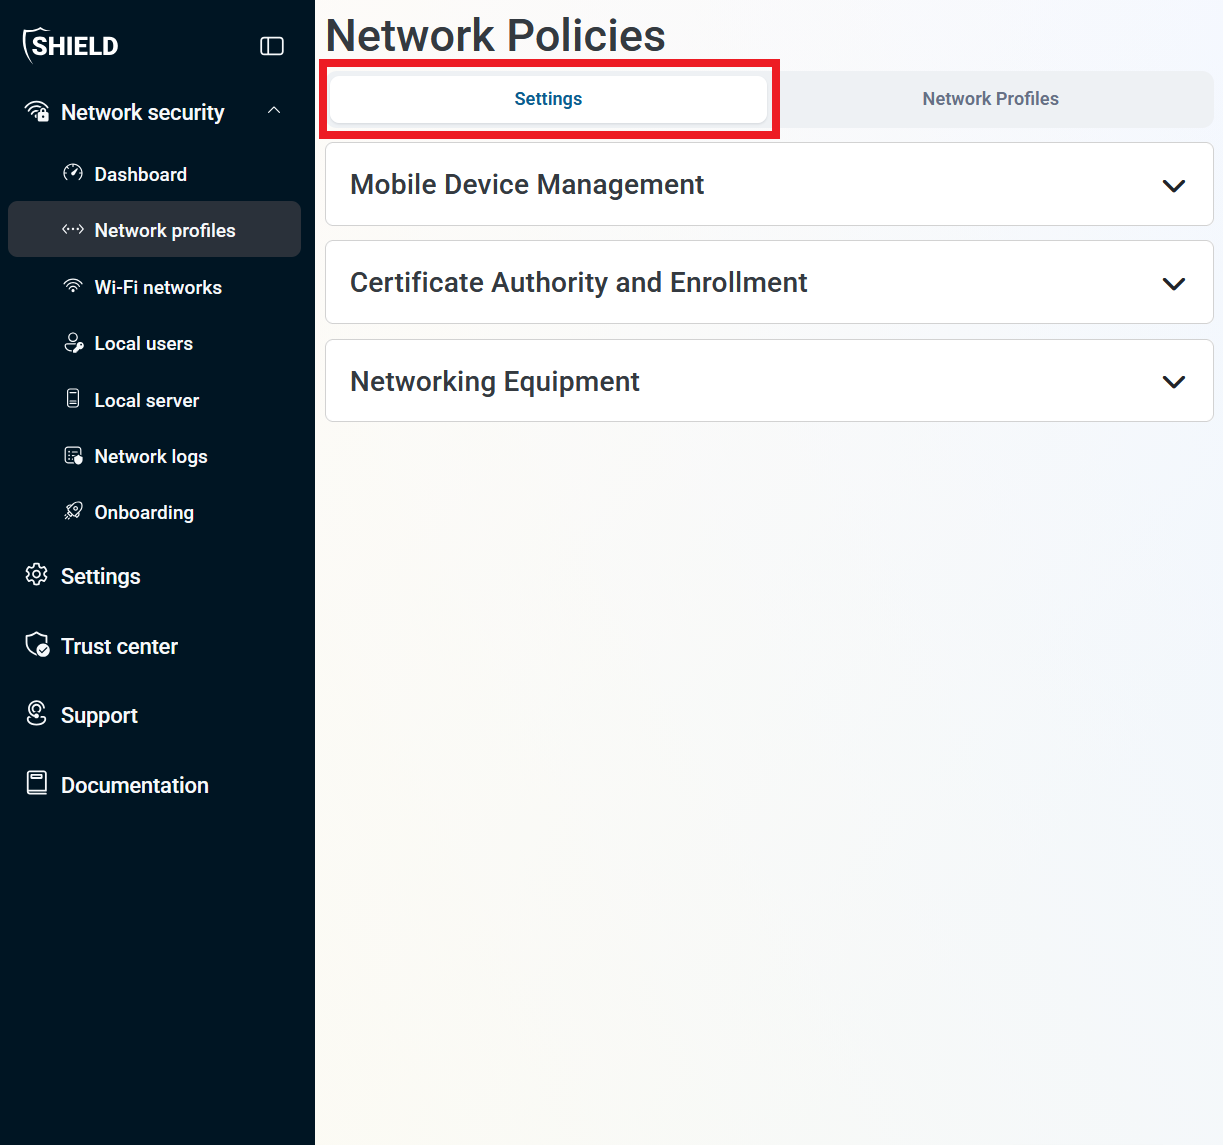
From the left-hand navigation bar, click on Network Profiles.
-
At the top of the page, select the Settings tab.
-
Scroll down to the Certificate Authority and Enrollment section and expand the Intune subsection.
Not seeing the Intune subsection? Make sure to enable Intune under the Mobile Device Management section further up on the page and save your changes.
-
Next to
rootca.cer, click Download and save it to your local machine. -
Next to
issuingca.cer, click Download and save it to your local machine as well.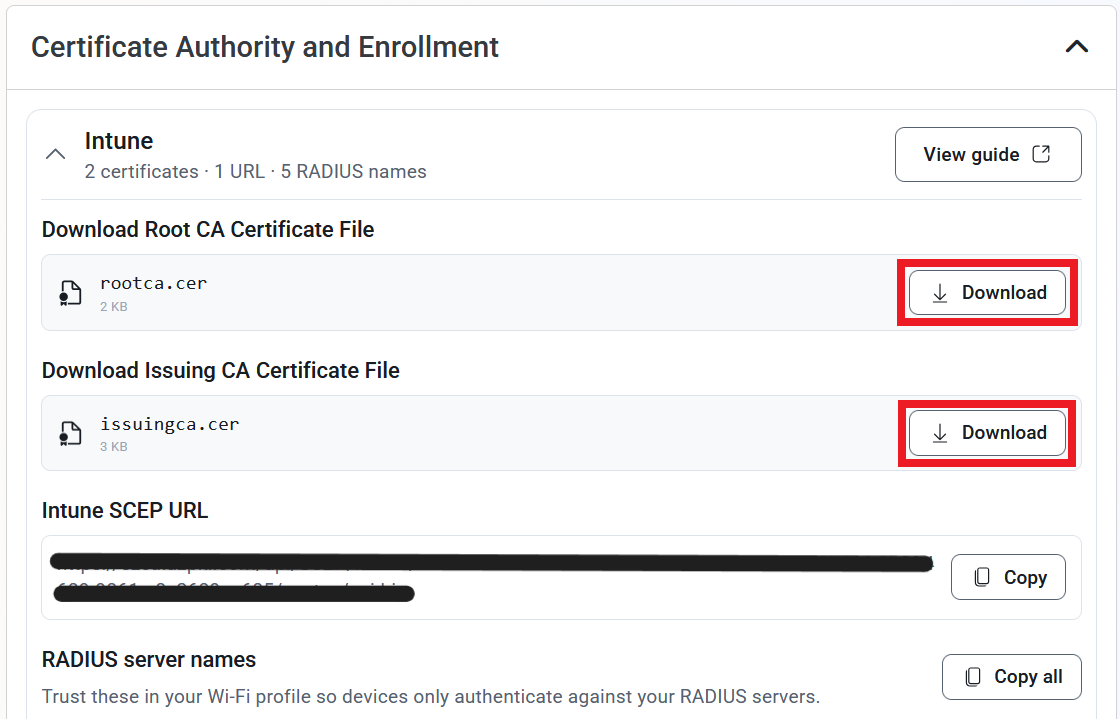
How to Add Your Keytos Shield CA Certificates to the NTAuth Store
Now that you have downloaded your Keytos Shield CA Certificates, you must add the Issuing CA certificate to the NTAuth Store to enable your domain controller to accept logon certificates issued by Shield.
-
Run the following command using an account with enterprise administrator rights:
certutil -f -dsPublish issuingca.cer NTAuthCA -
Run the following command to add the certificate chain to the Windows trusted store. If the root certificate you used to sign the Keytos Shield CA is already trusted by this domain then this step is optional:
certutil -f -dsPublish rootca.cer RootCA -
It can take several hours for this certificate to replicate. To speed up the process you can run
gpupdate /forcein the domain controllers and any relevant machines.
Step 2 - How to Configure Domain Controller Certificates in Keytos Shield
Now that we have established the domain trust, we have to create certificates for each of our domain controllers.
-
Navigate back to your Keytos Shield portal
-
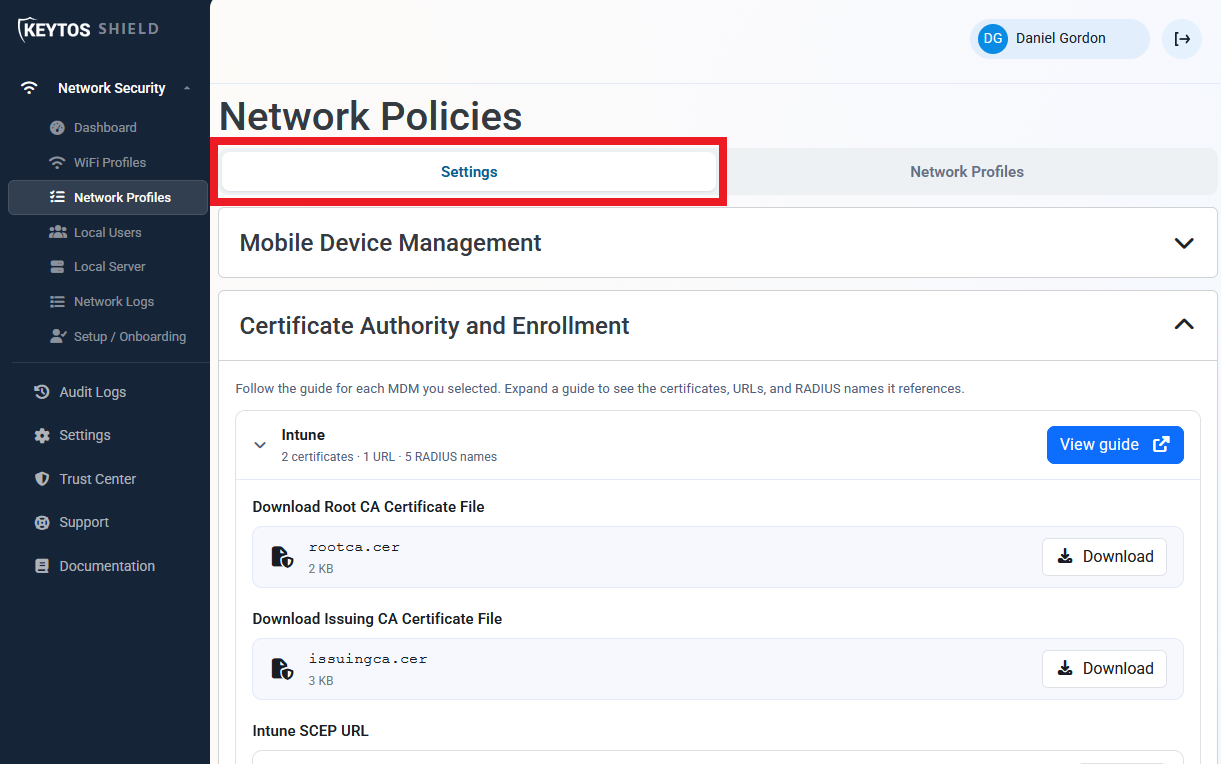
Using the left-hand menu expand Network Security and click Network profiles
-
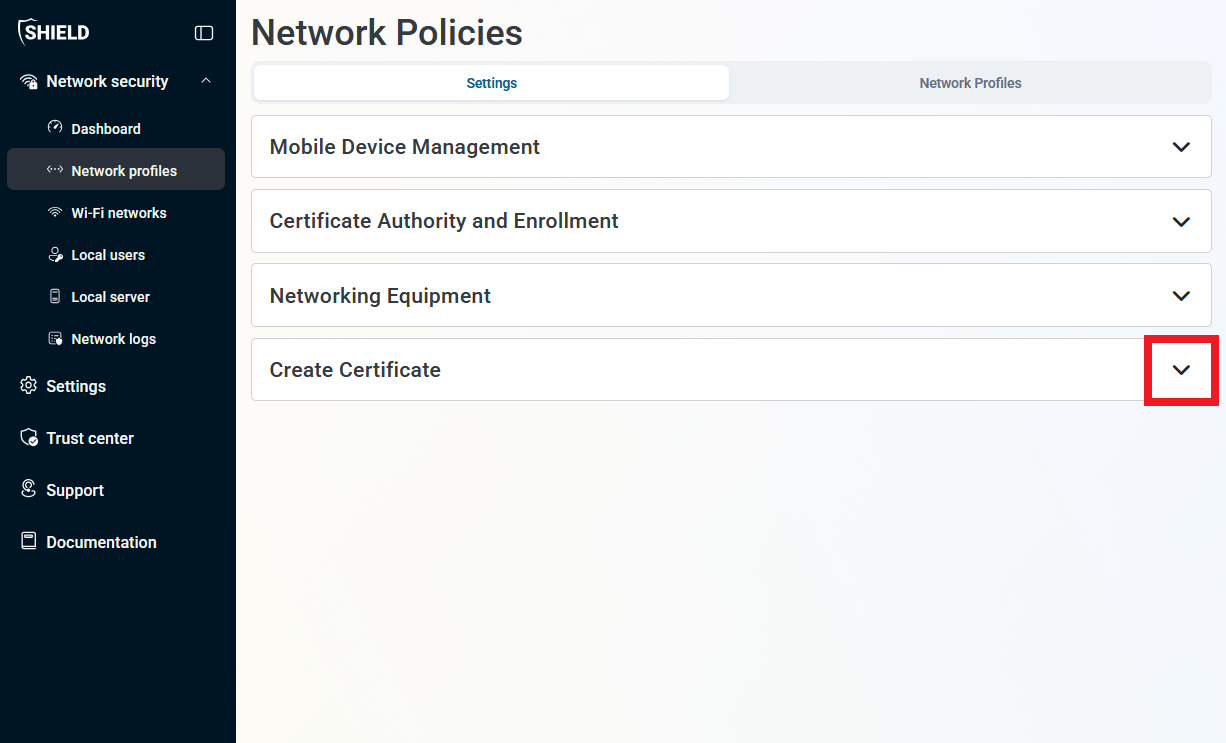
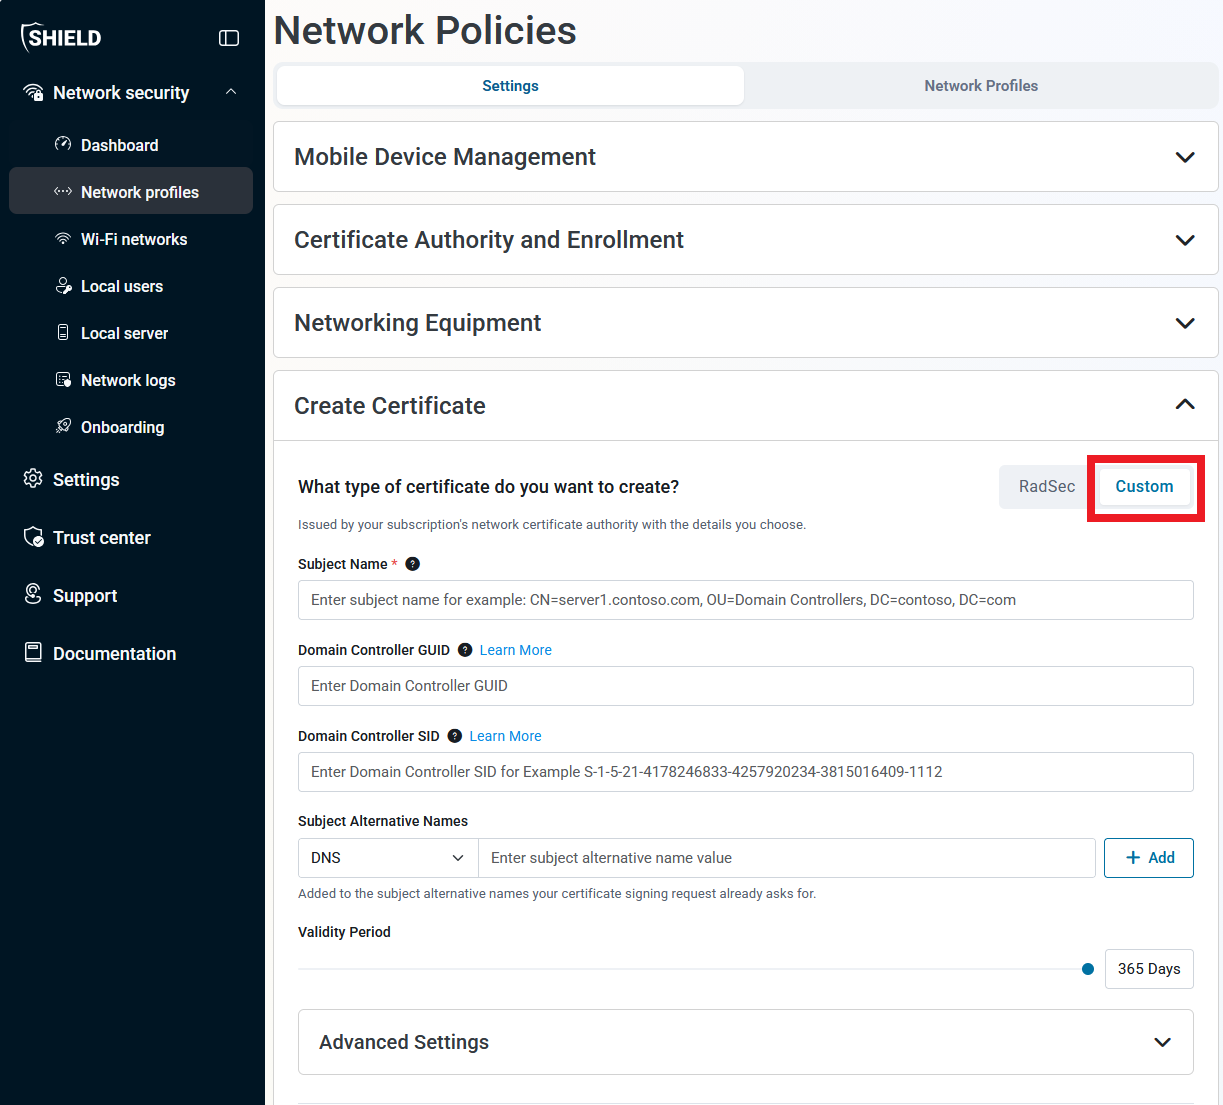
Scroll to the Create Certificate section and expand it.
-
For What type of certificate do you want to create?, select Custom.
-
Add the subject name in format
CN=server1.contoso.com, OU=Domain Controllers, DC=contoso, DC=com.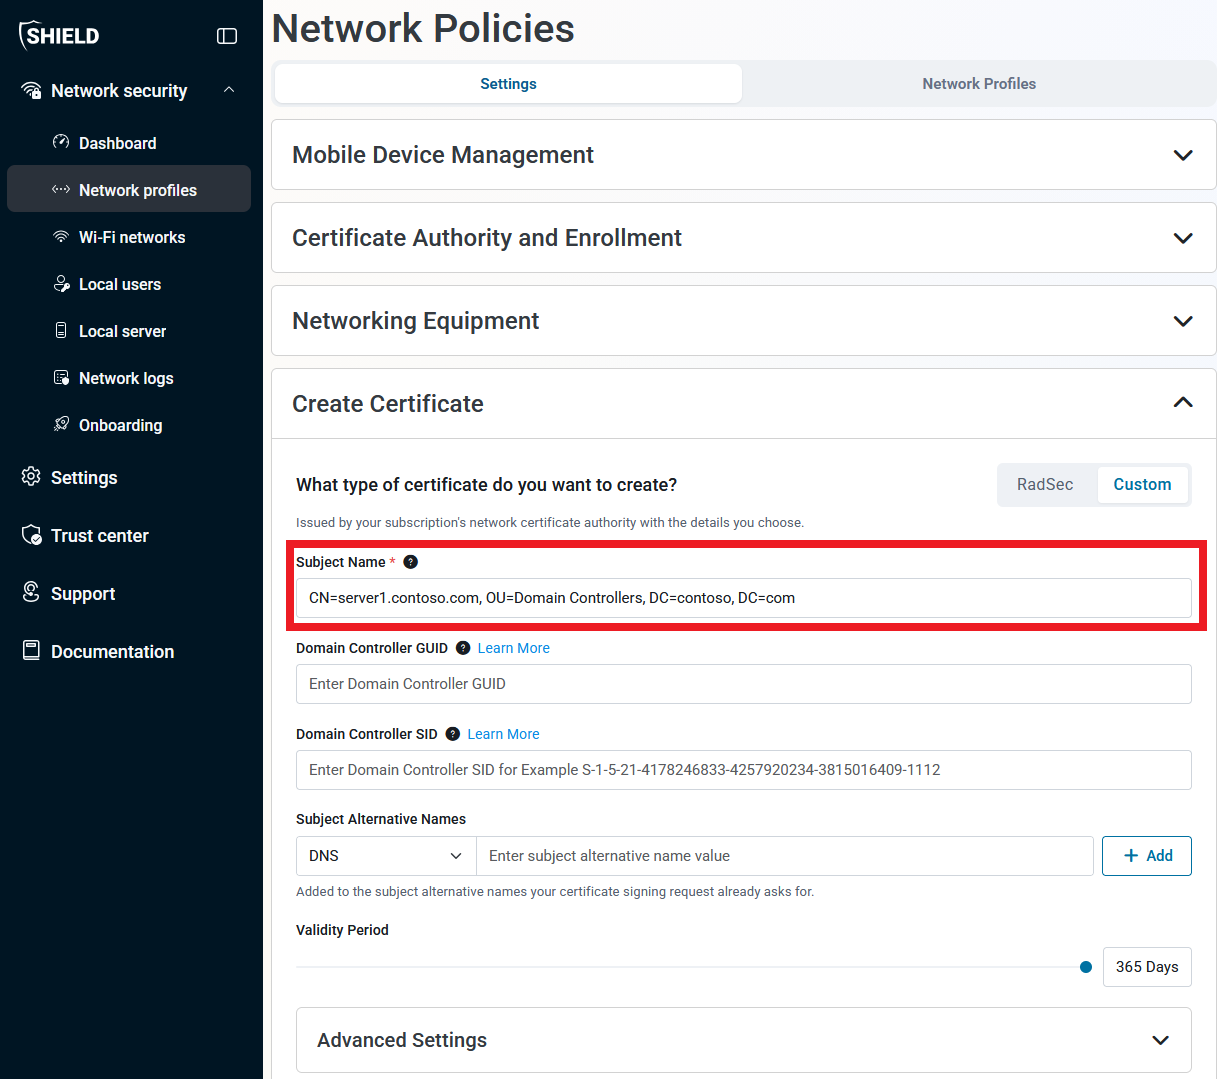
-
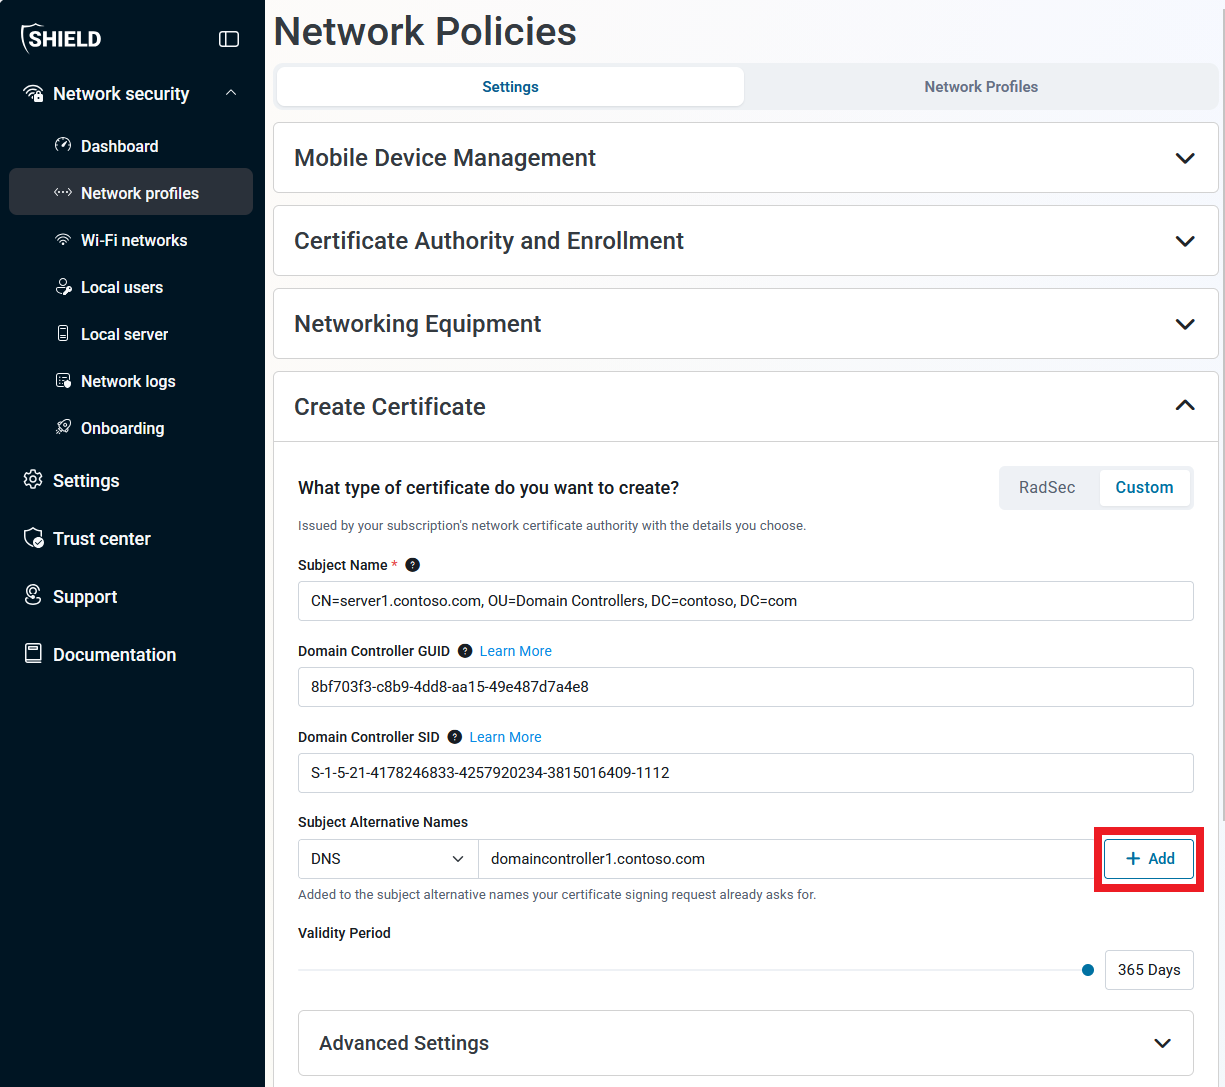
If you use SMTP replication in your domain, enter your Domain Controller GUID. You can just run the following command on your domain controller to get the GUID:
$adcomputer = Get-ADComputer -Identity $env:COMPUTERNAME -Properties ObjectGUID | Select-Object Name, ObjectGUID $guid = $adcomputer.ObjectGUID.Guid $guid -
Add the SID of the domain controller to enable Strong Authentication. To get the SID, run Richard Hicks’ SID Tool by running
Install-Script -Name Get-Sid. You can also run his script directly. Once you installed the powershell script, run the following command to get the SID and add it as a DNS Name entry.Get-Sid -Machine -
Enter your Host Name as a DNS Name entry and click Add.
-
Set the Validity Period of your certificate.
-
Expand the Advanced Settings section and ensure the certificate includes the KDC Authentication, Smart Card Logon, Client Authentication, and Server Authentication EKUs.
-
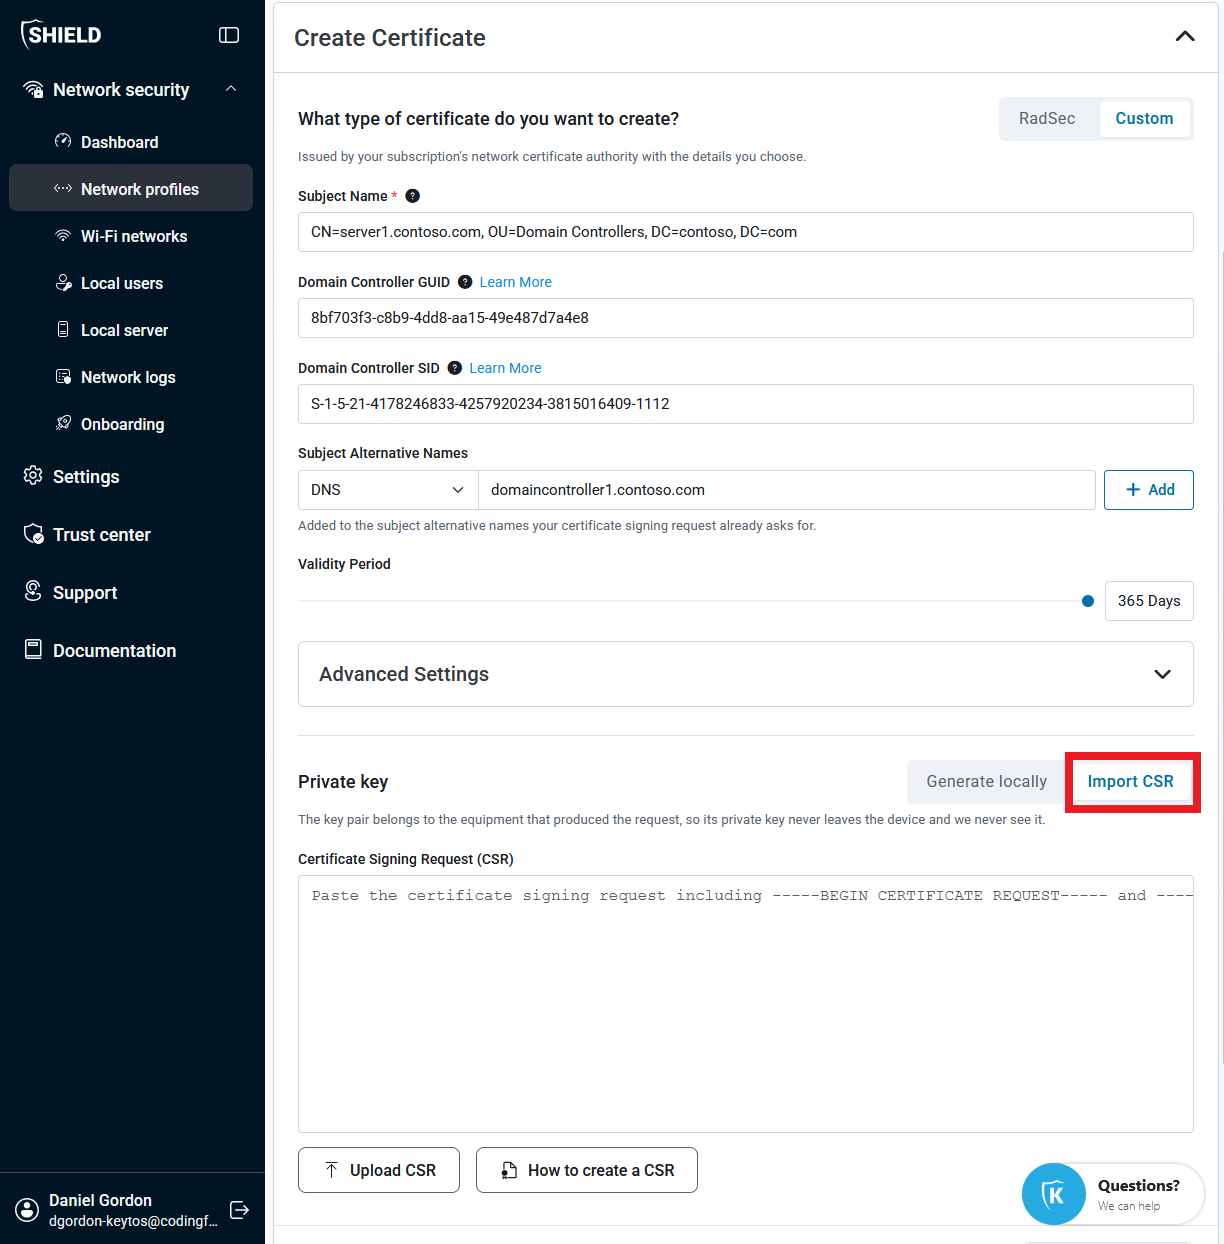
For Private key, select Import CSR
Step 3 - How to Create a CSR For Domain Controller Certificates in Keytos Shield
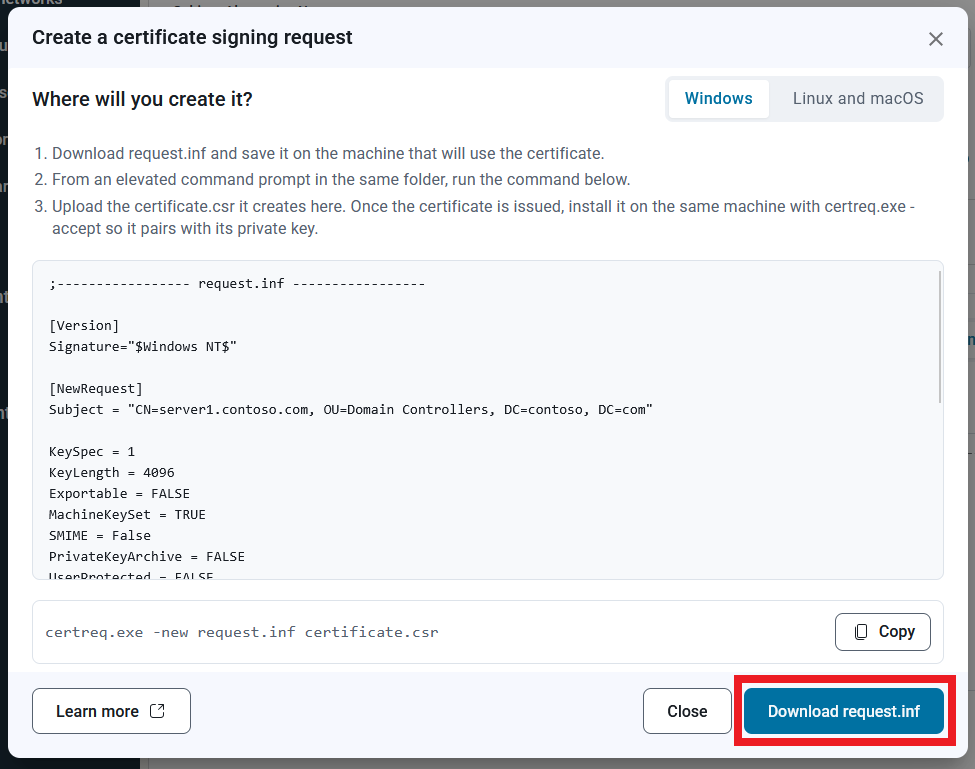
At the bottom of the page, click How to create a CSR. For the next step you will need to create a CSR. The steps vary depending on your operating system. Since we are creating a domain controller certificate, select Windows.
-
Click Download request.inf and save the file onto the domain controller that will use the certificate.
-
From an elevated command prompt where you saved
request.infon your domain controller, run the following command:certreq.exe -new request.inf certificate.csrThis should generate a CSR file named
certificate.csr. -
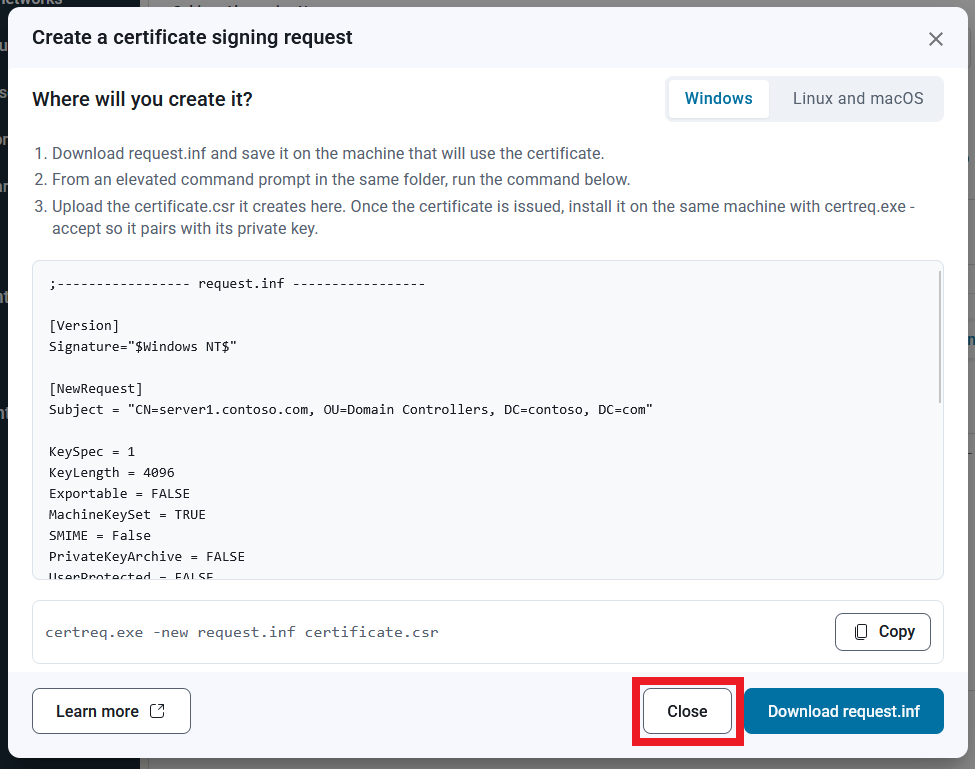
Back in Shield, click Close to close out of this window.
-
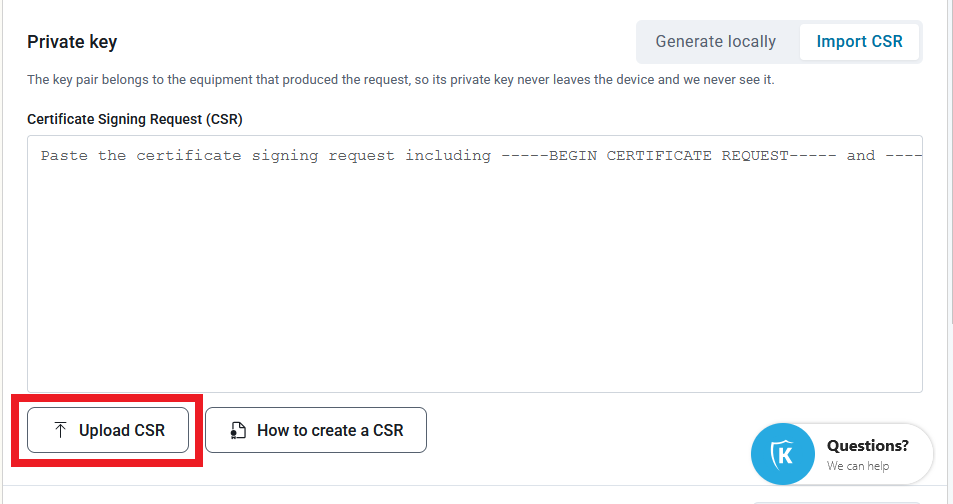
Click Upload CSR and select your newly created CSR file.
-
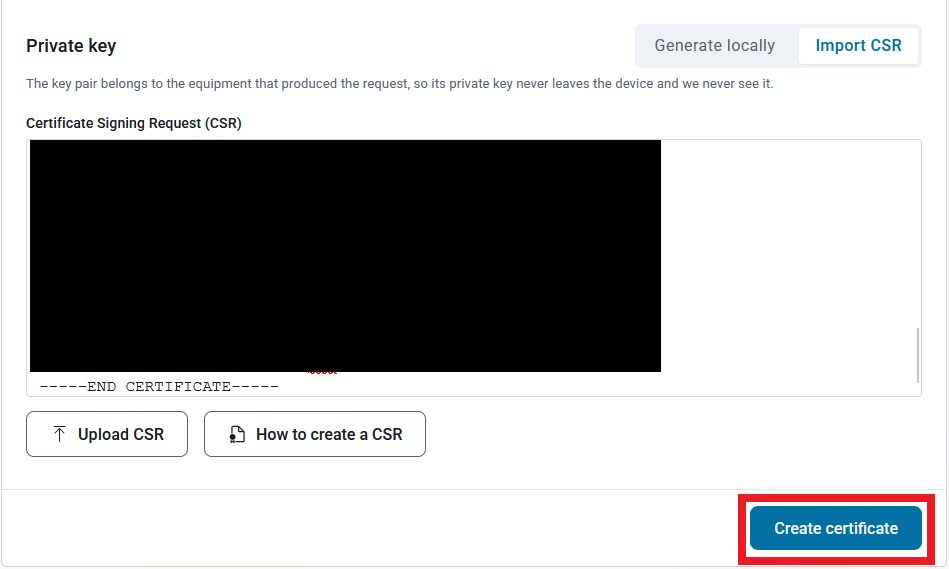
Scroll to the bottom and click Create certificate.
-
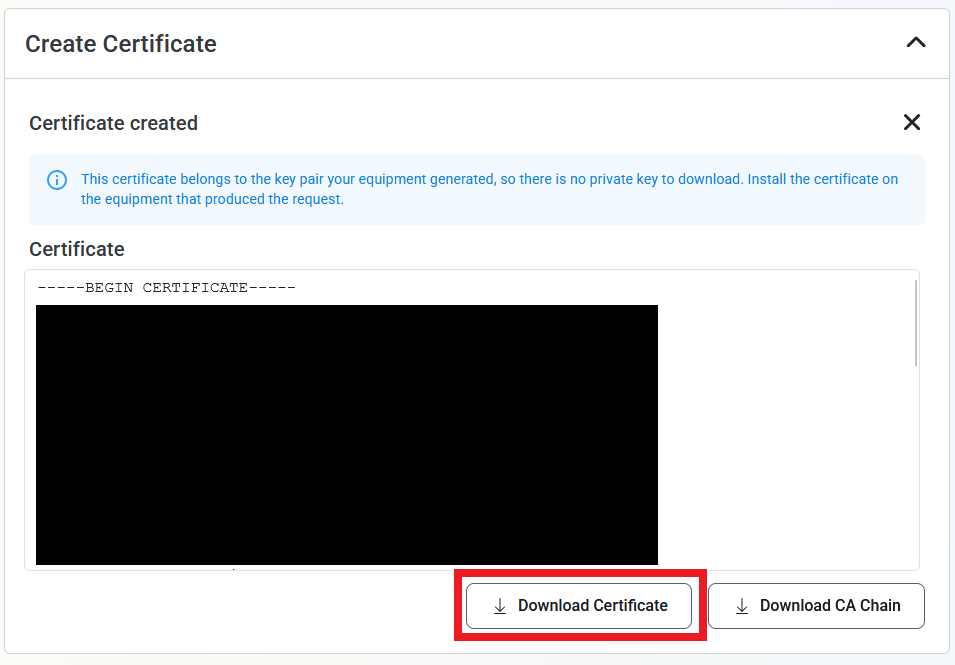
Once the certificate has been created, download it onto the domain controller that needs the certificate.
Step 4 - How to Install Keytos Shield Domain Controller Certificate on Your Domain Controller
Now that you have the certificate on the domain controller, from the domain controller run the following command from an elevated command prompt to install it and associate it with the generated private key:
certreq.exe -accept certificate.cer
Step 5 - How to Validate that the Domain Controller Certificate is Being Used
To validate that the domain controller certificate you created is being used, you can run the following command on a machine that is joined to the domain:
openssl s_client -showcerts -connect <DOMAIN Controller FQDN>:636 -servername <DOMAIN Controller FQDN>
How To Phase Out An Existing ADCS Internal PKI with a Cloud PKI
Once you have created the certificates for all your domain controllers, you can start phasing out your existing ADCS PKI. To do this, please ensure that your internal PKI does not enroll Domain Controller certificates anymore. You can do this by removing the Domain Controller template from the CA. Otherwise, the domain controller might use the domain controller certificate from your ADCS instead of the one from Shield.