















How-To: View Your Security Key Details with Keytos Connect
Overview - What Can I See About My Security Key?
Keytos Connect shows you what’s on your security key, such as a YubiKey: its model and serial number, the smart card certificates your organization installed, and its FIDO2 passkeys. This is useful when your IT team asks for your key’s serial number, or when you want to check when your certificate expires.
Before You Begin
- Install Keytos Connect on your computer. You can find the download links on the Keytos Connect overview page.
- Open Keytos Connect and sign in with your work or school account.
- Plug your security key into your computer.
Step-by-Step Guide - How to View Your Security Key Details in Keytos Connect
Step 1 - How to Open Your Security Key Details
-
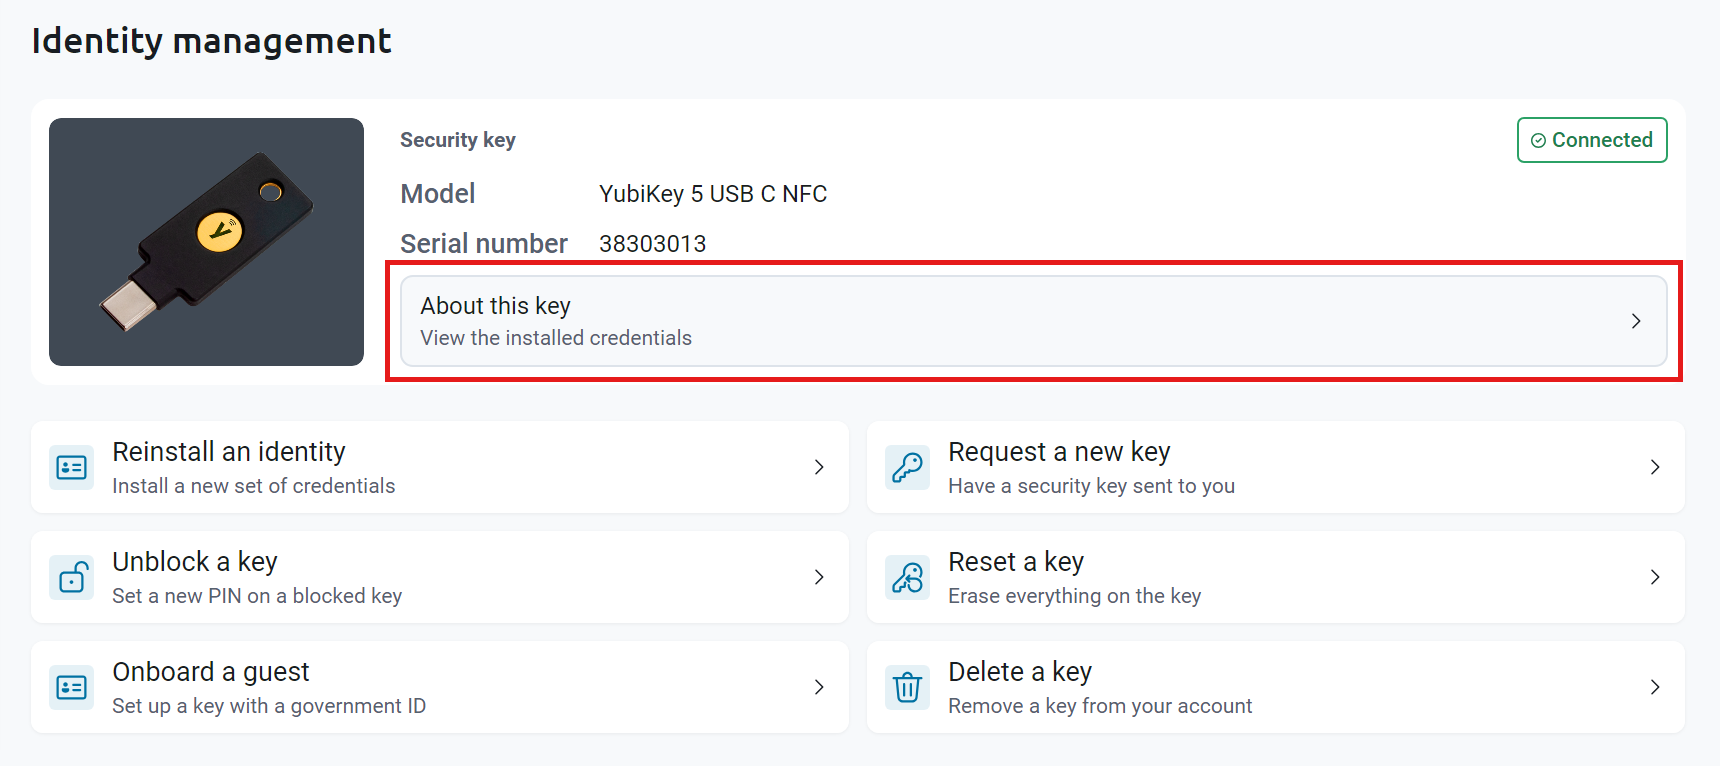
On the Identity management page, check the Model and Serial number of your security key. The badge next to it shows whether the key is Connected or Blocked. If it’s blocked, see how to unblock your security key.
-
Click About this key.
Step 2 - How to View the Smart Card Certificates on Your Key
-
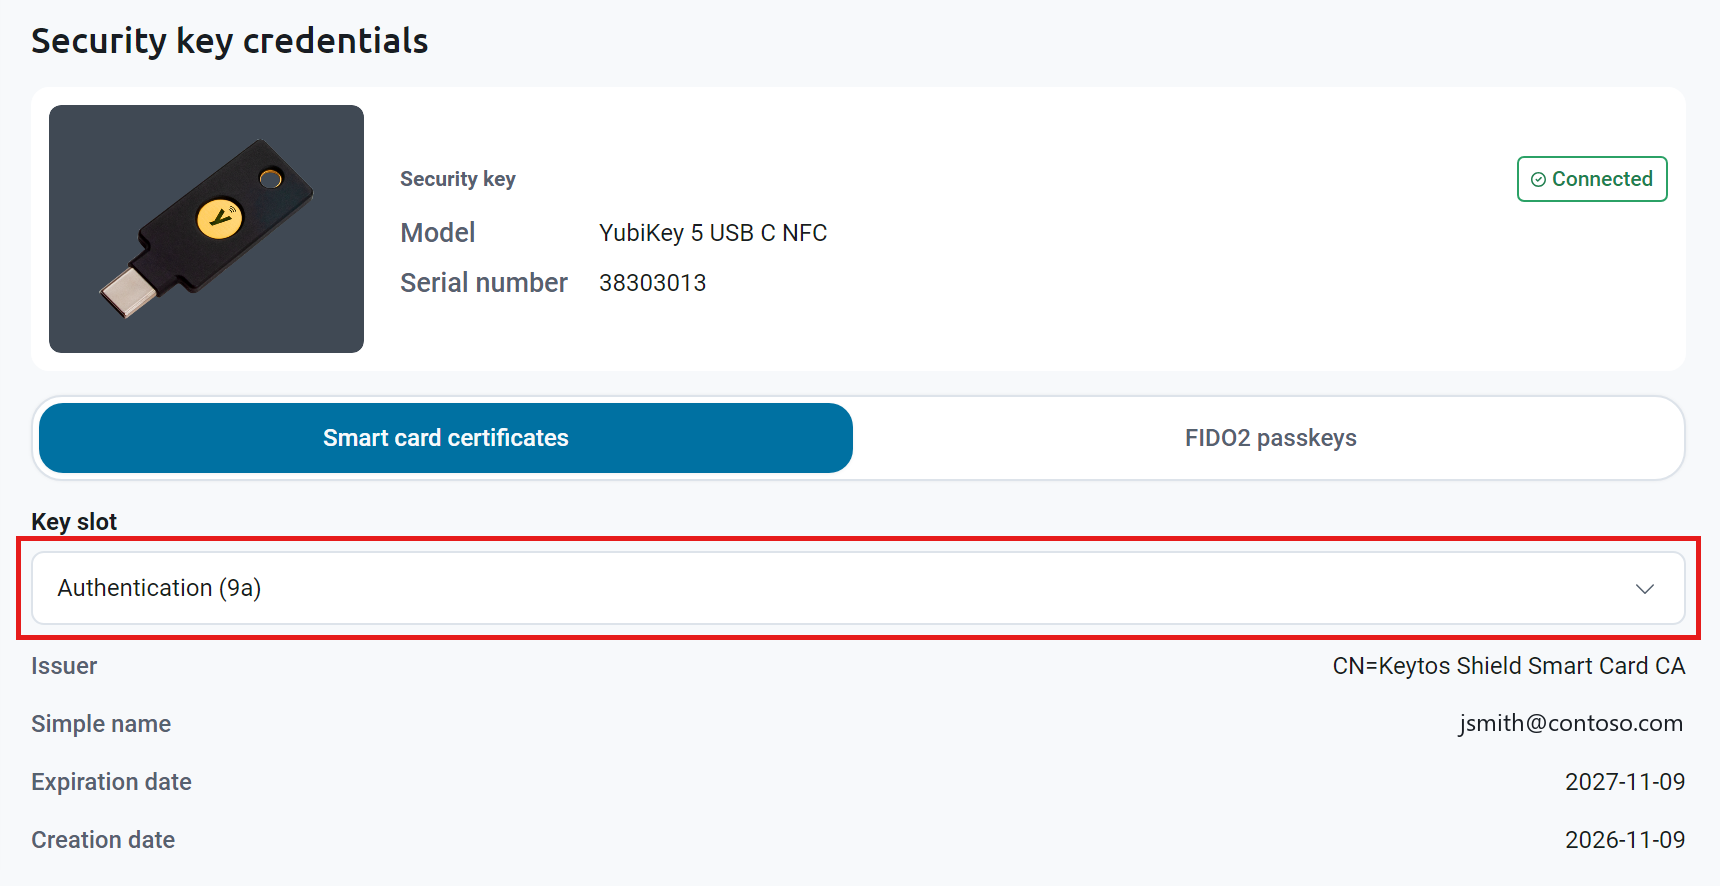
On the Security key credentials page, keep Smart card certificates selected.
-
Under Key slot, choose the slot you want to see. Authentication (9a) holds the certificate you use to sign in.
-
Review the certificate in that slot:
- Issuer: The Certificate Authority that issued the certificate, for example your organization’s Keytos Shield CA.
- Simple name: Who the certificate belongs to, usually your work or school email address.
- Creation date and Expiration date: When the certificate was issued and when it stops working.
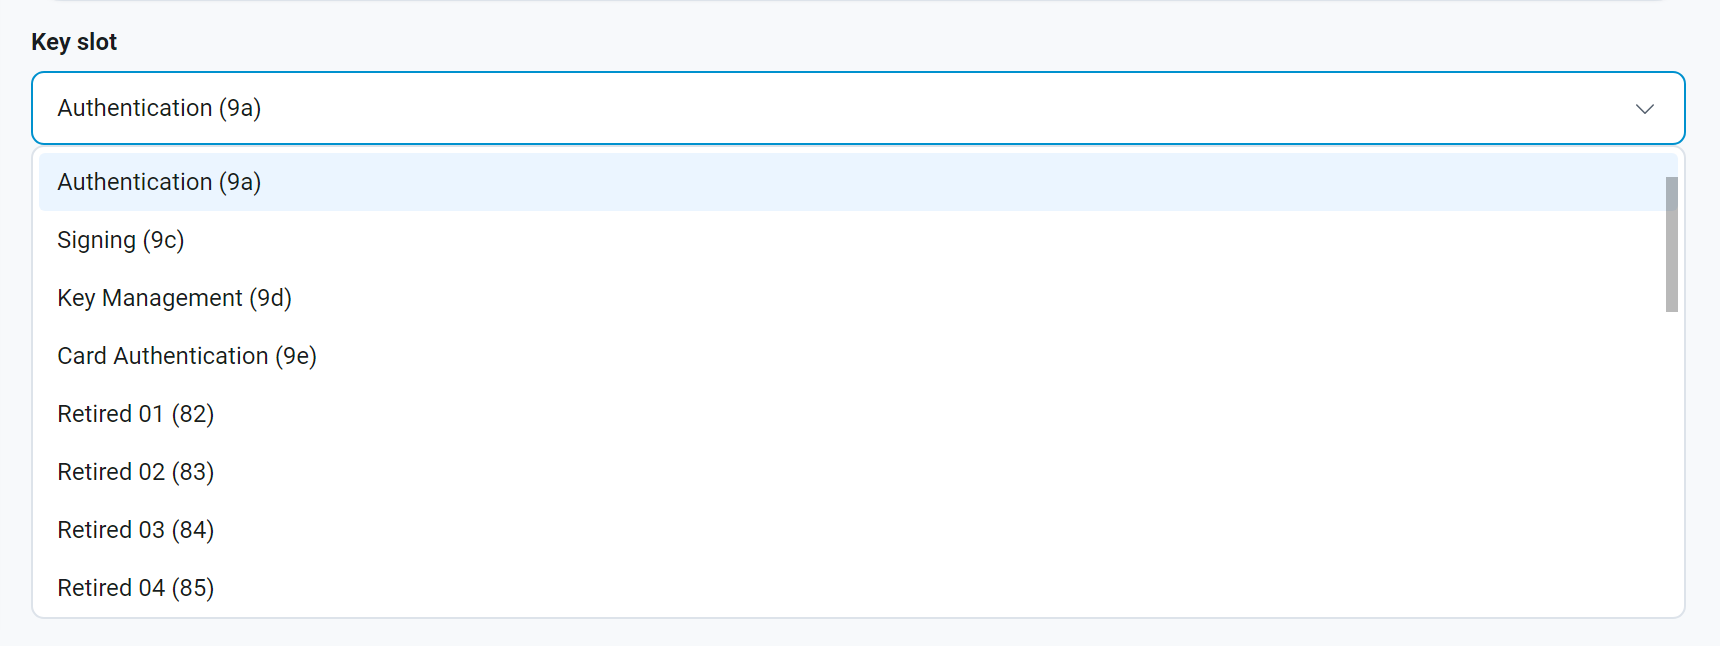
To see a certificate in a different slot, open the Key slot drop-down and choose another slot. Your key can hold certificates in these slots:
- Authentication (9a): Signing in to your computer, apps, and websites.
- Signing (9c): Digitally signing documents and email.
- Key Management (9d): Encrypting email and files.
- Card Authentication (9e): Physical access, such as door readers.
- Retired 01 (82) and up: Older encryption certificates kept so you can still open files you encrypted in the past.
Most slots are empty unless your organization uses them.
Step 3 - How to View the Passkeys on Your Key
-
Click FIDO2 passkeys.
-
Under Enter PIN, enter your security key’s FIDO2 PIN (at least 4 characters), and then click See FIDO2 passkeys to see the passkeys stored on your key.
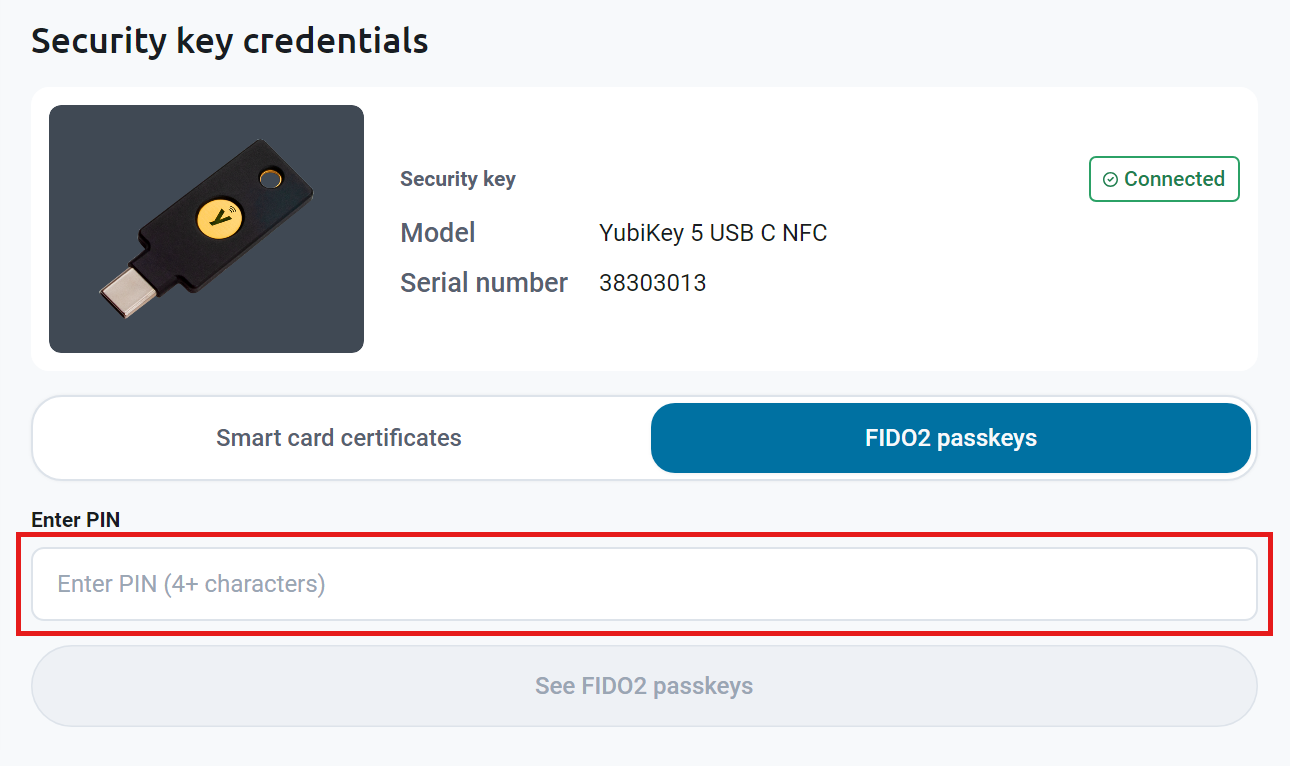 Entering the Wrong PIN Too Many Times Blocks Your Key
If you’re not sure of your PIN, stop and check with your IT team. Too many wrong PINs block your security key, and you’ll need to unblock it before you can use it again.
-
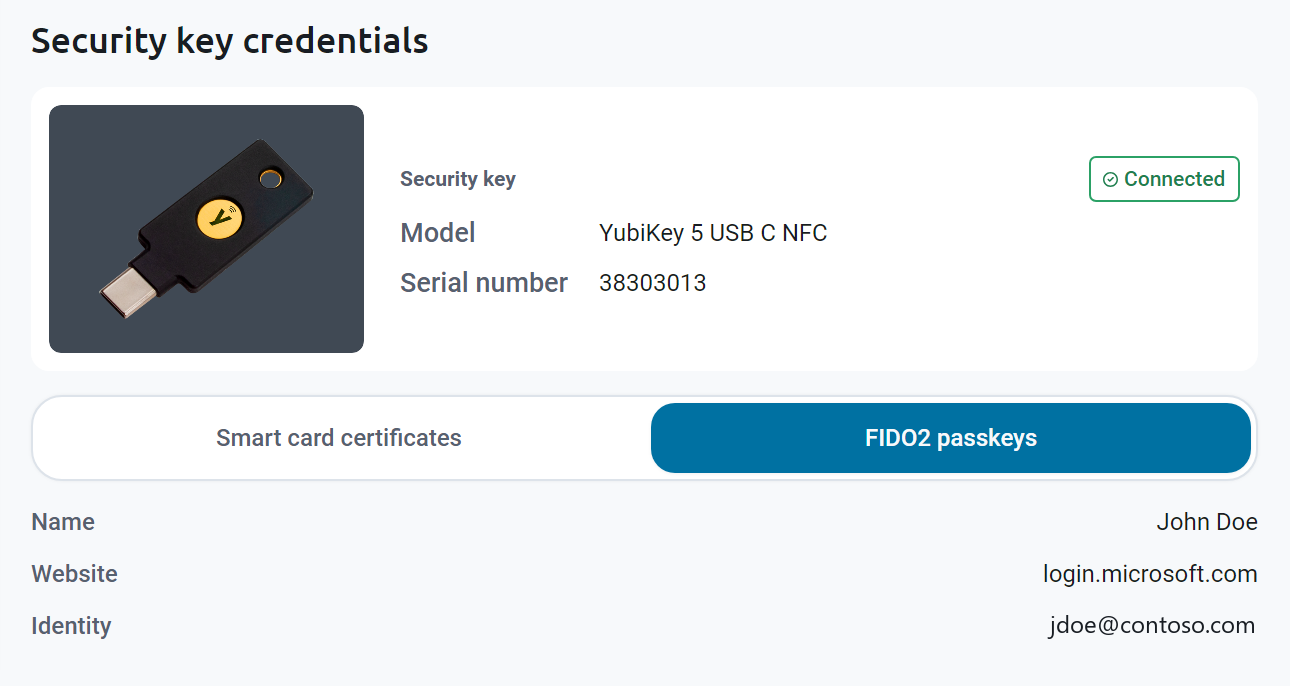
Review each passkey on your key:
- Name: The name of the account the passkey belongs to.
- Website: Where you use the passkey to sign in, for example
login.microsoft.comfor your Microsoft work or school account. - Identity: The account the passkey signs in as, usually your work or school email address.
-
When you’re done, click Back to return to the Identity management page.