







How To Get Started with Keytos Shield Identity Security
Overview - What is Keytos Shield Identity Security?
Keytos Shield protects your identities by giving every user a phishing-resistant security key which contains both a FIDO2 passkey and certificates for Entra CBA, backed by a fully managed cloud PKI. Shield handles security key enrollment, identity verification, and certificate issuance for you, so you can go passwordless without any servers or on-premises infrastructure.
Follow this step-by-step guide to set up your Shield identity profile, choose the Root CA for your security key certificates, and invite your users to enroll their security keys with Keytos Connect.
Step-by-Step Guide - How to Set Up Passwordless Security Keys with Keytos Shield
The first step to getting started with Keytos Shield is to create a subscription. This will allow you to access the Keytos Shield portal and begin onboarding your users.
How to Install Keytos Shield and Create a Subscription
It's free to get started and there's no sales call or credit card required
How to Register & Consent the Keytos Shield Entra ID Application
Keytos Shield uses native Entra ID authentication to provide a seamless passwordless experience for your users. Begin by registering the Keytos Shield Entra ID application using the link below. Make sure to use your Global Administrator account (or forward the link to your Global Administrator) to complete the consent process.
Single Click
The easiest way to register the applications is to click the button below while logged in with your Global Administrator account:
Manual URL
Alternately, you can copy & paste the following URL into your browser. Make sure you are logged in with your Global Administrator account before accessing the link.
https://login.microsoftonline.com/organizations/adminconsent?client_id=2963e596-88f5-43a1-ab17-68b8026c6468&redirect_uri=https://portal.keytos.io/Welcome
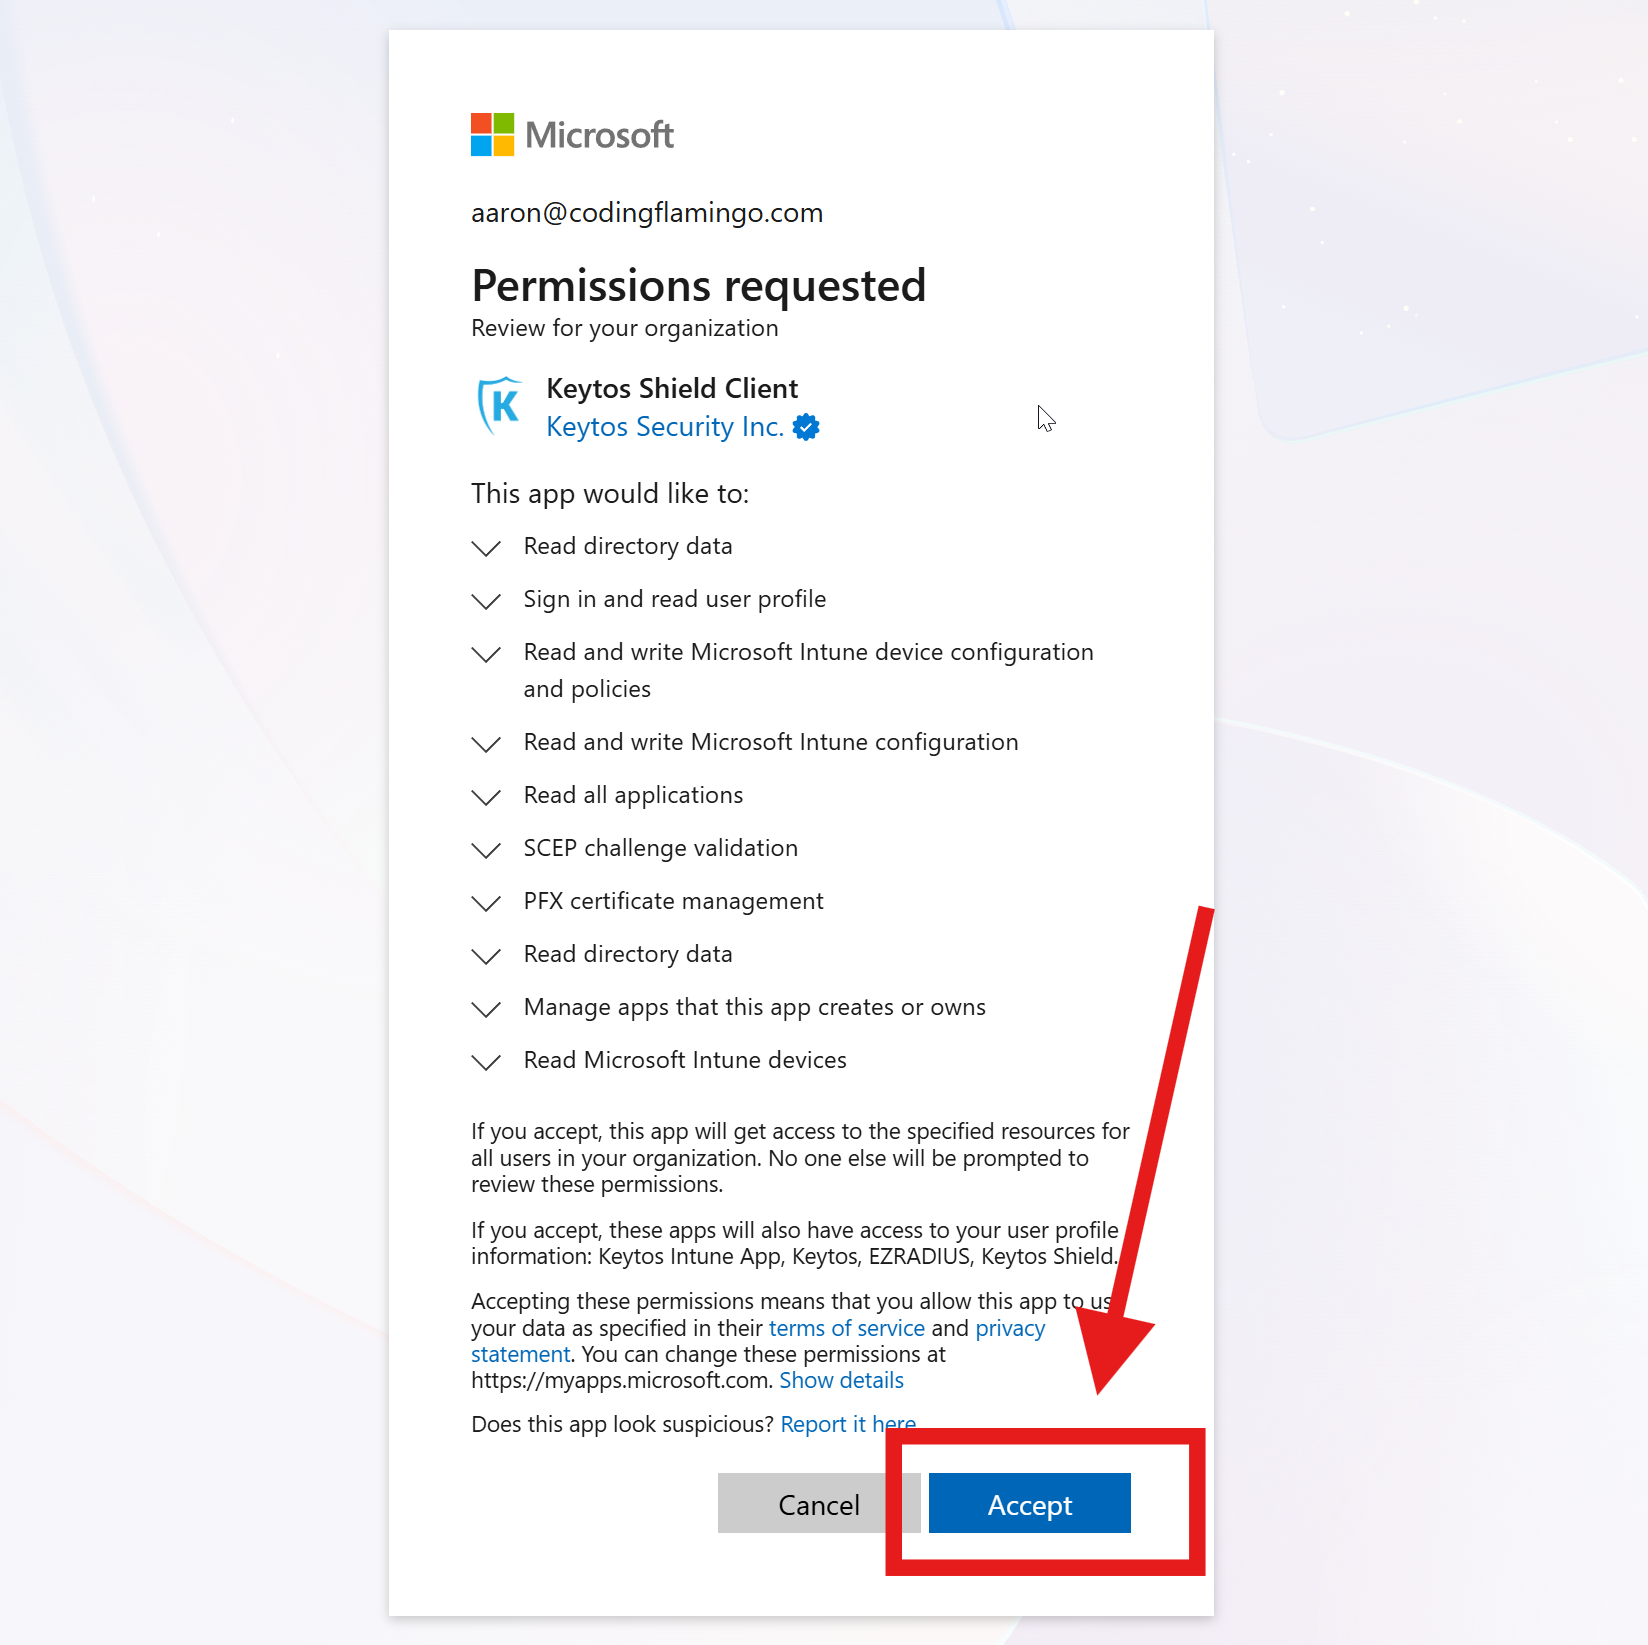
You will see a consent screen similar to the one below. Click Accept to register the applications in your tenant.
This registration is specifically for Azure GCC High tenants and will not work for commercial or other government clouds. An Azure GCC High tenant is required to use this registration.
Single Click
The easiest way to register the applications is to click the button below while logged in with your Global Administrator account:
Manual URL
Alternately, you can copy & paste the following URL into your browser. Make sure you are logged in with your Global Administrator account before accessing the link.
https://login.microsoftonline.us/organizations/adminconsent?client_id=2cf07322-0273-4052-bd9b-e38c1c433803&redirect_uri=https://portal.keytos.us/Welcome
For more information on these specific permissions and why they are needed, please refer to the Keytos Shield FAQs.
Collapses this section and completes the checkmark.
How to Create Your Keytos Shield Subscription
A Keytos Shield subscription handles permissions, billing, and central configuration for your organization. You can create a subscription directly with us, or through the Azure Marketplace. Both options provide a 1-month free trial, and you can cancel at any time.
You can create a Keytos Shield subscription directly through the Azure portal and bill straight to your existing Azure bill. To create a Keytos Shield subscription through the Azure Marketplace, follow these steps:
Note: Azure GCC High does not yet support the Azure Marketplace. Please create a subscription directly through the Keytos portal if you wish to deploy to Azure GCC High.
-
Open Keytos Shield on the Azure Marketplace in your browser.
-
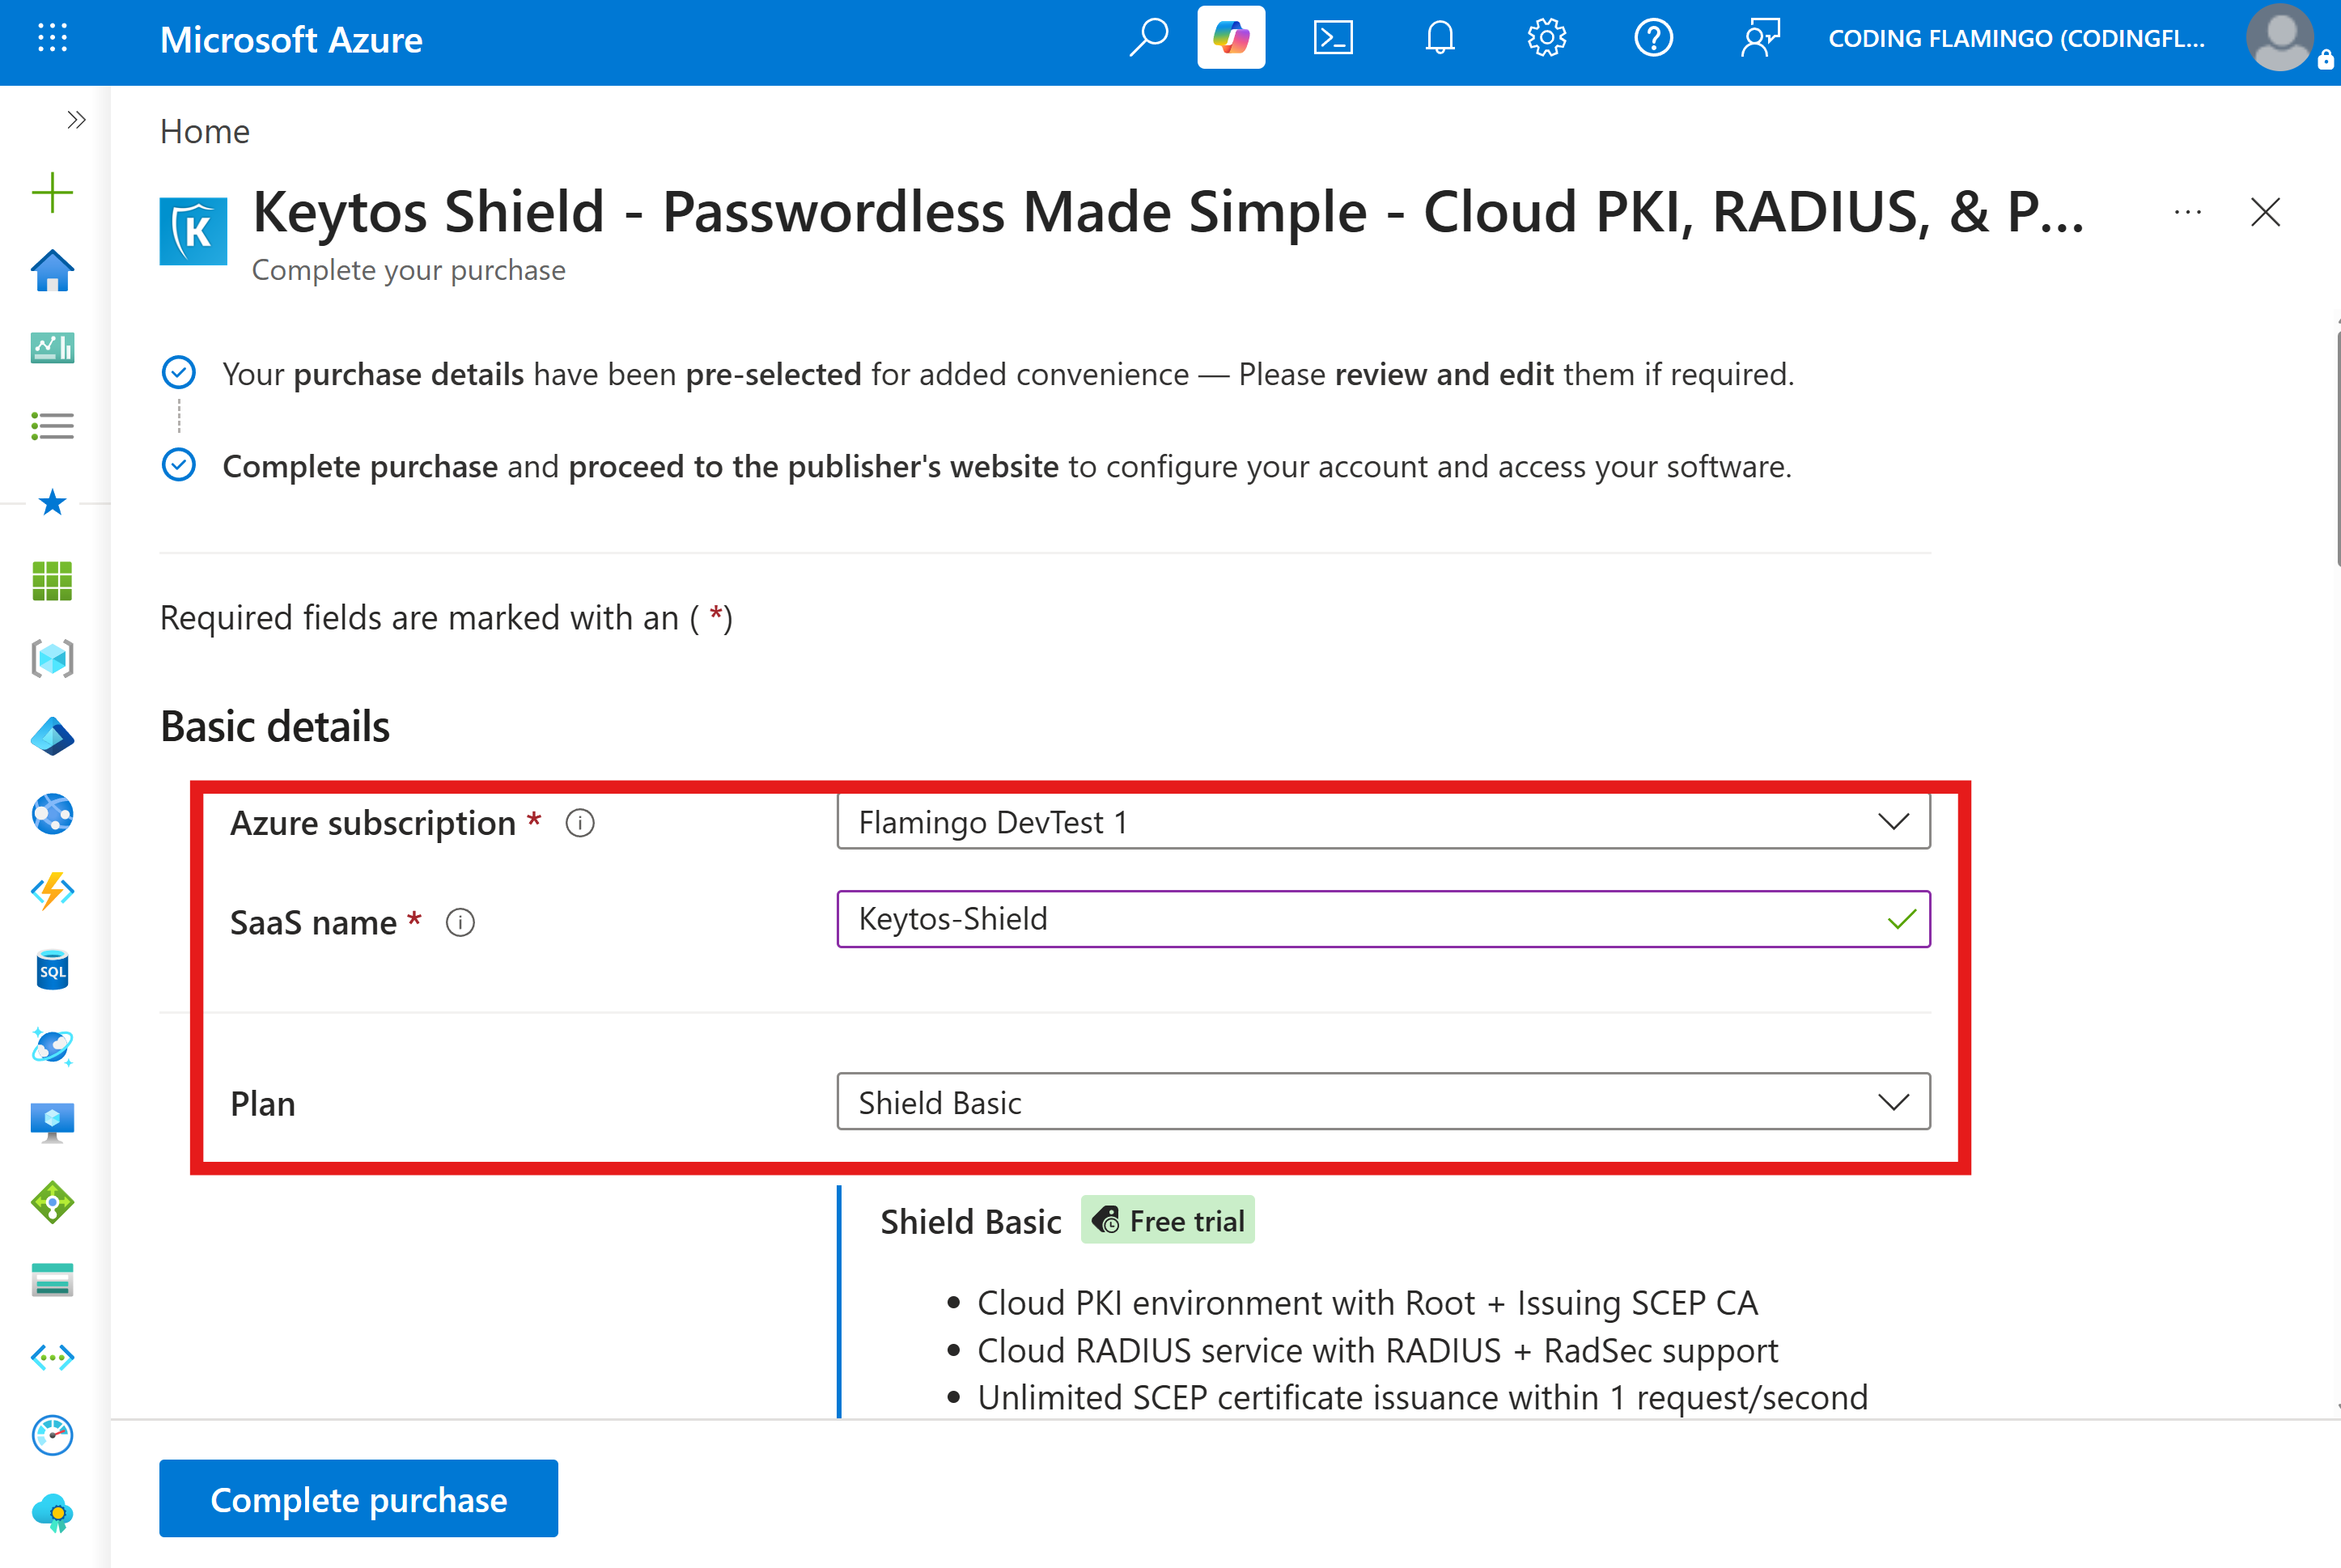
Under Basic details, enter the following required information: Azure subscription: Select the Azure subscription you want to use for your Keytos Shield deployment. SaaS name: Enter a unique name for your Keytos Shield SaaS instance. Plan: Select your desired Shield plan.
-
Make sure to enable Auto-renew for your subscription to ensure uninterrupted service.

-
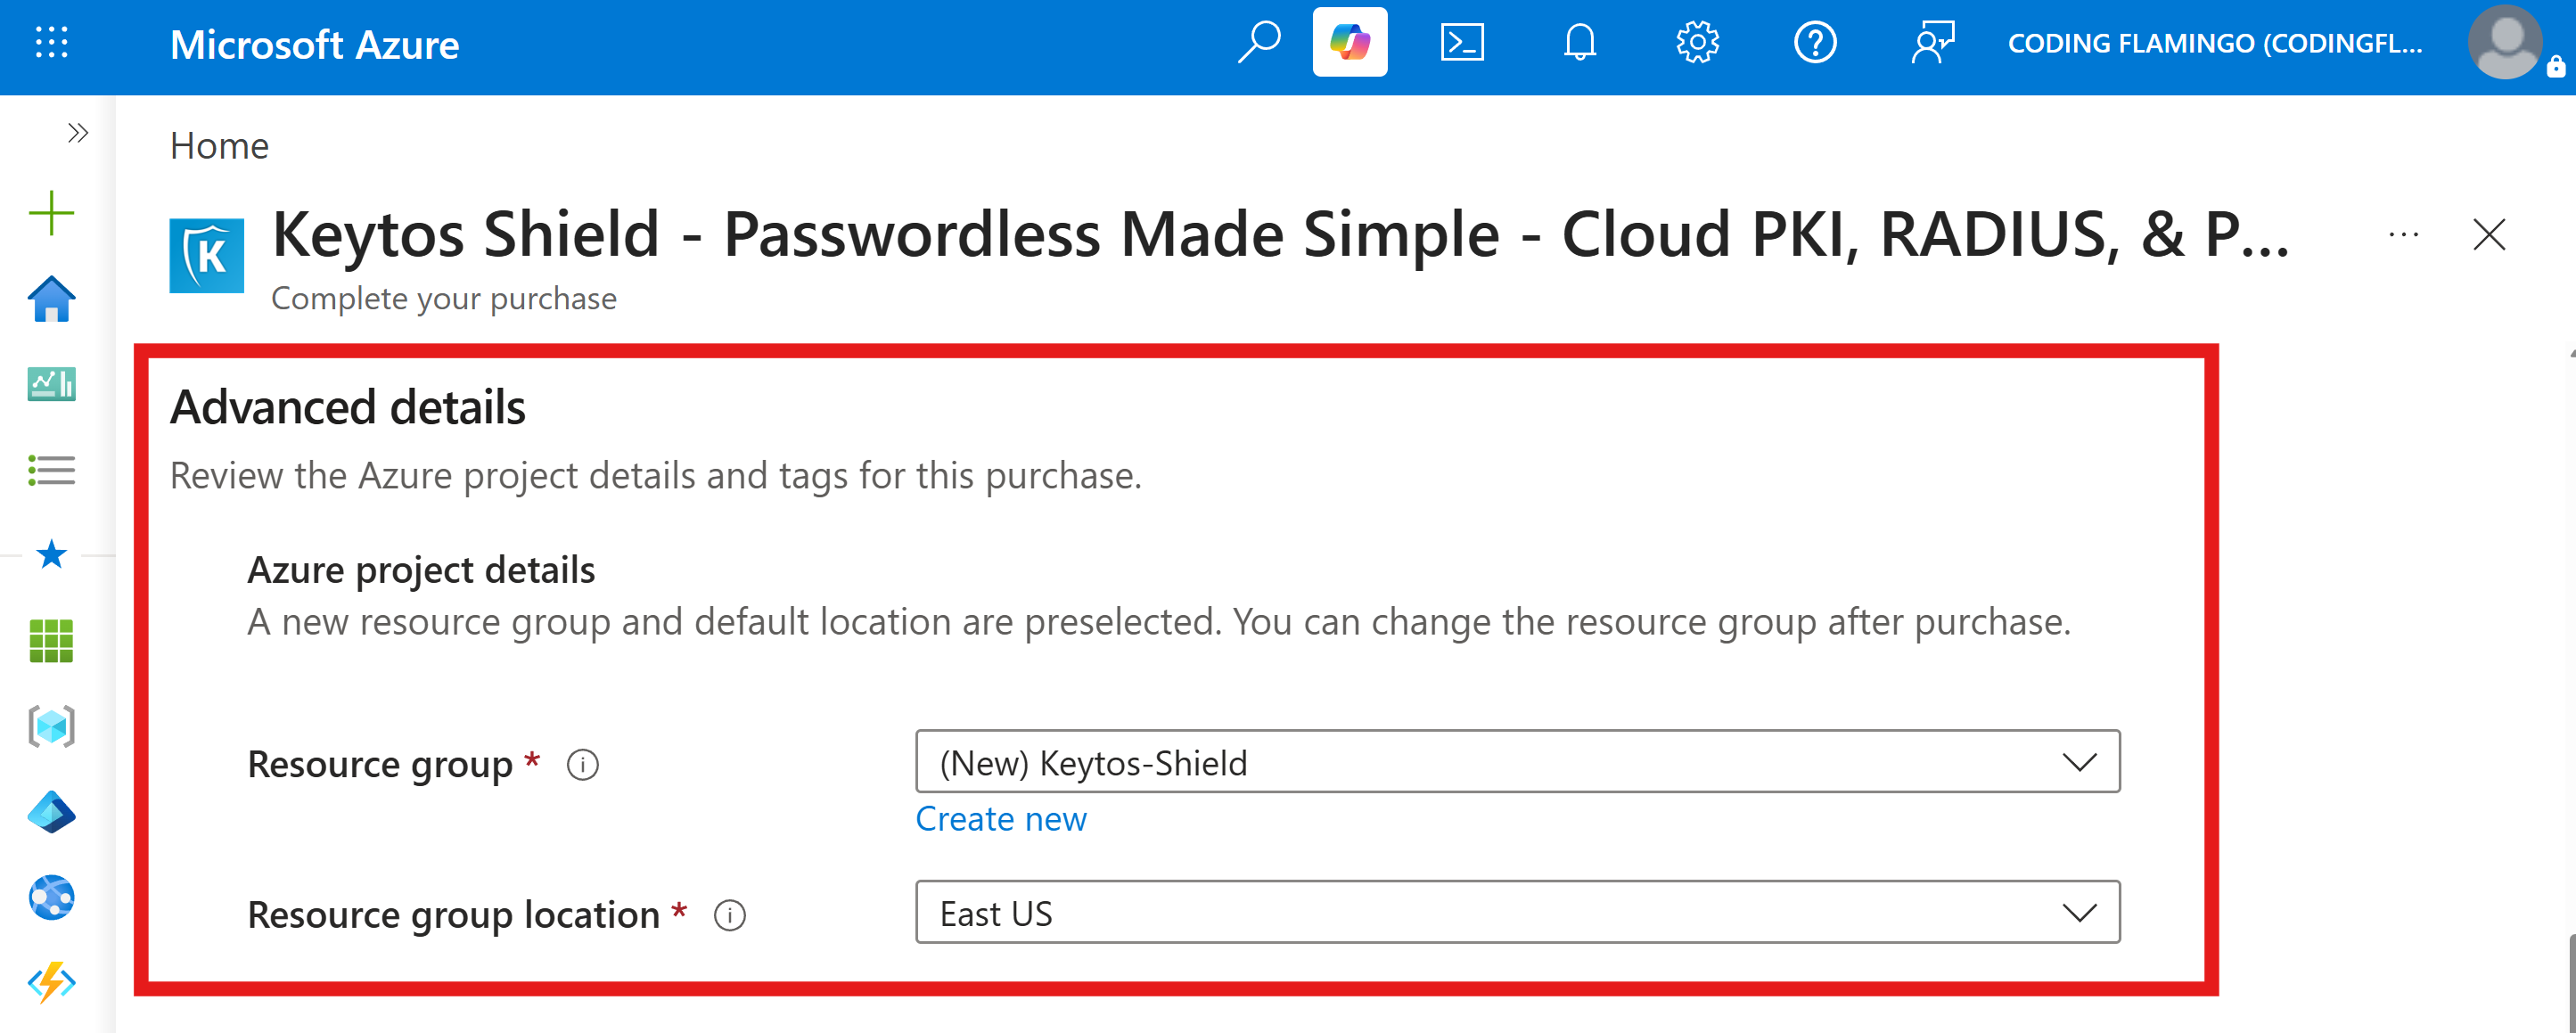
Under Advanced details, you can optionally configure the following settings:
- Resource group: Select the resource group where you want this SaaS resource to be deployed. Note that all backing infrastructure runs in Keytos’ secure environment, so no infrastructure is deployed within your selected resource group. Just the billing resource.
- Resource group location: Select the location for the resource group.
-
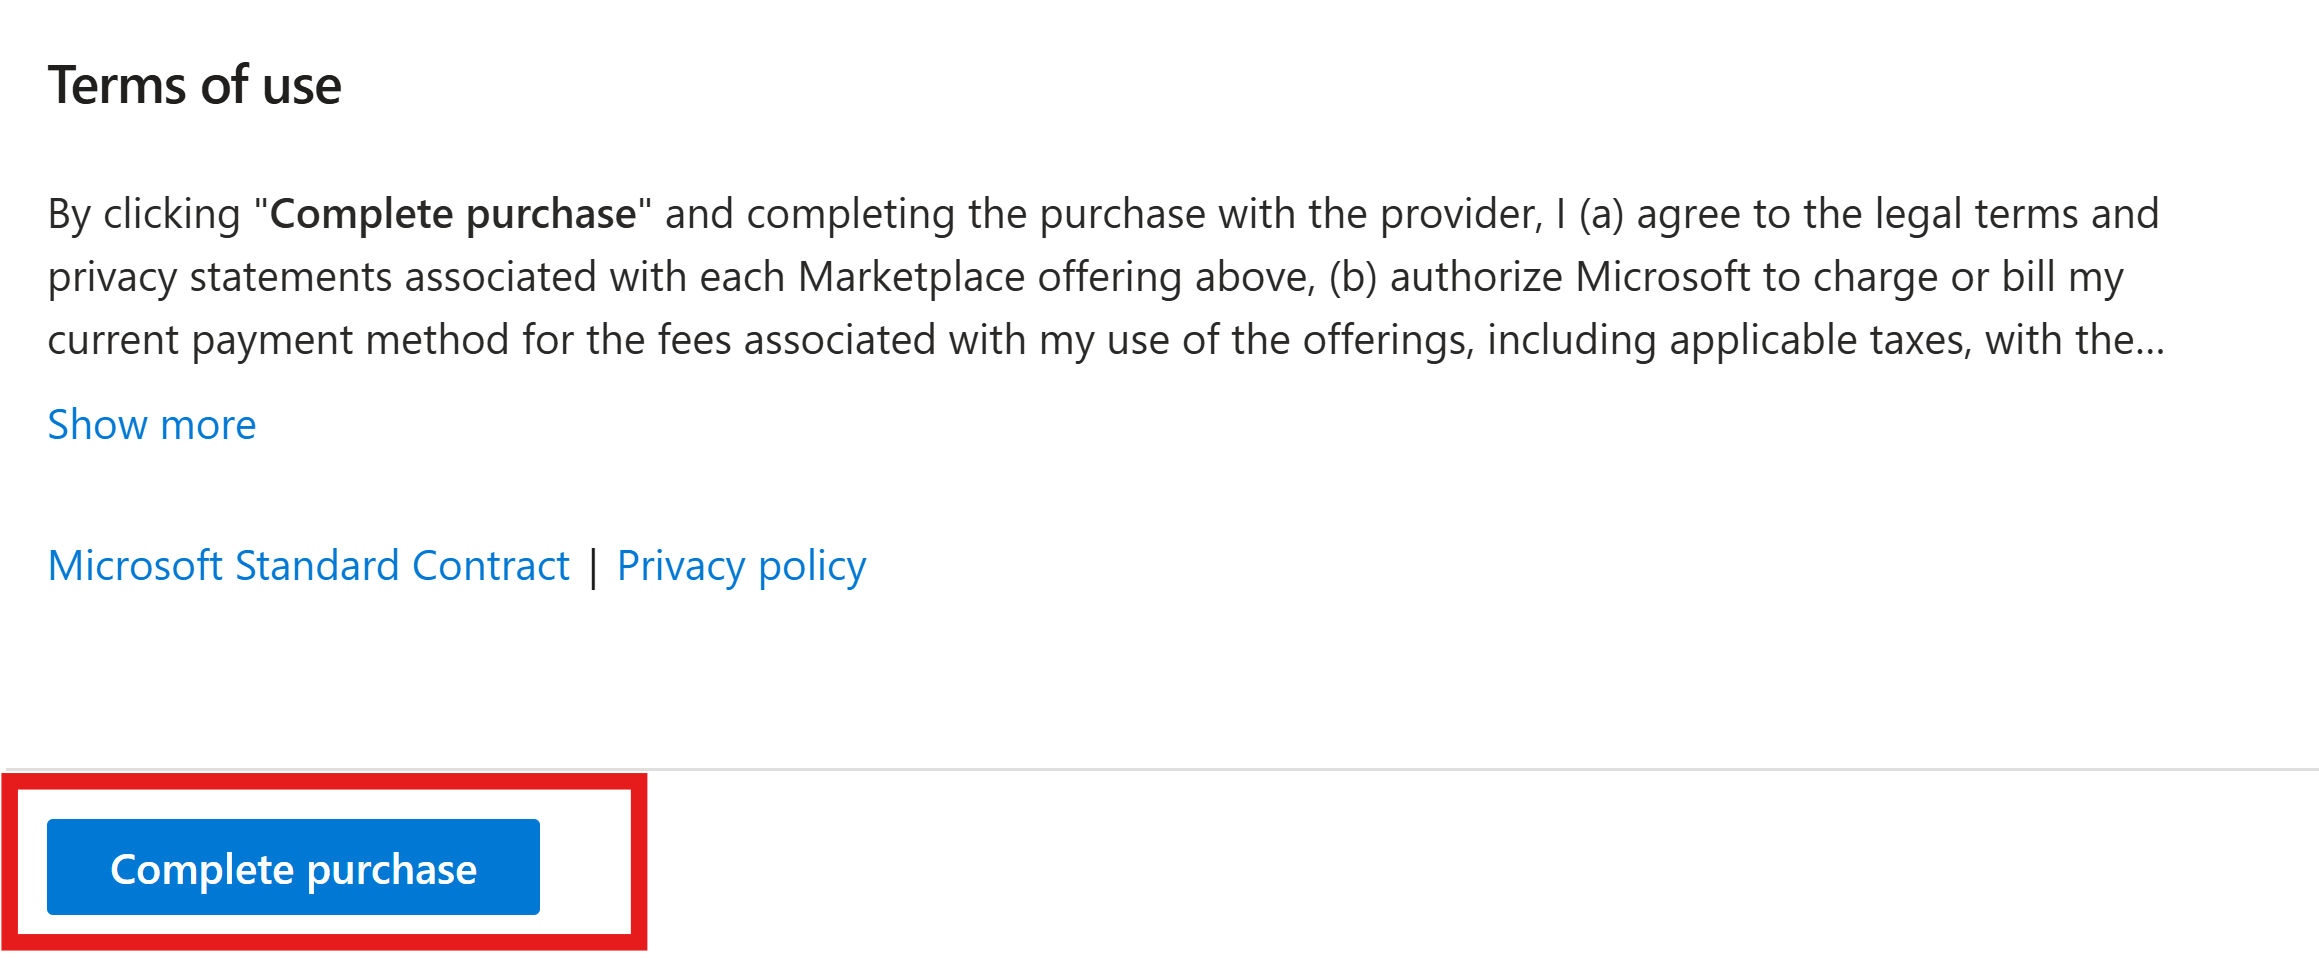
Click Complete purchase to deploy your Keytos Shield subscription. It should take a few seconds to complete.
-
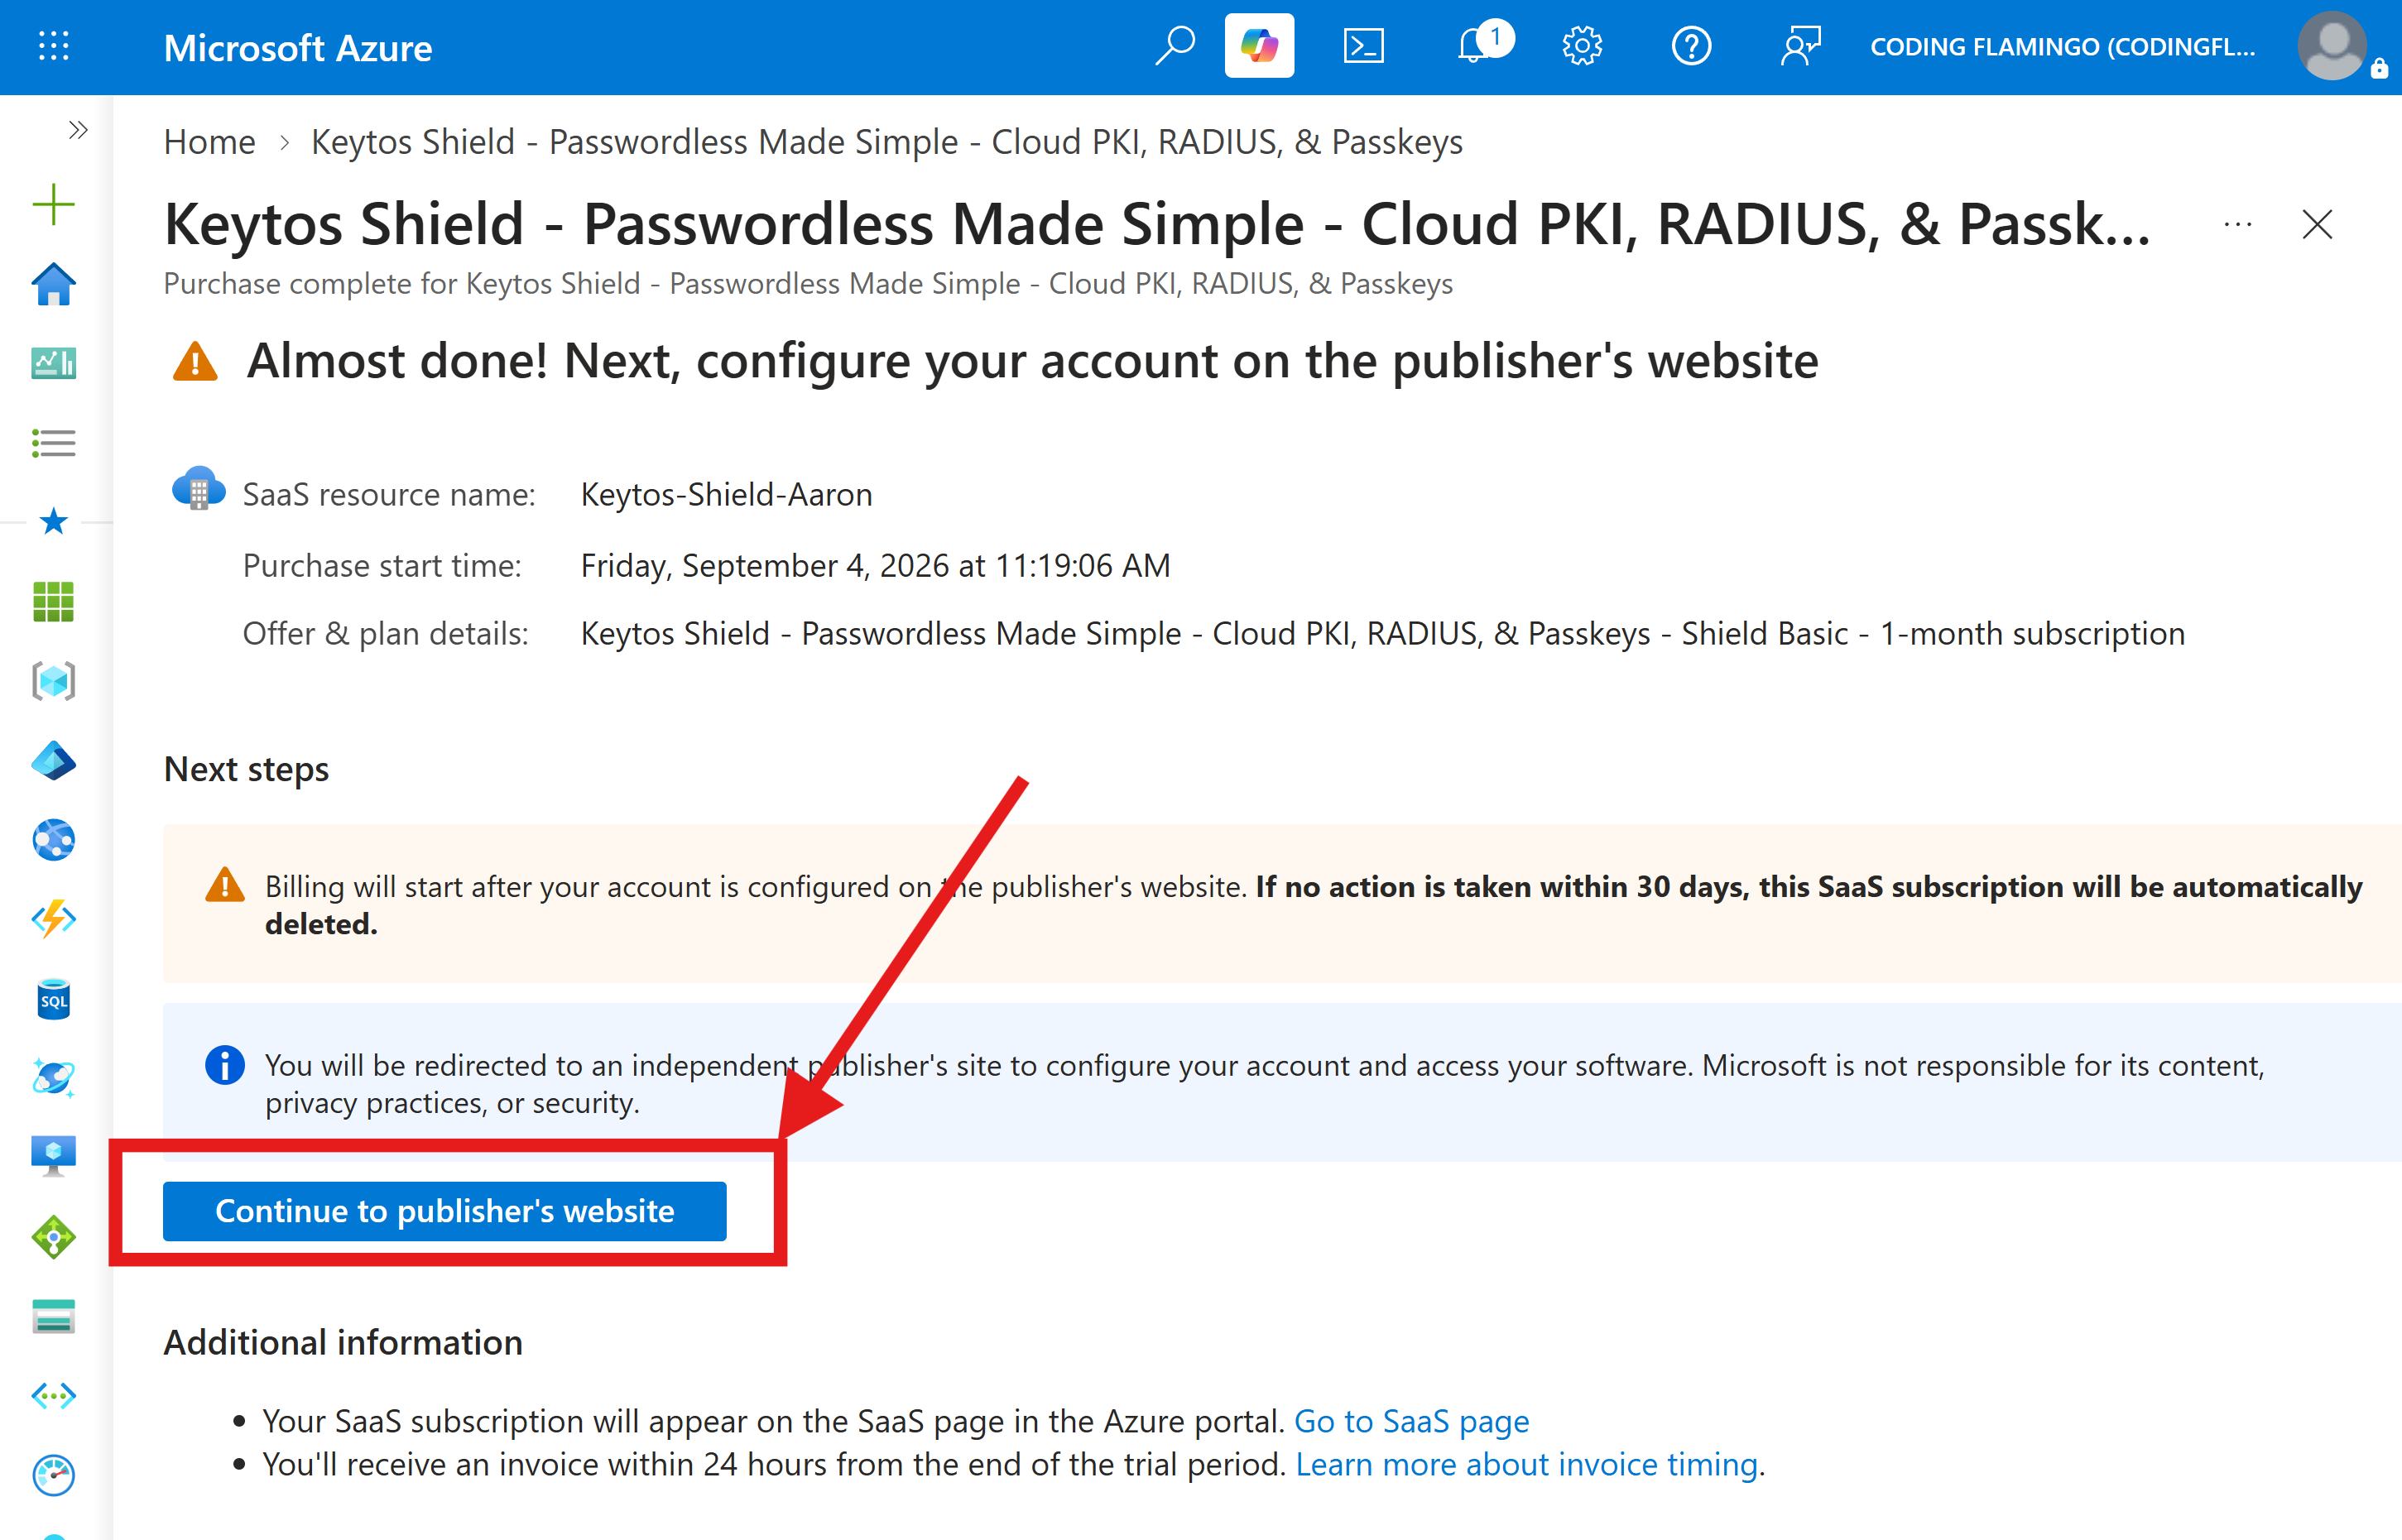
Click Continue to publisher’s website to finalize your Keytos Shield subscription creation.
-
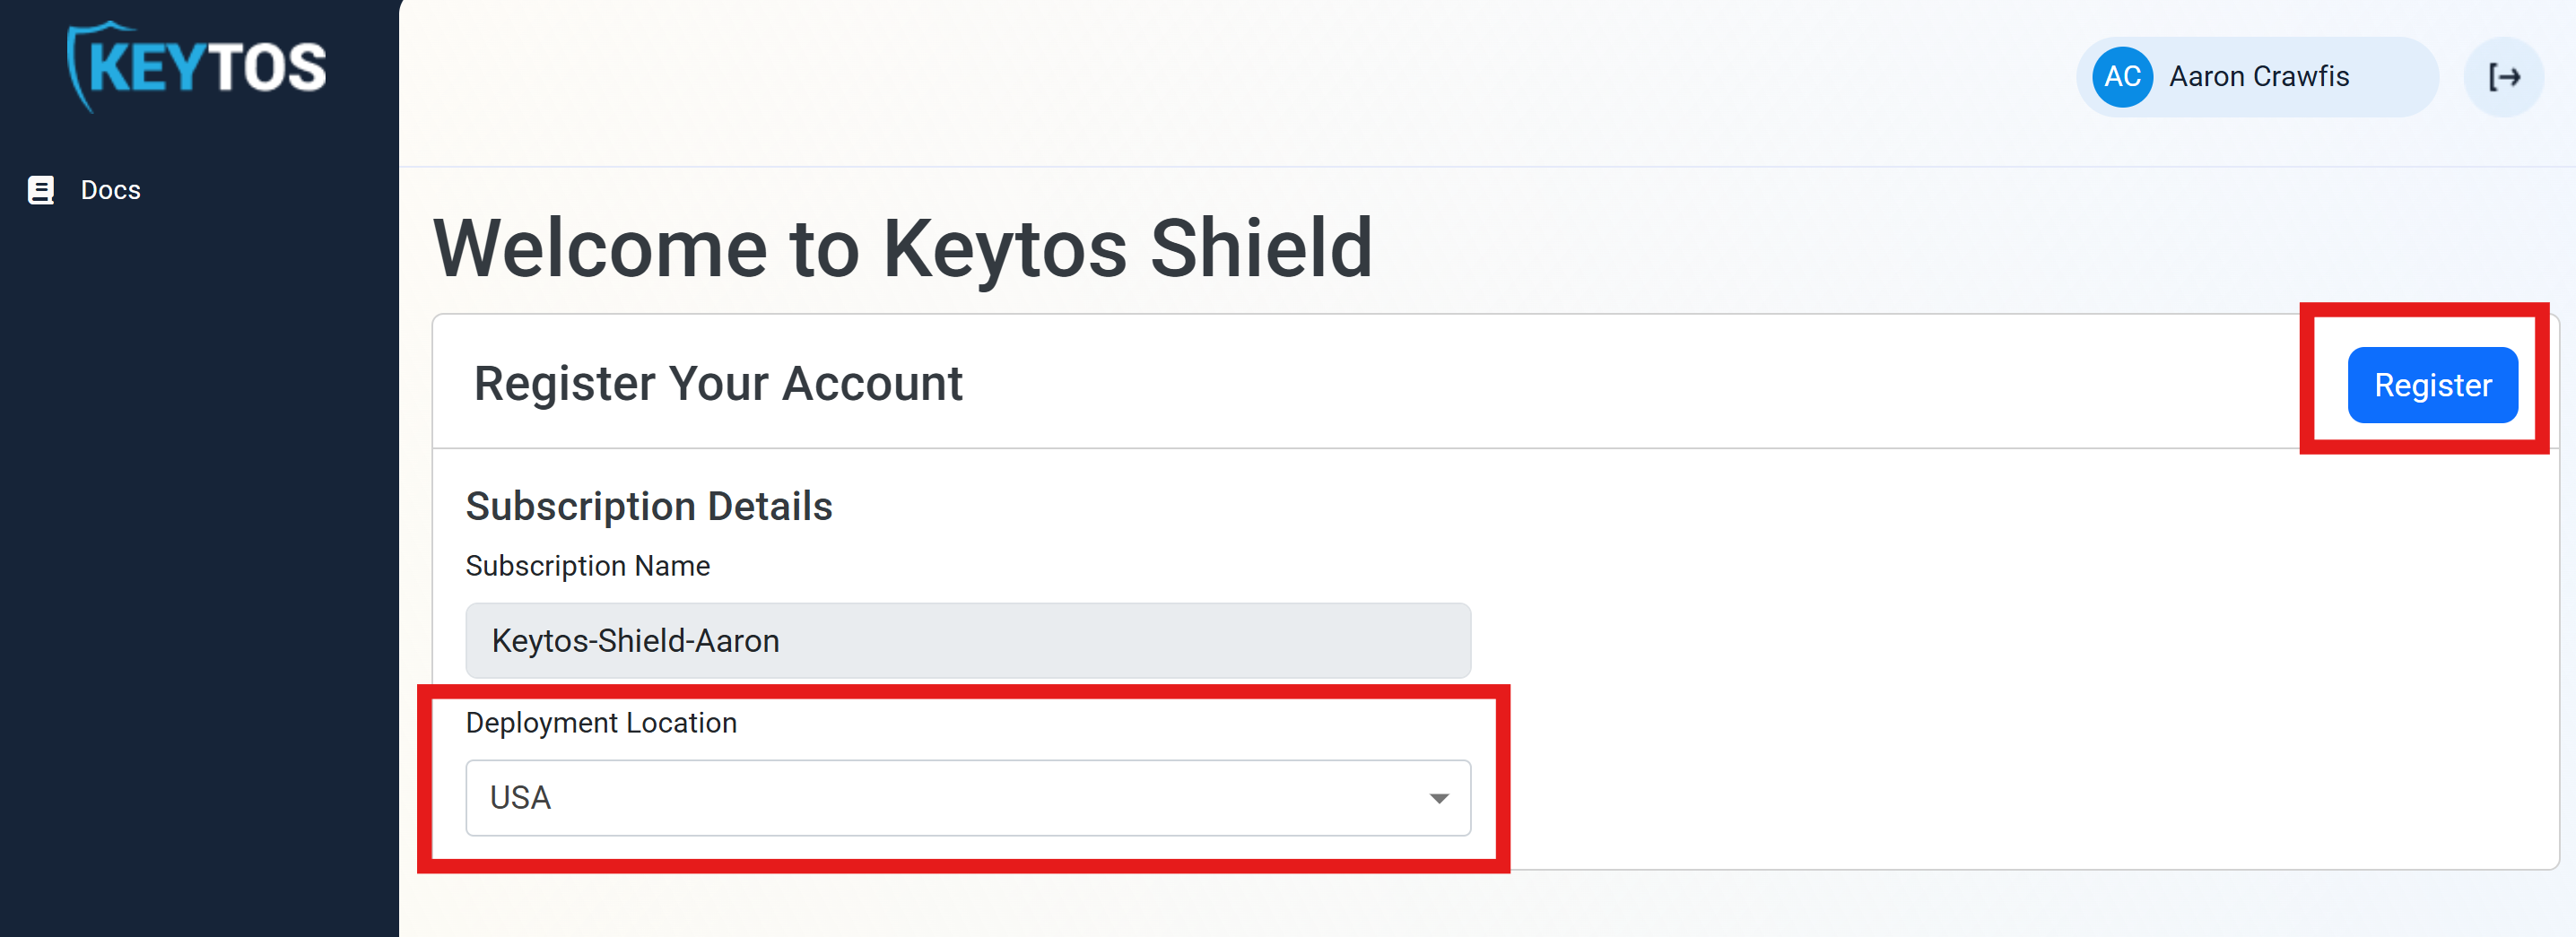
Within the Keytos portal, select a Deployment Location for your subscription and click Register to complete the subscription creation process.
-
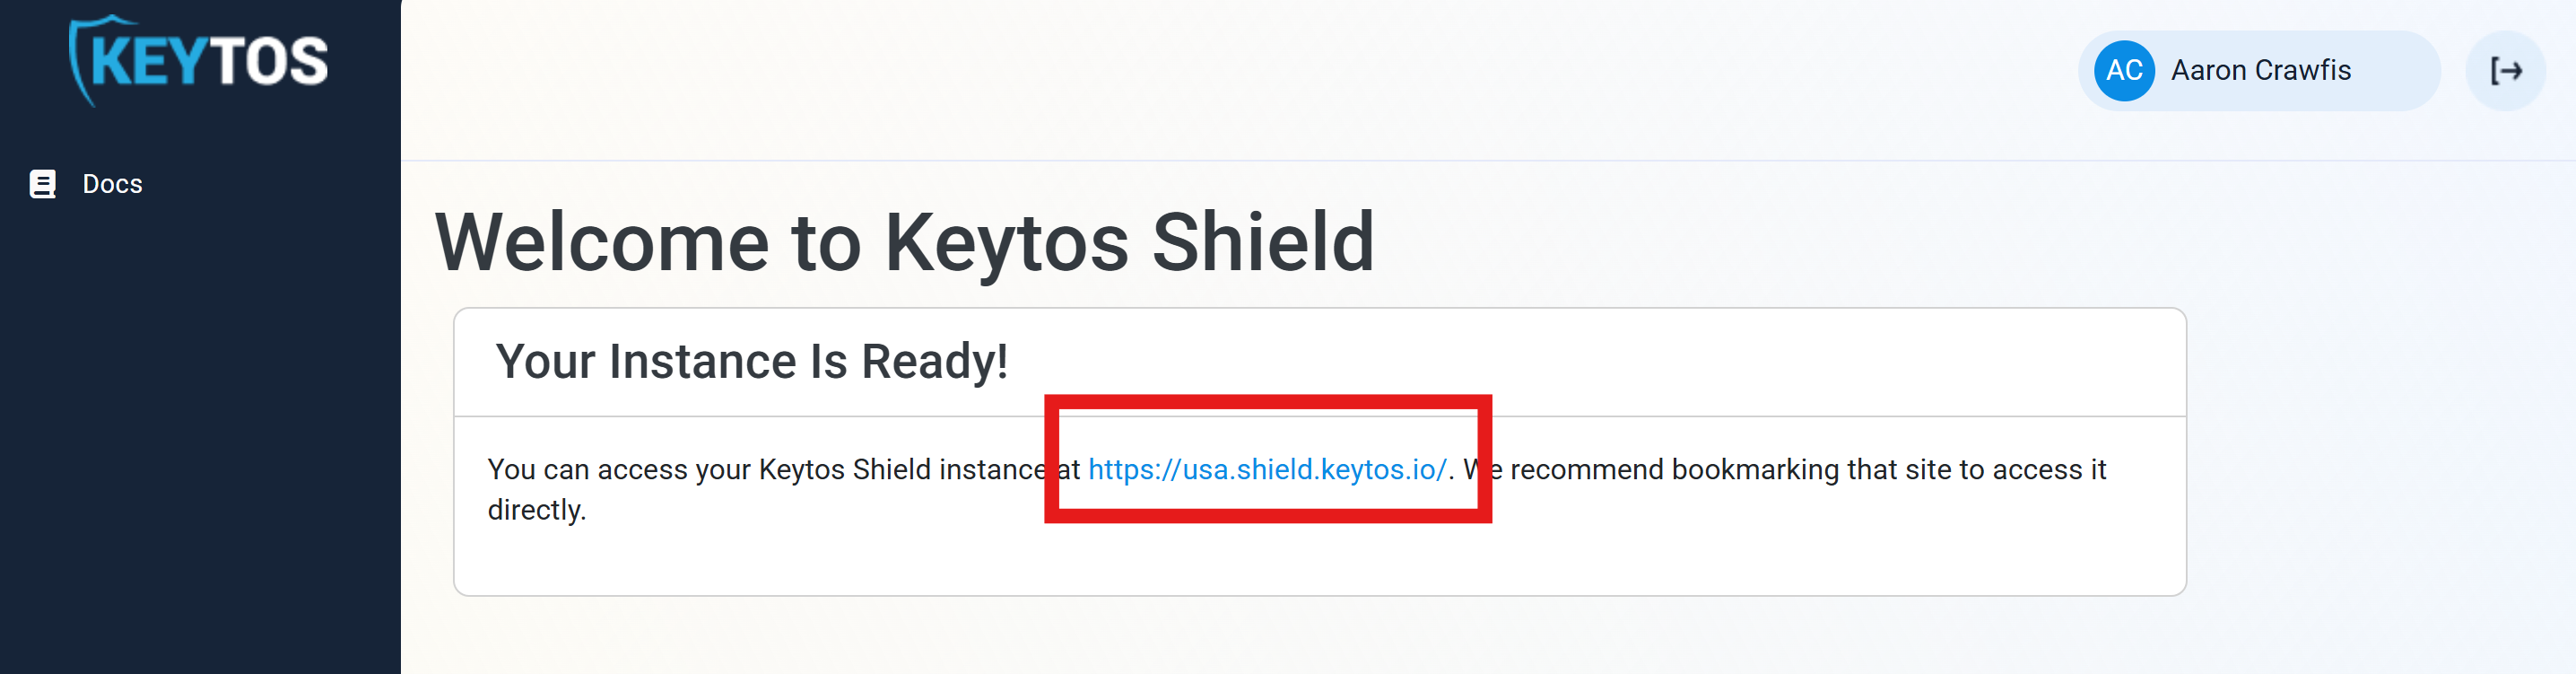
In a few seconds your instance will be ready. Click the instance URL to access your Keytos Shield subscription.
-
Done! You have successfully created your Keytos Shield subscription and can begin your onboarding process.
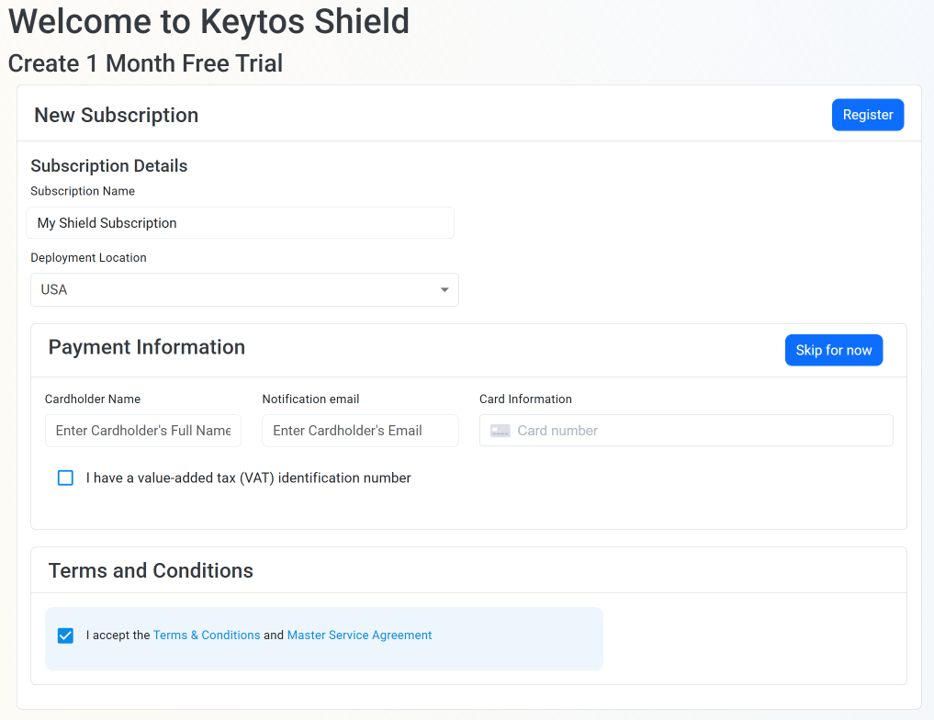
To create a Keytos Shield subscription directly through the Shield portal, follow these steps:
-
Open the Keytos Shield portal in your browser. (US Government Portal).
-
Under Subscription Name, enter a friendly name for your subscription. (you can always change this later)
-
Select a Deployment Location for your subscription. This will be your primary region where your Keytos Shield resources will be hosted.
-
Optionally enter your credit card information. You can click Skip for now if you just want to try out Keytos Shield for free for 1 month and add a payment method later.
- If you are managed by a MSP or reseller, the credit card form will not be shown, and you can proceed with creating your subscription without entering any payment information.
-
Check the Terms & Conditions box to agree to the terms of service.
-
Click Register to create your subscription. It should complete in just a few seconds.
-
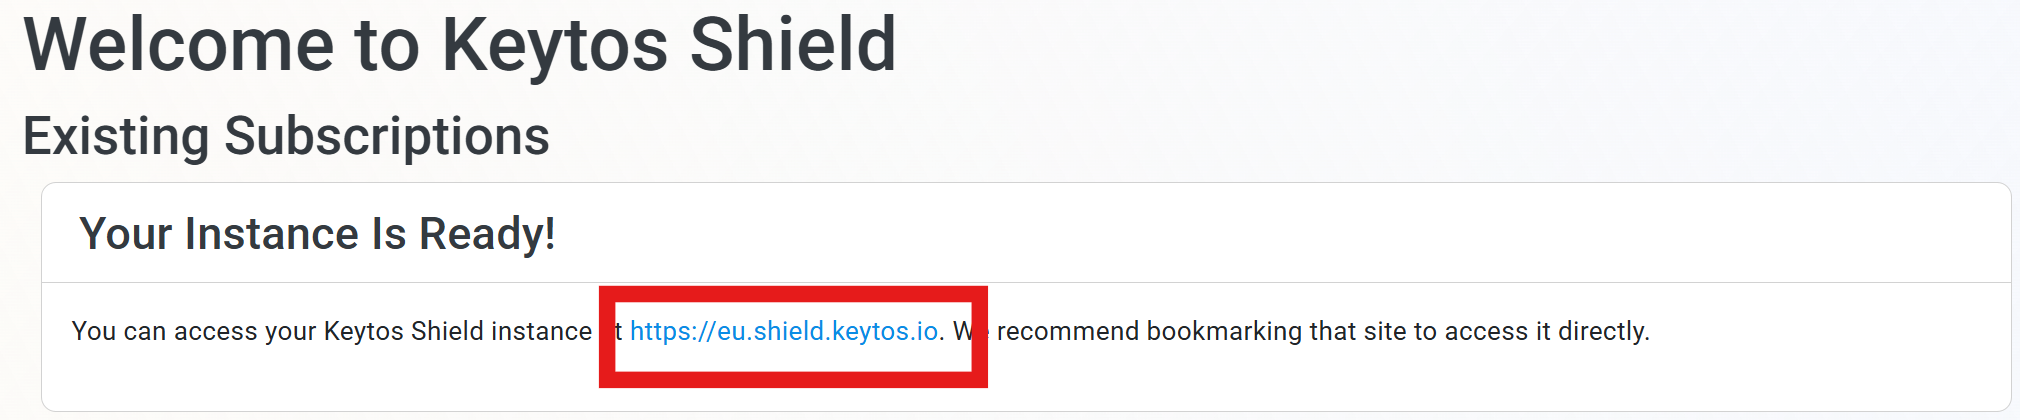
You should now see your newly created Keytos Shield subscription endpoint listed under Existing subscriptions:
Collapses this section and completes the checkmark.
Now that you have created a Keytos Shield subscription, you can proceed to onboard your users to identity security using the onboarding guide.
How to Configure Shield Identity Security via the Onboarding Guide
The Shield onboarding guide will walk you through the steps to onboard your users to phishing-resistant security keys
The interactive onboarding guide in Keytos Shield walks you through every setting you need to start issuing phishing-resistant security keys to your users. Follow these steps to open it.
-
Open the Keytos Shield global portal in your browser. (US Government Portal). Make sure to sign in with the same account you used to create your Keytos Shield subscription.
-
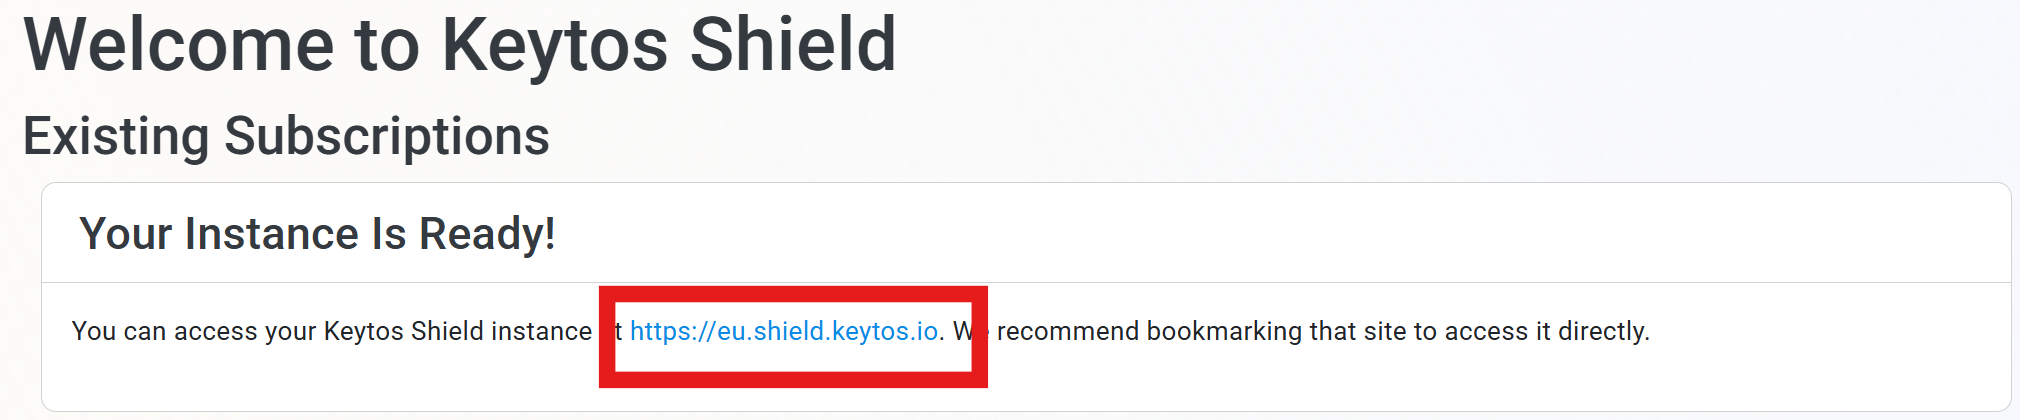
Under Existing subscriptions you’ll see your region-specific Keytos Shield endpoint. Open it to access your Shield portal.
-
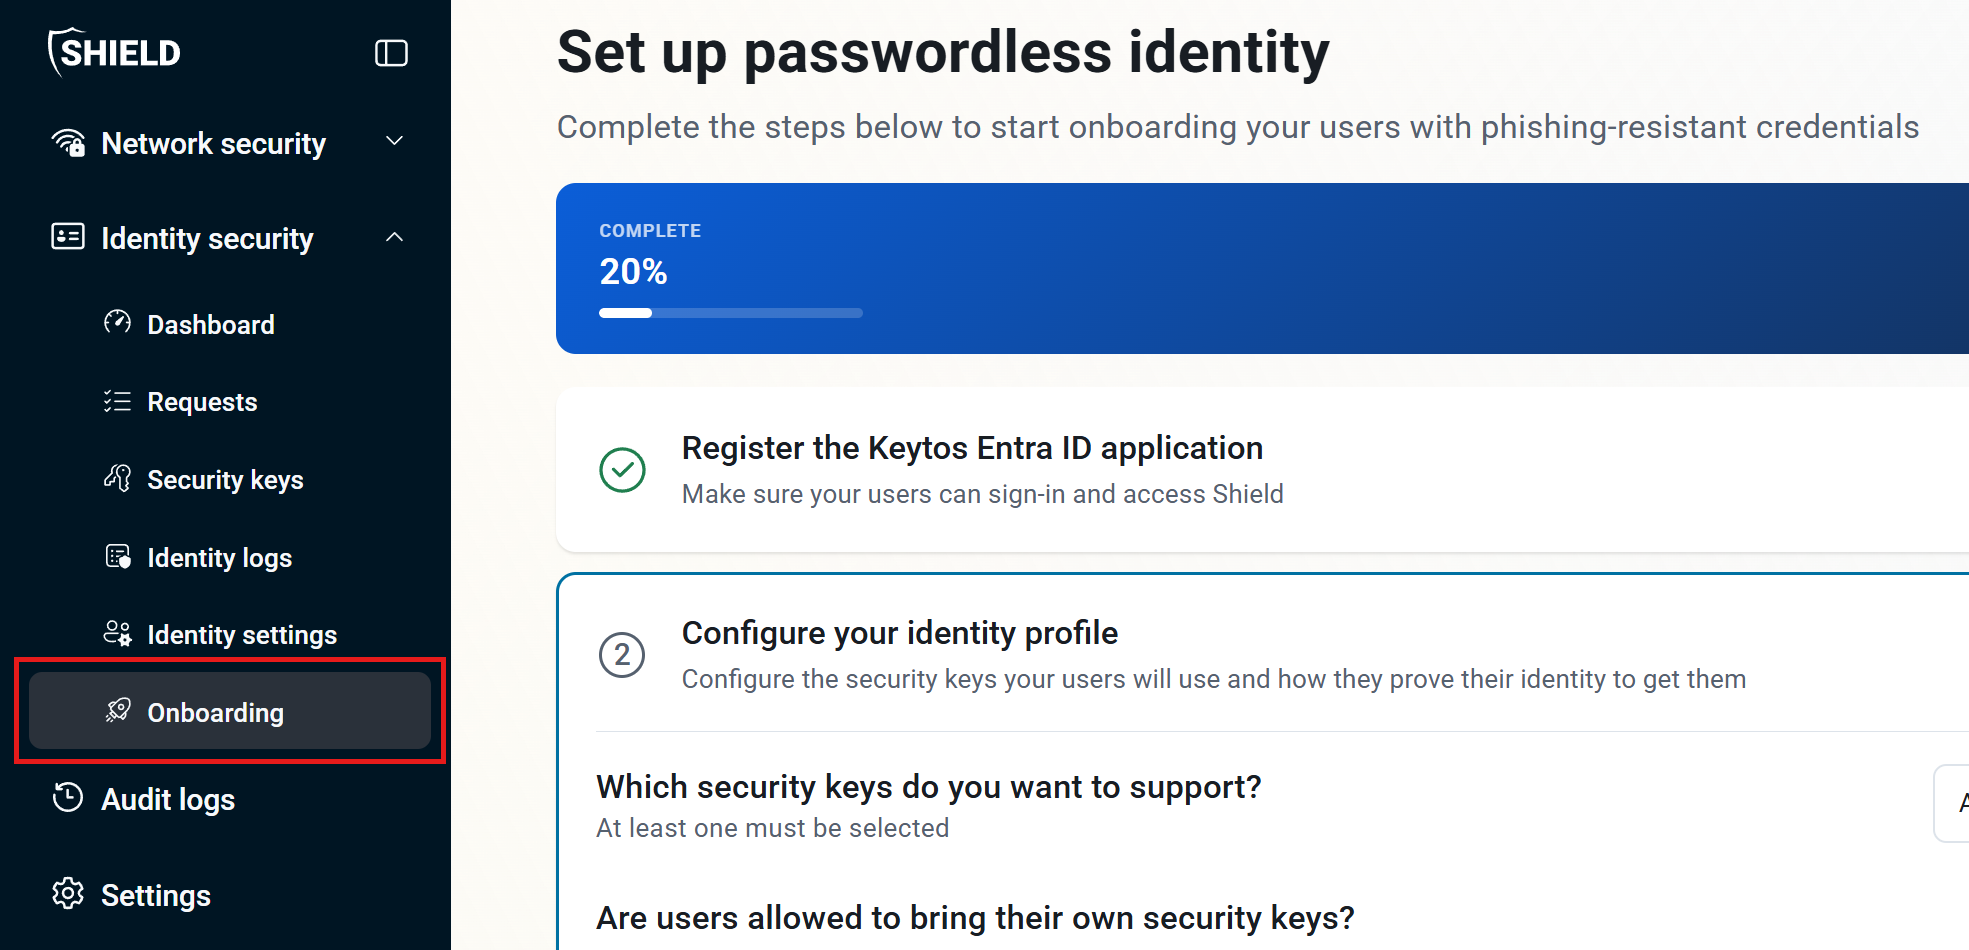
From the left-hand menu, expand Identity security and click Onboarding.
-
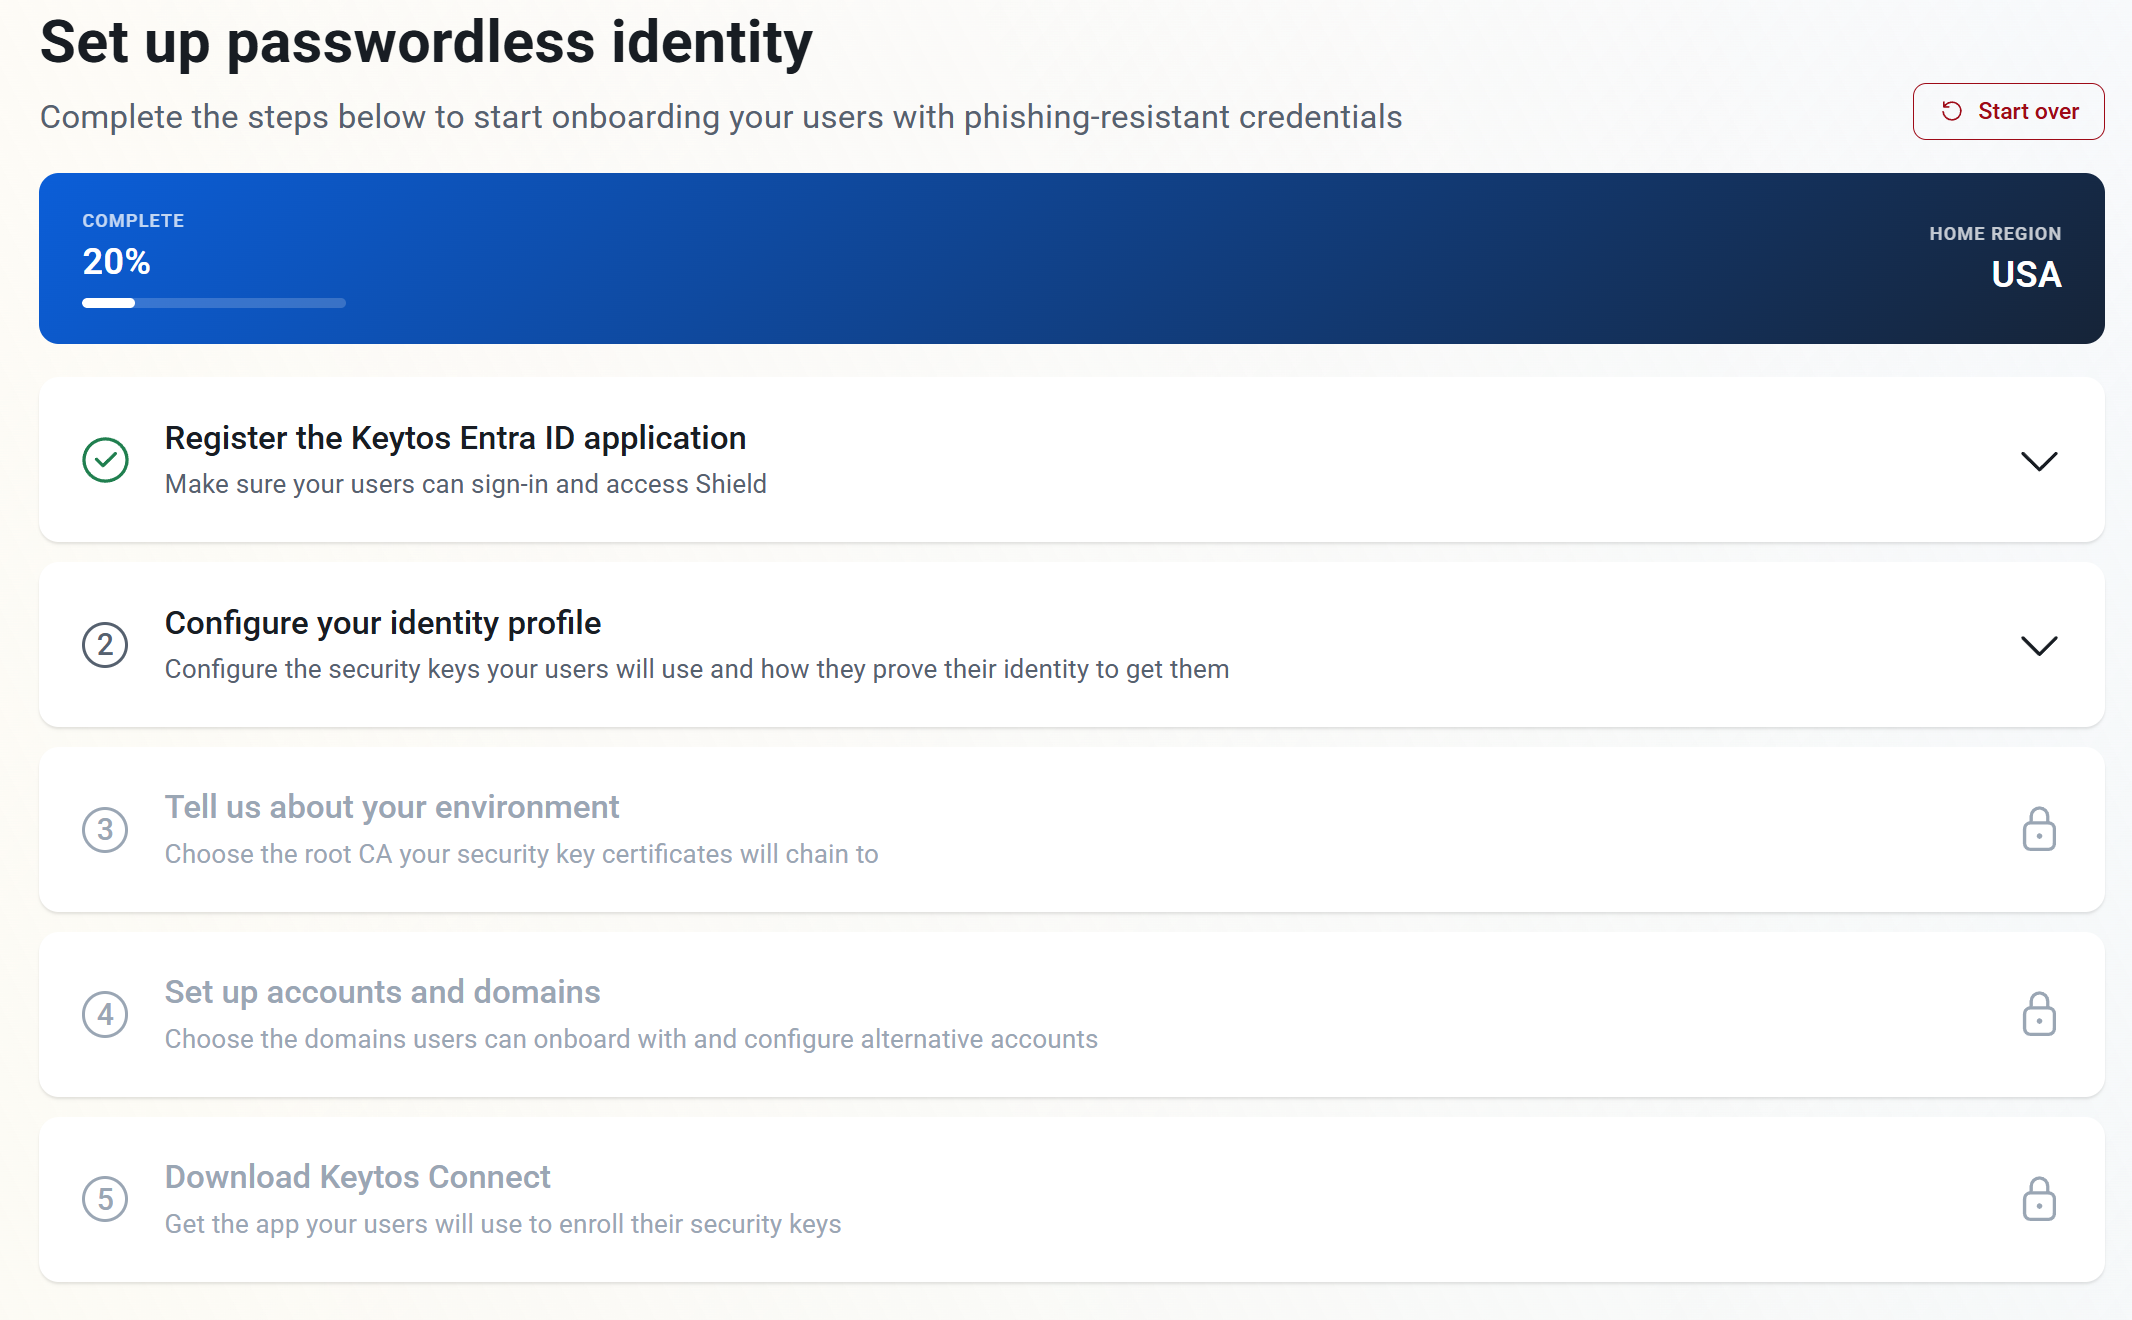
The Set up passwordless identity page shows the five onboarding steps and a progress bar. Steps unlock in order as you mark each one complete.
Collapses this section and completes the checkmark.
How to Register and Consent the Keytos Shield Identity Security Application
Keytos Shield uses a second Entra ID application, Keytos Shield Identity Security, to create phishing-resistant credentials for your users, such as FIDO2 passkeys and smart card certificates on their security keys.
Consenting the Keytos Shield application when you created your subscription doesn’t cover identity security. You must also consent the Keytos Shield Identity Security application, or Shield can’t create credentials for your users.
Use your Global Administrator account (or forward the link to your Global Administrator) to complete the consent.
-
While signed in with your Global Administrator account, click the button below to open the admin consent page for the Keytos Shield Identity Security application.
Register Keytos Shield Identity Security
You can also copy and paste this URL into your browser:
https://login.microsoftonline.com/organizations/adminconsent?client_id=7ac2dedd-8239-469d-88fd-699148118828 -
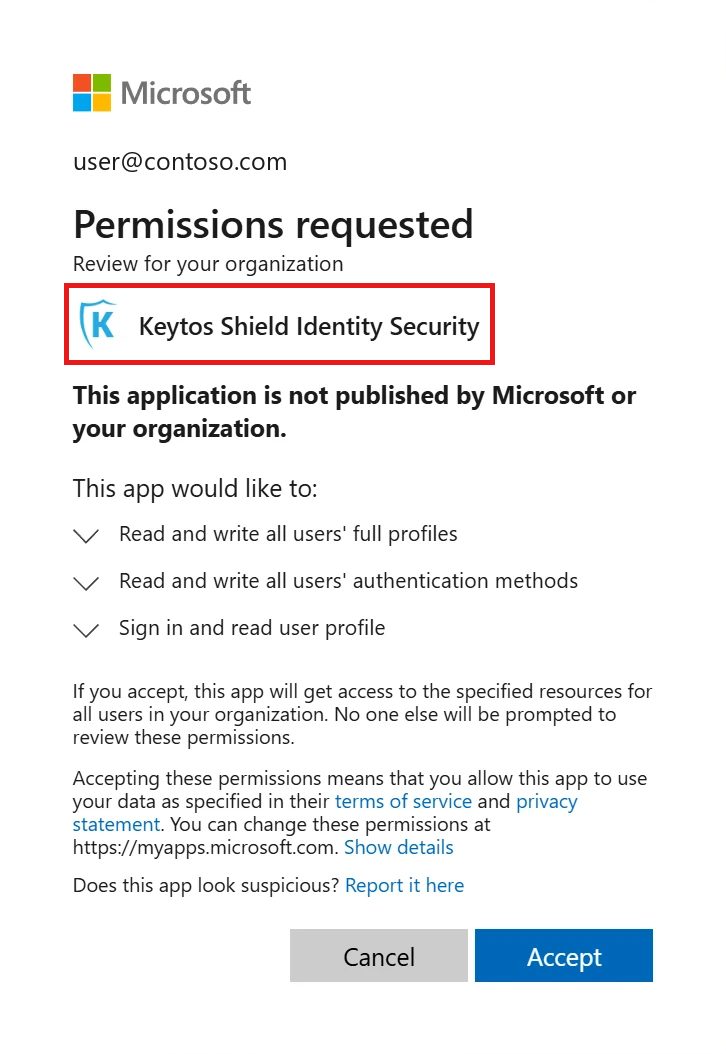
On the Permissions requested screen, check that the application is Keytos Shield Identity Security. The application asks for permission to:
- Read and write all users’ full profiles.
- Read and write all users’ authentication methods, so Shield can register security keys for your users.
- Sign in and read user profile.
-
Click Accept to consent the application for your organization.
-
Return to the Keytos Shield onboarding guide to continue to the next step.
Collapses this section and completes the checkmark.
How to Configure Your Identity Profile and Security Keys
Your identity profile defines which FIDO2 security keys your users can use, who can enroll them, and how users prove their identity before they get a key. We recommend starting with the defaults and narrowing them later from Identity settings once your rollout is underway.
-
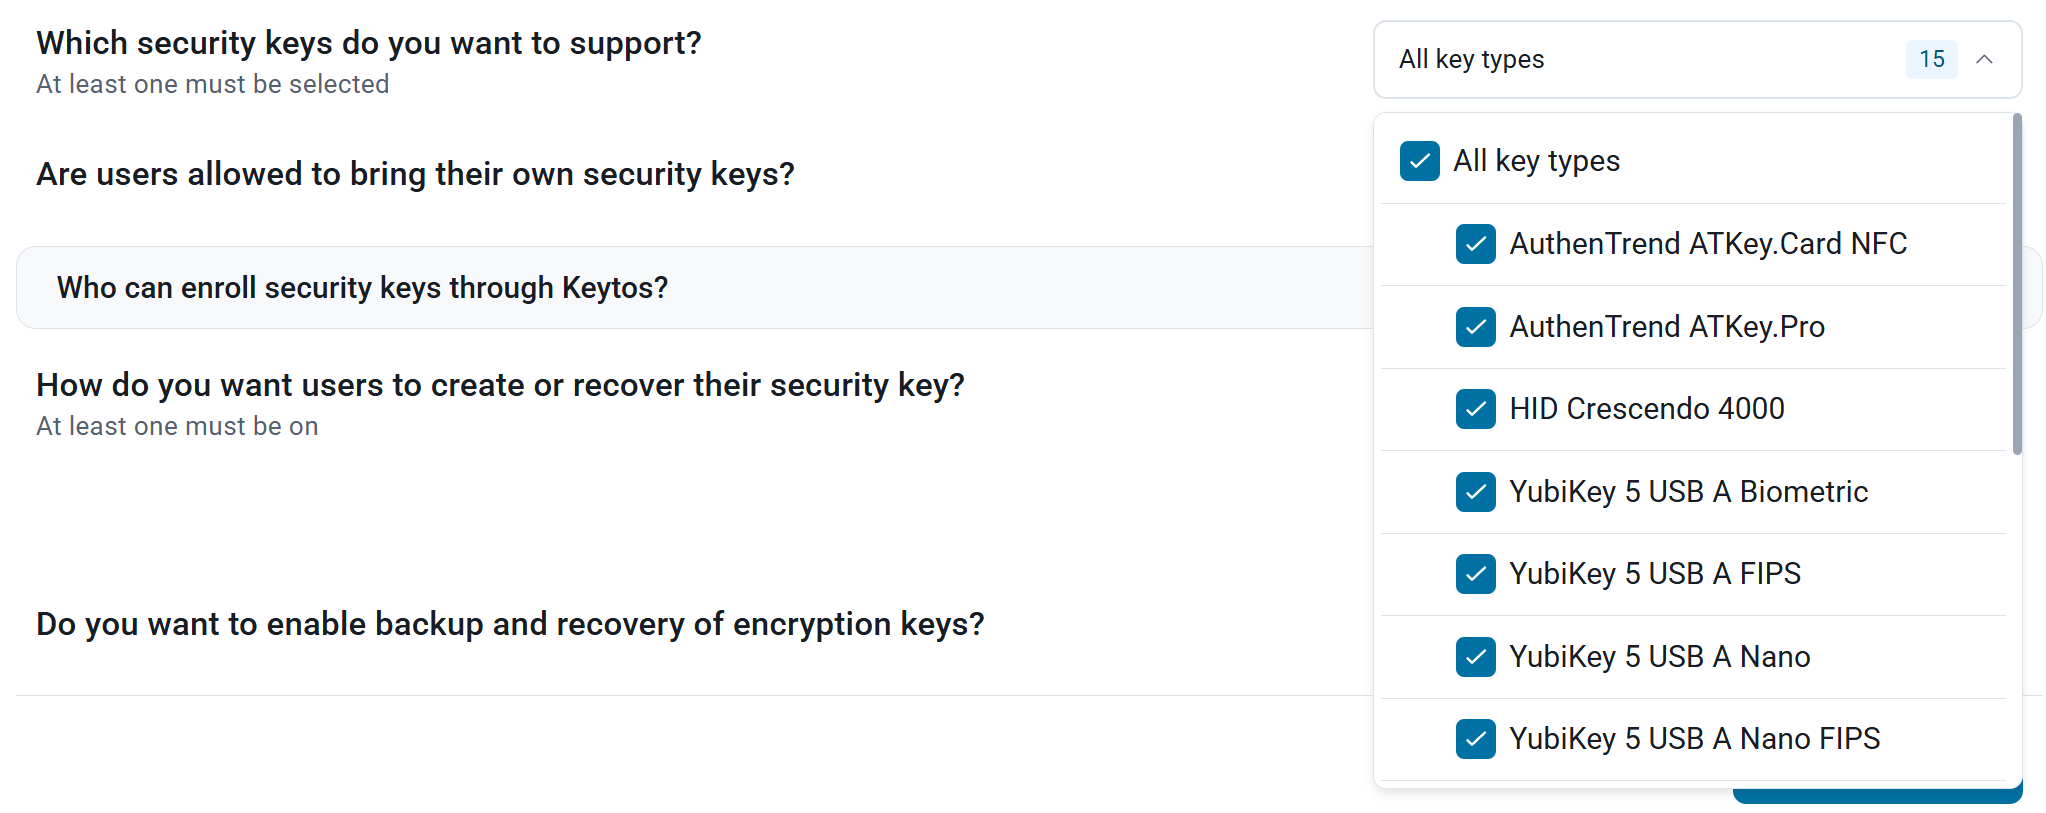
Which security keys do you want to support?
- Open the drop-down and select the security key models you want to allow. All key types is selected by default and includes the supported AuthenTrend, HID Crescendo, and YubiKey 5 series models, including FIPS and biometric versions.
- If your organization standardizes on one model (for example, YubiKey 5 FIPS keys for compliance), clear All key types and select only that model. At least one key type must be selected.
-
Are users allowed to bring their own security keys?
- Select Yes to let users enroll a supported security key they already have.
- Select No if users should only enroll security keys your organization provides.

-
Who can enroll security keys through Keytos?
- Keep All licensed users checked to let every user with a Shield license enroll a security key.
- To start with a pilot group, uncheck All licensed users and search for the Entra ID users or groups who can enroll. Users only need to be selected directly or be a member of one selected group.

-
How do you want users to create or recover their security key? Choose how users verify their identity before Shield lets them set up a new security key or recover a lost one. At least one option must be on.
- Government ID and face recognition: Users verify their identity with a government-issued ID and face recognition.
- Existing Entra ID credential: Users sign in with their current Entra ID credential to enroll their security key. This option is on by default.
- IT help desk: Your IT help desk verifies the user and helps them set up or recover their security key.

-
Do you want to enable backup and recovery of encryption keys?
- We recommend keeping this set to Yes so users can recover their encryption keys if a security key is lost or replaced. If you disable it, anything encrypted with a lost key’s encryption certificate can’t be recovered.
- Note that this is the encryption key in the 9D slot, not the authentication key in the 9A slot.
-
Click Mark as complete to save your identity profile and continue to the next step.

Collapses this section and completes the checkmark.
How to Choose the Root CA for Your Security Key Certificates
Keytos Shield includes a cloud PKI that issues the certificates on your users’ security keys. In this step, you choose which Root CA those certificates chain up to. If you don’t have an on-premises PKI, Shield creates and manages the Root CA for you.
If this section is greyed out, that means it was already completed during network security onboarding. You don’t need to take any further action here and can proceed to the next step.
Use the tabs below to follow the path that matches your environment.
Choose this option if you don’t have an on-premises PKI, or you want Shield to manage your entire certificate chain.
-
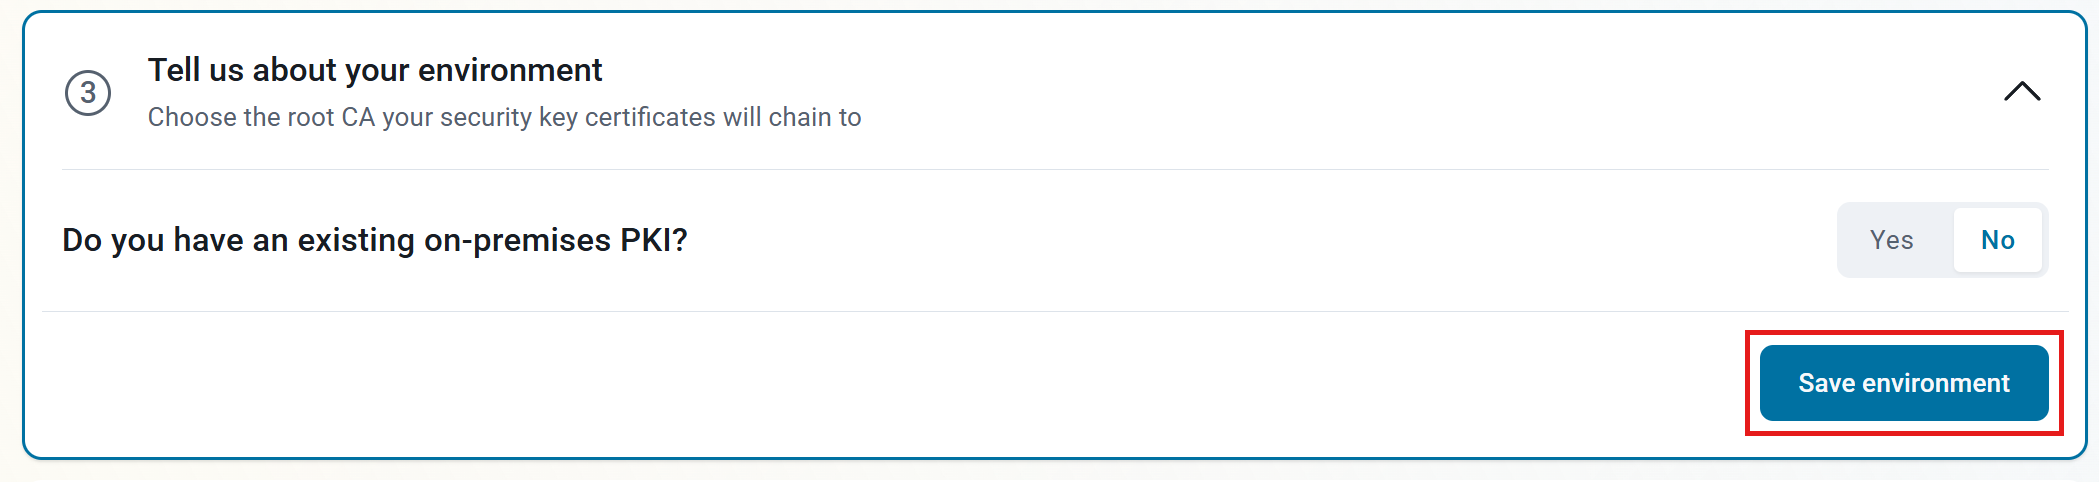
For Do you have an existing on-premises PKI?, select No.
-
Click Save environment. Shield takes about 30 seconds to set up your certificate authorities, and then the next step unlocks.
Choose this option if you want your security key certificates to chain up to your existing offline Root CA.
-
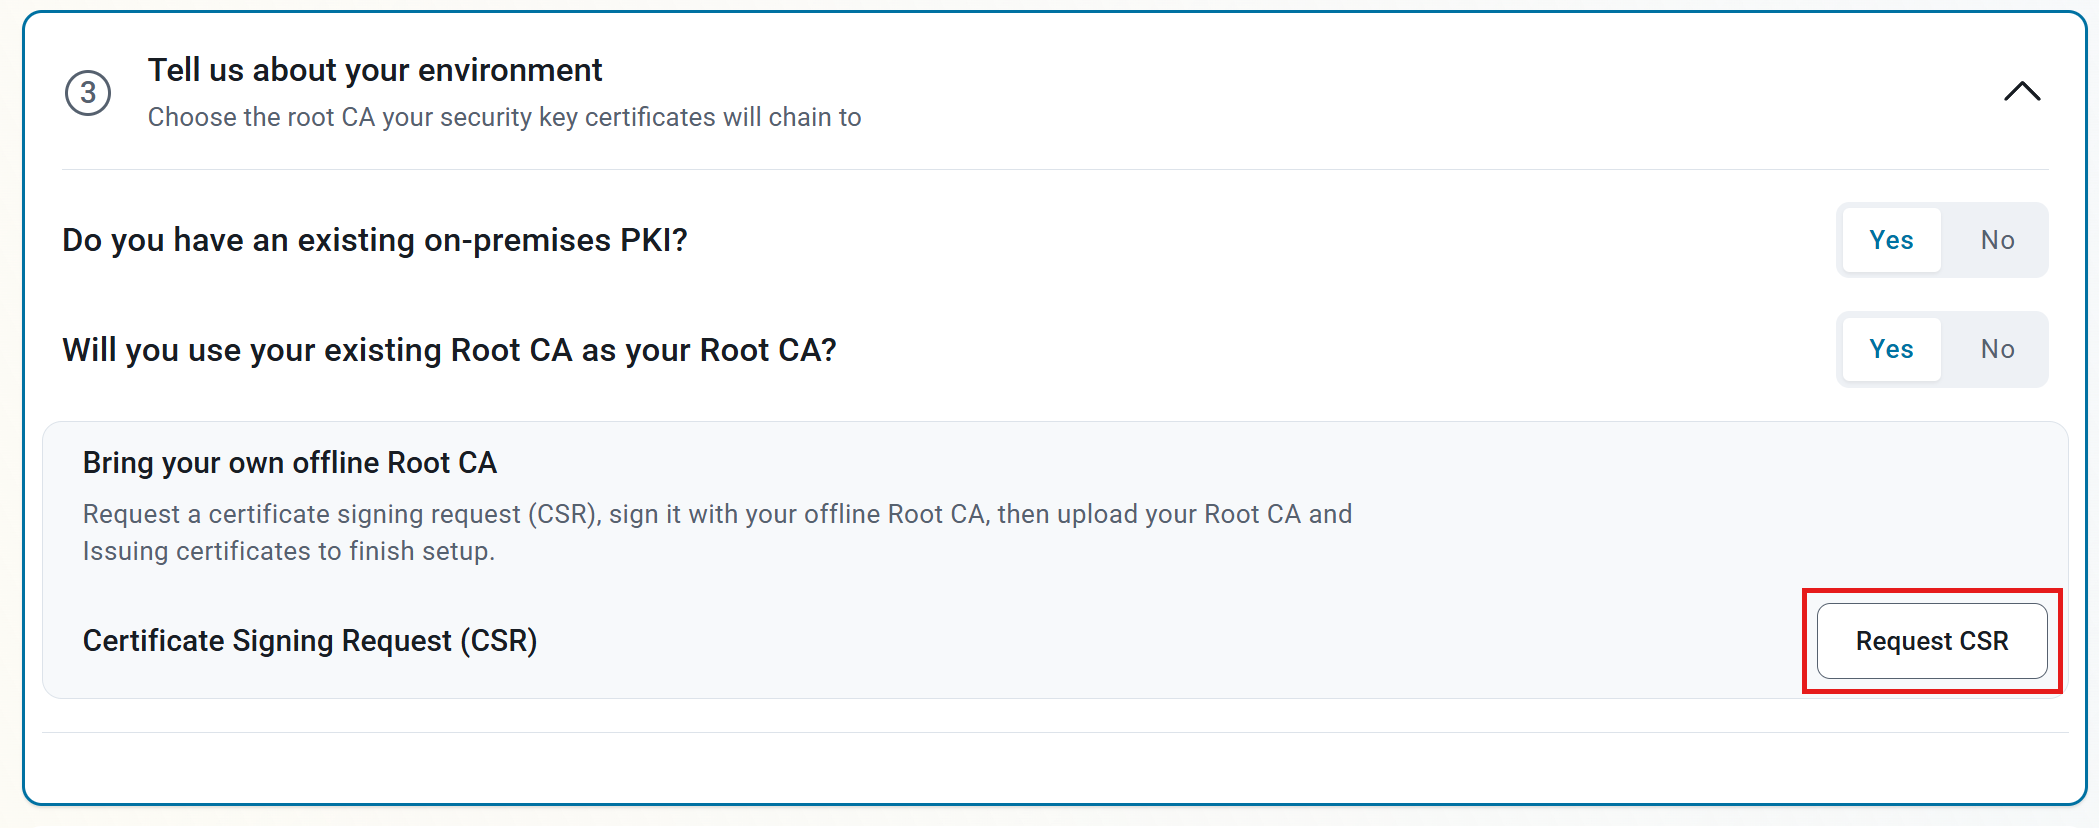
For Do you have an existing on-premises PKI?, select Yes.
-
For Will you use your existing Root CA as your Root CA?, select Yes.
-
Under Bring your own offline Root CA, click Request CSR to generate a certificate signing request (CSR) for your Shield Issuing CA.
-
Sign the CSR with your offline Root CA.
-
Upload your Root CA certificate and the signed Issuing CA certificate to Shield to finish setting up your environment.
Collapses this section and completes the checkmark.
How to Choose Which Domains and Accounts Can Enroll Security Keys
In this step you choose which of your Entra ID domains can onboard to Shield, and set up alternative accounts such as separate admin accounts.
How to Select the Domains That Can Onboard with Shield
-
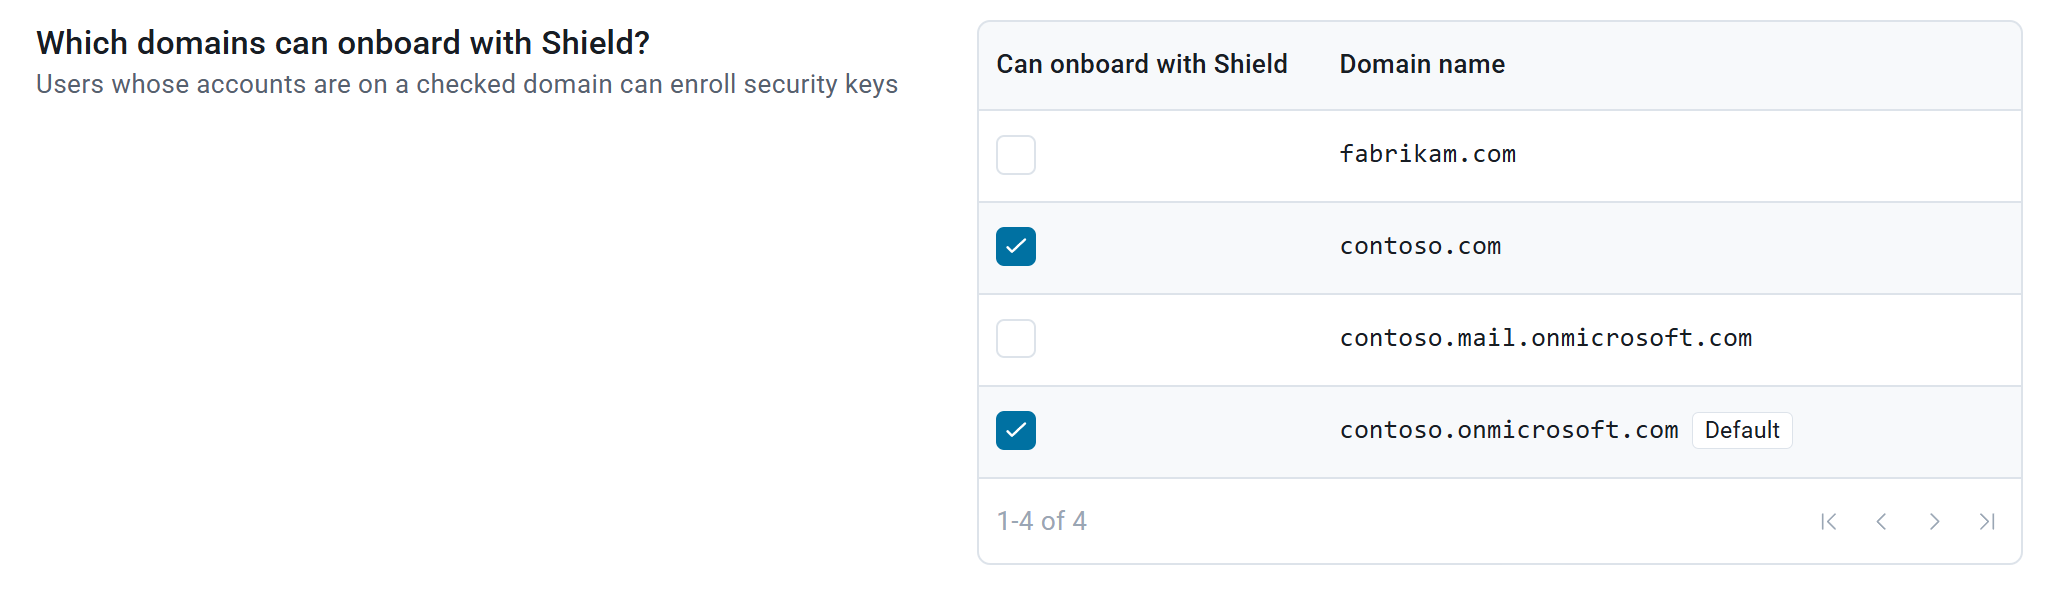
Under Which domains can onboard with Shield?, check Can onboard with Shield for every domain your users sign in with. Users whose accounts are on a checked domain can enroll security keys.
- Your Entra ID tenant’s Default domain is checked by default. You can uncheck it if needed.
- A domain that an alternative account uses (see below) must be checked to allow users to enroll security keys for accounts on that domain.
How to Set Up Alternative Accounts (optional)
Many organizations give administrators a second account, such as adm_jsmith or jsmith-admin, to keep privileged access separate from everyday work. Setting up alternative accounts lets Shield link these accounts to the user’s primary account.
-
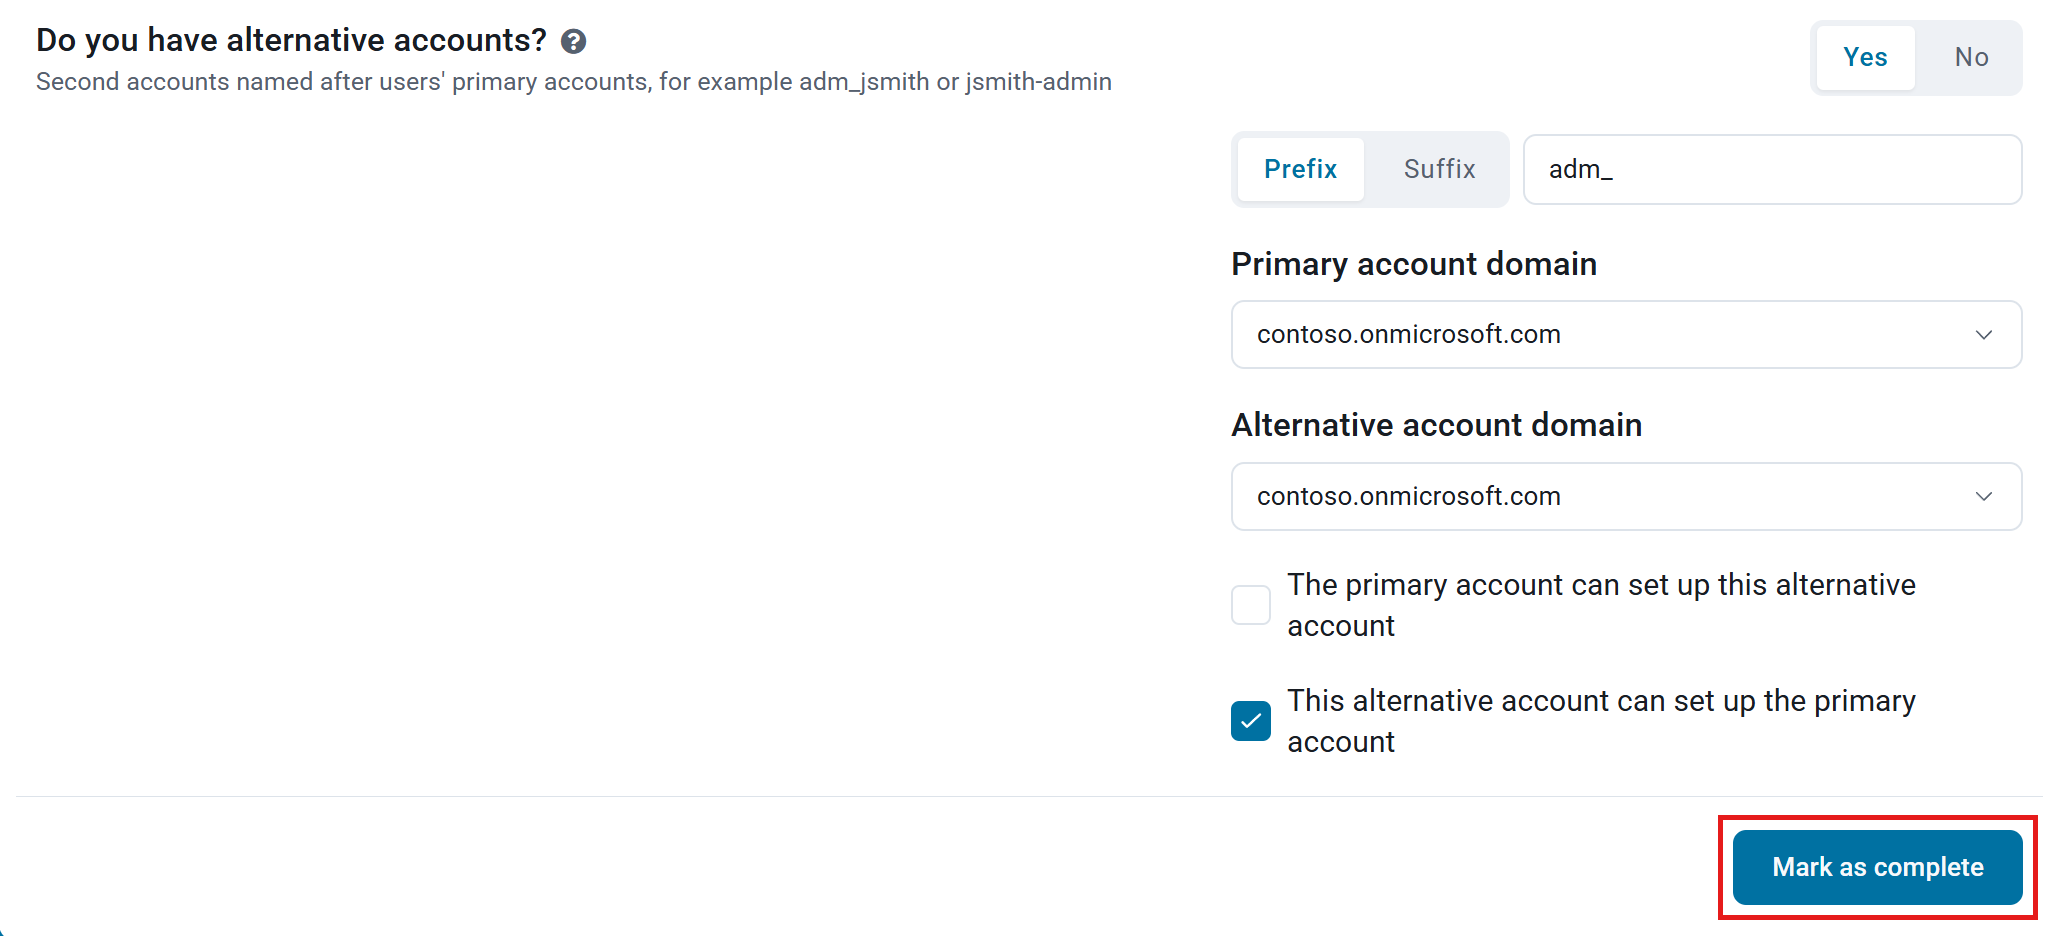
For Do you have alternative accounts?, select Yes. If you don’t use alternative accounts, select No and skip to the last step below.
-
Select Prefix or Suffix, and enter the text your alternative accounts add to the primary account name (for example
adm_foradm_jsmith). -
Select the Primary account domain and the Alternative account domain.
-
Choose who can set up which account:
- The primary account can set up this alternative account: lets users enroll a security key for their alternative account while signed in with their primary account.
- This alternative account can set up the primary account: lets users enroll a security key for their primary account while signed in with their alternative account.
Have more than one naming pattern? You can set up one alternative account here. Add more from the Alternative accounts settings page once onboarding is complete.
-
Click Mark as complete to save your domains and accounts and continue to the next step.
Collapses this section and completes the checkmark.
How to Share Keytos Connect with Your Users
Your users enroll their security keys with the Keytos Connect app. The last onboarding step gives you a download link to share with them.
-
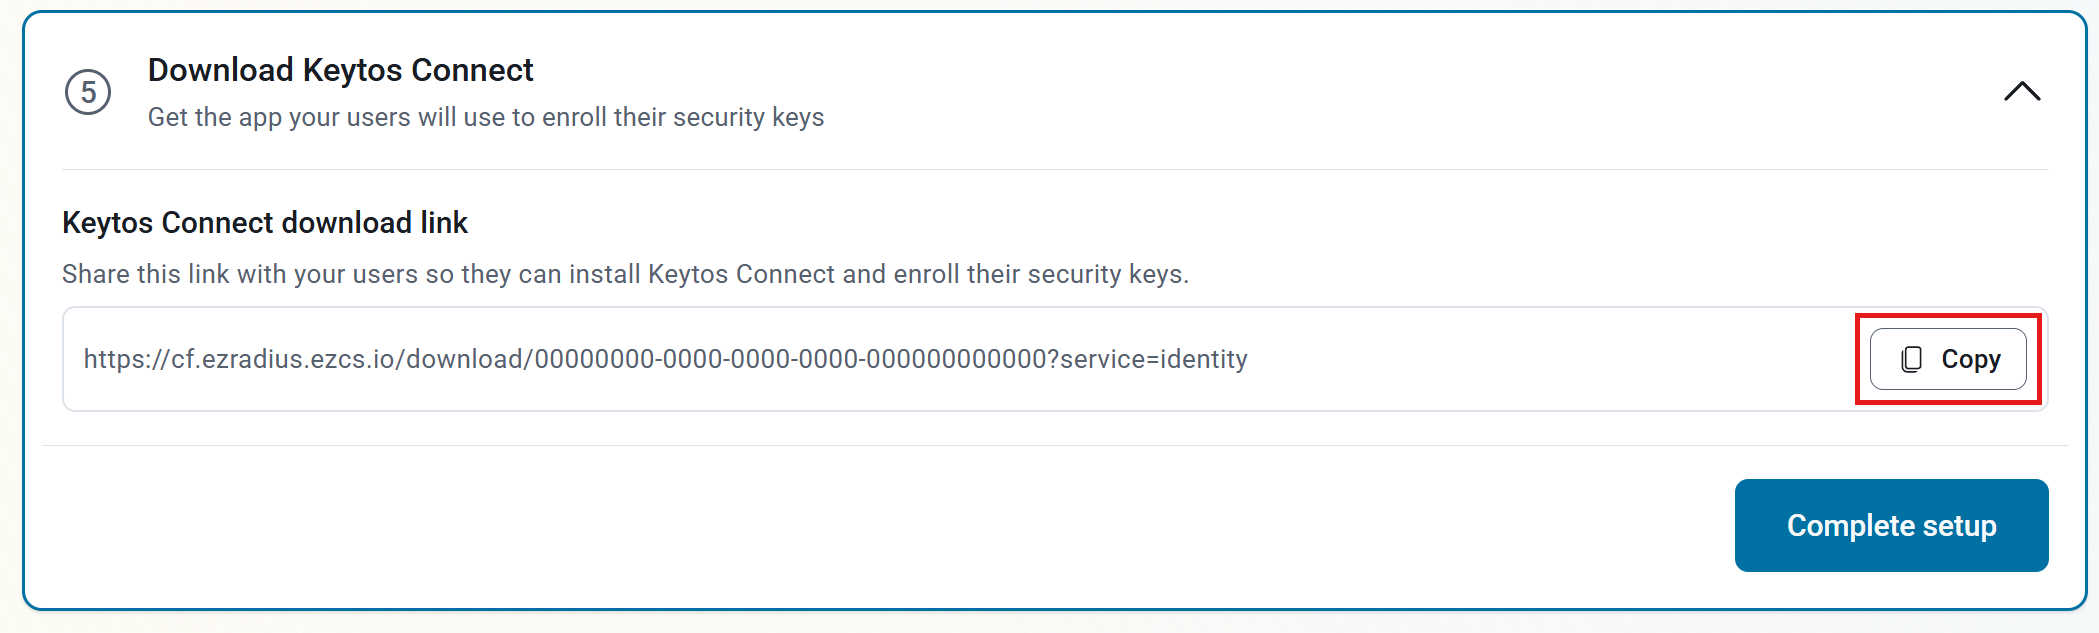
Under Keytos Connect download link, click Copy to copy the link to your clipboard.
-
Share the link with your users, for example in an email or on your intranet, so they can install Keytos Connect and enroll their security keys.
-
Click Complete setup to finish onboarding.
Collapses this section and completes the checkmark.
That’s it! Your users can now install Keytos Connect and enroll their phishing-resistant security keys.
Next Steps - How to Complete Your Keytos Shield Setup
Now that you have Shield identity security up and running, there are a few additional steps you can take to protect your environment and extend your protection.
- Configure Entra ID so users can sign in with their FIDO2 passkeys and smart card certificates
- Fine-tune your identity settings, such as PIN policies and alternative accounts
- Add additional administrators to your Shield subscription
- View and export your audit logs to a SIEM platform
- Secure your Wi-Fi with Keytos Shield network security
Next Steps - Share the Keytos Connect Docs with Your Users
Your users set up, unblock, and request their security keys in Keytos Connect. Share these guides with them in your onboarding emails or IT help desk articles:
- Get started with Keytos Connect: Install Keytos Connect and sign in.
- Onboard a security key: Set up a new security key with an Entra ID account or a government ID.
- Unblock a security key: Set a new PIN on a blocked or pre-loaded key.
- Request a security key: Ask IT for a new or replacement key.