














How-To: Manage Your Security Key Inventory in Keytos Shield
Overview - What is the Keytos Shield Security Keys Page?
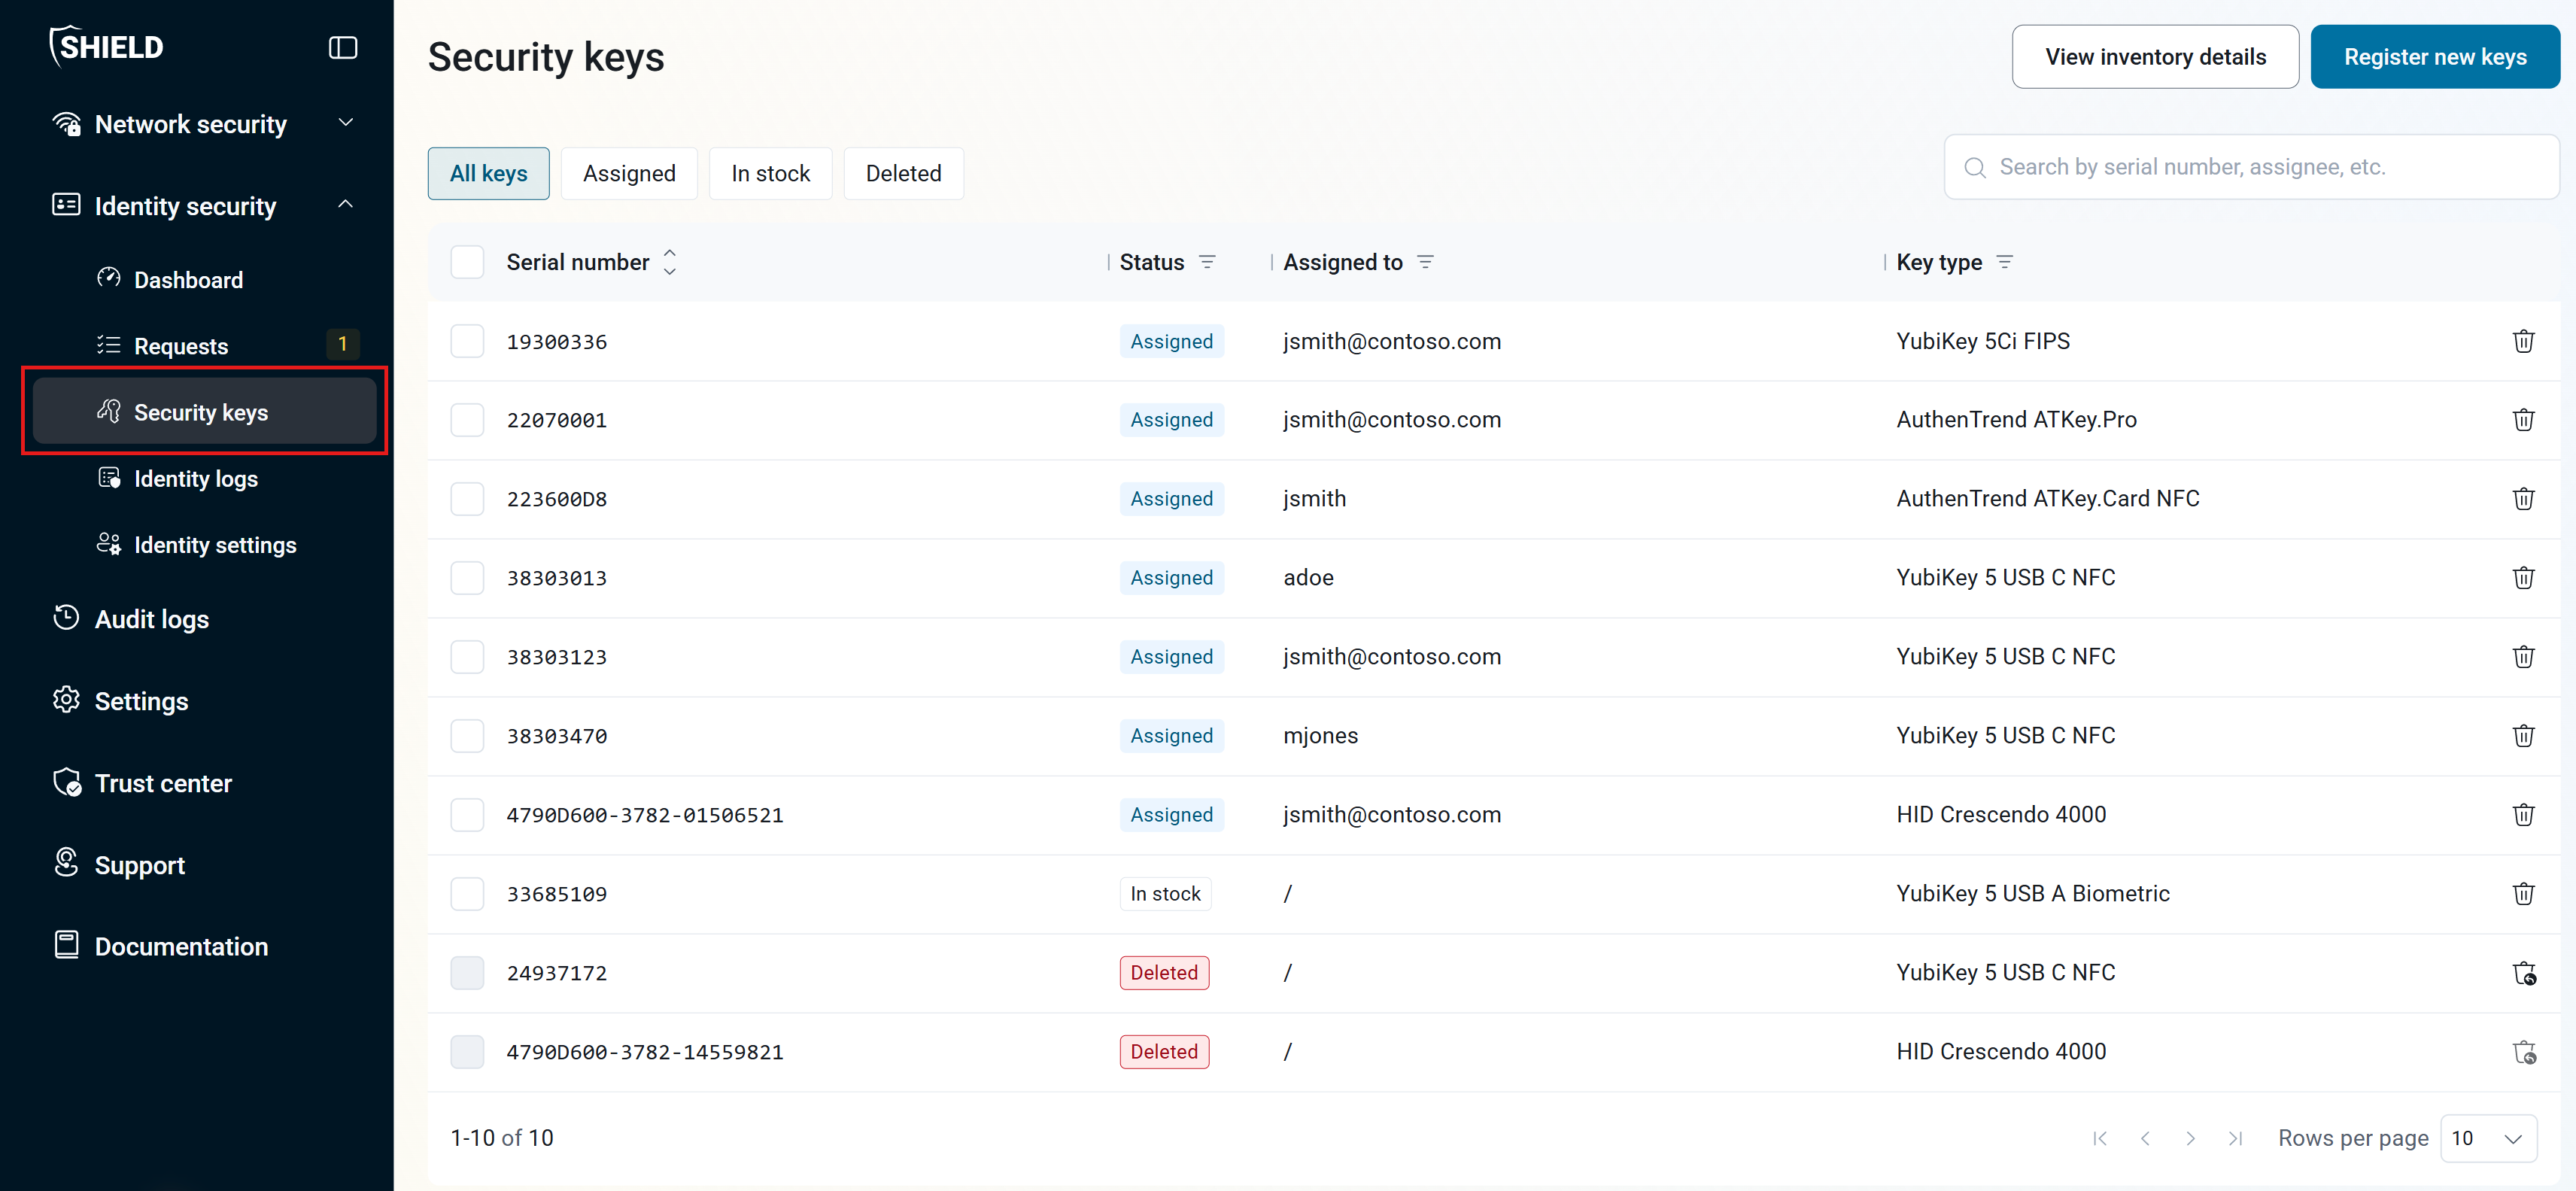
The Security keys page is your inventory of every physical security key in your Keytos Shield subscription, such as YubiKeys, AuthenTrend keys, and HID Crescendo smart cards. From this page you can register new keys as they arrive, see which keys are assigned to which users, check how many spare keys you have left, and remove keys you no longer use.
Each security key has one of these statuses:
| Status | What it means |
|---|---|
| Assigned | The key is assigned to a user. The Assigned to column shows who. |
| In stock | The key is registered in your inventory but not assigned to anyone yet. These are your spare keys. |
| Deleted | The key was removed from your inventory. Some deleted keys can be restored. |
Turn on Should security keys be assigned to users before they can be registered? in your enrollment and recovery settings. Your inventory managers then assign keys from this inventory to users before the users can register them.
Prerequisites for Managing Security Keys
- You have completed Keytos Shield identity security onboarding.
- You have the Owner or Identity Administrator role on your Keytos Shield subscription.
Step-by-Step Guide - How to Manage Security Keys in Keytos Shield
Step 1 - How to Open Security Key Management
You can manage your security key inventory in the Shield portal or in the Keytos Connect app. Use the tabs below to open the one you want to use. Finding and registering keys (Steps 2 and 3) work in both, while checking spare inventory and deleting or restoring keys (Steps 4 and 5) are only available in the Shield portal.
-
Open the Keytos Shield global portal in your browser (US Government Portal) and open your region-specific Shield endpoint under Existing subscriptions.
-
From the left-hand menu, expand Identity security and click Security keys.
-
Open Keytos Connect and sign in with your administrator account. If you don’t have it yet, you can also download it from Download the client at the bottom of the Shield portal’s left-hand menu.
-
On the Identity management page, under Admin access, click Manage security keys.
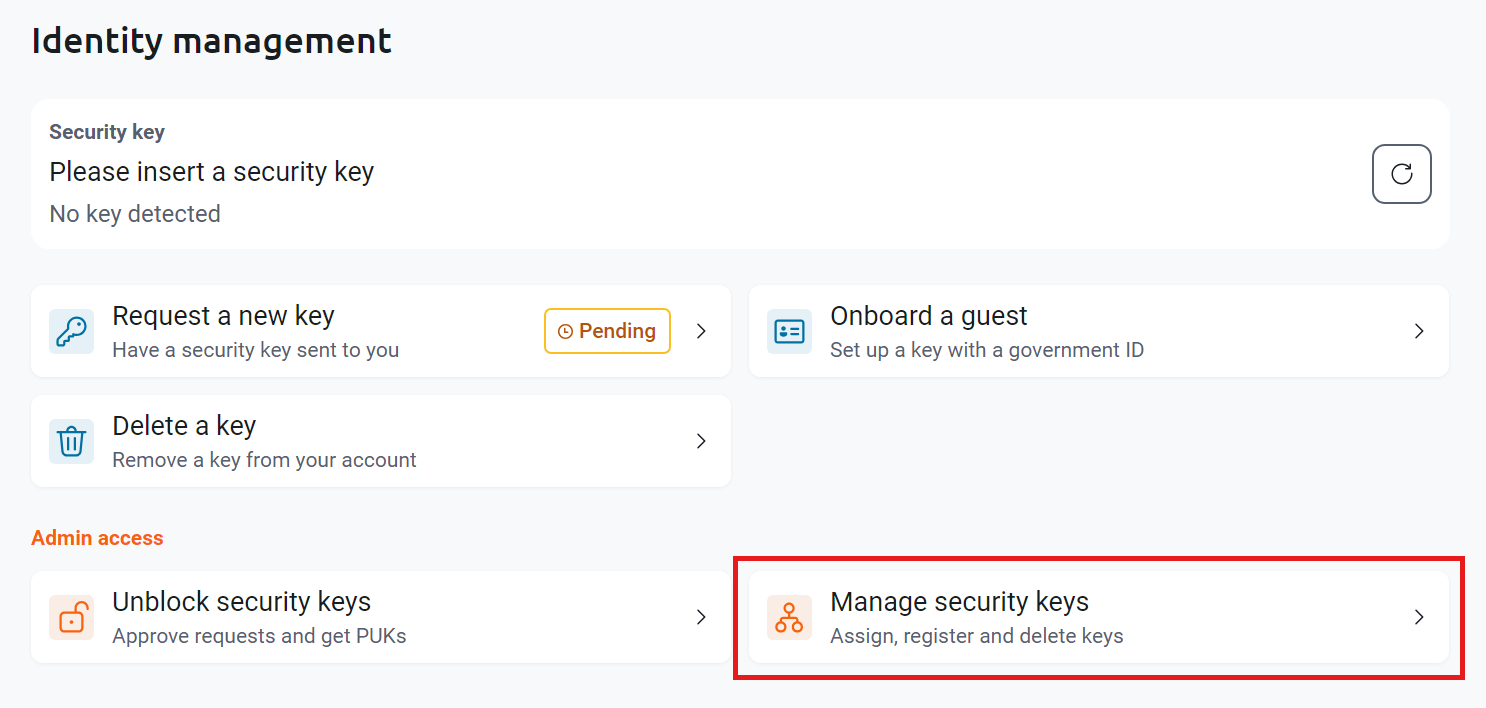
The Admin access section only appears if your account has an Owner, Identity Administrator, Inventory Manager, or Credential Manager role on your Keytos Shield subscription. See how to manage access to Keytos Shield to assign these roles.
Step 2 - How to Find a Security Key
In the Shield portal, you see every key in your inventory and can filter the list. In Keytos Connect, you look up the security keys assigned to one user at a time.
On the Security keys page, use any of these options to narrow down the list:
- Status tabs: Click All keys, Assigned, In stock, or Deleted to show only keys with that status.
- Search: Type a serial number, assignee, or other value in the Search by serial number, assignee, etc. box.
- Column filters: Click the filter icon next to Status, Assigned to, or Key type to filter by one or more values.
- Sorting: Click Serial number to sort the list by serial number.
-
In Keytos Connect, open Manage security keys as described in Step 1.
-
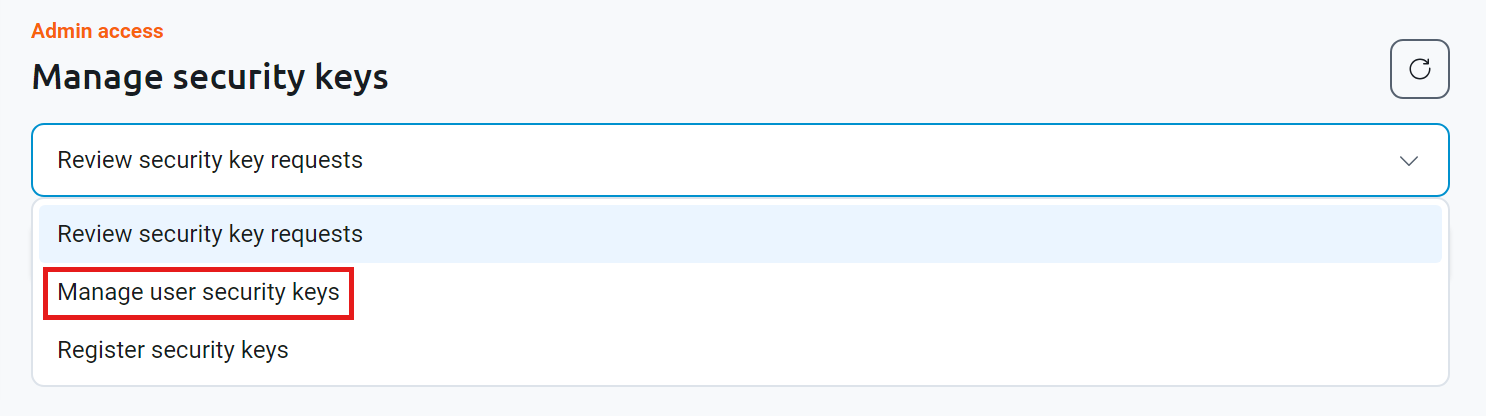
Open the drop-down at the top of the page and select Manage user security keys.
-
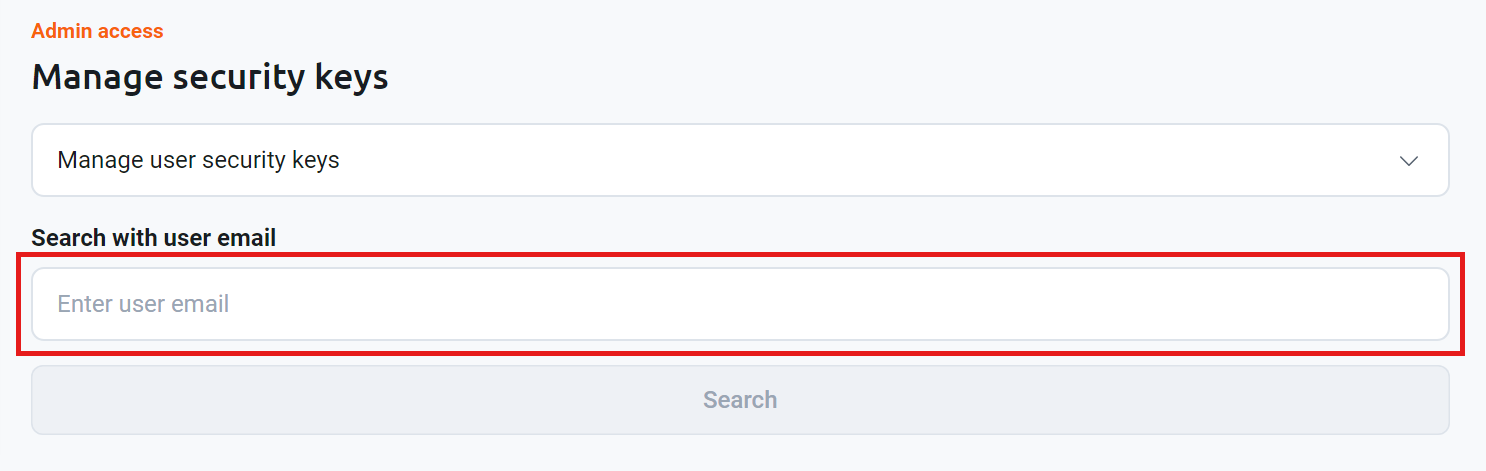
Under Search with user email, enter the user’s email address in the Enter user email box, and then click Search.
-
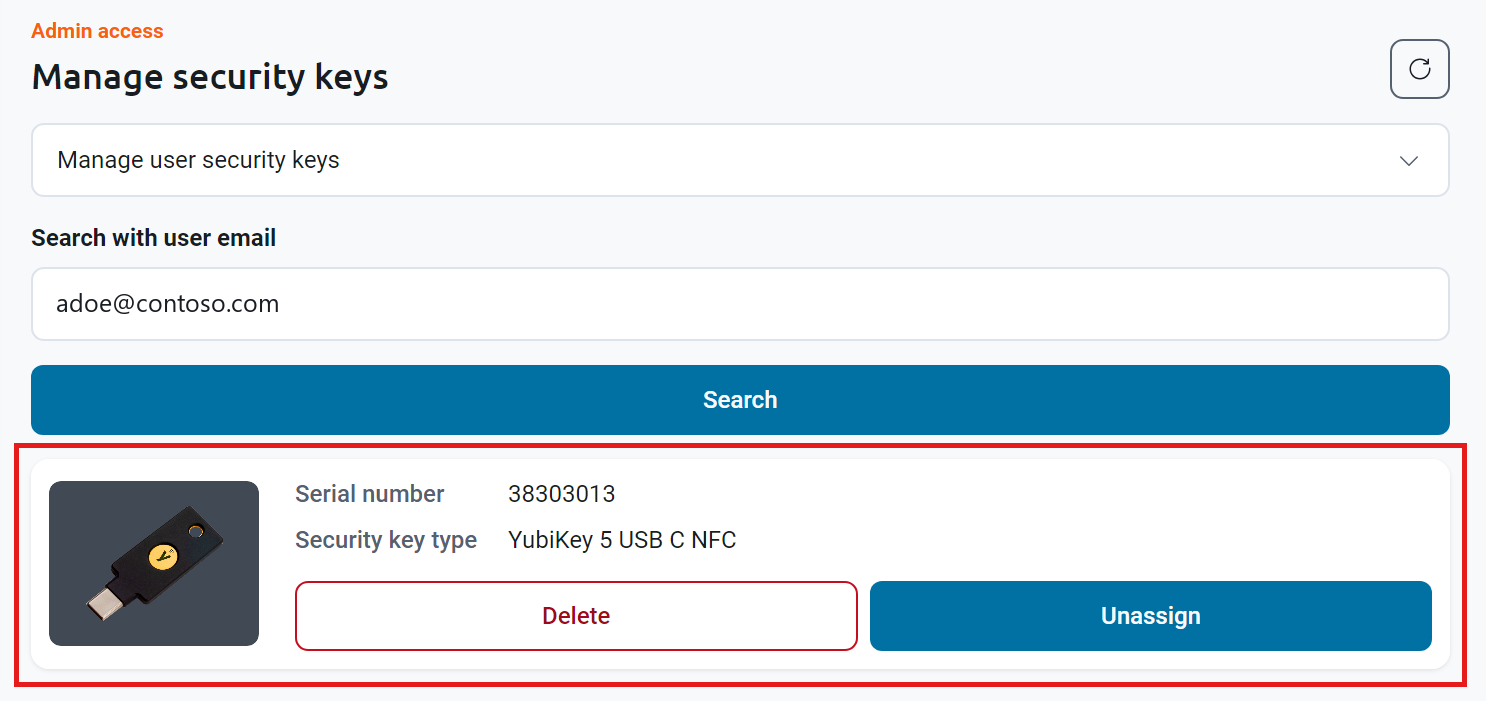
Keytos Connect lists every security key assigned to that user, with its Serial number and Security key type. From here you can also Unassign or Delete a key.
Step 3 - How to Register New Security Keys in Your Inventory
Register security keys when they arrive, so they show up as In stock and can be assigned to users. You can register keys in the Shield portal or in the Keytos Connect app:
- Shield portal: Useful for registering many keys at once from their serial numbers or a CSV file.
- Keytos Connect: Plug in a key and Keytos Connect reads its model and serial number for you, so there are no typos.
-
On the Security keys page, click Register new keys at the top right of the page.
-
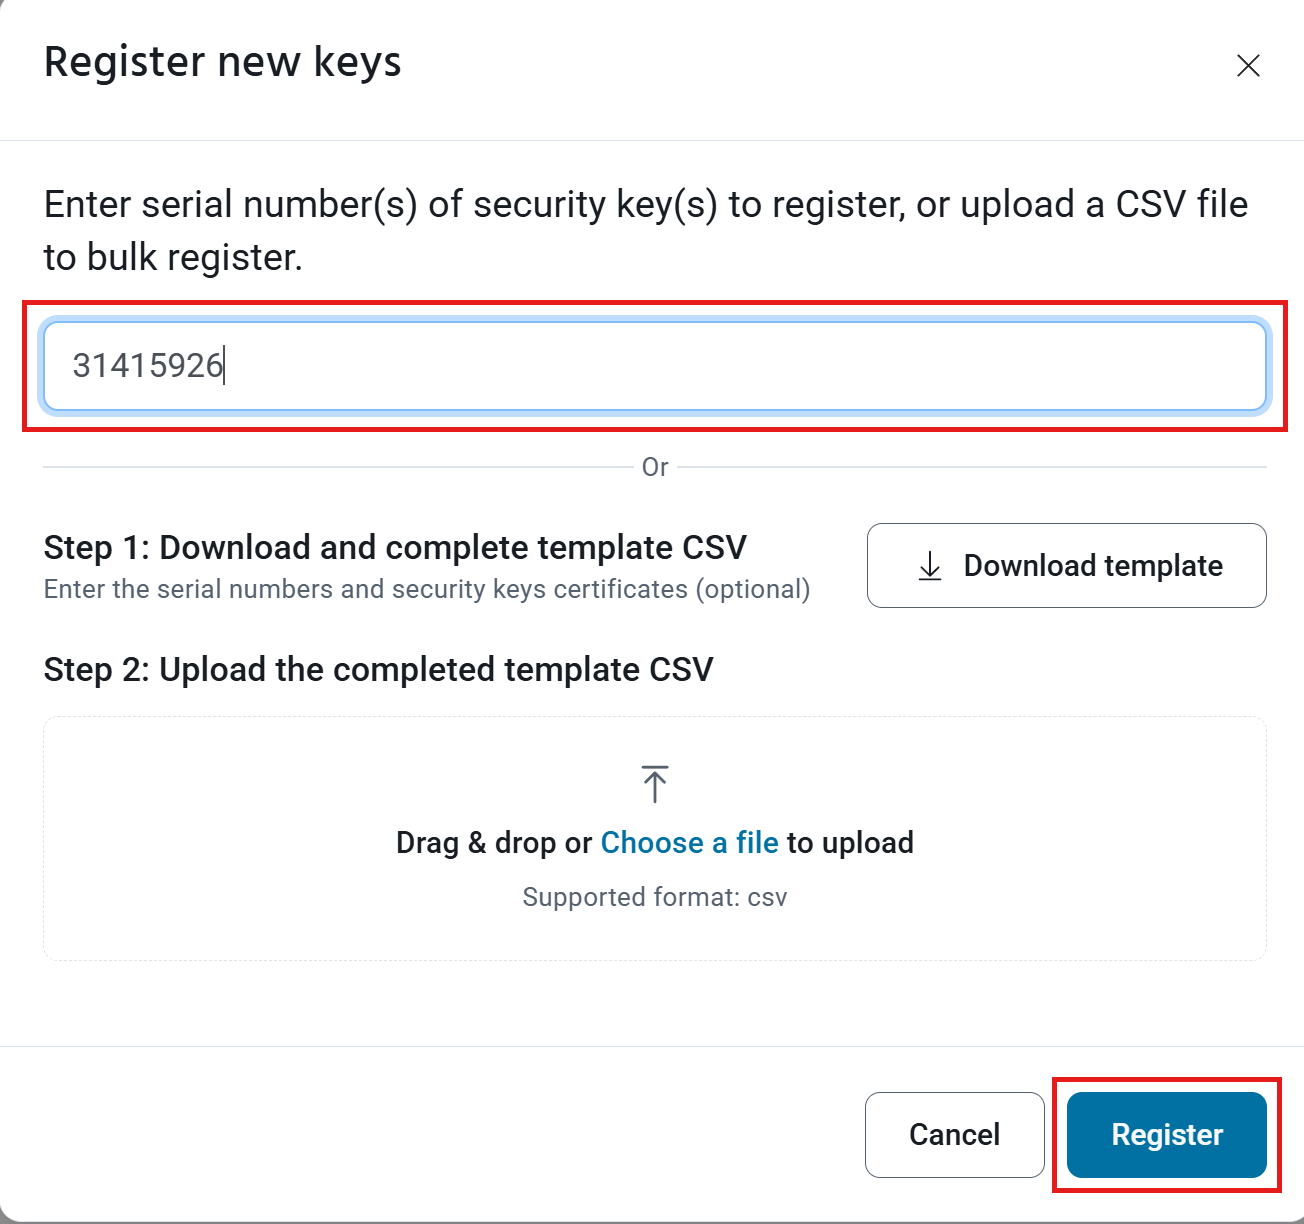
Choose how you want to register your keys:
- A few keys: Enter the serial number of each security key in the Enter security key serial number(s) box.
- Many keys at once: Click Download template, fill in the serial numbers (and, optionally, each key’s certificates), and then drag and drop the completed CSV file into the upload area, or click Choose a file.
-
Click Register.
-
In Keytos Connect, open Manage security keys as described in Step 1.
-
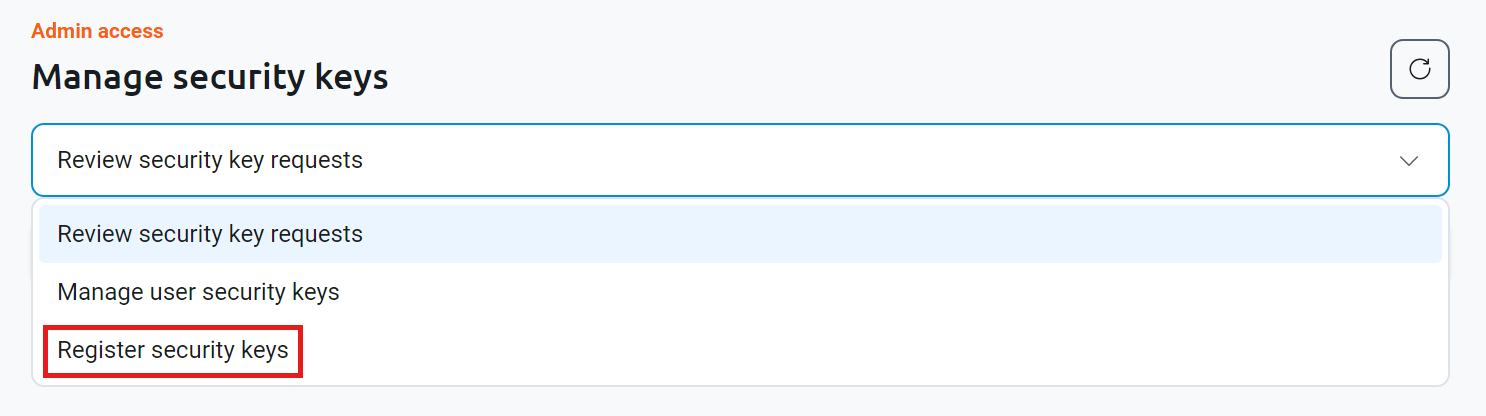
Open the drop-down at the top of the page and select Register security keys.
-
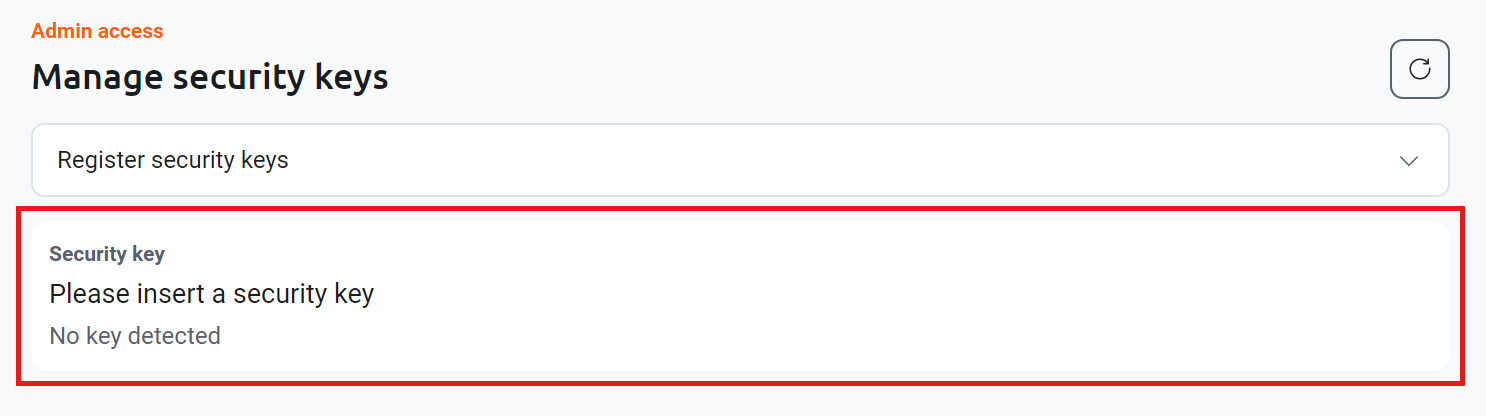
Plug in or tap the security key you want to register.
-
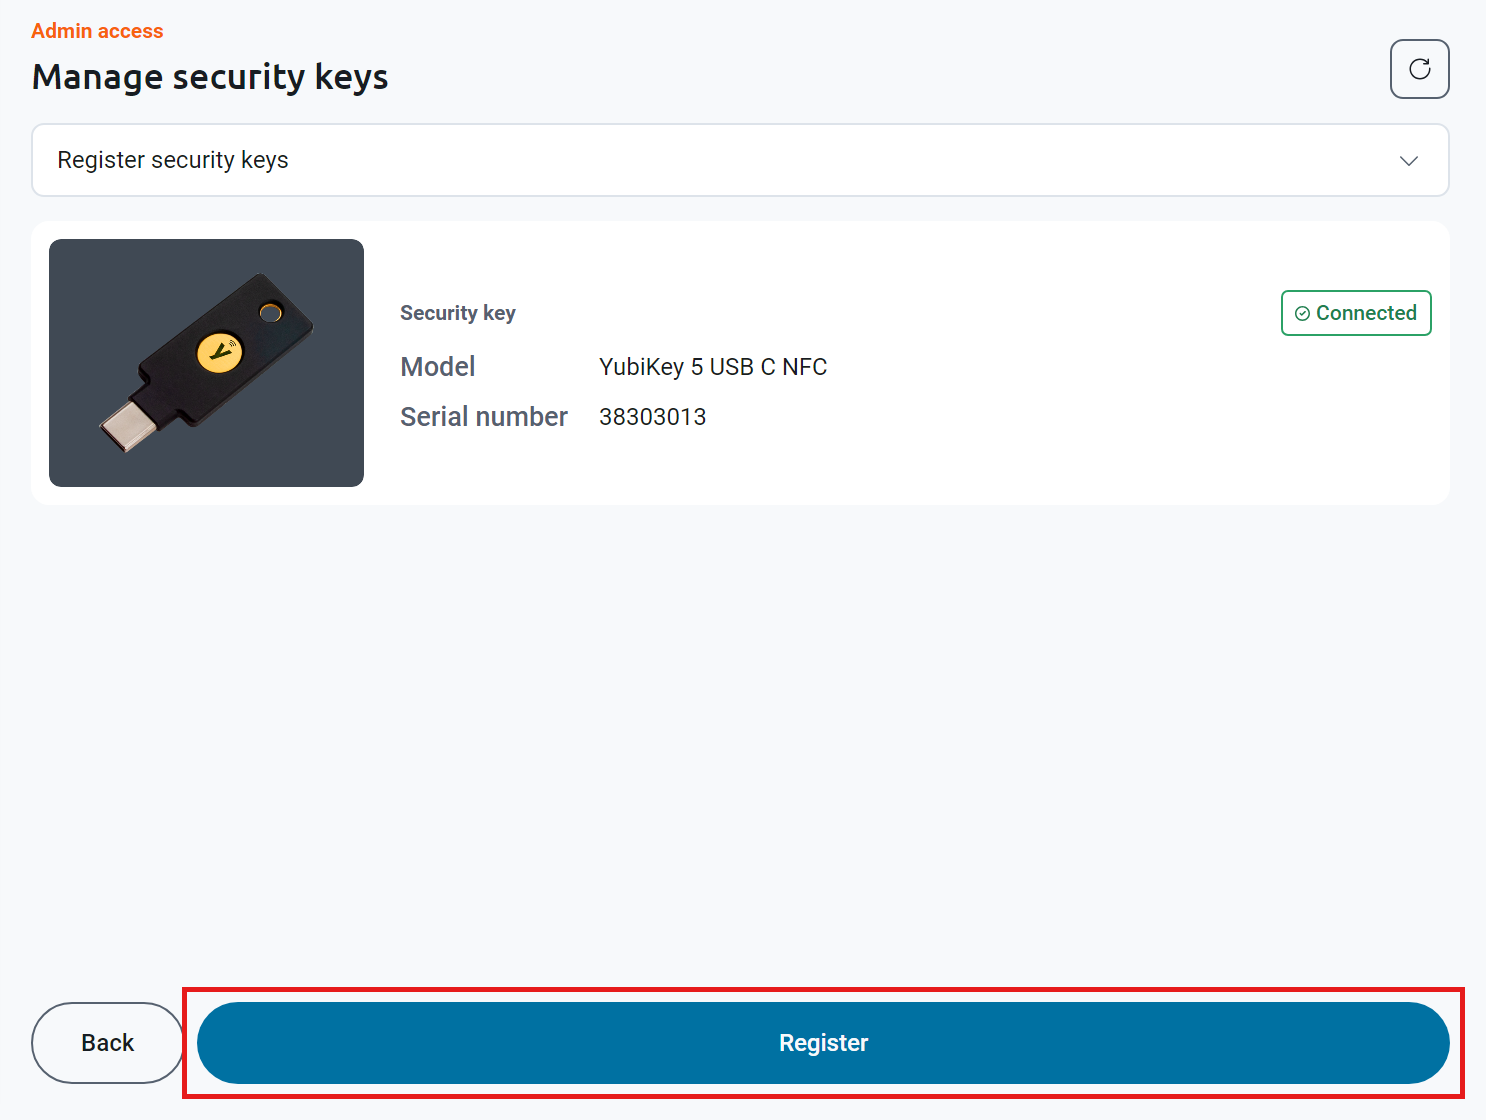
Check that Keytos Connect shows the key as Connected, with the right Model and Serial number, and then click Register.
-
When the key is registered, the Register button changes to Key is already registered. This confirms the key is now in your inventory.

-
Unplug the key and repeat for each new security key.
Step 4 - How to Check Your Spare Security Key Inventory
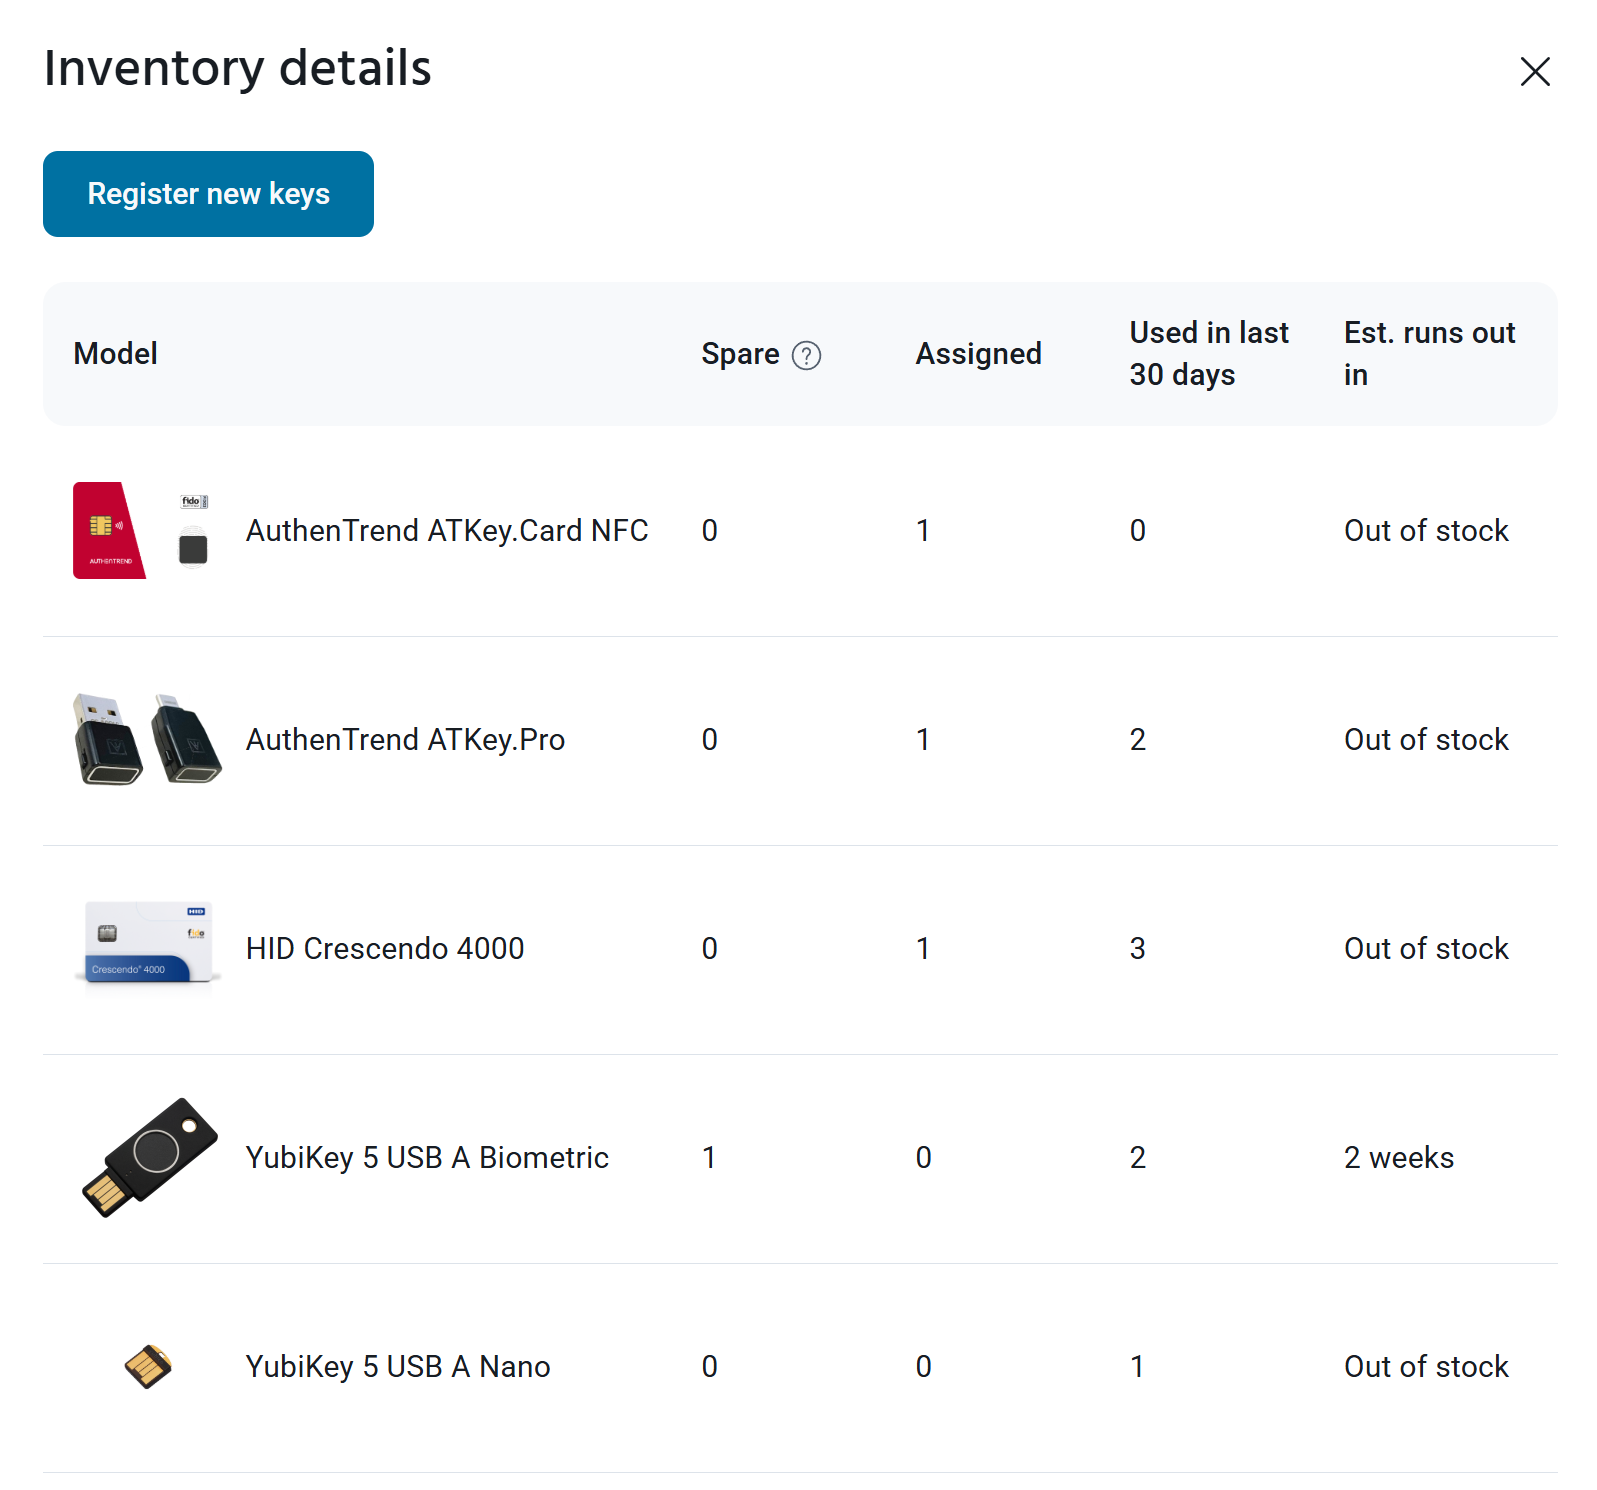
Inventory details show how many keys of each model you have left, so you can reorder before you run out.
-
On the Security keys page, click View inventory details at the top right of the page.
-
Review the inventory for each security key model:
- Spare: Keys registered in your inventory that aren’t assigned to anyone.
- Assigned: Keys currently assigned to users.
- Used in last 30 days: How many keys of this model were used in the last 30 days.
- Est. runs out in: An estimate of when you will run out of spare keys of this model, based on recent usage. Models with no spare keys show Out of stock.
-
To add more keys from this panel, click Register new keys and follow Step 3.
Keytos Connect doesn’t show your spare security key inventory. To see how many spare keys you have and when you’ll run out, use the Shield Portal tab.
Step 5 - How to Delete or Restore a Security Key
Delete a security key when it is lost, broken, or retired, so it no longer counts toward your inventory.
-
On the Security keys page, to delete one key, click the delete icon at the end of its row.
-
To delete several keys at once, check the box next to each key, and then click Delete in the selection bar at the bottom of the list.

-
To restore a deleted key, open the Deleted tab and click the restore icon at the end of its row. If the icon is grayed out, that deleted key can’t be added back.
To delete or restore security keys in your inventory, use the Shield Portal tab.