












How-To: Configure Security Key Enrollment and Recovery in Keytos Shield
Overview - How Do Users Enroll and Recover Security Keys in Keytos Shield?
The Enrollment and recovery settings control what Shield puts on each security key, how users prove who they are before they get or recover a key, and what happens when a user locks their key by entering the wrong PIN too many times. You chose some of these settings during identity security onboarding, and you can fine-tune all of them here.
Prerequisites for Configuring Enrollment and Recovery
- You have completed Keytos Shield identity security onboarding.
- You have the Owner or Identity Administrator role on your Keytos Shield subscription.
Step-by-Step Guide - How to Configure Enrollment and Recovery in Keytos Shield
Step 1 - How to Open the Enrollment and Recovery Settings
-
Open the Keytos Shield global portal in your browser (US Government Portal) and open your region-specific Shield endpoint under Existing subscriptions.
-
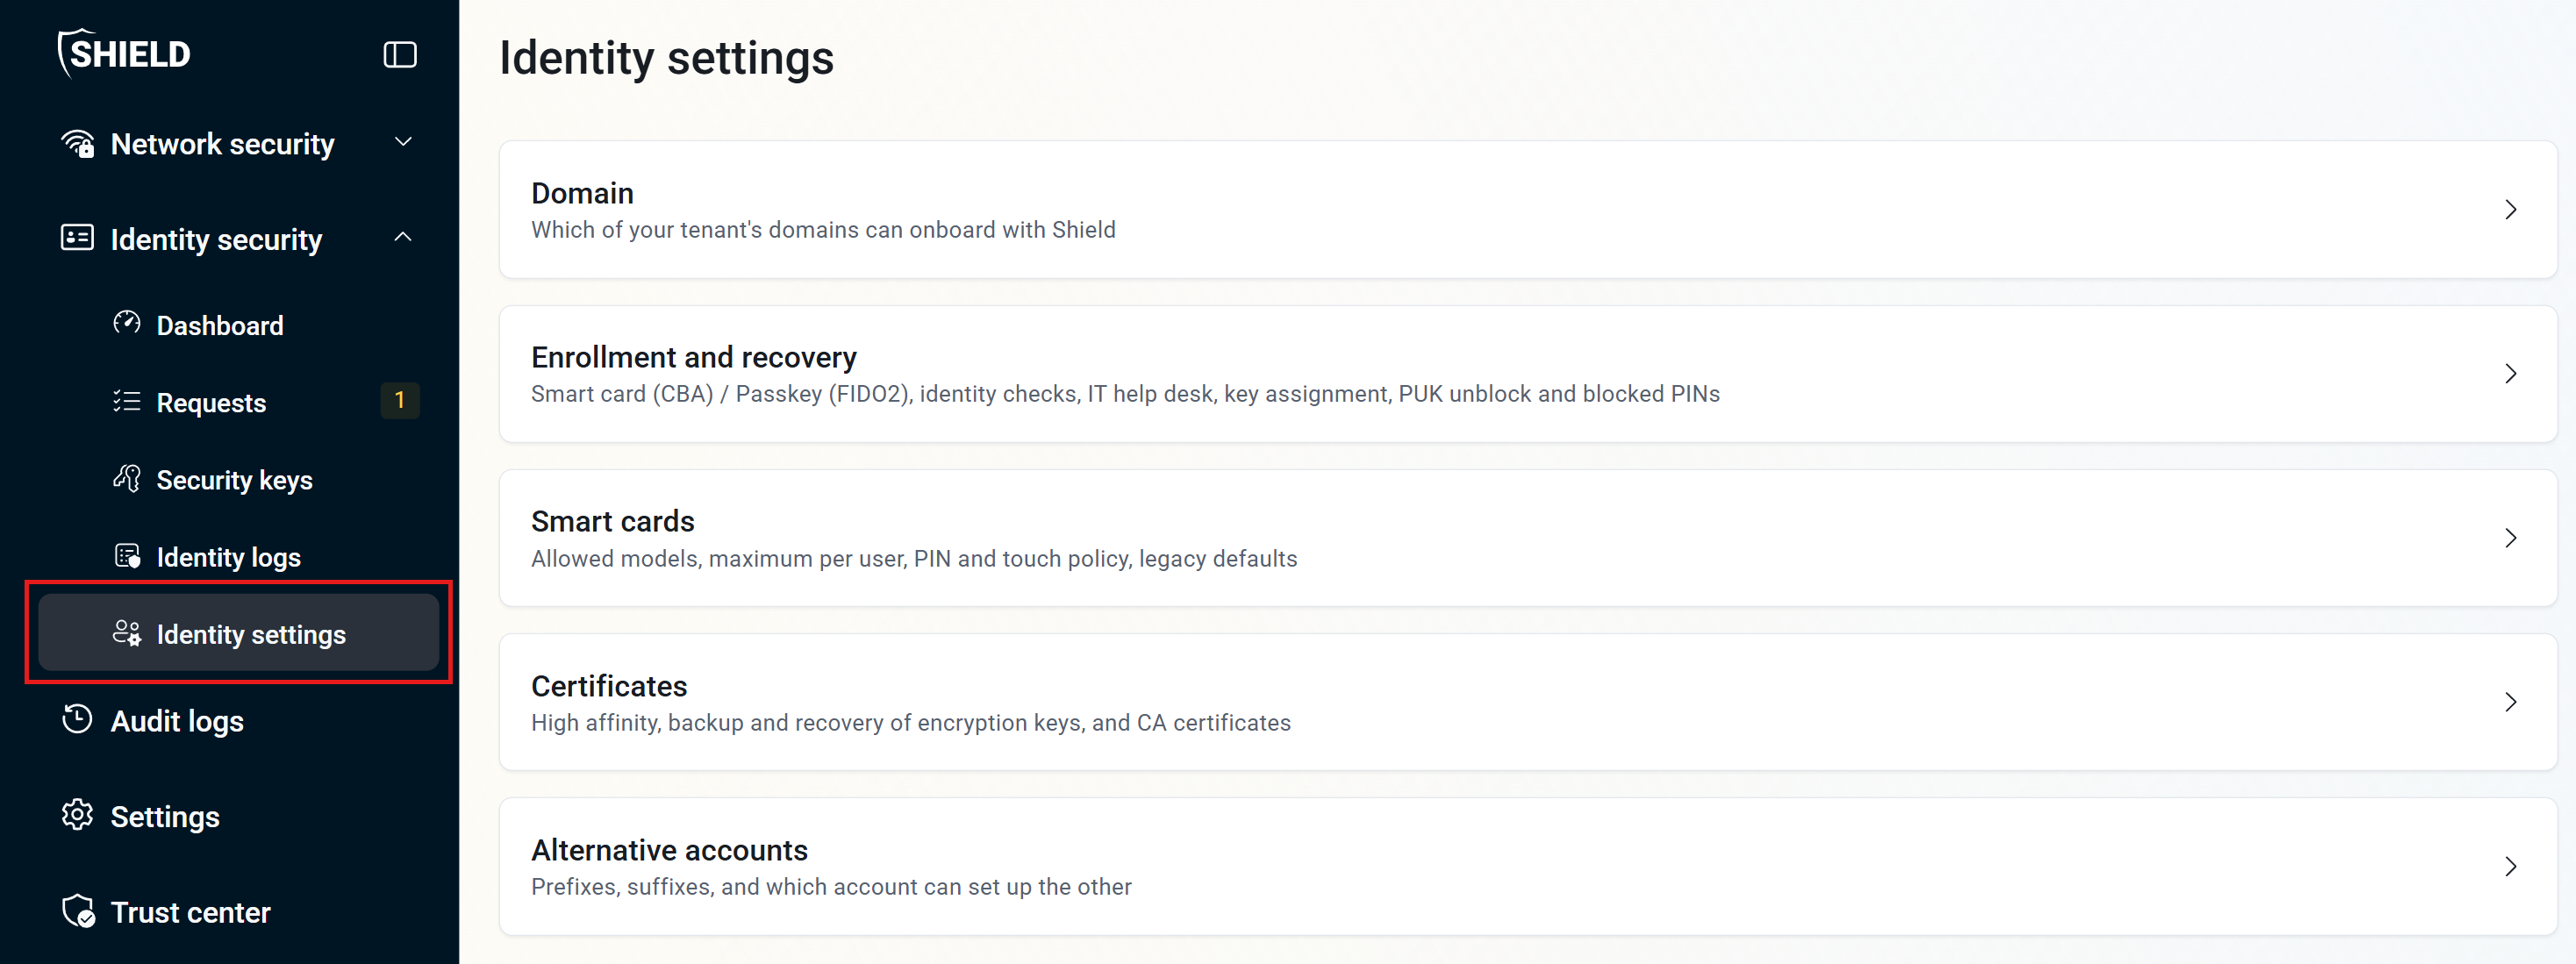
From the left-hand menu, expand Identity security and click Identity settings.
-
Click Enrollment and recovery.
Step 2 - How to Choose Which Credentials Shield Creates on Security Keys
-
For What types of credentials do you want to create on user security keys?, select at least one:
- Smart card (CBA): Shield issues a certificate to the security key so users can sign in with Microsoft Entra certificate-based authentication (CBA).
- Passkey (FIDO2): Shield registers a FIDO2 passkey on the security key so users can sign in with Entra ID passkeys.
We recommend keeping both selected. Users then have two phishing-resistant ways to sign in, and apps that support only one of them still work.

Step 3 - How to Choose How Users Verify Their Identity
-
For How do you want users to create or recover their security key?, turn on at least one way for users to prove their identity before Shield lets them set up a new security key or recover a lost one:
- Government ID and face recognition: Users verify their identity with a government-issued ID and face recognition.
- Existing Entra ID credential: Users sign in with their current Entra ID credential.
- IT help desk: Your IT help desk verifies the user and helps them set up or recover their security key. When you check this option, a Credential managers list appears. Add the Entra ID users or groups on your help desk. Credential managers can onboard security keys on behalf of users, for example by bootstrapping a user’s security key, but can’t assign keys.

Step 4 - How to Control Which Security Keys Users Can Register
-
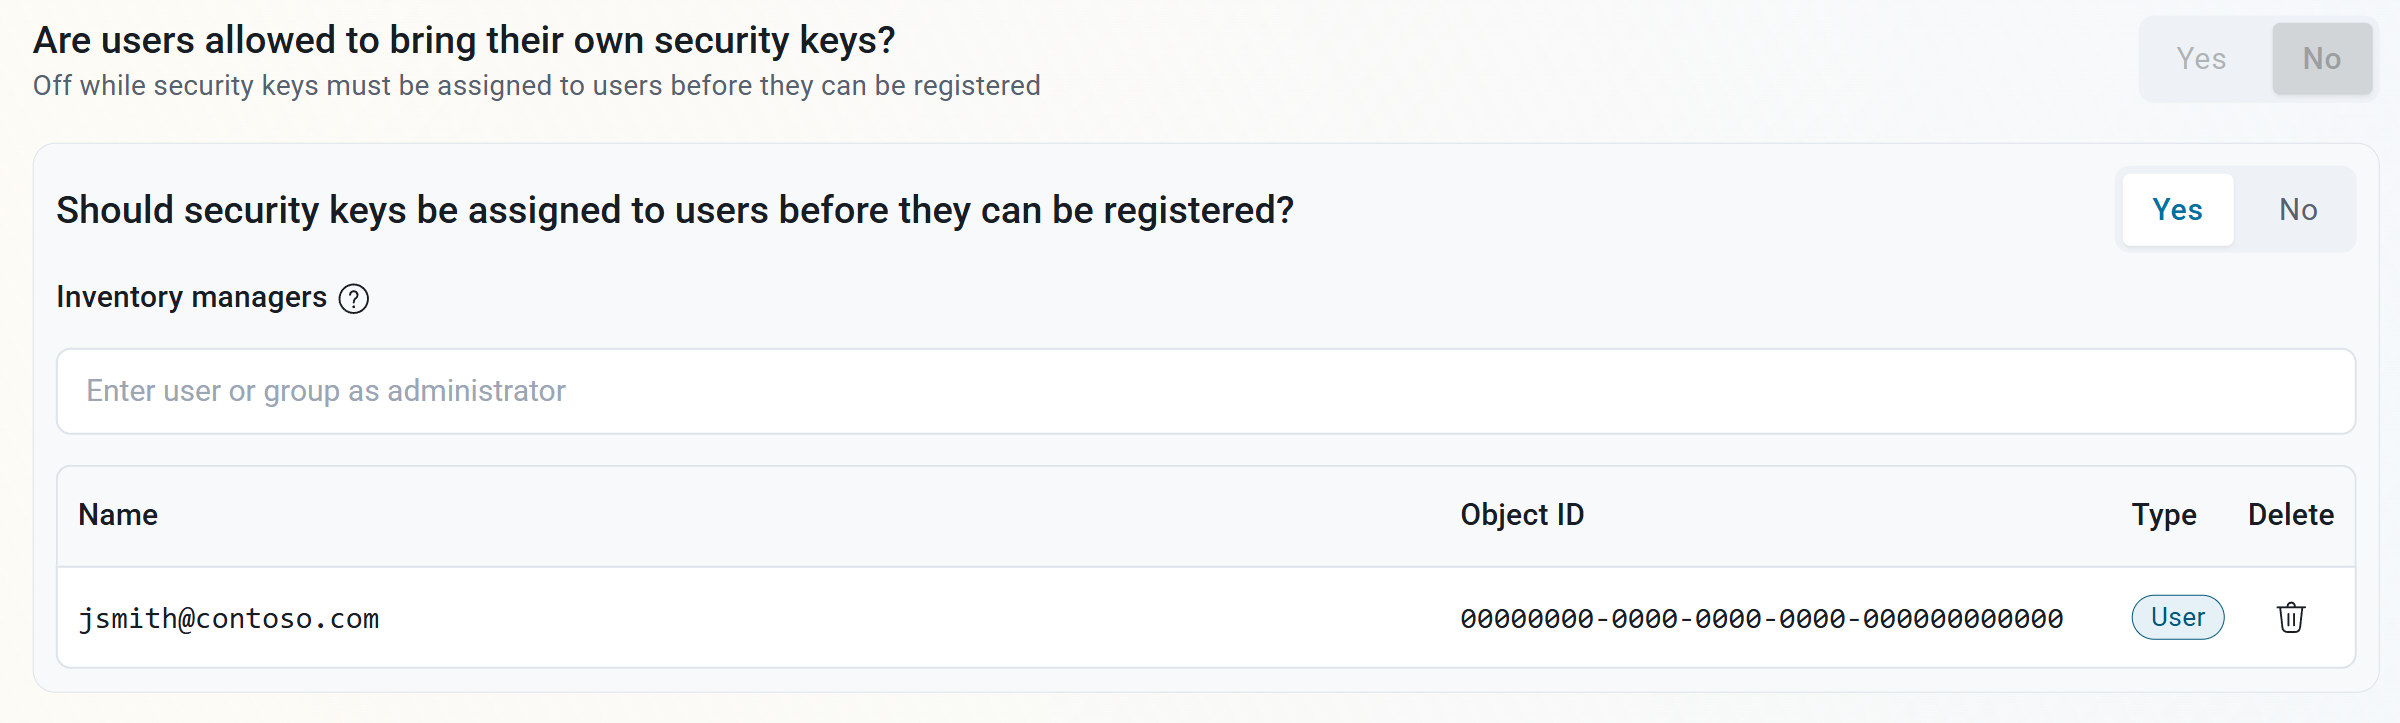
For Are users allowed to bring their own security keys?, select Yes to let users register a supported security key they already have, or No if users should only register security keys your organization provides.

-
For Should security keys be assigned to users before they can be registered?, select Yes if you want to track your security key inventory and control exactly which key each user gets.
- When this is Yes, users can’t bring their own security keys, so Are users allowed to bring their own security keys? is turned off.
- Under Inventory managers, search for the Entra ID users or groups who assign security keys to users. Inventory managers can assign security keys to users, but can’t onboard them on behalf of users.
Step 5 - How to Configure Security Key Unblock Options
A security key blocks its PIN after too many wrong attempts. You set the number of attempts in the smart card settings. These settings control who can unblock a blocked key.
-
For Allow administrators to unblock user security keys, select Yes to let the credential managers you added under IT help desk unblock users’ security keys. We recommend keeping this set to Yes so a locked-out user can get back to work without replacing their key.
-
Under PUK settings, choose whether users can unblock their own security keys. These options appear when Allow administrators to unblock user security keys is set to Yes.
- Allow users to unblock security keys with MFA: Users can unblock their key after completing multifactor authentication.
- Allow users to unblock security keys with Government ID verification: Users can unblock their key after verifying their identity with a government-issued ID.

Step 6 - How to Block Common or Weak PINs
Blocked PINs stop users from choosing PINs that are easy to guess, such as 123456 or 111111. By default, Keytos Shield blocks a set of commonly used weak PINs, but you can add additional PINs to the blocked list or remove default ones as needed.
-
Under Blocked PINs, enter a PIN you want to block and click Add.
-
Repeat for every PIN you want to block. To allow a PIN again, click the delete icon next to it.

-
Click Save changes at the top right of the page.
Done! Your enrollment and recovery settings are saved.