
















How-To: Configure Entra ID Certificate Based Authentication (CBA) for Keytos Shield
Overview - Why Configure Entra ID CBA for Keytos Shield?
When you use smart card (CBA) credentials, Keytos Shield issues a certificate to each user’s security key from your cloud PKI. Before users can sign in with that certificate, Entra ID must trust the Certificate Authorities (CAs) that issued it, and certificate-based authentication (CBA) must be turned on in your tenant.
Prerequisites for Configuring Entra ID CBA
- You have completed Keytos Shield identity security onboarding.
- You have an Entra ID role that can manage the PKI trust store and authentication methods, such as Privileged Authentication Administrator or Global Administrator.
Step-by-Step Guide - How to Configure Entra ID CBA for Keytos Shield
Step 1 - How to Download Your Shield CA Certificates
- Download your root CA certificate (
rootca.cer) and issuing CA certificate (issuingca.cer) from your Shield certificate settings. See how to download your Shield CA certificates.
Step 2 - How to Add Your Shield CA Certificates to Entra’s Trust Store
Add both CA certificates to Entra ID’s trust store, so Entra ID can validate the smart card certificates Shield issues to your users.
How to Get Your Shield CA Certificate Revocation List (CRL) URLs
Entra ID uses each CA’s certificate revocation list (CRL) URL to check whether a certificate was revoked. Each certificate lists the CRL URL of the CA that issued it under CRL Distribution Points.
- Root CA CRL URL: Open
issuingca.cer, select the Details tab, select CRL Distribution Points, and copy the URL. The root CA signed the issuing CA certificate, so this is the root CA’s CRL. - Issuing CA CRL URL: Open a smart card certificate Shield issued to a user, and copy the URL under CRL Distribution Points the same way. If no user has a certificate yet, you can leave the CRL URL blank for the issuing CA and add it later.
How to Import Your Shield CA Certificates into Entra’s Trust Store
-
Navigate to the Entra admin center at https://entra.microsoft.com.
-
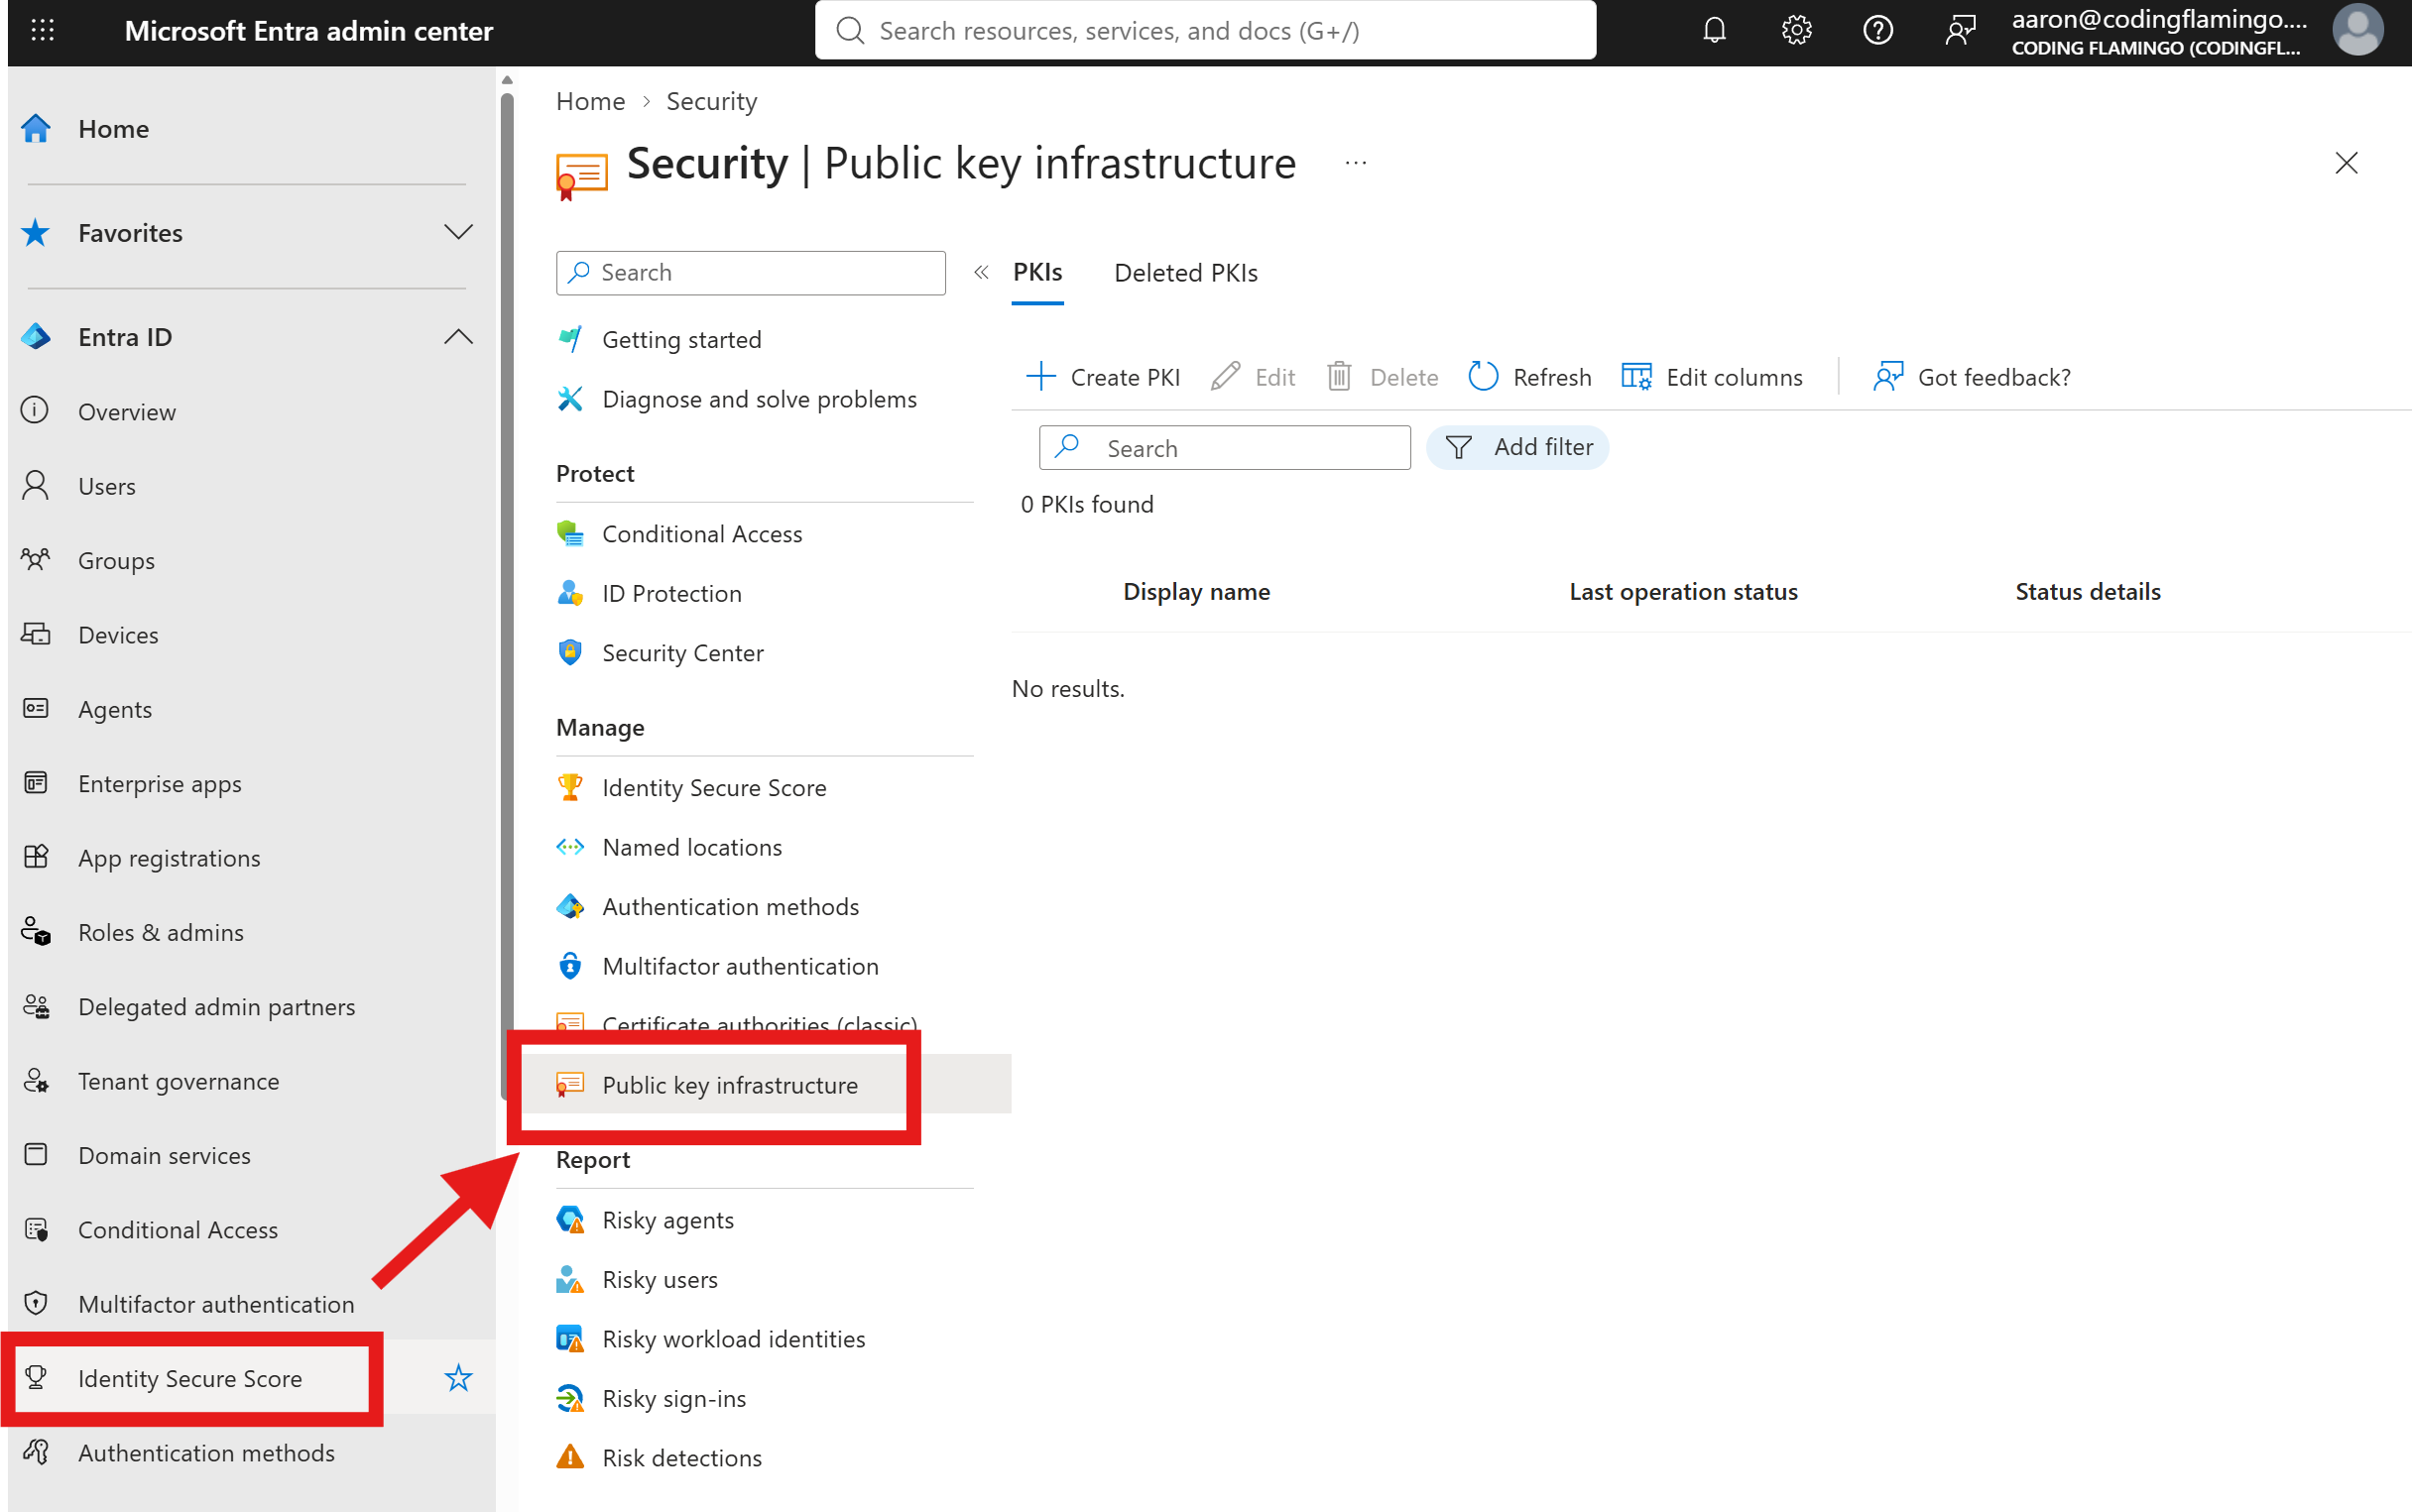
From the left-hand navigation menu, select Identity Secure Score > Public key infrastructure. (direct link).
-
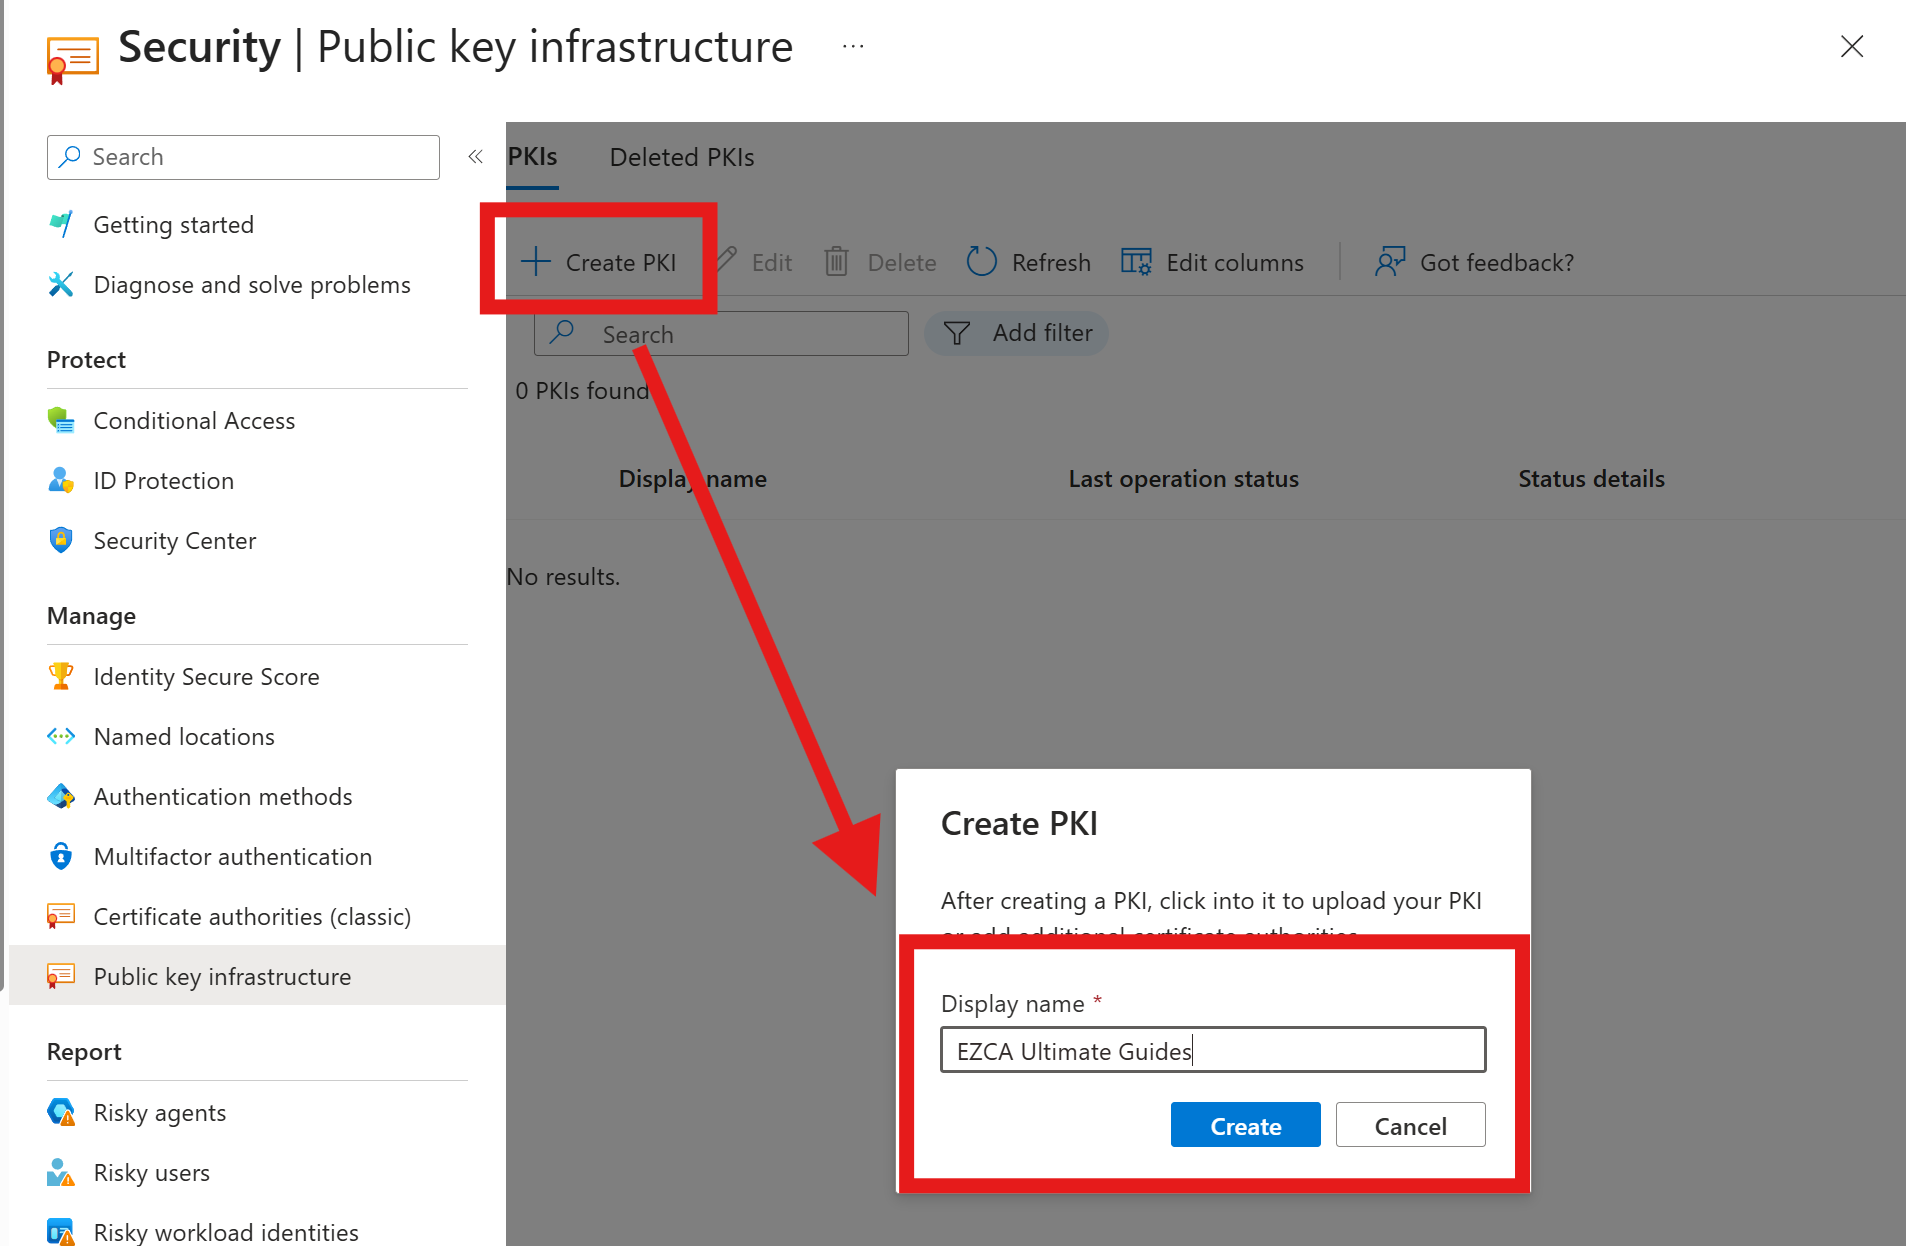
Click + Create PKI, enter a Display Name for your PKI configuration, and click Create.
-
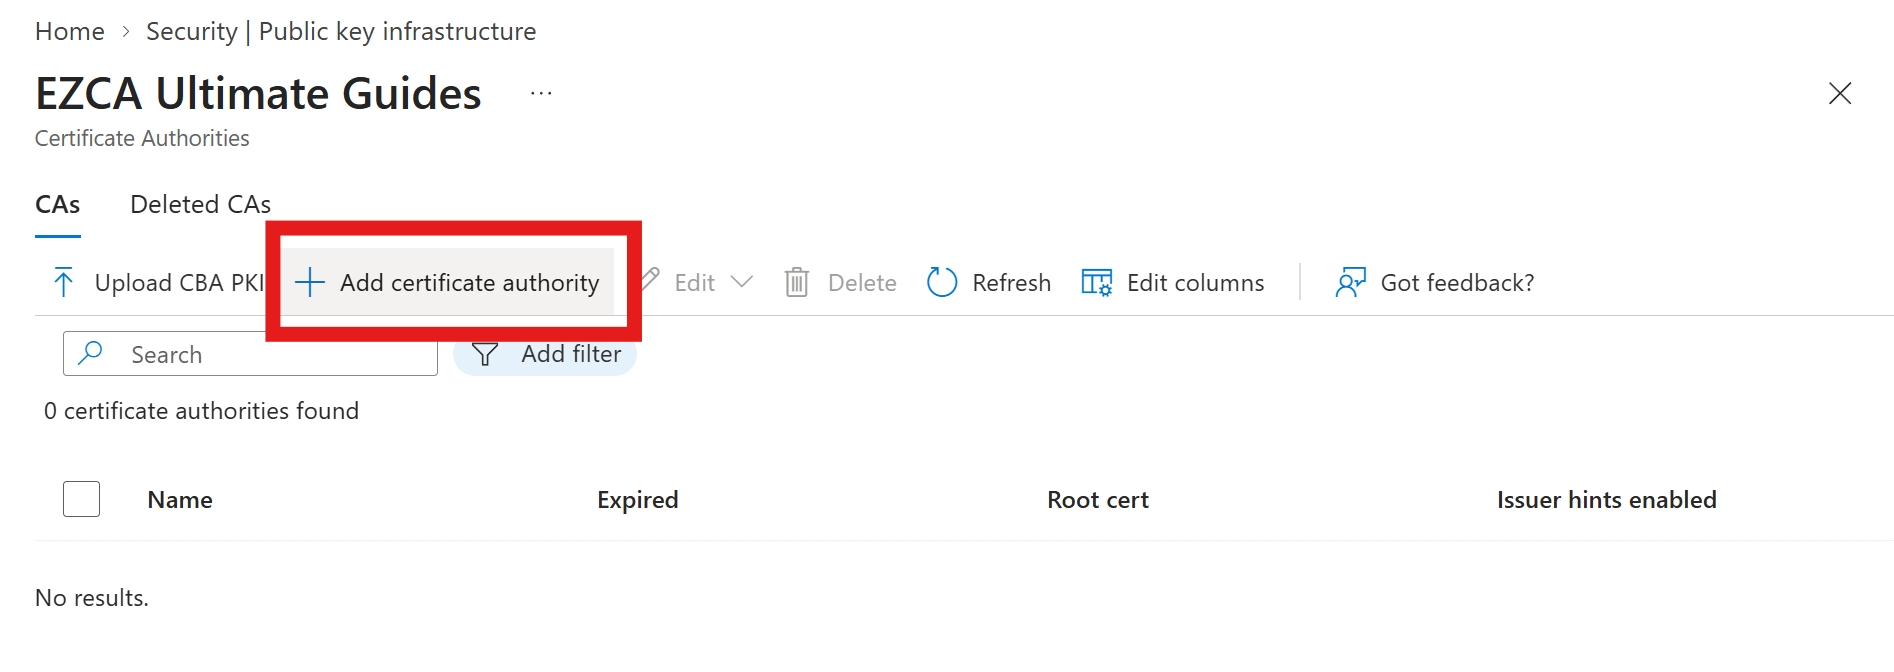
Open your newly created PKI configuration to manage and import your CA certificates.
-
Click + Add certificate authority to add your first CA certificate to Entra.
-
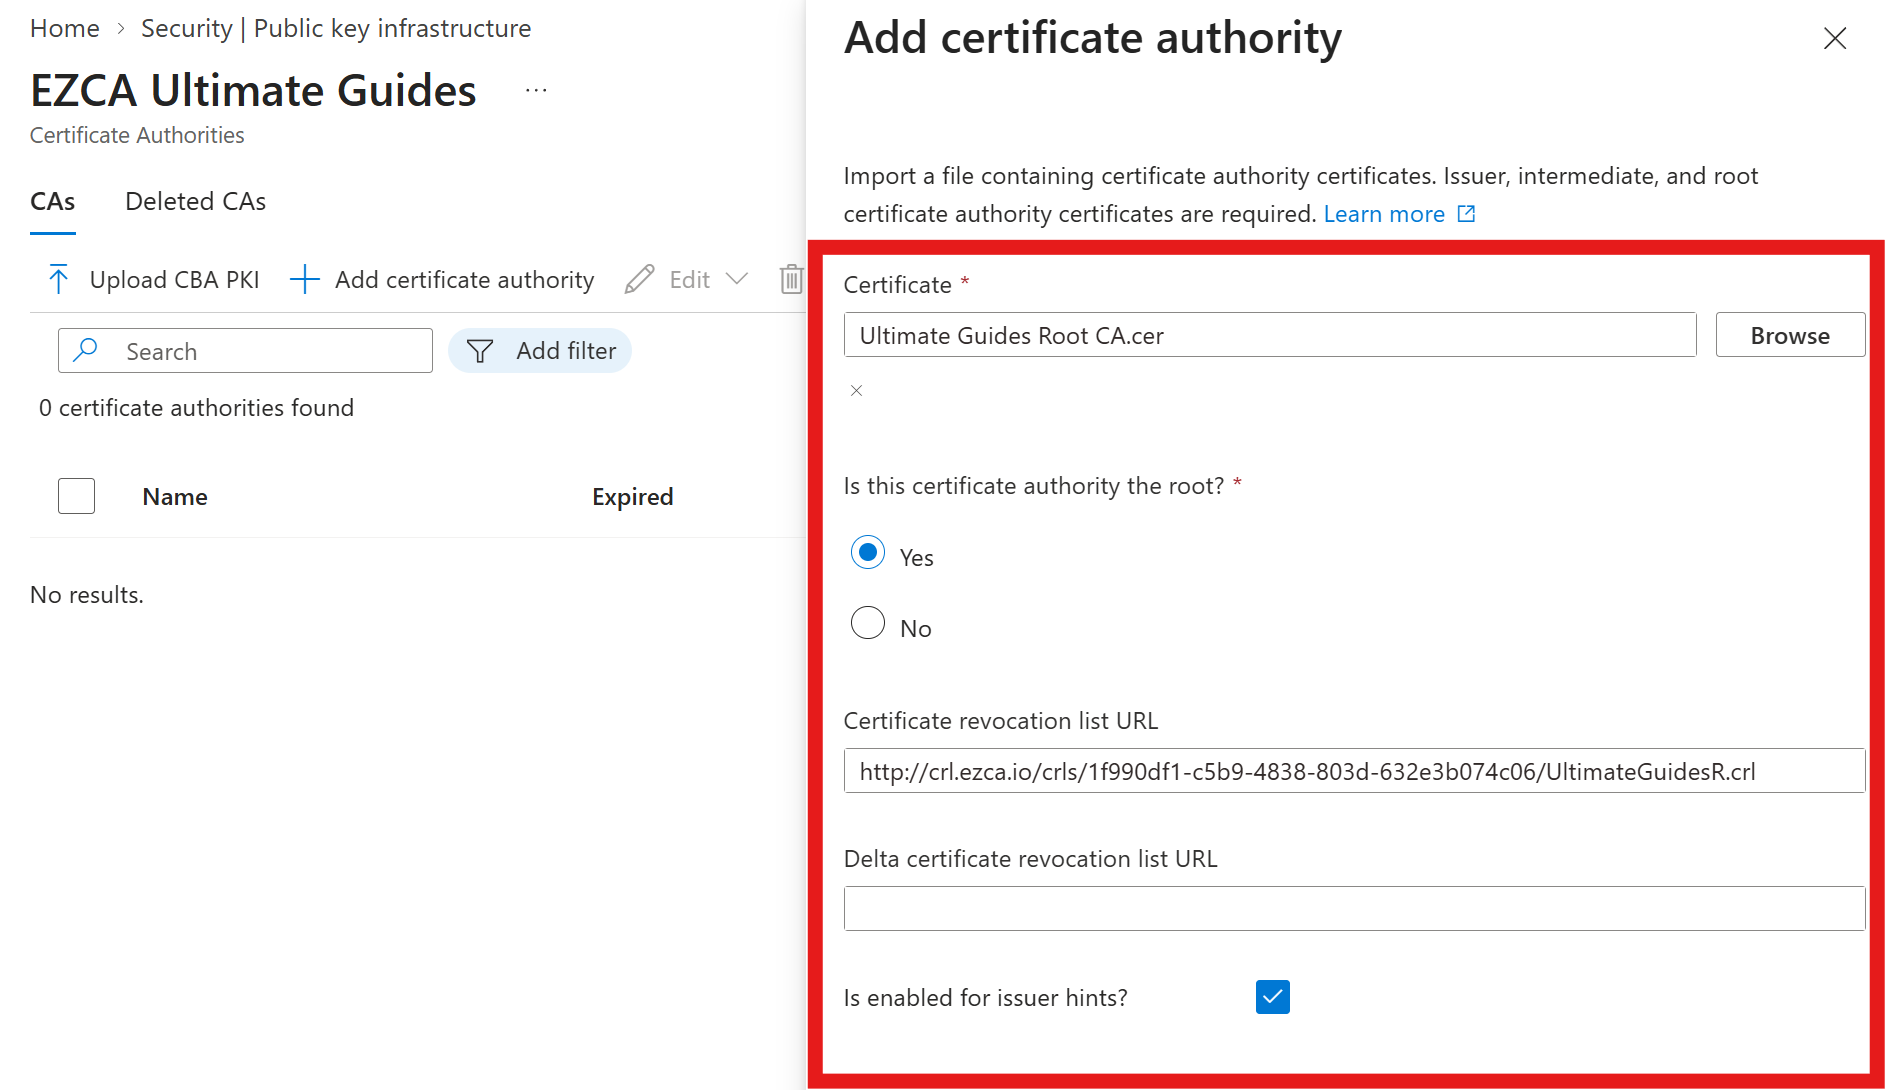
Enter the following details for your CA certificate:
- Certificate: Select the Keytos Shield CA certificate file you downloaded earlier.
- Is this certificate authority the root: Select Yes if this CA is the root CA; otherwise, select No.
- Certificate revocation list URL: Enter the CRL URL you copied earlier for this CA.
- Delta certificate revocation list URL: Leave blank.
- Is enabled for issuer hints?: Leave this checked.
-
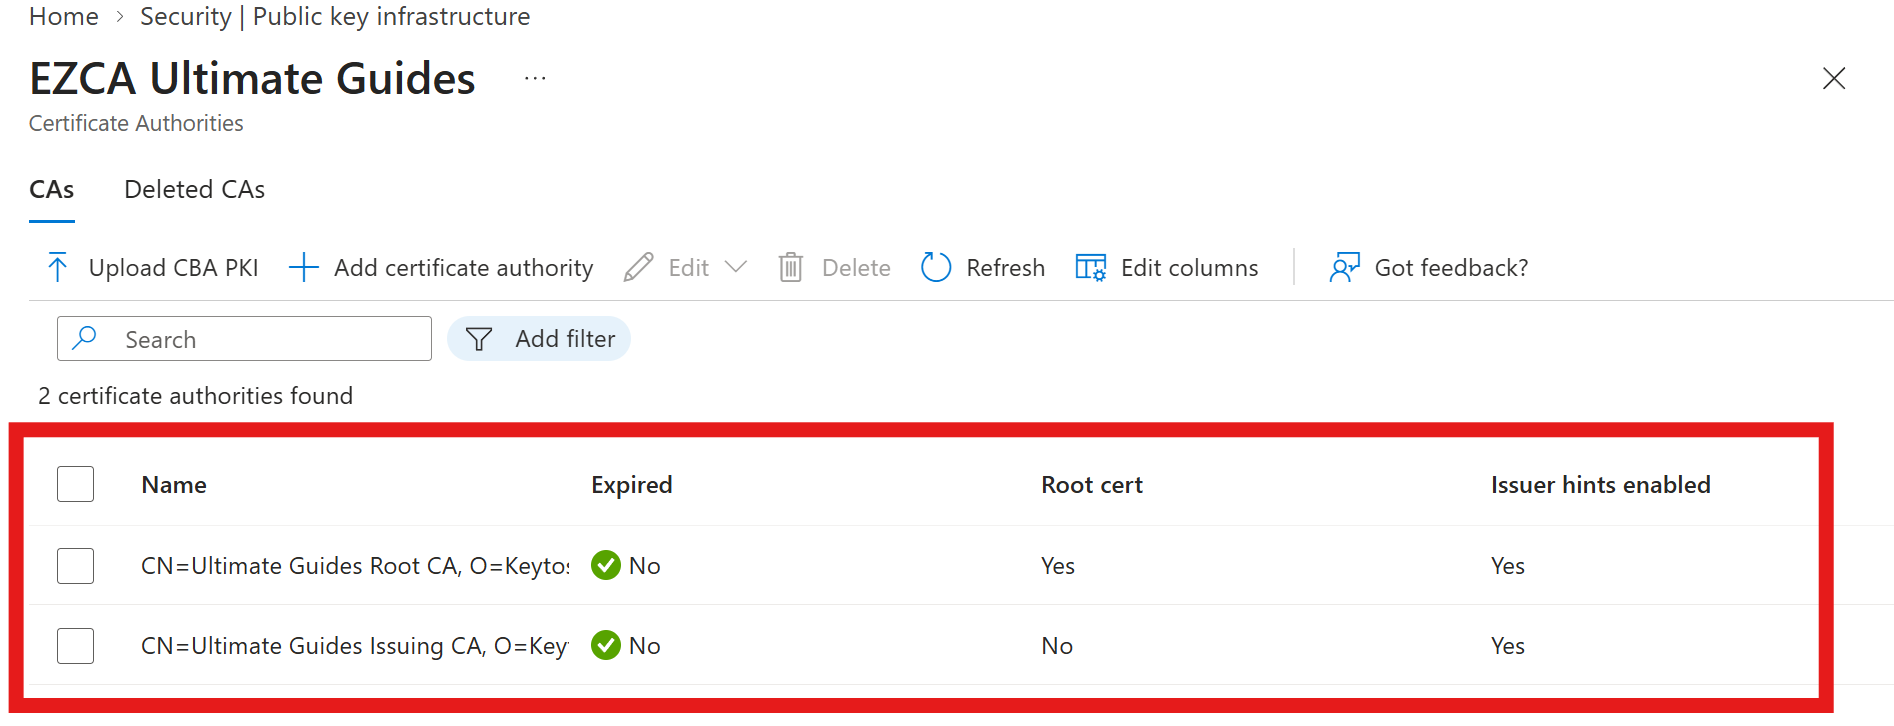
Click Save to add your CA certificate to Entra’s trust store.
-
Repeat the process to add any other CA certificates in your hierarchy to Entra’s trust store, such as your issuing CA. You should now have all your CA certificates imported and visible in Entra’s trust store.
Step 3 - How to Enable and Configure Entra Certificate-Based Authentication (CBA)
Now turn on Entra CBA, so users can sign in with the smart card certificate on their security key. Because a smart card certificate is protected by the security key’s PIN, set the authentication strength to Multi-factor. If you set Entra CBA high affinity to Yes in your Shield certificate settings, select High instead of Low for the affinity binding.
-
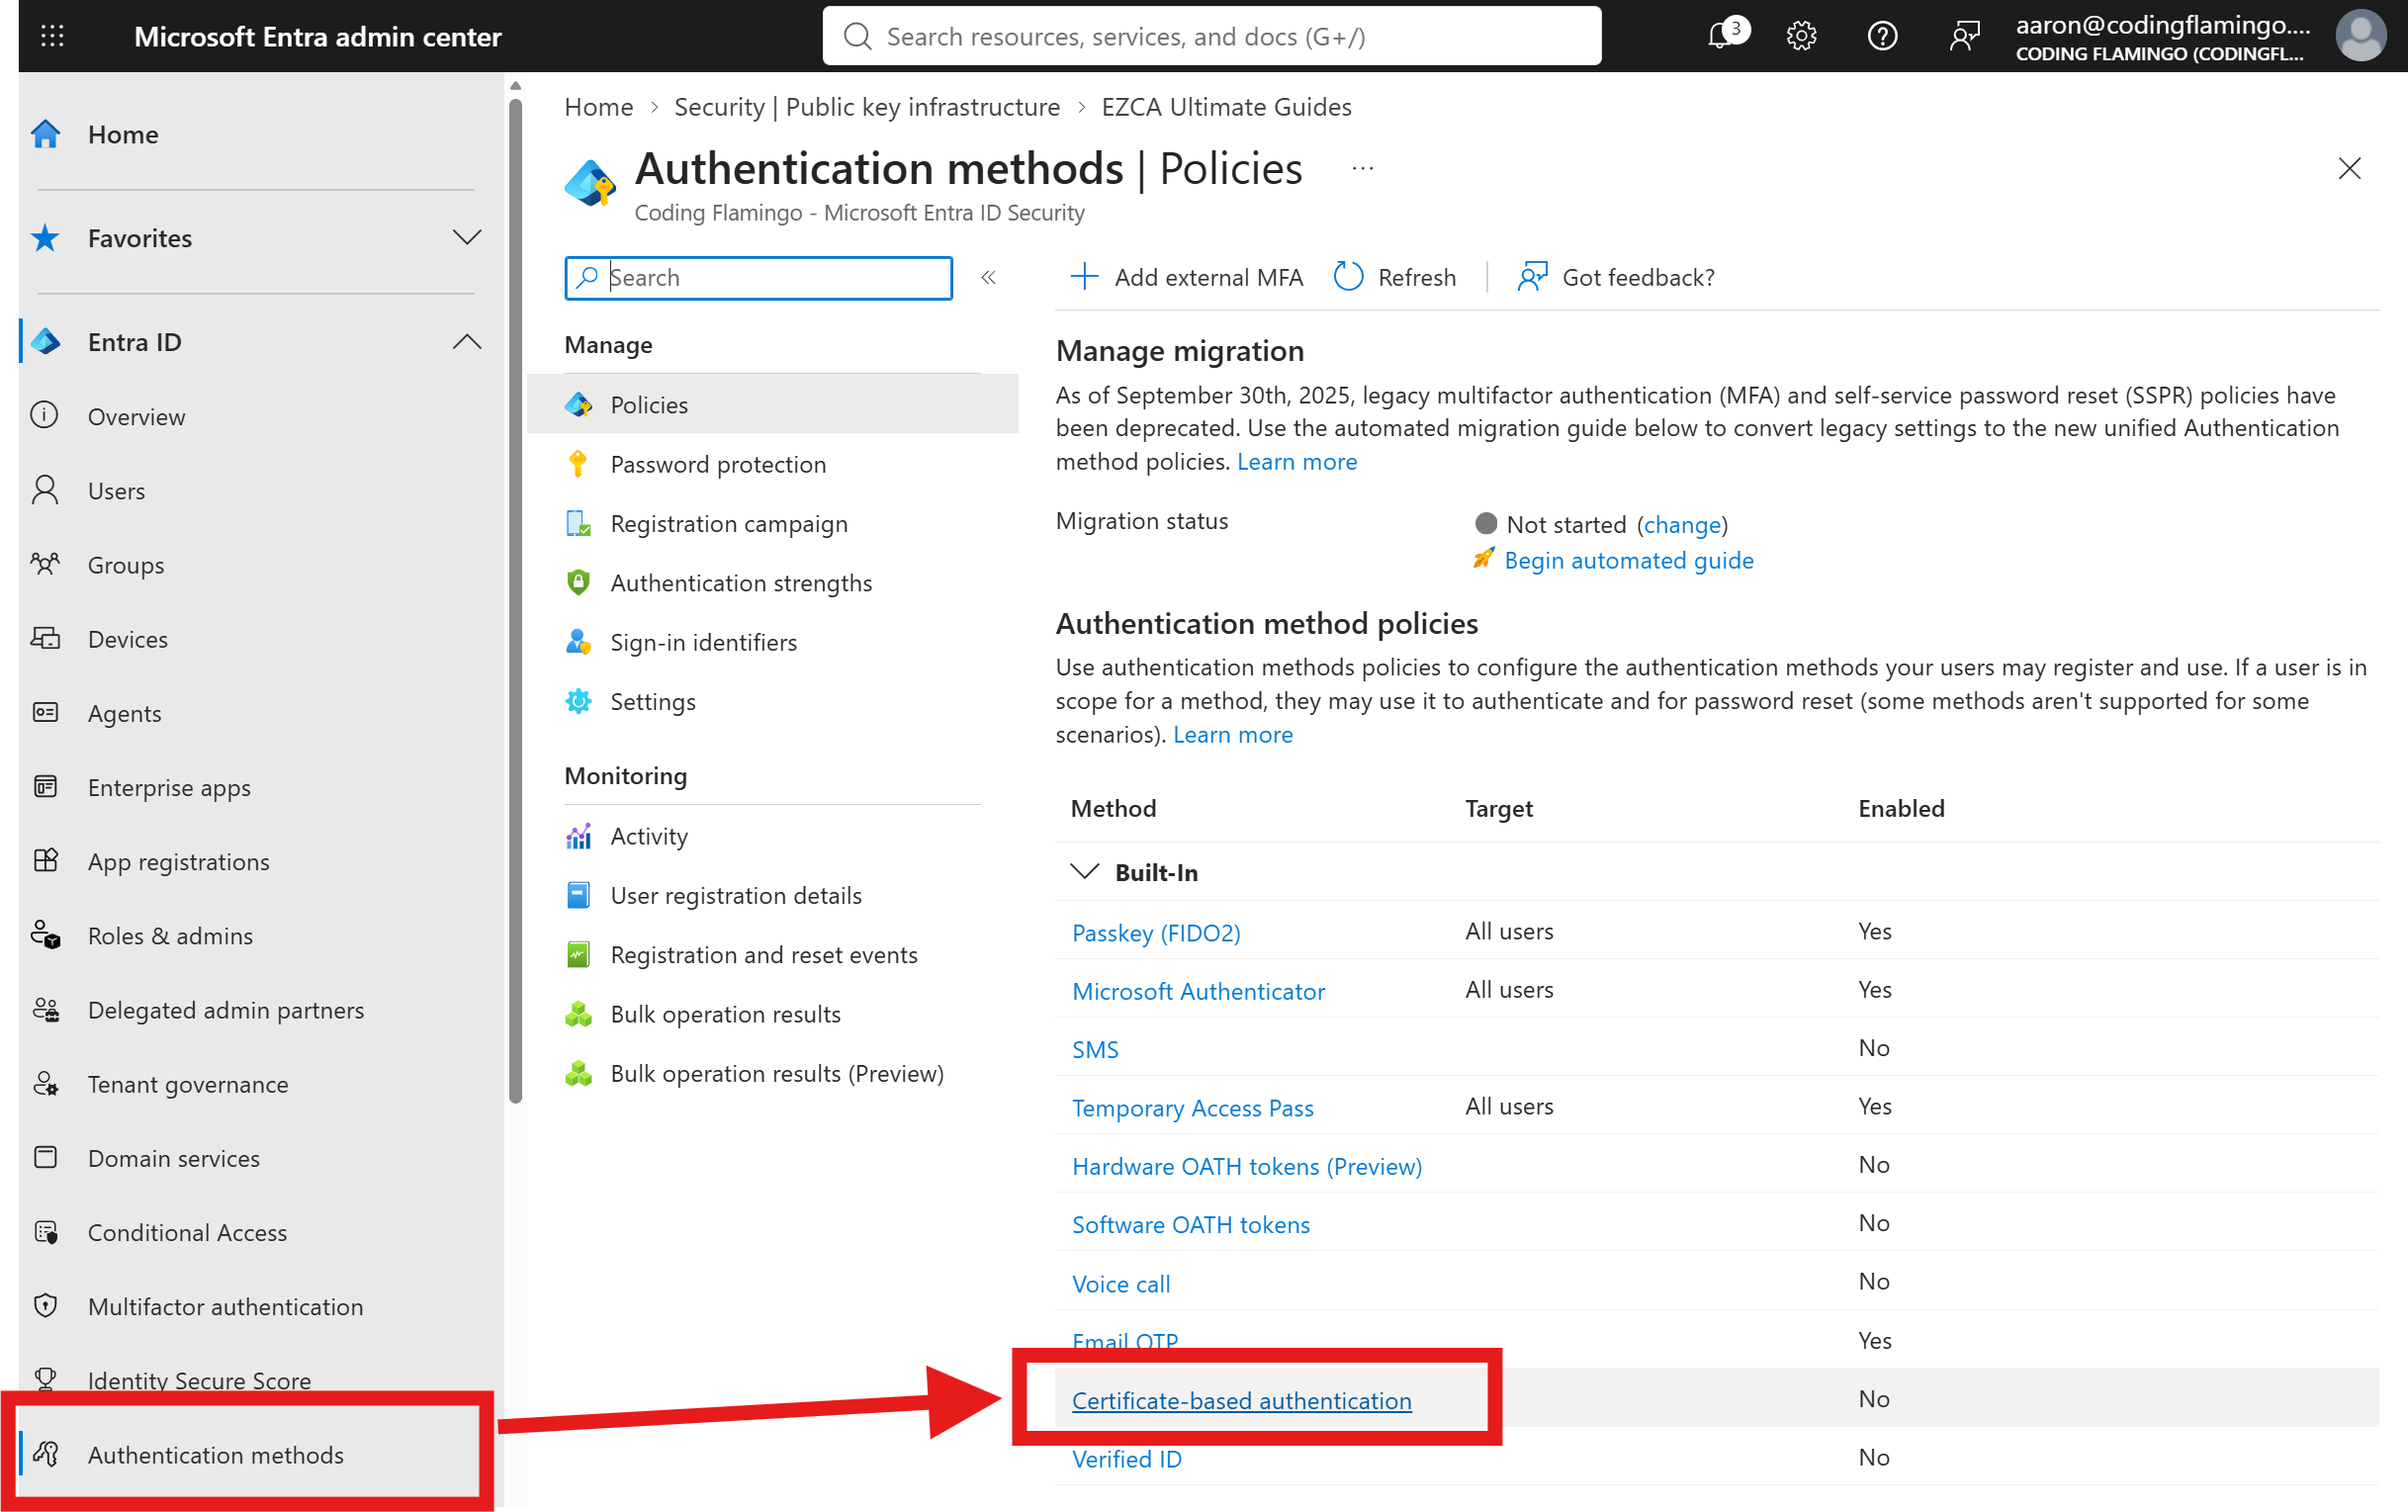
In the Entra portal left-hand navigation, navigate to Authentication methods and then select Certificate-based authentication.
-
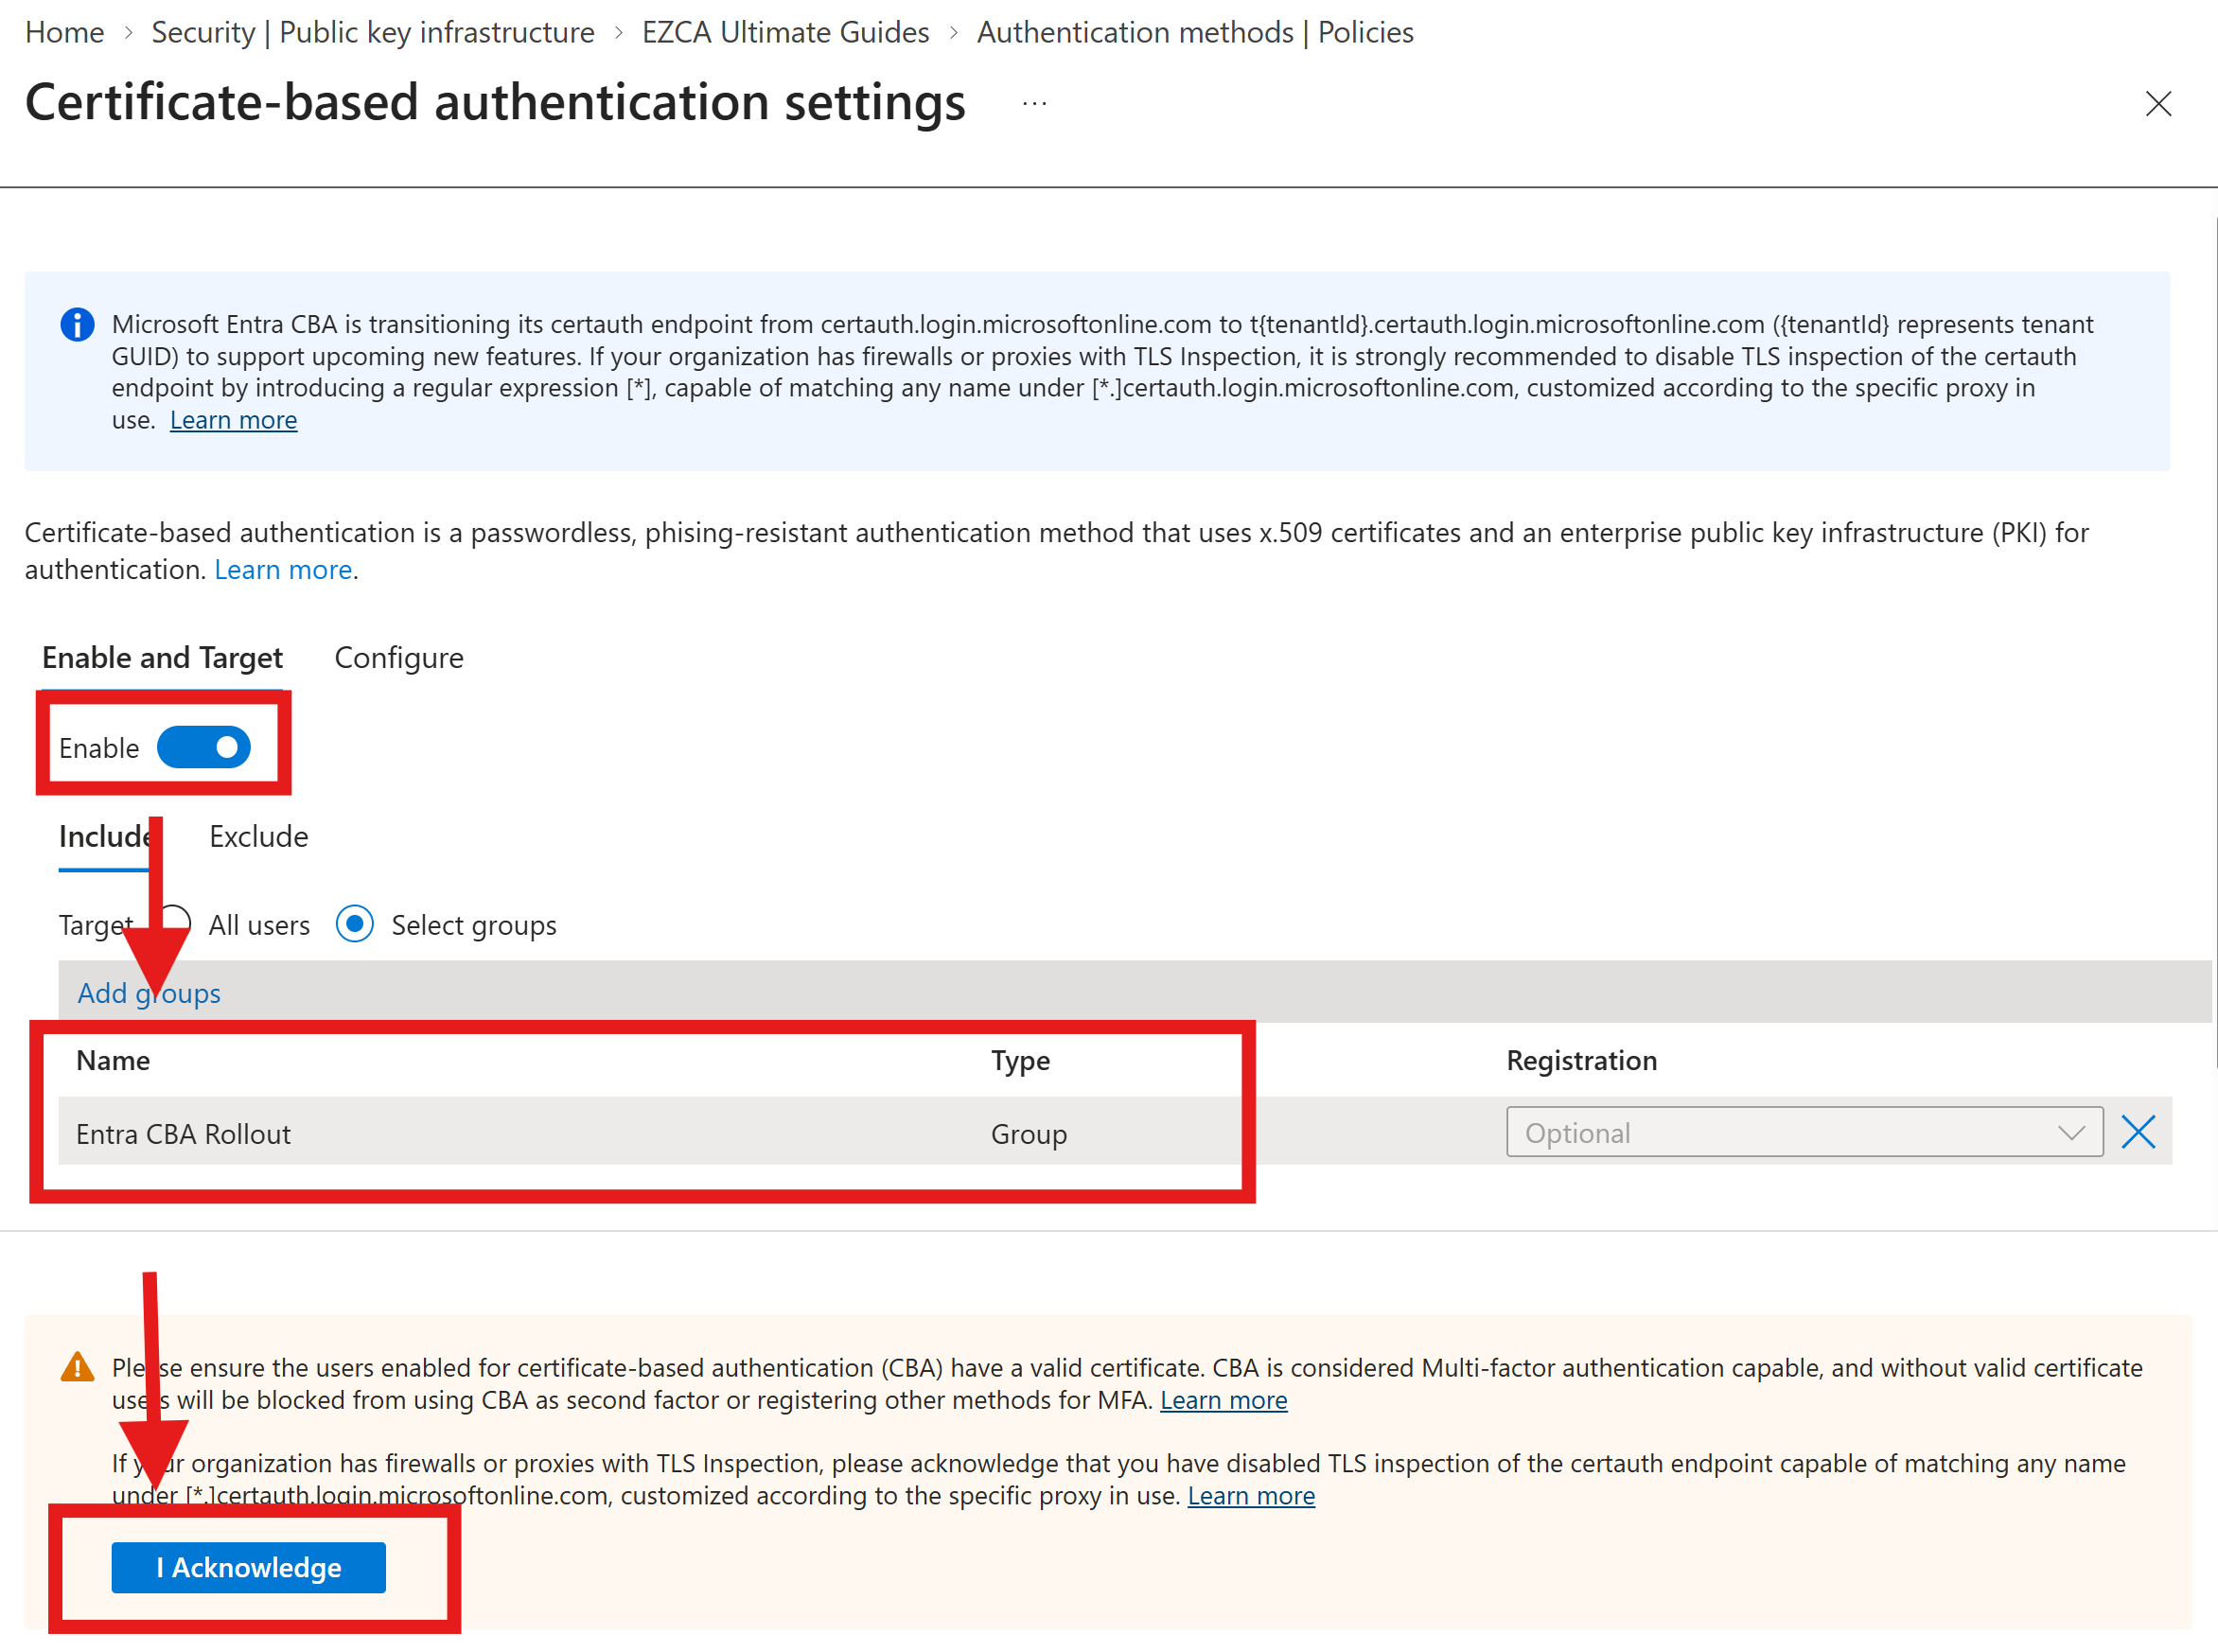
Switch the Enable toggle to on.
-
Under Include, select a small pilot group of users who will be part of the initial CBA rollout. It is not recommended to enable CBA for all users at this stage.
-
Click I Acknowledge to confirm that your users have a valid certificate issued to them already and they may be locked out if they do not have one.
-
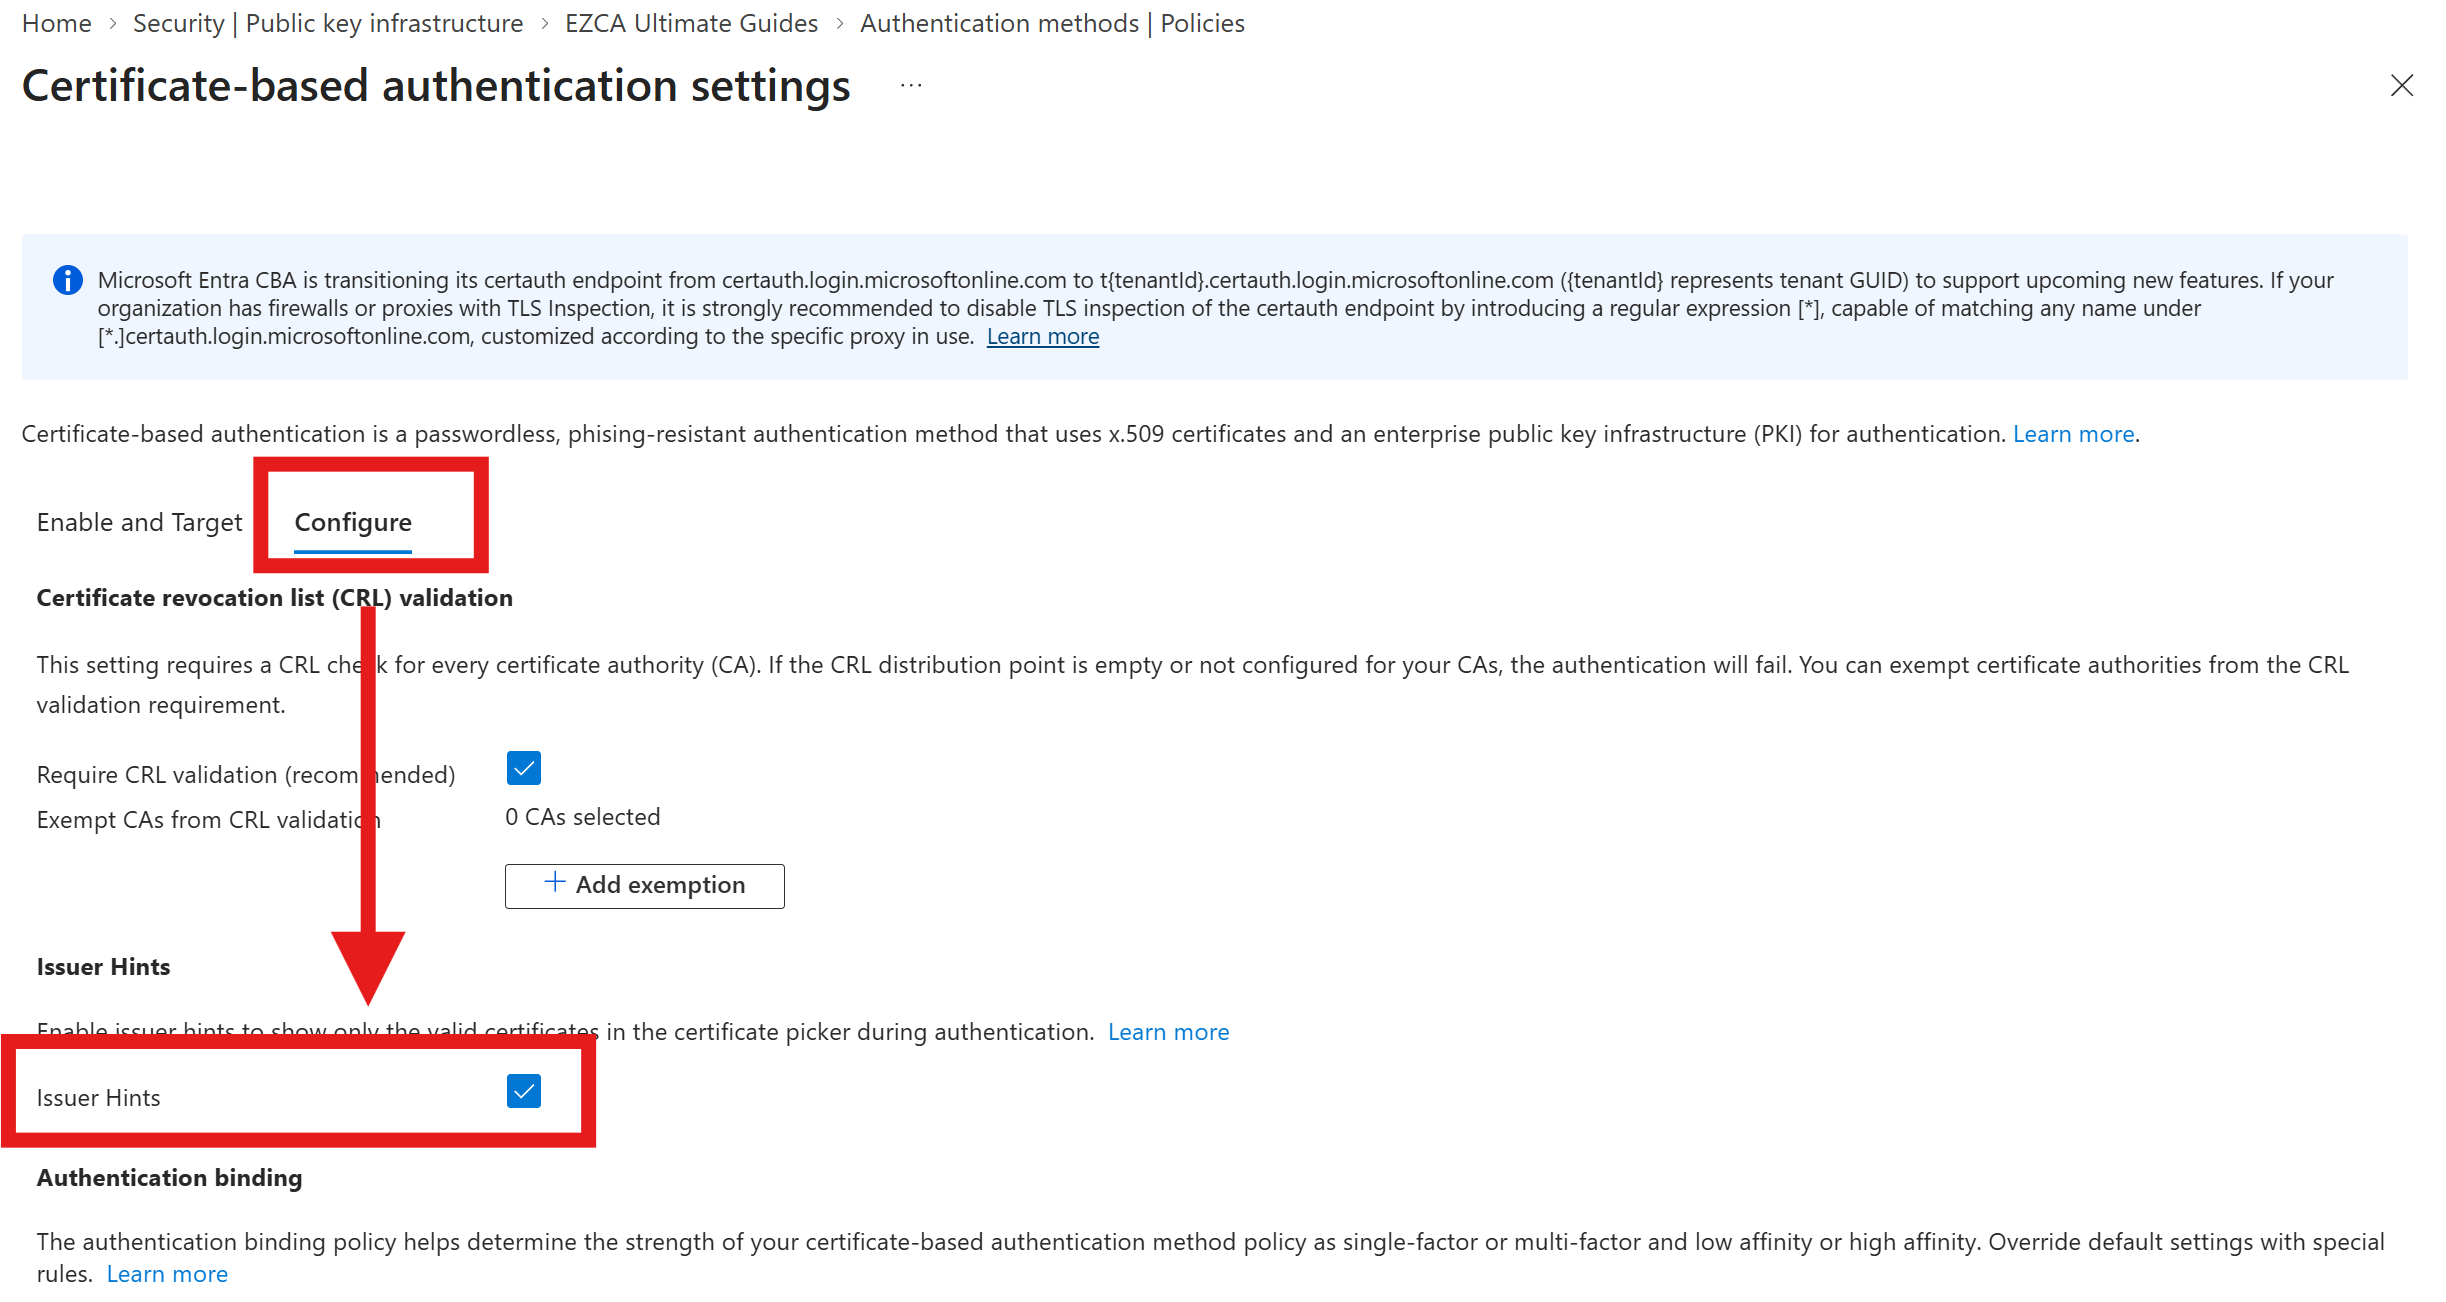
Select the Configure tab to configure your CBA settings.
-
Enable Issuer hints to show only valid certificates during the authentication process.
-
Under Authentication Binding:
- Set Default authentication strength to Multi-factor.
- Set Required Affinity Binding to Low.
-
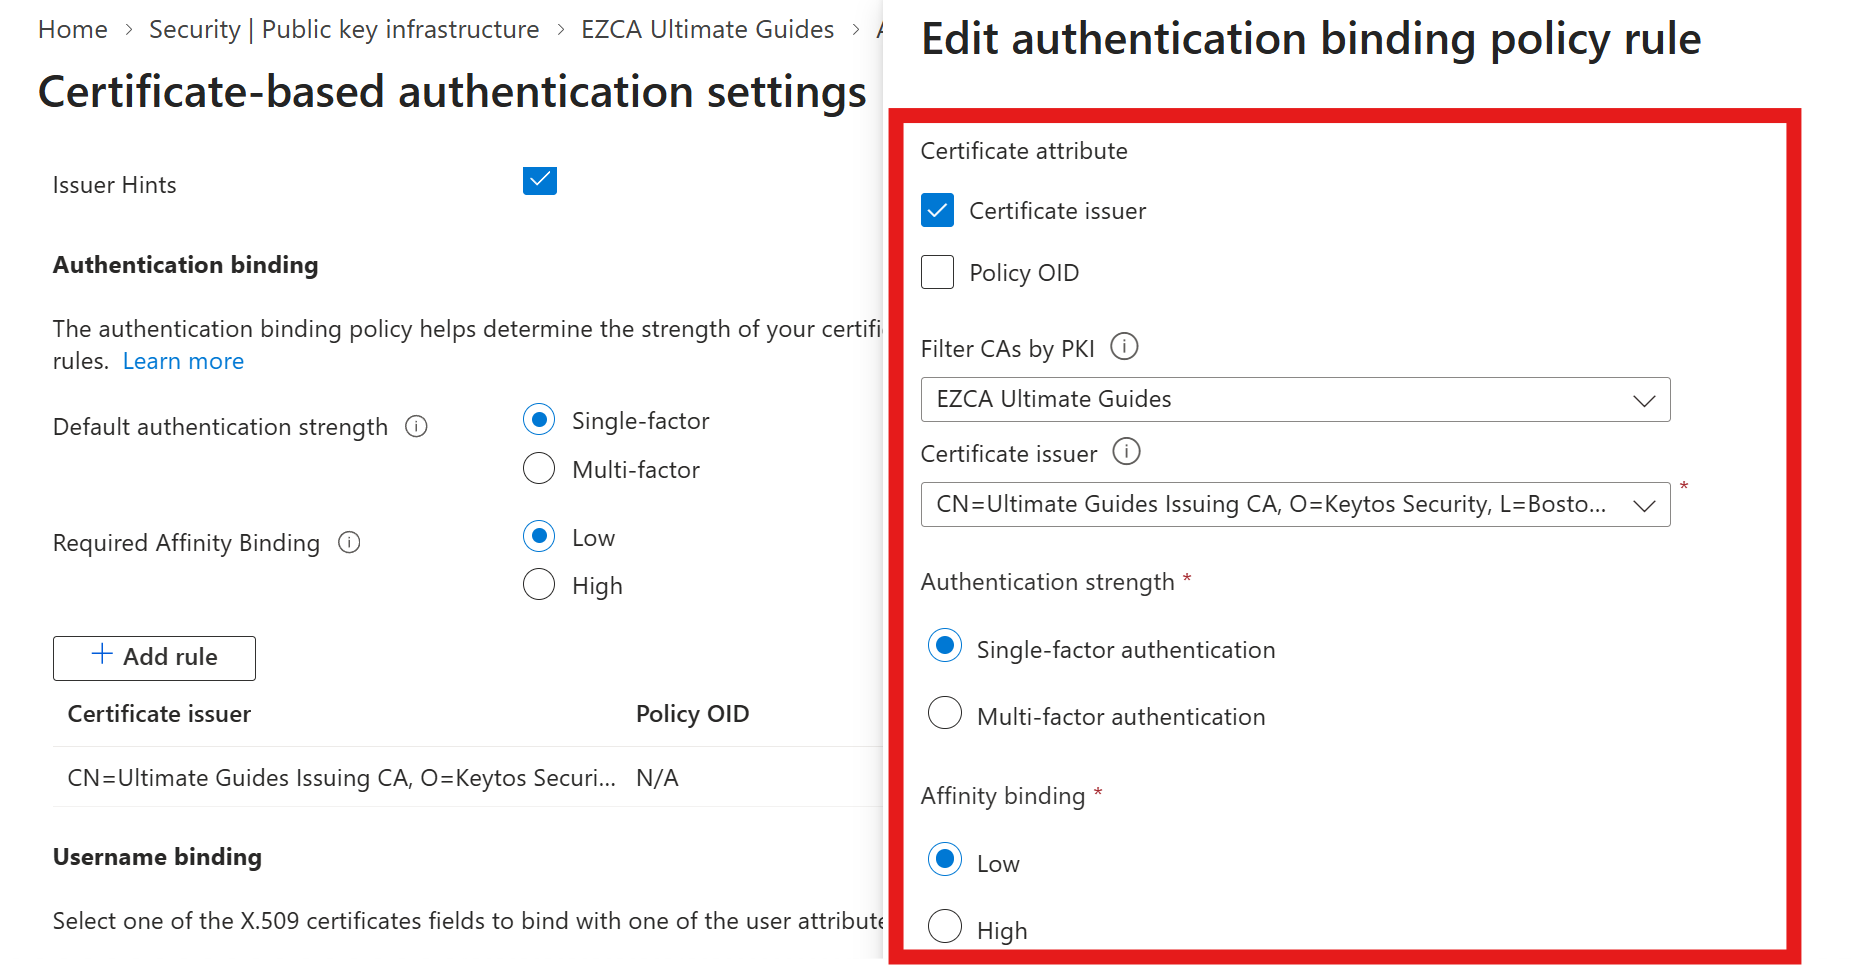
Click + Add rule and configure the following settings:
- Certificate attribute: Check the Certificate issuer box.
- Filter CAs by PKI: Select the PKI you previously configured in Entra’s trust store.
- Certificate issuer: Select the specific CA issuer that directly issues your smart card certificates.
- Authentication strength: Select Multi-factor authentication.
- Affinity binding: Select Low.
-
Click Save to apply your authentication binding rule.
-
Under Username binding, ensure that you have at least PrincipalName selected with the userPrincipalName user attribute. This ensures that the certificate is correctly mapped to the user’s principal name during authentication. You can optionally add other attributes as needed for your environment.

-
Leave Certificate issuer scoping policy section empty unless you want to restrict authentication to specific certificate issuers for specific groups of users.
-
Click Save.
Done! Your users can now sign in to Entra ID with the smart card certificate on their security key. To require certificate-based sign-in for specific apps, see how to add a custom authentication strength and Conditional Access policy.