












How To Distribute Network Profiles to Windows Devices via ManageEngine Mobile Device Manager Plus
Overview - How to Distribute Network Profiles to Windows Devices via ManageEngine
To connect your ManageEngine Windows Devices to your network, you need to distribute a configuration profile that includes the necessary network settings, authentication methods, and certificates. This guide will walk you through the steps to configure and push these profiles to Windows Devices using ManageEngine for EAP-TLS.
Step-by-Step Guide - How To Configure Network Profile ManageEngine Configuration Policies for Windows Devices
Follow these steps to configure and push the necessary ManageEngine configuration policies for Windows Devices:
Prerequisites for Configuring Windows Network Profiles via ManageEngine
Before you begin configuring network profiles for Windows Devices via ManageEngine, ensure that you have completed all the necessary prerequisites:
- The Keytos Entra ID applications are registered in your tenant.
- You have signed up for a Keytos Shield Plan.
- You have existing access policies in Keytos Shield.
- You are a Subscription Owner or Network Administrator.
- You are an ManageEngine Administrator.
Step 1 - How to Push your Shield CA Certificates as Trusted Certificates in ManageEngine
The first step is to push your Shield CA certificates as trusted certificates in ManageEngine. This ensures that your Windows devices recognize and trust the certificates issued by your Shield CA.
How to Download Your Root and Issuing CA Certificates in Keytos Shield
Begin by downloading your Root and Issuing CA certificates from the Keytos Shield portal.
If you are still working through the onboarding guide, you can simply download the Root and Issuing CA certificate without leaving the page.
-
Scroll down and expand step 6, Set Up Mobile Device Management (MDM).
-
Expand the ManageEngine subsection.
Not seeing the ManageEngine subsection? Make sure to enable ManageEngine in step 2, Tell us about your environment and save your changes.
-
Next to
rootca.cer, click Download and save it to your local machine. -
Next to
issuingca.cer, click Download and save it to your local machine as well.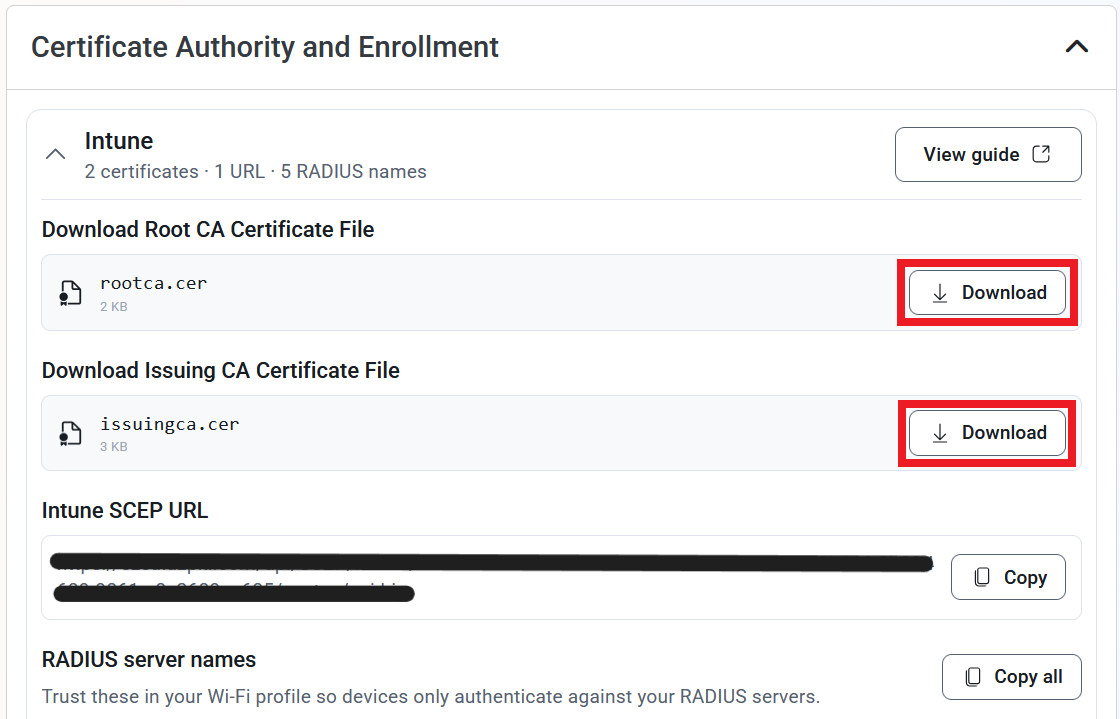
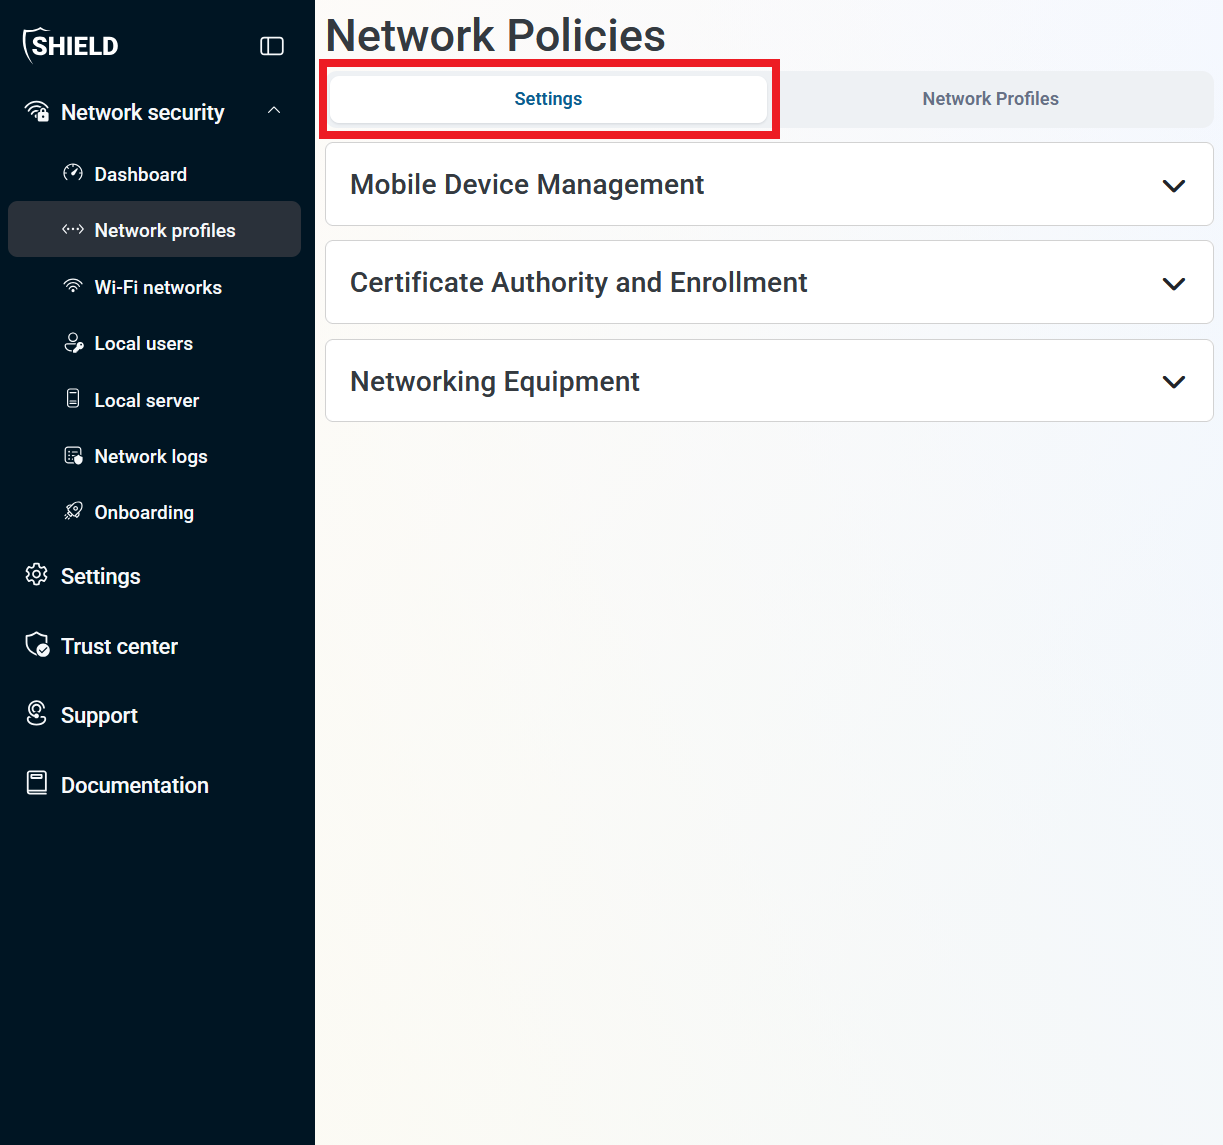
If you’ve already gone through the onboarding guide, you can download your Root and Issuing CA certificates from the Network profiles page.
-
Log in to your Keytos Shield portal.
-
From the left-hand navigation bar, click on Network Profiles.
-
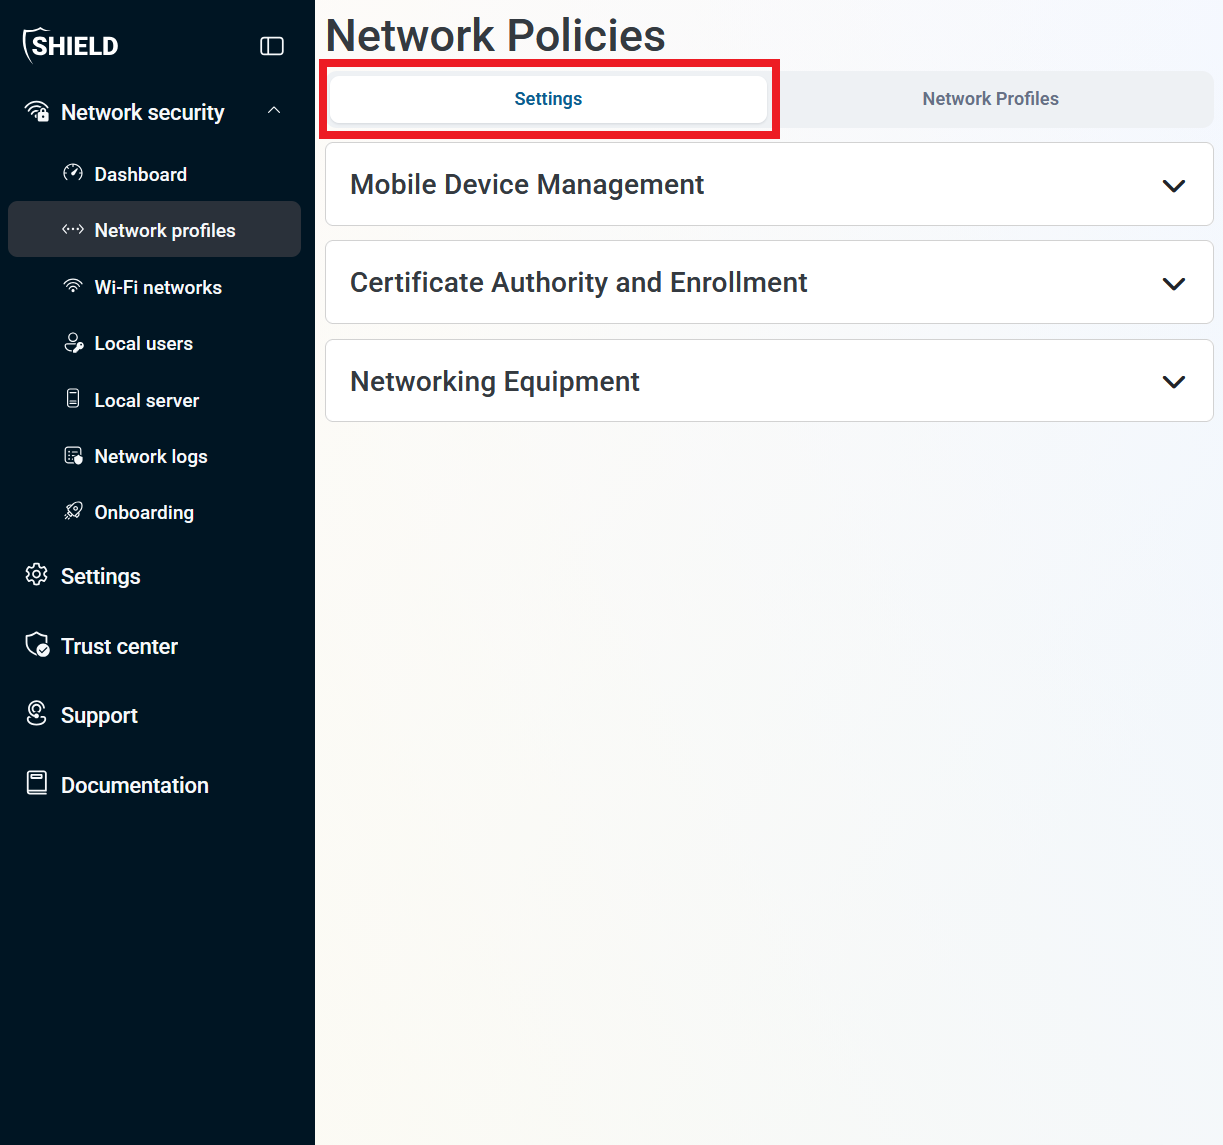
At the top of the page, select the Settings tab.
-
Scroll down to the Certificate Authority and Enrollment section and expand the ManageEngine subsection.
Not seeing the ManageEngine subsection? Make sure to enable ManageEngine under the Mobile Device Management section further up on the page and save your changes.
-
Next to
rootca.cer, click Download and save it to your local machine. -
Next to
issuingca.cer, click Download and save it to your local machine as well.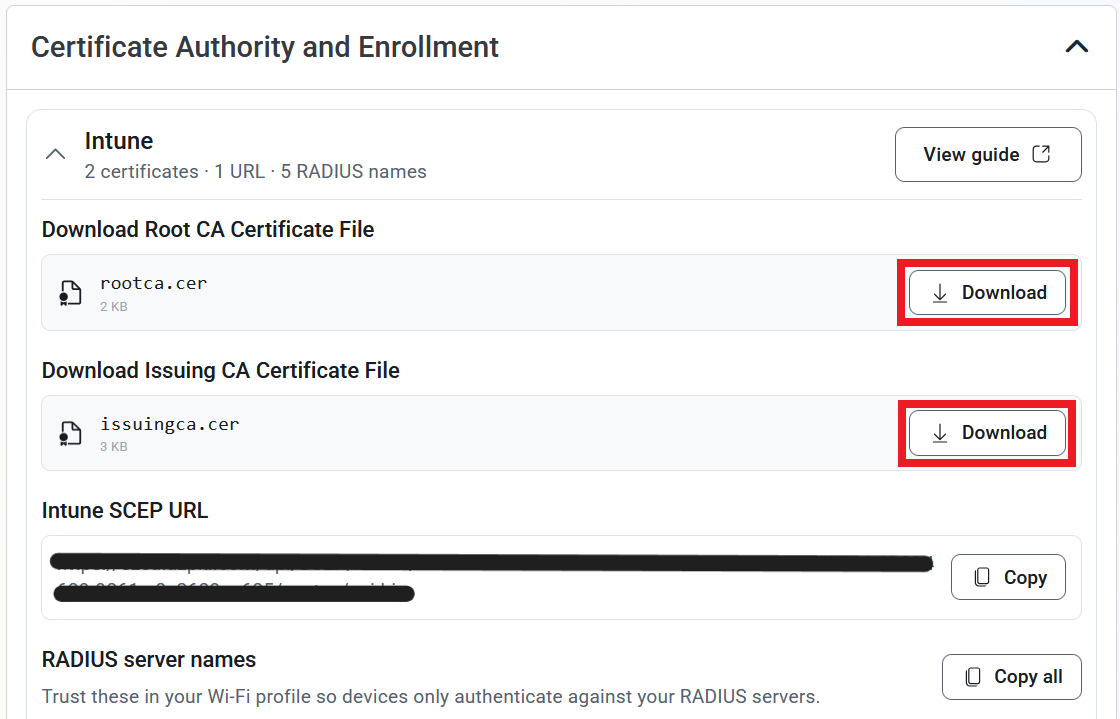
How to Upload Your Shield CA Certificates to ManageEngine
Now that you have downloaded your Shield Root and Issuing CA certificates, you can upload them to ManageEngine.
-
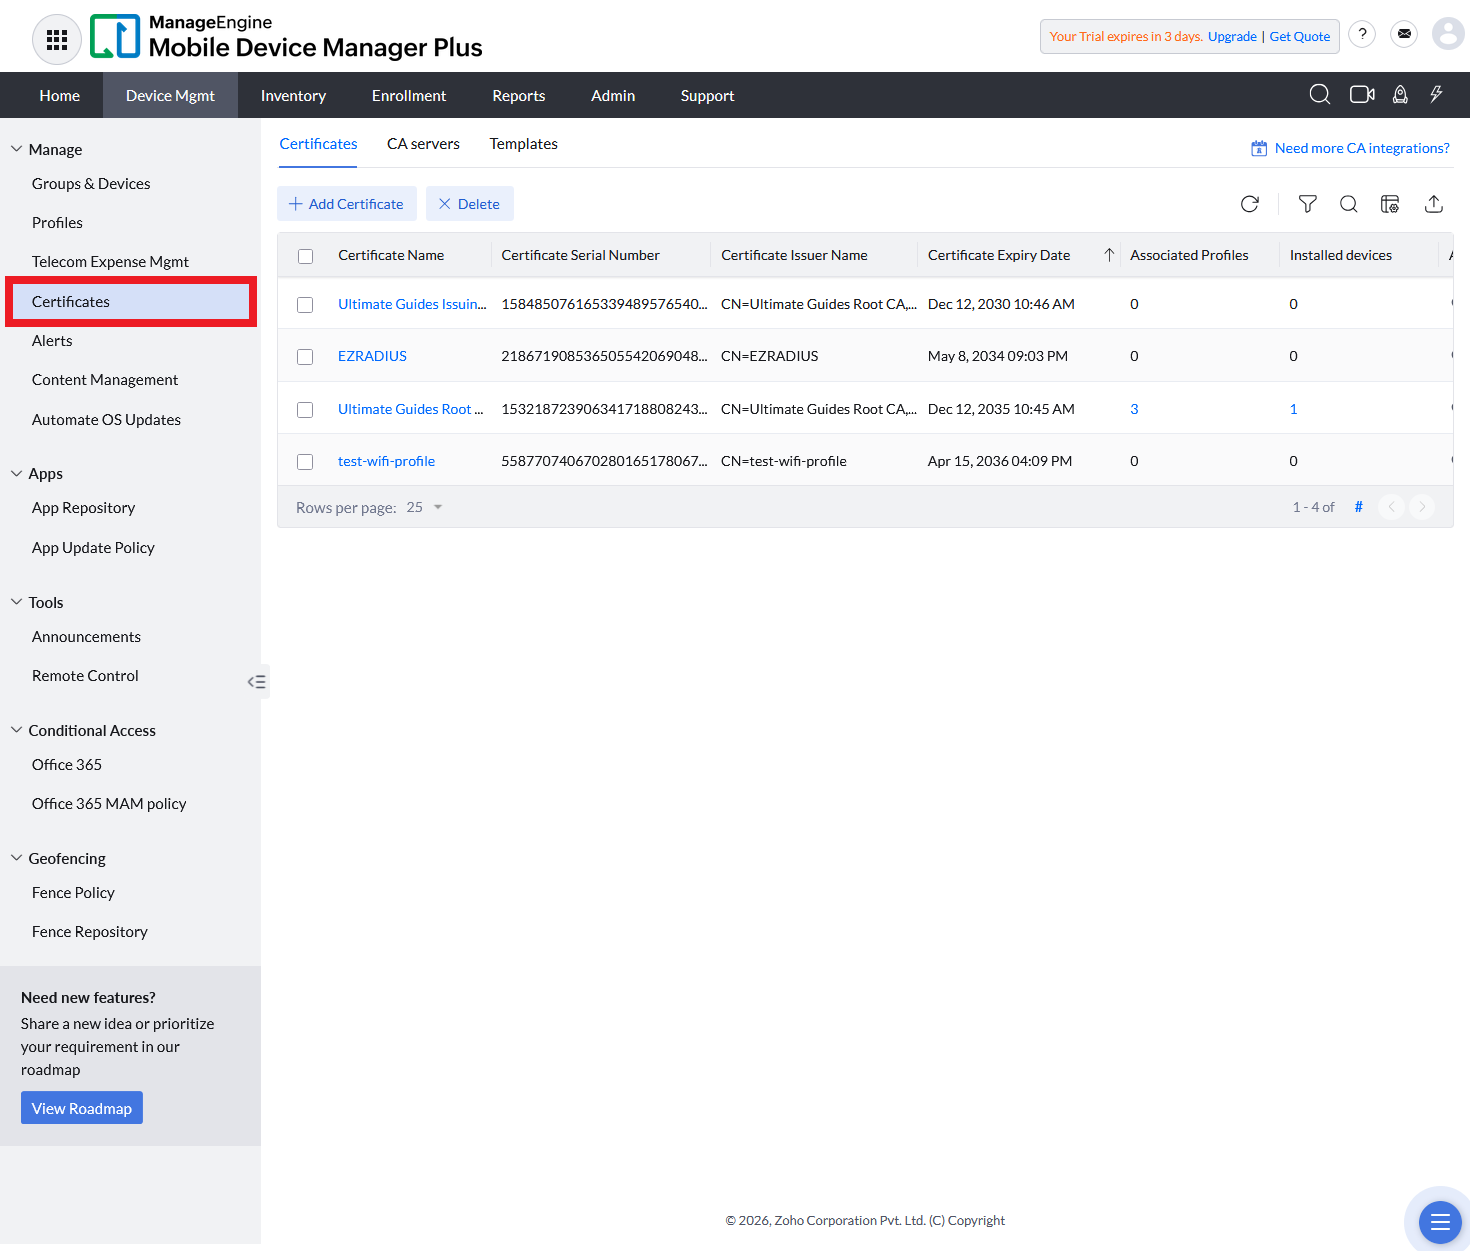
In your ManageEngine Mobile Device Manager Plus portal, navigate to the Device Mgmt page.
-
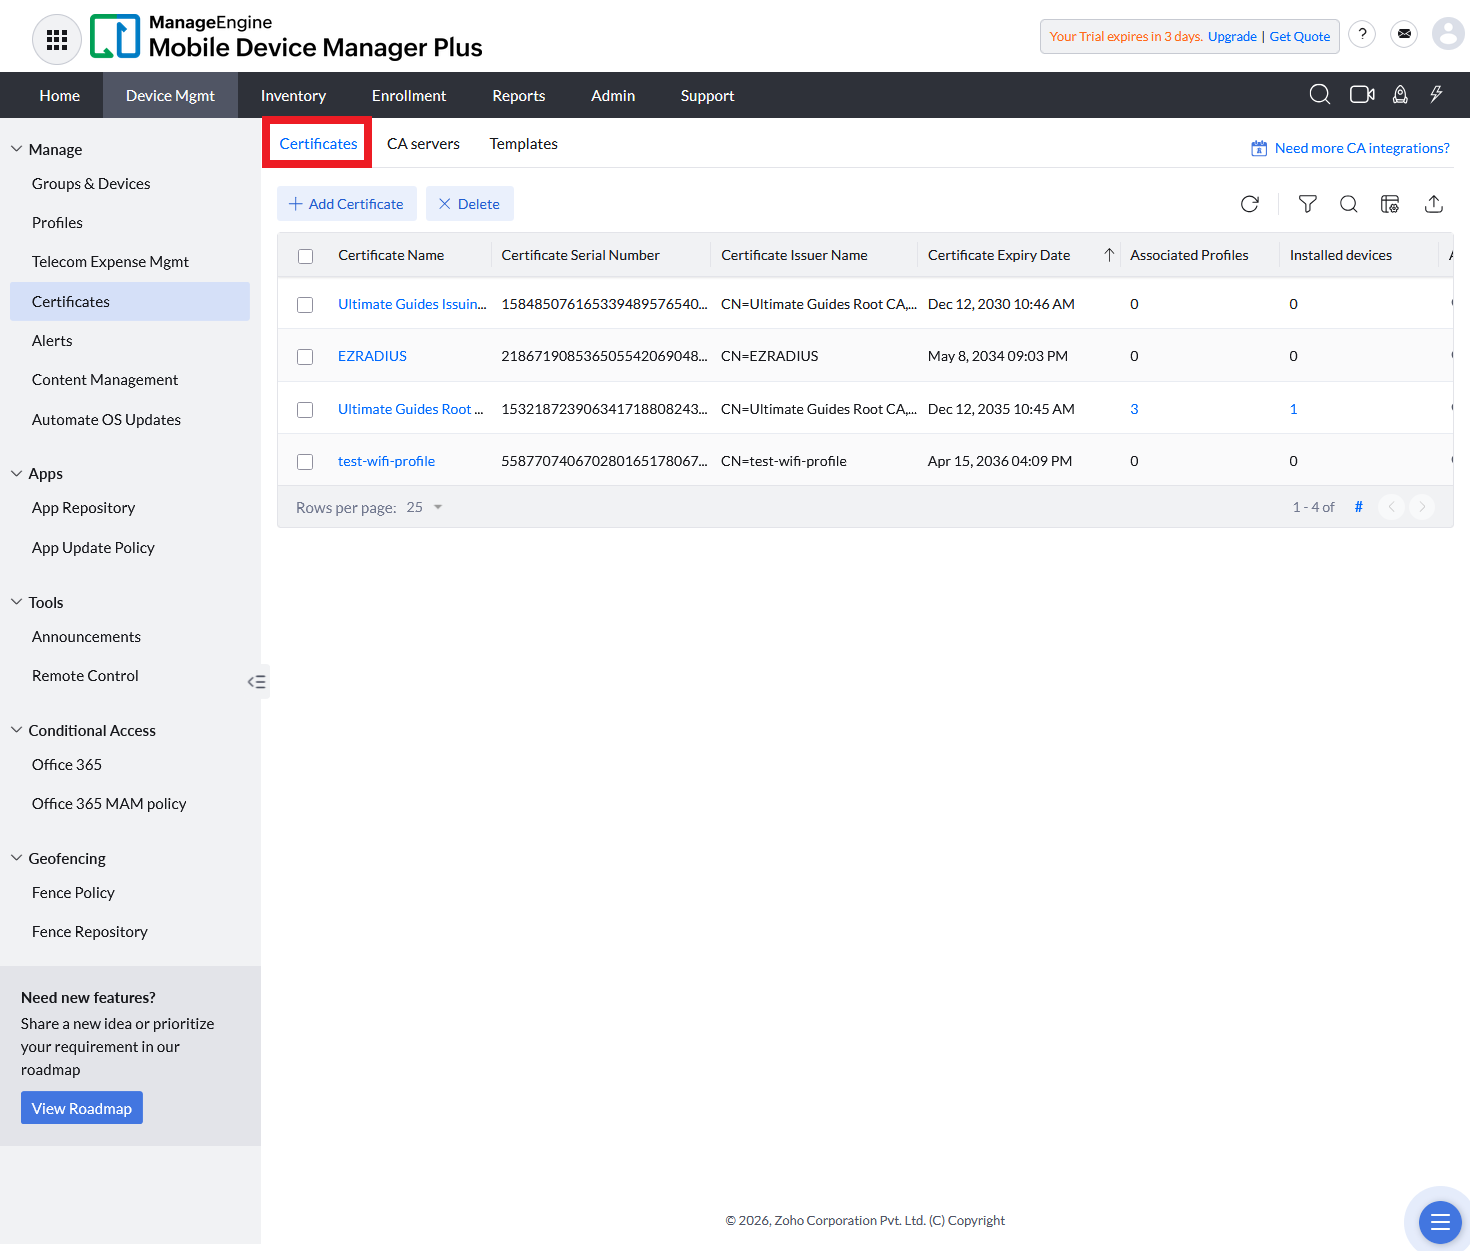
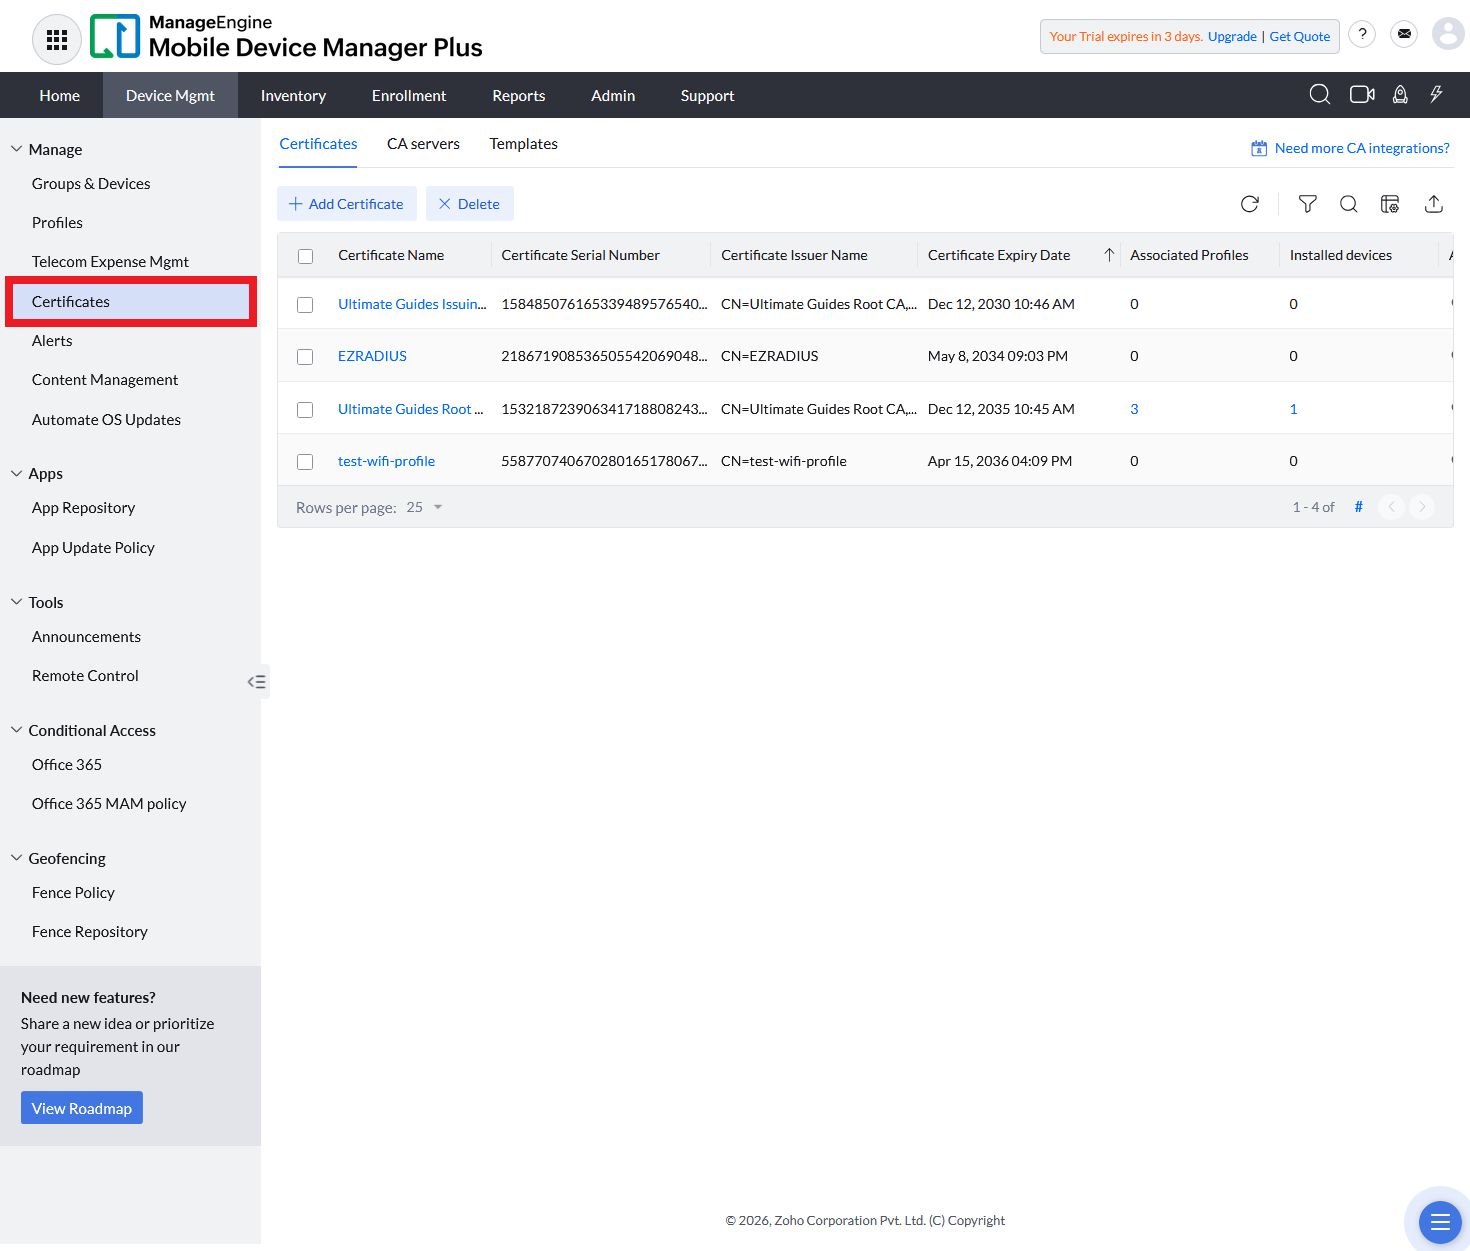
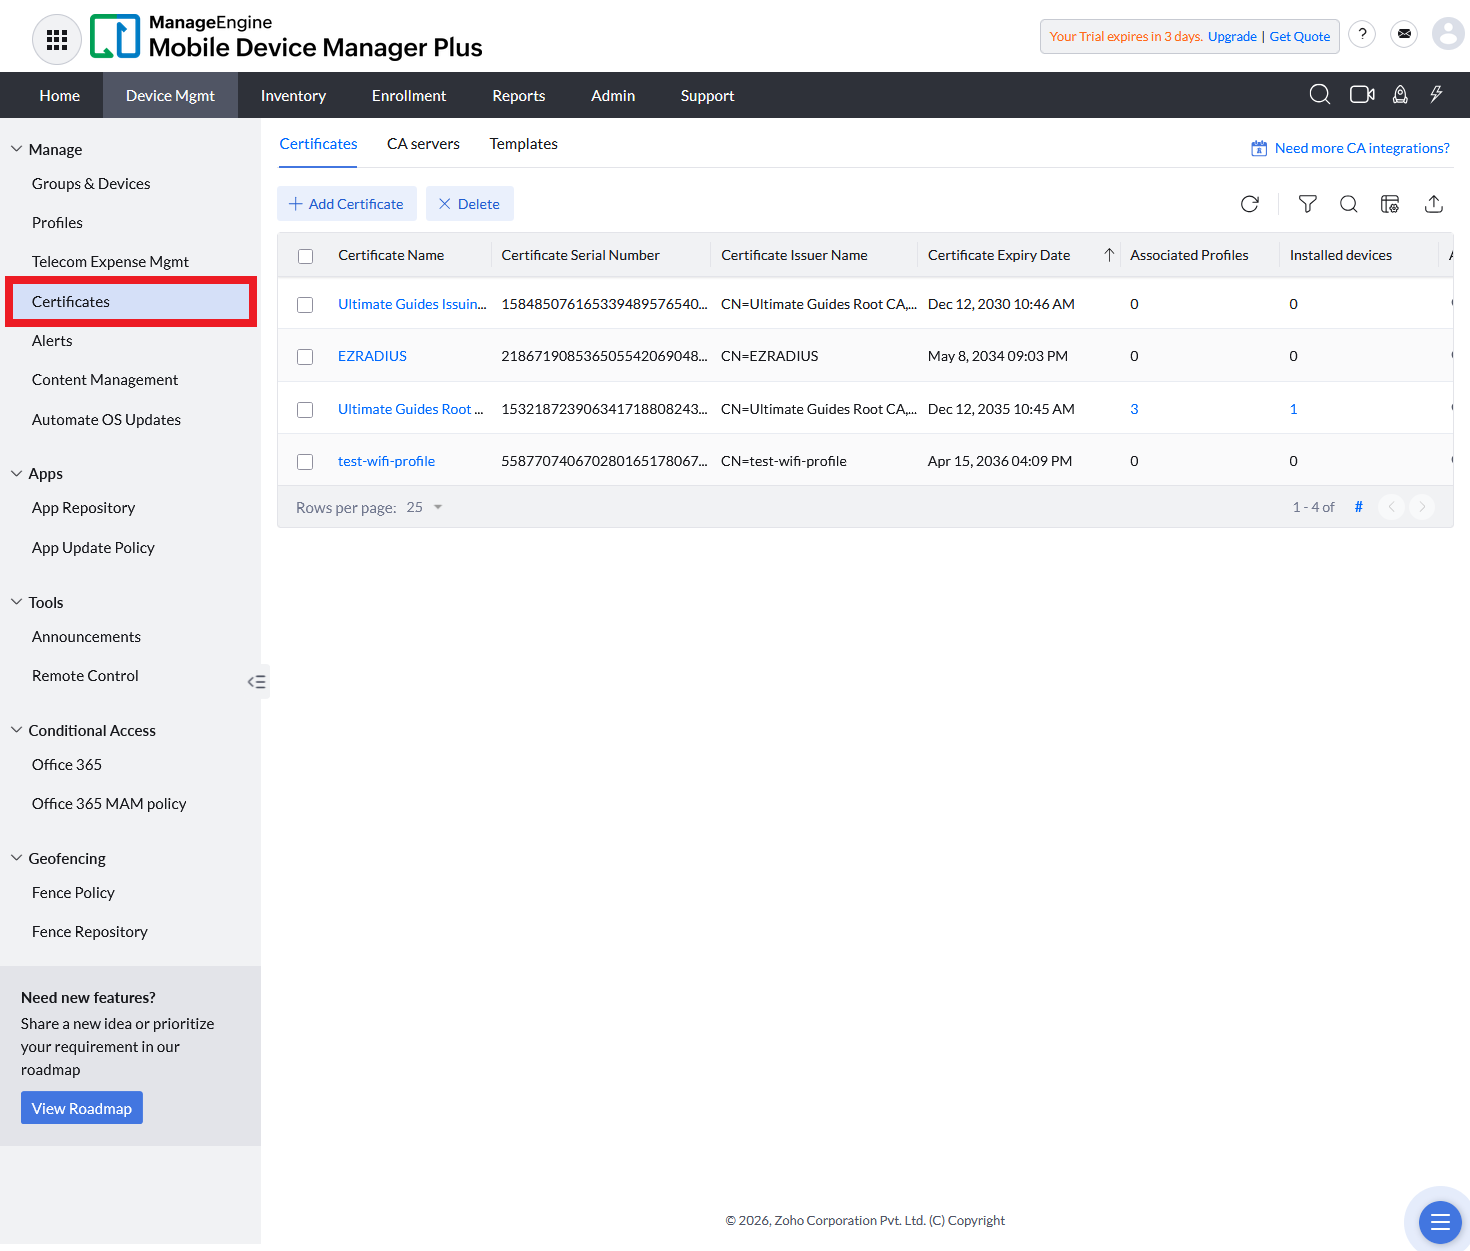
Using the left-hand menu, under Manage select Certificates.
-
Using the tabs at the top of the Certificates page, ensure you are on Certificates.
-
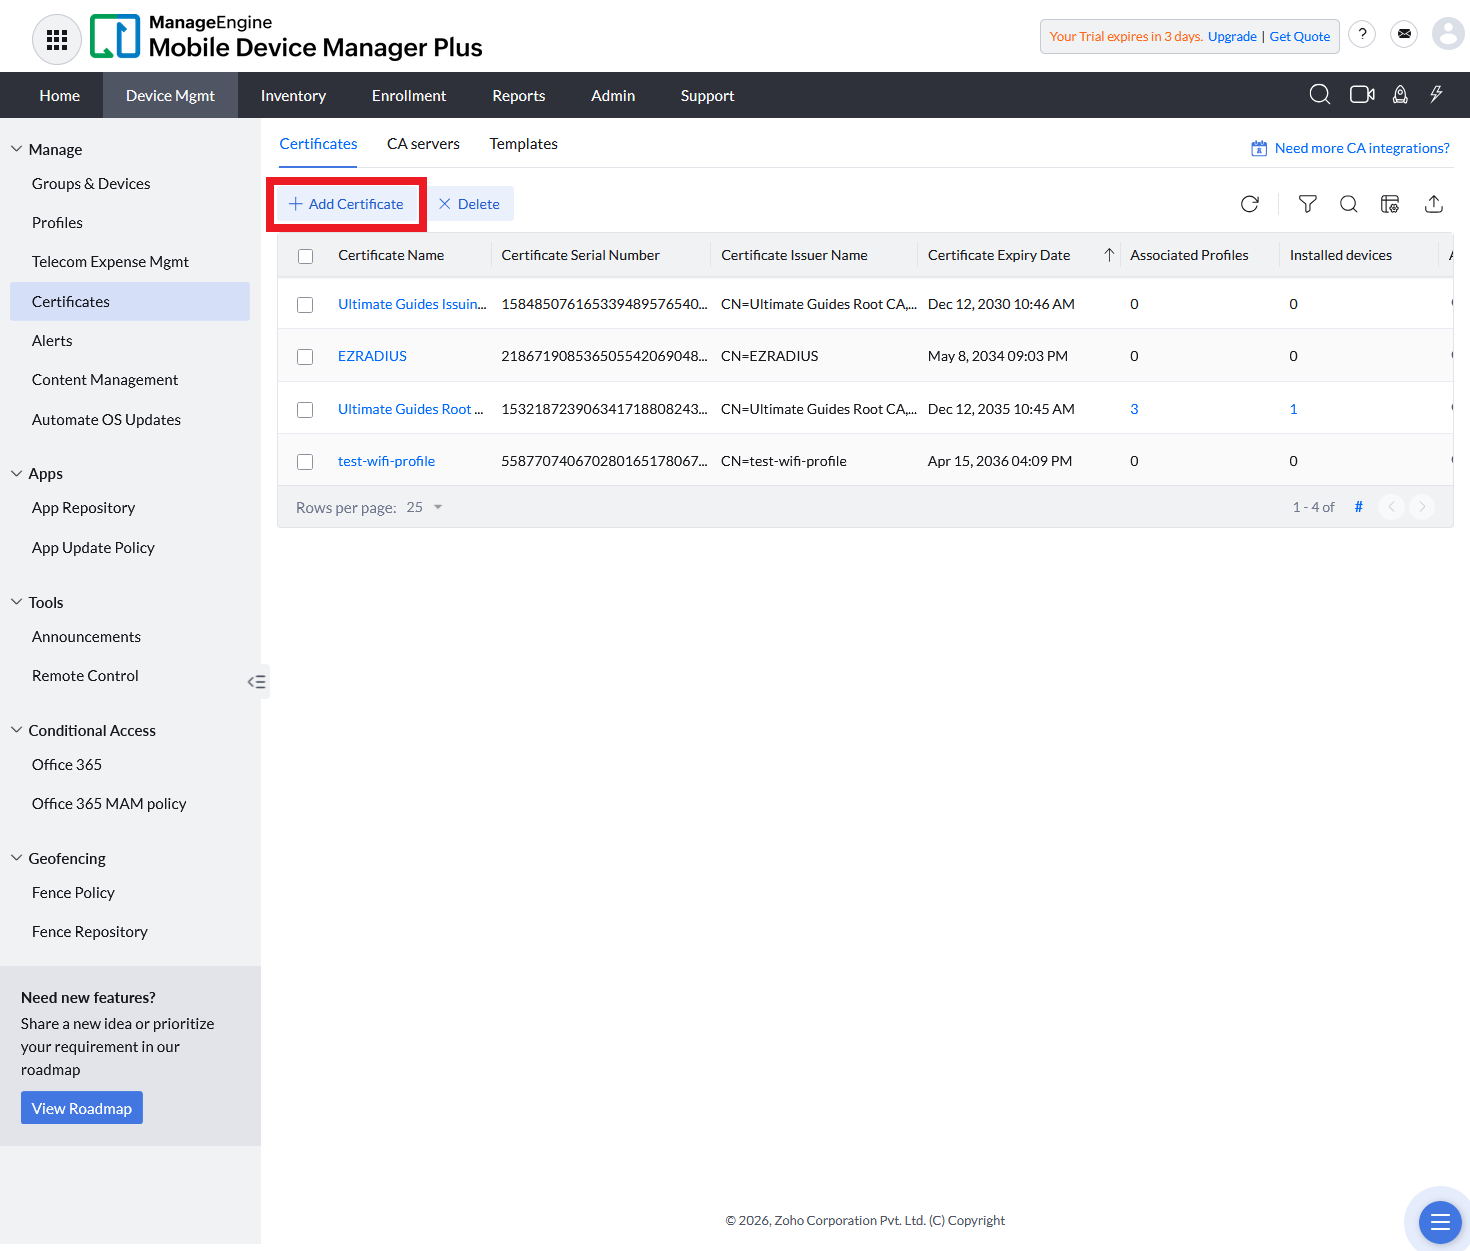
Click the + Add Certificate button.
-
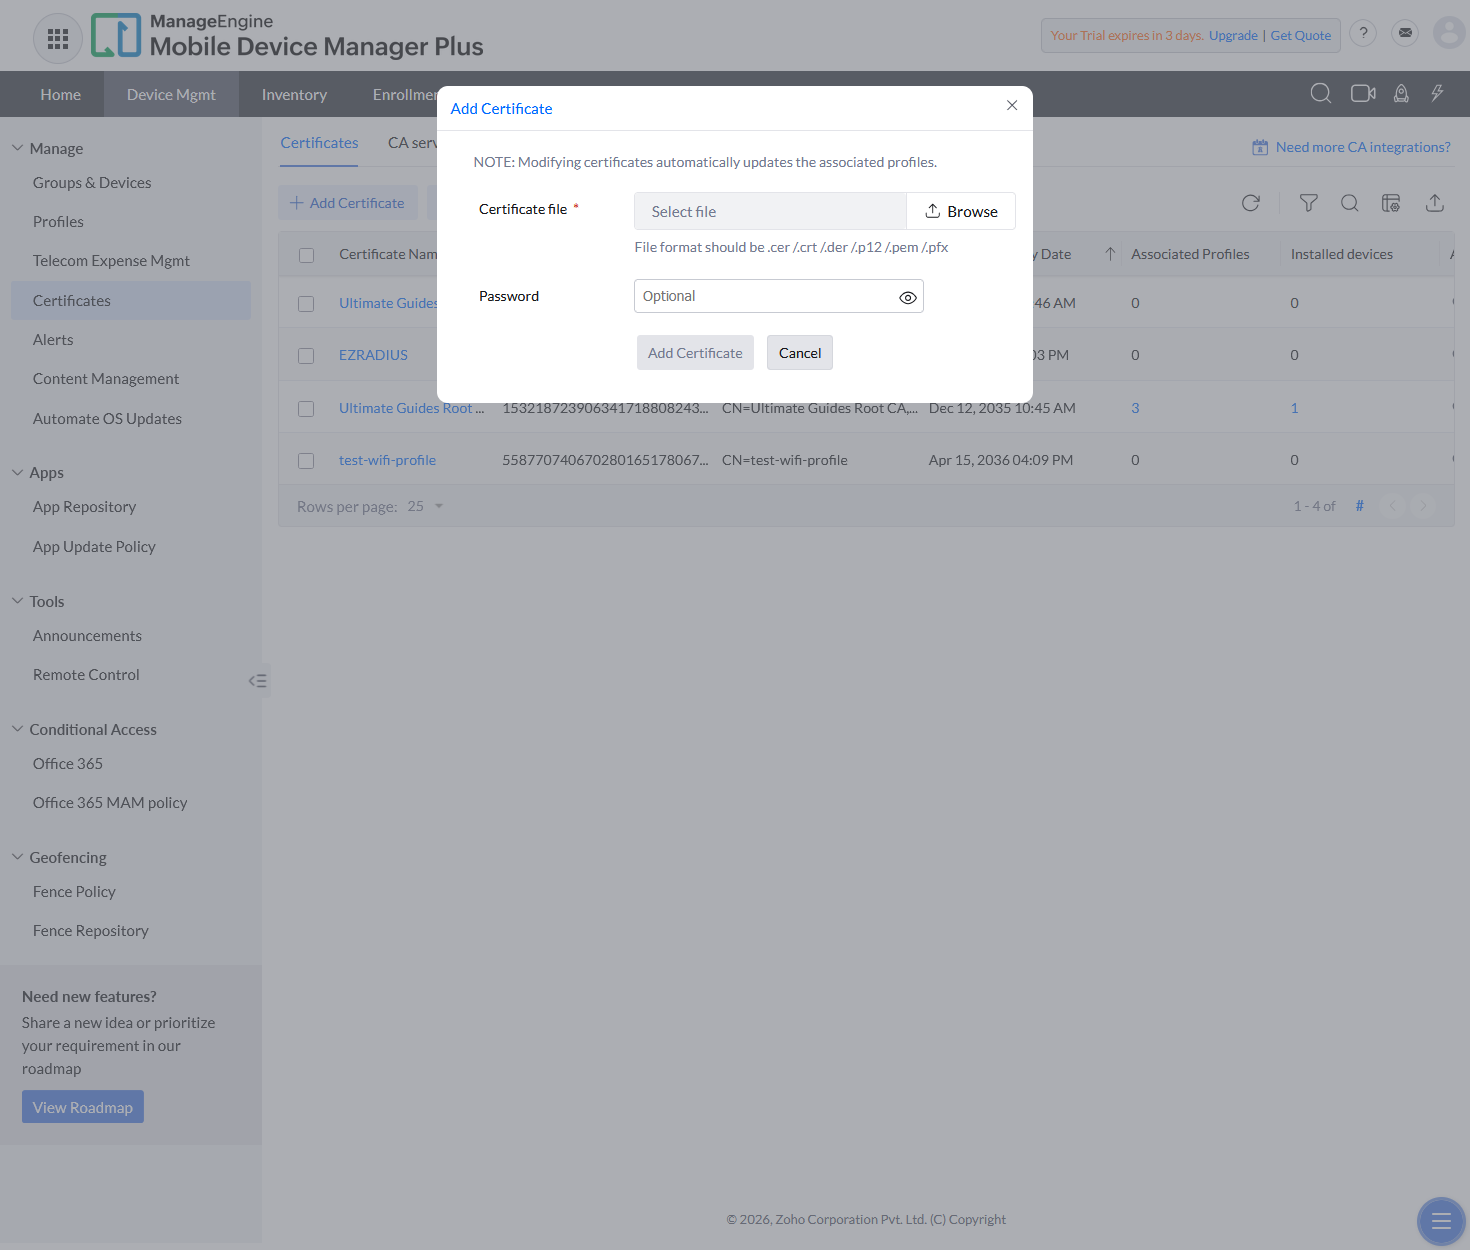
Upload the Root CA certificate you just downloaded from Keytos Shield.
-
Once uploaded, click Add Certificate.
-
If you also have an Issuing CA certificate, repeat the above steps to upload it as well.
How to Add Your Shield CA Certificates to a ManageEngine Profile
To add your Shield CA certificates to a ManageEngine profile, follow these steps:
-
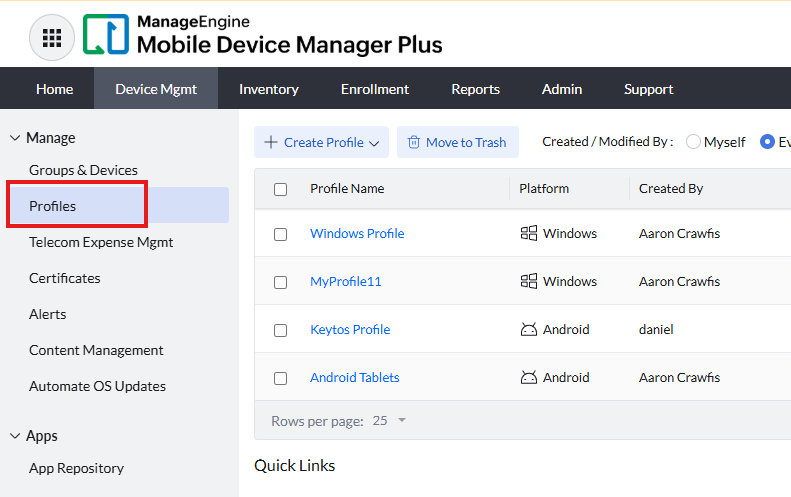
From Device Mgmt, navigate to Profiles.
-
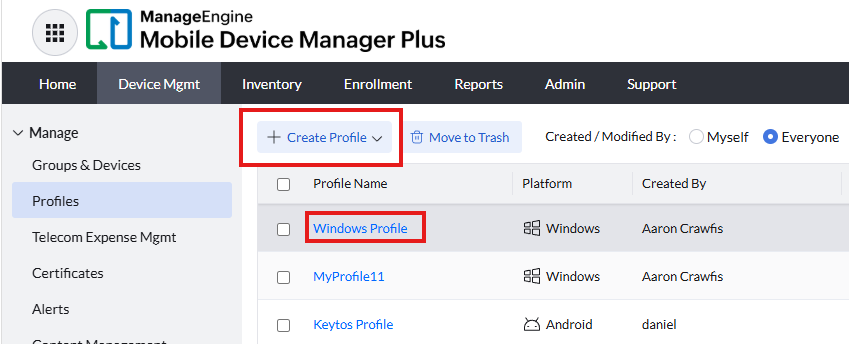
Either selecting an existing Profile Name or select + Create Profile.
-
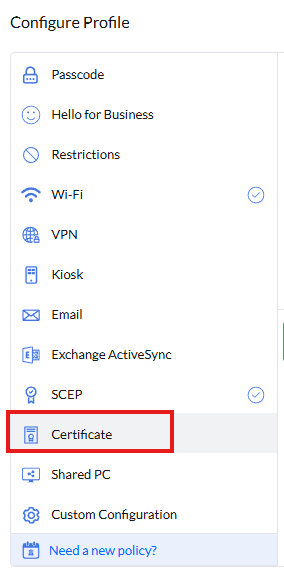
From the left-hand nav-bar, select Certificate.
-
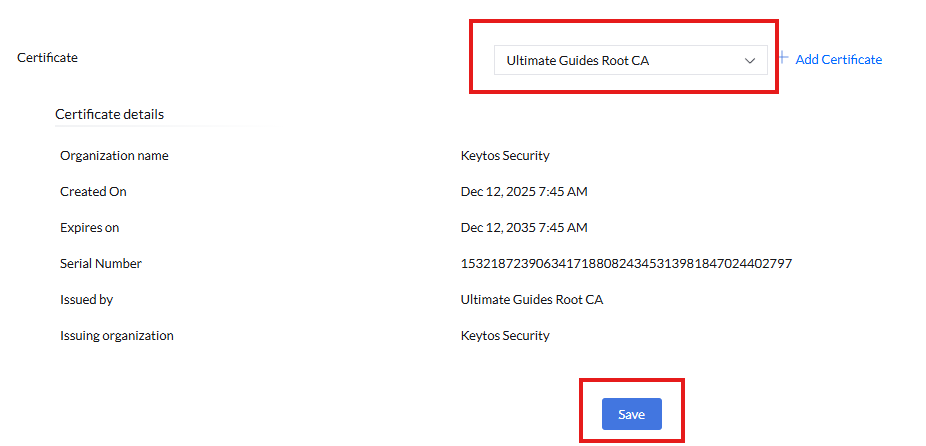
From the Certificate drop-down menu, select the Root CA certificate that you uploaded earlier and then click Save.
-
Click the Publish button to apply the changes to the profile. We’ll come back to this in a bit to finish configuring the profile.
-
Done. This certificate will now be pushed to all devices that are associated with this profile.
Step 2 - How to Create a CA Server for Windows Devices in ManageEngine
A SCEP (Simple Certificate Enrollment Protocol) certificate allows your Windows device to authenticate with its own unique certificate, which can be used for secure network access and other authentication purposes. Follow these steps to issue a SCEP certificate to your Windows device via ManageEngine.
How to Get Your Keytos Shield Static SCEP URL and Password
Begin by retrieving your Keytos Shield Static SCEP URL and password from the Keytos Shield portal.
If you are still working through the onboarding guide, you can simply copy the static SCEP URL without leaving the page.
-
Scroll down and expand step 6, Set Up Mobile Device Management (MDM).
-
Expand the ManageEngine subsection.
Not seeing the ManageEngine subsection? Make sure to enable ManageEngine in step 2, Tell us about your environment and save your changes.
-
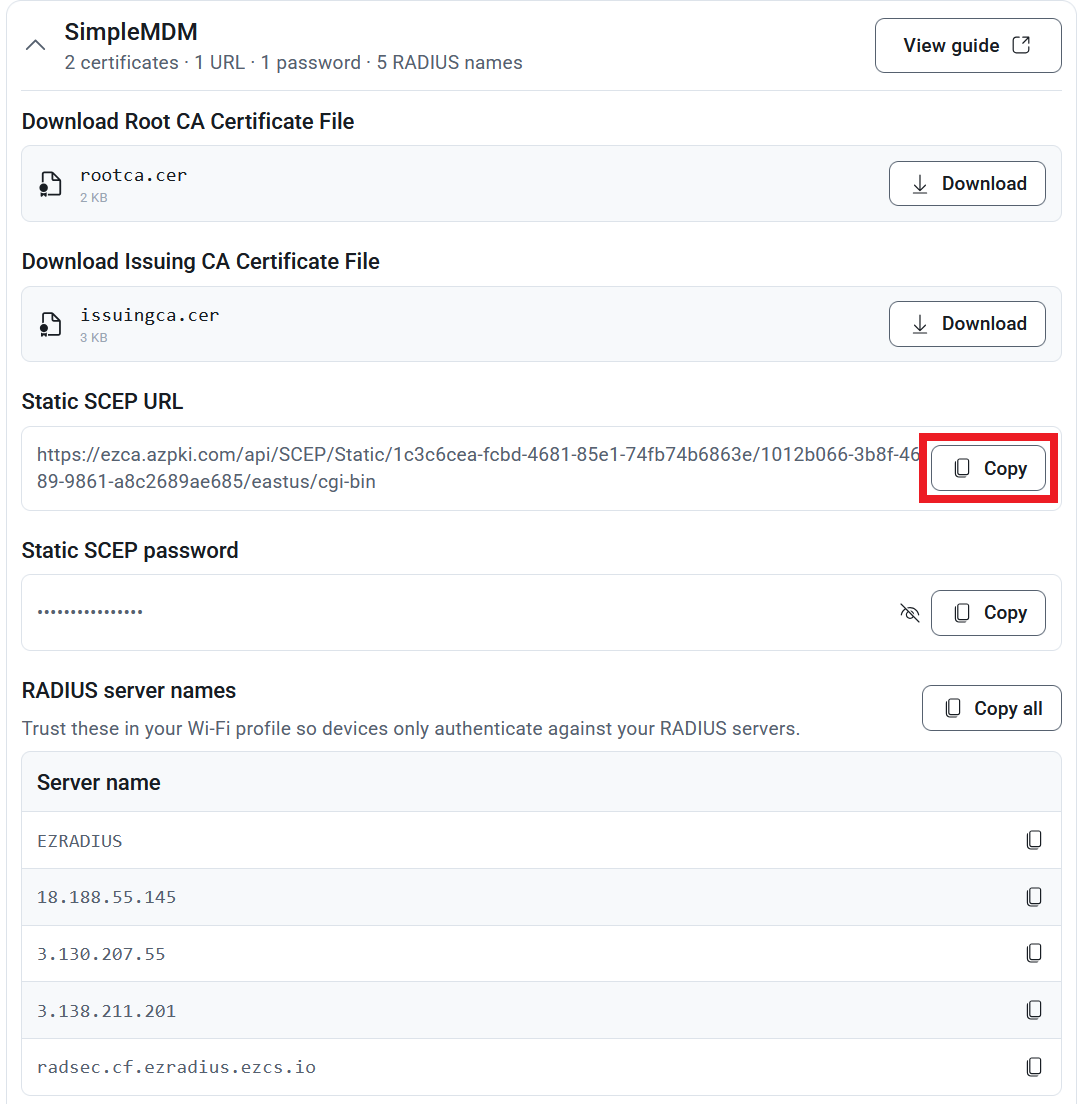
Next to Static SCEP URL, click Copy. You’ll need this in a little bit.
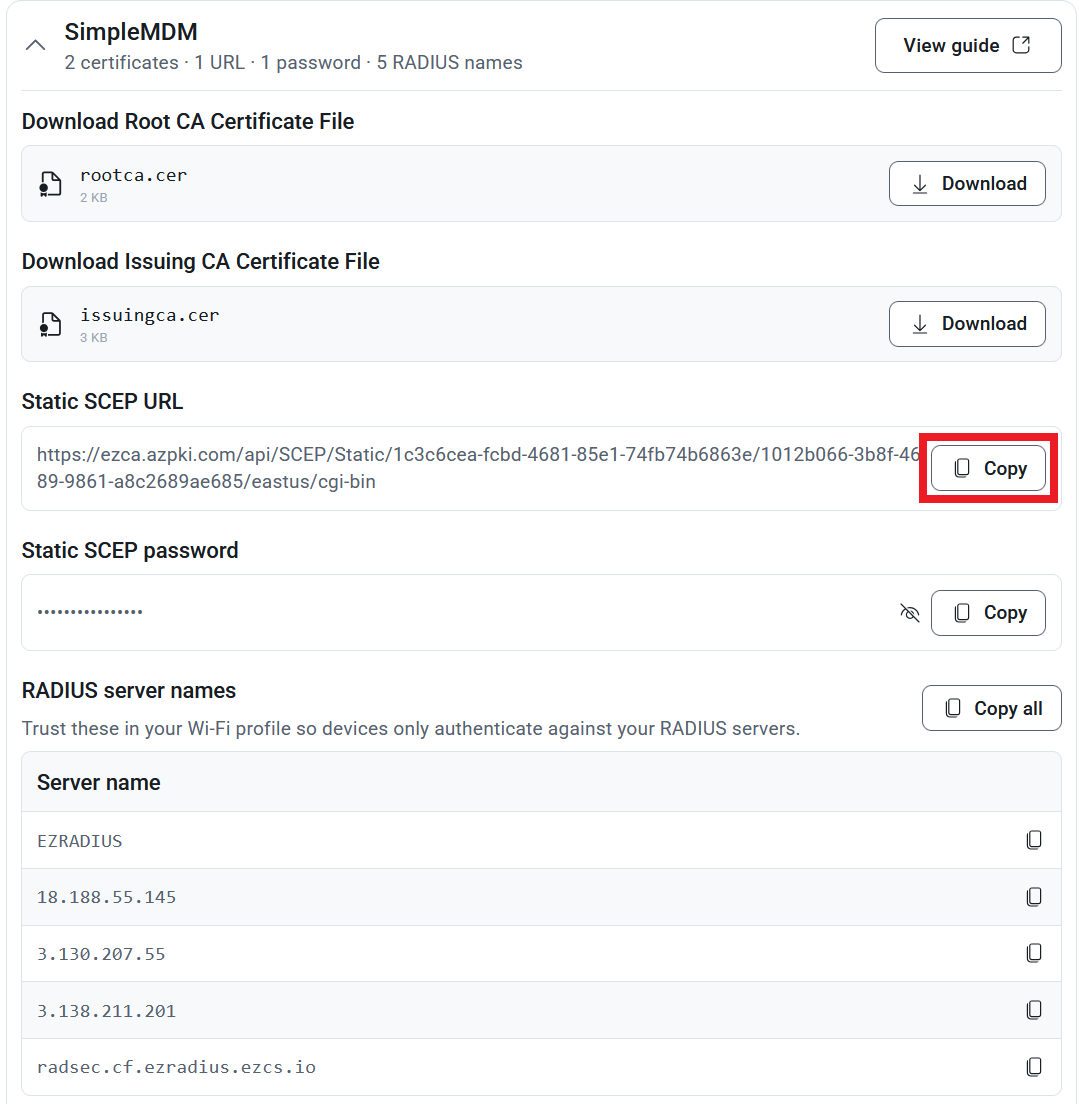
If you’ve already gone through the onboarding guide, you can copy the static SCEP URL directly from the network profiles page.
-
Log in to your Keytos Shield portal.
-
From the left-hand menu, navigate to Network profiles.
-
At the top of the page, select the Settings tab.
-
Expand Certificate Authority and Enrollment, and then expand the ManageEngine subsection.
Not seeing the ManageEngine subsection? Make sure to enable ManageEngine under the Mobile Device Management section further up on the page and save your changes.
-
Click the Copy button next to the Static SCEP URL.
-
Click the Copy button next to the Static SCEP password to copy the password without displaying it. You will need both values when you create the SCEP profile in your MDM.
How to Create a SCEP CA Server in ManageEngine
Now that you have your SCEP URL, you will have to create a SCEP CA Server in ManageEngine.
-
In your ManageEngine Mobile Device Manager Plus portal, navigate to the Device Mgmt page.
-
Under Manage select Certificates.
-
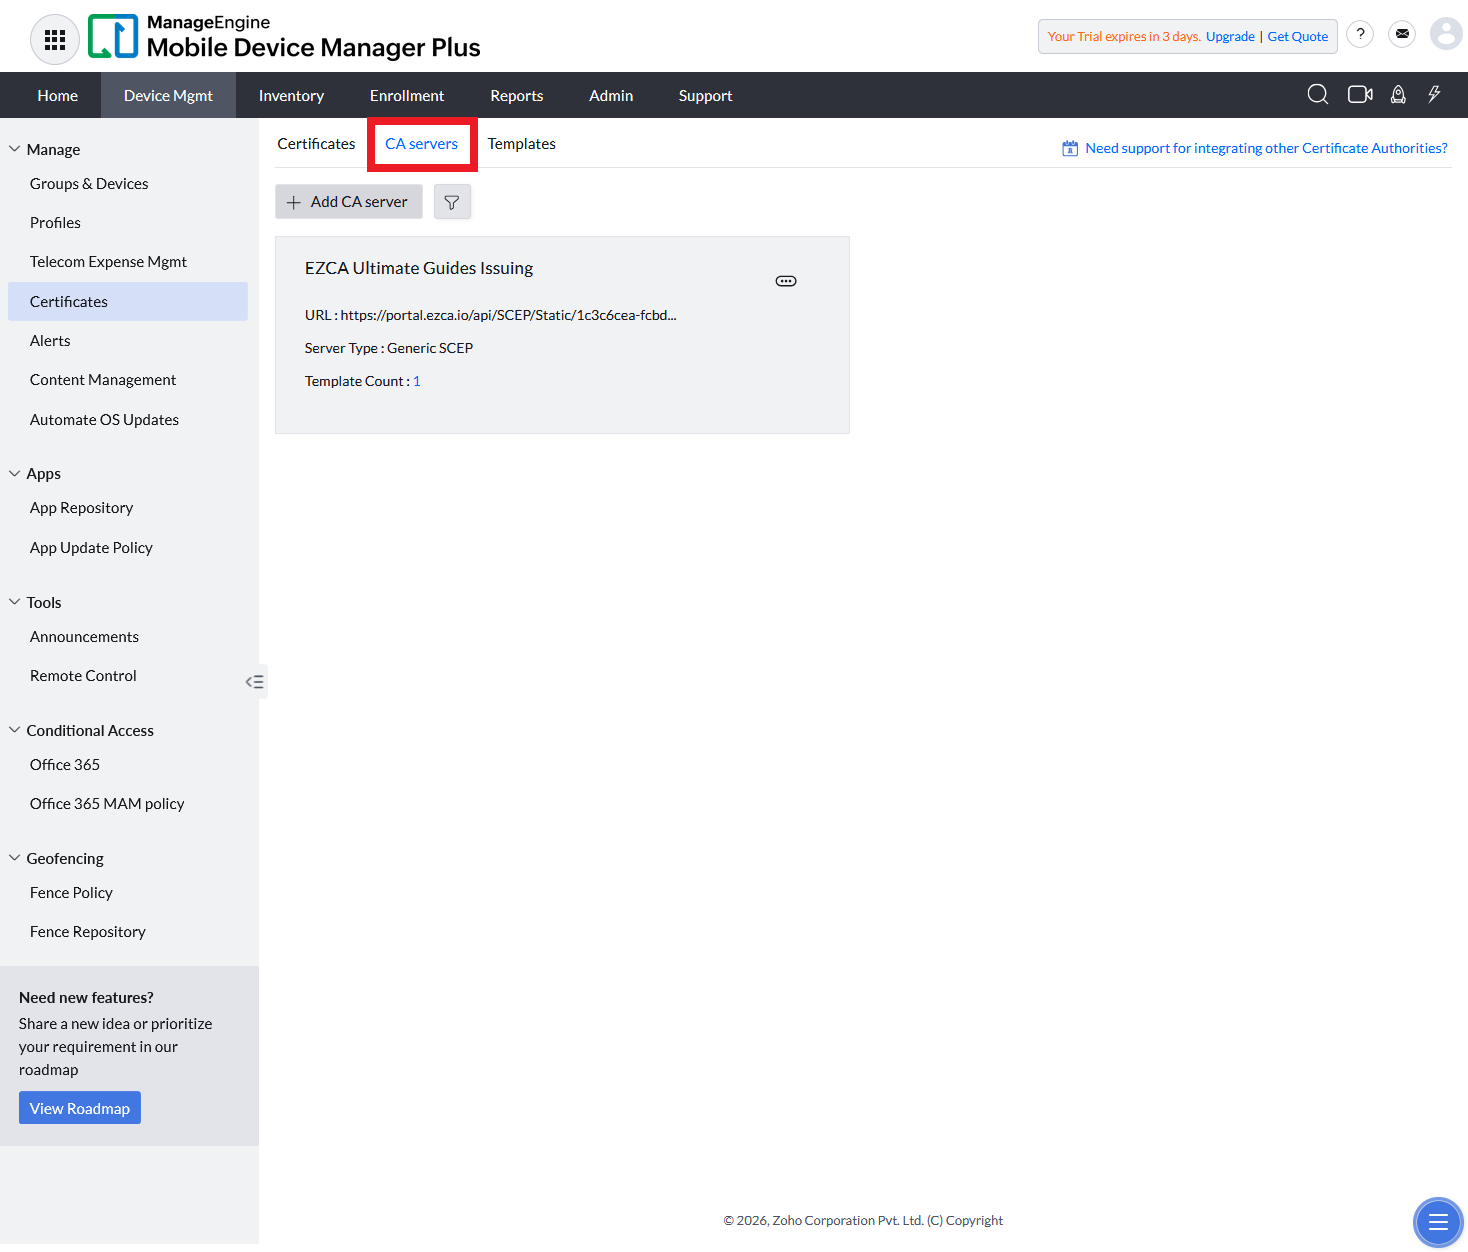
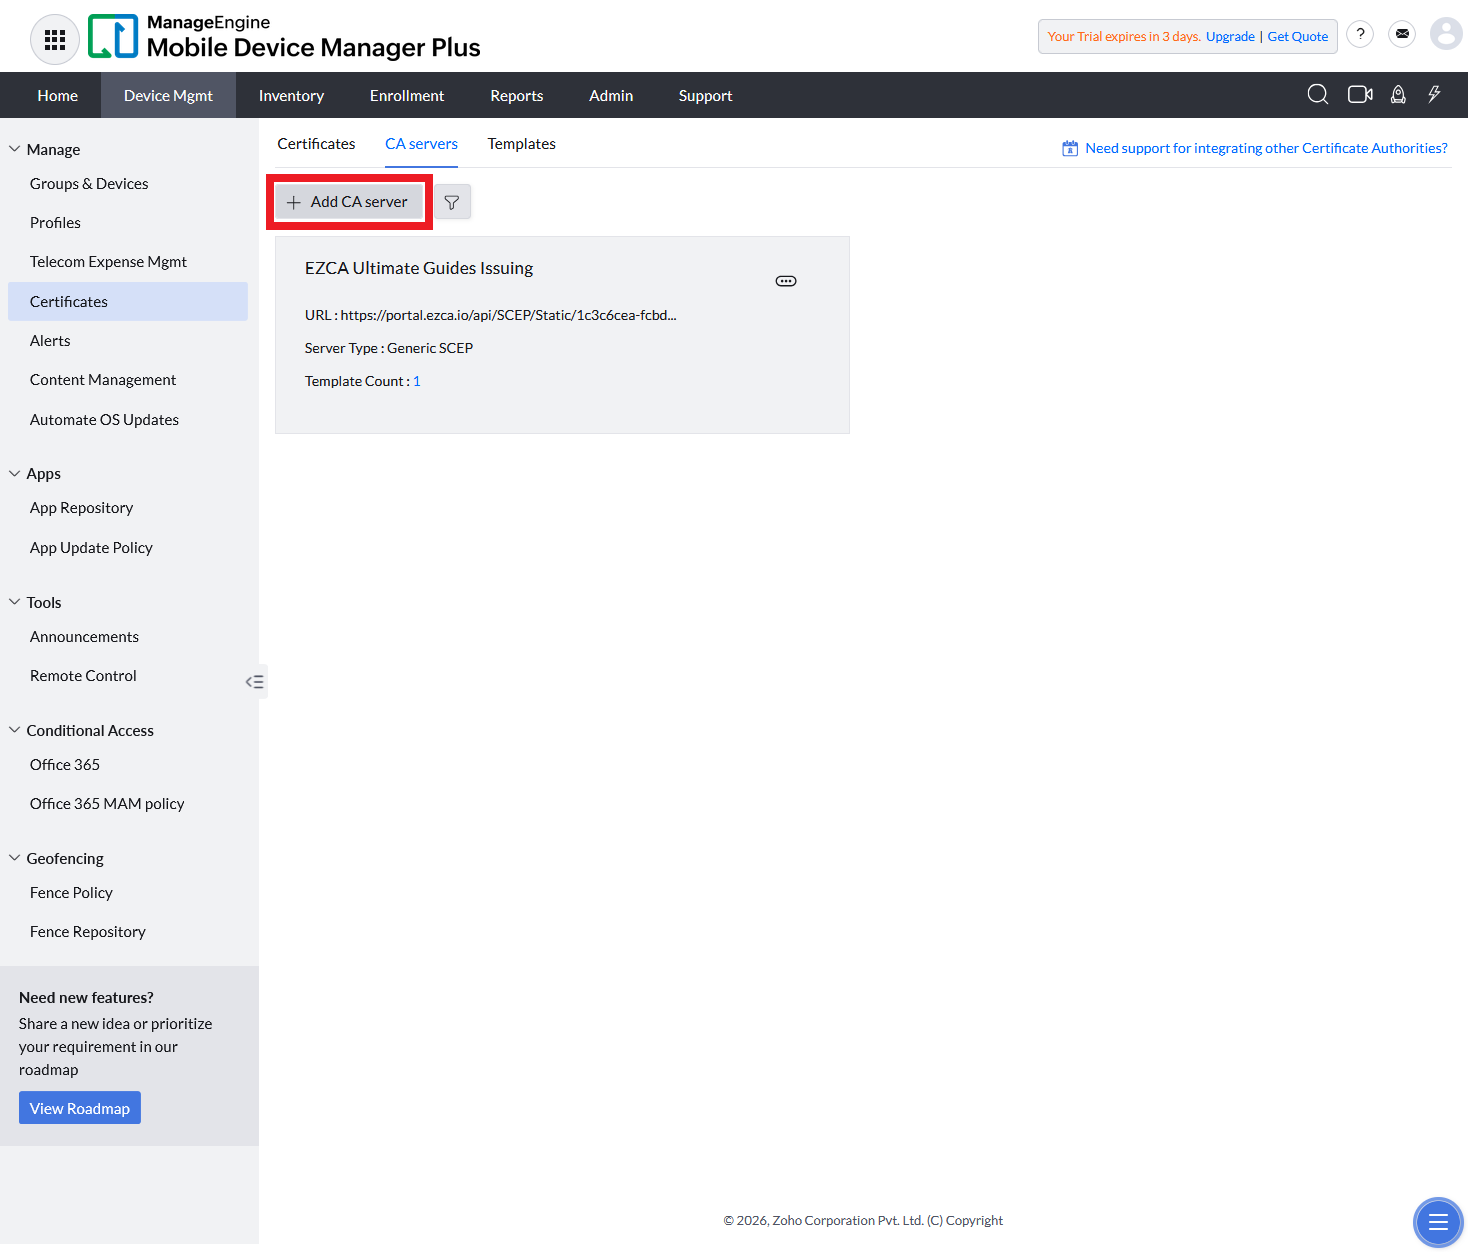
Using the tabs at the top of the Certificates page, ensure you are on CA Servers.
-
Click the + Add CA Server button.
-
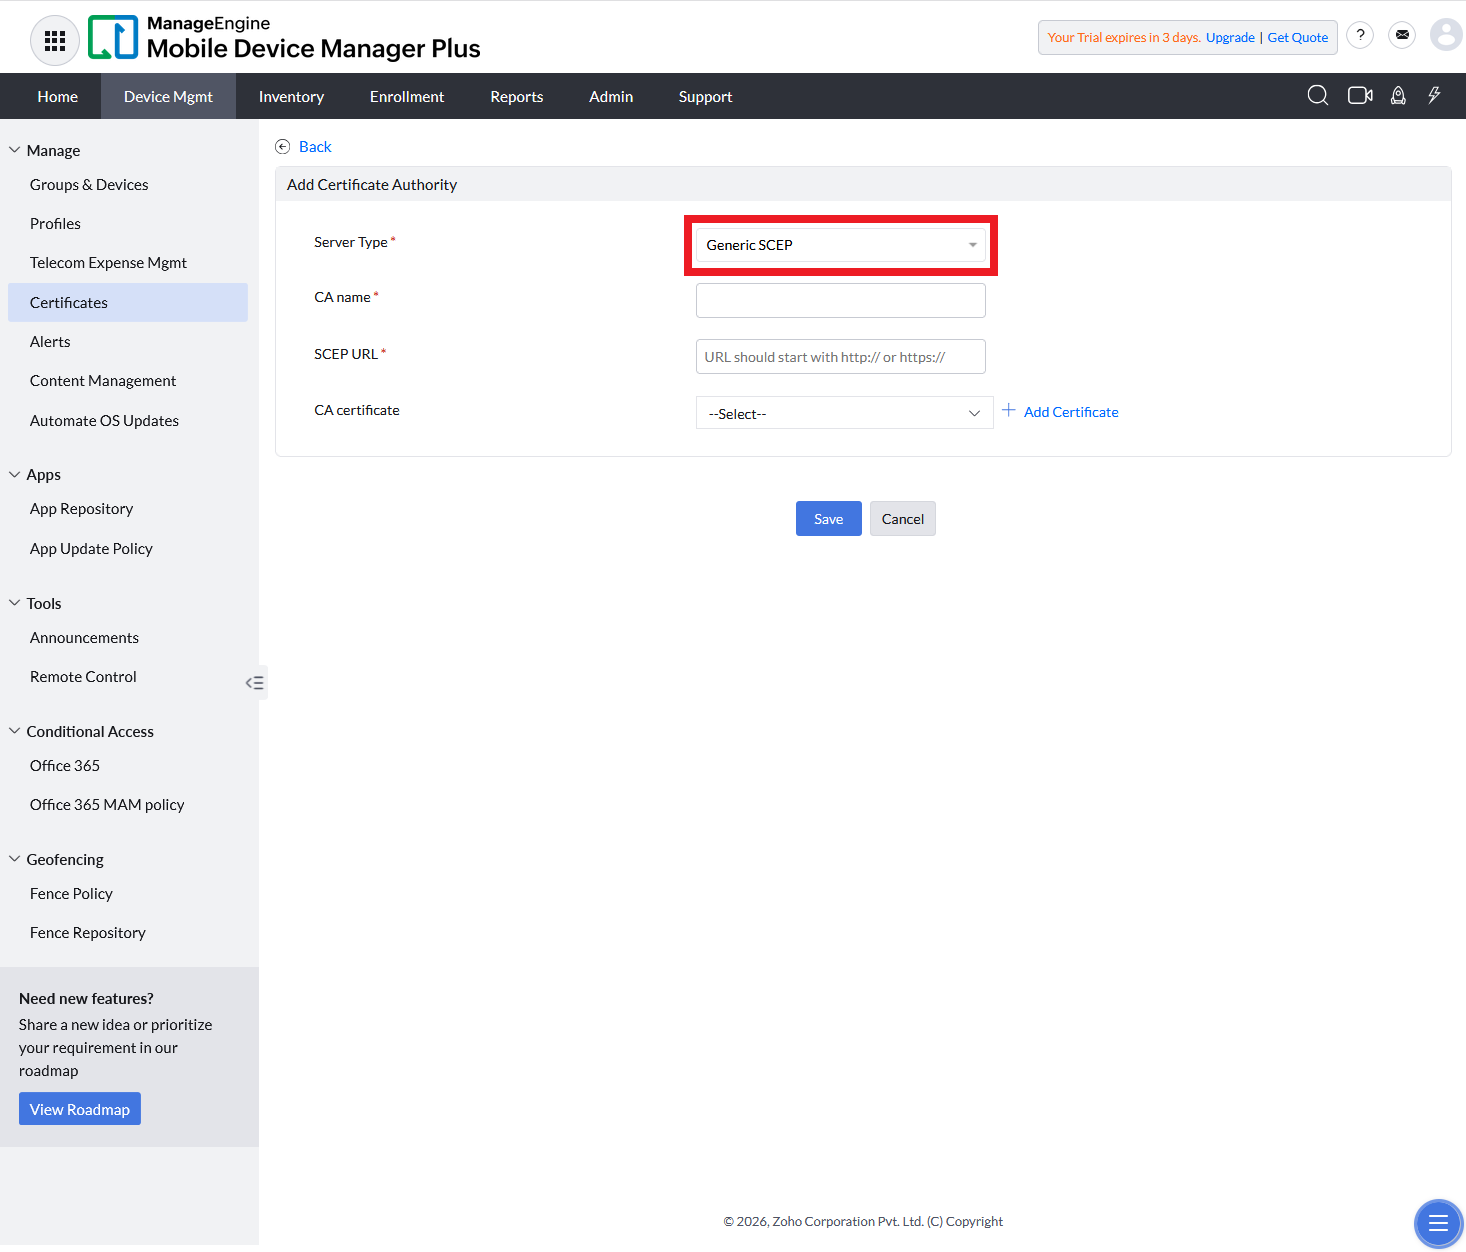
For the Server Type dropdown, select Generic SCEP.
-
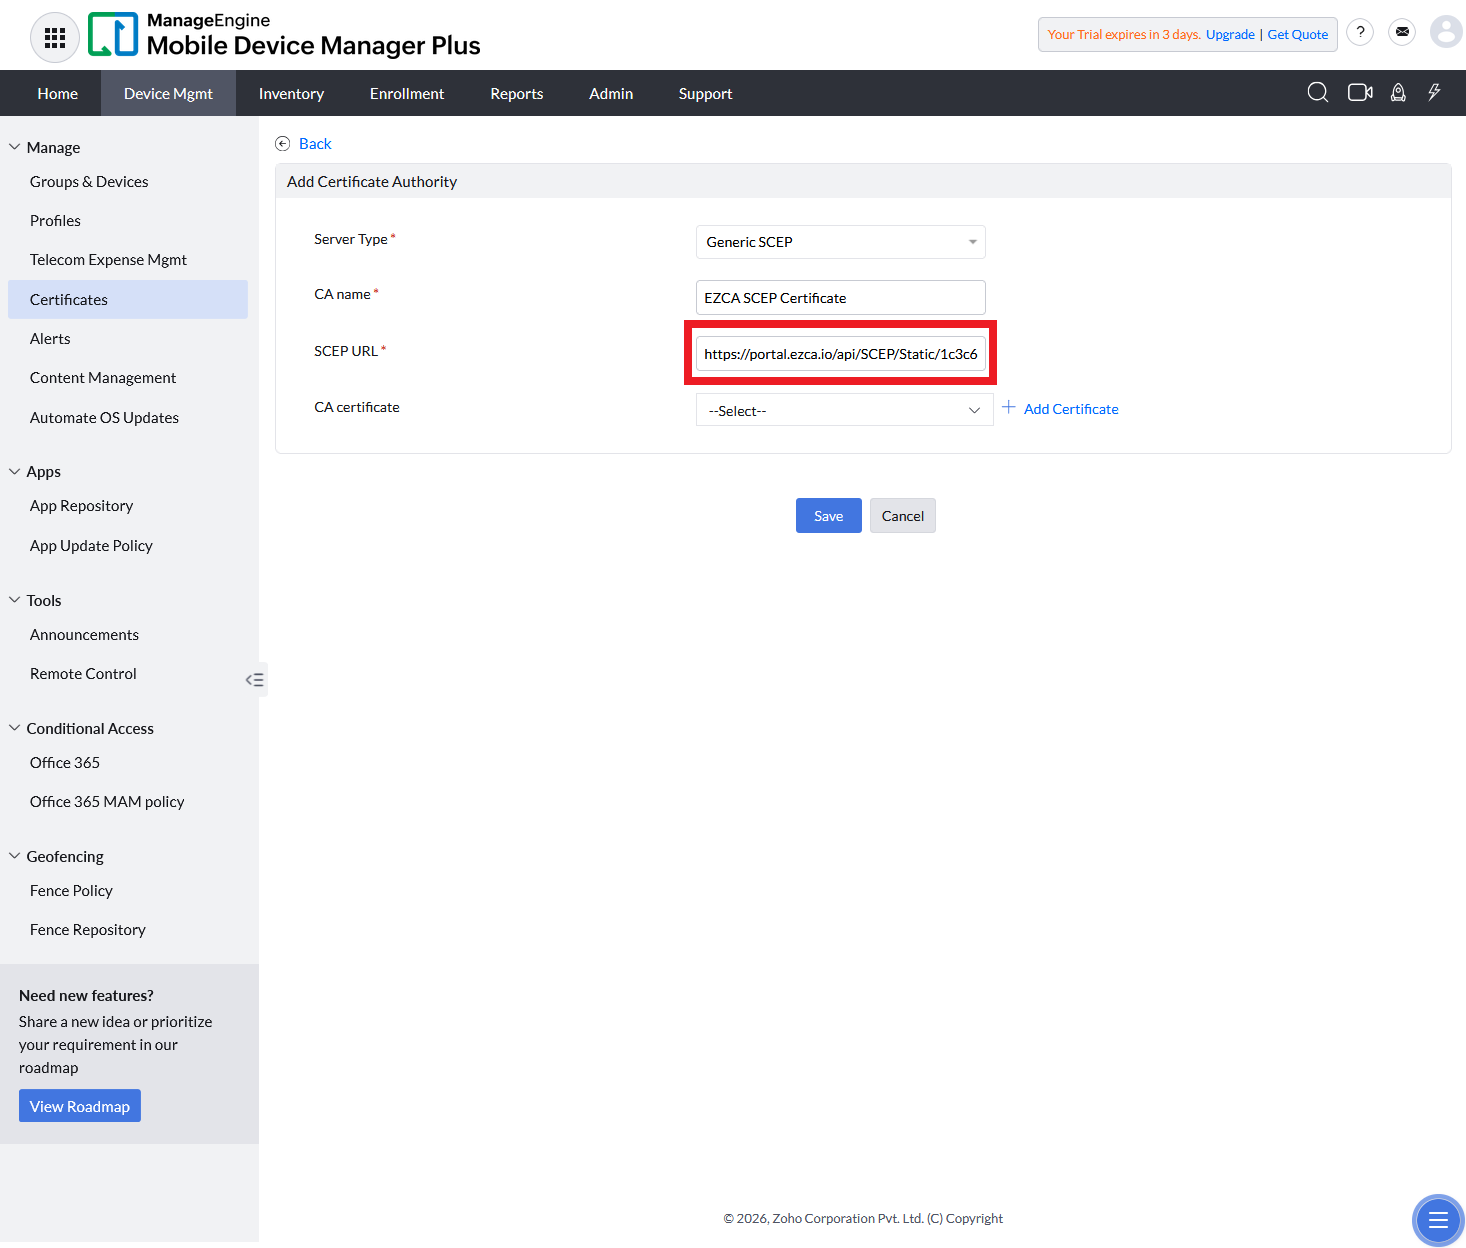
Give the CA a friendly name.
-
Paste the SCEP URL you copied from Keytos Shield.
-
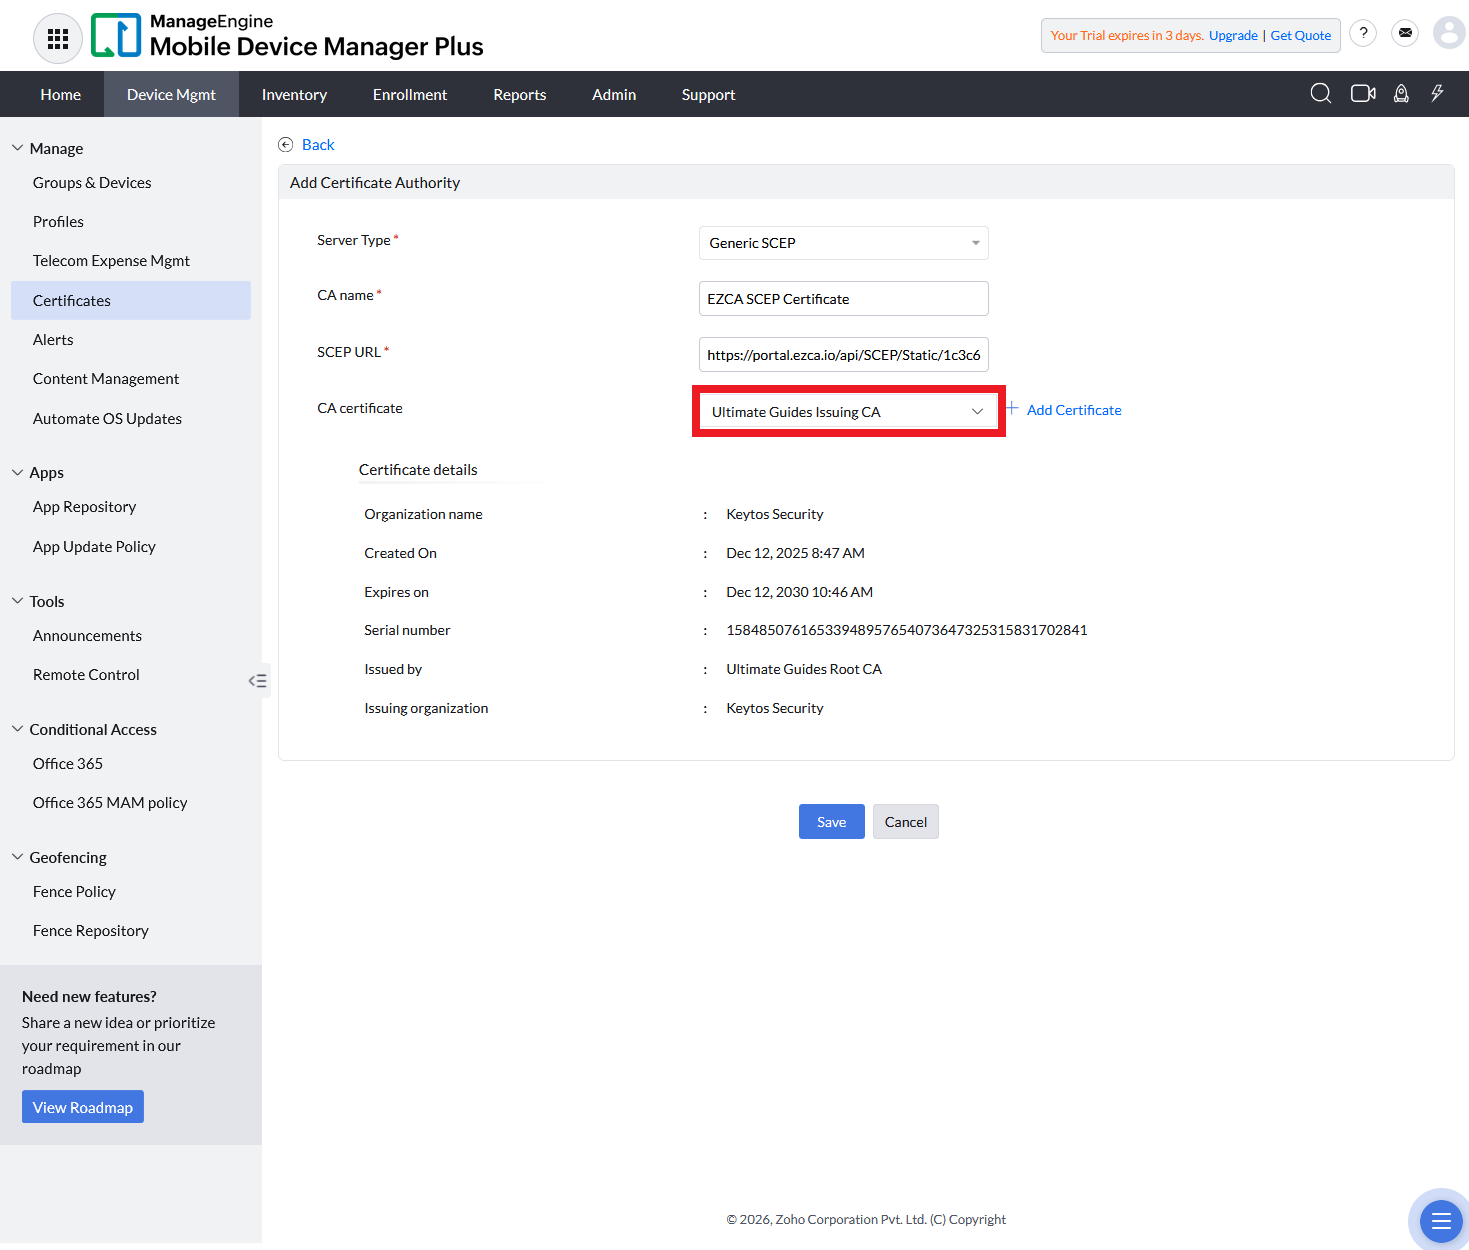
For the CA certificate dropdown, select the issuing CA certificate you previously added to ManageEngine.
-
Click Save at the bottom of the page.
Step 3 - How to Create a SCEP Template in ManageEngine
The following steps will guide you on how to create a ManageEngine SCEP profile to issue device certificates to your Windows devices.
How to Create a SCEP CA Template in ManageEngine
-
In your ManageEngine Mobile Device Manager Plus portal, navigate to the Device Mgmt page.
-
Under Manage select Certificates.
-
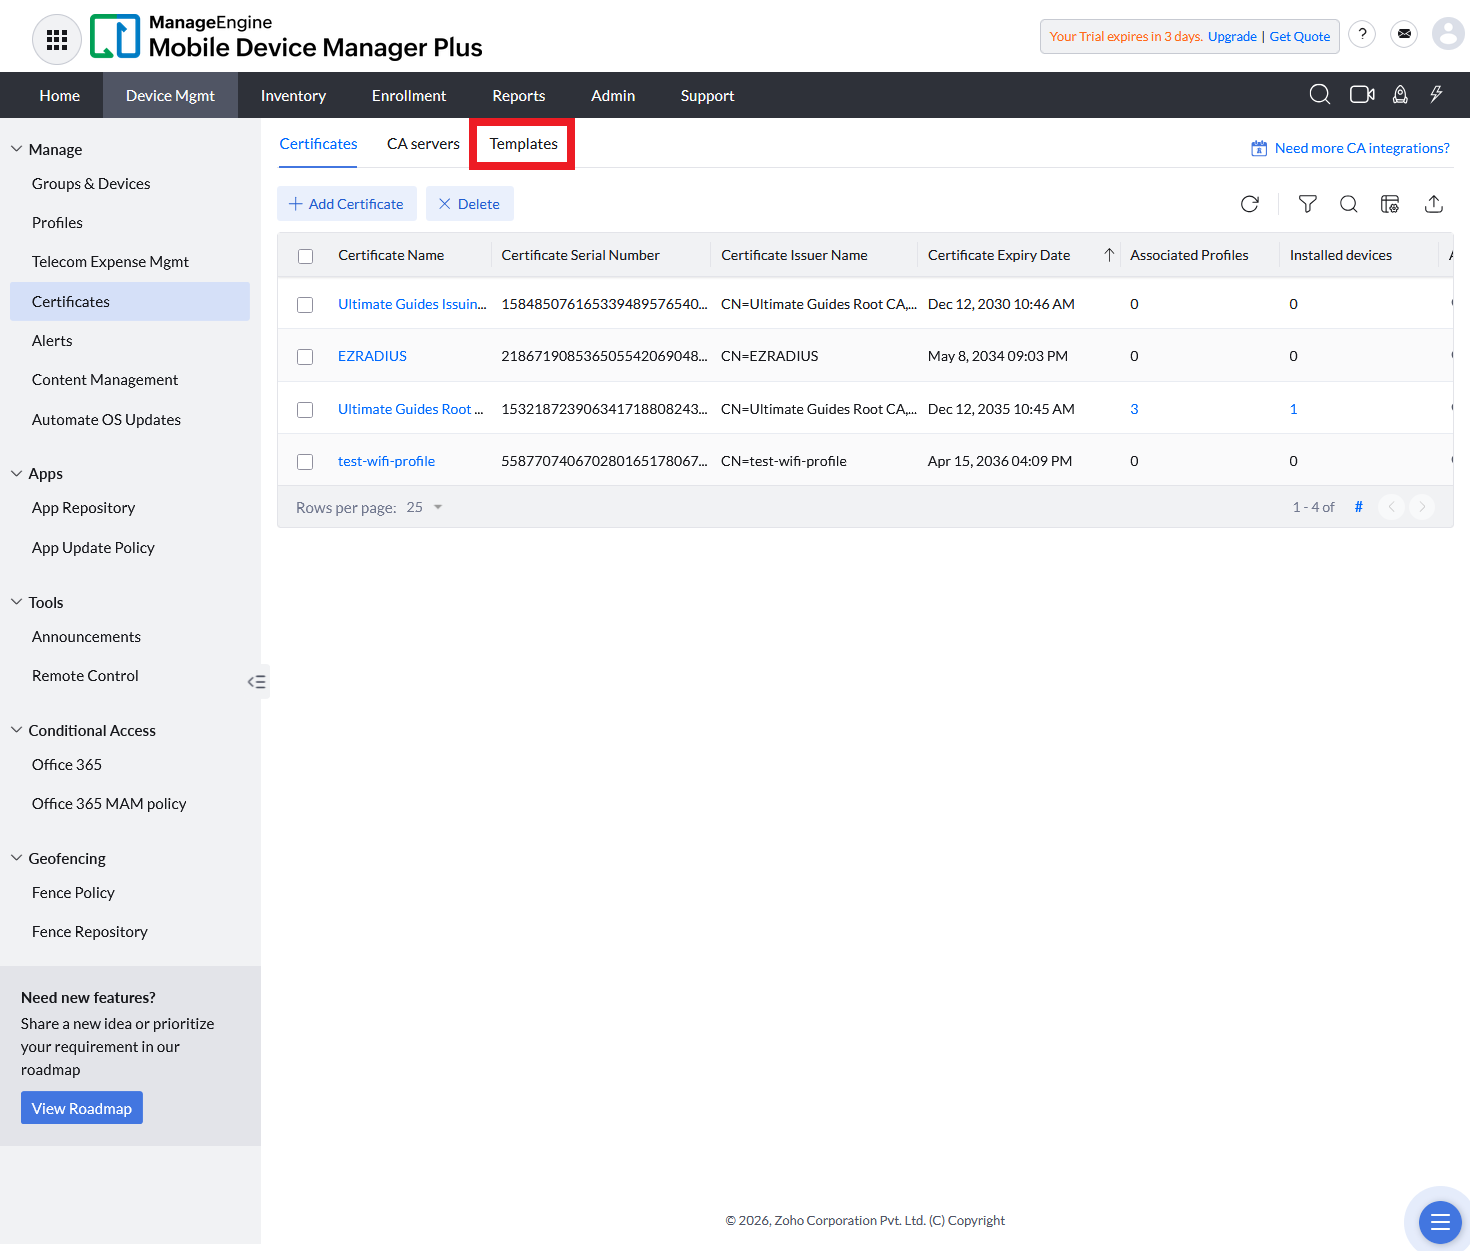
Using the tabs at the top of the Certificates page, select Templates.
-
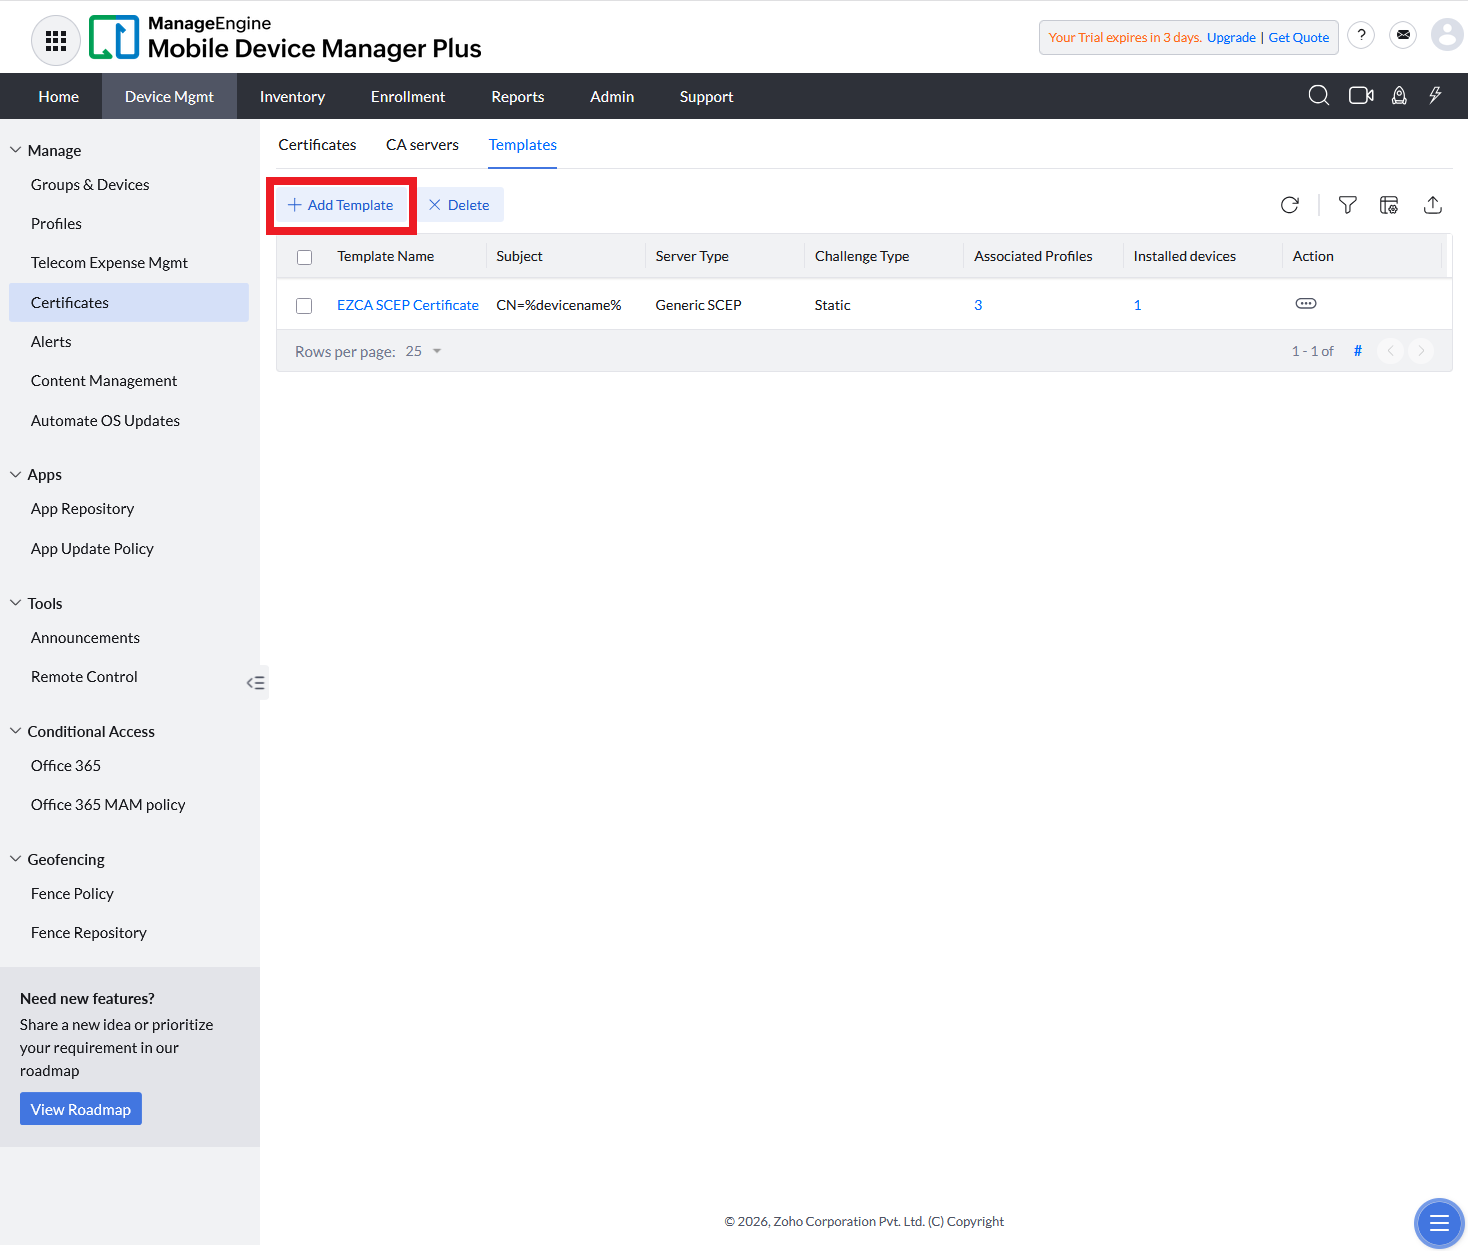
Click the + Add Template button.
-
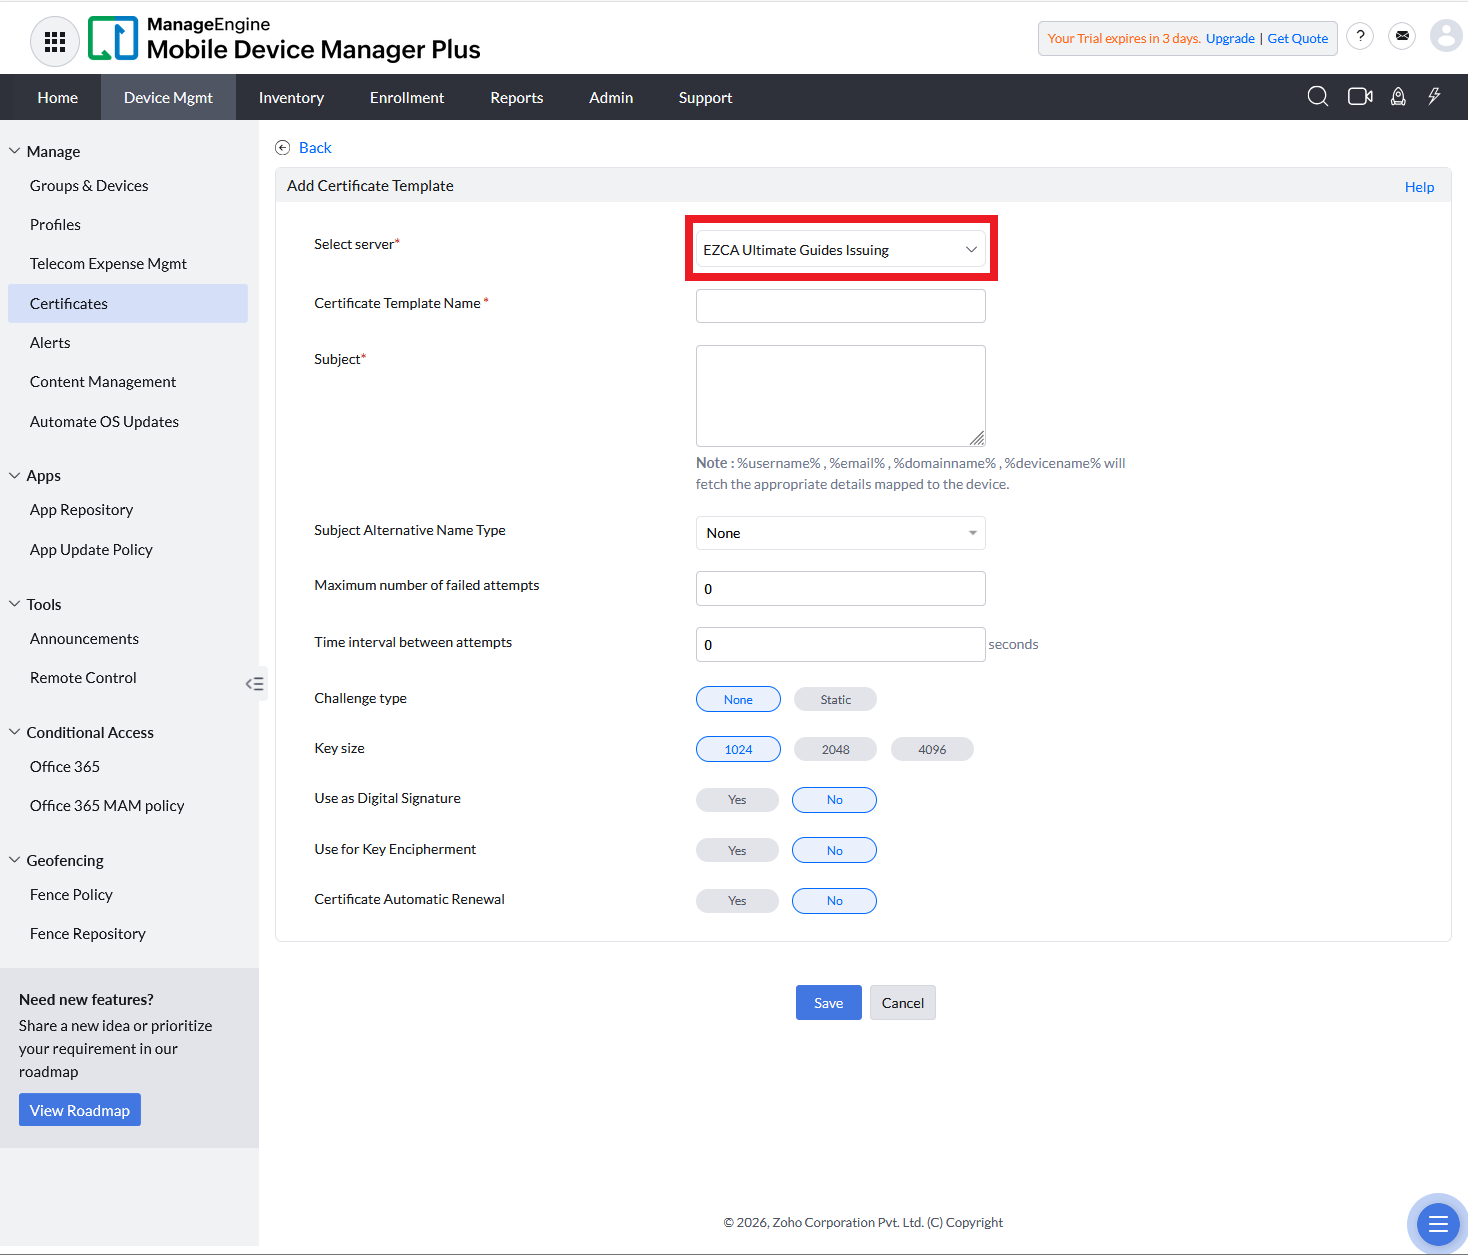
For the Select server dropdown, select the server you just created.
-
Specify a friendly name for the Certificate Template Name.
-
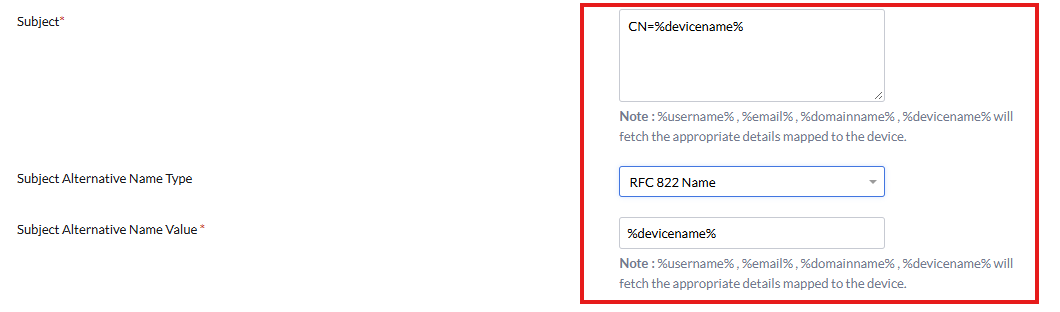
For the Subject field, enter:
- User Certificates:
CN=%username% - Device Certificates:
CN=%devicename%
- User Certificates:
-
For the Subject Alternative Name Type dropdown, select RFC 822 Name.
-
Set the Subject Alternative Name Value:
- User Certificates:
%email% - Device Certificates:
%devicename%
- User Certificates:
-
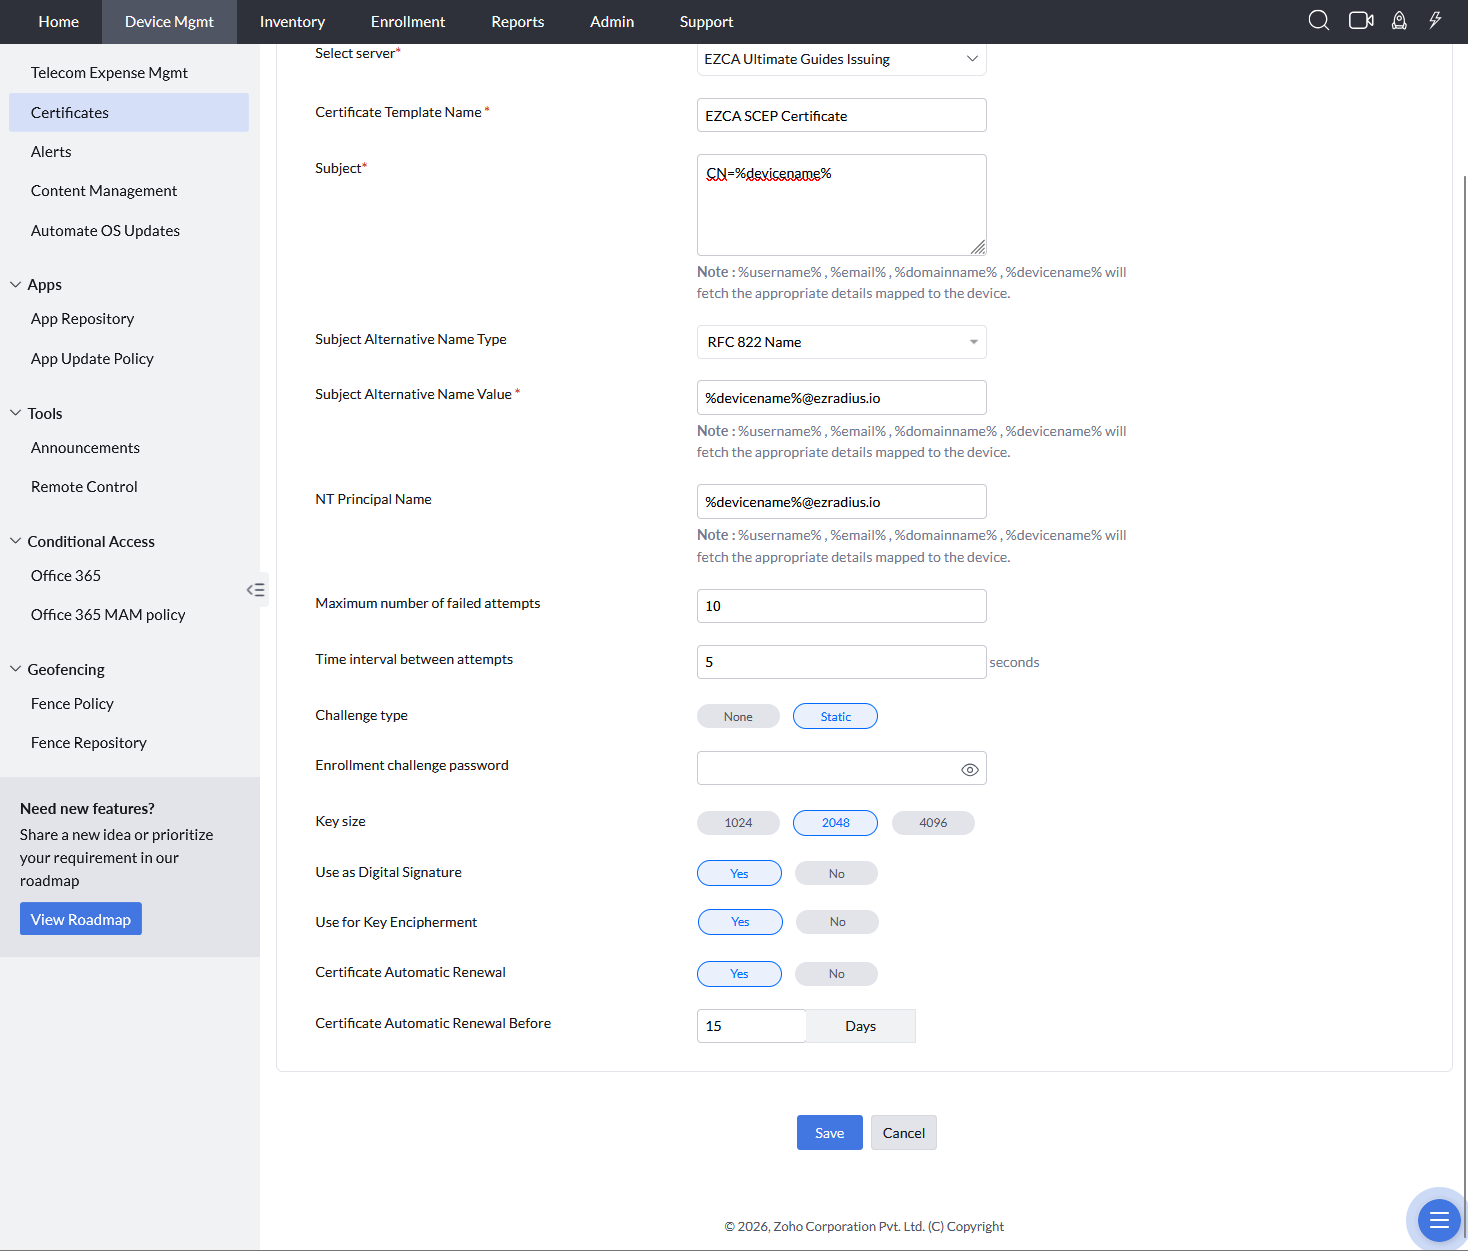
Set NT Principal Name to:
- User Certificates:
%username% - Device Certificates:
%devicename%@ezradius.io
- User Certificates:
-
Enter the following values:
- Maximum number of failed attempts: 10.
- Time interval between attempts: 5 seconds.
- Challenge type: Static.
- Enrollment challenge password: paste the SCEP challenge you copied from Keytos Shield.
- Key Size: 2048.
- Use as Digital Signature: Yes.
- Use for Key Encipherment: Yes.
- Certificate Automatic Renewal Before: 15 days.
-
Scroll to the bottom of the page and click Save.
-
Repeat these steps for all CA server(s) you added to ManageEngine.
Step 4 - How to Create a Wi-Fi Profile in ManageEngine for Certificate-Based Authentication
Now that you have all the building blocks in place, you can create a Wi-Fi profile that uses certificate-based authentication for your Windows devices.
How to Configure a SCEP Profile in ManageEngine
Begin by configuring a SCEP certificate in your profile.
-
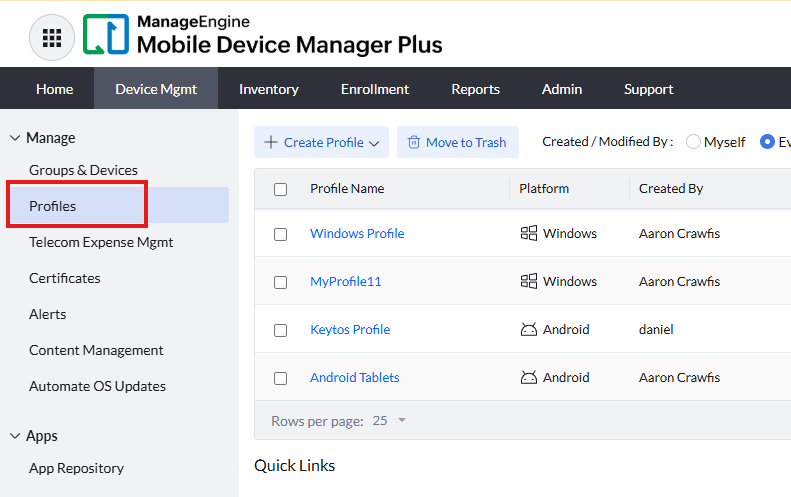
From Device Mgmt, navigate to Profiles.
-
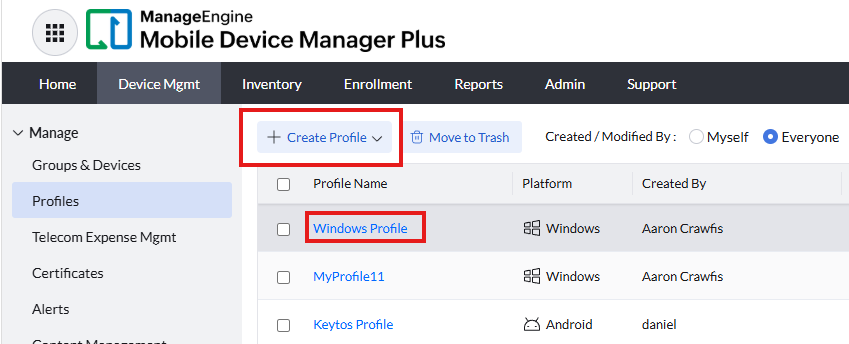
Either selecting an existing Profile Name or select + Create Profile.
-
Give the profile a name then click Continue.
-
Set the Profile Type to MDM Profile.
-
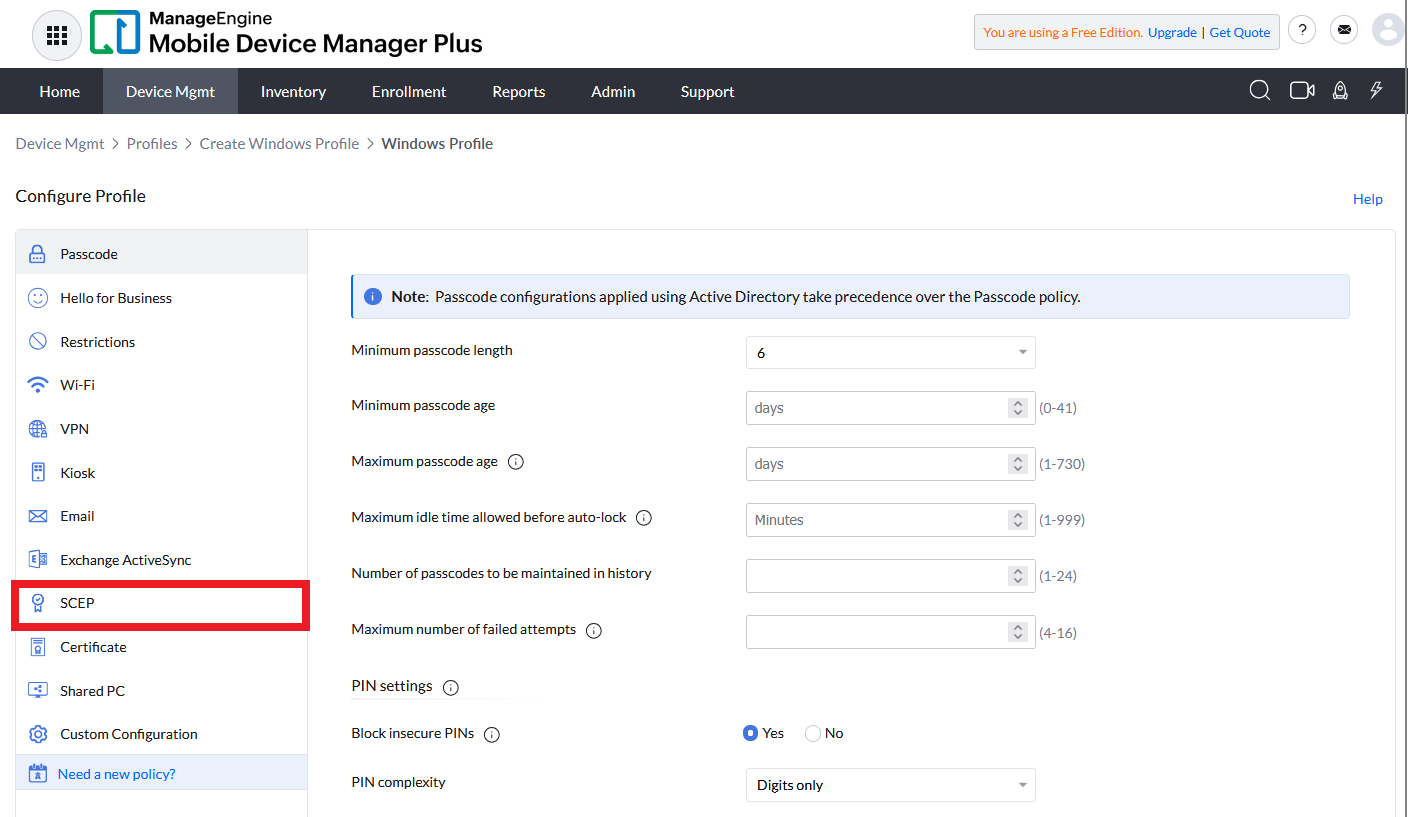
On the Configure Profile page, navigate to the SCEP section using the left-hand menu.
-
For Certificate Type, select Device to make your ManageEngine devices use device certificates or User for user certificates.
Make sure to choose the same auth type you set in the SCEP templateThe authentication type you select here must match the one previously configured in your SCEP template.
-
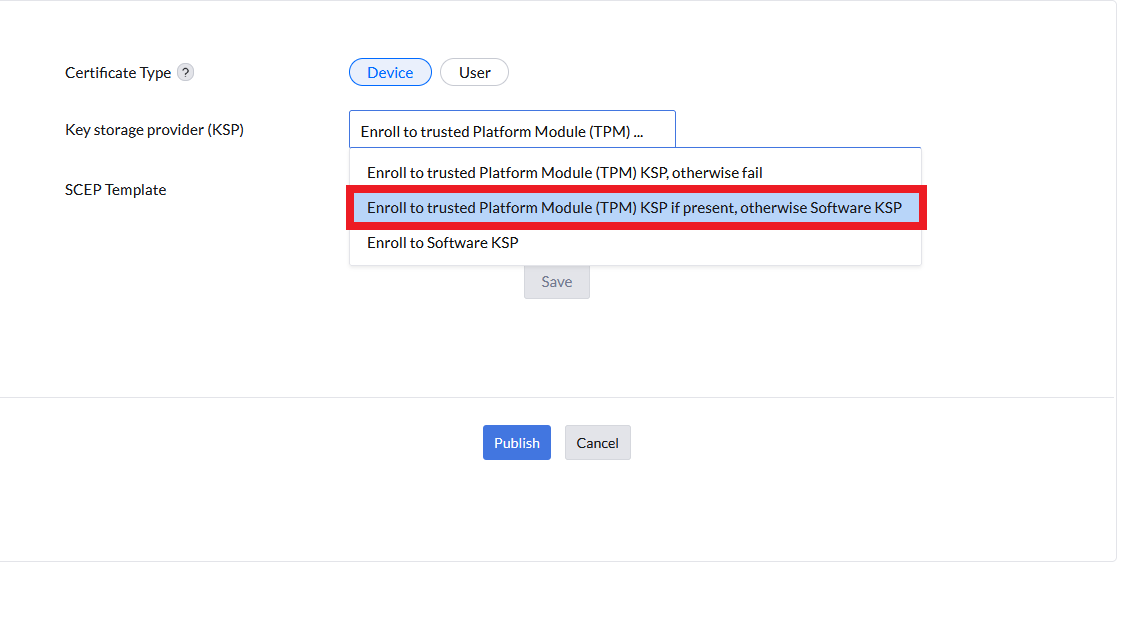
From the Key storage provider (KSP) dropdown, select Enroll to trusted Platform Module (TPM) KSP if present, otherwise Software KSP.
-
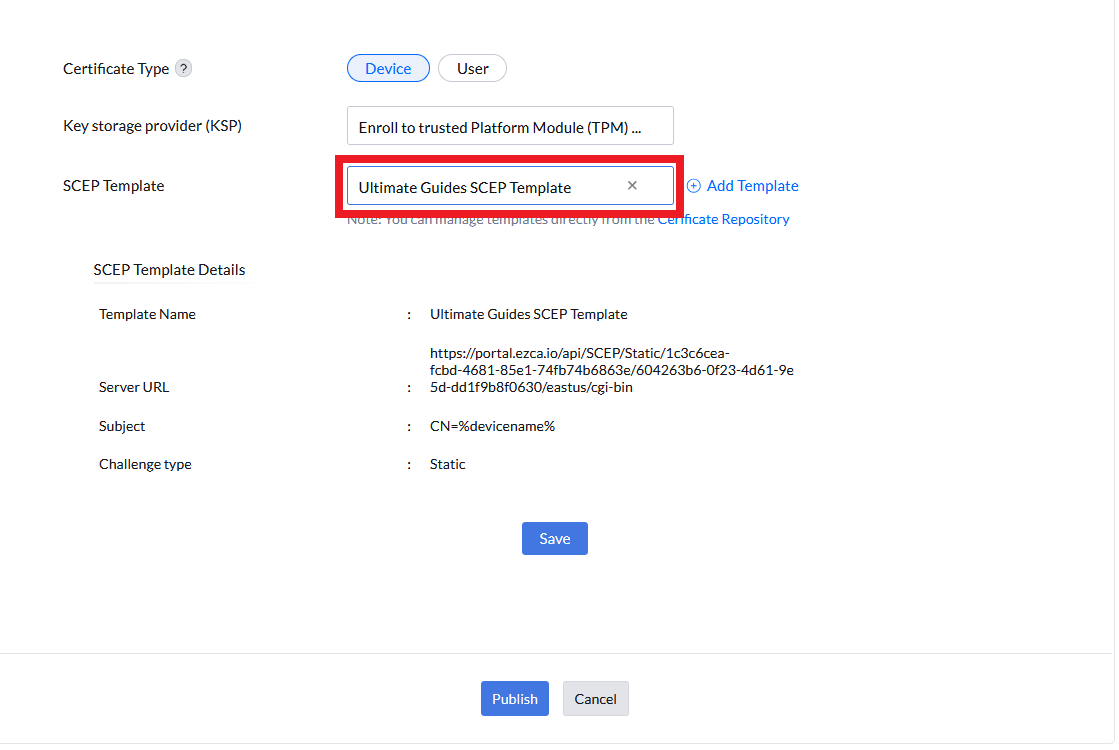
Select the SCEP Template you previously created.
-
Scroll down the bottom of the page and click Save.
How to Configure a Wi-Fi Profile in ManageEngine
Next, add a Wi-Fi profile to your profile.
-
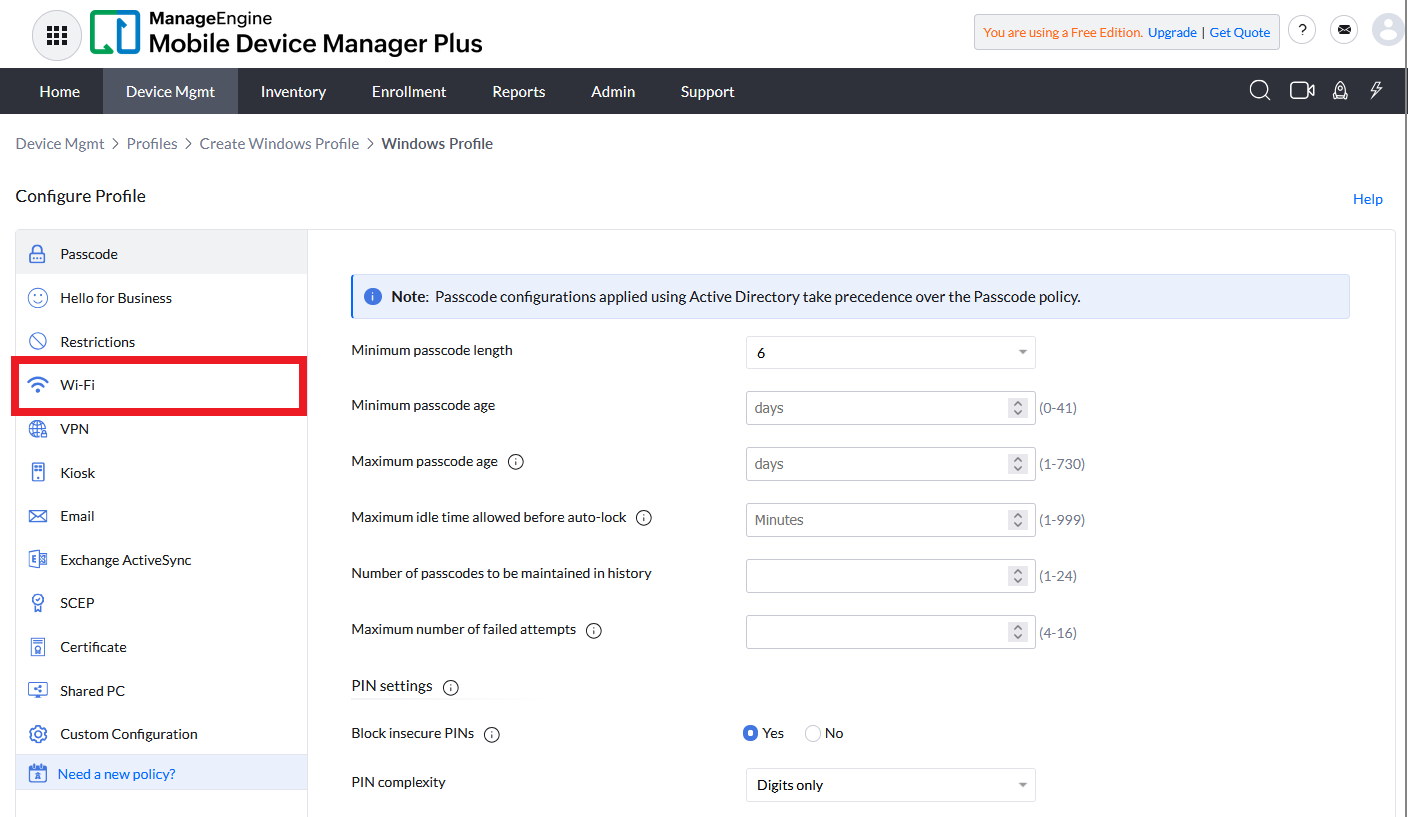
Click on the Wi-Fi section using the left-hand menu.
-
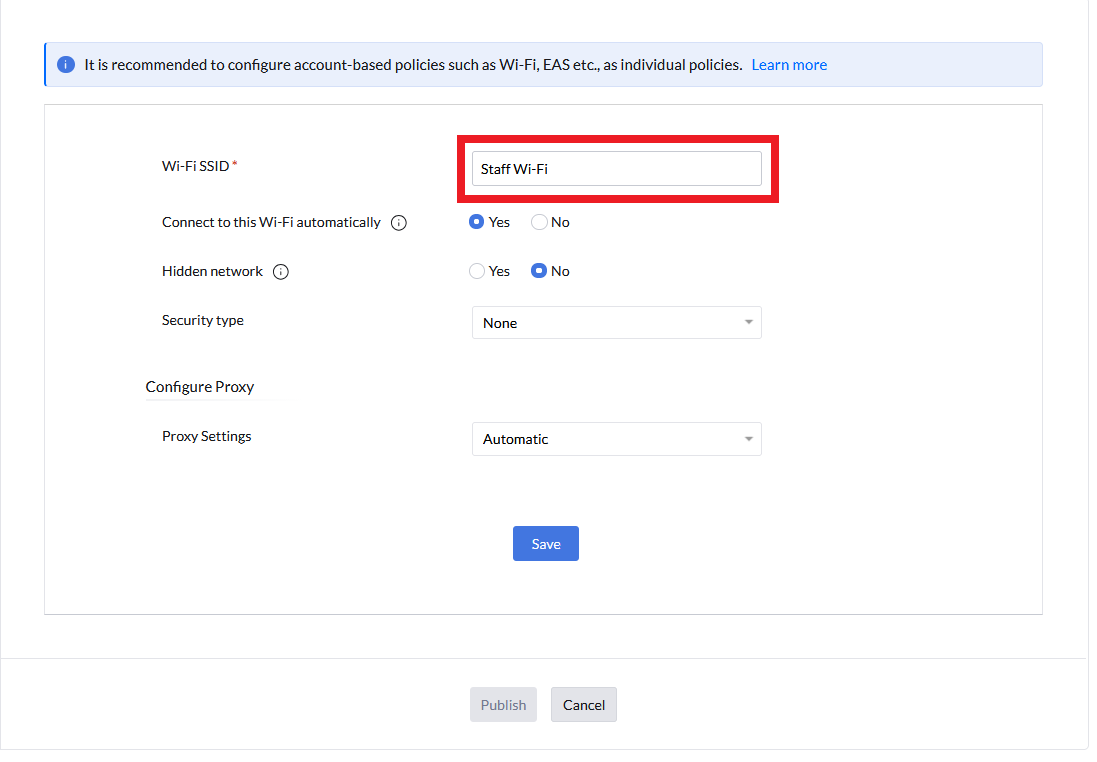
In the Wi-Fi SSID textbox, type the SSID of your Wi-Fi network (this is case sensitive).
-
Enable Connect to this Wi-Fi automatically if you would like devices to automatically join the network without prompting users.
-
Select Yes for Hidden network only if your Wi-Fi access point does not broadcast its SSID.
-
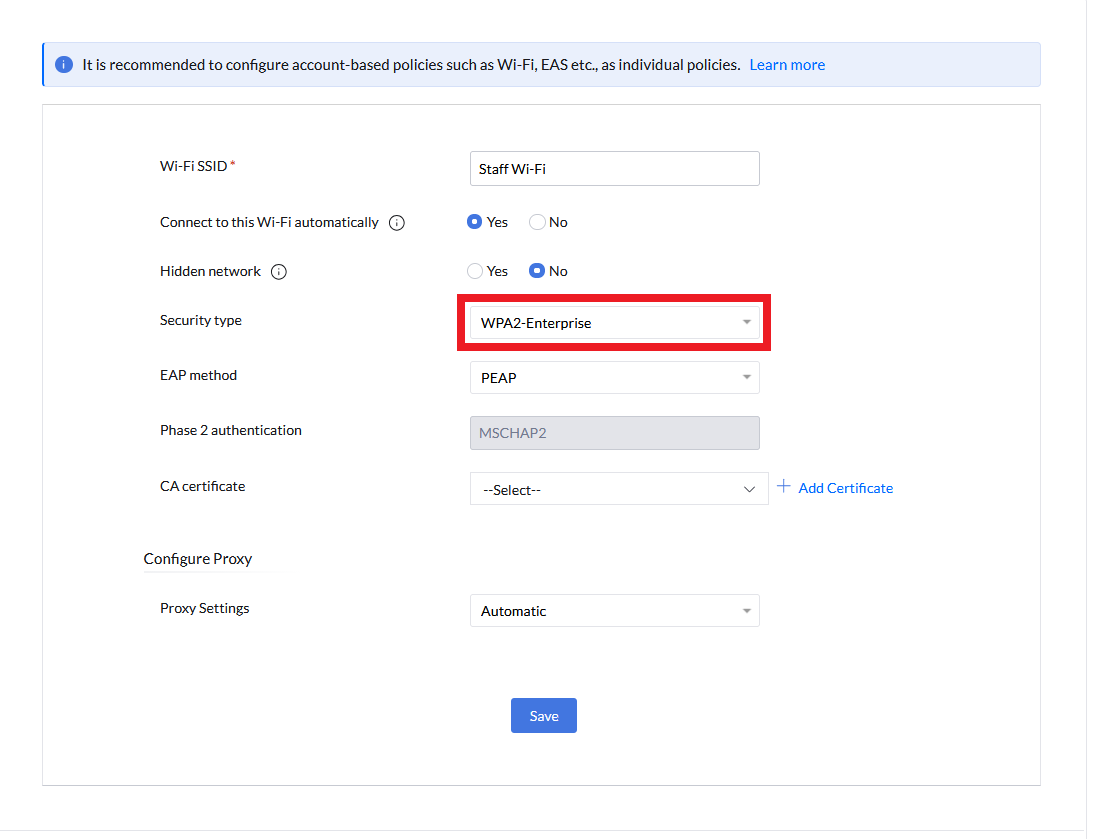
Set the Security type to WPA2-Enterprise.
-
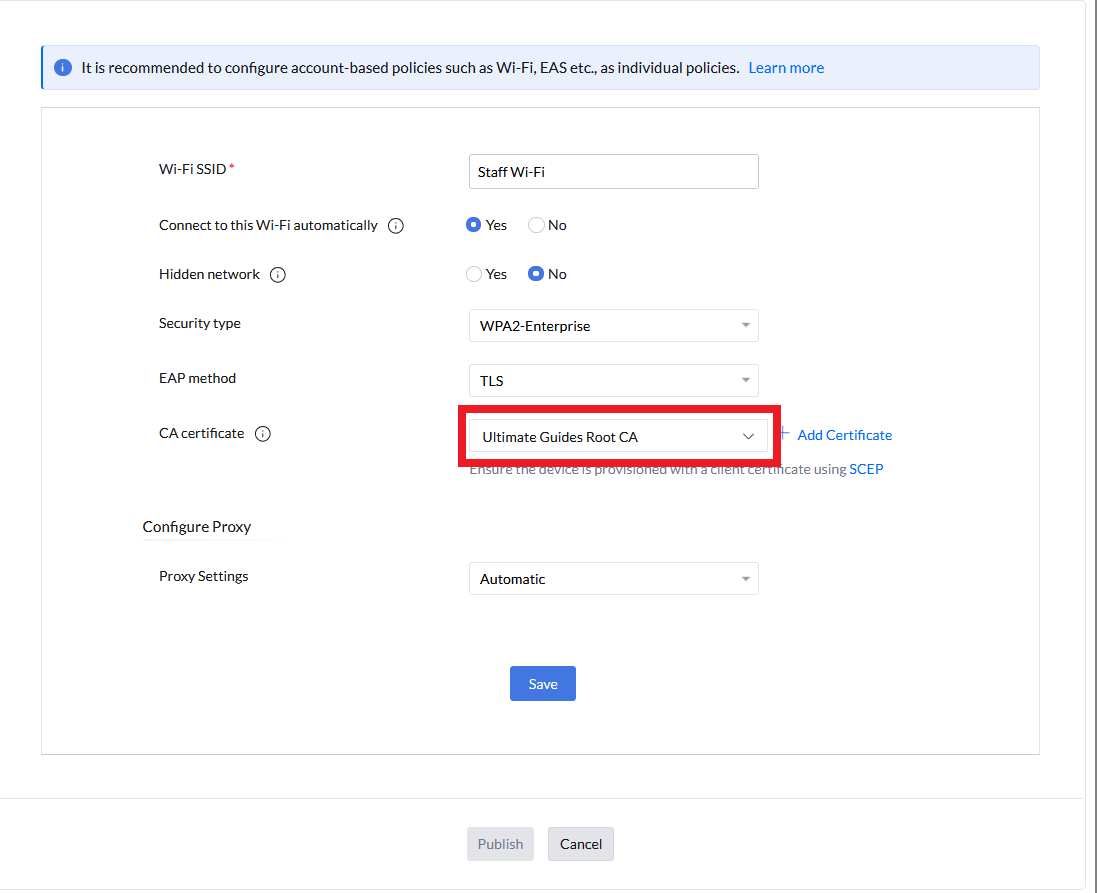
From the EAP method dropdown, select TLS.
-
In the CA certificate dropdown, select the Root CA certificate you previously uploaded.
-
Scroll down to the bottom of the page and click Save.
-
Once the profile is saved, click Publish.
Done! You have now created a Wi-Fi profile for EAP-TLS authentication in ManageEngine.
Step 5 - How to Associate Your Wi-Fi Profile to Groups or Devices in ManageEngine
Now that you have create a Wi-Fi profile for certificate-based authentication, you will need to distribute it to all your Windows devices.
-
In your ManageEngine Mobile Device Manager Plus portal, navigate to the Device Mgmt page.
-
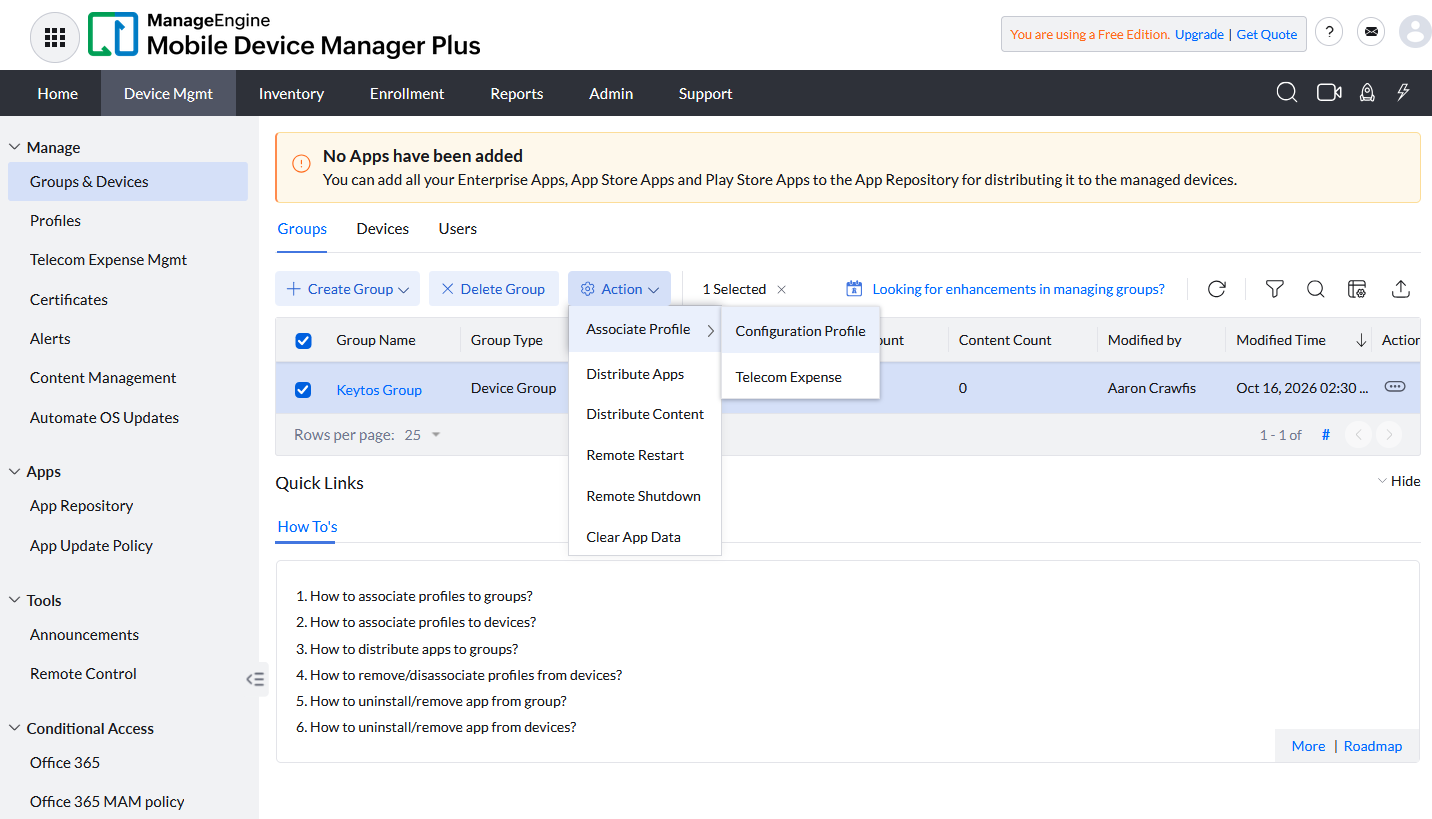
Using the left-hand menu, under Manage select Groups & Devices.
-
Select any Group, Device, or User you would like to add this Wi-Fi profile to.
-
Click Action > Associate Profile > Configuration Profile.
-
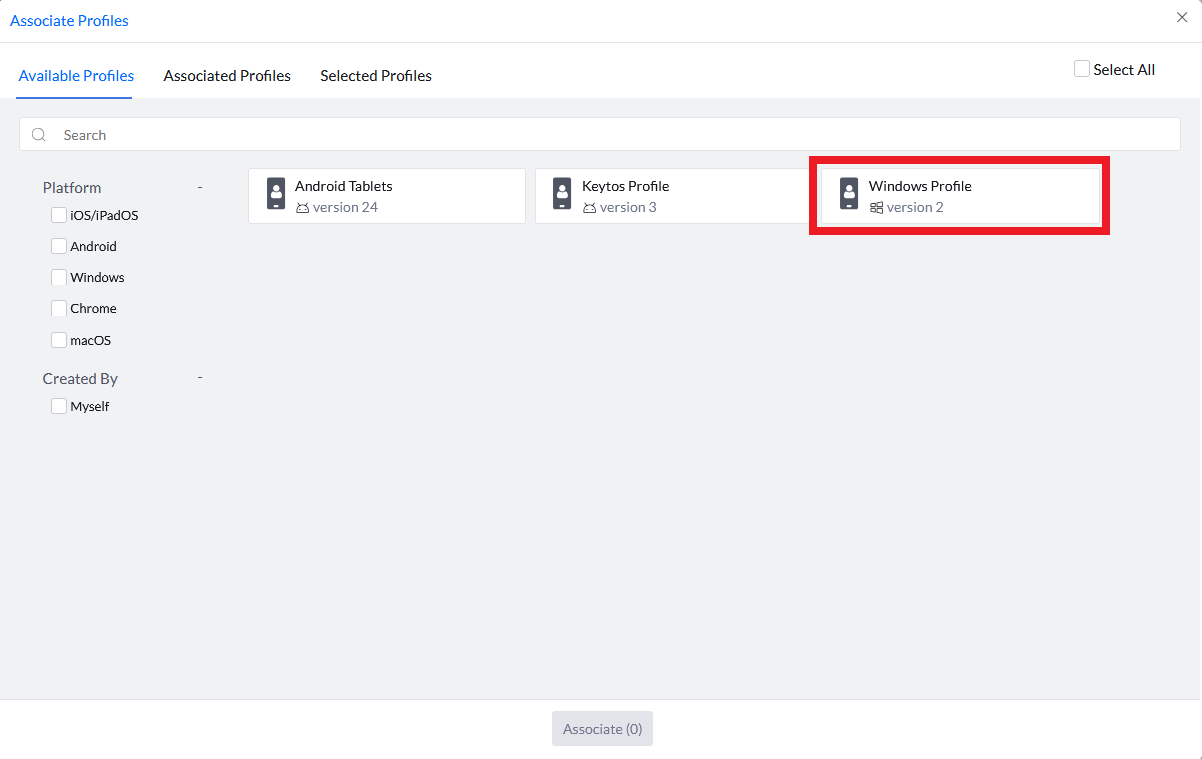
Under Available Profiles select the Windows Wi-Fi profile you just created.
-
At the bottom of the page, click Associate.
Done! Your Wi-Fi profile is now created and will be pushed to your devices. Once the profile is applied, users will be able to connect to the Wi-Fi network using certificates.
How to Test the Wi-Fi Certificate Authentication Setup
Now that you have created and deployed the Wi-Fi profile, it’s important to test the setup to ensure everything is functioning correctly. Follow these steps to test your Wi-Fi profile:
- On a managed Windows device, go to Settings > Network & Internet > Wi-Fi > Manage known networks. You should see the SSID you configured in the list.
- If you use User-based certificate authentication, attempt to connect to the Wi-Fi network. You should be connected without being prompted for a username or password. If you use Device-based certificates, the device should connect automatically without user interaction. You may need to restart the device to trigger the connection.
Due to limitations of ManageEngine, users are prompted to continue connecting during every authentication attempt. They only need to click the Connect button to proceed. Your Shield authentication logs may also show this error: Error: Client timed out. Client was authenticated but failed to complete the authentication session. As long as users can authenticate, both the prompt and the error are expected behavior and can be safely ignored.
How to Troubleshoot RADIUS Authentication for Keytos Shield
If you are unable to connect to your network, refer to our troubleshooting guide.
Shield RADIUS Troubleshooting Guide